SOURDOUGH WHOLE-WHEAT BRAN BREAD (added yeast)

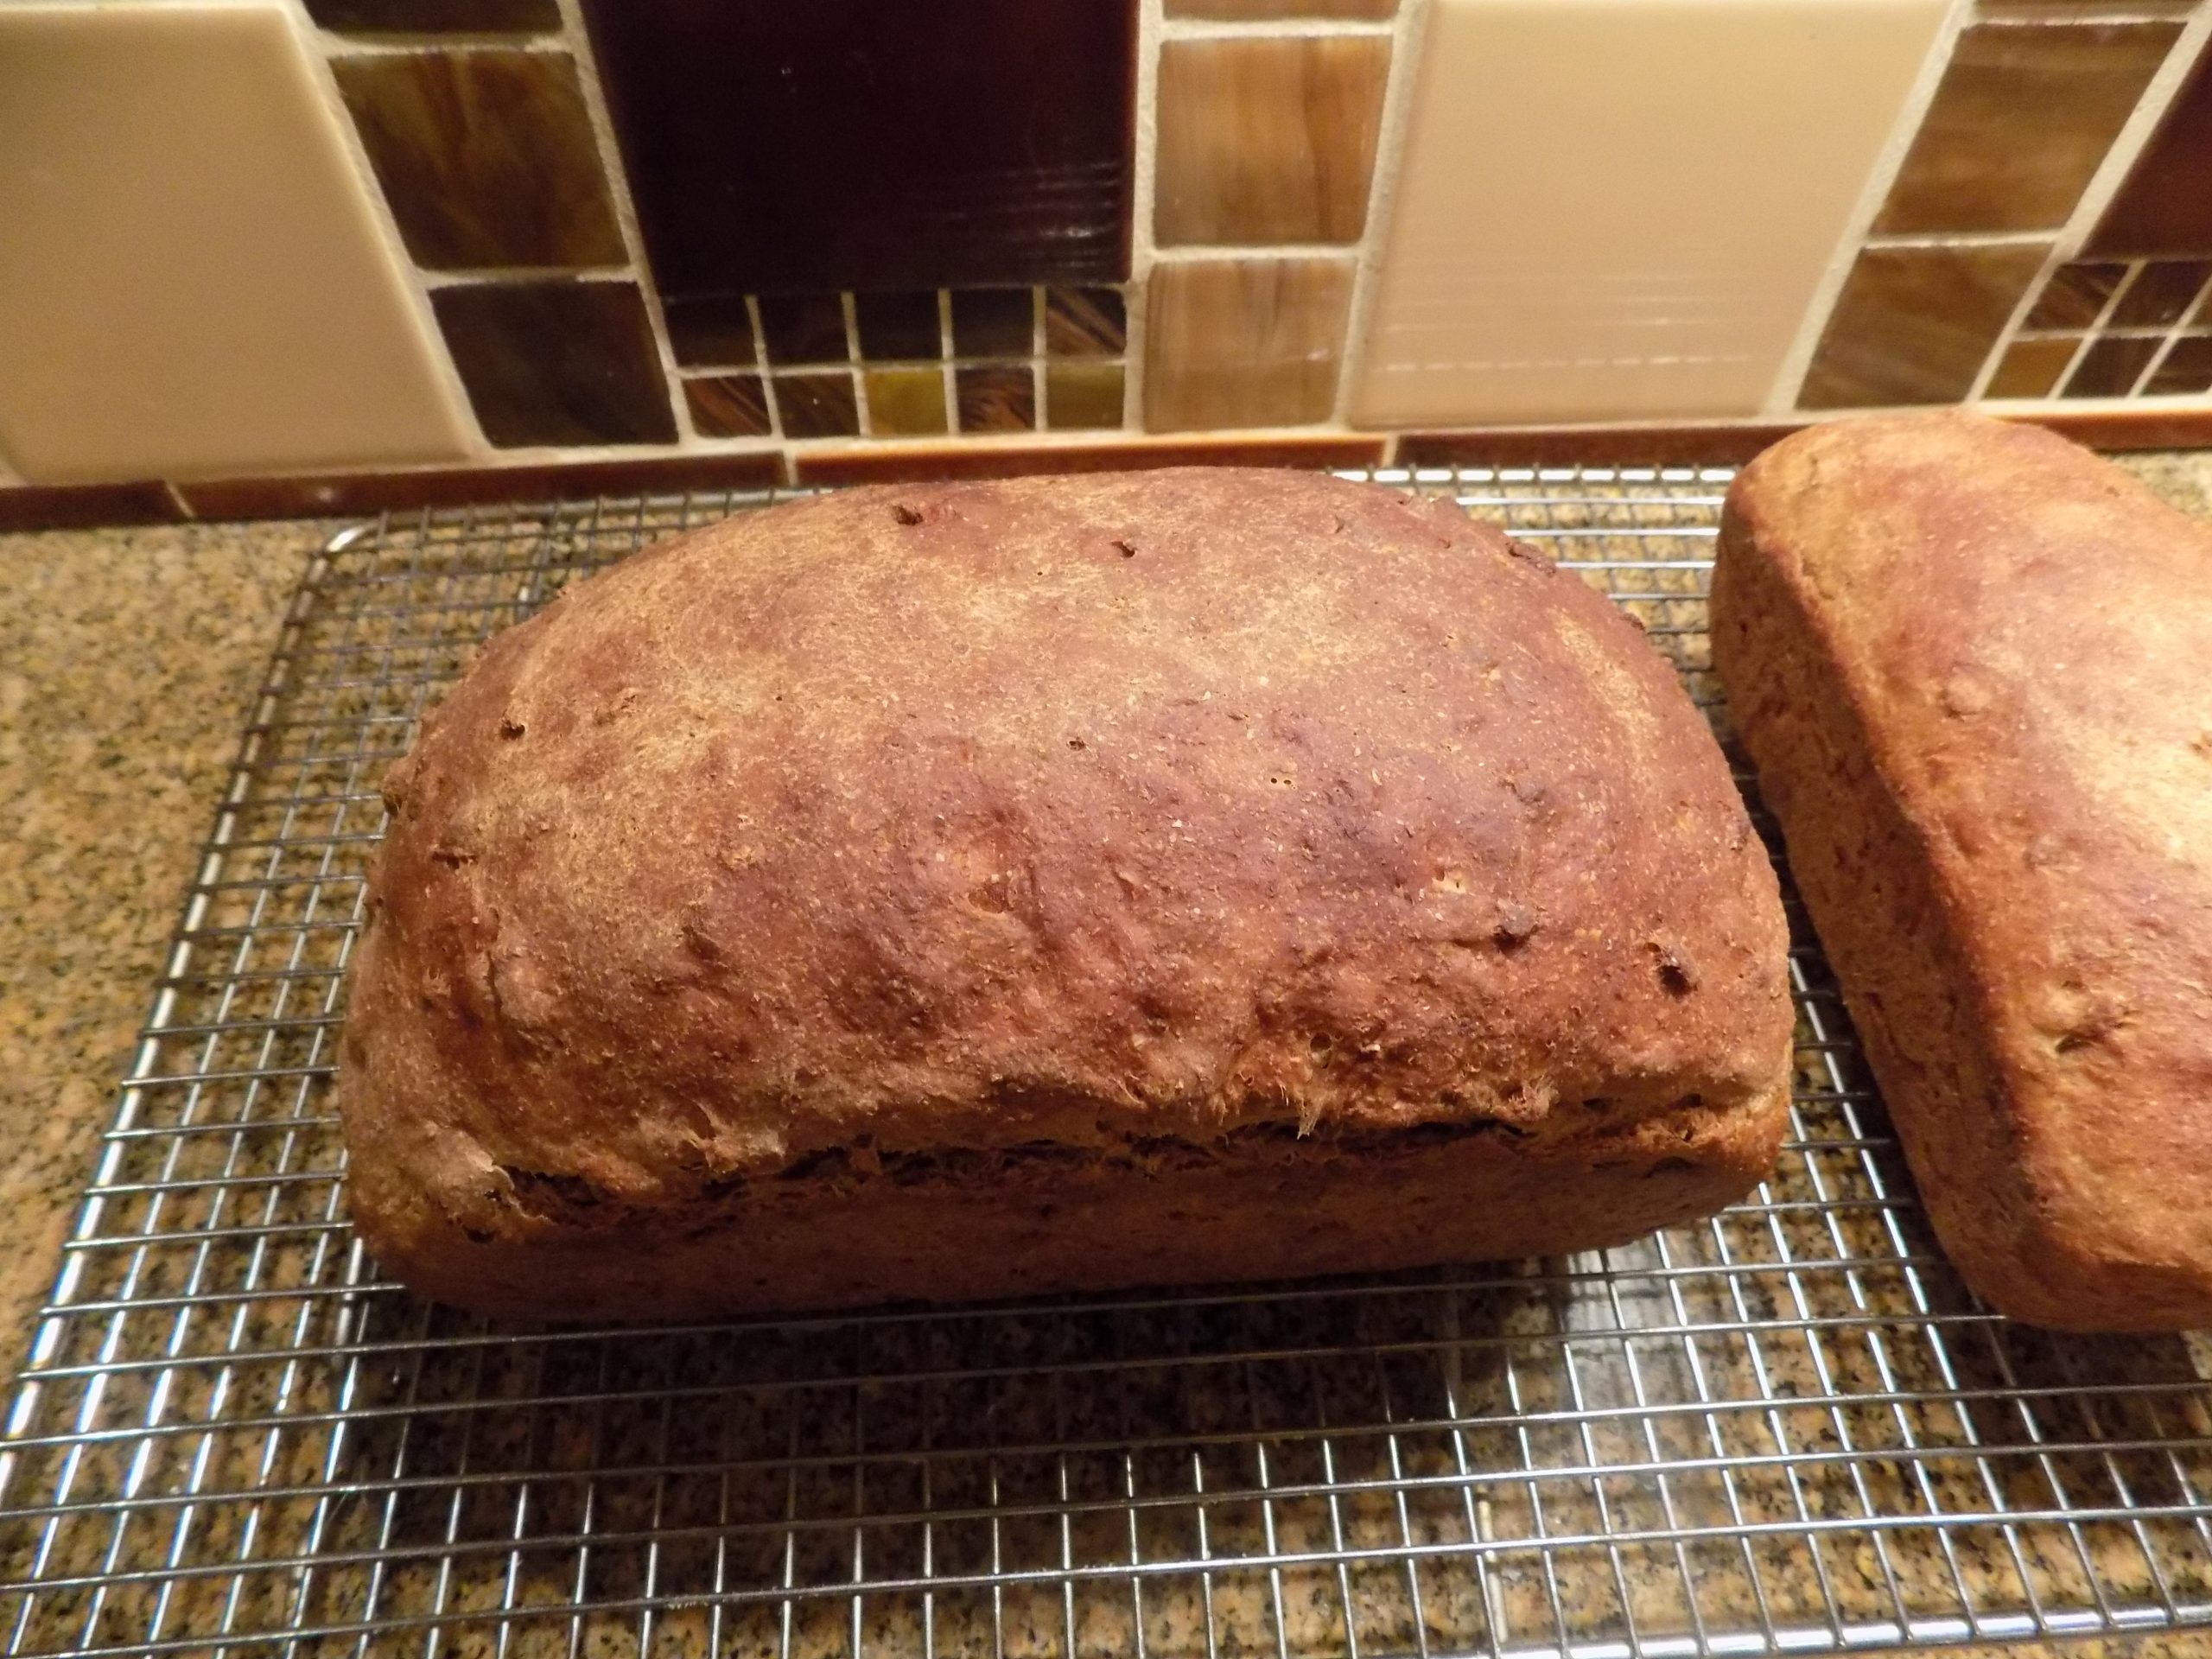
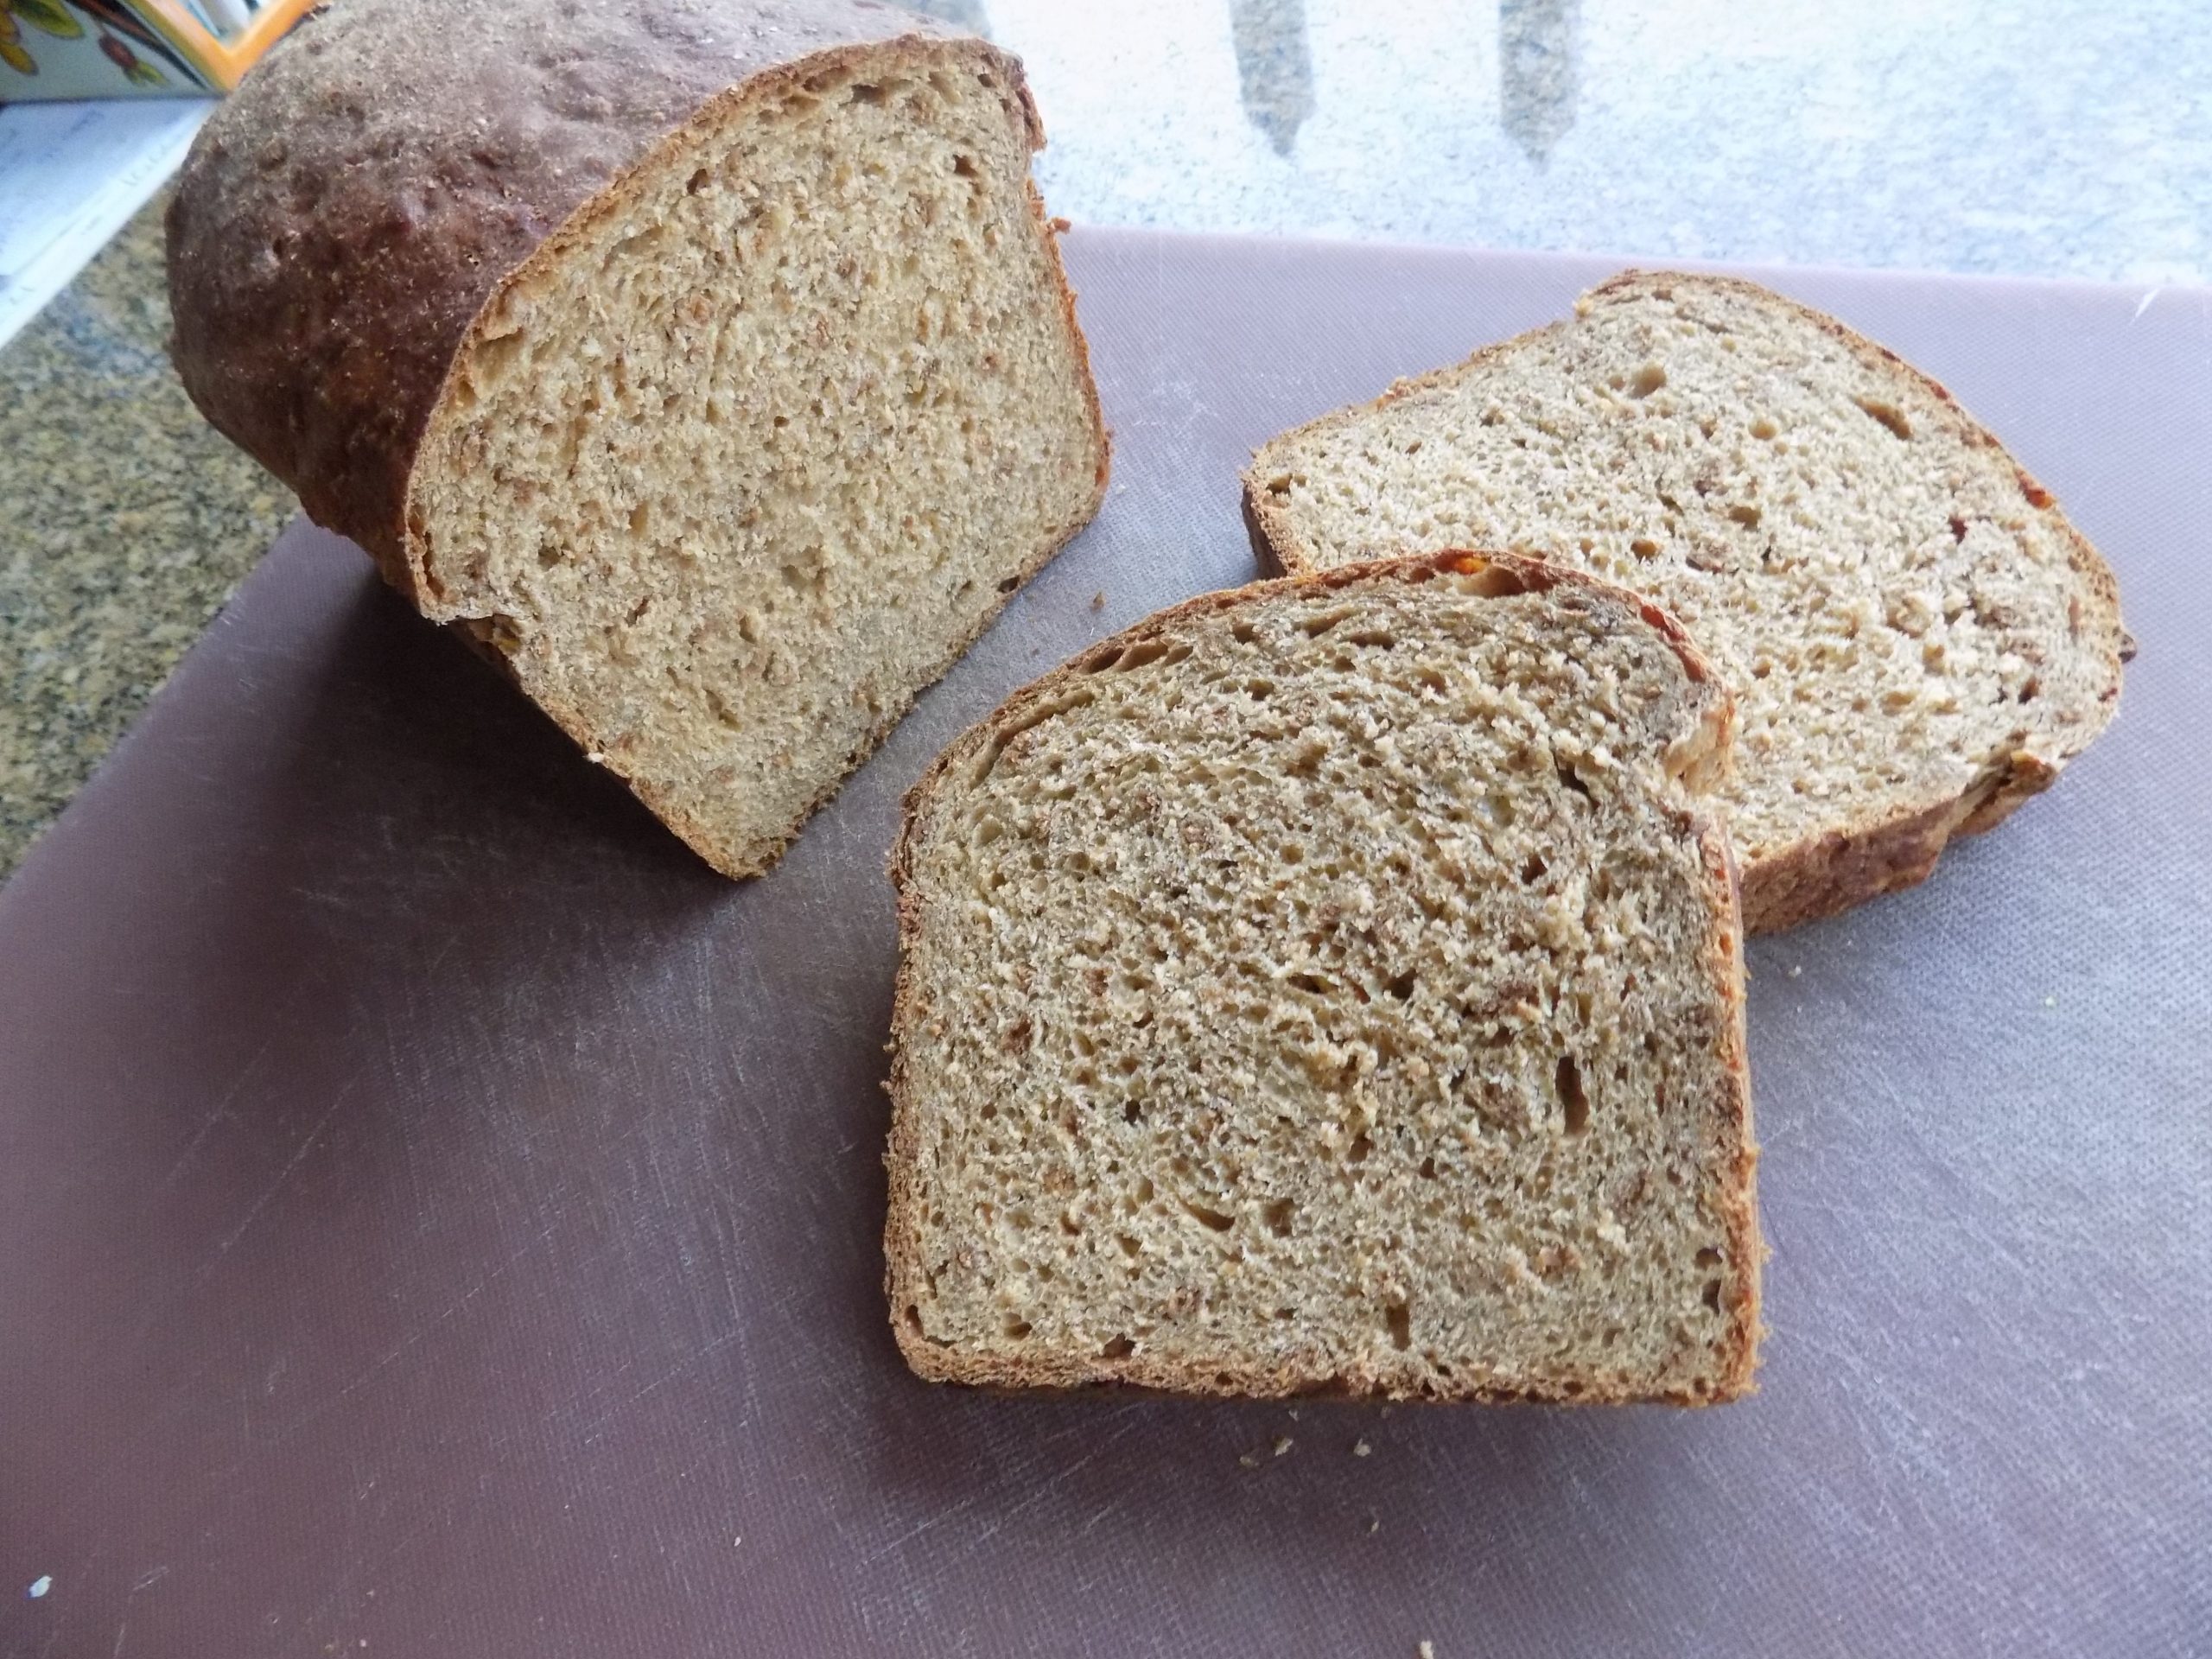
I’m always amazed at how many recipes are out there for something as simple as sourdough bread. Because, at first glance, one would think there were only a finite number of ingredients you could add to the basic 4 ingredients that constitute a sourdough loaf. The basic ingredients being – flour, salt, sourdough starter (yeast), and water. But no, there are as many recipes for sourdough bread as there are for stew. (Well, maybe not as many. But pretty darn close!) I guess it’s because you can stick all kinds of different grains, fats, seeds, nuts, herbs, spices, sweeteners, etc. into a basic sourdough bread dough. And in this recipe, the addition of molasses and all-bran cereal (high in fiber and psyllium BTW) definitely add a lovely, deep rich color to the bread. Plus, a slightly sweet, slightly nutty flavor generally associated with whole grains. And of course there’s some whole-wheat flour in the mix too. Which only makes for a healthier and tastier product.

Now for some, the taste of bran is not to their liking. But for me, I absolutely love the taste of bran. In fact, bran muffins are my favorite kind of muffin. So, when I went to look up the recipe on this site for my favorite muffins, I realized I had never posted the recipe. But in all honesty, the thing that stops me from making and eating these fabulous muffins more frequently, is that they contain a great deal of sugar and vegetable oil. Much more than in this bread. So, when I eat this bread, I still get that beautiful bran flavor I love, without the guilt I feel when I eat a bran muffin.

But please don’t let me stop you from making bran muffins. They are so, so delicious. (See recipe below.) It’s just that I’m basically old. And staying as far away from sugar and fat is my ultimate goal. Unfortunately, one that I generally ignore in favor of living life to the fullest. But I’m still cognizant of the fact that I should restrict my sugar and fat intake in favor of a long life and a healthy body. (Why does this have to be so difficult?) Anyway, the gist of all this verbiage is – make this bread, and if you are younger than 40 – make the muffins too!

As always, live your life like it was the main event. Because – bottom line – it is! (The dress rehearsal was cancelled because of covid-19!) So, dance when the spirit moves. Sing at the top of your lungs in the shower. Kiss your spouse like it’s the first and last time. And cook like you and Julia were soul sisters or sister and brother. Life is short. Too damn short! Experience the joy NOW. Peace and love to all.

1 c. sourdough starter discard

1 c. warm milk (I use whole milk)  

1 pkg. or 1 T. active dry yeast

¼ c. molasses

1 lg. egg

3 T. unsalted butter, room temperature

1½ tsp. kosher salt

1½ c. whole-bran cereal (I use Kellogg’s All-Bran Buds)

1½ c. whole-wheat flour

1½ -2 c. unbleached all-purpose flour

veggie oil

Place sourdough starter discard in the bowl of your stand mixer. Add the warm milk, yeast, molasses, egg, butter, salt, and whole-bran cereal. Mix with the dough hook and let sit for 15 minutes. (This allows the bran buds to partially soften.)

Add the whole wheat flour and mix well. Add enough of the all-purpose flour to produce a smooth and elastic dough that cleans the sides of the bowl.

Pour a bit of oil around the dough, and using your hands and a stiff rubber spatula, form the dough into a completely greased ball. Cover with plastic wrap and place in a warm place for about 90 minutes or until doubled in size.

Punch down the dough, halve it, and form into 2 loaf shapes. (Don’t worry if there are still little hard pieces of bran buds in the dough. They will soften as they bake.) Place in 2 – 8½ x 4½ greased loaf pans. (There is too much dough in this recipe for 1 standard (9 x 5-inch) loaf pan. So more than one pan is needed. But of course, you can choose whichever size loaf pans you want to use. Just change the baking time accordingly.)

Cover pans with tea towels or greased plastic wrap and let rise in a warm place for about 90 minutes. (You want the dough to rise a bit, but not too much. So, you can always give it the poke test. According to the experts at King Arthur flour, “Lightly flour your index finger and press it gently into the dough, about to the bed of your fingernail. If the indentation remains and doesn’t spring back/fill in, then the bread is well risen and ready for the oven”.)

Bake in a pre-heated 375-degree oven for 30 to 40 minutes or until golden brown and sounds hollow when tapped with your fingers. The internal temperature should reach at least 200 degrees.

Remove from oven and turn out of pans immediately. Cool completely before slicing. Store in an airtight container. Absolutely wonderful toasted and spread with peanut butter and jelly. Lightly spread with peanut butter and jelly, of course!

SIX WEEK BRAN MUFFINS

3 c. all-bran cereal (I use Kellogg’s All-Bran Buds)

1 c. boiling water

½ c. vegetable oil

1½ c. granulated sugar

2 c. buttermilk

2 lg. eggs

2½ c. unbleached all-purpose flour

2½ tsp. baking soda

1 tsp. kosher salt

Place the all-bran cereal in a large mixing bowl. Pour the boiling water over the cereal, stir, and let sit for at least 10 minutes. Add the oil, sugar, buttermilk, and eggs. Stir until well combined.

In a separate bowl, whisk the flour, baking soda, and salt together. Add to the cereal mixture and stirring only until combined.

Using a large ice cream scoop, drop balls of batter into greased muffin pans. Bake in a pre-heated 400-degree oven for 20 minutes or until a pick inserted into a muffin comes out clean. Remove from oven and let cool on a wire rack. Store in an airtight container. Makes about 2½ dozen.

The muffin batter will happily reside in your refrigerator for up to 6 weeks. Thus, the name Six Week Bran Muffins.

And thank you again (Auntie) Evelyn for this wonderful recipe. It still produces the best bran muffins I ever tasted. And as always, love and hugs to you and (Uncle) Dan. (Dan and Evelyn are my kid’s uncle and aunt. And two of the grandest people you could ever hope to meet.)

FLOUR TORTILLAS

As you can see, my rolling out the dough technique was fine. My getting the rolled dough to the griddle, not so much! Hopefully I will have many more years to get it right. And even if they never look pretty, they will always taste divine.

And to think I have been buying flour tortillas all these years. What could I possibly have been thinking? OK, obviously I wasn’t thinking! Even after purchasing un-baked flour tortillas at Costco for years that always tasted better and fresher than any flour tortillas I could find at a regular grocery store. The reason of course being that they were frozen raw and only baked at home just before being served.  So, in essence, these un-baked tortillas were fresh. And yet, it never occurred to me to make my own dough?!?! As if it could possibly be terribly difficult to build? Which, BTW, it is not! 5 simple ingredients combined in a stand mixer using a dough hook. Then “baked” (kind of like a pancake) for a couple of minutes. So – incredibly – easy!   

So, now that I’ve made my own flour tortillas, I plan to never go back to buying them either from Costco (I don’t even know if they sell frozen raw tortillas anymore) or from our local grocery store. Purchased tortillas are simply not as delicious as the ones I made a couple of evenings ago. Plus, making my own means I have control over the quality of the ingredients. And there are no unpronounceable ingredients for me to ponder. That too is very important to me.

It all started two mornings ago with me wanting to use 2 ripe avocadoes for guacamole. So, I thought burritos would be fun to serve too. But I didn’t have either flour or corn tortillas on hand. And I really didn’t want Mr. C. to make an unnecessary trip to the grocery store for 1 item. (Pandemic aside, we try to limit our shopping excursions to times when we need products from several stores and can hunt and gather all in one trip.) So, one item, one shop was out of the question. Now, never one to have a menu plan thwarted by a problem so menial as a missing gluten product, I went on-line to see what I could find.

When I discovered this recipe on thecafesucrefarine.com site, I was thrilled. It looked perfect. And I was right. This fabulous recipe produced the most tender and delectable flour tortillas. I wrapped the baked tortillas around seasoned ground beef, re-fried beans, and shredded sharp cheddar cheese. Then just before I served them, I put a small amount of veggie oil in a pan and browned the burritos so that the tortilla shell would be a bit crunchy. Then I served them with several condiments – sour cream, salsa, chopped tomatoes, chopped lettuce, finely minced red onion, and black olives. Yum! As far as the guacamole part, suffice it to say that when I cut the 2 beautiful avocados open, the flesh was filled with streaky black veins throughout. Yuck! I hate it when that happens. So, into the yard waste container they went. Grrrrrrr So, there was no guacamole on our plates that evening. But the wonderful burritos made up for it. Well, almost!  

So, as always – think outside the box. If someone else can build a “culinary something”, you undoubtedly can too. Or at least you can give it that old college try! If you learn nothing else from me, let it be that regardless of whether you’re a novice in the kitchen or an accomplished cook, if you can read and follow directions, you most certainly will amaze yourself and your family with what you can accomplish. And like anything else, the more you practice your craft, the easier it becomes and the more fun you will have doing it. It’s like that famous old joke.  “A fellow goes to New York to attend a concert but gets lost.  He spots another fellow who’s carrying a violin case.  “Sir, can you tell me how to get to Carnegie Hall?”  The musician smiles and says, “Practice, practice, practice.” So, happy cooking everyone. Salud!

Peace and love to all.

3 c. unbleached all-purpose flour, fluffed

1 tsp. kosher salt

1 tsp. baking powder

⅓ c. vegetable oil  

1 c. warm water

Combine flour, salt, and baking powder in the bowl of your stand mixer. Using the dough hook, mix dry ingredients until well combined.

Add oil and water with mixer running at a low speed. After about 1 minute, or when mixture comes together and begins to form a ball, continue to mix for 1 minute more or until the dough is smooth.

Transfer dough to a lightly floured work surface. Divide into 8-10 equal portions. Turn each piece to coat with flour. Form each piece into a ball and flatten with the palm of your hand. Cover flattened balls of dough with a clean kitchen towel and allow to rest for at least 30 minutes (or as much as 2 hours) before proceeding.

After the rest period, heat a large non-stick pan or griddle over medium heat. Roll a dough piece into a very thin rough circle, about 6-7 inches in diameter, while keeping the work surface and rolling pin lightly floured. When the pan is hot, place the dough circle into or onto the pan and allow to cook 45 seconds to 1 minute or until the bottom surface has a few pale brown spots and the uncooked surface is bubbly. If browning too fast, reduce the heat a bit. If it’s taking longer than a minute to see a few pale golden-brown spots on the underside of tortillas, increase the heat a bit. Using a spatula, flip to other side and cook for 15-20 seconds. The tortillas should be nice and soft but have a few small brown spots on the surface. While the first tortilla bakes, roll out the second so it is ready to bake when the first one is done. Then proceed the same way until all the tortillas are baked.

Note: Don’t be tempted to roll out all the tortillas before starting to bake them. Or if you do, stack the uncooked tortillas separated by parchment paper or you will never get them apart. 

Remove the baked tortilla from pan and stack to help keep the tortillas soft. Promptly place the next tortilla on the pan and let it bake as you roll out the next.

Serve warm or allow to cool for later use. When ready to use, place a slightly damp paper towel in the bottom of a microwave-safe container (with a cover) that will hold the stacked tortillas. Microwave uncovered for 15-30 seconds (start with 15) or until warm, then keep covered to hold heat while serving.

Store in an airtight container or zippered bag at room temperature for 24 hours or refrigerate for up to 1 week. To freeze, separate tortillas with waxed paper and place in a zippered bag before placing in the freezer.

ITALIAN SAUSAGE, CANNELLINI BEAN, PASTA, AND KALE MINESTRONE

And yes, I know. I just posted a soup recipe. But if you could look out my East facing windows, you would know why soup was most definitely on the menu again last evening. Where on a clear day we can see several snow-covered peaks in the Cascade mountain range, including Mt. Baker, the ever-changing wind patterns on Port Susan Bay, and a great expanse of sky even if there are a vast array of clouds, the last few days have been gray, misty, foggy, rainy, drizzly, socked in, etc. – basically obscuring our beautiful view. In other words, we are experiencing typical winter weather in the North Sound region. So, of course, what else should I expect? I know. I get it. But that doesn’t mean I have to like it! So, when I look outside and all I can see are wet dripping trees in my front yard, my body goes into comfort mode. And as you well know, one of my favorite comfort foods is soup.

Now, I didn’t start out to make minestrone. I don’t even like most soups calling themselves minestrone. Mr. C. doesn’t particularly like them either. I just wanted a soup with Italian sausage, cannellini beans, lots of veggies, and pasta. But by the time I finished listing the ingredients I wanted to use, it dawned on me that what I had basically created was minestrone. But my way. So, why fight it? I just told myself to build the soup and see what happens.

So last evening, we sat down to this soup and slices of Sourdough Whole-Wheat Bran Bread (recipe coming soon) that had only been out of the oven for a couple of hours. We both agreed, that call this soup what we may, it was absolutely delicious. And if this was what good minestrone tasted like, perhaps we had been missing out on a rare treat all along. Of course, we will never know. Because when we get a yearning for this soup again, this minestrone recipe is what I will use.

So, next time you get a craving for a hearty, winter soup, I advise you to prepare a big old pot of minestrone. (I still can’t believe I’m advocating making minestrone!) Anyway, just make this soup. You’ll be glad you did.

As always, never be afraid to change your opinion when you are proven wrong. Or laugh at yourself for being pig-headed over an inconsequential matter. (Like me denouncing minestrone!) Many of our prejudices (great or small) are grounded in feelings rather than facts. So, like my prejudice against minestrone soup, just let them go. Peace and love to all.

1 lb. bulk Italian sausage

2 carrots, chopped

2 stalks celery, thinly sliced

1 med. yellow onion, chopped

3 garlic cloves, finely minced

6 c. chicken broth, or more as needed

1 (14.5-oz.) can diced tomatoes (Italian, if possible)

2 tsp. dried basil

1 tsp. Italian seasoning

scant ¼ tsp. crushed red pepper flakes

1 bay leaf

½ tsp. kosher salt

freshly ground black pepper

1-2 c. cooked cannellini beans* (1 (15-oz.) can, drained and rinsed works too)

1 c. dry pasta (I use small elbow macaroni)

2- 3 c. loosely packed chopped kale or spinach

extra virgin olive oil, for drizzling

grated Parmesan or Pecorino-Romano cheese, for garnish

Brown the Italian sausage in a large, covered soup pot or Dutch oven. Remove the sausage with a slotted spoon and set aside**.  

Add the carrots, celery, and onion. Cook until the onion is tender, about 6 minutes. Add the garlic and cook for 1 minute.

Add the chicken broth, canned tomatoes including juice, dried basil, Italian seasoning, crushed red pepper flakes, bay leaf, salt, and pepper. Bring to a boil, reduce heat, cover, and simmer gently for 40 minutes.  

Add the cannellini beans (cooking liquid and all) and pasta. Simmer, covered, stirring occasionally, until pasta is al dente, about 10 minutes. Stir in the kale and cooked Italian sausage.  Cook only until the kale is wilted, about 2 minutes. Adjust seasoning. Discard bay leaf.

Serve soup drizzled with a bit of olive oil. Pass grated cheese.

*How I cook cannellini beans for this soup

1 c. dried cannellini beans, rinsed

3 c. water

½ tsp. seasoned salt

freshly ground black pepper

1 T. dehydrated onion pieces

1 tsp. Italian seasoning

2 T. extra virgin olive oil

Put all in a covered pot. Bring to boil. Reduce heat, cover, and simmer until the beans are tender. Depending on the age of your dried beans, this can take 2-4 hours – or beyond. So, I start the beans well in advance of the soup itself. When the recipe calls for the beans, I pour the whole mess in the soup pot. I don’t drain the beans. The liquid itself adds flavor to the soup.

**Please note: This is a trick I learned many years ago and often use whenever I use Italian sausage or the like in a recipe. I take the Italian sausage out of the pan after I have first cooked it, because, if I left it in the soup, by the time it came time to serve the soup, there would be no flavor left in the meat. I want that burst of Italian sausage yumminess in every bite. And yes, the broth will still be delicious even without the sausage simmering away with all the other ingredients. Try it, you’ll like it Mikey!     


CAMANO COCK-A-LEEKIE SOUP

OK, I expected this to be just another basic chicken soup. And it is, but not quite. It has a more complex flavor. I think it has to do with the use of a bit of dry white wine, fresh thyme, and of course the use of leeks rather than regular onions. Whatever the reason, I say – vive la difference! Because, regardless of what you name this soup, it is darned tasty.

Now for those of you who are purists, I did not include any prunes. No offence to prunes, but I just couldn’t go there. I also didn’t use rice or barley, which are more often found as the thickeners in a traditional Scottish Cock-a-leekie soup. I happen to love noodles. And in just a few rare cases, I don’t really like rice in soup. (And yes, Avgolemono is one of the rare exceptions.) And as far as barley goes, well suffice it to say, you won’t find any barley in my pantry. I simply do not care for either the slimy chewy texture or bland flavor of barley. (Any doubts how I really feel about barley?) But, of course, if you love rice or barley in soup, feel free to replace the noodles with either of these ingredients. (I will not take it personally.)

So, is this an authentic cock-a-leekie recipe? Heck no! Is it a mish-mash recipe concocted from too much research and way too much esprit de corps shown for the usual suspects in a delicious chicken soup? Heck yes! And is it worth making? You bet your last package of boneless, skinless chicken breasts it is!

Now, if you look closely, you won’t find a lot of fat in this recipe. What you will find however, is a nice assortment of veggies. So, is it a fairly healthy dish? Yes, I believe it is. And what’s more, super easy to prepare.

So, as always, think soup on cold winter days. Nothing says healthy comfort better than a big old bowl of steaming goodness. And keep looking for better days to come. We now have a vaccine and the prospects for a better year ahead. So, stay positive. We all need time to heal after the last few years. Healing takes time, courage, and forgiveness. Be the person in your family that helps make the healing transition happen. Peace and love to all.  

2 T. unsalted butter

1 lb. boneless, skinless chicken breasts or thighs, cut into bite sized pieces

1 tsp. seasoned salt

freshly ground black pepper

1 c. thinly sliced celery (including leaves)  

1 med. carrot, finely diced   

2 lg. leeks, white and light green parts, halved, and thinly sliced

3 garlic cloves, finely minced

½ c. dry white wine (I generally use Pinot Grigio)  

5-6 c. chicken stock

1 bay leaf

2 tsp. fresh thyme leaves or ½ tsp. dried thyme

2 c. broken thick egg noodles

1 tsp. lemon zest

2 T. chopped fresh parsley

chopped green onion, garnish

Heat the butter in a large heavy covered soup pot or Dutch oven. Add the chicken pieces and sprinkle evenly with the seasoned salt and pepper. Fry until the pieces are a bit browned and cooked through. Remove from pan with a slotted spoon and set aside. 

Add the celery, carrot, and leeks to the pan. Cook until leeks have softened a bit, about 4 minutes. Add garlic and cook for one minute. Add the wine and cook until almost no liquid remains. Add the chicken broth, bay leaf, and thyme. Bring to a boil, cover pan, reduce heat and simmer for 30-45 minutes, or until the carrot is tender.  

Add the egg noodles and lemon zest. Return the heat to a high simmer and cook until the pasta is al dente. Return the cooked chicken to pot, add the parsley, taste, and adjust seasoning. (Will probably need a bit of kosher salt.) Discard bay leaf.

Serve in soup bowls garnished with green onion.


RED HOT FRIED OYSTERS WITH LEMON-DILL TARTAR SAUCE

And yes, these are jumbo oysters. The jars were labeled “small”. They lied. But the oysters were still delicious!

And yes, I know. I already have a great recipe for fried oysters (Southern Fried Oysters) on this site. But really, can you ever have too many great recipes for fried oysters? In my humble opinion, no, you can’t! It’s like having too many fabulous cookie recipes. That’s not possible either!

So, the other evening when we were hankering after some fried oysters, I came up with this recipe for fried oysters and a yummy new tartar sauce to serve alongside. (I was on a roll.) And we enjoyed the heck out of the briny little darlings dipped in this lovely piquant sauce.

Now I know, not everyone enjoys the taste or texture of oysters. Good, that means there’s more for us to enjoy! Because we feel that oysters are one of the greatest ways to celebrate living in the Pacific NW. Their taste is unrivaled. And thankfully, so is the nutritional value of these succulent little bivalves. They come straight from the sea chock full of essential vitamins, minerals, and organic compounds. They are an excellent source of protein, vitamin D, zinc, iron, and copper. They also contain high levels of Vitamin C, phosphorus, niacin, and riboflavin.

Now please realize, I’m not trying to talk you into becoming a fan of oysters if you are firmly in the “I hate oysters” camp. But, if you love oysters as much as we do, then I would love to have you try fixing them this way.

For years I just dipped the raw oysters in egg and then cornmeal, with a sprinkle of salt and pepper while they were sizzling away in veggie oil. Yes, they were good. But I was not allowing them to live up to their full potential. With just a few additional ingredients, oysters can jump from good to awesome.  

And yes, for you purists out there, we too enjoy eating tiny, raw oysters. But they need to be super fresh. So, the oysters we get in jars from our local grocery store are fine for frying. But I wouldn’t consider eating them raw. I save that fabulous experience for dining in reputable restaurants.

As always, keep working at improving your cooking technique. Keep finding new and interesting ways to present food to your family. And keep trying new and different recipes. Life is simply too short to eat the same food, fixed the same way, meal after meal. Of course, there are people like my husband for whom a little less variety might be desirable. (That’s the curse of being married to a recipe developer/food blogger.) But the lovely man never complains. And bless him for that. Stay safe everyone.

Peace and love to all.

½ c. buttermilk

¾ tsp. granulated garlic

¾ tsp. paprika

1 tsp. hot sauce (I use Franks RedHot Sauce)

2 10-oz. jars fresh oysters (enough for 2 people)   

½ c. cornmeal

½ c. unbleached all-purpose flour

½ tsp. kosher salt

freshly ground black pepper

veggie oil

Whisk together the buttermilk, granulated garlic, paprika, and hot sauce in a small bowl.

Whisk together the flour, cornmeal, salt, and pepper together in a separate shallow dish.

Add the oysters to the buttermilk and let soak. Then remove, letting the excess drip off, and dredge through the cornmeal mixture, tapping off the excess.

Heat the oil in a large fry pan. Fry the oysters until golden and crisp, about 2 minutes. Remove to a paper towel-lined plate and serve with Lemon Dill Tartar (see recipe below) or your favorite tartar sauce.

Lemon-Dill Tartar Sauce

¼ c. mayonnaise

¼ c. sour cream

1 tsp. Dijon mustard

1 T. fresh lemon juice

¼ tsp. kosher salt

freshly ground black pepper

1 T. dill pickle relish (or finely chopped dill pickle)

2 tsp. finely chopped red onion

Combine all the ingredients. Refrigerate until served. Can be made ahead.   

BUTTERMILK “EVERYTHING SEASONED” ENGLISH MUFFINS

Why in the wide world of sports did I ever put off making English muffins? OK, I know you don’t have the answer. But I don’t have a good explanation either. Because English muffins are so easy to build. And when I think of how much they cost in the grocery store, I’m shocked. Shocked, I tell you. Shocked! And yah, yah. I know that I’m not just paying for the ingredients. I get that. (I was a banker after all.) In fact, the ingredients themselves are practically inconsequential in the grand scheme of things. It’s the labor, preparation space, transportation, marketing, yadda yadda yadda, that really racks up the dollars. But I’m a reasonably smart gal. I should have figured it out years ago!

And of course, while I was still working, I didn’t have the time (or frankly the energy) to make English muffins. But what’s my excuse for the last 15 years? And why did it take a pandemic to open my eyes? OK, I will never have an adequate explanation. But going forward, I won’t have a good excuse either for buying English muffins! So, in order to keep me on track, let me elaborate on how darned simple these muffins are to prepare.

First of all, you don’t have to be a gluten guru to make English muffins. You don’t even have to spend hours in the kitchen. You must, however, own a large frying pan or a griddle. Because English muffins are not baked in an oven like most “muffins”. They are “baked” on your stove top like pancakes. (Of course, most “cakes” are baked in a pan and in the oven too. So, you must grant some verbal leeway to the name “muffin”, knowing full well that the English language is often difficult to fathom and arbitrary at best!)

Now, about the “everything seasoning” part of this recipe. If you don’t appreciate “everything seasoning”, leave it out. Simple. Or, if you have your own homemade version or a store-bought version that you admire, use it instead. I just wanted an English muffin that had a bit of savory flavor. And I got what I was after. But if you don’t hold “everything seasoning” in as high a regard as I do, like I said above – leave it out. The muffin will still be delicious.

So, for all you bread bakers out there, be you new to bread building or simply blessed with an adventurous culinary streak, please give this recipe a try. You will be so delighted when you experience how easy it is to build your own English muffins. And your family will love toasting these babies in the morning. Just a slather of butter or cream cheese, a bit of breakfast meat, an egg or two, and they are off to a great start to their day.

As always, keep thrilling and delighting your family with great food. Keep challenging yourself with new recipes that even a year ago would have scared the pickles out of you. And keep smiling. It’s not easy always being Mrs. or Mr. sunshine. But it’s a heck of a lot more pleasant for your family if you at least give it a try. Peace and love to all.

2 T. poppy seeds

2 T. sesame seeds

1 T. dried finely minced onion (I crush the dehydrated onion in my mortar and pestle before adding it to the other ingredients)

1 tsp. granulated garlic

1 tsp. kosher salt

1¾ c. buttermilk

1 pkg. or 2½ tsp. active dry yeast

1 tsp. granulated sugar

1 lg. egg

¼ c. (½ stick) unsalted butter, room temperature

4½ c. bread flour

extra virgin olive oil

corn meal for sprinkling on pan

Combine the poppy seeds, sesame seeds, minced onion, granulated garlic, and kosher salt together in a small bowl. Set aside.

Warm the buttermilk to about 120 degrees in your microwave. (Use your instant read thermometer to take the buttermilk’s temperature.) The buttermilk might separate and look curdled. Not to worry. Pour into the bowl of your stand mixer.

Add the yeast, sugar, egg, and 2 cups of the flour and mix until combined using your dough hook. Add the poppy seed mixture and 2 more cups of flour. Mix/knead the dough using more flour as needed to produce a smooth and elastic dough. (The main part of the dough will form a ball around the dough hook. But in a perfect world, there should still be a bit of dough that clings to the bottom of the bowl.)

Pour a little olive oil around the dough, and using you hands and a stiff rubber spatula, form the dough into a ball well greased with the oil. Cover with plastic wrap and let rise until the dough has doubled in size, about 60 minutes.

When the dough has risen sufficiently, sprinkle cornmeal on a clean surface and pat dough to somewhere between a ⅓ to ½-inch thickness. (I use a large-rimmed baking pan as my “clean surface”. The pan sides prevent the cornmeal from going everywhere!) Cut into 13-14 circles 3½ – 4 inches in diameter. And don’t waste the dough that is left after you cut out the first set of circles. Just moosh the remaining dough back together, pat it out, and cut out more muffins. Believe me, re-patting out the dough will make no difference to the tenderness of the final product. You might end up with a bit of corn meal in the interior of the muffins cut after the 2nd or 3rd pat-out. But who cares? The muffins will still be delicious.  

After each muffin is formed, flip it over to also coat the topside with cornmeal. Place on a lightly greased cookie sheet at least 1½-inches apart. Cover the pan with a lightweight tea towel and let the dough rest for 20 minutes.

Carefully place the muffins on a lightly greased (if your griddle is not non-stick), or dry griddle (if yours is non-stick) over medium low heat. (You will just have to figure out the best level of heat on your stove as you go. Not too hot or the muffins will burn before the inside is done. Not too low or you’ll be at it all day!) (On my BlueStar range, which has high BTU burners, straight up “low” works perfectly.)

Bake for 4-5 minutes on each side or until bottoms are a deep golden brown. (The internal temperature should be just under 200 degrees when the muffins are done).  Place cooked muffins on a wire rack to cool. Store in an airtight container or freeze for longer storage. Lovely toasted and slathered with either butter or cream cheese. Or for a real treat, make eggs Benedict. Yum

 Buttermilk Substitute:

1 c. whole milk

1 T. plain white vinegar or lemon juice


Whisk the milk and vinegar together.  Let sit at room temperature until it curdles, about 10 minutes. Stir and you’re ready to go.

CREAMY BACON AND CHEDDAR CHEESE VEGETABLE SOUP

Whenever I’m feeling kind of low or my arthritis is flaring up, I turn to soup. So yesterday, feeling both low and not physically at my best, I came up with this easy recipe for a cheesy vegetable soup for dinner.

Now, for those who know me personally, please don’t worry about either my mental health or my physical well-being. Every once in a while, when I read about all the morons out there who cause trouble just for the shear pleasure of doing so, their antics over-whelm me. I simply can’t understand or empathize in any way with their stupid and destructive behavior. I lose all ability to sympathize in any way with their fundamental right to be nitwits. In other words – I want to take a bucket of ice water and pour it over their heads. Or better yet, become Marshall Dillon and throw all their racist, destructive, malevolent butts in jail. And, throw away the key! I know. Tell me how you really feel, Patti!

But as much as I try to stay mad or moody or depressed, it only lasts for a day or so. Then my usual calm and equanimous nature springs back and I once again feel magnanimous towards all my fellow denizens of mother earth. (Well, most of them anyway!) And because of fast acting drugs, I can usually force my arthritis into submission within a couple of days also. So, like I said, not to worry. I’m much better today. But back to this soup.

I had some bacon that needed to be used. I also had a small green pepper on its last legs (so to speak), and some broccoli that was well past its pull date. (I know. Fresh veggies don’t come with pull dates. But if they did……) Anyway, I decided a nice hearty vegetable soup would be just what the doctor ordered. But not too healthy. Considering my mood and joint pain, I felt in need of comfort. And of course, felt I well deserved it too. Mr. C. offered to either cook dinner or go pick something up, but I had been inactive all day. And as I am fond of saying, busy hands are happy hands. (No, I don’t always say that. But it has always worked out that way for me!) So, to the kitchen I proceeded.

And after spending all of an hour plotting, planning, hacking, slashing, cooking, and simmering, dinner was on the table. And I felt better. Not only about the state of the world, but my arthritis seemed to have taken the hint and faded into the background.    

So, if you too have days when life seems more difficult than usual, may I take this opportunity to recommend soup. There is just something about a big old bowl of soup that fairly screams “it’s going to be OK”!

As always, treasure the good times, work through the rough patches, and don’t let others influence your feelings of joy and happiness. Peace and love to all.

6 oz. meaty thick bacon, cut into small pieces

1 carrot, shredded

2 celery stalks, thinly sliced

½ med. onion, finely chopped

1 green pepper, finely diced

3 lg. garlic cloves, finely minced

freshly ground black pepper

3 c. water

2 tsp. chicken base (I use Better Than Bouillon Chicken base)

dash hot sauce, such as Frank’s RedHot Sauce

2 c. chopped broccoli (I cut the broccoli into small bite-sized pieces)

2 T. flour

1 c. milk   

1 sm. (4 oz.) jar sliced pimentos, drained 

2 c. grated sharp cheddar cheese, or more to taste

¼ c. loosely packed fresh parsley

Fry the bacon in a large, covered soup pot until crisp. Remove the bacon leaving about tablespoons of the grease in the pan. Add the carrot, celery, onion, and green pepper; cook until the onion is soft. Add the garlic and cook for 1 minute. Add the black pepper, water, chicken base, and hot sauce. Cover the pot, bring to a boil, reduce heat and simmer for 20 minutes. Add the broccoli and cook for a couple minutes or until crisp tender.  

Whisk the flour and milk together. Add to the pot and stir until the soup is bubbling and thick. Add the sliced pimentos, cheddar cheese, cooked bacon, and parsley. Let simmer for a minute, then remove from heat. Stir until the cheese melts completely. Taste and adjust seasoning.


SEASONED SALT

This morning I woke up thinking about natural progressions. How one thing can automatically lead to another. Like how breakfast leads to lunch leads to dinner. And since breakfast comes as our first meal of the day, and I woke up hungry, I started thinking about eggs. Because an egg is almost invariably a part of every breakfast I prepare. Usually, it’s an easy-over egg. But some mornings eggs are the base for a scramble or whipped up with milk for French toast or an ingredient in pancake batter. So, my container of eggs is almost always the first thing I bring out of the refrigerator as I assemble ingredients for our meal. And in our home, breakfast is huge. Huge as in important. It’s the most indispensable meal of our day. Without it, our energy levels would diminish throughout the day, and we wouldn’t be getting some of the important nutrients needed for continued good health.

So, as I was thinking about breakfast, I pondered the fact that we eat a fried egg almost every day without either of us ever getting sick and tired of doing so. I mean really. I couldn’t think of one other quality protein source I could eat every single day and actually look forward to it rather than run screaming into my bedroom to bury my head under a pillow! Then the answer came to me in a flash. Seasoned salt. Yup, seasoned salt. Every time I fry an egg or make a scramble, I season the egg or eggs with seasoned salt. Every – single – time! Seasoned Salt simply enhances the flavor of eggs to the point that we never tire of eating them. Never!

And then I realized (there’s that natural progression thing again), I list seasoned salt as an ingredient in a lot of my recipes. Yet I have never provided you with the recipe. How terribly remiss of me. So, on this 3rd day of January, year 2021, I’m rectifying this egregious omission. You now have this recipe, and because I’m feeling terribly guilty, I’m giving you my second best loved Seasoned Salt recipe free of charge. And yes, I use them both.

So, now you have the story of my life. Or at least a portion of it. Pretty heady stuff, right?!?!  

As always, find the humor and blessings in everyday life. Think how lucky we are to live in this beautiful world. And continue to work hard to keep it that way. Peace and love to all.

Seasoned Salt #1

½ c. kosher salt

8 tsp. finely ground black pepper (I buy cheap finely ground black pepper to use in this recipe) Shhh – don’t tell Martha S

4 tsp. paprika

4 tsp. granulated garlic

4 tsp. granulated onion  

½ tsp. chili powder

½ tsp. celery salt

½ tsp. granulated sugar

pinch cayenne pepper

pinch ground cinnamon

Whisk all together and store in an airtight container. And yes of course you can double, triple, etc. this recipe to no ill effect. Use anytime seasoned salt would be a nice addition or called for in a recipe. Great on easy over and scrambled eggs.

Seasoned Salt #2

½ c. kosher salt

2 tsp. finely ground black pepper

2 tsp. paprika

1 tsp. granulated garlic

1 tsp. granulated onion

½-1 tsp. dried lemon peel granules (make sure you buy only granules that have no preservatives or other weird ingredients)

Whisk all together and store in an airtight container. Lightly flavored so perfect on fish or chicken.

STEAK DIANE

And yes, any food blogger worth her or his salt would have cleaned up the plate before taking a picture. Obviously photography is not my passion. Eating is!

HAPPY NEW YEAR

I don’t know about you, but I’m very glad to see the last of 2020. OK, I know, we mostly all feel the same way, but I disdain generalities, so I thought I’d start 2021 on a good footing. And no, it’s not my New Year’s resolution to abstain from making generalities. It’s more of a realization that defining someone or something in general terms rather than being specific to the individual or situation, is ultimately unfair. Am I no longer a vital and contributing member of society because I’m over 75? Am I a better citizen because I’m not in a racial minority? Am I a more learned or intelligent person because I’m a democrat rather than a republican? Heck no to all those questions! So, if I were to come even close to setting myself up for failure by making a New Year’s resolution, it would be to begin each day by simply trying to be a better person. Of course, that would be cheating because I start every day by giving myself a little lecture on that very subject. Some days it works better than others. Some days my good angel wins. But more often than I would like, my little devil (who is terribly cute with his little reptilian tail and pitchfork) wins the day. But I’m still hopeful that the little angel will win out in the end. So, what does all this have to do with Steak Diane? Not a great deal. But enough to make me choose to celebrate 2020 rather than cast it aside without fanfare. And how do I celebrate any special occasion? With wonderful food, of course! Thus, Steak Diane for dinner. BTW, it is believed that the name “Steak Diane” is of Roman origin. After the Roman goddess, Diana or Diane.  

But before we got to dinner, there just had to be appetizers and a drink. So, at around 4:00 pm, that’s how our evening began. (See picture below.)

Starting back left – red onion, capers, lemon zest and juice, salt, and pepper mixed with cream cheese to spread on crackers topped with smoked salmon. Next Bacon Wrapped Water Chestnuts, pitted castelvetrano olives, and Blue Cheese, Cream Cheese, and Date Spread.

Steak Diane didn’t happen until about 8:00 pm. Speaking of which………….

I found this wonderful recipe for Steak Diane on the coctione.com site. The recipe appealed to me instantly because it contained every single ingredient I felt would compliment a beautiful steak. I followed the recipe to a tee. (Something that rarely happens.) And I’m so glad I did. What a fantastic combination of flavors. And simple instructions for a sauce that ends up better than almost anything I ever tasted in a restaurant. And speaking of restaurants, apparently in the 1950s and early 60s, especially in New York city, upscale restaurants prepared this dish table side, with its theatrics arising from the flambéing of the cognac used to make the sauce.

Well, I must tell you, while I was preparing this dish, Mr. C. was enjoying his before dinner Spanish sparkling wine (cava) while observing my every move as I prepared this dish. Even the part where I almost started a conflagration when I set fire to the cognac. (And yes, some of our acquaintances, like our dear friend Jim, can flambé with panache. Me, not so much. But I’m learning. The hard way, of course.) Anyway, Mr. C. found it entertaining. (Got to keep our spouses riveted. But burning down our home might have been a little too riveting. Yah think! But thank God, that didn’t happen.)

Anyway, to make a short story long, the next time you want to celebrate a special occasion, I would recommend preparing this dish. It is really fantastic. We both decided that this dish might just become a New Year’s Eve tradition. It’s just that good!

As always, keep astounding yourself by trying something new. And it doesn’t have to be by preparing a new dish. It could be by learning a new language. Or learning to ski. Or taking up origami. Life is so darn short. Don’t waste it by wondering what if? Just do it! And more than ever – peace and joy and love to all.   

2 T. canola oil

2 1-inch (at least) thick tenderloin or filet mignon steaks

kosher salt

freshly ground black pepper

1½ c. beef stock

2 T. unsalted butter

2 cloves garlic, finely minced

1 sm. shallot, minced

½ c. thinly sliced fresh mushrooms

¼ c. cognac or brandy

¼ c. heavy cream

1 T. Dijon mustard

1 T. Worcestershire sauce

dash hot sauce, such as Bob’s Red Hot

1 T. minced fresh parsley

1 T. minced fresh chives

Heat the oil in a 12″ skillet over medium-high heat. Liberally season the steaks with salt and pepper. Add to skillet. Fry, turning once, until browned on both sides and cooked to desired doneness, about 4 to 5 minutes for medium-rare. (Depending on how “medium-rare” you like your steaks, the internal temperature should read anywhere from 130 -145 degrees.) Transfer steaks to a plate; set aside.

Return skillet to high heat, add stock, and reduce the broth to ½ cup, about 10 minutes. Pour into a bowl and set aside.

Return the skillet to heat, and add butter, garlic, and shallots. Cook, stirring, until soft, about 2 minutes. Add mushrooms, and cook, stirring, until they begin to brown, about 2 minutes. Remove pan from heat.

Add cognac, and light with a match or fire stick to flambée; cook until flame dies down. Please note: The cognac flames will shoot up about 15-16 inches when torched. So be very, very careful.)

Return pan to heat and stir in the reduced stock, cream, mustard, Worcestershire sauce, and hot sauce. Let burble and start to thicken before returning steaks to the skillet.

Steak just returned to the sauce.

Turn the steaks in the sauce until warmed through and the sauce is thickened, about 4 minutes. Transfer steak to serving plates and stir parsley and chives into sauce. Pour sauce over steaks to serve.

I served the steak with creamy mashed potatoes and my Roasted Beets, Candied Pecans, and Feta Cheese Salad with Balsamic Vinegar Dressing. Yum

MINCEMEAT GALETTE

One of the first pies I ever remember eating was a mincemeat pie. I don’t think I was very impressed, but then I was probably only 4 years old. So, I guess my reaction was only to be expected. Fast forward a few years, and my parents couldn’t keep me out of the mincemeat. And I still love the stuff. I mean really, what’s not to love about dried fruits and apples gently marinated in a slightly sweet, spicy, and boozy syrup?

But for all you purists out there, I must state up front, there are no chunks of beef or shredded beef suet in this recipe. As close as any cow gets to being an ingredient in this mincemeat, is by donating milk to be churned into butter. (And bossy dear, we thank you for that from the bottom of our dark little non vegan hearts.) So, purists, you may be excused. This post is not going to be to your liking.

But for all you mincemeat lovers out there, who willingly and joyfully accept that mincemeat can still be delicious sans meat and suet, and who find paying at least $9 a jar for decent mincemeat egregious, you are going to love this recipe. And no, it’s not inexpensive to make your own mincemeat. But it’s a heck of a lot cheaper and the quality is so much better than anything you can find in a jar. And yes, it does take some pre-planning. But it is not a long and tiring process.

So, next time you get the craving for a mincemeat tart, pie, bars, or galette, make up a batch of this heavenly concoction. And yes, I know, mincemeat is kind of an “old world” delicacy. But that only makes it more interesting as far as I’m concerned. And isn’t it fun to keep a centuries old tradition alive.

As always, keep having fun in your kitchen. Keep celebrating life. And stay positive. It’s much nicer being around someone who gives off positive vibes rather than displaying negativity. And CHEERS to 2021. We are all in need of a HAPPY NEW YEAR. So, let’s be part of making it the best year ever. Peace and love to all.  

Mincemeat: (needs to be prepared at least a week ahead of time)

1½ c. raisins

1½ c. golden raisins (sultanas)  

1½ c. dried currents

2/3 c. bourbon

2 tart apples, peeled, cored, and finely minced

8-oz. container candied orange peel

½ c. (1 stick) unsalted butter, melted

¾ c. brown sugar

½ tsp. ground nutmeg

½ tsp. ground cinnamon

¼ tsp. ground mace

¼ tsp. ground allspice

1/8 tsp. ground cloves

finely grated zest and juice of 1 lemon

finely grated zest and juice of 1 orange

¼ c. cognac

Place the raisins, sultanas, and dried currents in a small saucepan. Add the 2/3 cup bourbon, bring just to a boil, stir to coat all the fruit, remove from heat, and set aside to cool.

Meanwhile, combine the apples, candied orange peel, butter, brown sugar, spices, and the zest and juice of the lemon and orange, in a large ovenproof dish. When the raisins and currents are cool, stir into the apple mixture. Cover the dish and place in a cool place overnight.  

The following day, place the ovenproof dish in a cold oven, bring the temperature to 200 degrees, and bake for three hours, stirring every hour or so. Remove from oven, let cool completely, and stir in the cognac. The mincemeat will look quite runny. But do not be concerned. After it has rested in the refrigerator for a few days it will be perfect.

Store covered in your refrigerator until ready to use. (Best if left to mellow at least 4 weeks, but if you are like me, the mince only gets to age for about a week. It’s still good, so no worries.)

This recipe makes enough mincemeat for 2 10-inch tarts, 2 8-inch pies, or 3 10-inch galettes.

Crust: (makes enough crust for 1 10-inch galette)

1¼ c. unbleached all-purpose flour, fluffed

1 T. granulated sugar

¼ tsp. kosher salt

½ tsp. cinnamon

½ c. (1 stick) unsalted butter

¼ c. + 1 T. ice water

In the bowl of a food processor, pulse the flour, sugar, salt, and cinnamon together. Cut the butter into small pieces, then add to the food processor. Pulse at 1 second intervals until butter is the size of tiny peas. Should take about 10 quick pulses. Add the ice water and pulse again about 10 times until the mixture is crumbly but holds together when pinched. 

Dump the crumbly dough onto a lightly floured work surface. Using your hands, press the dough into a flat, thick disk. Roll the dough out into a 12- or 13-inch round. Use as much flour as needed to prevent the dough from sticking.

Place on a parchment-paper lined baking sheet.

To assemble the Galette:

1 10-inch galette crust

1½ c. mincemeat

3-5 very thin apple slices  

1 egg, plus a few drops of water beaten together, for brushing

finishing sugar for sprinkling (turbinado, demerara, or any large-grained sugar)

ground cinnamon, for sprinkling

whipped cream, for serving

Place the mincemeat in the center of the galette crust, then spread evenly to about 2-inches from the edge. Fold the edge of dough towards the center to make a rustic enclosure. (See picture above.) Lay the apple slices on top of the mincemeat in whatever pattern works for you. Brush the dough with egg and water mixture. Sprinkle the entire galette with finishing sugar and cinnamon.

Bake in a pre-heated 400-degree oven for 30-35 minutes or until the crust is a light golden brown. (Don’t over-bake.) Remove from oven and let rest on a cooling rack for 5 to 10 minutes before carefully lifting the parchment paper and galette off the pan onto a serving or cake plate. To serve, cut into wedges, warm in your microwave, and dollop with whipped cream (see recipe for Vanilla Bean Paste Whipped Cream below) or vanilla ice cream.

Vanilla Bean Paste Whipped Cream

1 c. heavy whipping cream

2 tsp. vanilla bean paste or vanilla extract

2 T. powdered sugar

Whip the cream in a mixing bowl using an electric mixer on medium-high until hard peaks form. Add the vanilla bean paste and powdered sugar. Whip until blended.