And yes, I have two other corn salad recipes on this site. And yes, one of the recipes is very similar to this one. And that’s not a coincidence. Because I started with my recipe for Black Bean and Grilled Corn Salad, then adjusted it a bit and added a few ingredients I thought would make for tasty additions. And frankly, I love corn salads. So, for me having choices is a lovely thing. And since it’s summer and we are once again free to entertain, I figured you too might enjoy having another healthy and mayonnaise free salad recipe at your disposal. And I might add, very easy to prepare. And the prep instructions state those six little words I so love to read, and I imagine some of you might also appreciate – refrigerate for several hours or overnight! I tell you, as I continue into my golden years, but still loving to entertain, I must start preparations at least a day ahead if I want to adhere to my own self-imposed standards of what constitutes a meal for company.
When I was younger, even with 4 kidlets under foot, I thought nothing of calling up good friends at 11:30 a.m. on a Saturday, for example, and having a whole spread ready for guests at 6:00 p.m. Including homemade bread and dessert. Not anymore. No way, no how! Now I need to plan ahead, shop ahead, bake ahead, chop ahead, and then take a nap ahead! Even though in my head I am still super woman, the reality is that I am no longer able to leap tall buildings with a single bound. Heck, I can’t even climb our stairs without stopping at the top to wonder how much longer before our elevator is my main means of travel between our basement and the main floor. But, at least for me, the solution is to just keep going and keep cooking. But spread the tasks into reasonable segments. In between which, force myself to sit down, read a chapter in my book, or check my email. Even though the break may only be 10 minutes, it is now a mandatory requirement for me to get almost any chore completed. But the good news is – I can still do most things. It just takes me a bit longer.
But to offset the physical limitations imposed by advancing age, there are the things that don’t change at all. I’m still very capable of laughing, loving my life, looking forward to new adventures, and spending time with Mr. C., our wonderful family, and our fabulous friends. And really, is there anything better or more important than that?!
As always, live your life to the fullest. Don’t let anyone or anything hold you back from enjoying every minute of your day. And don’t stop making memories. They are truly our life blood.
Peace and love to all.
2-3 ears of corn
¼ c. extra virgin olive oil
1 tsp. lime zest
3 T. fresh lime juice
2 garlic cloves, finely minced
1 T. pickled jalapeño juice
½ tsp. kosher salt, or more to taste
freshly ground black pepper
1 c. diced celery, including celery leaves
1 c. halved black olives
1 orange bell pepper, diced
¼ c. finely chopped red onion
2 T. chopped pickled jalapeño slices, or more to taste
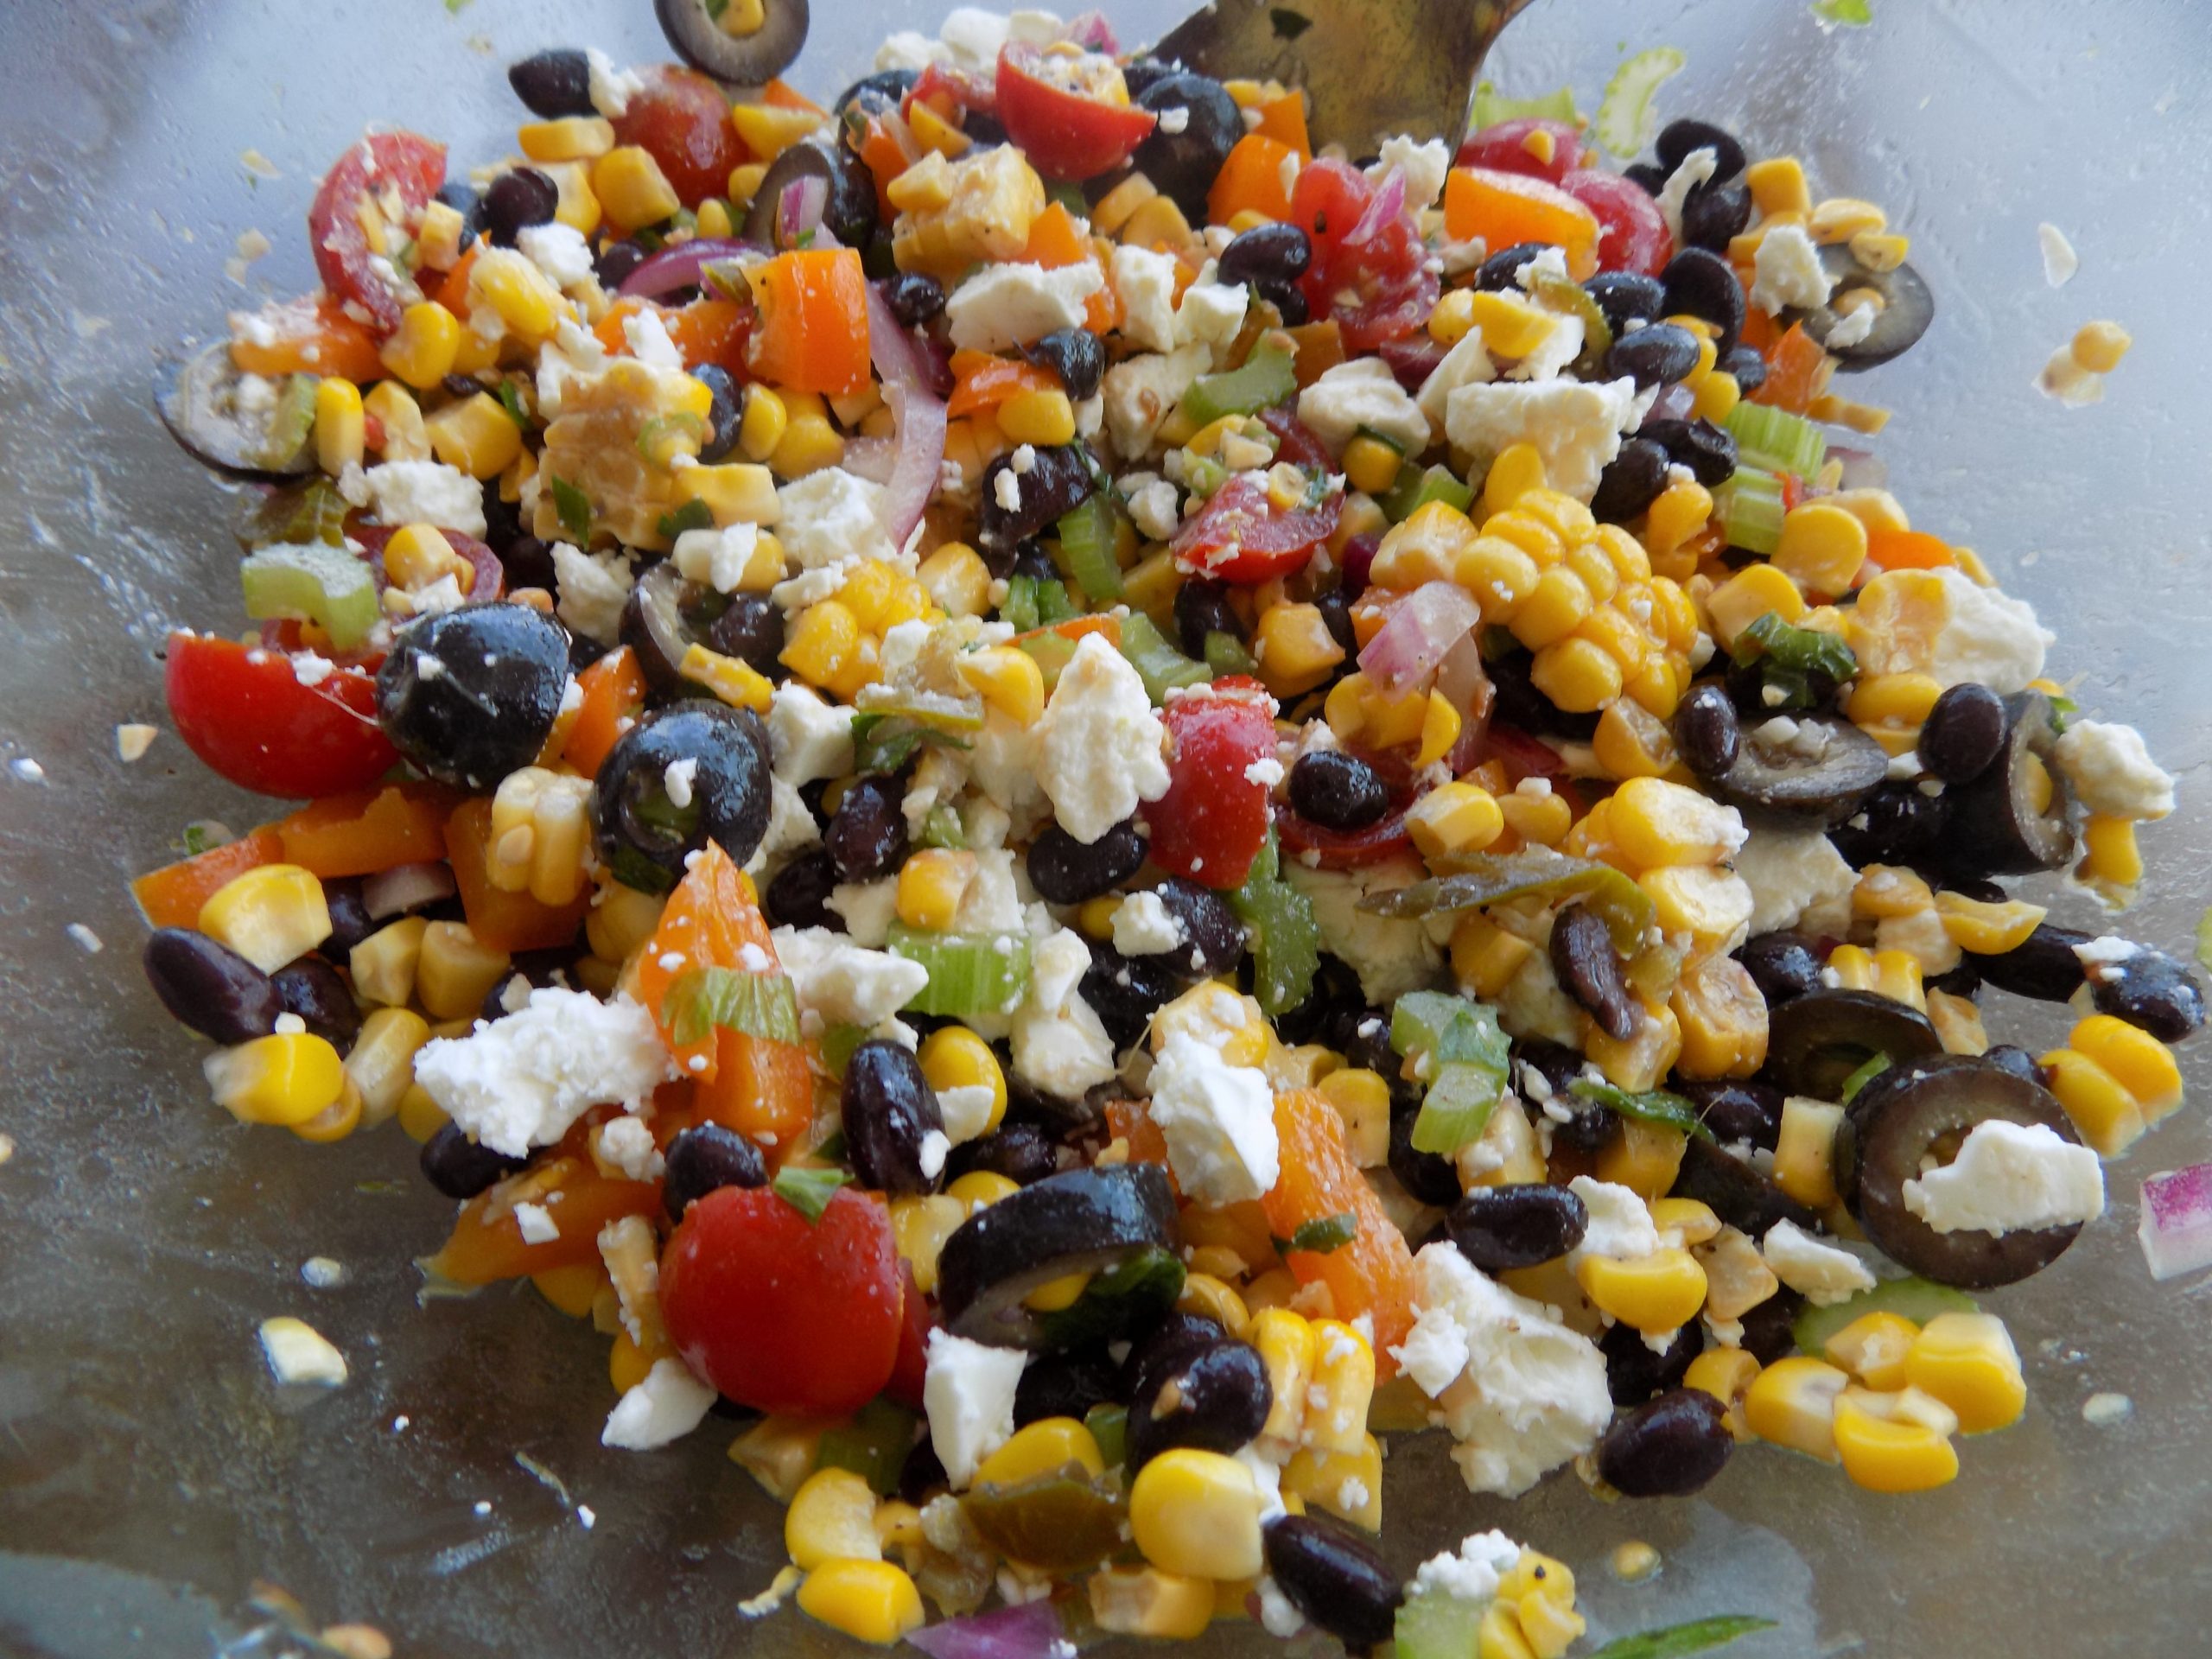
1 (15 oz.) can black beans, rinsed and drained
2 c. cherry or grape tomatoes, halved or cut in thirds
1 c. crumbled feta cheese
Bring a large pan of water to a boil. Add the ears of corn, bring water back to a boil, and cook corn for 3 minutes. Remove from water and let sit about 15 minutes before cutting the corn kernels off the cob. Set kernels aside.
Whisk the olive oil, lime juice, garlic, jalapeño juice, salt, and pepper together in a large mixing bowl.
Mix the corn, celery, olives, orange bell pepper, red onion, chopped jalapeño, and black beans in with the dressing. Gently fold in the halved cherry tomatoes and crumbled feta cheese. Cover the bowl and refrigerate for several hours or overnight.
When ready to serve, stir gently and scoop into a pretty salad bowl. No decoration required.
First of all, you should know that this recipe produces the best yellow cake I have ever tasted. EVER! And through the years, I have baked a lot of cakes. But until my dear friend Vicki made her amazing Southern Caramel Cake for one of our JazzVox concerts, I had no idea a yellow cake could taste so good. And be so tender. And I should know, because I have tried many recipes for yellow cake that have left me wanting. Wanting everything this recipe delivers – in spades. So, the really good news is that now you too have a recipe for the perfect yellow cake. Because really and truly, where other cake recipes might be considered mandatory only as the excuse for eating frosting, this yellow cake can hold its own with pride.
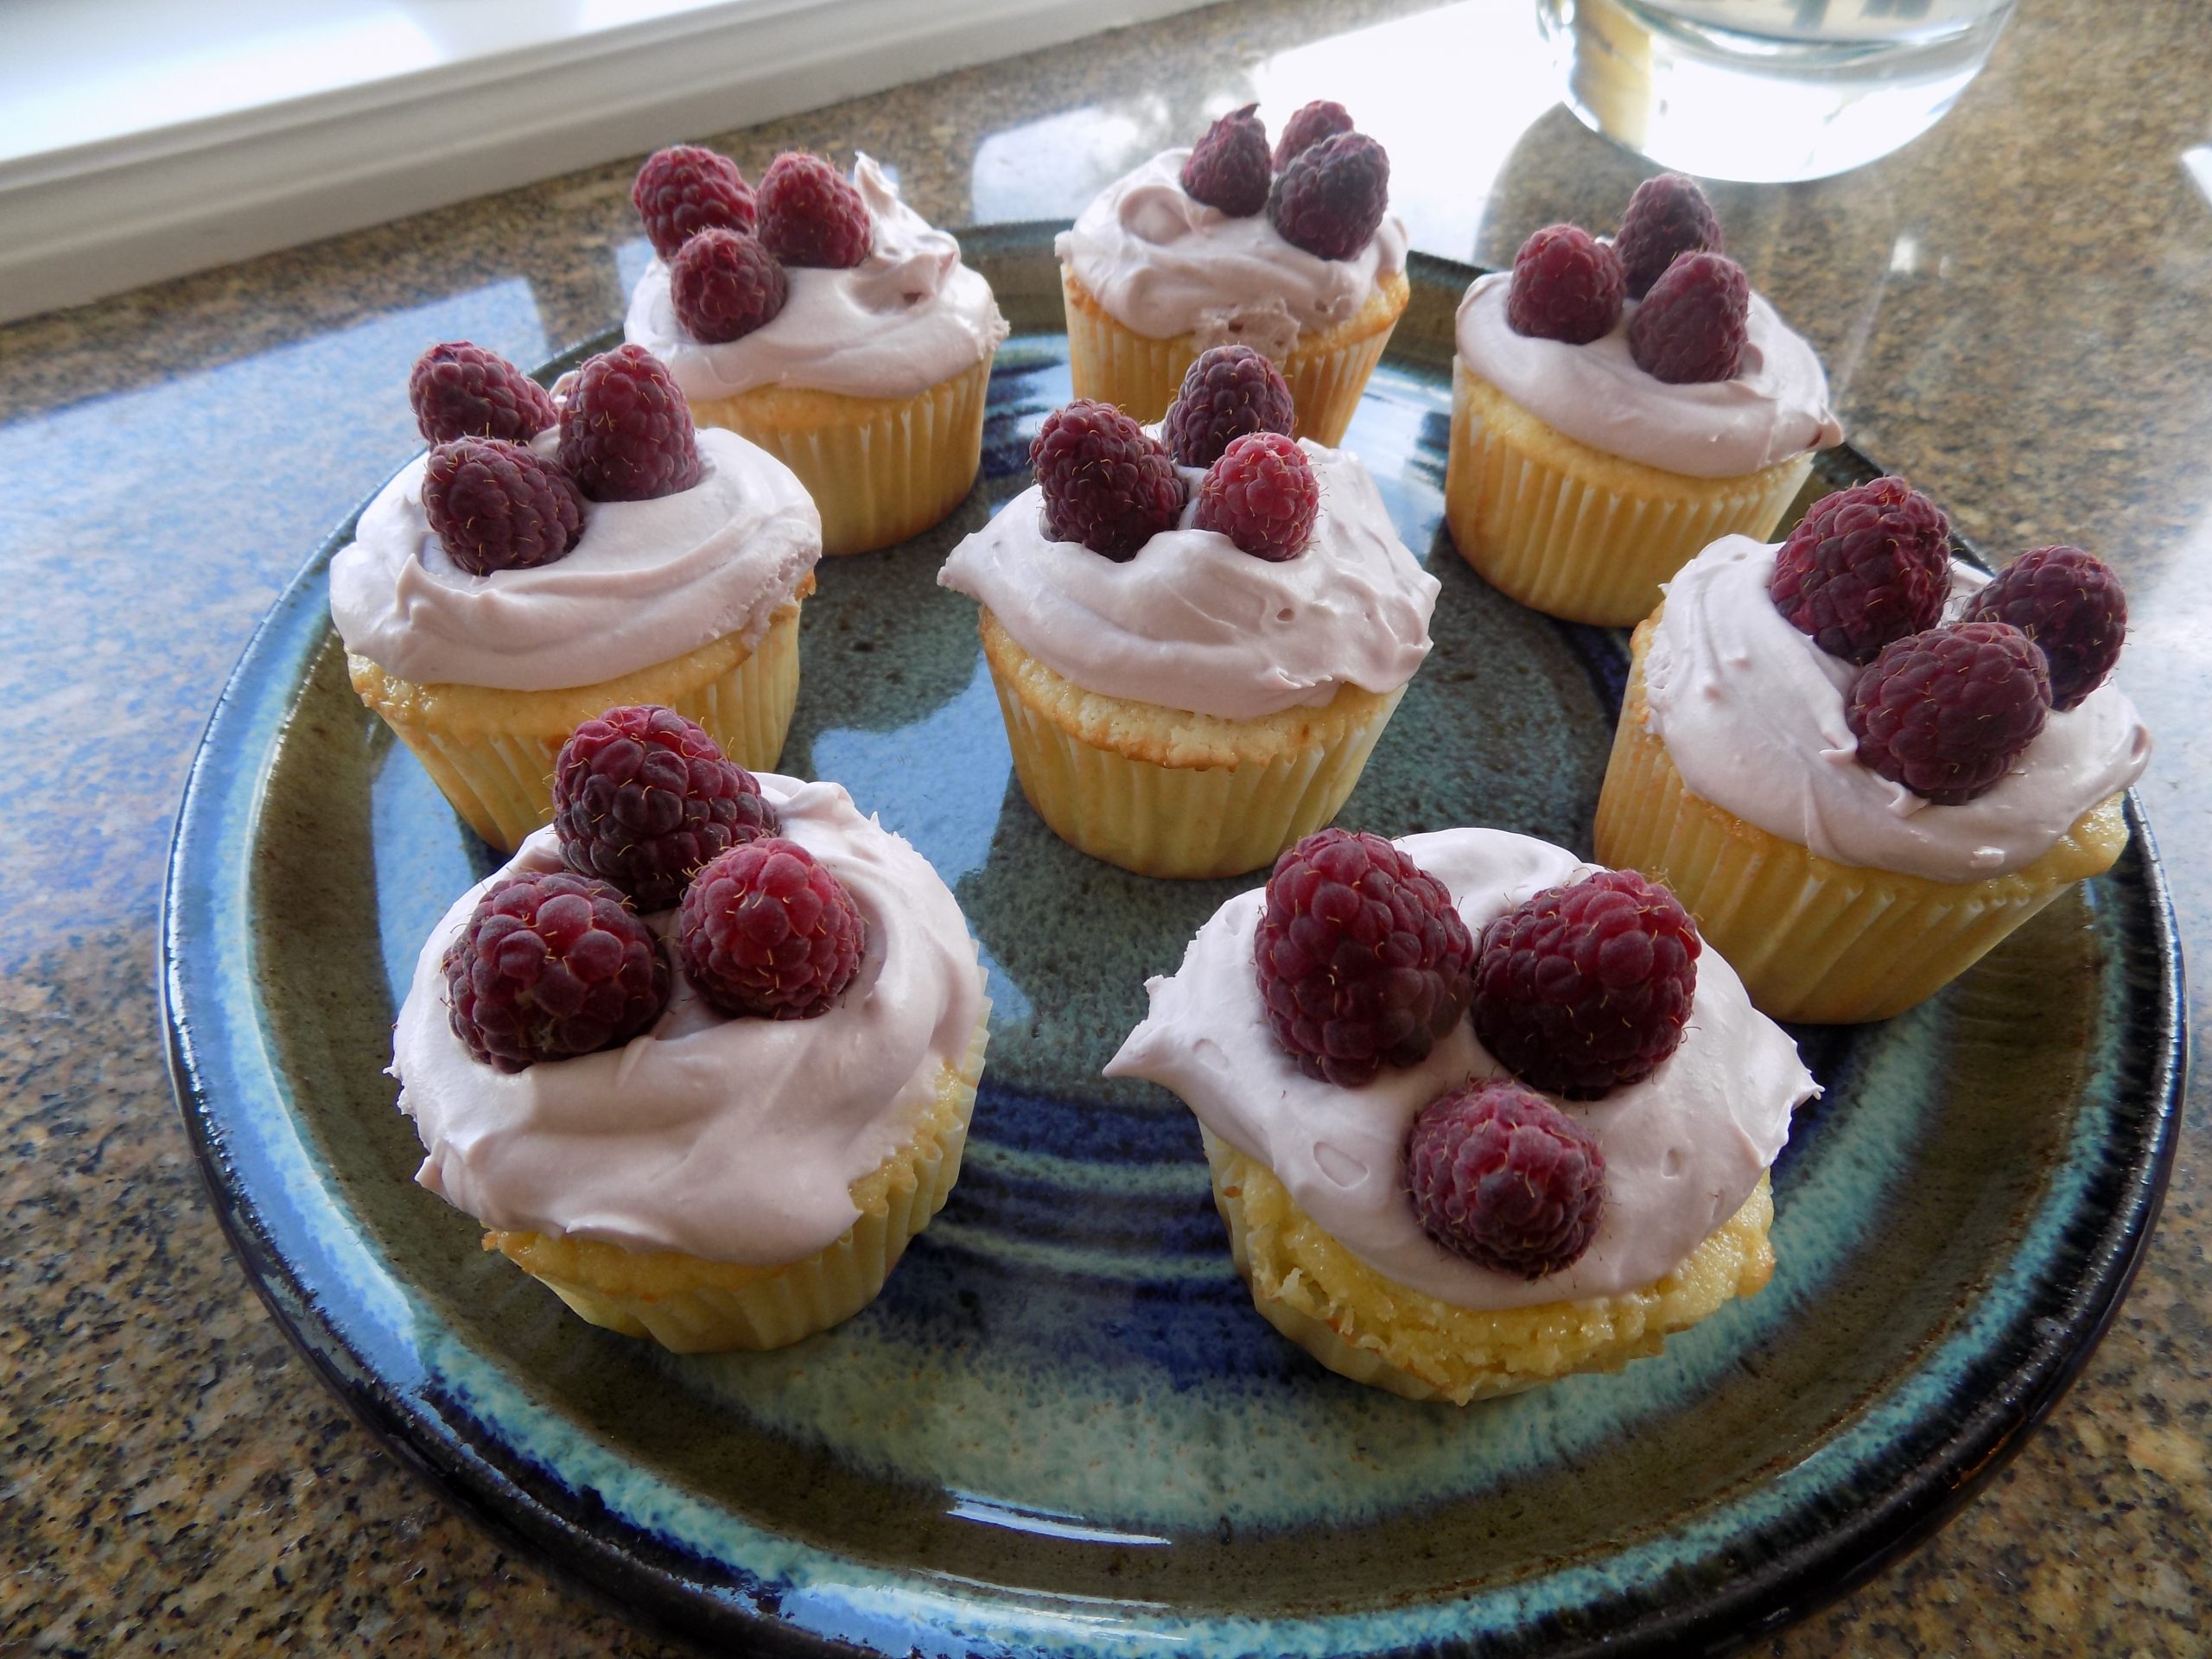
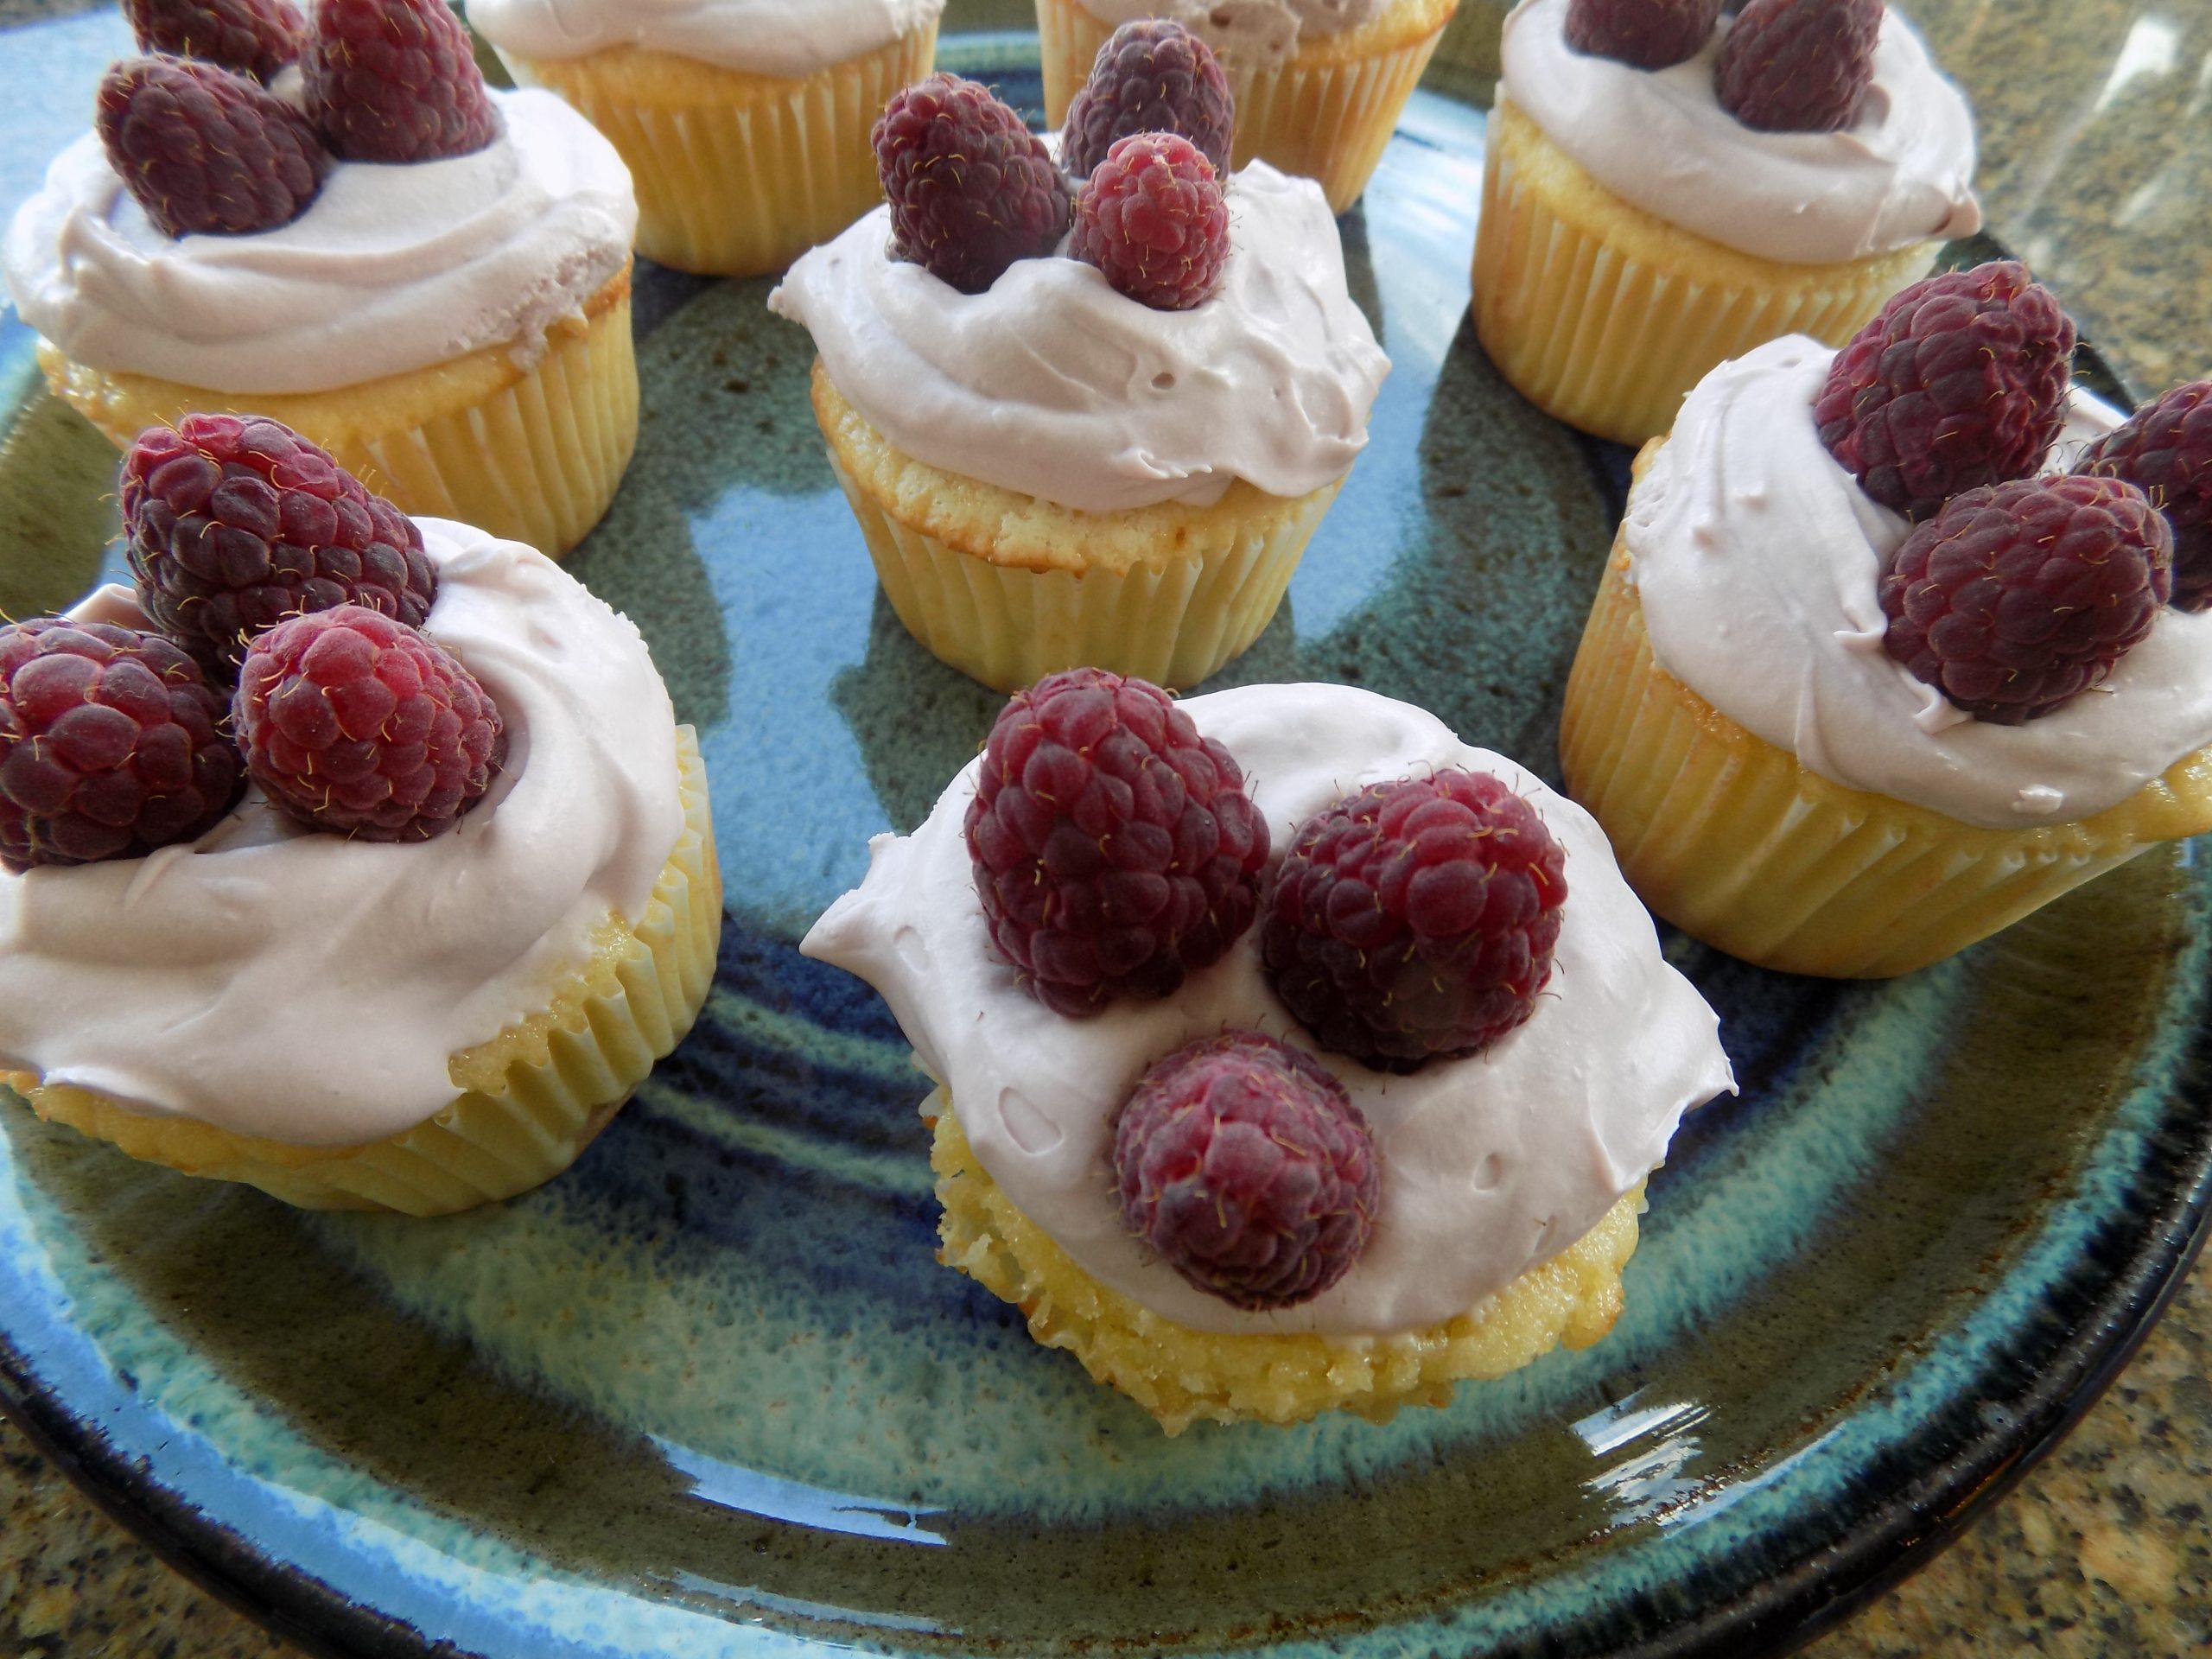
And just because I chose to frost the cupcakes in this post with raspberry cream cheese frosting, doesn’t mean that other frostings wouldn’t be equally delicious. I just wanted a raspberry frosting this time.
And luckily, both the cake part and the raspberry frosting are very easy to prepare. No fancy ingredients in the cake, but you need to plan-ahead and purchase some freeze-dried raspberry or strawberry powder for the frosting. (Trader Joe’s carries the powder at a reasonable price.)
So, as always, keep playing in your kitchen. And even if you think you don’t like yellow cake because you often find it dry and tasteless, you need to build these cupcakes or cake to realize how delightful a truly great piece of yellow cake can be!
Peace and love to all.
Cake Batter:
½ c. (1 stick) unsalted butter, room temperature
3 T. vegetable oil
1¼ c. granulated sugar
3 lg. eggs, room temperature
1 lg. egg yolk, room temperature
1 T. pure vanilla extract
1½ c. fluffed up or sifted cake flour
½ tsp. baking powder
¼ tsp. salt
½ c. sour cream
In the bowl of your stand mixer, cream the butter, oil, and granulated sugar on high until light and fluffy, about 5-6 minutes. (Do not skimp on the time for this step. Very important.)
Add eggs and egg yolk one at a time until well incorporated. Scrape the bowl as needed. Add in the vanilla extract and mix until well combined.
In a medium sized bowl whisk the cake flour, baking powder, and salt together.
With mixer on low speed, alternate adding in flour mixture and sour cream. Do not over mix.
Cupcakes:
Using a #16 (¼ cup, 2-oz.) ice cream scoop, drop batter into cupcake lined muffin tins 7/8 full. (Makes about 16 cupcakes.)
Bake in a pre-heated 350-degree oven for about 18 minutes, or until a toothpick inserted in the center comes out clean and the internal temperature reaches 210-degrees. Don’t over-bake.
Remove from oven and let cupcakes cool in the pan for 5 minutes before transferring to a wire rack to cool completely before frosting each cupcake. Store in the refrigerator. Decorate with fresh berries just before serving.
Layer Cake:
Grease and flour two 8-inch round cake pans. Pour the batter evenly into the pans. Shake to help even off the batter.
Bake in a pre-heated 350-degree oven for 18-20 minutes or until a toothpick stuck into the middle of the pan comes out clean and the internal temperature reaches 210-degrees. Do not overbake. Check after 17 minutes to be sure.
Remove pans from oven and place on cooling racks for 10 minutes. Then gently remove cakes from pans and allow to cool completely before icing.
To frost the cake, place one of the cakes upside down on your cake plate. Spread icing over layer. (Not too much.) Add the top layer and frost just the top. Store in refrigerator. When ready to serve, decorate with fresh berries.
RASPBERRY (OR STRAWBERRY) CREAM CHEESE FROSTING
¼ c. (½ stick) unsalted butter, room temperature
4 oz. cream cheese, room temperature
3 T. freeze-dried raspberry or strawberry powder
pinch salt
1 tsp. Chambord (black raspberry liqueur), opt.
1¾ c. powdered sugar, plus more if required
fresh raspberries or strawberries, for decoration
Cream butter, powdered sugar, and freeze-dried raspberry powder together until light and fluffy. Add the salt, Chambord, and enough powdered sugar to make a firm but not stiff consistency. Beat until smooth and easy to spread. Spread as described above.
I absolutely love Eggplant Parmesan. But I don’t like all the calories and mess associated with most homemade versions. Even my favorite recipe from Marcella Hazan, my favorite Italian chef BTW, requires frying the eggplant. And there was a time when the mess was just part of the deal and I accepted that the top of our range would be spattered with grease. But those days are over. I no longer have the strength to clean up that much mess, nor do I need the associated calories. So, when I decided to make Eggplant Parmesan for brother-in-law Rick and sister-in-law Katie last evening, I went looking for a new and improved method of pre-cooking the eggplant.
I found several recipes that baked the eggplant before layering it together with sauce and various cheeses. So, I took inspiration from others and glommed this recipe together, including the use of my old reliable and simple to prepare Marinara Sauce.
So, if you too love Eggplant Parmesan, I hope you give this recipe a try. It is absolutely delicious without being in the least bit greasy tasting. In fact, the end product fulfilled all my requirements and then some. (In other words, it turned out even better than I expected.)
But in all fairness, Eggplant Parmesan is never going to be a quick and easy fix. It takes a certain amount of time to do all the hacking, slashing, and grating. But I can promise you that all the work involved is worth the effort. And of course, you can use a jar of marinara sauce in place of homemade. But if you have the time, I truly feel that you can’t beat the recipe below for ease of preparation or flavor.
As always, have fun preparing good food. The food you yourself consume and provide for your family and friends should never be just a means of survival. It should always be a pleasure to consume, a treat to smell, and attractive to the eye. And as good cooks, we can make that happen.
Peace and love to all.
3 lbs. eggplant (about 3 medium sized), ends removed, partially peeled, and sliced into between ¼ and ½-inch thick rounds
kosher salt
extra virgin olive oil
12-16 oz. low fat cottage cheese, whirled in a food processor or blender until smooth
about 3 c. Marinara Sauce (see recipe below)
2/3 c. grated Parmigiano-Reggiano, divided
2 lg. eggs
½ c. loosely packed chopped fresh basil
2½ c. grated low-fat mozzarella (8-oz.), divided
Sprinkle kosher salt over the slices of eggplant, being sure to salt both sides. Set the salted eggplant in a colander and let it rest for about 30 minutes. By then the eggplant should begin to sweat. Rinse the eggplant under cold water to remove the excess salt. Then press the eggplant between clean kitchen towels or paper towels to extract as much liquid as possible.
Lightly grease 2 low-sided sheet pans (or one large sheet pan) with olive oil. Lay the first layer of eggplant on the greased pan. Then lightly brush the eggplant slices with olive oil. Lay the next layer down, and lightly brush the top of this layer too. Bake for about 20 minutes in a pre-heated 450-degree oven or until the top layer of eggplant is a light golden brown.
Meanwhile, combine the cottage cheese, ⅓ cup of the grated Parmesan, eggs, basil, and ½ cup of the grated mozzarella cheese.
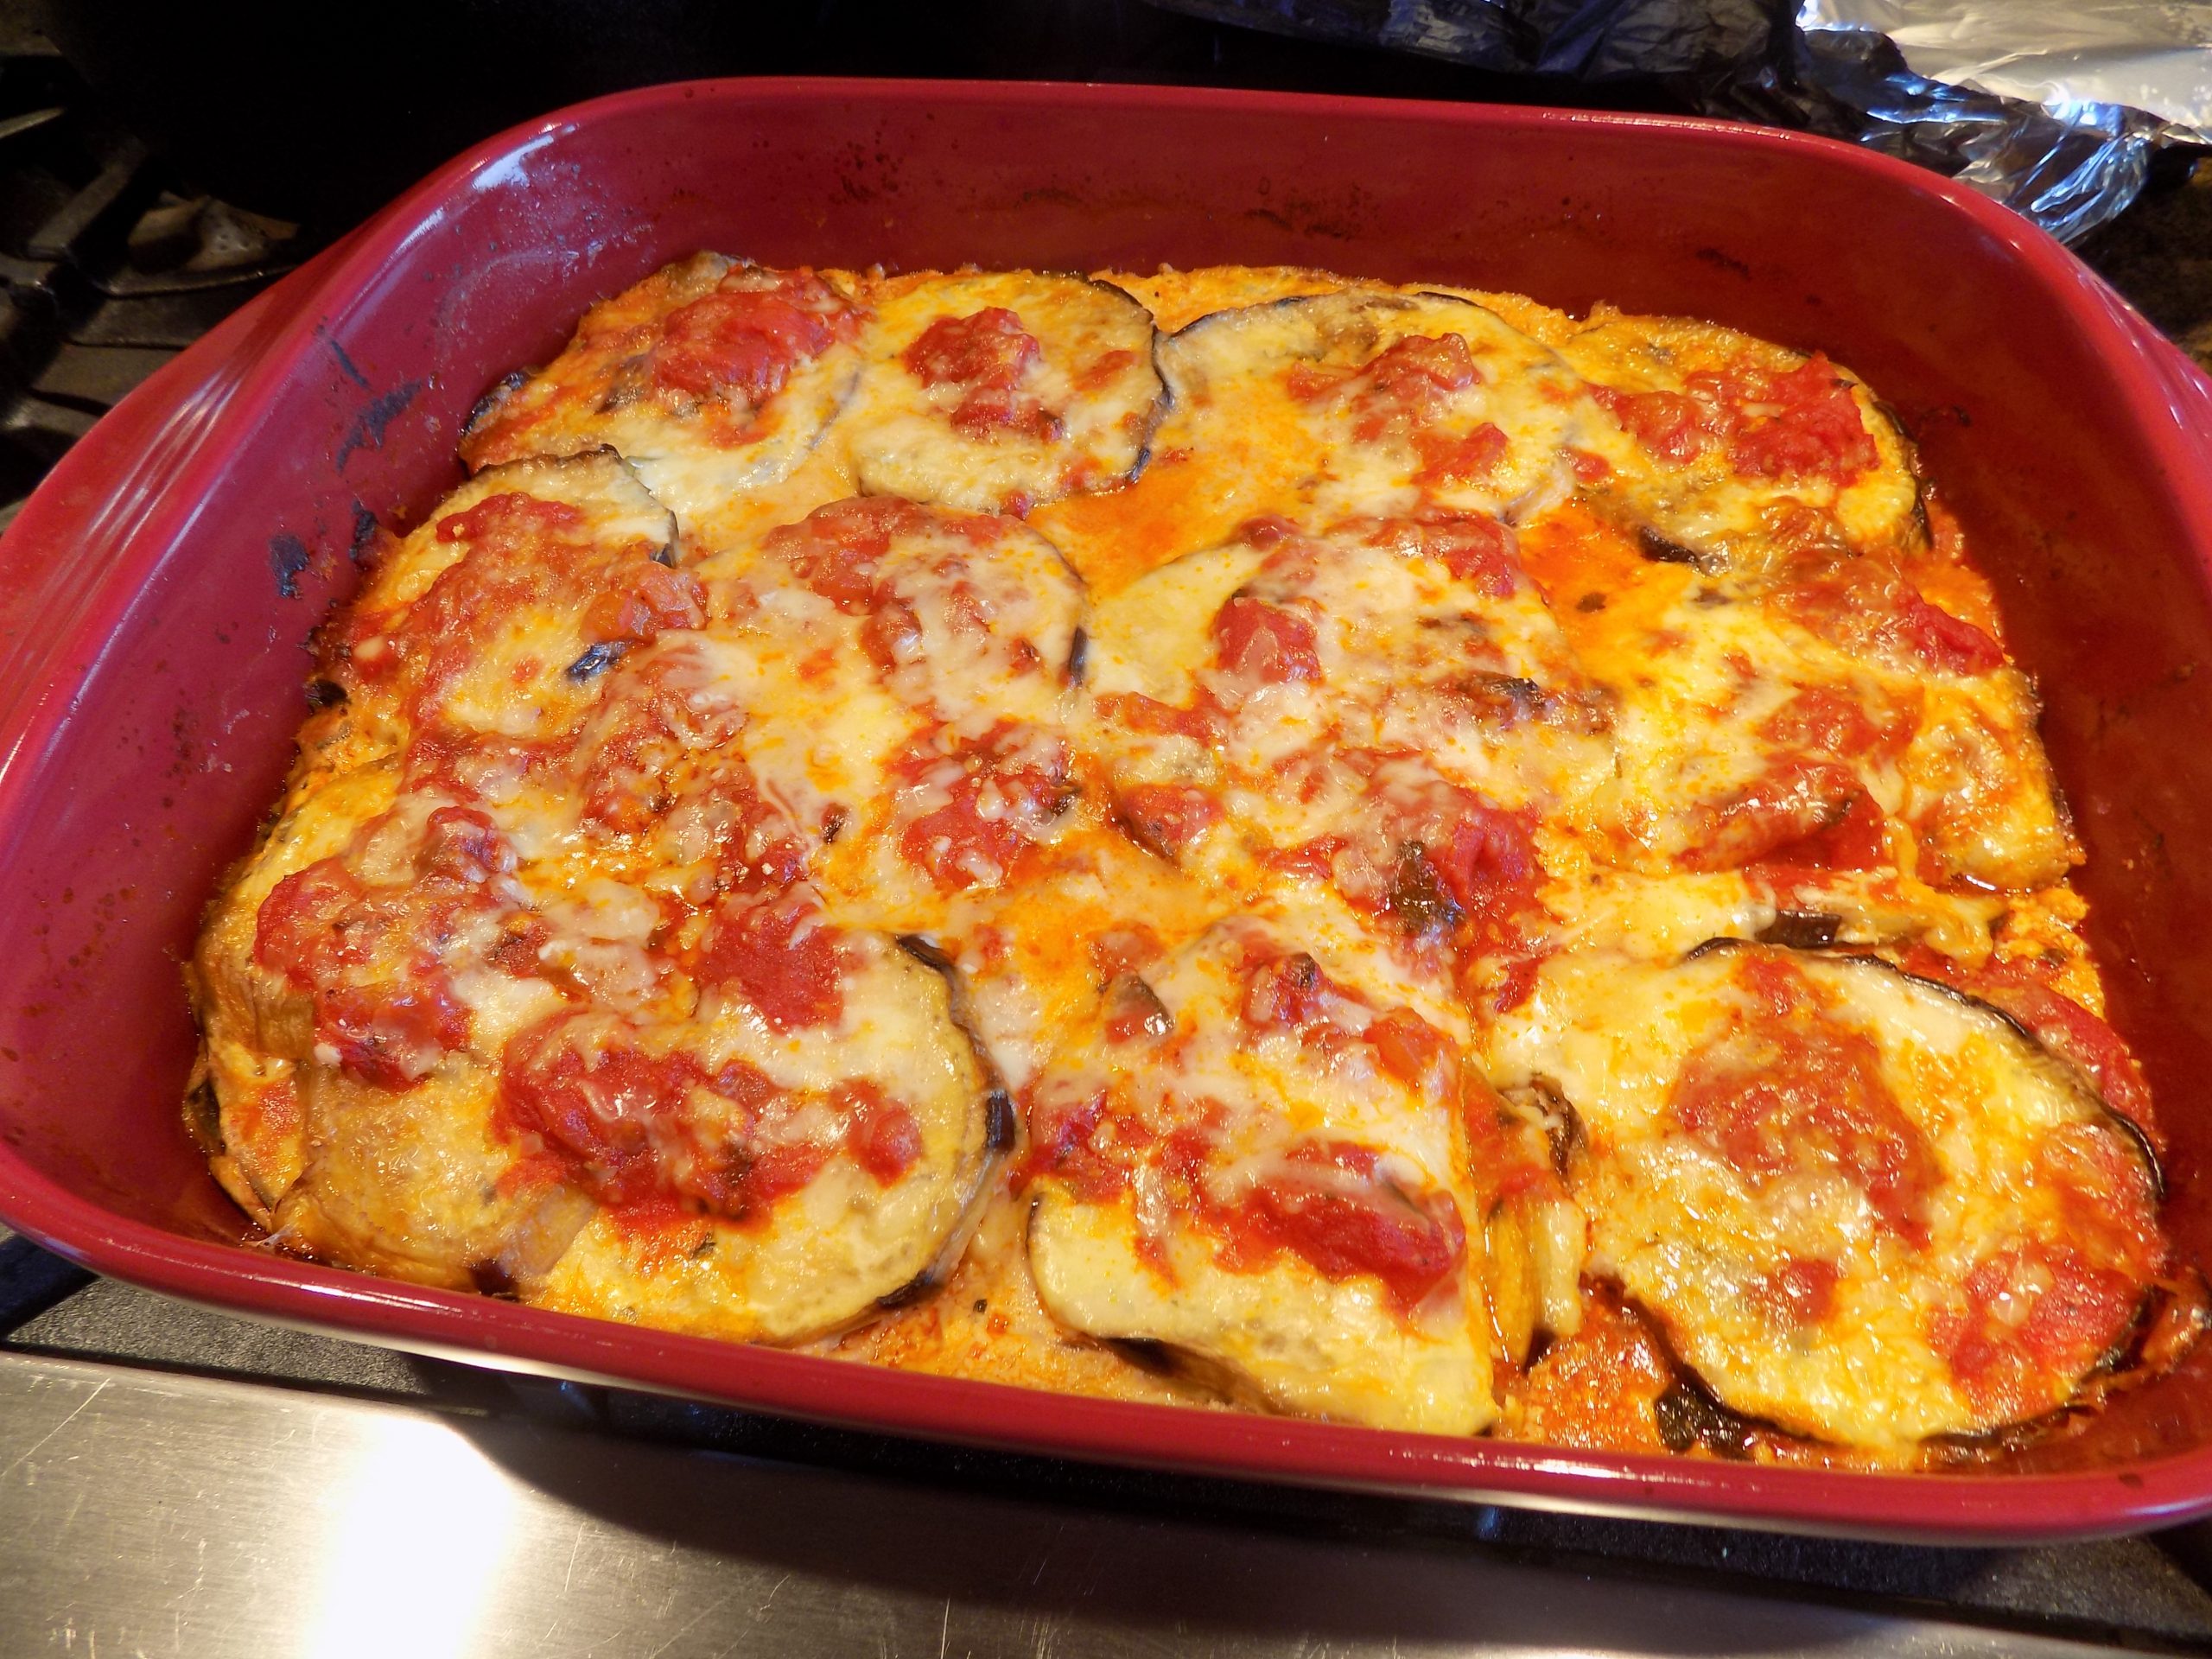
Butter the bottom and sides of a 10×16-inch baking or casserole dish. Spread ½ cup of the marinara sauce on the bottom of the pan. Add ⅓ of the eggplant to cover the bottom of the dish. Top with ⅓ of the cottage cheese mixture, ⅓ of the mozzarella cheese, and ⅓ of the marinara sauce. Add another layer of eggplant and repeat with the cottage cheese mixture, mozzarella cheese, and sauce two more times, reserving the third layer of mozzarella for topping. Sprinkle with the remaining ⅓ cup of grated Parmesan cheese.
Cover with aluminum foil and bake in a pre-heated 400-degree oven until the cheese is melted and bubbling, about 40 minutes. Remove foil and bake an additional 15 minutes. Remove from oven and let sit about 10 minutes before serving.
Marinara Sauce
2 T. extra-virgin olive oil
½ c. chopped onion
2 cloves garlic, chopped
1 (28-oz.) can chopped, diced, or Roma tomatoes (Italian tomatoes preferably)
1 bay leaf
pinch crushed red pepper flakes
1 tsp. dried oregano (I use Mexican oregano)
½ tsp. kosher salt
freshly ground black pepper
3 T. chopped fresh basil leaves
1-2 T. unsalted butter, opt.
In a large, covered saucepan, heat the oil over medium heat. Add the onion and sauté until soft and translucent, about 6 minutes. Stir in the garlic and cook for an additional minute. Add the tomatoes, bay leaf, red pepper flakes, oregano, salt, and pepper. Stir to combine ingredients. Bring to a boil, reduce heat, cover, and simmer for about 30 minutes.
Remove from heat, discard bay leaf, add the basil, and adjust seasoning. If the sauce tastes acidic, add butter 1 tablespoon at a time to round out the flavor.
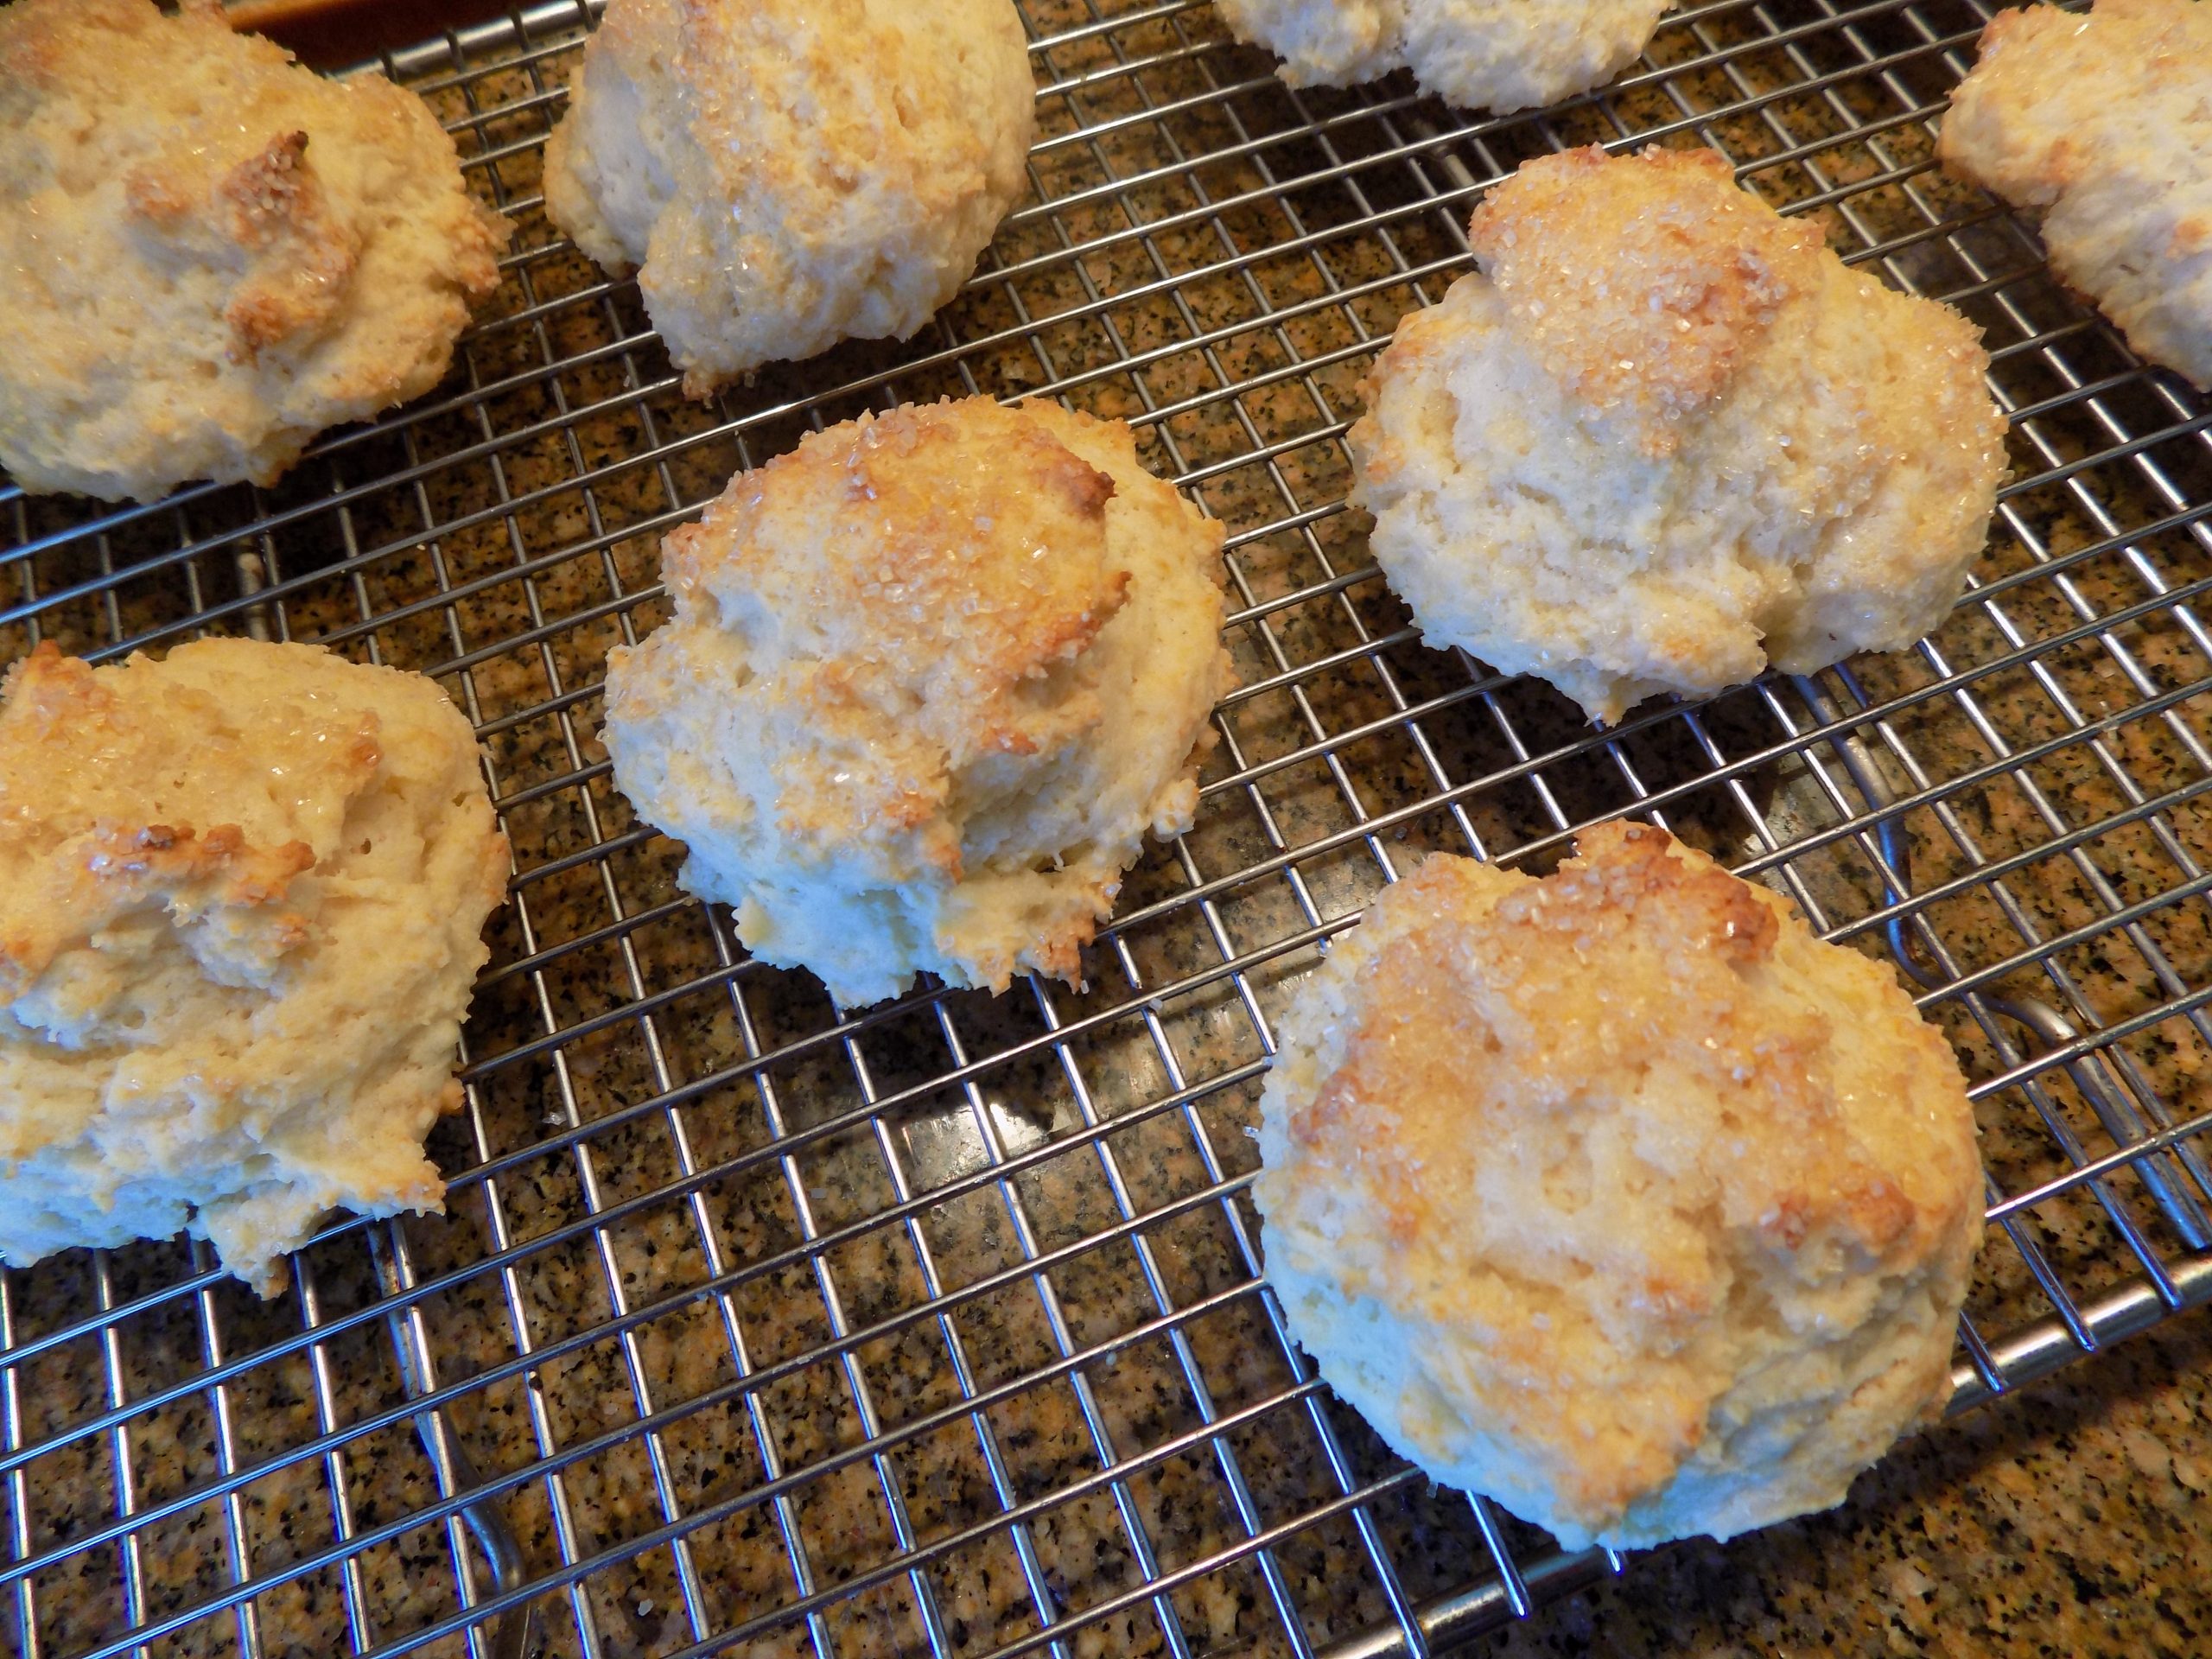
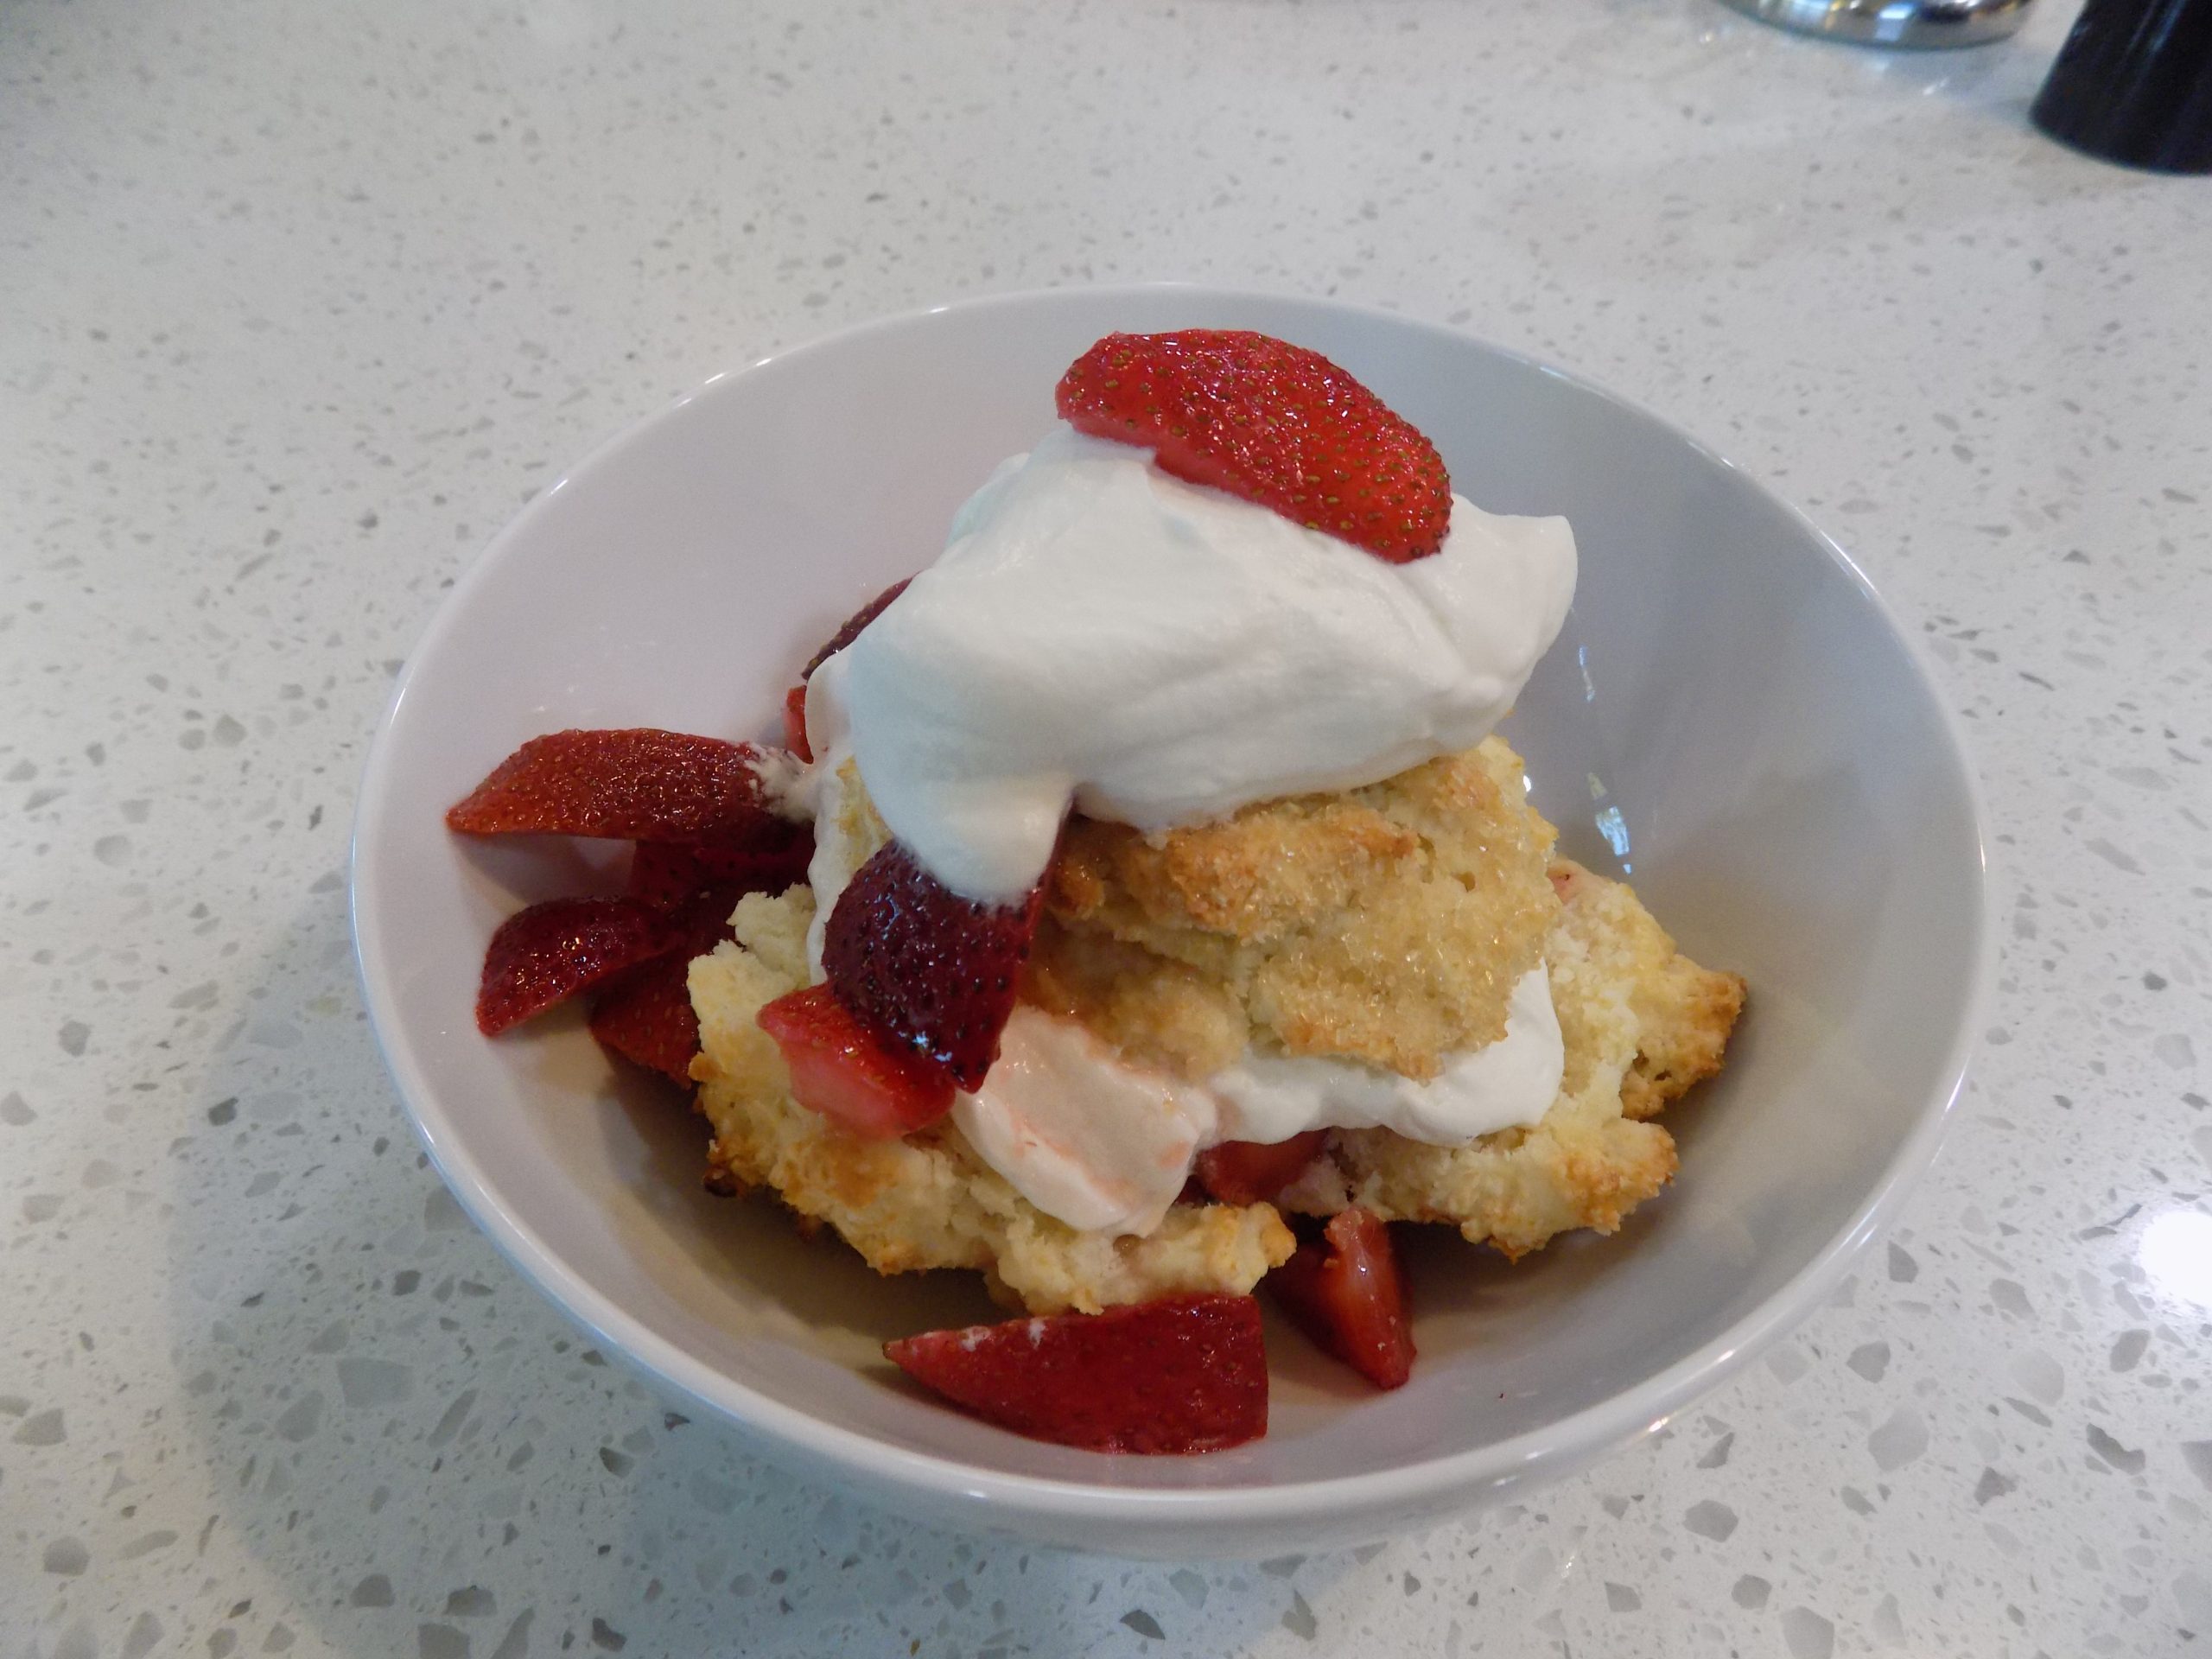
OK, I know most of you already know how to make strawberry shortcake. But for those of you who have yet to master this classic American dessert, have I got a simple yet exceedingly delicious recipe for you. The biscuits themselves are yummy without being too sweet. And the bit of turbinado sugar baked on top of each biscuit gives them just a lovely little crunch that is super appealing. And the orange liqueur is just heavenly combined with the strawberries and as an additive in the whipped cream. Transforms the whole dessert from ordinary to amazing. And the best part – this entire dessert is totally easy to prepare. Even for a complete novice. And each part (the biscuits, berries, and topping) can be prepared ahead. So, when it comes time to serve the dessert, all you have to do is split the biscuits, heap on lots of berries and juice, and dollop the whole mess with the flavored whipped cream. Nothing could be easier or produce yummier results. And since strawberries are at their finest right now, I say – go for it.
As always, have fun preparing food. And don’t ever be intimidated by any culinary skills you feel you lack. None of us was born knowing how to do anything in the kitchen, even a supposedly simple task like frying an egg. But please consider, we all had to break that first egg and plop it in a pan. And then get it back out of the pan without breaking the yolk. If you figured out how to do something as skillful as frying a perfect over easy egg, you are going to have no trouble developing other culinary skills. Because most recipes, even though they may contain a lot of ingredients and at first glance appear to be difficult, take much less finesse than getting that egg you fry every morning on a plate intact.
Peace and love to all.
Shortcake Biscuits:
2 c. unbleached all-purpose flour, fluffed
1 T. baking powder
¼ tsp. baking soda
1 T. granulated sugar
½ tsp. kosher salt
6 T. cold unsalted butter, cut into small pieces
1 c. buttermilk (I use full fat Bulgarian style buttermilk)
turbinado sugar (or any coarse finishing sugar)
In a large bowl, whisk together the flour, baking powder, baking soda, granulated sugar, and salt.
Add the pieces of cold butter. Using your fingertips, rub the butter into the dry ingredients until the mixture resembles coarse crumbs with pea-sized clumps of butter within. Add the buttermilk and stir with a regular table knife until the dough comes together into a sticky, shaggy mess. Do not overmix.
Using a #24 (1.75 oz.) ice cream scoop, form the dough into balls (really shaggy blobs) and place on a parchment paper lined baking sheet. (If you don’t have an ice cream scoop, use a large serving spoon. The blobs should be bigger than golf balls but smaller than tennis balls.) Don’t worry about making them perfect. It’s best if they are a little rough around the edges. (That gives the baked shortcakes more nice crispy bits.) (And do not be tempted to pat the blobs down. They will flatten nicely as they bake.) Sprinkle the tops liberally with turbinado sugar.
On the middle rack of your oven, bake the biscuits for 16 to 18 minutes in a pre-heated 425-degree oven. The biscuits will be a nice golden brown when they are done, and the internal temperature should register between 205-210 degrees.
Remove from oven and place the biscuits on a rack to cool completely. Store in an airtight container until ready to use.
Strawberry Mixture:
2 T. granulated sugar
2 T. Cointreau or other orange-flavored liqueur, or more to taste
6 c. sliced fresh strawberries
Combine the sugar and Cointreau in a covered bowl. Add the strawberries, cover the bowl, and place in your refrigerator for a couple of hours.
Whipped Cream:
1-pint heavy whipping cream
3 T. powdered sugar
1-2 tsp. vanilla bean paste or vanilla extract
1 T. Cointreau, or more to taste
Whip the cream to stiff peaks. Whip in the powdered sugar, vanilla bean paste, and Cointreau. Cover the mixing bowl and place in refrigerator until needed.
Put it all together:
Using a serrated knife, split the biscuits in half horizontally and transfer the bottoms to rounded dessert plates or bowls. Spoon the macerated berries and their juice evenly over the biscuit bottoms. Let some of the berries spill out onto the plate or bowl. Top with a generous dollop of whipped cream and cover with the biscuit tops. Spoon more berries and whipped cream over the tops and serve immediately.
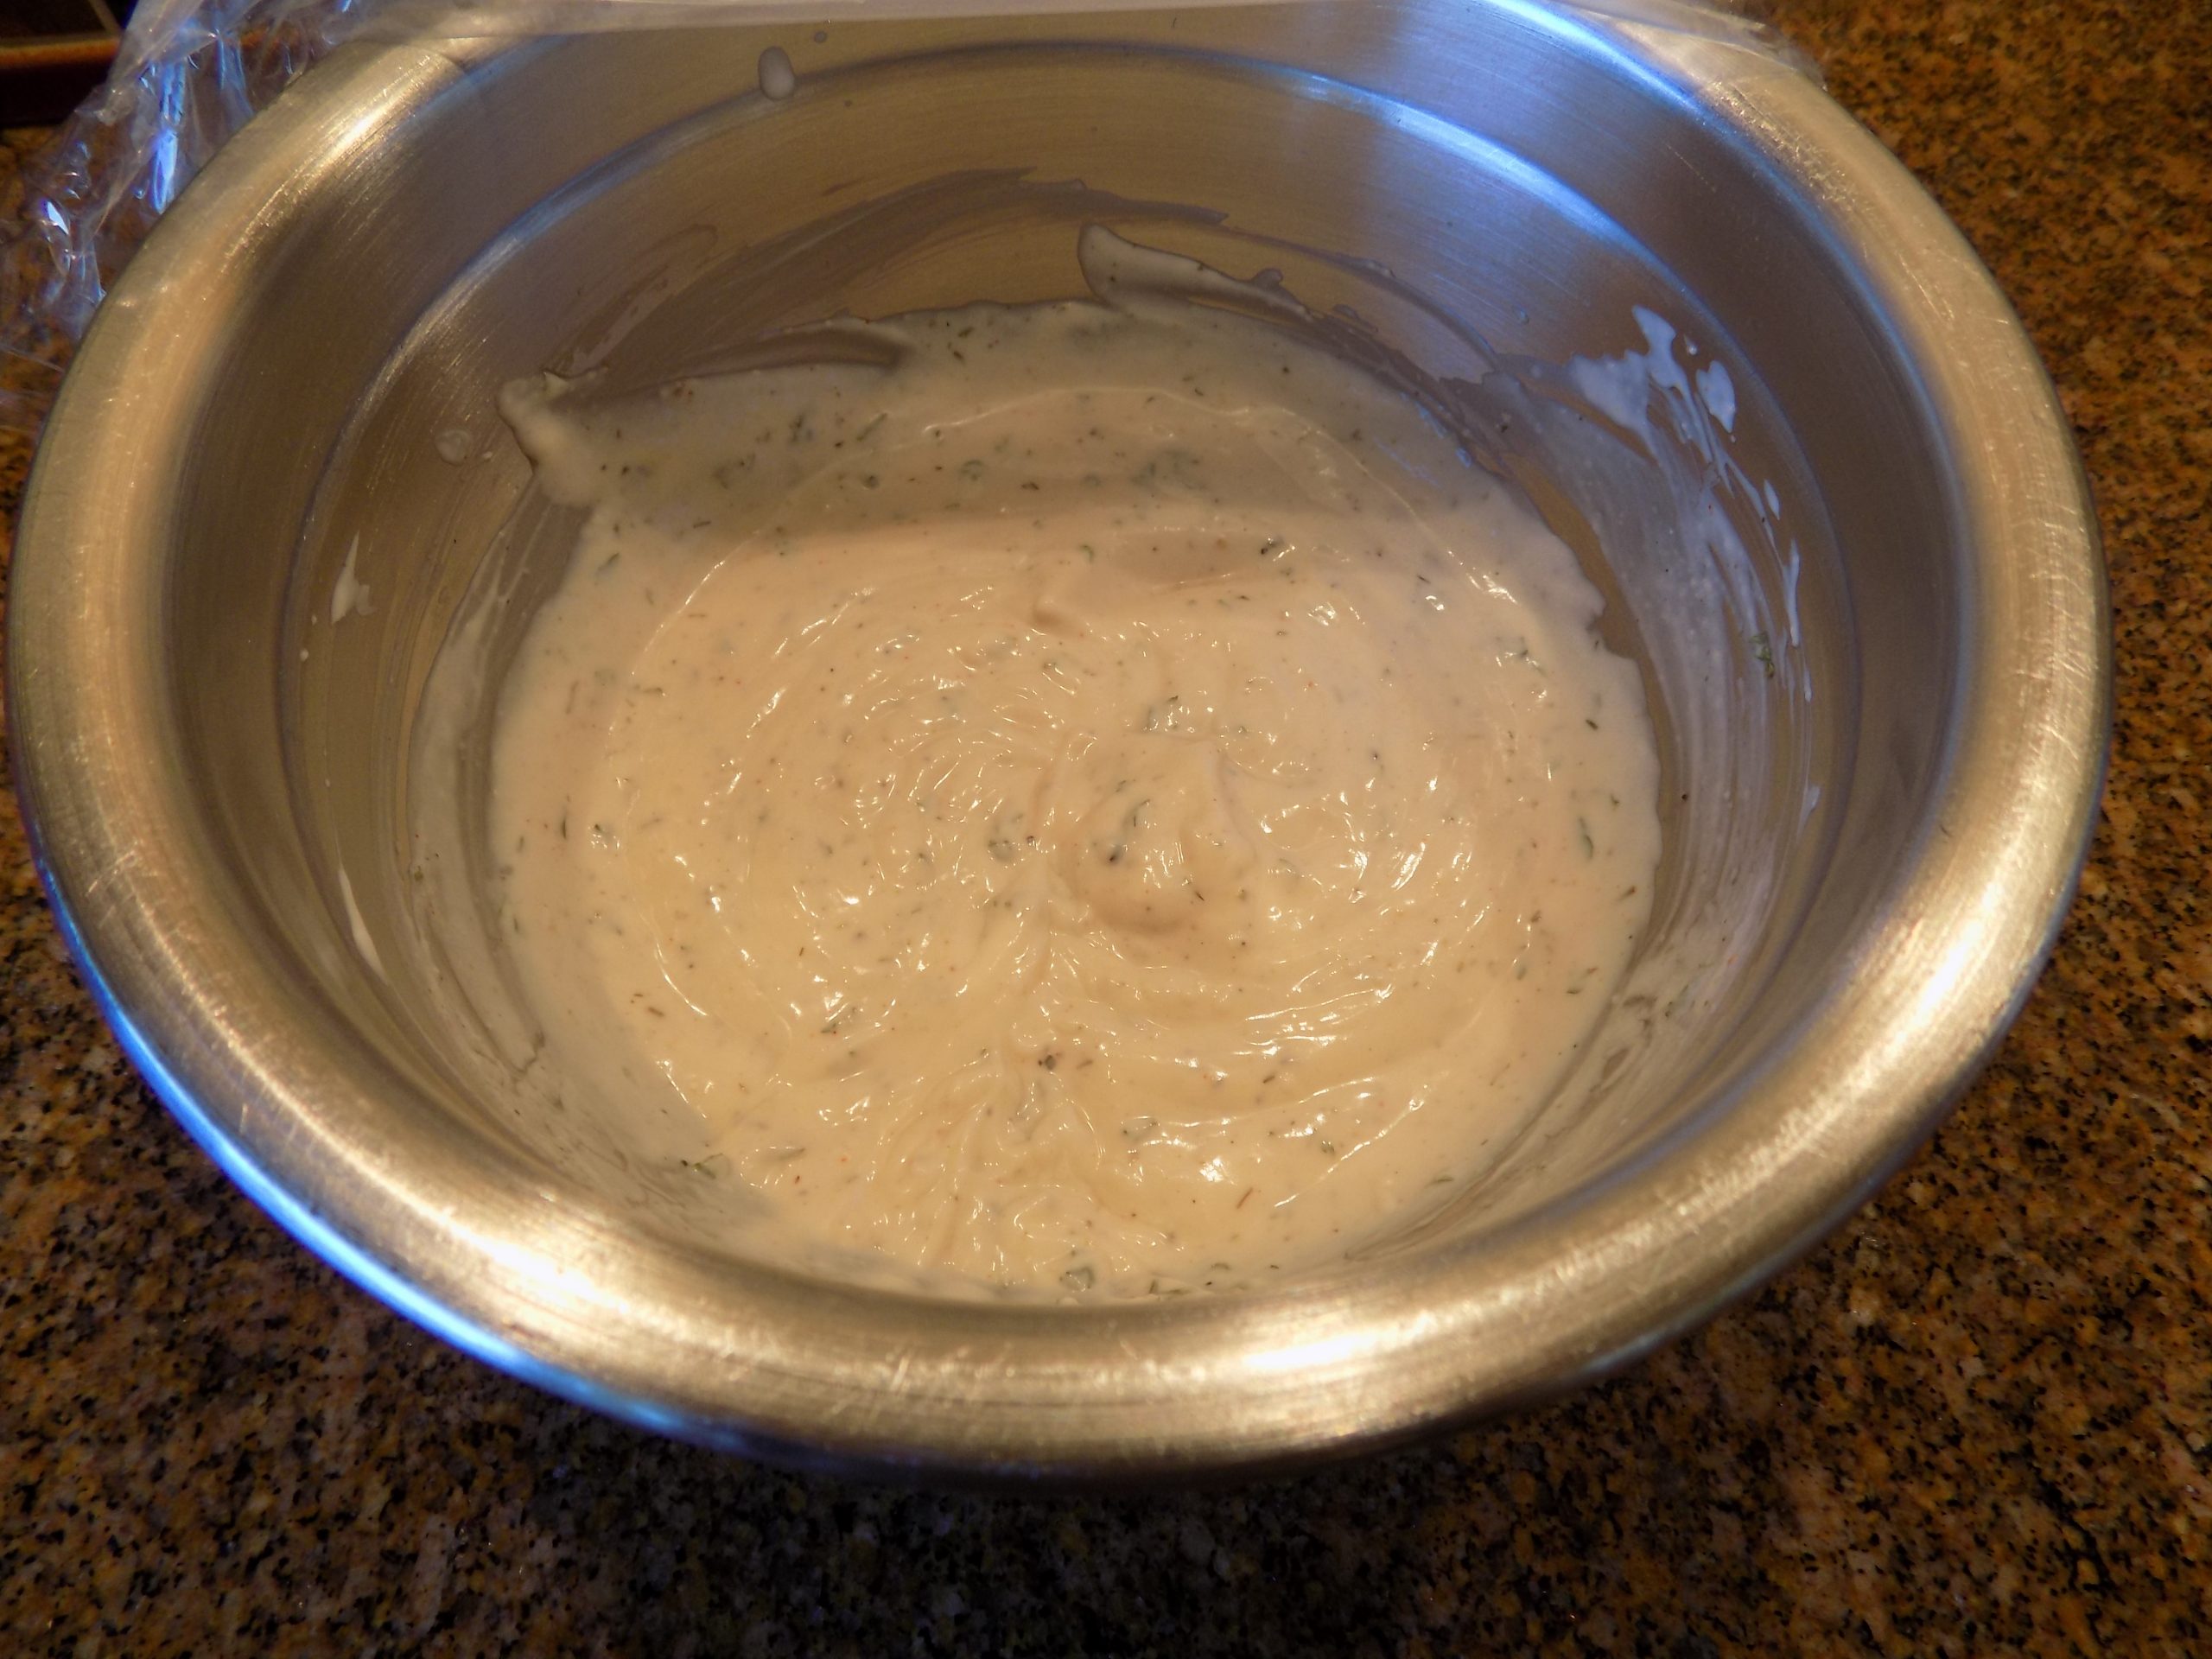
OK, this has to be the easiest salad dressing/dip I have ever made. Absolutely no chopping of anything involved. But after working up this recipe for the other evening’s salad, I must admit I was a bit disappointed. It tasted OK, but it had that kind of raw taste. I wasn’t too surprised because of all the dried veggie action. And having a bit of experience in the kitchen, I should have remembered that it might take a day or two for the dried veggies to re-hydrate and mellow. But I was in a hurry and wanted to get dinner on the table. (You know how that goes.) So, we ate our salad, and I put the rest in the fridge. Jump forward 3 days.
While grating and chopping veggies for coleslaw, I remembered that I had envisioned this dressing as also a dip for crudité. And really, sacrificing my fingertips just to not waste the nub ends of celery stalks and carrots just didn’t seem like the reasonable thing to do. So, both the practical and smart answer was to nibble on whatever part of the veggie that I deemed prudent not to grate. So, I retrieved the dressing/dip from the fridge and took my first bite. OMG – all this wonderful blend of ingredients needed was just a bit of time together. And I tell you true, this is the best buttermilk dressing/dip I have ever tasted. But I can’t state this too fervently – THIS DRESSING MUST BE MADE AHEAD OF TIME. TWO DAYS AHEAD OF TIME, AT LEAST! (And no cheating.)
But it is so worth the wait. Perfect on salads. Perfect as a dip. PERFECT period! And just so darn easy to prepare, that I’m almost embarrassed to post it for all to see. But I must. Because it is just that darn good. And I like to share.
As always, have fun making food. And Happy 4th of July. And while we are celebrating with family and friends, let’s all remember why we still celebrate this day in history. Because on July 4, 1776, the Second Continental Congress adopted the Declaration of Independence, declaring at the beginning of the second paragraph: “We hold these truths to be self-evident, that all men are created equal, that they are endowed by their Creator with certain unalienable rights, that among these are Life, Liberty and the Pursuit of Happiness.”
Peace and love to all.
¾ c. buttermilk (full-fat Bulgarian buttermilk is best)
½ c. mayonnaise
1 tsp. dried parsley
½ tsp. granulated onion*
½ tsp. granulated garlic*
½ tsp. celery salt
scant ¼ tsp. seasoned salt
pinch dried dill weed
freshly ground black pepper
Whisk or shake together in a lidded container. Use as a salad dressing or dip for crudité.
*You will notice that I almost always use granulated onion and garlic rather than onion and garlic powder. It’s just a preference because the difference in these forms is merely texture, powder having a flour-like consistency and granulated being coarser, like fine cornmeal. Most reputable manufacturers sell 100% pure versions of both, but occasionally you will find additives to improve flow or prevent caking, especially in the powdered variety.
But the main thing to know is that anyone who uses granulated or powdered onion or garlic is not less of a cook than those who always use the fresh variety. To my way of thinking, there is certainly a place for the fresh variety, and I use fresh garlic and onion a great deal in my cooking. But there are also times when a more delicate flavor is preferable. And I get to make that judgement. Not because I’m lazy (well sometimes because I’m lazy), but mainly because it’s my kitchen and my choice! And I always love having a choice.
We love East Indian food. But until recently there hasn’t been a decent Indian restaurant anywhere near our home. And even though we now have an option, I don’t always like to go out to eat. Most of the time, I just like to fix what I’m hungry for in the privacy of my own kitchen. And of course, sometimes the dishes I prepare turn out pretty good and I share the recipes with you. Sometimes, well let’s just refer to them as colossal failures. Great idea, but not the results I expected and therefore quickly relegated to the never to be seen or heard of again. Or if I think the recipe might be redeemable, I’ll put the recipe in my “try again with changes” folder.
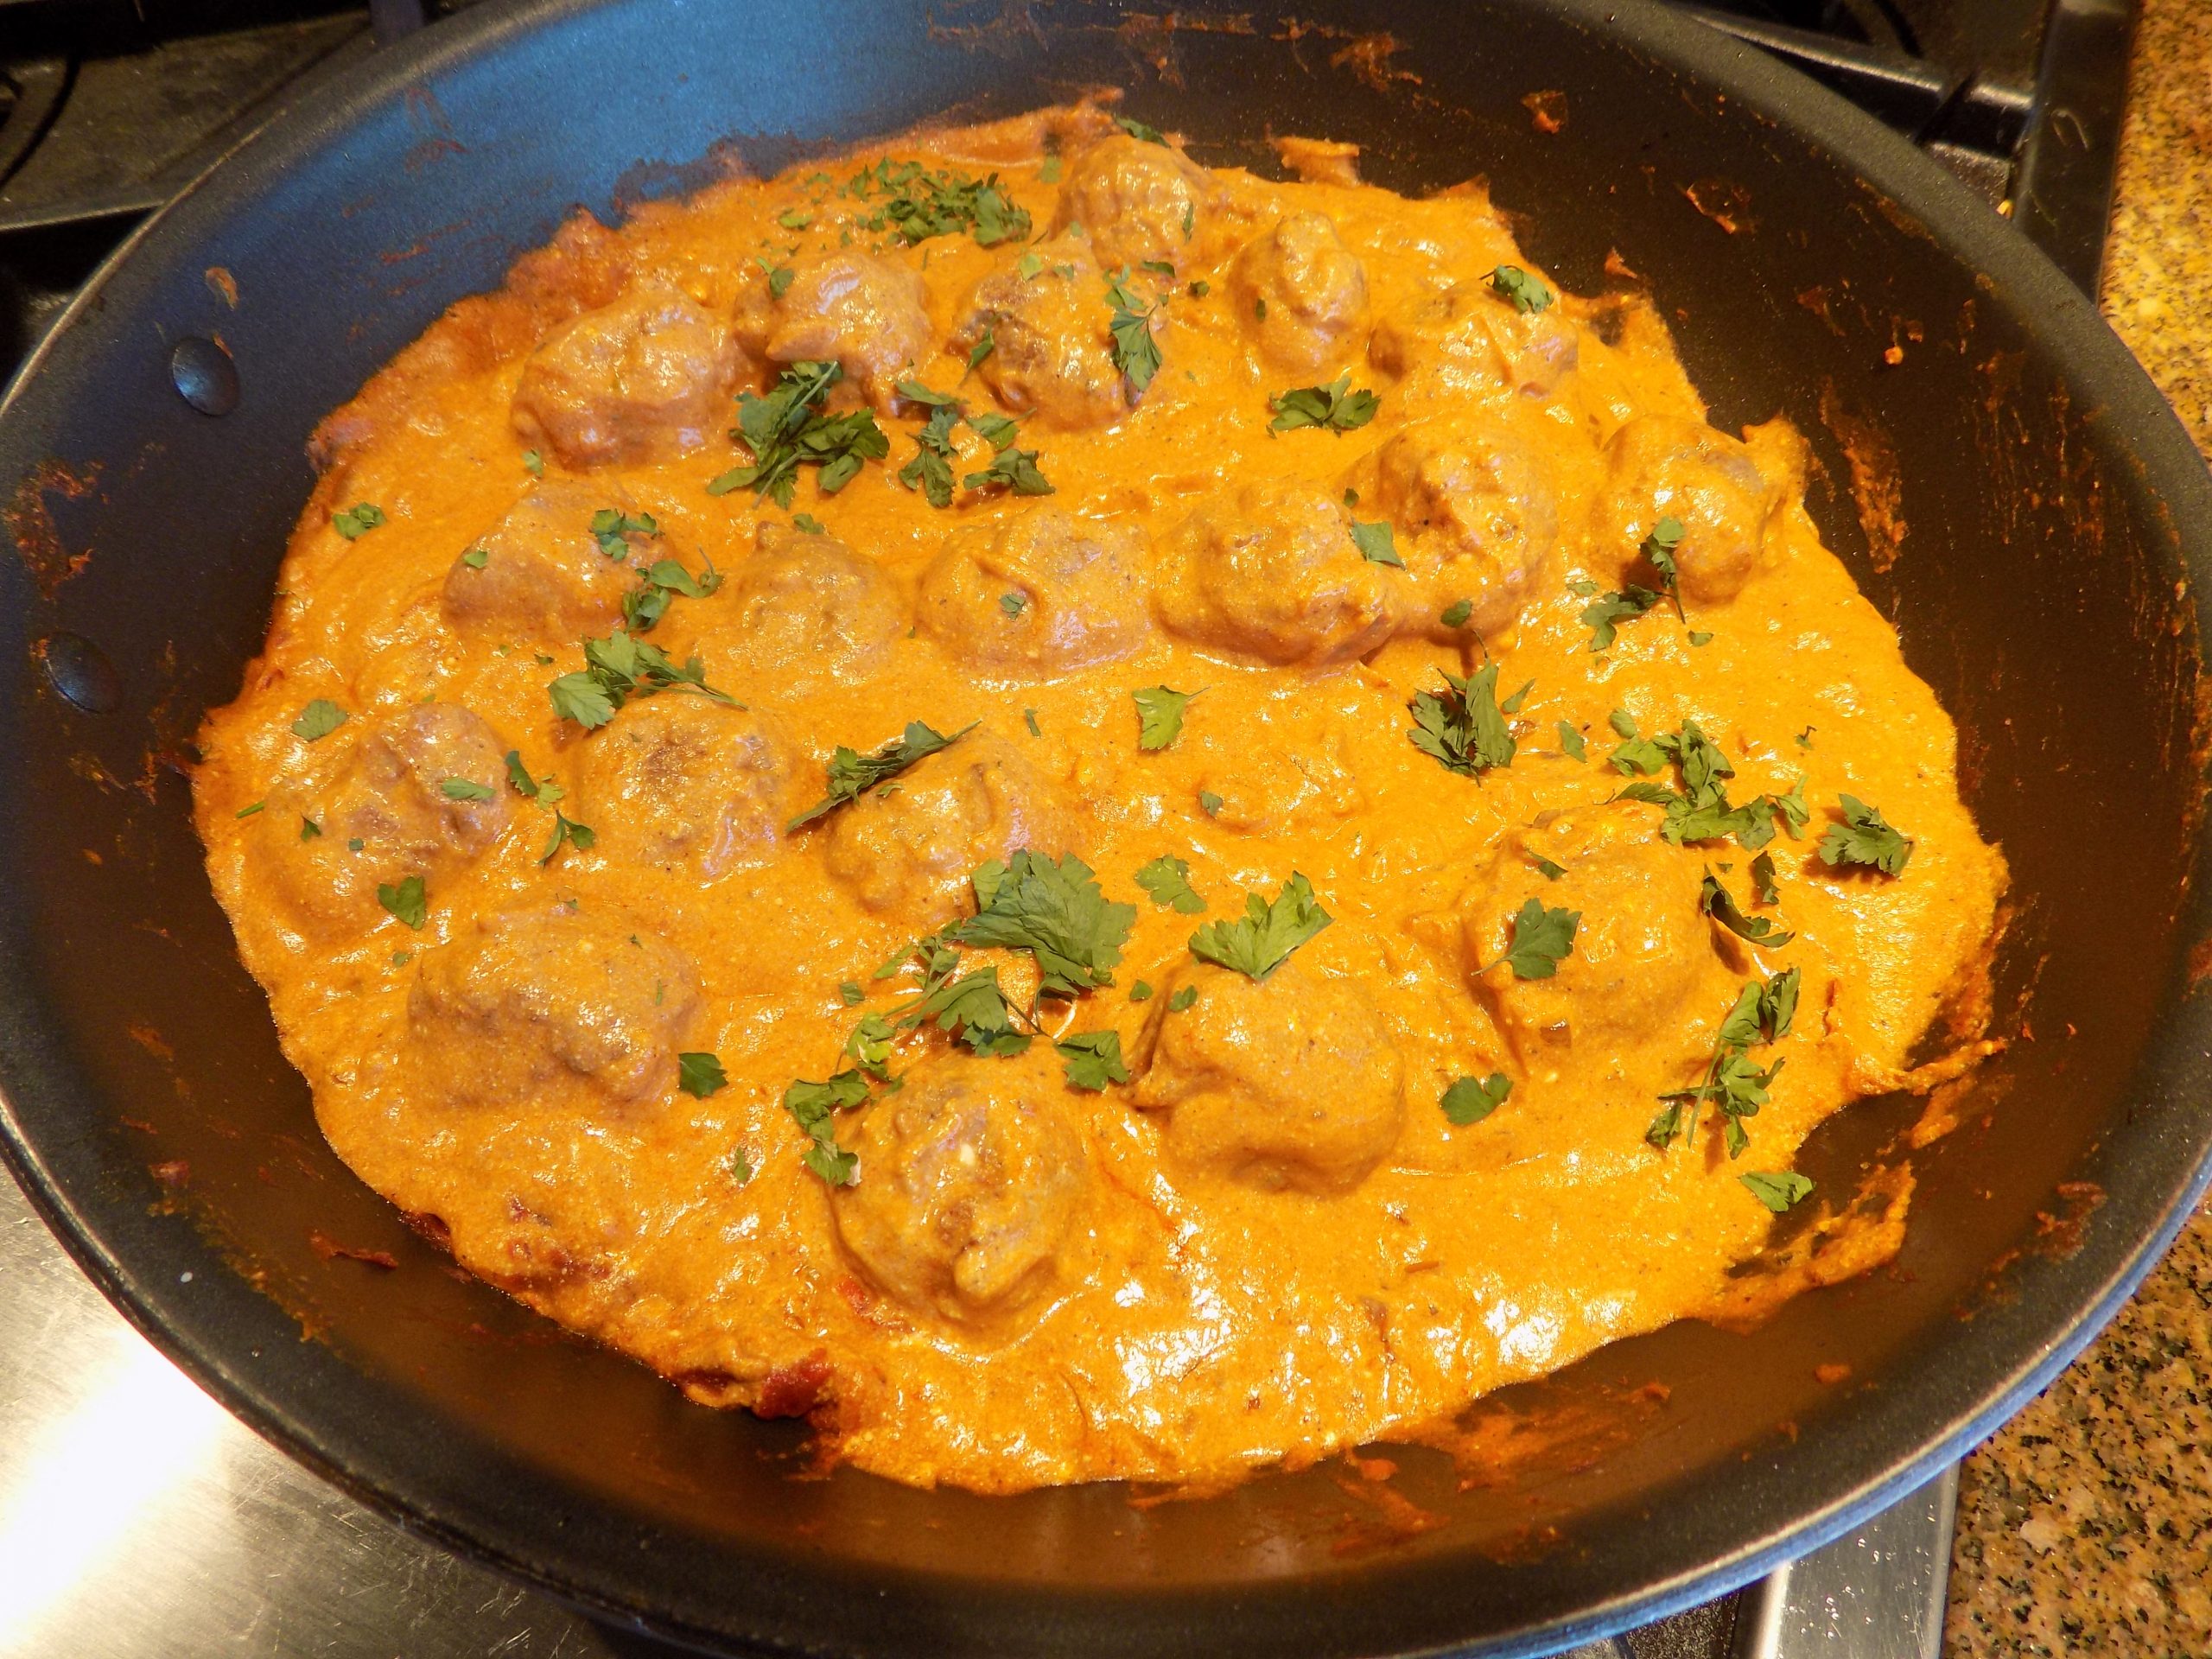
But luckily, this was not one of those recipes. Thank goodness. Because this dish was very easy to prepare. (I really like that!) And very tasty. And the whole house smelled like an Indian restaurant. (Who could ask for anything better than that?)
So, if you too love Indian food, give this simple recipe a try. Add a green veggie and dinner is on the table in no time.
As always, stay cool (both literally and figuratively), honor your kitchen by visiting it frequently, and never be discouraged if a recipe you try isn’t as amazing as you expected. Everyone’s tastes are different. So, if you try a dish and it isn’t completely to your liking, don’t make it again. Or try it again with modifications that you feel would improve the final result. Believe me, rarely does the printed recipe I start out with end up pristine. Especially if it’s a recipe I developed myself. Like this one. All the time I was preparing this dish last evening, I was making changes. Might be too much salt, so cut in half. Add chicken stock because the sauce is too thick. Add 2 teaspoons regular curry powder to increase the depth of flavor.
So, please do the same with any of my recipes. Don’t ever hesitate to make a recipe your own. You know what you like, so embrace “modify” as your official culinary mantra. It’s been mine for decades, and it has never steered me wrong.
Peace and love to all.
4 garlic cloves, finely minced, divided
½ c. + 1 c. chopped onion, divided
kosher salt
freshly ground black pepper
3 tsp. garam masala, divided (see recipe below)
1 lb. ground lamb
1 T. extra-virgin olive oil
2 tsp. minced fresh ginger
2 tsp. curry powder
1 (14.5 oz.) can diced tomatoes
⅓ c. water, or more if sauce is too thick
1 tsp. chicken base (like Better Than Bouillon chicken)
pinch cayenne pepper
½ c. plain Greek yogurt or sour cream
2 T. freshly chopped parsley, opt.
chopped peanuts, opt.
steamed basmati rice (see recipe below)
Combine half of the minced garlic, the ½ cup chopped onion, ¾ teaspoon kosher salt, a few grinds of black pepper, and 1 teaspoon of garam masala in a mixing bowl. Stir in the ground lamb. Form into balls whatever size you prefer. (I use an ice cream scoop to form the balls.)
Heat the olive oil in a large fry pan. Fry the meat balls until they are nicely browned. (They will finish cooking as they briefly simmer in the sauce.) But for now, remove from pan and set aside.
Add the remaining 1 cup chopped onion to the pan and sauté for 4-5 minutes, until softened. Add the other half of the minced garlic and the minced fresh ginger; sauté another 30 seconds.
Stir in the remaining 2 teaspoons garam masala, curry powder, diced tomatoes, and chicken broth. Season with salt, black pepper, and cayenne. Bring to a low simmer and cook for about 10 minutes, or until slightly thickened. Stir in the meatballs until warmed through, 1-2 more minutes. Adjust seasoning. Turn off the heat and stir in the Greek yogurt until just combined.
Serve hot over basmati rice (see recipe for perfect basmati rice below) garnished with parsley and chopped peanuts.
STEAMED BASMATI RICE
1 c. basmati rice
1½ c. water
Place rice and water in a medium size saucepan over medium high heat, no lid. Bring to a simmer, then cover, reduce heat to low, and cook for 12 minutes. DO NOT LIFT THE LID.
After 12 minutes, remove from heat, leave for 10 minutes with the lid on, then uncover, fluff with a fork, and serve immediately.
GARAM MASALA SPICE BLEND
1 T. ground cumin
1½ tsp. ground coriander
1½ tsp. ground cardamom
1½ tsp. ground black pepper
1 tsp. ground cinnamon
½ tsp. ground cloves
½ tsp. ground nutmeg
Combine all the ingredients and store in an airtight container in a cool, dry place.
Invariably when I get a craving for rich and decadent comfort food, it coincides with my lack of desire to spend a lot of prep time over said dish. I don’t understand why there is such a strong correlation, but never-the-less, it happens to be the reality of the situation. Perhaps my desire for rich food comes from my subconscious reminding me that I should be feeling stressed or a bit anxious over something. And because we have such a long experience of each other, my subconscious is quite aware that a creamy and luscious culinary concoction always gives me a feeling of wellbeing. Whatever the excuse, I can always find an adequate justification for treating myself to a delicious indulgence.
But then, along with the desire for said indulgence, comes the reality that I don’t always feel like spending a lot of time in the production. So, what is a 77-year-old foodie to do? Well, I will tell you. It’s just this kind of recipe which is quick and easy to prepare but decadent enough for the most sophisticated gastronome, that saves my bacon. (So, to speak.) And thank heaven, after cobbling several recipes from my internet search together, I had my desired comfort food on the table in short order. And there was much rejoicing at Chez Carr.
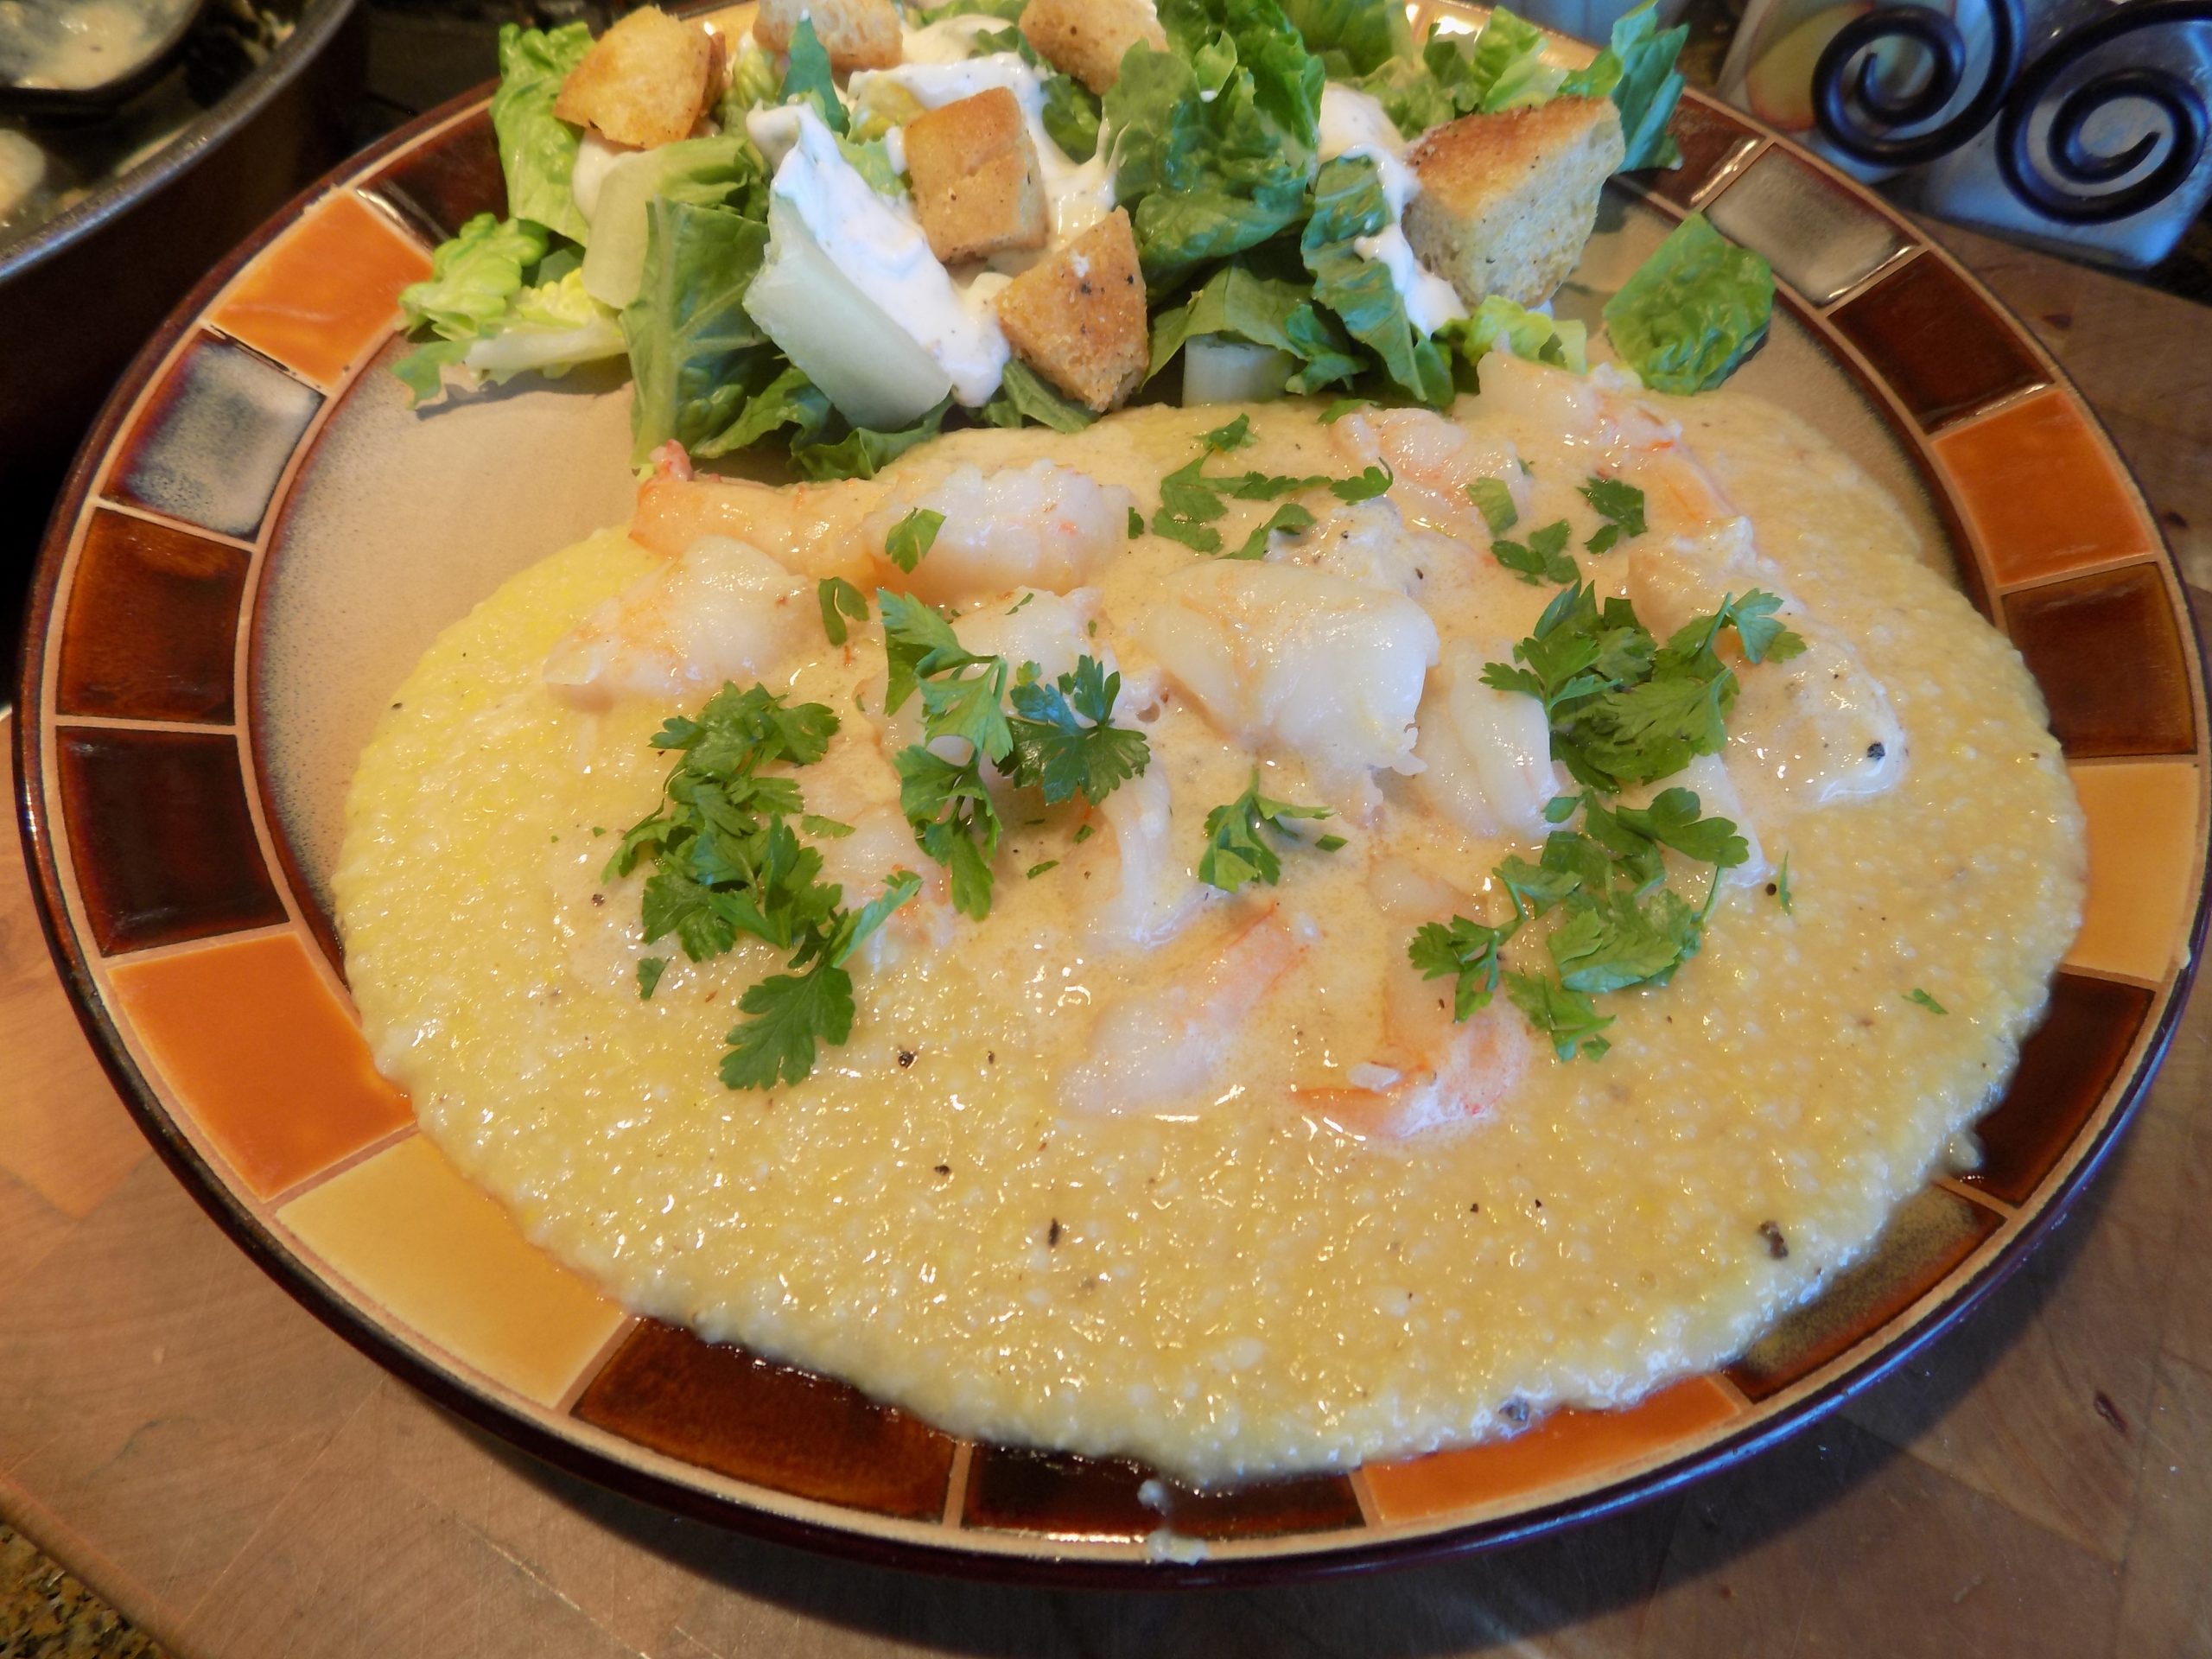
This delightful creamy shrimp dish, served over Parmesan Polenta, along with a simple green salad, made for a mighty fine dinner the other evening. And this old gal was still able to walk and talk (almost coherently) after all the preparation had been completed.
So, if you too would appreciate a delightful new way to cook shrimp that tastes like it came out of a 5-star restaurant, I recommend you give this recipe a try. The dish could not be easier to prepare, doesn’t require any fancy ingredients, and packaged frozen shrimp is perfect in this dish.
As always, keep smiling, keep looking on the bright side, and keep going. As I get older, my reading chair keeps looking more and more comfy. But if I want to stay able to do things, I must continue to stand my butt up, and force myself into action. And truthfully, I always feel better and stronger for the effort.
Peace and love to all.
2 T. unsalted butter
1 lb. lg. shrimp, peeled, de-veined, and tails removed, then cut in thirds
kosher salt
freshly ground black pepper
4 garlic cloves, finely minced
pinch crushed red pepper flakes
½ c. dry white wine
½ c. chicken broth
½ c. half & half
⅓ c. grated Parmigiano-Reggiano cheese
2 T. chopped fresh parsley
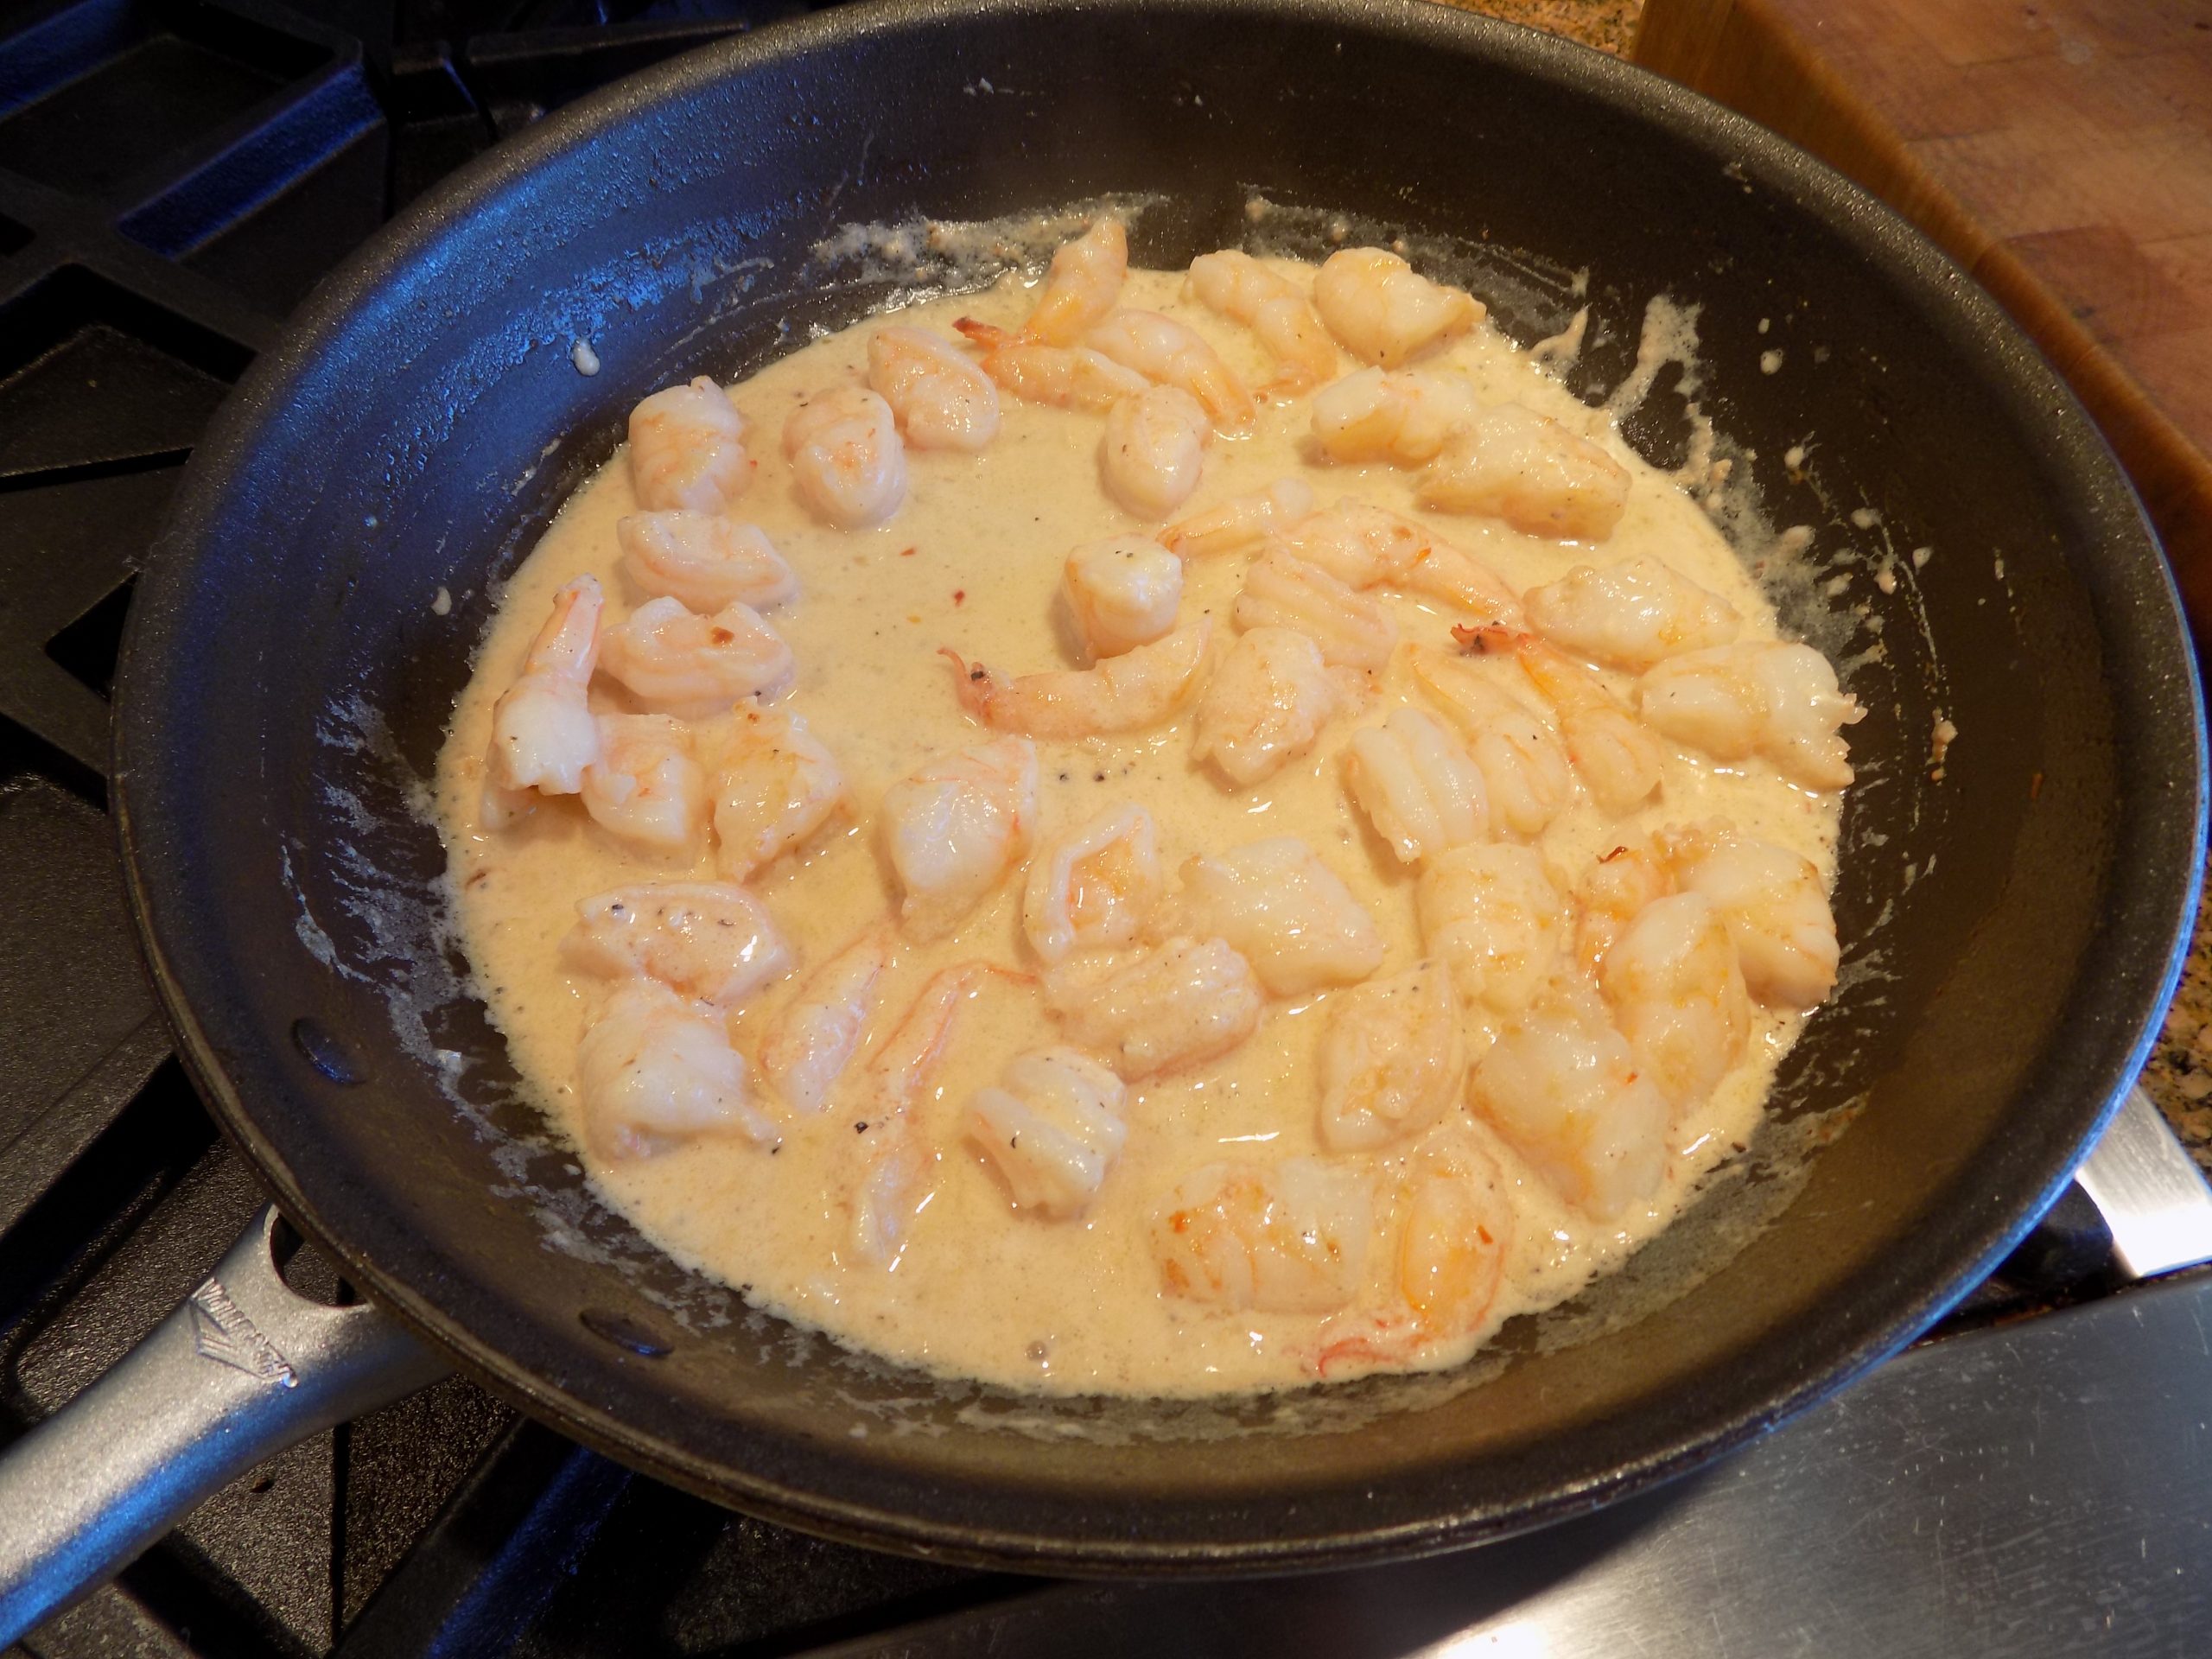
Heat the butter in a large skillet over medium-high heat. Season the shrimp very lightly with kosher salt and plenty of black pepper. Add to the skillet and cook until the shrimp is just cooked through and no longer translucent, about 4 minutes. Transfer to a plate and set aside.
Add the garlic to the skillet. Sauté until fragrant, about 30 seconds.
Reduce the heat to medium-low. Add the crushed red pepper flakes, wine, and chicken broth; reduce by half. Add the half & half. Bring to a gentle simmer and cook until the sauce is a bit thickened. (This should take about 2 minutes.) Add the Parmesan cheese and gently stir until melted, about 30 seconds. Taste and adjust seasoning.
Add the shrimp back to the skillet. Gently stir to combine and cook for about a minute. Sprinkle with parsley and serve.
Great served over Parmesan Polenta. (See recipe below.)
PARMESAN POLENTA
4 c. chicken broth
pinch sea salt
freshly ground black pepper
1 scant c. polenta (not instant or fast cooking variety)
3 T. unsalted butter
½ c. freshly grated Parmigiano-Reggiano cheese
Bring broth, salt, and pepper to a boil in a medium-sized, covered saucepan. Whisk the dry polenta slowly into the boiling broth until all of the grains are stirred in and no lumps remain.
Reduce heat to low and simmer, whisking continuously until polenta starts to thicken, about 5 minutes. Cover and cook for 30 minutes, whisking every 7 minutes or so. (When polenta is too thick to whisk, stir with a wooden spoon.) Polenta is done when the texture is creamy and the individual grains are tender.
Remove from heat and stir in the butter until partially melted. Then add in the Parmigiano-Reggiano until the cheese too has melted.
Cover and let stand 5 minutes to thicken. Stir, then taste to see if additional salt or pepper is required.
Whenever I want a simple main dish that requires a minimum of effort and a maximum of flavor, I think of pork tenderloin. I know I’ve said it before, but pork tenderloin is just about the perfect meat. It is tender and juicy, when treated with respect, easy on the budget, and tastes amazing when given the opportunity. And it does taste marvelous when marinated, baked, or sauced with other yummy ingredients. Because let’s be honest here. Left unadorned, pork tenderloin (or pork roast or chops) can be a bit boring. But quite often, I don’t want a heavy sauce with all the extra calories. I just want a simple piece of meat, but I want it to be flavorful. And that’s where a great marinade can come in handy. And oh my, this marinade makes for a very flavorful meat. I changed the recipe a bit from the original I found on the plainchicken.com site to better reflect our tastes, but the bones of the recipe are all on Stephanie.
And I also know what some of you are thinking. Here you go again Patti with your love/hate relationship with bourbon. And you’d be correct. I still can’t get the stuff past my lips if it is in the form of a drink. But as an ingredient, I have nothing but respect for what it lends to all kinds of dishes, from savory to sweet. In fact, if you want to see how frequently I use bourbon as an ingredient, just type bourbon in the “search” box on this site, and you will be amazed at this whiskey’s versatility. (And no, I am not on the bourbon industry’s payroll. But perhaps I should be. Of course, it would all be fun and games until they offered me a drink. Then all bets would be off! I would probably be asked to resign and that would hurt my feelings. So, I’m better off just using the product in recipes, then sharing my recipes with you, and leaving the rest in the capable hands of people who actually enjoy drinking the stuff.)
So, bottom line, if you would like a recipe for pork tenderloin that is easy to build and tastes wonderful, give this recipe a try. And no, you don’t have to use fancy bourbon for this recipe. I use Jim Beam in every dish I make that calls for bourbon. I keep the bottle in my pantry along with other wines and spirits I use exclusively in recipes. My own stash for my own use! (OK, I do let Mr. C. use my booze if he asks very nicely.)
As always, have fun in your kitchen. Try new recipes, but cling to your favorites as well. There is just nothing better than making an old favorite that everyone adores. It’s like having a good friend over to dine. Just brings a smile to your face. Speaking of which, isn’t it wonderful to be able to once again have family and friends over for dinner. Or to go to someone else’s home for a visit.
On that happy note, I wish to propose a toast to all the medical personnel who worked on the covid-19 vaccine, who attended people who came down with the virus, or who were in any way responsible for helping us make it this far in our pandemic struggle. And to the people who taught our children via Zoom, worked in grocery stores, or in any way provided services that brought them into potential harm, my sincere thanks to each and every one of you.
And if you have yet to be vaccinated, please do so as soon as possible. We should each do our part to help conquer this horrible virus. I feel that it is not only our responsibility to help in this cause; it should also feel like our privilege to assist in putting an end to the spread of this often-fatal disease. So, please do your part. Get vaccinated!
Peace and love to all.
¼ c. bourbon
2 T. brown sugar
2 T. soy sauce
1 T. Worcestershire sauce
1 T. fresh lemon juice
¼ tsp. granulated garlic
1/8 tsp. granulated onion
1 pork tenderloin, silver skin removed
kosher salt
Whisk the bourbon, brown sugar, soy sauce, Worcestershire sauce, lemon juice, granulated garlic, granulated onion, and black pepper together in a covered container.
Place pork tenderloin in the marinade and refrigerate for an hour to overnight. (Overnight is best.)
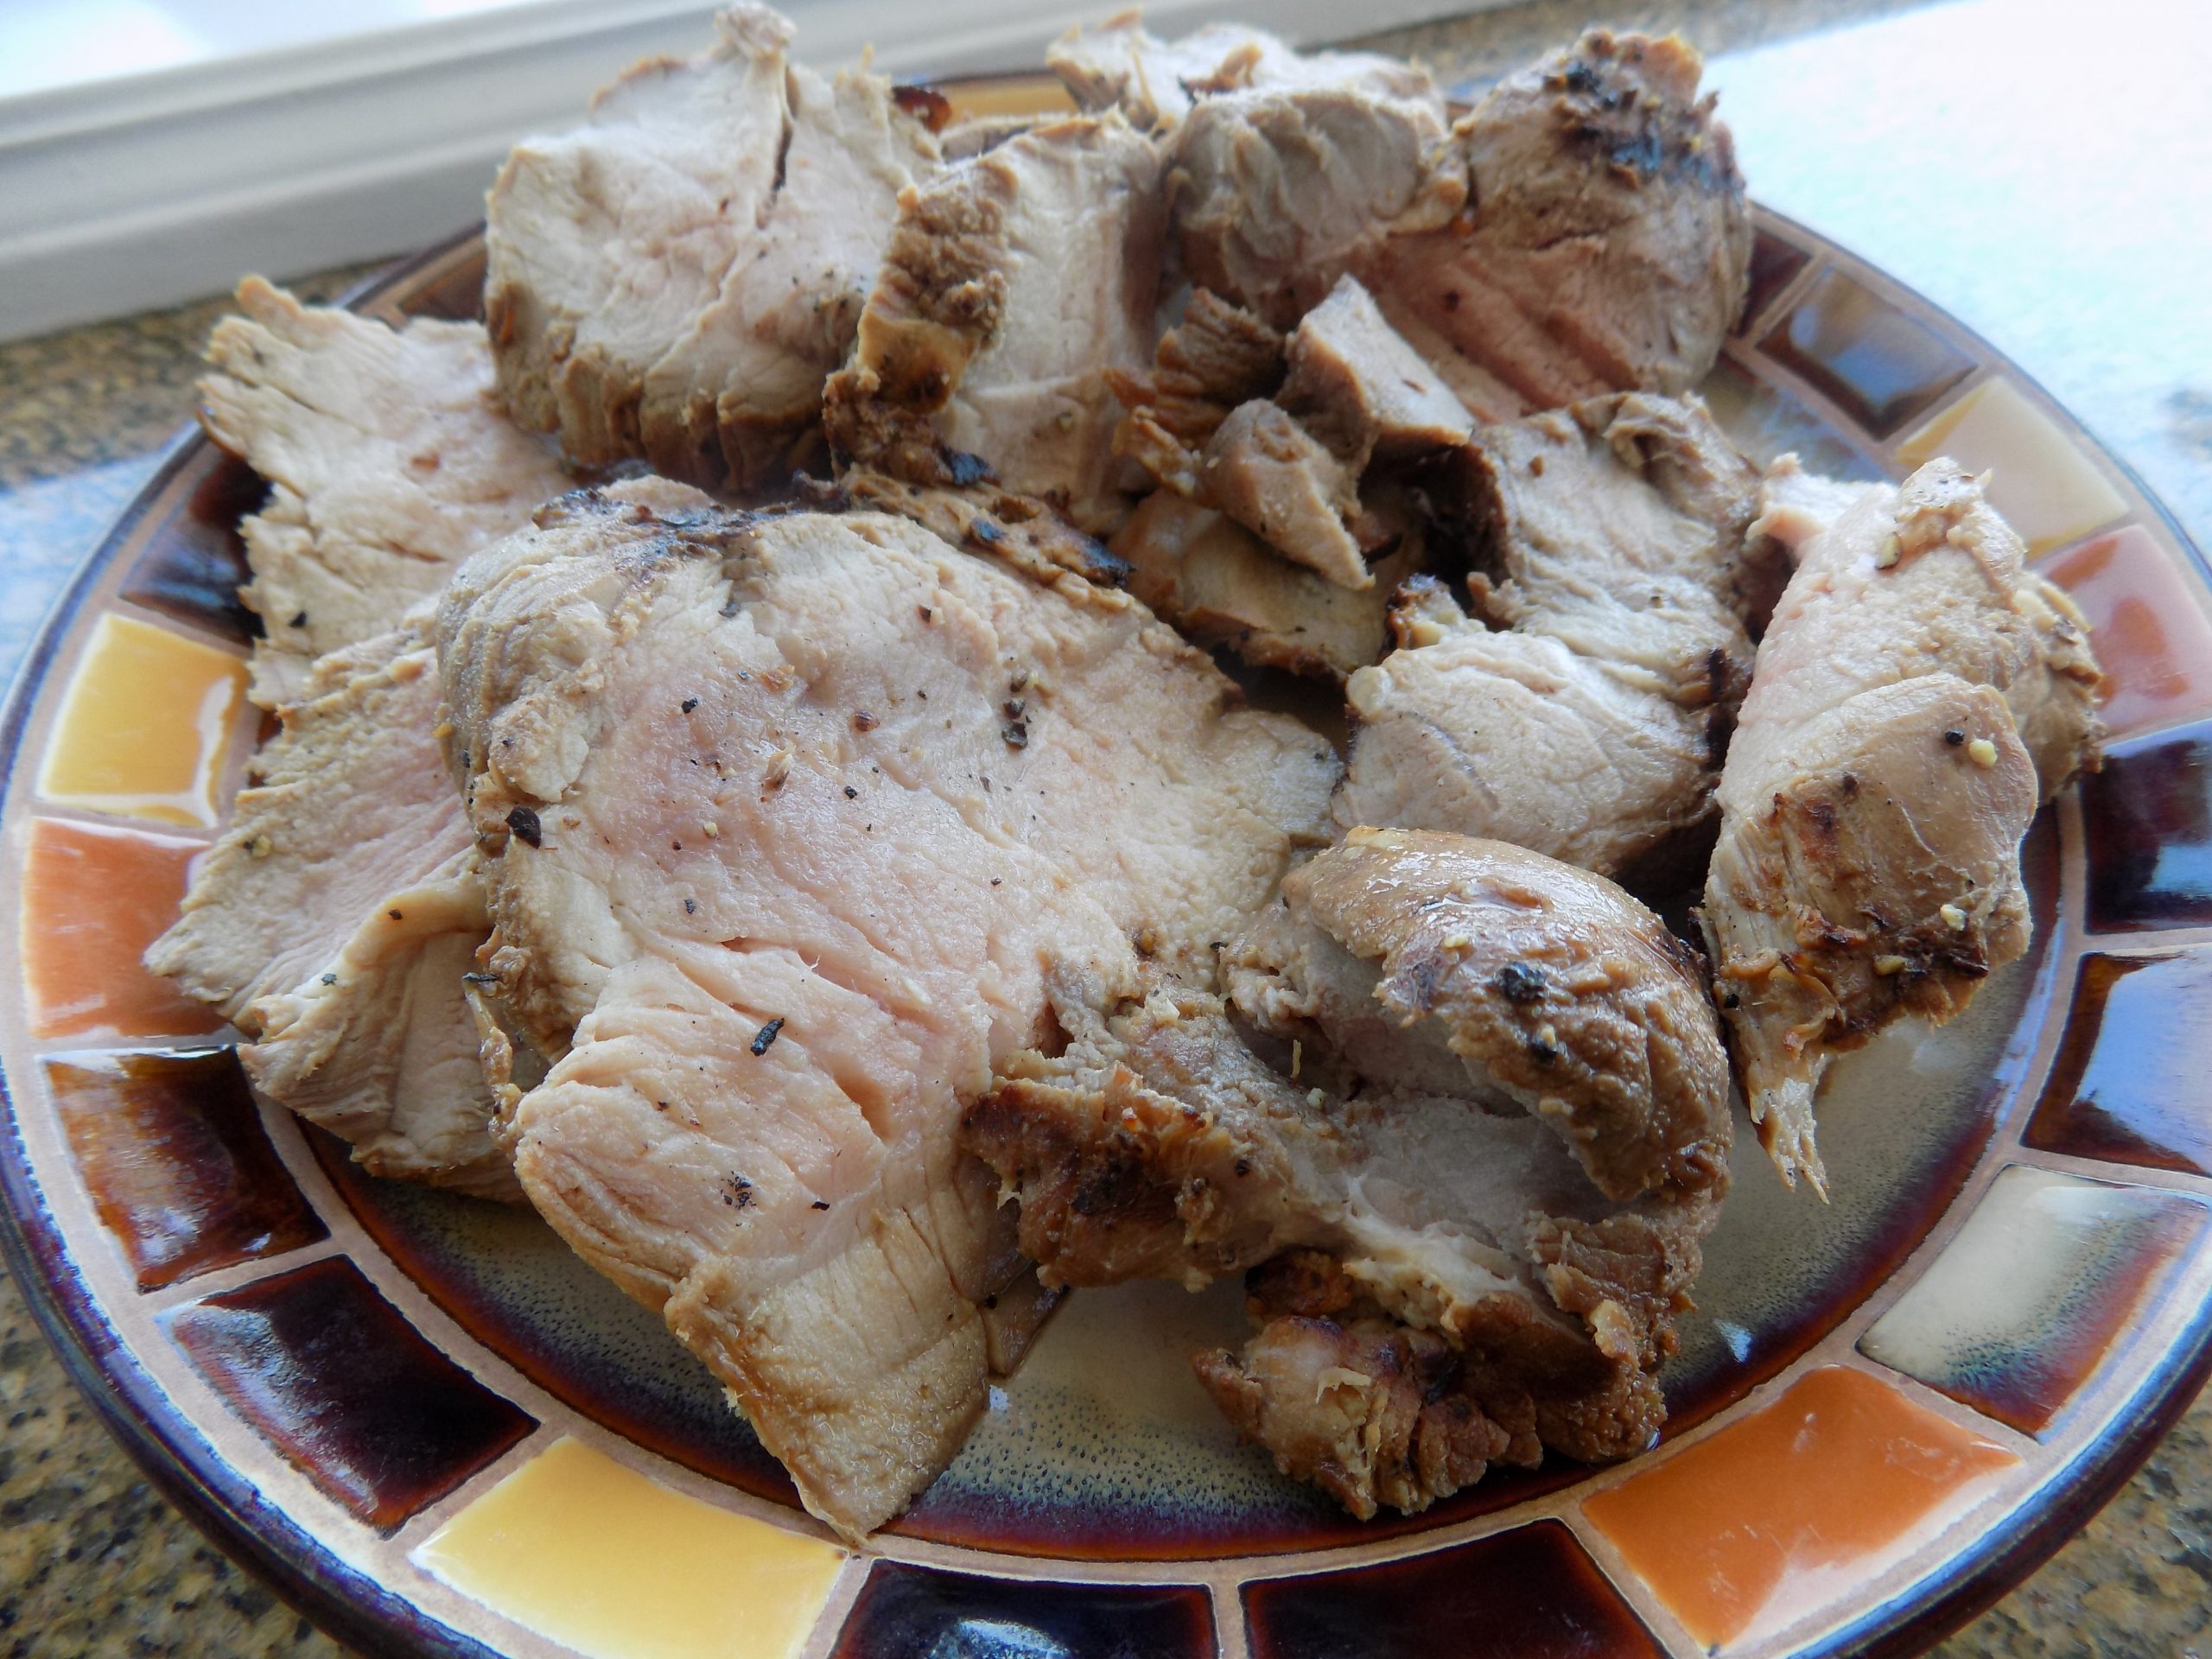
Remove pork from marinade, sprinkle liberally with kosher salt and grill until internal temperature reaches 145-degrees. (about 12 minutes)
Remove from grill, tent, and allow to sit for about 5 minutes before thinly slicing on the diagonal.
OK, I know I should not be eating cookies, but I always build a batch (or two) before we leave on a trailer trip. And of course, this time was no exception. There was a difference, however. We didn’t go on our planned outing. Not because of health concerns, thank goodness, but because our destination was in Eastern Washington and the predicted weather while we would be camping in the desert was somewhere around 112-degrees. Yikes! That is just too hot to be sitting in our travel trailer waiting for the air conditioning or the motor on our refrigerator to experience a full-on meltdown. Not to mention that if that happened, I’d be right there with our appliances having my own tearful meltdown! (I do not do well in hot weather.) And hiking or even taking a nice leisurely walk would have been completely out of the question. Not to mention the conniption fit my dermatologist would have thrown had he found out that I had spent 12 hours a day in a lake, even with 50 SPF sunscreen slathered all over my body! (I simply can’t be in the sun more than 2 minutes anymore. I have become a sensitive flower in my golden years. Not by choice, believe me. But by necessity. Grrrr) Anyway, we cancelled our trip. Which of course left us with an abundance of these amazing cookies calling my name every time I got within 10 feet of our home cookie jar.
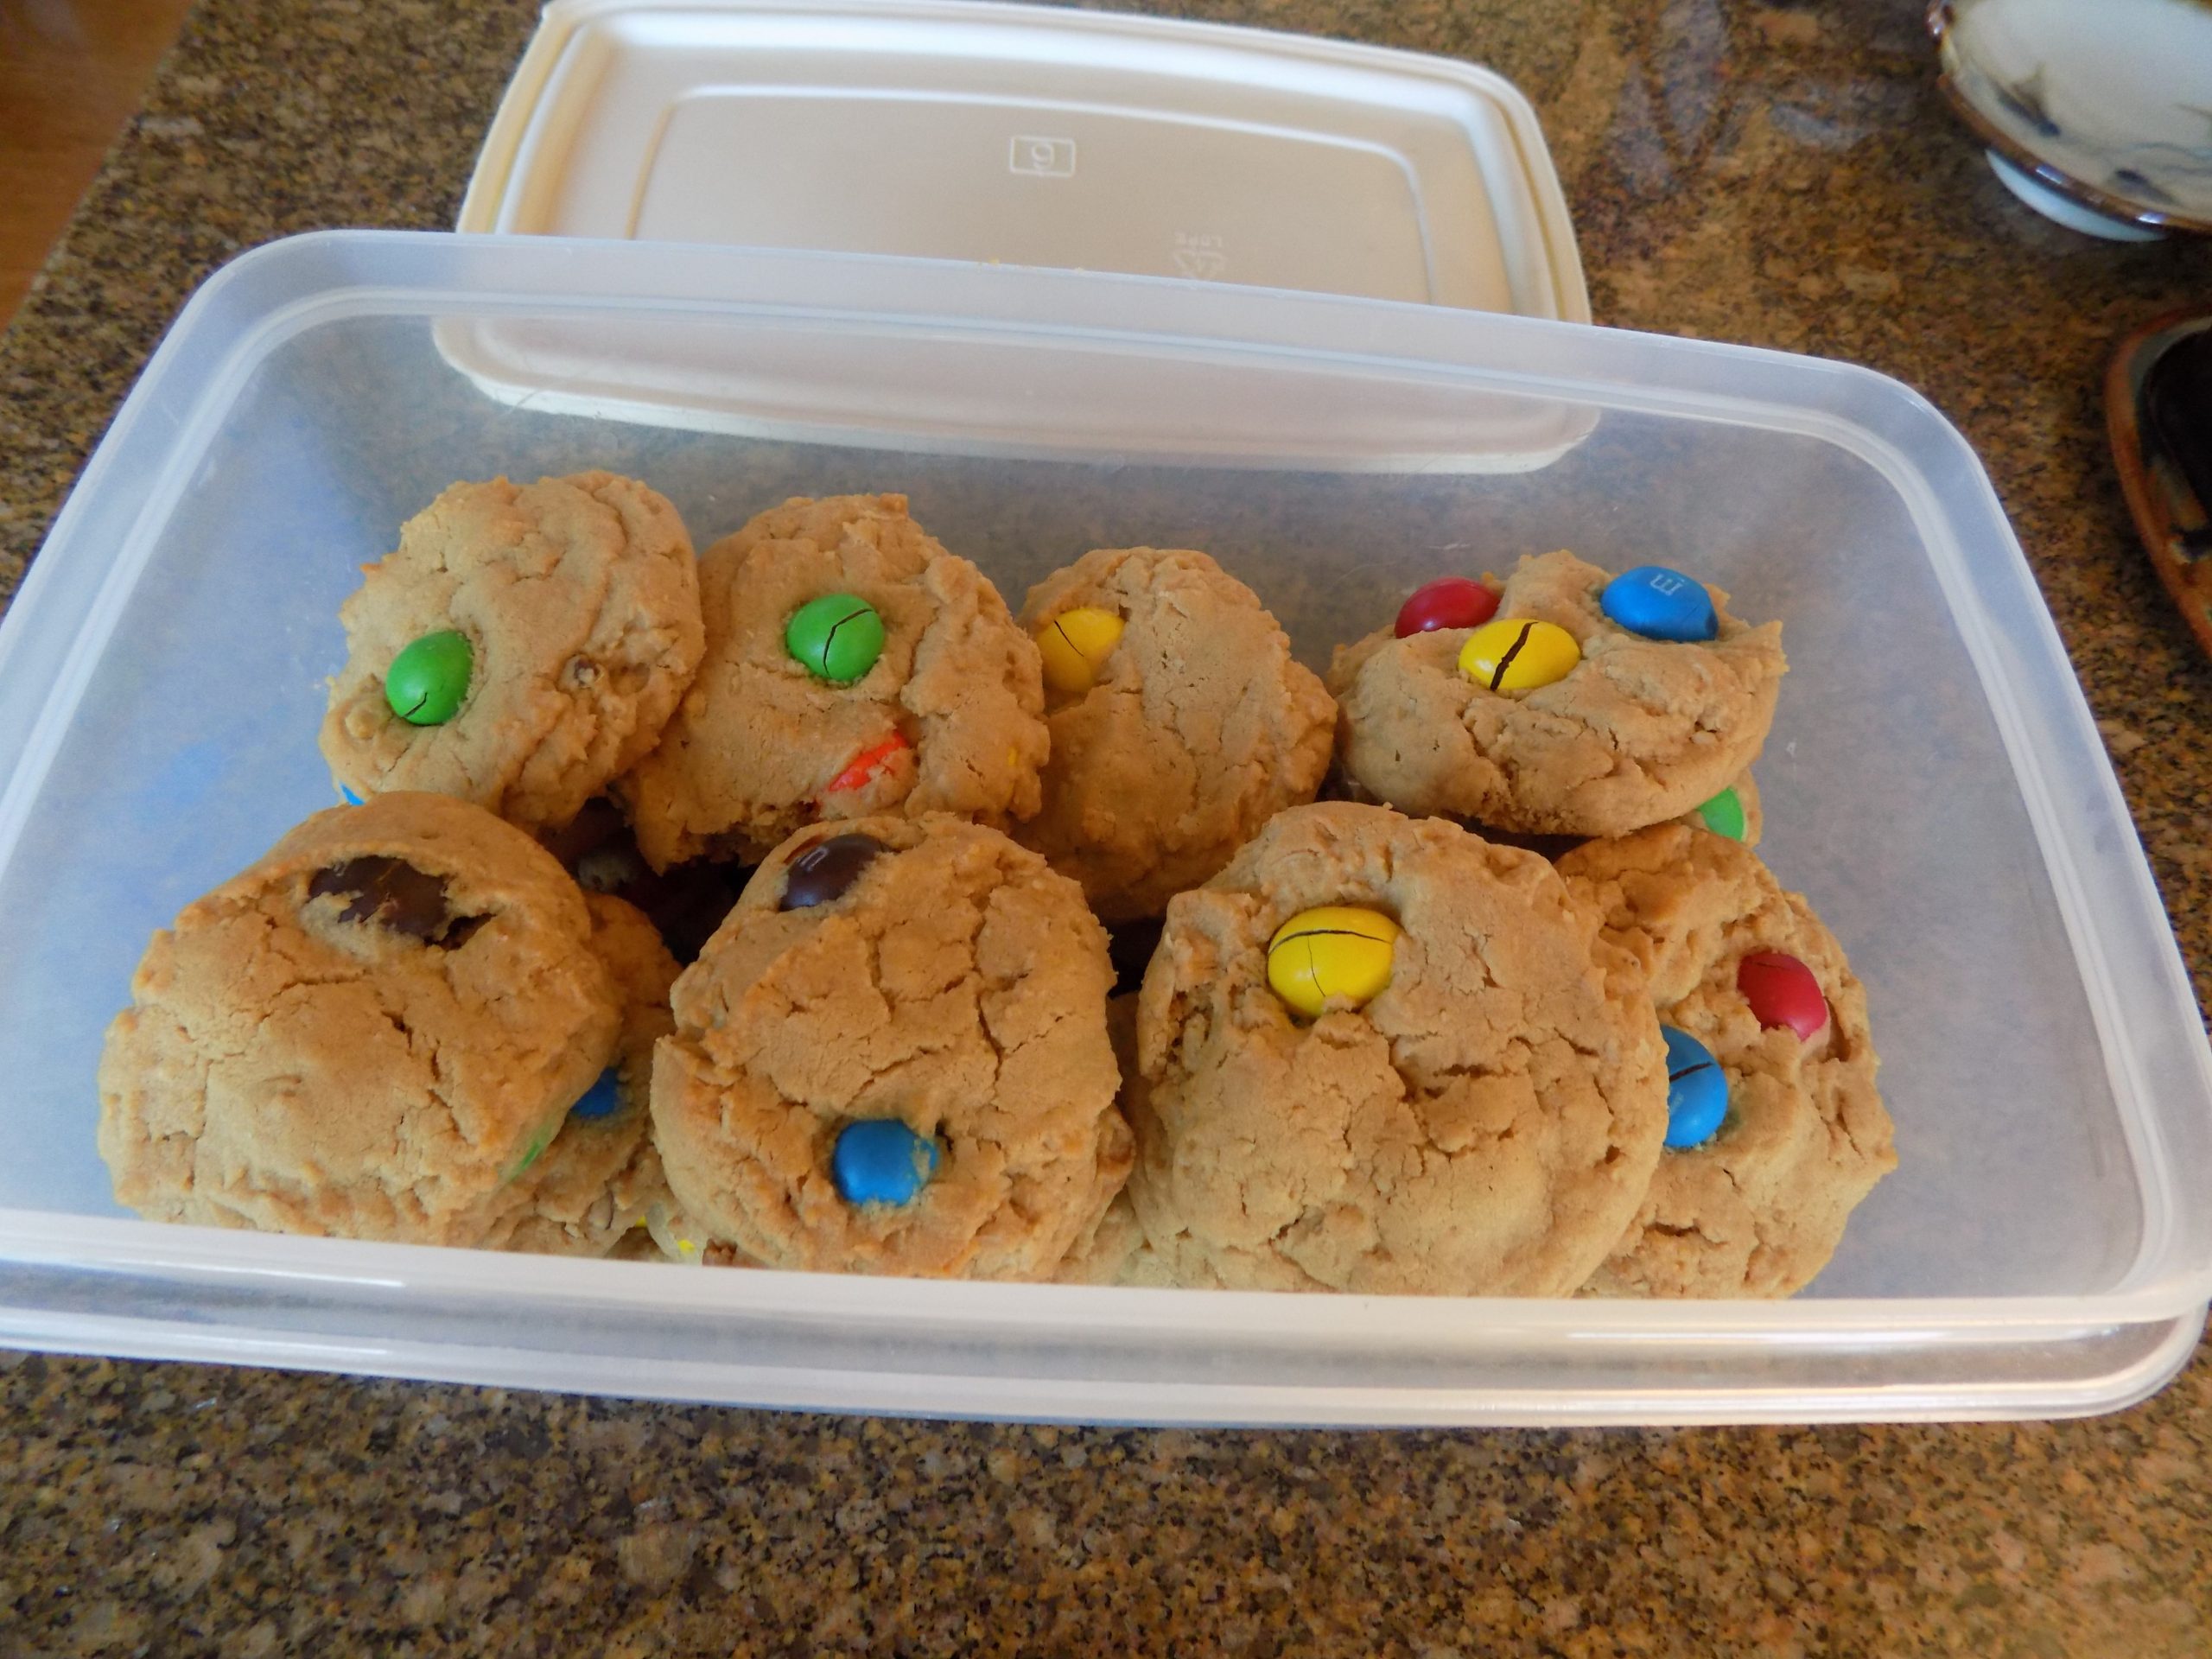
But I must say, if I have to be corrupted by cookies, I’d like it to be by the likes of these cookies. Because they are wonderful. Full of peanut butter and Peanut M&Ms. And who can resist Peanut M&Ms? Not me, that’s for darn sure!
So, next time you want to treat your friends or family to homemade cookies, I would advise giving this recipe a try. You will not be unhappy with the results. And to their credit, these delicious cookies contain a bit of rolled oat action. Even though you would be hard pressed to find anyone who could discern the presence of anything as healthy as rolled oats in the mix. But no one could possibly miss the abundance of Peanut M&Ms. They are forefront for all to appreciate.
As always, tackle your culinary endeavors with zest and zeal. Appreciate the fact that you not only have a kitchen, but the knowledge and skill to provide delicious and nutritious food for not only yourself, but also for your family and friends. Cooking takes time and effort, but the rewards far outweigh any alternative such as most prepared food found at your local grocery store or frequent visits to local restaurants. At least for me, going out to eat is great about once a week. More than that, and I find myself thinking about the quality of the food I can produce at home, compared to what we can find in most of our local dining establishments. And even as I am eating out, I often torture myself by wondering why I didn’t just stay home and cook dinner in the first place. (And yes, I am an enigma.) But then I must acknowledge that I probably like to cook more than a lot of folks. So, I’ll get off my high horse now and just stick to once again telling you how great these cookies are and how much you would enjoy biting into one. (Or two, if you’re like me.)
Peace and love to all.
½ c. rolled or quick oats (see note below)
½ c. (1 stick) unsalted butter, room temperature
½ c. brown sugar, packed
¼ c. granulated sugar
¾ c. creamy peanut butter (not natural)
1 lg. egg
1 tsp. vanilla extract
1¼ c. unbleached all-purpose flour
½ tsp. baking soda
¼ tsp. kosher salt
2 c. Peanut M&Ms (I use the 10.57 oz. Fun Size for this recipe)
In the bowl of your stand mixer, cream the butter, brown sugar, and granulated sugar together until light and fluffy. Add the peanut butter and mix until well combined. Add the egg and vanilla and mix until well combined.
In a separate bowl, whisk the flour, baking soda, salt, and oats together. Add to the wet mixture just until incorporated. Do not overmix. Gently mix in most of the Peanut M&Ms.
Form the dough into about 2-inch diameter balls. (I use my #30 teal blue-handled ice cream scoop to form the balls.) Place on a parchment paper lined cookie sheet and gently press the balls down slightly. (They won’t spread very much while baking, so they can be placed fairly close together. About 1½ inches apart works fine.) If there are any of the cookies that appear to need an additional Peanut M&M or two, gently poke the remaining M&Ms into the dough balls. (We want all our cookies to look pretty, now don’t we!) Place the cookie sheet in the refrigerator for about 30 minutes before baking in a pre-heated 350-degree oven for 13-16 minutes. (Cookies will be a bit soft and look undone. But don’t fret. They will firm up nicely as they cool.)
Remove from oven and allow to cool a couple minutes on the cookie sheet before transferring to a wire cooling rack to cool completely. Store in an airtight container at room temperature. Makes about 35 cookies.
Note: If using regular rolled oats, place in a food processor. Pulse a few times to break the oats down a bit. Set aside. Or use quick oats. (Quick oats don’t have to be messed with at all.)
Now as much as I love me a good pie, I don’t bake pies very often because they are a lot of work, and then it only takes about 5 minutes for a small group of diners to consume an entire pie. That is, if I still baked regular sized pies. (Which BTW, I never do anymore.)
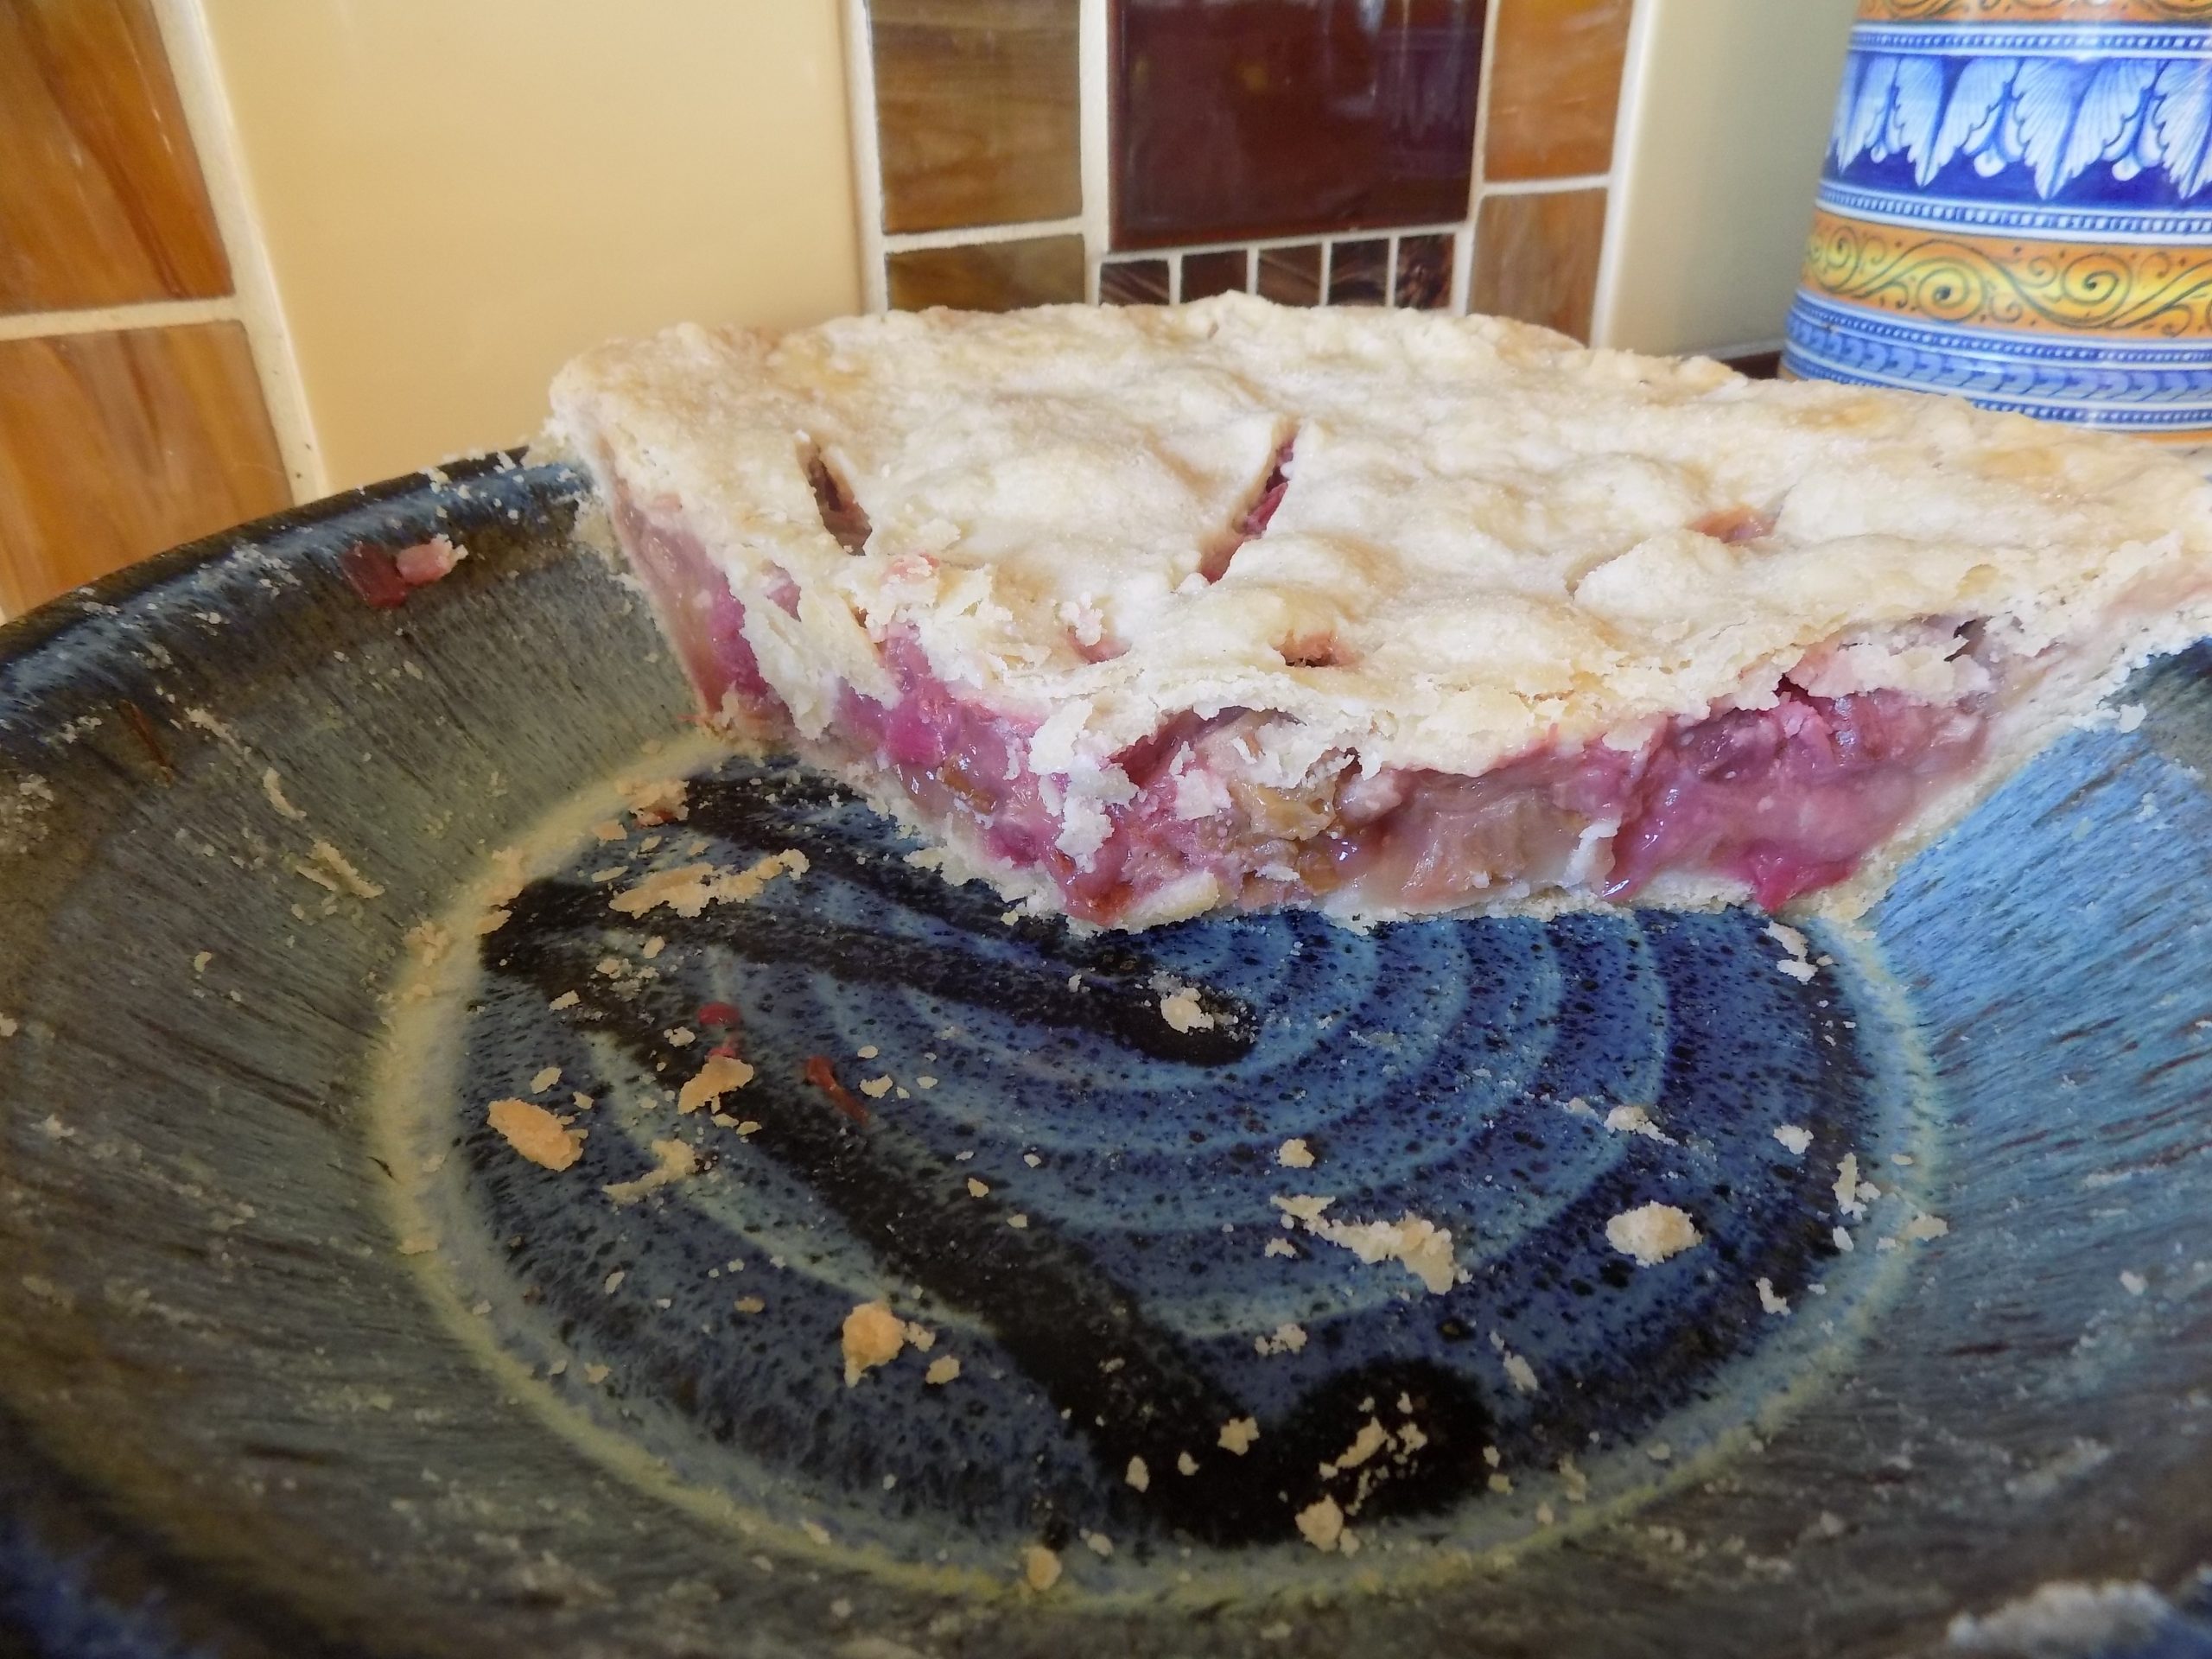
Because about 25 years ago, I was lucky enough to find a potter who made wider and deeper than normal pie plates. Not only are these pie plates lovely to look at; they are constructed of heavy clay. So, my pies always bake evenly. And they hold a lot of pie. Which for us is imperative. Because basically I don’t bake pie unless it’s a holiday or I’m having company. But back to my wonderful pie plates.
I bought 3 for myself and gave several away as gifts. Because of the size of these masterpieces, the pies I bake are almost half again as large as a regular sized pie. So, with that in mind, I have provided you with the same recipe, only proportioned to fit both my need and the needs of those of you who are normal and only make reasonable sized pies.
But regardless of the size of the pie you plan to build, you are going to love this recipe for a simple rhubarb pie. But if you want to build a fancy rhubarb pie, this is not the recipe for you. There are no unusual ingredients in the filling, and the filling always sets up beautifully. The bottom crust is not soggy, if that is something you strive to achieve. The filling isn’t too sweet, again an attribute I appreciate, but may not be to your liking. And there is a lot of top crust, which BTW is pretty darn tasty. But those of you who don’t particularly like crisp and flaky crust might want to look elsewhere for something a little less perfect.
But if you want a recipe that shouts rhubarb with every bite, then stick with me on this one. Because this pie is all about the rhubarb. And since its still fresh rhubarb season, I say build a rhubarb pie while supplies last. There is simply no other dessert that smacks of good home cooking like a rhubarb pie. Or any pie for that matter!
I can still remember walking into my grandmother’s kitchen and seeing a pie on the counter that I knew we were going to be enjoying that evening. I always felt like the luckiest little girl in the world. And I still feel that way. Even if I am far from being a young girl and the pie is on my own kitchen counter, and I’m the one who expended all the effort to prepare the darn thing! Seeing, and of course smelling a homemade pie, simply makes me exceedingly happy.
As always, keep thinking of great ways to bring your family joy. Even a simple pan of brownies can help a kid whose had a rough day feel better about the world. I cannot remember a day when the first thing out of my teenager’s mouths when I walked in the house after work was – what’s for dinner? There must have been some connection in their minds between feeling safe and secure because I was home, and the fact that they probably had escaped starvation for yet another day. Whatever triggered this feeling of being loved and feeling safe, I know it had a lot to do with food. And good food is such a simple way to prove your love. So, take time in preparing the food for your family. Believe me, your adult children will remember their childhood with a great deal more fondness if good food was the standard in their childhood kitchen.
Peace and love to all.
Pie Crust: (for 10 to 11-inch pie pan)
6 T. very cold water
3 c. unbleached all-purpose flour
1½ tsp. kosher salt
heaping 1 c. Crisco
2 T. granulated sugar (for use later), plus more for the top crust
Step 1 – Pour cold water into a small bowl.
Step 2 – Measure flour and salt into a mixing bowl.
Step 3 – Take ½ cup of the flour back out of the mixing bowl and stir it into the water. Make a paste. Set aside.
Step 4 – Add the Crisco to the flour and salt mixture. Mix together. (I use my KitchenAid mixer.)
Step 5 – Add the water/flour paste to the flour/shortening bowl and mix just until blended. Do not over-mix.
Filling: (for 10 to 11-inch pie pan)
8 c. diced rhubarb
1 c. granulated sugar
¼ c. brown sugar
½ c. flour
1 tsp. vanilla
2 T. unsalted butter
Combine the diced rhubarb, granulated sugar, brown sugar, flour, and vanilla together in a bowl. Let sit for about 10 minutes.
Put the Pie Together:
Roll out ½ of the dough and place in your pie plate. Sprinkle the 2 tablespoons granulated sugar (shown under pie crust) evenly over the bottom and sides of the crust. (You will have to gently pat the sugar into place on the sides of the pie plate.) Scoop the rhubarb mixture into the pie pan. (And yes, it will seem like too much rhubarb, but it will be fine.) Dot the rhubarb with butter. Roll out the top crust. Place over the rhubarb and dotted butter. Crimp along the top edge as desired. Cover edge of crust with thin strips of aluminum foil to prevent edges from getting too brown. Make a few slits in the top crust to allow steam to escape. Sprinkle with a bit of granulated sugar. Not too much. Just a light sprinkle.
Please note: If you don’t want a top crust on your pie, roll out some of the remaining pie dough fairly thick. Cut out fun shapes with cookie cutters. Lightly sprinkle with granulated sugar. Place on top of the pie.
Place the pie on a rimmed cookie sheet. (The hot filling might escape over the sides of the pie pan. Probably not, but just in case…… Believe me, it’s a whole lot easier to clean a baking sheet than the bottom of your oven!)
Bake in a pre-heated 425-degree oven for 15 minutes. Reduce heat to 350-degrees and continue baking for 45 to 50-minutes more, or until a bit of pink juice bubbles up through the slits or around the decoration pieces on the crust. Remove the aluminum foil covering the edge of the crust and continue baking for 15 minutes.
Remove from oven and allow to cool before serving. Great topped with vanilla ice cream.
Pie Crust: (for 9-inch pie pan)
4 T. very cold water
2 c. unbleached all-purpose flour
1 tsp. kosher salt
heaping 2/3 c. Crisco
2 T. granulated sugar (for use later), plus more for the top crust
Step 1 – Pour cold water into a small bowl.
Step 2 – Measure flour and salt into a mixing bowl.
Step 3 – Take ⅓ cup of the flour back out of the mixing bowl and stir it into the water. Make a paste. Set aside.
Step 4 – Add the Crisco to the flour and salt mixture. Mix together. (I use my KitchenAid mixer.)
Step 5 – Add the water/flour paste to the flour/shortening bowl and mix just until blended. Do not over-mix.
Filling: (for 9-inch pie pan)
5-6 c. diced rhubarb
¾ c. granulated sugar
3 T. brown sugar
⅓ c. flour
1 tsp. vanilla
2 T. unsalted butter
Combine the diced rhubarb, granulated sugar, brown sugar, flour, and vanilla together in a bowl. Let sit for about 10 minutes.
Put the Pie Together:
Roll out ½ of the dough and place in your pie plate. Sprinkle the 2 tablespoons granulated sugar (shown under pie crust) evenly over the bottom and sides of the crust. (You will have to gently pat the sugar into place on the sides of the pie plate.) Scoop the rhubarb mixture into the pie pan. (And yes, it will seem like too much rhubarb, but it will be fine.) Dot the rhubarb with butter. Roll out the top crust. Place over the rhubarb and dotted butter. Crimp along the top edge as desired. Cover edge of crust with thin strips of aluminum foil to prevent edges from getting too brown. Make a few slits in the top crust to allow steam to escape. Sprinkle with a bit of granulated sugar. Not too much. Just a light sprinkle.
If you don’t want a top crust on your pie, roll out some of the remaining pie dough fairly thick. Cut out fun shapes with cookie cutters. Lightly sprinkle with granulated sugar. Place on top of the pie.
Place the pie on a rimmed cookie sheet. (The hot filling might escape over the sides of the pie pan. Probably not, but just in case…… Believe me, it’s a whole lot easier to clean a baking sheet than the bottom of your oven!)
Bake in a pre-heated 425-degree oven for 15 minutes. Reduce heat to 350-degrees and continue baking for 35 to 45-minutes more, or until a bit of pink juice bubbles up through the slits or around the decoration pieces on the crust. Remove the aluminum foil covering the edge of the crust and continue baking for 10 minutes.
Remove from oven and allow to cool before serving. Great topped with vanilla ice cream.
Helpful hint: Use a pastry cloth to roll out your pie crust. It really makes a difference when you go to move the rolled-out crust onto the pie plate. You can find pastry cloths in almost any kitchen wares shop. Well worth the $10 or so.