ITALIAN SAUSAGE AND PENNE RIGATE SOUP WITH CROSTINI   

Soup
Crostini made with Tangy Overnight Sourdough bread – recipe to follow within the next couple of days

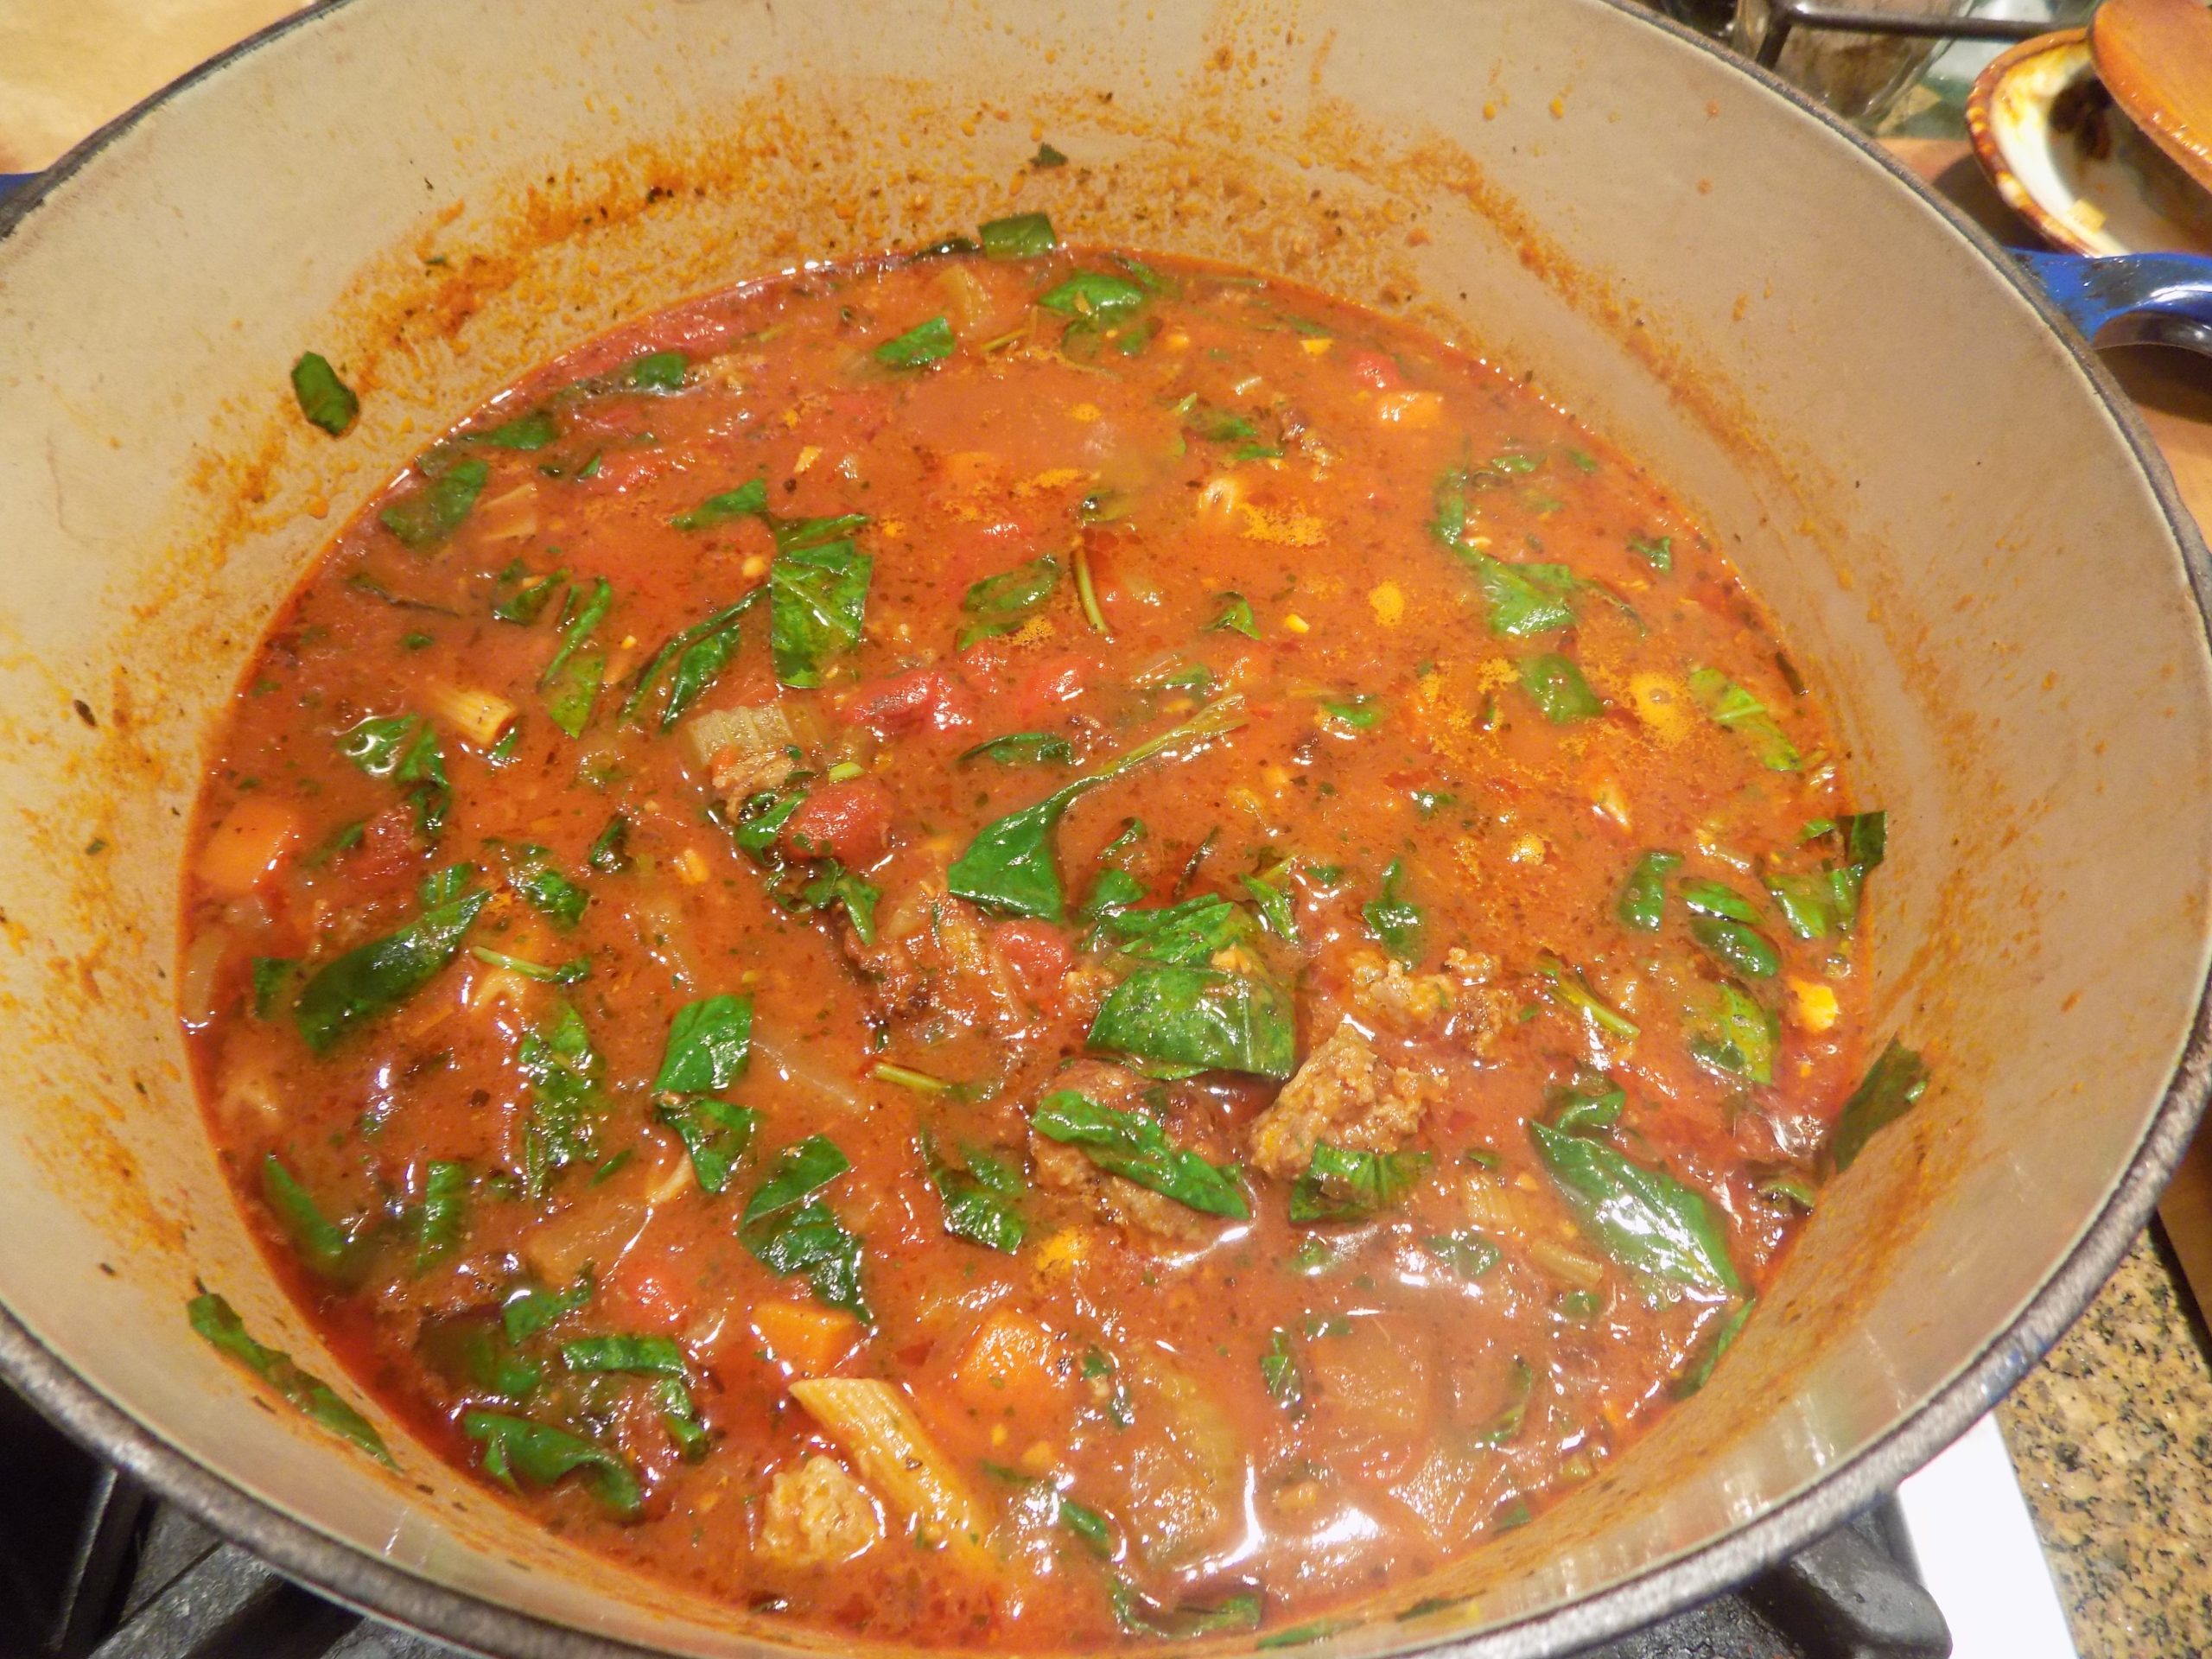
OK, at first glance it looks like a lot of ingredients in this recipe. And your first glance would be correct. But other than frying the Italian sausage, chopping the mirepoix (onion, carrot, celery), garlic, spinach, fresh parsley, and basil, the rest of the preparation is quick and easy. Just a matter of adding a bit of this and a bit of that to the pot. Then the soup burbles for a while, and soups on!

And what you get for this effort, is a truly rich and delicious soup. And a meal unto itself. Nothing else required. Of course, if you want to take the meal to an even higher level, while the soup simmers away, you can build crostini to serve with the soup. (See recipe for crostini below)

And now, my friends, you have a meal fit for a king or queen. (Or even company!)

So, frankly, there is nothing left to say. I want this soup to speak for itself!

Peace and love to all.

1 T. extra virgin olive oil

1 lb. bulk Italian sausage 

1 c. chopped onion 

1 med. carrot, chopped 

2 ribs celery, sliced

3-4 cloves garlic, finely minced

¼ c. dry red wine

4 c. chicken broth

1 (28-oz) can tomatoes (preferably Italian)

2 T. tomato paste

2-3 Parmigiano-Reggiano rinds*, opt.

1 bay leaf

2 tsp. paprika

2 tsp. Italian seasoning

1 tsp. fennel seed, coarsely cracked

pinch crushed red pepper flakes

½ tsp. seasoned salt

freshly ground black pepper

½-1 c. penne or penne rigate** pasta (or pasta of choice)   

2 c. chopped fresh spinach, chard, or kale

2 T. chopped fresh parsley

⅓ c. chopped fresh basil (or 1 T. pesto)

freshly grated Parmigiano-Reggiano or Pecorino-Romano (or combination)

freshly baked crostini or baguette slices (see recipe for crostini below)

Heat olive oil in a large, covered soup pot over medium heat. Add the sausage and break into chunks as it browns. When brown, remove from pan and set aside***.

Add onion, carrot, and celery to the pot. Sauté until onion starting to soften, about 6 minutes. Add garlic and sauté 1 minute longer. Add the red wine and cook until liquid is all but evaporated.

Add the broth, canned tomatoes (plus juice), tomato paste, Parmigiano-Reggiano rinds*, bay leaf, paprika, Italian seasoning, fennel seed, crushed red pepper flakes, seasoned salt, and black pepper.

Bring to a boil, cover, reduce heat to medium-low, and let simmer for about 30 minutes.

Add penne rigate. Cover and let simmer, stirring occasionally (while scraping along bottom of pot as pasta will tend to stick). Cook until pasta is nearly al dente. About 8 minutes. Stir in cooked Italian sausage and cook for 2 minutes. Taste and adjust seasoning. Remove from heat. Stir in spinach, fresh parsley, and basil.

Serve hot. Pass grated Parmigiano-Reggiano or Pecorino-Romano. Great with crostini or fresh, chewy sourdough bread.

*Parmesan rinds

I used to feel cheated by having to pay for the thick rind on Parmigiano-Reggiano. Heaven knows, the stuff was expensive enough without having to discard the rind. But I love the flavor of Parmigiano-Reggiano, so, I would pay the price. But a few years ago, I read that Parmigiano-Reggiano rinds are packed with flavor and can enrich the taste of tomato-based sauces, ragù, and soups. So, I have been using them ever since. (When I remember to use them, that is!)

**Penne and penne rigate

The shape of penne comes from the Italian word for “quill.” There are generally two variations of penne: smooth (lisce) and ridged (rigate). Thanks to its ridges, the rigate version is a bit sturdier and tends to soak up more sauce than smooth penne.

But either are perfect in this soup. As are elbow macaroni or any other small pasta.

***Setting cooked sausage aside

I have found that when I cook sausage for soups like this one and leave the meat in the pot while is simmers to blend all the other wonderful flavors, the meat loses it’s unique flavor in the process. And I want that burst of sausage flavor when I enjoy my soup. So, I remove the meat just after it’s been cooked and add it at the end. You, of course, can leave the meat in the entire cooking time if you prefer. It’s a personal choice.
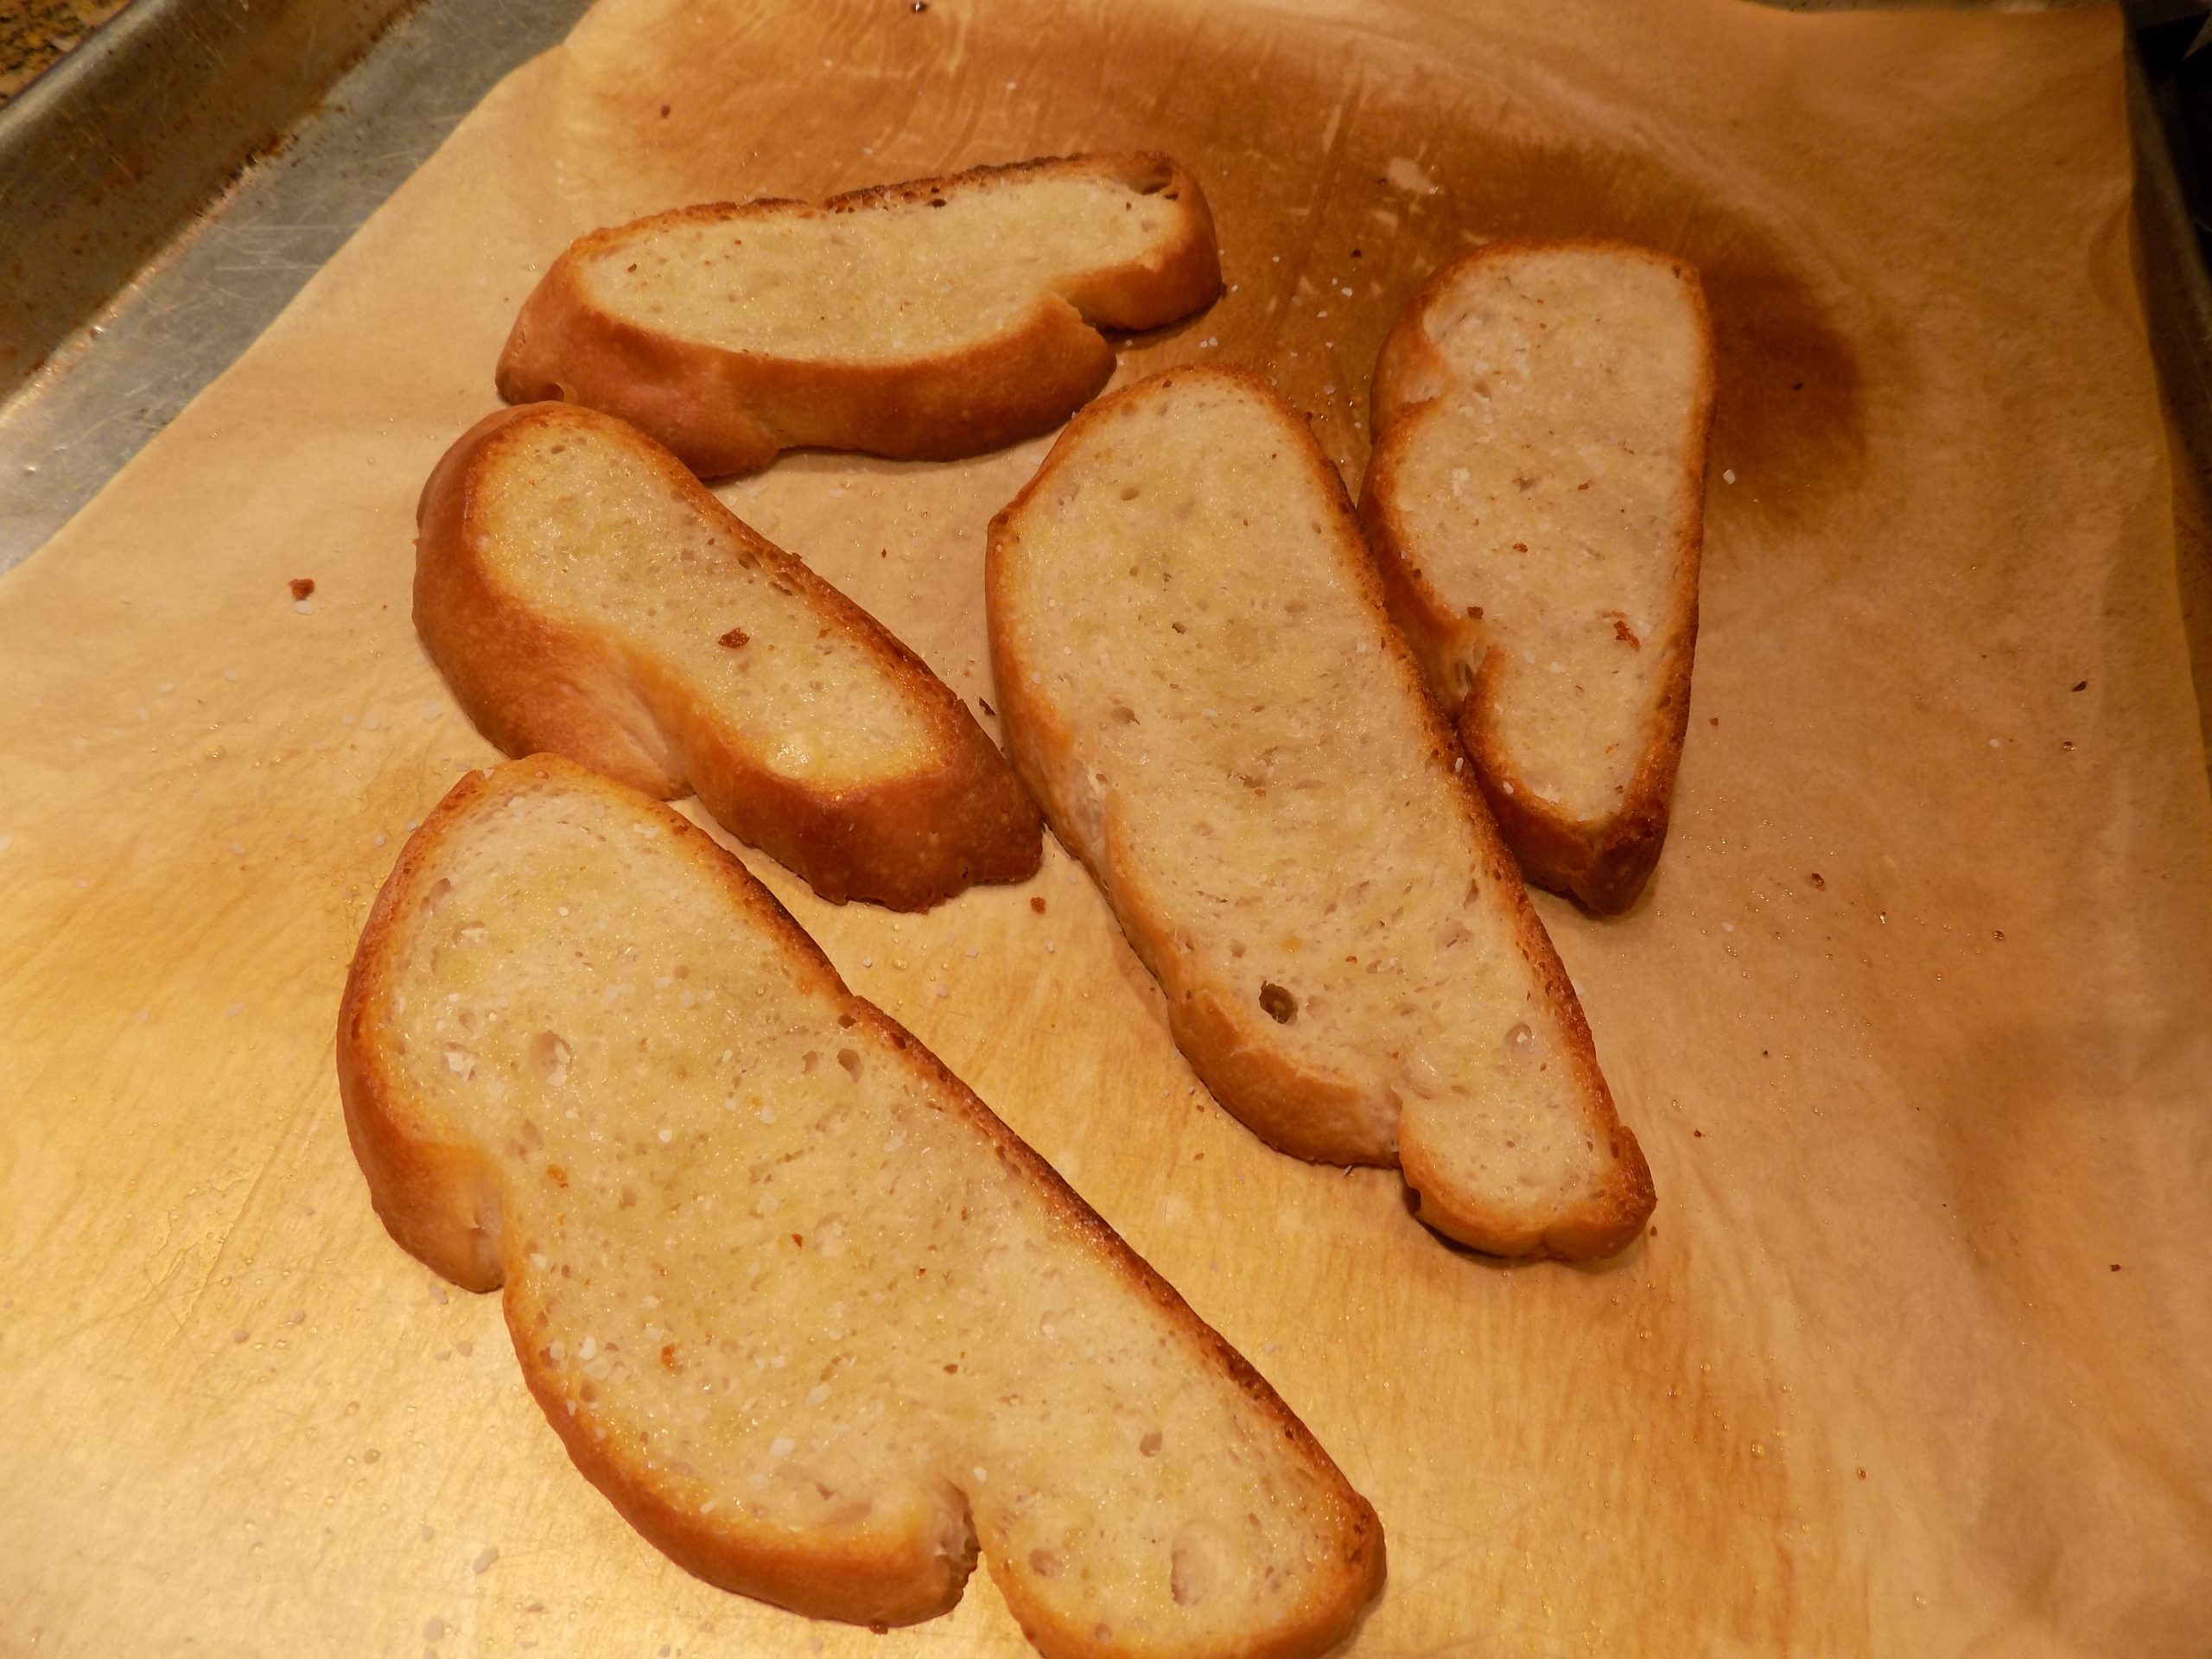
CROSTINI

crusty French or Italian bread

extra-virgin olive oil

flaky or fine sea salt, to taste

Pre-heat your oven to 450-degrees. Line a rimmed baking sheet with parchment paper for easy clean-up.  

Slice the baguette on the diagonal into pieces no wider than ½-inch. Lightly brush both sides of each slice with olive oil.

Place the slices in a single layer on your prepared baking sheet and bake them on the middle rack for about 9 minutes, until they are crisp and nicely golden on top. Remove from oven and sprinkle lightly with salt. Serve immediately.


CRISPY BACON, JARLSBERG CHEESE, SPINACH, AND GREEN ONION QUICHE

When it comes to quiche, we, the residents of Chez Carr, are avid fans. And because I love to try new ways of presenting this perennial favorite, I play mix and match with ingredients as often as I make quiche. Sometimes the combination of ingredients work, sometimes, not so much. Oh, the quiches are still edible. But they simply don’t deliver the fantastic result I was striving so hard to achieve. But last night’s quiche was a winner. And therefore, worthy of this post.

But really, there is nothing new or inventive about the ingredients I chose to use. I had Jarlsberg cheese that needed to be consumed. And bacon, green onions, and baby spinach available and willing to be a part of the adventure.

So, bottom line, there are no screaming new taste sensations to be experienced when biting into this quiche. But there are old favorites in combination that make you want to stand up and shout hallelujah! (Wait, that was me who stood up and shouted hallelujah. You, I’m sure, are much more refined and dignified!) Anyway – what I’m trying to relate, in my own idiosyncratic way, is that this recipe produced a really good quiche! (I really must learn to tell a story in fewer words!)

So, if you too are a quiche lover, consider giving this recipe a try. The dish is easy to prepare, contains everyday ingredients, and everyone will love it. It contains bacon!

As always, have fun in your kitchen. Keep trying new recipes, but don’t forget about your old favorites.

And don’t let anyone ever tell you that real men don’t eat quiche. The men I know LOVE quiche. And they are as real as men get! And as wonderful, I might add. (You know who you are!)

Peace and love to all.

8-inch pie crust, unbaked and set in pie plate  

10 slices thick, meaty bacon, chopped and cooked until crisp

2 c. grated Jarlsberg cheese (or Swiss, Gruyère, Emmental, etc.)

⅓ c. sliced green onions

2 c. chopped baby spinach  

¾ c. milk (whole milk is best)

¼ c. half & half

4 lg. eggs

freshly ground black pepper

dash ground nutmeg

Scatter half of the cooked bacon over pie crust. Then layer half the cheese, half the greens onions, and half the spinach on top of that. Then repeat until all the bacon, cheese, green onions, and spinach are in the pie pan.

Whisk the milk, half & half, eggs, and black pepper together. Pour liquid mixture over all. Sprinkle with nutmeg. Cover edges of crust with thin strips of aluminum foil.

Bake in a pre-heated 325-degree oven until filling is set, about 45 minutes. Remove aluminum foil and bake for another 5 minutes.

Remove from oven and allow to sit for about 5 minutes before serving.


UPPER CRUST LEFTOVER CHICKEN, TURKEY, OR CAPON POT PIE

This is a recipe for individual pot pies with only an upper crust. And I know, I too love crust with a passion. But incipient old age has now proved, beyond a shadow of a doubt, that too much of a good thing is indeed NOT a good thing! So, with that in mind, I decided to make pot pies with our leftover baked capon, with moderation in all things foremost in mind. (Well, kinda sorta!)

So, forget a bottom crust, but save the day by topping the darling little quiches with a really delicious top crust.  

Now one of the joys of making your own crust, is that you can control the amount of fat in the dough. Well, there is no miserly fat content happenin’ in this crust recipe! There is plenty of fat to go around. (Hey, if I’m going to deny us a bottom crust, then the top crust, like I said above, has got to be fabulous!)

Then that leads to the filling. Although for some of us the crust is the star of the show, the filling must be equally delicious. So that when you take a bite that contains both filling and crust, your mind automatically goes to its happy place. And your mouth makes a smile that can only be interpreted by others as a sign of true bliss. Then you know – you’ve got a marriage of crust and filling not made in heaven, but in your very own kitchen.

So, don’t hesitate to make a pot pie from scratch. And I know, pot pies are not low calorie. But as an occasional treat, they are perfect. And yes, they take a bit of time to prepare. But the end product is so worth the effort.  

Peace and love to all.

For the Crust: This recipe makes enough crust to cover 4 (5-inch wide and 2½-inch deep) Corning Ware French white casserole dishes or a single 8-inch pie plate plus a bottom crust for a pie (or whatever)   

1 sm. egg

2 tsp. milk

2½ c. unbleached all-purpose flour

1 tsp. kosher salt

5 T. vegetable oil

½ c. (1 stick) cold unsalted butter, cut into small pieces 

7-8 T. ice water 

Whisk the egg and milk together in a small bowl. Set aside

Place the flour and salt in the bowl of your food processor. Pulse to combine. Add the oil and pulse until mixture resembles coarse crumbs. Toss in the butter. Dribble ice water in, a tablespoon at a time, mixing just until the mixture can hold its shape. The dough should be moist, but not wet and not crumbly.

Remove the dough onto a large sheet of plastic wrap. Use the plastic wrap to gather the dough into a disc shape, then wrap the dough tightly and press down on it firmly to compact it. Chill the dough in the refrigerator for 1-2 hours.

Remove from fridge and divide the dough in half. Re-wrap one of the halves for another purpose. Or store the dough in your freezer for up to 3-months. If you do freeze the dough, bring to room temperature before using.

With the remaining half disc, cut it into 4 even pie-shaped pieces. Then using your hands, make 4 balls, then roll each into a 7-inch circle.

Please note: If you prefer to make just a single large quiche, roll as much of the dough as needed to cover the entire diameter of a pie plate plus a 1-inch hangover. Set the 4 small crusts or single crust aside while you make your filling.

For the Filling:

2 T. unsalted butter

½ onion, chopped

¾ c. chopped celery

1 carrot, diced

2½ c. gravy, either leftover or made just for the occasion (see Gravy recipe below)

chicken base (I use Better Than Bouillon Chicken Base)

2 c. cooked veggies (green beans, peas, broccoli, mushrooms, etc.)

3-4 c. diced cooked chicken, turkey, or capon

Melt the butter in a medium sized pan. Add the onion, celery, and carrot and cook until the carrot is just becoming tender. Stir in the gravy, cooked veggies, and the diced chicken, turkey, or capon.

Scoop the filling evenly into the 4 small casserole dishes or single pie plate. Top with the dough which will hang over the edge(s). For the small casseroles, crimp the dough to fold over the side, pressing it a bit to make it stick. Brush the dough with the egg wash. Make 3-5 slits in the top. Place the pies on a rimmed baking sheet.

For a large quiche, top the filling with the crust. Crimp the edges. Brush the dough with the egg wash. Make 5-7 slits in the top.

Bake in a pre-heated 400-degree oven for 45-50 minutes or until the tops are nicely browned and the filling is bubbly. Remove from oven and let sit for 5-minutes before serving.  

Gravy:

2 T. unsalted butter

2 T. flour

2½ c. water

4-5 tsp. chicken base (I use Better Than Bouillon Chicken Base)

1 tsp. Kitchen Bouquet

freshly ground black pepper

1-2 tsp. cognac

Melt the butter in a small saucepan. Whisk in the flour. Let burble for a couple of minutes. (This process takes time, so be patient.) Slowly whisk in the water and chicken base. Let that burble for a few minutes too. Add the Kitchen Bouquet (gives the gravy great color) and some freshly ground black pepper. No salt! Taste the gravy. If you think it needs more depth of flavor, begin by adding another teaspoon of chicken base. Let it simmer for a couple of minutes and taste again. Repeat if needed. Just before using as called for in the pot pie recipe, taste the gravy and make any final adjustments to the seasoning. Stir in the cognac. (Don’t forget the cognac!)

DUTCH OVEN BAKED CAPON WITH LEMON, GARLIC, ROSEMARY, AND THYME

So, why a capon you might ask. And I would totally understand. Because that is just what I asked Mr. C. when he returned from a grocery shopping expedition just before Christmas. A capon. Really? Why?! And his answer. “Because it was there and we had talked about it recently, and it seemed like a good idea.” Fine. I get it. We now have a capon in the freezer. Life is good.

But then, how in the heck should I go about cooking this oversized, male version of a chicken?! So, I did what I sometimes do when faced with this kind of situation. I procrastinated. I’m not proud of this lamentable tendency, but I’m not going to lose sleep over it either. (There are much worthier causes to feed my anxiety and keep me from a good night’s sleep!)  But finally, the time came to face this 7.58-pound frozen hunk of poultry. So, armed with 1 capon defrosting on my drainboard and a good bit of timidity, I went in search of a recipe.

Well, to be truthful, there aren’t that many recipes out there for baked capon. Of course, I could have used one of my recipes for baked chicken, and simply added more baking time to allow for the difference in weight. But frankly, after baking the capon, I realized that there is much more than a size difference between a chicken and a capon.

According to The Spruce Eats, “A capon is a special type of chicken created to make the meat more tender and less gamy. It is a rooster that has been castrated before reaching sexual maturity, which improves the quality of the meat; after that, it is fed a rich diet of milk or porridge. The lack of testosterone makes for a more tender, flavorful meat that is a delight compared to regular chicken. Unfortunately, in the United States today, it may be rare to see capon on a dinner menu or in the grocery store.

This poultry was once considered a luxury, and during the early part of the twentieth century, the capon was the chosen bird for Christmas feasts, especially for the wealthy. Working-class families saw capon as a rare treat because it was quite expensive.”

(And BTW – it still is. And at least in our immediate vicinity, capons are only available during the holidays.)

So, what to do? I simply took a bit from this recipe, and that recipe, and came up with the recipe you see below. And the meat was perfect. Tender, succulent, and tasty. Really tasty! I mean, how could it not be with all the herb, garlic, and lemon action going on. Truly delicious.

So, when you decide to bake a capon, I hope you find it to be as rewarding an experience as I did. The ease of preparation, the simplicity of ingredients (except the capon itself, of course), and the fantastic results make the effort completely worthwhile.

And for those of you who also have a predilection for using delaying tactics when faced with an unknown, take heart from my experience with baking a capon. If I hadn’t baked the capon, I never would have had the satisfaction of overcoming. And I think overcoming has never been given the respect it deserves. I overcame procrastination and my self-doubt about baking a capon. And I know, at a glance, both seem trivial. But when I add them to all the other minor achievements that make up my daily routine, like cleaning up after myself, or doing the laundry, calling a friend, or performing my almost daily exercise program, it leaves me feeling good about myself. And if I feel OK about me, then I can reflect my inner peace to my family, friends, and especially to Mr. C. And witness their comfort and happiness with me in their countenance. That, my friends, is the greatest feeling in the world!

Peace and love to all.  

1 T. vegetable oil

4 T. (½ stick) unsalted butter

5 cloves garlic – 3 minced, 2 halved

2 T. finely minced rosemary

1 lemon – zested, halved, and juiced (all parts will be used in this recipe)

2 tsp. kosher salt, plus more for seasoning the cavity

freshly ground black pepper

1 capon (7-8 lb.), giblets removed, then washed and dried thoroughly

½ onion, cut in 4 pieces

1 (3-inch) sprig fresh rosemary

3 (2-3 inch each) sprigs fresh thyme

Coat the bottom and sides of an enameled Dutch oven with the veggie oil. (I use my Le Creuset Dutch oven.) Set aside.

Preheat your oven to 475-degrees.

Melt the butter in your microwave. Stir in the minced garlic(3 cloves), minced rosemary, lemon zest, kosher salt, and black pepper. Set aside.

Season the cavity of the capon with salt and pepper. (Not too much.) Then stuff the bird with the zested and juiced lemon rind, 2 halved garlic cloves, onion pieces, sprig of fresh rosemary, and thyme sprigs. Place the capon in the prepared Dutch oven, breast side up.

Using your hands, spread the mixture liberally over every part of the chicken and under the breast skin. (Be careful not to tear the skin).

Tie the legs of the capon together tightly using kitchen twine. Pour reserved lemon juice over all.

Roast capon uncovered for 15 minutes at 475-degrees, then reduce heat to 350-degrees. Bake still uncovered for approximately 20 minutes per pound, or until internal temperature taken reaches 180-degrees in the thickest part of the thigh.  (About two and a quarter hours for a 7.5 lb. capon). The capon should be uncovered the entire time it cooks, unless it seems like it’s getting too brown. If so, place the lid ajar on the Dutch oven until the capon has fully cooked.

Remove from oven, remove the capon to a platter, and let it rest for at least 15 minutes before carving. Use the liquid left in the pan for gravy, if desired. See recipe below.

CAPON GRAVY WITH COGNAC

pan drippings from roasted capon

flour

chicken stock

1 tsp. Kitchen Bouquet

freshly ground black pepper

chicken base (I use Better Than Bouillon Chicken Base)

1-2 tsp. cognac

Skim off a bit of the fat. Whisk in enough flour to absorb the remaining fat. Let burble for a couple of minutes. (This process takes time, so be patient.) Slowly whisk in chicken stock until you reach the desired thickness. Add the Kitchen Bouquet (gives the gravy great color) and some freshly ground black pepper. No salt! Taste the gravy. If you think it needs more depth of flavor, begin by adding one teaspoon of chicken base and a small amount of chicken stock. Let it simmer for a couple of minutes and taste again. Repeat if needed.

Turn heat as low as possible and let the gravy gently simmer while you carve the capon. Whisk periodically. (You will probably need to add more stock during this time.) Also, after the capon is sliced and plated, don’t forget to add the accumulated juices on the platter to the gravy.

Just before serving (and gravy should be the last item plated), taste the gravy and make any final adjustments to the seasoning. Stir in the cognac and serve piping hot.

SAVORY MUSHROOM RICE-A-RONI

Some entrees just scream to share the spotlight with a dish that is creamy and savory. So, last evening when I baked a capon* (yup, a capon), I felt it necessary to serve a side dish that would complement not only the rich and pleasing texture of the meat, but also the subtle flavoring I had added before I set the guy to roast in the oven. So, I invented this recipe.

And yes, I know. White rice and pasta in the same dish. Isn’t one or the other enough without adding insult to injury by including both? What were you thinking Patti? Well, it was just one of those dinners that called for a side dish that was just a bit special. After all, we were having capon for dinner! So, a special side dish was absolutely in order. And no, we don’t eat capon on a regular basic. In fact, this was the first time! But definitely not the last time. The meat was amazingly tender and tasty. And when it is once again safe to have dinner guests, and we can find capon in our local grocery stores (usually only during the holidays), this special bird is going to be on the menu! And I gotta say, this side dish will be on the table right along with Mr. Capon. And I’ll probably complete the meal with steamed fresh green beans just like I did last night. Made for pretty darn good eating if I do say myself.

And yes, of course I’m going to share the recipe for Dutch Oven Baked Capon with Lemon, Garlic, Rosemary, and Thyme. Look for that recipe in the next couple of days. But back to this recipe.

This side dish is easy to prepare and really quite delicious. And except possibly for the addition of dried mushrooms, a dish that children should enjoy.

So, be brave. Make this dish with both white rice and orzo pasta. You really do need to treat yourself on occasion. And I frankly can’t think of a better way!

Peace and love to all.  

⅓ c. small pieces of dried mushroom

½ c. boiling water

2 T. unsalted butter

½ c. orzo pasta

½ c. uncooked long grain white rice  

½ c. diced onion

½ c. finely diced celery

2 cloves garlic, minced

⅓ c. dry sherry

2 c. vegetable broth, or a bit less if there is still quite a bit of mushroom soaking water left after the mushroom pieces have re-hydrated

½ tsp. seasoned salt

freshly ground black pepper

½ tsp. dried thyme

2 T. chopped fresh parsley

½ c. toasted slivered or sliced almonds

Place the pieces of dry mushroom in a small bowl. Add the boiling water, stir, and set aside.

Melt the butter in a lidded pan over medium-low heat. Add the orzo pasta and rice and fry until just starting to turn golden brown. Stir in onion and celery; cook for a couple of minutes. Add the garlic and cook for 1 minute. Stir in the dry sherry and cook until liquid is evaporated.  

Stir in the broth, re-hydrated dried mushroom pieces plus any remaining liquid, seasoned salt, pepper, and dried thyme. Increase heat to high and bring to a boil. Reduce heat to medium-low, cover, and simmer until the rice is tender, and the liquid has all been absorbed, 20 to 25 minutes.

Remove from heat and stir in the parsley and almonds. Adjust seasoning. Let stand for 5 minutes, then fluff with a fork.

*According to The Spruce Eats, “A capon is a special type of chicken created to make the meat more tender and less gamy. It is a rooster that has been castrated before reaching sexual maturity, which improves the quality of the meat; after that, it is fed a rich diet of milk or porridge. The lack of testosterone makes for a more tender, flavorful meat that is a delight compared to regular chicken. Unfortunately, in the United States today, it may be rare to see capon on a dinner menu or in the grocery store. This poultry was once considered a luxury, and during the early part of the twentieth century, the capon was the chosen bird for Christmas feasts, especially for the wealthy. Working-class families saw capon as a rare treat because it was quite expensive.”

BTW – capon is still relatively expensive poultry. About $6 a pound. But well worth the money. And, at least in our immediate vicinity, capons are only available during the holidays. But if you are feeding 3-4 people for Thanksgiving, for example, a capon would certainly be my choice over a small turkey. And I love turkey. Just sayin’!


POTSTICKER SOUP

Now, believe it or not, this is one of the best soups I have ever made. And I know, I say that about all the soup recipes you find on this site. And granted, I love soup. But it’s kind of like someone asking me what is my favorite cookie? And of course, I would most likely answer – the one I am eating at the time. Duh!

But I must also add that I am very partial to Asian soups. And the broth in this soup has tons of the Asian flavors I so dearly love. Combine that with ease of preparation, the use of fairly standard pantry and refrigerated ingredients, and what’s not to love about this dish?

And although this soup might not be the heartiest soup I make, it’s absolutely perfect for two adults approaching the golden years of their lives. (Like we aren’t already there, but unwilling to let our actual ages diminish our zest for life and our enjoyment of gastronomic pleasures!) But I digress…..

Anyway, this soup is really good. You should give it a try. And I’ll share a little trick with you. I love bok choy. Mr. C., not at all. So, I cooked the bok choy separately. I chopped up 2 cups of this wonderful vegetable. Then I cooked it for a couple of minutes in a bit of chicken broth. When it came time to serve the soup, I ladled a big portion of the soup into a bowl for Mr. C. Then I placed a couple big old spoonsful of bok choy in the bottom of my bowl and topped it off with the bok choy unadulterated broth with veggies that Mr. C. requested. Win/win. I got my bok choy fix. And Mr. C. did not have to suffer any cruciferous flavor discomfort. But in his defense, had I used spinach or kale, he would have been just fine eating the soup the way it was originally intended. I just didn’t happen to have either spinach or kale on hand.

So, with way too much knowledge of the idiosyncrasies of the residents of Chez Carr, I offer up this delicious soup recipe. It truly is yummy.

Peace and love to all.

⅓ c. broken pieces of dried shiitake mushrooms (or dried mushroom of choice)

½ c. boiling water

2 T. extra virgin olive oil

1 pkg. frozen pot stickers (I use Annie Chun’s organic potstickers – 7.6-oz. pkg.)

1 med. carrot, julienned

1 stalk celery, finely diced

1 T. minced fresh ginger

4 garlic cloves, finely minced

5 c. water

5-6 tsp. chicken base (I use Better Than Bouillon Chicken base)

3 T. soy sauce, or more to taste

1 T. toasted sesame oil

½ tsp. Asian chili-garlic sauce, or more to taste

4-6 green onion, thinly sliced, divided

pinch sea salt

freshly ground black pepper

1-2 c. chopped bok choy, spinach, or kale

sesame seeds, opt.

In a small bowl, soak the dried mushroom pieces in the boiling water. Set aside.

Coat the bottom of a large, covered soup pot with the olive oil. Fry the pot stickers over medium heat until they get some nice browning on all sides (about 10 minutes). Remove from pan and set aside.

In the same pan, sauté the carrot and celery until the carrot is tender. Stir in the ginger and garlic and cook for 1 minute. Add the water, chicken base, soy sauce, sesame oil, chili-garlic sauce, half the green onions, salt, pepper, and the re-hydrated mushrooms plus soaking water. Bring to a boil, reduce heat, cover, and simmer for 15 minutes. Taste and adjust seasonings.

Add the bok choy and fried potstickers. Increase heat and bring to a boil.

Serve garnished with sesame seeds and the remaining sliced green onions.


THIN PIZZA CRUST

We love homemade pizza. And I especially love thin crust pizza. Not so much for the overall taste, but more for the reduction of carbs. Less dough, less carbs and calories. So, I decided to come up with a crust that I could pat out very, very thin. Just enough crust to support all the yummy topping ingredients. And while I was at it, I decided for the pizza I was building that evening, and because I had some fresh basil in the fridge that was quickly becoming tired, I would work up a pesto like sauce. So, you will find that recipe below too.

So, nothing more to say except I didn’t take a picture of the finished product. (Hard to take a picture of the bottom crust of a pizza after it’s been baked. If you don’t believe me, try it yourself sometime. But only if you plan to serve upside down pizza!)

As always, peace and love to all.  

1 c. warm water

½ tsp. granulated sugar

1 pkg. or 1 scant T. active dry yeast

½ tsp. kosher salt

1 T. extra virgin olive oil

½ c. whole wheat flour

1½ c. unbleached all-purpose flour, more or less

Combine the water, sugar, and yeast in the bowl of your stand mixer. Let sit for 10 minutes. Add the salt, olive oil, whole wheat flour, and 1 cup of the all-purpose flour.

Using your dough hook, mix/knead until the dough is smooth and elastic using as much flour as required.   

Cover and let rise for 20-30 minutes. Divide dough in half. (Dough can be used immediately or a portion frozen for later use.)

To bake your pizza on a pizza pan or baking sheet:

Lightly grease a 12-inch pizza pan. Sprinkle with a bit of cornmeal. Place one of the half pieces of dough on the prepared pizza pan and pat it with your fingers until it stretches over the whole pan. Make sure the edge is a bit thicker than the rest.

Place in a pre-heated 475-degree oven for about 8 minutes to set the crust. Remove from oven and spread with pizza sauce and toppings of your choice.

Return to the oven and continue baking for 10-20 minutes longer or until the crust is a nice golden color and the cheese is melted and starting to brown. Remove from oven and let sit for 5 minutes before cutting into slices.  

To bake your pizza on a pizza stone:

Pre-heat your oven and pizza stone to 475-degrees. (This takes longer than just heating your oven. So, you may want to start heating your oven at the same time you start making your dough. Rise time and all.)

Place a piece of parchment paper on top of a pizza peel or a baking sheet with only one edge. Pat one of the half pieces of dough out as thin as possible. Then, place your topping ingredients over the crust.

Transfer the pizza (parchment paper and all) off the pizza peel or baking sheet onto your pre-heated pizza stone and bake for 10-15 minutes or until the crust is golden brown and the cheese is bubbly. Remove from oven and wait 5 minutes before cutting. (I don’t have a pizza peel. I use a one-sided baking sheet. When the pizza is ready to come out of the oven, I just slide the pizza, parchment paper and all, back on to the baking sheet.)

BASIL PESTO PIZZA SAUCE  

2 garlic cloves

2 c. packed basil leaves

tiny pinch kosher salt

a couple grinds black pepper

¼ c. extra virgin olive oil

½ c. freshly grated Parmesan cheese

Place all the ingredients in your food processor. Whirl until you reach desired consistency.

Slather the sauce on unbaked or partially baked crust. Use as much of the sauce as you want. That may be only half of the sauce, or every last bit scraped out of the food processor.   


CAJUN HAMBURGER PATTIES SMOTHERED IN ONION GRAVY

These days, for me, when given a choice, 90% of the time I prefer a dish featuring lean ground beef over steak. Why this is I have no idea. Except that, ground beef can be flavored easier than steak. And ground beef just smacks of comfort food. And most of you know, I am all about comfort food.

Of course, I would never turn down a rare steak, especially when grilled by our dear friend Jim. But when I think about fixing beef for dinner, it usually involves a package of lean ground beef.

But how to turn a pound of ground beef into a delicious dish? Quite easy, as this recipe will attest. A few simple ingredients. A modicum of time. And a spirit of adventure.

And what do you get for your time and energy preparing this dish? A hearty meal that is delicious and quite inexpensive to produce. And a sure winner that your entire family will enjoy. I mean really! Who doesn’t love gravy? No one I know, that’s for darn sure! And nothing could be easier to prepare than the gravy for this dish. And served over grits – well boy howdy, nothing could be finer! Southern comfort to the max.

I found the bones of this recipe on the themccalumsshamrockpatch.com site. Of course, I changed the original recipe a bit. But the true hero is Heidy, who thunk up this recipe in the first place. Hat off to you Heidy. And thanks, of course!

So, without further ado, I present this amazing comfort food recipe for your gastronomic delight. (You may thank me later!)

As always, peace and love to all.

For the Patties:

1 lb. lean ground beef

¼ c. Panko breadcrumbs

¾ tsp. Cajun seasoning

½ tsp. granulated onion

¼ tsp. granulated garlic

¼ tsp. seasoned salt

freshly ground black pepper

1 T. extra virgin olive oil

Combine the ground beef, Panko breadcrumbs, Cajun seasoning, granulated onion, granulated garlic, seasoned salt, and freshly ground black pepper. Form into 3-4 equal sized patties.  

Heat the olive oil in a large fry pan. Place the patties in the hot oil and fry until the bottom of each patty is dark brown. (You want a nice crust on these babies.) Flip and brown the second side. When browned, remove from pan. Do not remove the dripping from the pan.

For the Gravy:

3 T. pan drippings or unsalted butter

1 yellow or white onion, halved then thinly sliced

2 garlic cloves, finely minced 

3 T. flour

½ tsp. Cajun seasoning

freshly ground black pepper

pinch crushed red pepper flakes

2 c. water

1 T. beef base (I use Better Than Bouillon Beef base)

1 T. Worcestershire sauce 

kosher salt, to taste

If less than 3 tablespoons of drippings left in the pan, add unsalted butter to make up the difference. Add the sliced onion and cook on medium-low heat for about 8 minutes or until the onion is tender. Add the garlic and cook for 1 minute. Add the flour, Cajun seasoning, black pepper, and tiny pinch of crushed red pepper flakes. Allow to cook for a couple of minutes. Then whisk in the water, beef base, and Worcestershire sauce. Whisk until the gravy starts to thicken. Taste and add salt or other seasoning as needed. Add the hamburger patties back to the skillet, reduce heat to the lowest setting, and cook for about 10 minutes. Stir occasionally and flip patties once or twice during this time.

Remove from heat. Serve the hamburger patties and gravy over grits. (See recipe below.) Or, if you prefer, serve the patties and gravy over rice, mashed potatoes, or thick al dente egg noodles.

GRITS

1½ c. milk

1½ c. water

¼ tsp. kosher salt

freshly ground black pepper (just a bit)

¾ c. regular or quick-cooking grits

1 T. butter

Bring milk, water, salt, and pepper to a simmer over medium heat in a covered pan. Slowly whisk in the grits. (Whisking helps to avoid lumps.)

Cook grits covered over medium-low heat, stirring frequently (about 15 minutes for regular grits, 5 minutes for quick-cooking grits).

Remove from heat and stir in butter. Taste and adjust seasoning if necessary.           


CLASSIC BUTTERMILK CORNBREAD (no added sugar)

I am always trying (most times not terribly successfully) to remove added sugar from recipes. So, the other evening to accompany Vegetarian Lentil Soup, I decided to develop a sugar-free cornbread recipe. I perused a few sites looking for the perfect recipe, but some had bacon fat, or some other ingredient that just didn’t work for me. So, I cobbled together this recipe. And fortunately, it worked. Boy did it work! I can honestly say I had no feelings of guilt eating this cornbread. Of course, there was butter in the recipe. But the no additional sugar helped me from becoming guilt-ridden. And I really didn’t miss the sweetness that I always find appealing about this wonderful and easy to prepare bread. Of course, the next morning I did serve it drizzled with warm maple syrup for a special breakfast treat. But that’s a story for another time.

Anyway, this cornbread is inexpensive and easy to prepare (only 7 ingredients and no mixer required), and a dish that everyone in your family will love. And of course, if you must, you can gently warm the bread and slather it with butter to further enhance its enjoyment. (I can’t speak from experience on this myself. But I’m sure Mr. C. could attest to the fact if gently coerced.)

So, if you too are trying to avoid added sugar, but still want to enjoy life’s little pleasures like cornbread, give this recipe a try. It’s darn good. That’s all I’ve got to say!

Peace and love to all.   

 ½ c. unbleached all-purpose flour

1½ c. cornmeal

1 tsp. baking soda

½ tsp. kosher salt

5 T. unsalted butter, melted

1¼ c. buttermilk

1 egg

Whisk the flour, cornmeal, baking soda, and salt in a large bowl.

In a microwave safe bowl, melt the butter. Then whisk in the buttermilk and egg until well combined.

Stir the buttermilk mixture into the dry ingredients just until blended.

Spoon the batter into a greased 9×9-inch square baking dish, smoothing the top before placing in the oven.

Bake in a pre-heated 400-degree oven for about 20 minutes, or until the edges turn golden brown and a toothpick inserted in the center comes out clean.

Remove from oven and let cool for 5 to 10 minutes before serving.

CREAMY SHRIMP AND BROCCOLI FETTUCCINI (reduced fat)

I don’t have a sweet tooth. I have a creamy tooth. Or should I say, creamy teeth! If it has a cream sauce, I will eat just about anything. OK, I draw the line at creamed Spam, eel, chitlins, Rocky Mountain oysters, or other ingredients of that ilk. But that’s about it!

But true cream sauces are not good for us. So, I must cheat. I am forced, by my desire to keep us healthy, to achieve that lovely smooth creamy taste and consistency we so admire by substituting highly caloric ingredients with those that are less caloric. Not an easy feat my friends. But definitely one worth pursuing.

Now at first glance, this recipe might scare you because there is still some butter and cheese in the recipe. But if you consider the amount of cream, butter, and cheese in a regular alfredo sauce, you should feel significantly relieved by the substitutions I have made in this recipe. And regardless of the fact that this sauce is basically a fake alfredo sauce, it is still absolutely delicious. That creamy flavor and texture we all adore is still there.   

But, in truth, no cream sauce is ever going to be as healthy as say, a simple tomato-based sauce which has roughly 55 calories, 1 gram of fat, and 280 milligrams of sodium per ½ cup serving. Whereas a true alfredo sauce has about 275 calories, 28 grams of fat, and 145 milligrams of sodium per serving. But there are just some dishes I am unwilling to live without. And a creamy pasta dish like this one is just one of those dishes.

So, if you too love shrimp and broccoli in a creamy sauce with pasta, this is the dish for you. Not too much sauce. Not too much pasta. Just the right amount of everything.

Well, it’s Thursday here on Camano Island. Nothing planned for the day but posting this recipe, researching recipes, and planning what to fix for dinner. Of course, I could do a little housework, but that seems too productive for such a mellow day. So, I think I’ll read a while this afternoon, do some more planning for our September trailer trip, and generally take it easy. With omicron still running amuck, this forced confinement is getting a bit old. But I would still rather be safe than sick. So, I basically stay home as much as possible. And yes, I know, the best laid plans of mice and men often go awry. (You can’t live to my ripe old age and not know first-hand the truth contained in that statement.) But I am willing to stay home if it helps keep me and others from contracting this terrible disease. I just feel blessed to have a home. A place to stay warm, sleep, eat, and stay healthy. My wish is that everyone else was as lucky.

Peace and love to all.

1 T. extra virgin olive oil

2 c. small bite-sized pieces of fresh broccoli (florets and peeled stems)

5 cloves garlic, finely minced

¼ tsp. kosher salt

freshly ground black pepper

tiny pinch crushed red pepper flakes 

1 lb. lg. uncooked shrimp (peeled and deveined)

2 T. dry white wine

1 T. unsalted butter

1 T. flour

1½ c. milk

2 oz. cream cheese 

½ c. freshly grated Parmesan, plus more for passing  

6-oz. fettuccini pasta, cooked al dente (save some of the pasta water)

Heat the olive oil in a large fry pan. Add the broccoli and sauté for 2-3 minutes. (Broccoli should still be crisp.) Add the garlic, salt, pepper, and crushed red pepper flakes. Cook for 1 minute. Remove broccoli mixture from pan and place in a bowl.

In the same frying pan, over medium heat, cook the shrimp until they are pink. Remove from pan and add to the bowl with the broccoli. Pour wine into the pan and cook until just a whisper of liquid remains. Add the tablespoon of butter and the flour. Whisk together and cook for about a minute.  

Gradually whisk in the milk, and cook over low heat, whisking constantly, until sauce is very slightly thickened. Stir in the cream cheese and whisk until the cream cheese is lump free. Stir in the Parmesan. Taste and adjust seasoning.

Add the broccoli and shrimp to the pan. Then gently toss in the al dente pasta until it is well coated with sauce. (Add a bit of pasta water if the sauce is too thick.) 

Serve immediately. Pass additional Parmesan at table.