HEALTHY OATMEAL RAISIN QUICK BREAD WITH WHOLE WHEAT PASTRY FLOUR, RYE FLOUR, AND COCONUT PALM SUGAR

One of the two loaves I baked in my 8 x 4-inch loaf pans

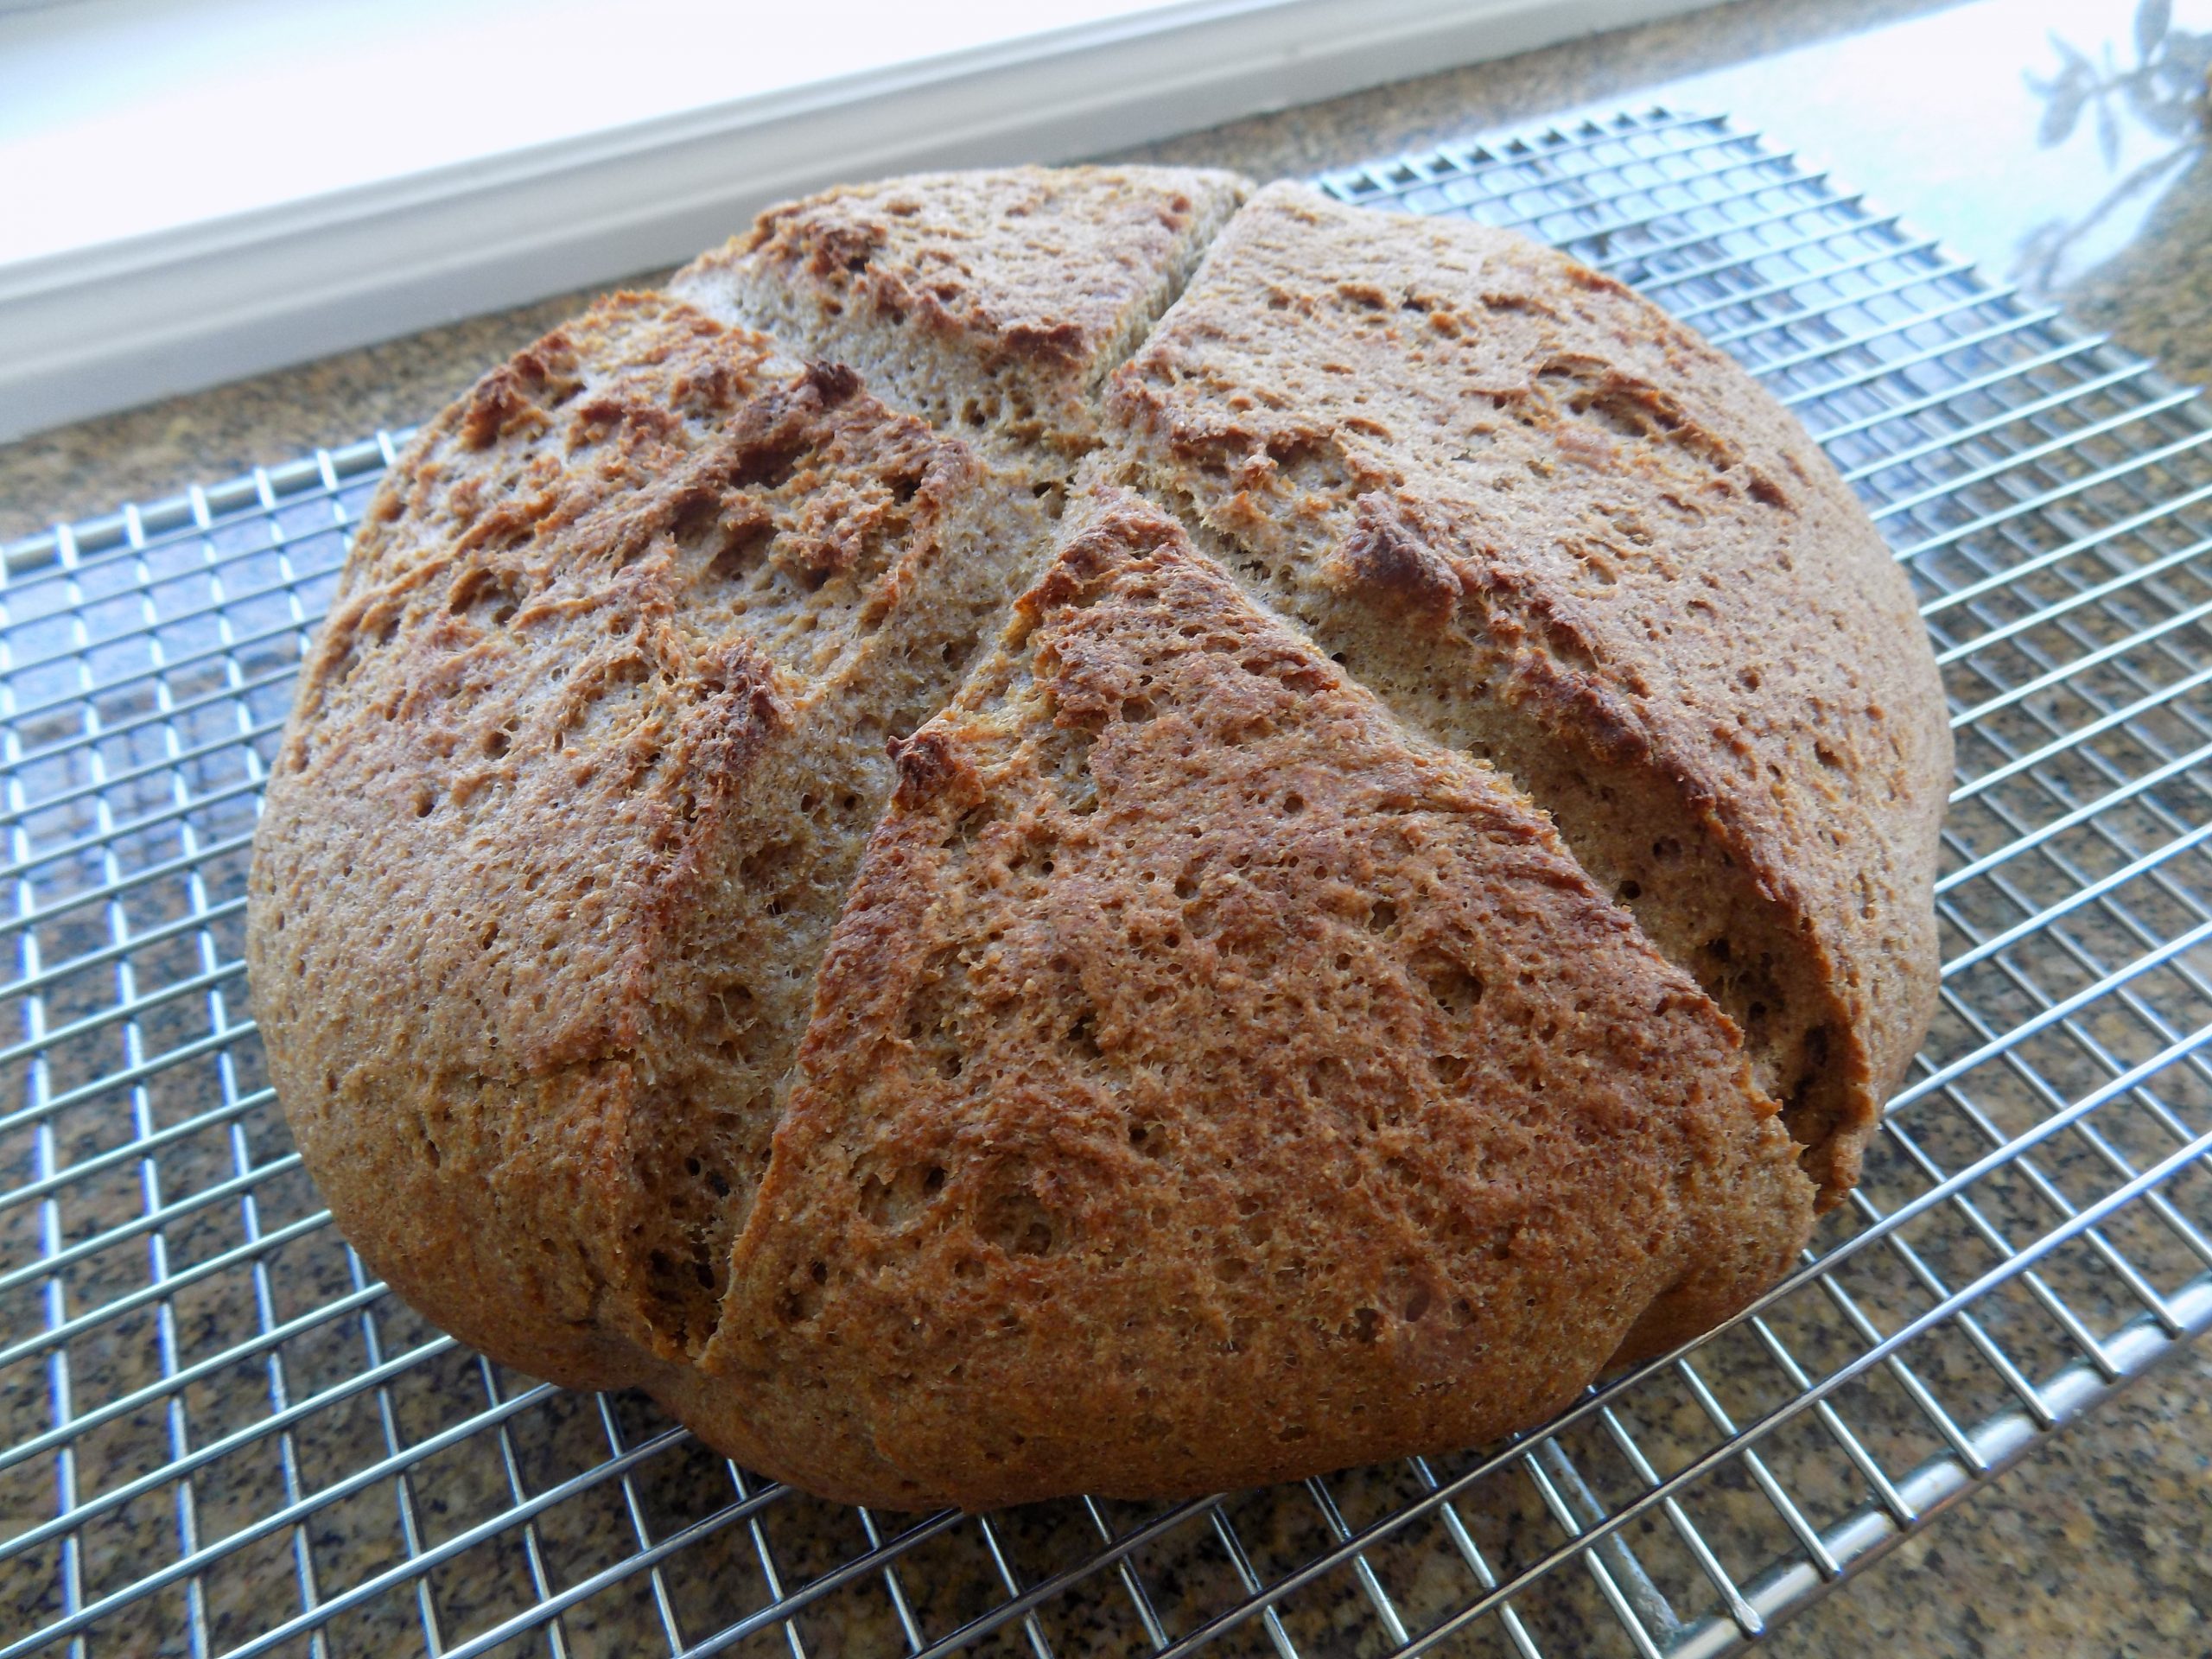
If you are a Boston brown bread lover, then this recipe should be right up your alley. The only real difference in ingredients between this quick bread and Boston brown bread is in the use of rolled oats and wheat germ in place of cornmeal. And there is no steaming this bread. It goes in the oven just like any other quick bread.

In fact, this is one of the easiest breads you will ever have the pleasure of building. No mixer involved. And you only need to get one mixing bowl dirty in the process. Of course, there are measuring cups and spoons necessary for recipe integrity, but then there are always measuring implements involved in baking. Baking being the chemical changing “thing” that it is!

But truly, this is one of the easiest breads to fix. And one that your entire family will enjoy. I know this as a fact because this was my 4 children’s favorite breakfast bread. They loved it straight out of the oven or toasted the next morning. I used to make a triple batch and every bit of it was gone within 2 days.

Now I bet you are wondering where I got this recipe. And I would love to be able to provide you with that information. But I don’t have the foggiest idea. Maybe that’s because I have been making this bread since the mid-70s. And that my friends, was a long time ago. All I remember is that I added the wheat germ to the original recipe because I was adding wheat germ to any dish that I could. Meatloaf, cookies, bread, you name it. And of course, since I am now on a healthier food quest, I replaced the white flour called for in the original recipe with whole wheat pastry flour and the granulated sugar with coconut palm sugar. And as far as I can tell, there is no discernable difference in the flavor or texture of the bread. And it’s a bloody good thing, because there is no going back even though this was a fairly healthy bread to begin with!

And why I haven’t posted this recipe until now is anyone’s guess. (Actually, I thought I had already posted it, so if you stumble upon it as you peruse this site, please let me know.) (Oh, and please provide me with whatever name I gave it, or I won’t be able to find it a second time. And yes, thank you, I am feeling every one of my 78 years!)

Well, that’s it for today. It’s Friday again and I’m not quite sure how that happened so quickly. Time just seems to be passing at warp speed. I remember hearing older people talk about this very thing when I was younger. And thinking that they were crazy. Now, that I am in the category of being an “older person”, I realize I was the one who was crazy. Time really does fly by when you get older. I’ve kind of always wondered how that works. But I’m too lazy now to do the research required to prove that it actually happens. Of course, I don’t really have to do any research. Einstein got there before me. In the Special Theory of Relativity, Einstein determined that time is relative—in other words, the rate at which time passes depends on your frame of reference. So, I’ve decided that people’s point of reference changes according to their age. I’m sure if Mr. Einstein were still around, he would thank me for that little bit of extra enlightenment.

As always, take the time to have fun. Laugh a lot and often. And seek positivity in others as well as in yourself. We are only here for a very short time. Make the most of the time you have.

Peace and love to all.

1 c. whole wheat pastry flour or regular whole wheat flour

1 c. rye flour

2 T. wheat germ* or wheat bran** (your choice)

1 tsp. baking powder

1 tsp. baking soda

1 tsp. kosher salt

¼ c. coconut palm sugar (granulated sugar can be used if preferred)

1 c. rolled oats

½ c. regular molasses***

1¼ c. buttermilk

1 c. golden raisins

¾ c. chopped walnuts

Combine flours, wheat germ or bran, baking powder, baking soda, salt, coconut sugar, and rolled oats in a large mixing bowl. Gradually stir in the molasses and buttermilk. Then stir in the golden raisins and chopped walnuts. Scoop into a greased loaf pan or pans. Let stand at room temperature for 20 minutes.

Please note: Non-stick pans are best for this recipe.

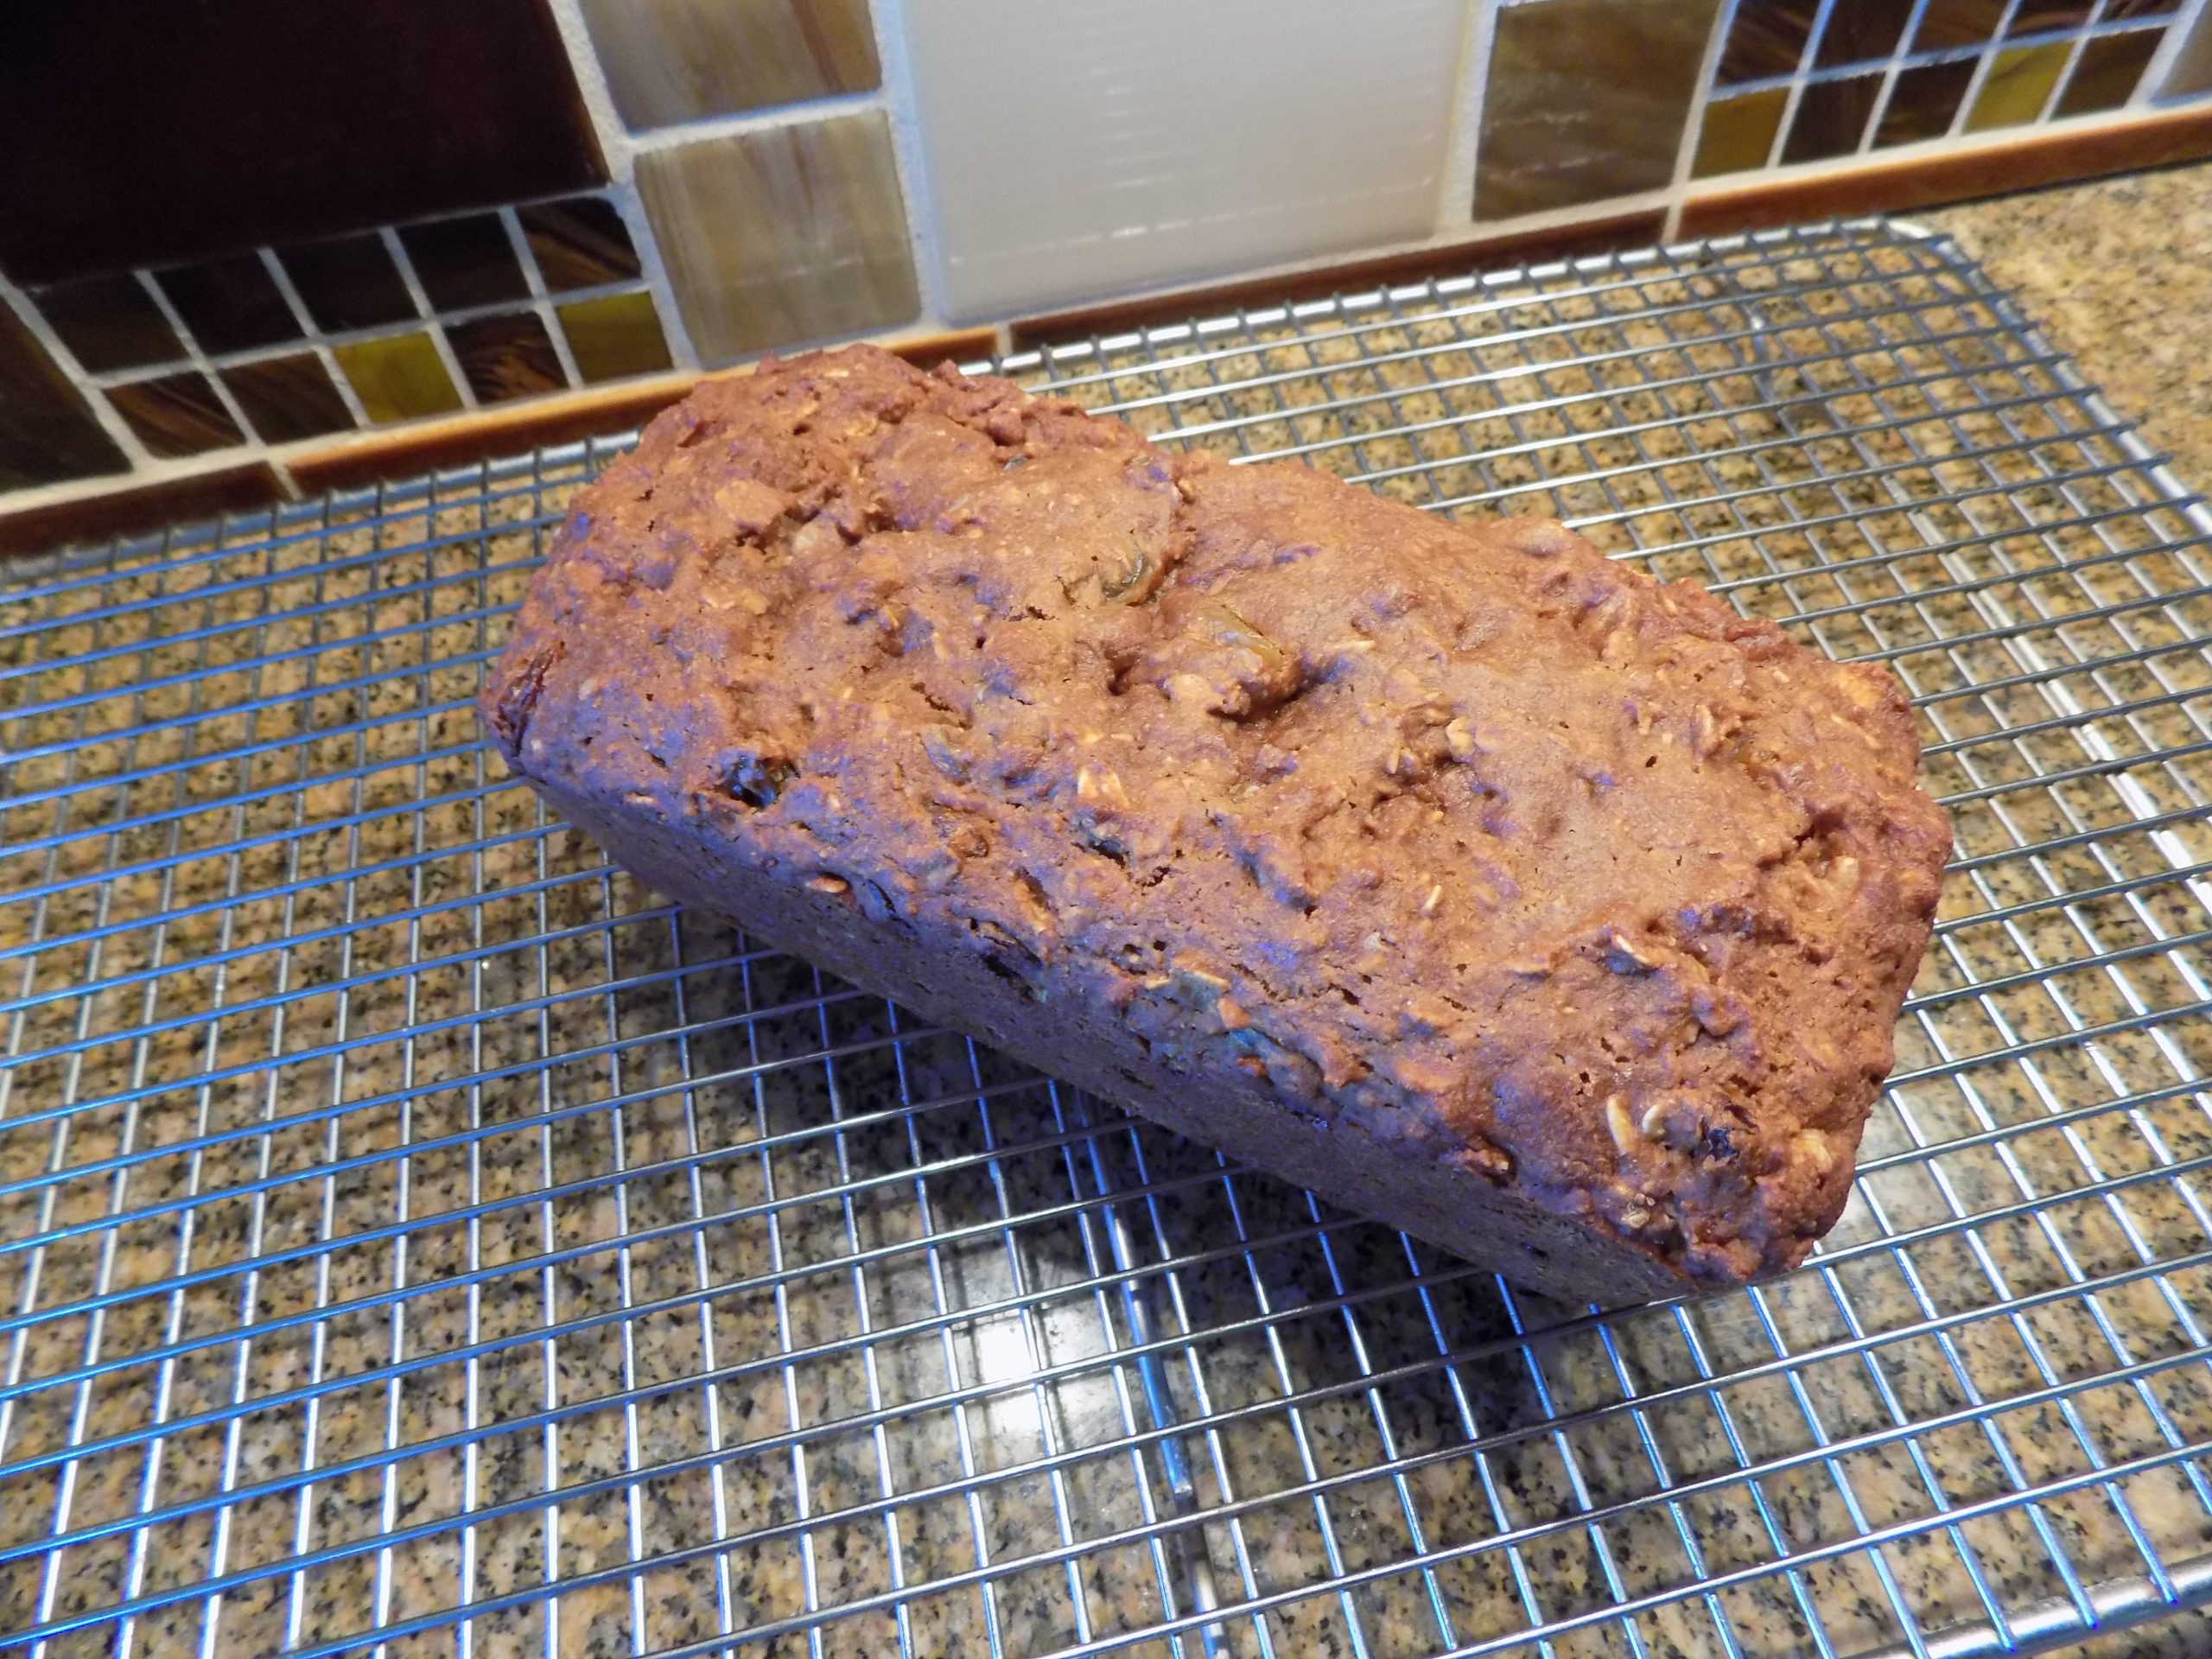
Bake in a pre-heated 350-degree oven for 1 hour (single loaf pan 9×5-inch) or 40 minutes for 2 8×4-inch loaf pans. A toothpick will come out clean when stuck in the middle of a loaf when the bread is done baking.

Remove from oven and let cool for 10 or so minutes before removing from pan.

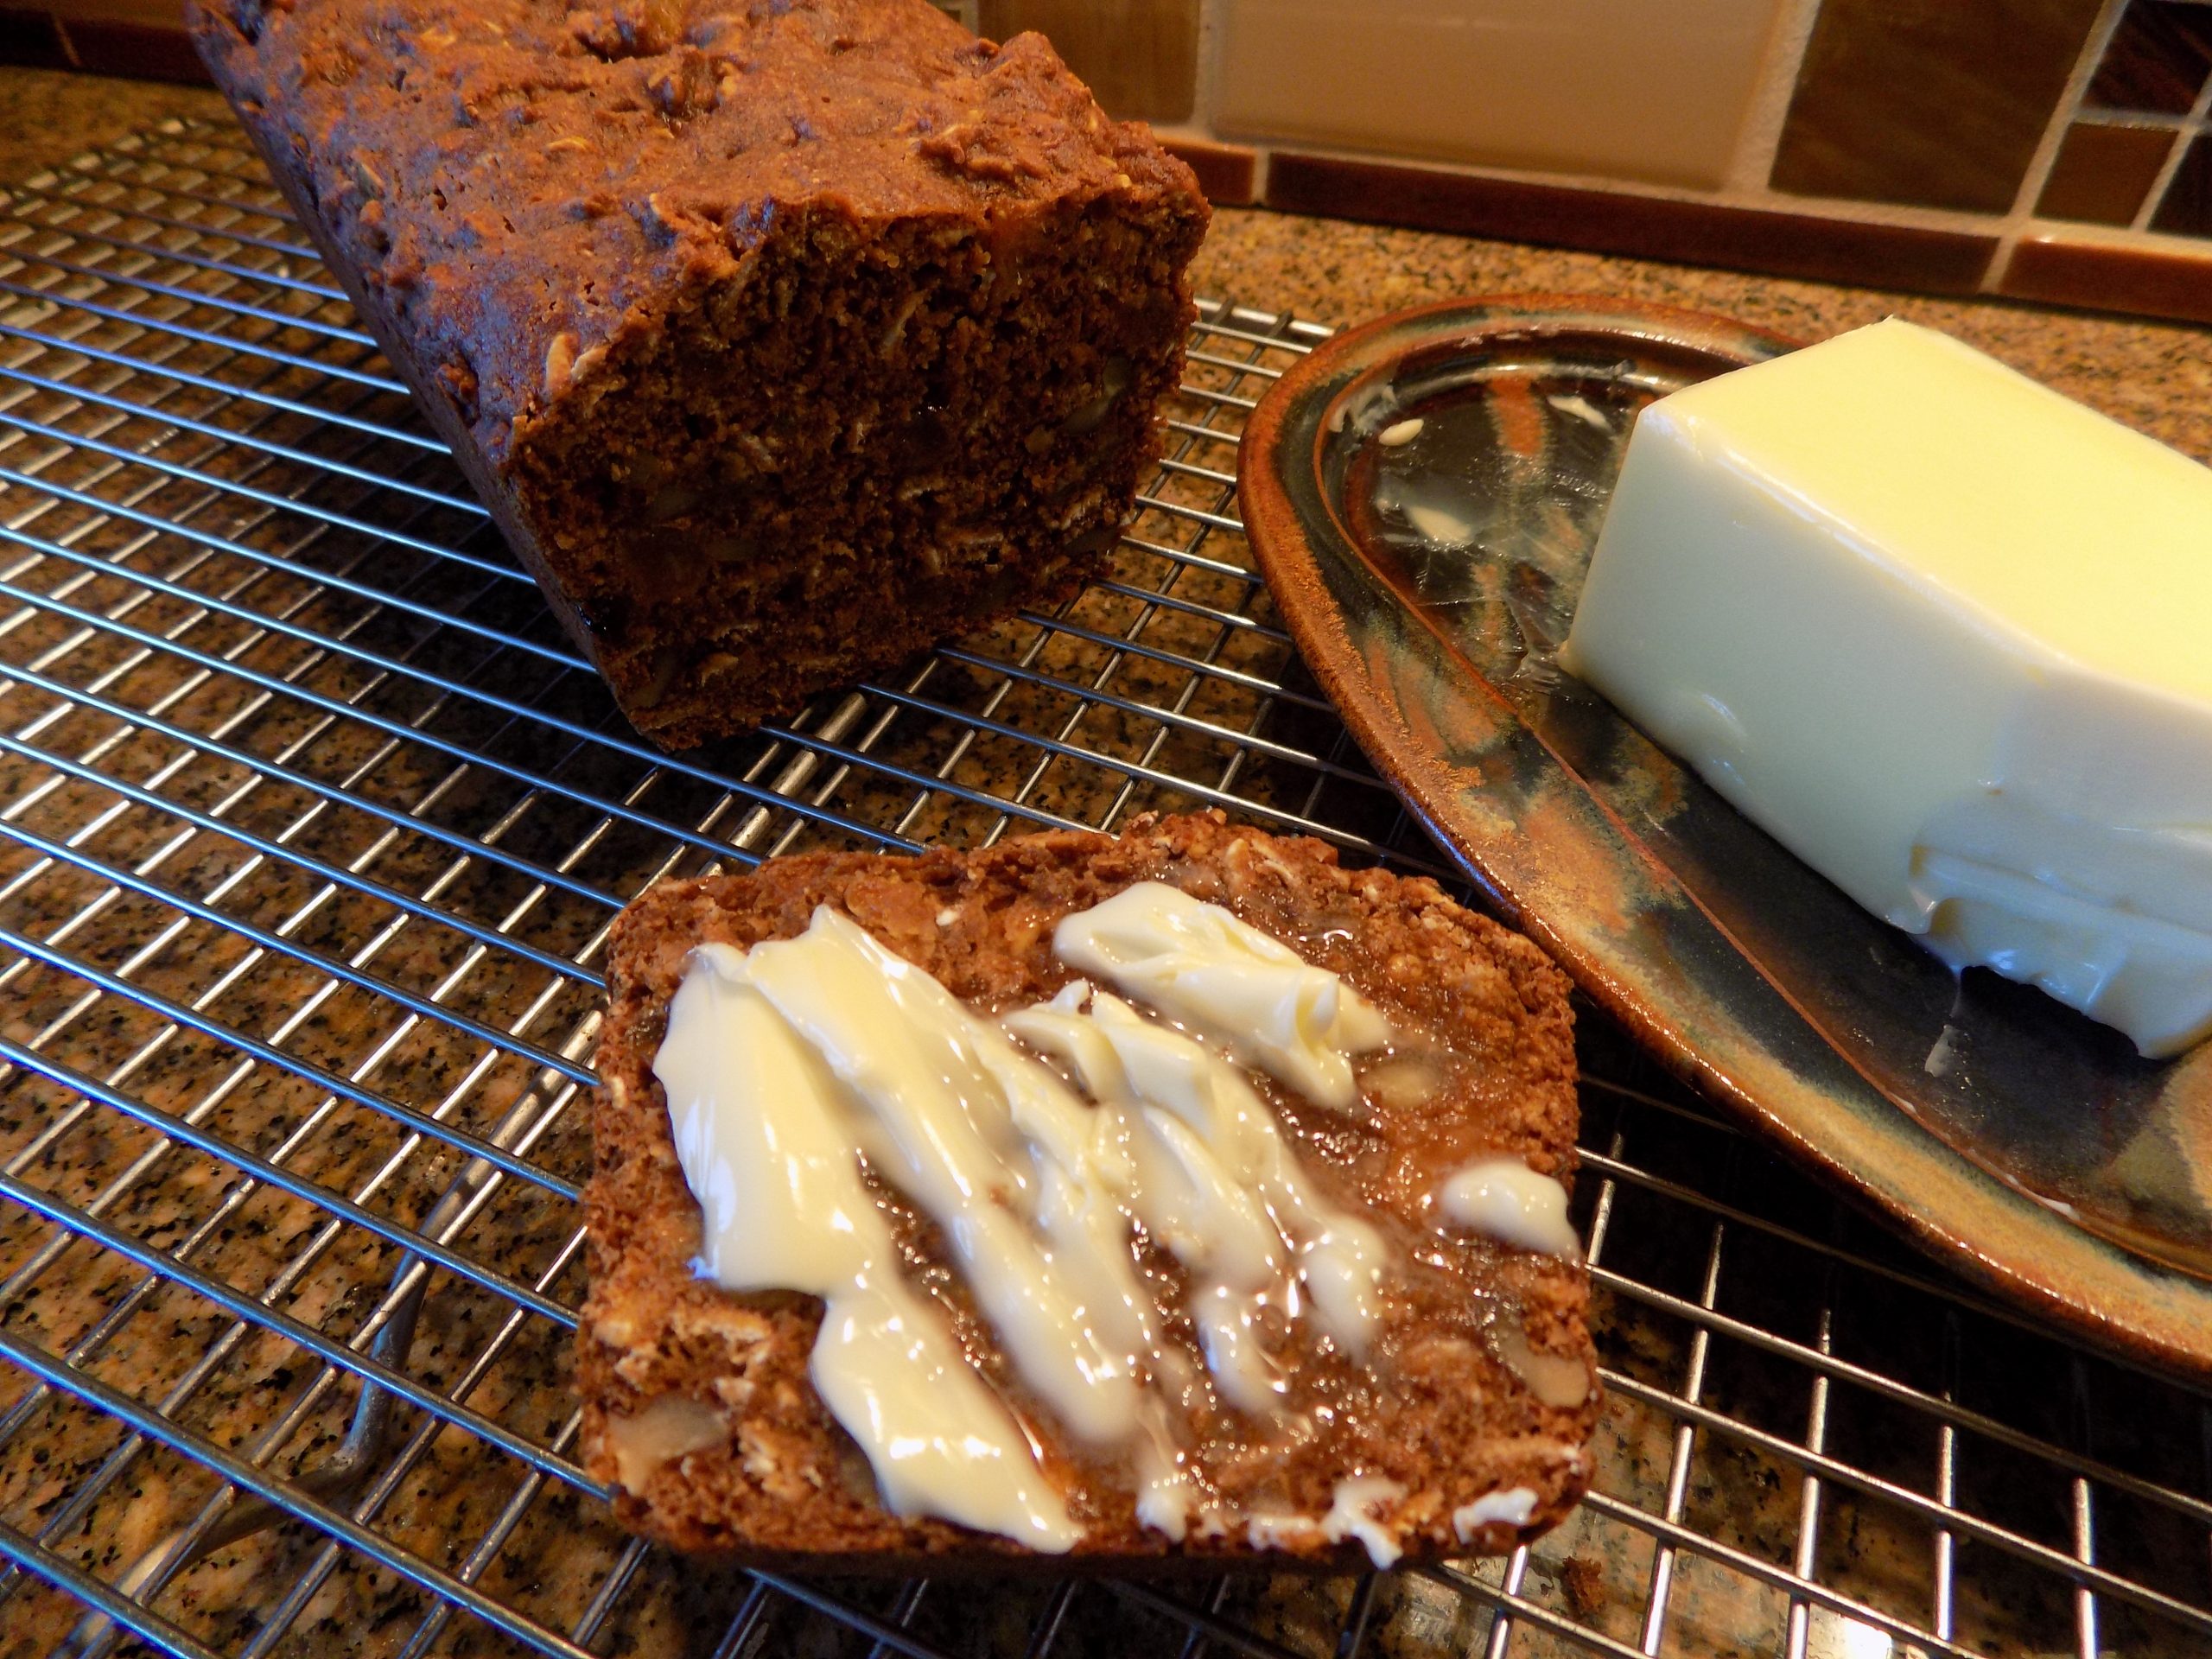
Great slathered with butter at breakfast or as a afternoon treat with coffee or tea.  

*Wheat Germ

According to healthline.com “Wheat germ has excellent nutritional value as a food supplement, experts say. It’s a great source of vegetable proteins, along with fiber and healthy fats. It’s also a good source of magnesium, zinc, thiamin, folate, potassium, and phosphorus.

Wheat germ is part of a wheat kernel and is responsible for helping the plant reproduce and spawn new wheat. Although it’s removed from most processed wheat products, it is a major nutritional component of whole grain wheat.”

From thehealthsite.com “8 amazing health benefits of wheat germ:

Relieves constipation

Boosts immune system

Lowers blood sugar

If diabetics are skeptical about wheat germ, here is something to convince you otherwise. We already know that this food by product has a high content of dietary fiber. And this can help reduce postprandial blood glucose response. Making whole grains a part of your diet can even help you prevent type 2 diabetes.

Improves cardiovascular health

Reduces cancer risk

Soothes PMS symptoms and improves menstrual health

Fights obesity

Supplies your gut with prebiotics”

** Wheat Bran

According to Bob’s Red Mill “Technically speaking, the wheat kernel has three distinct parts: the germ, the bran and the endosperm. The hard exterior of the kernel is known as the wheat bran, and it is often separated from the other parts of the wheat kernel during the milling process. It’s a source of plant-based nutrients and minerals, and it has both a sweet and nutty flavor. However, wheat bran is perhaps best known as being an amazing source of fiber.”

Wheat germ, however, is richer in protein and packed with important nutrients including vitamin E, vitamin B, and fatty alcohols. In comparison, wheat bran is richer in fiber, three times that of the wheat germ and has more niacin. 

***People with diabetes can eat small amounts of molasses as part of an overall healthy diet. According to the American Diabetes Association, the amount of carbohydrate consumed has a greater impact on blood sugar than does the type of carbohydrate consumed — in this case, molasses. If you choose to consume added sugar, whether from molasses or another source, the ADA advises reducing other carbohydrates in the meal so that your total carbohydrate consumption remains in check. For example, if you plan to have a dessert made with molasses after dinner, you might omit the rice or bread from the meal.

Also, from what I have read, offsetting sugar intake with high amounts of fiber is a good plan. And this bread has tons of fiber. So, as an occasional treat, this bread should be OK.


BACON, MOZZARELLA CHEESE, AND SPINACH QUICHE IN A 100% WHOLE WHEAT PAT-A-PAN CRUST    

OK, I know I have other quiche recipes on this site, but can you really ever have too many great quiche recipes on hand? Especially recipes for quiches that are a bit healthier than some and also stinkin’ easy to prepare. I think not! Plus, contain ingredients most of us always have on hand. Because, if you are like me, sometimes I don’t have Swiss or Jarlsberg cheese in my refrigerator. But I almost always have mozzarella cheese. (You just never know when a pizza craving might hit you in the middle of the night! For that alone mozzarella cheese must always be available.)

And even though I already feature a non-rollout whole-wheat crust in my recipe for Ham, Caramelized Onion, and Swiss Cheese Quiche, the crust isn’t made with 100% whole-wheat flour. And that’s what I was looking to produce when I first thought about a new and healthier quiche recipe.

And believe me, I looked at a lot of whole-wheat pastry recipes before choosing this one to try. Some included all-purpose flour in addition to whole-wheat flour, some had added sugar, some were all olive oil or all veggie oil, others called for cold water, or melted butter, you name it. So, I finally said to heck with the recipes I could find and came up with my own version. However, I did take inspiration from the amish365.com site. I changed Kevin’s crust recipe somewhat, but his was still the closest I could find to what I had in mind. I just didn’t want to use any sugar, and I wanted to use at least some olive oil. So, I decided to use half olive oil and half veggie oil. And I have to say, this recipe made for one tasty and incredibly easy crust to prepare.

As far as the filling is concerned, it’s pretty standard except for the mozzarella cheese. I was half afraid the filling would be boring because mozzarella cheese has a blander flavor than both Swiss and Jarlsberg cheese, but that was absolutely not the case. It was perfect. A bit salty, but I reduced the salt from ½ teaspoon in my original recipe, to the “pinch” of salt you will find in the perfected recipe below.

So, all in all, I would whole heartedly recommend you make this quiche in the near future.

Well, that’s it for today. It’s predicted to be very hot today and for the next 3-4 days. So, I have already watered all the pots and water needy plants in our yard this morning. The heat pump is working away to keep our house cool, and I have left-over quiche to serve for dinner tonight. All I have to do today is make a big old green salad to accompany the quiche. I should be able to manage that, if of course I pace myself. Which believe me, I have become very accustomed to doing.

I never thought I would reach a time when my diminishing energy would be an acceptable reality. Maybe I’m finally growing up! Because, why should I still have boundless energy when my friends and relatives who are the same age as I am, are also slowing down. What kind of conceit would I have to possess that would make me think I was a human anomaly? Inconceivable conceit, that’s what! So, I am learning to be content with my many blessings. A fabulous husband, wonderful family, true friends, a lovely home, a few medical conditions that cause concern, but none that are life threatening. So, am I going to let my waning energy get me down? Hell no! I’m going to accept it as my reward for living a full and rich life!  Now, if you will excuse me, I’m going to take a much-deserved nap!

Peace and love to all.

Crust:

1½ c. stone-ground whole-wheat flour

½ tsp. kosher salt

¼ c. extra virgin olive oil

¼ c. veggie oil

3 T. milk   

Place the flour and salt in a 9-inch pie pan and mix until evenly blended.

In a measuring cup, whisk the oils and milk together until creamy.

Pour all at once over the flour mixture. Mix with a fork until the flour mixture is completely moistened.

Pat the dough with your fingers, first up the sides of the pie pan and then across the bottom. Form the dough around the rim as flat and even as possible. Prick the crust with a table fork (sides and bottom) and bake for 12 minutes in a pre-heated 425-degree oven. While the crust pre-bakes prepare the filling.

After 12 minutes, remove pie pan from oven. Reduce heat to 350-degrees. Set crust aside.  

Filling:

6 lg. eggs

1 c. half & half (or half whipping cream and half low-fat milk)

½ tsp. Dijon mustard

pinch kosher salt

freshly ground black pepper

9 strips thick meaty bacon, chopped and cooked until crisp

2 c. grated mozzarella cheese, divided

¼ c. chopped fresh chives or thinly sliced green onions

1½ c. thinly sliced baby spinach

ground nutmeg

Whisk the eggs, half & half, Dijon mustard, salt, and pepper together. Layer the cooked bacon, 1 cup of the mozzarella cheese, chives, and spinach in the partially baked pie crust.   

Carefully pour egg mixture over the layers. Sprinkle remaining 1 cup of mozzarella cheese over the egg mixture. Lightly sprinkle with ground nutmeg. Place strips of aluminum foil over the edge of the pie crust. (The edges are probably already brown from the pre-baking. You don’t want them any darker.)

Bake at 350-degrees for 40-45 mins, or until cooked all the way through. To check if the quiche is set (done), stick a toothpick into the center of the quiche. If it comes out clean, the quiche is ready to come out of the oven.

Remove from oven. Let stand for 5-10 minutes before serving.

MEDITERRANEAN BROWN BASMATI RICE SALAD

I often make extra brown rice just so that I can do something fun with it for a future meal. And the other evening was no exception. Mr. C. wanted to grill steak, so I decided to put the leftover rice waiting patiently for me to do something exciting with it, to good use. But what to do with it? Since it’s summer, I decided to use the rice in a salad. So, I went on-line looking for the perfect salad recipe that contained rice. And as luck would have it, I found this somewhat adapted recipe on the aheadofthyme.com site. I changed things up a bit because I didn’t have all the ingredients called for. I also added more olive oil to the dressing and used my already cooked brown basmati rice instead of cooking up some regular brown rice as directed in the original recipe. Which BTW, I am not going to be using from now on. (To read all about why I am going to refrain from serving regular brown rice any longer, take a quick gander at the information I provided below.) But for now, back to this salad recipe.  

First thing I need to state emphatically, is that this salad is absolutely delicious. We both loved it and it is so very easy to prepare. Plus, the salad needs to be made ahead of time to allow the flavors to get to know one another before being devoured. So, easy to prepare, should be made ahead, tastes amazing. Nothing there not to like!   

So, perfectly grilled steak and this salad made for a great meal enjoyed on our east facing outdoor table. Shade, good food, and a view of the Cascade Mountains and Port Susan Bay made for a very pleasant meal. Of course, the before dinner martini Mr. C. built me didn’t hurt either. Nor did his wine with dinner.

But the real star of the show was this salad. So, I hope you give this recipe a try. And please do read below about brown rice. I don’t know about you, but there is enough poison going around in the form of societal hate, racism, gun control issues, women’s rights pejoration, etc. without inadvertently and unknowingly adding inorganic arsenic to our diet. Just sayin’!

And just because I know you were wondering; brown basmati rice is a lot tastier than regular brown rice. And, this is important, so read carefully – in my humble opinion, brown basmati rice is a perfect replacement for plain old white rice. It is not chewy like regular brown rice. So, it can replace white rice in any of your favorite recipes and no one will be the wiser. In other words – brown basmati rice rocks!

Well, that’s all the news for today. Mr. C. has a gig in Oak Harbor on Whidbey Island this evening. As the crow flies, we are talking about 12 miles from our home. However, because of all the surrounding water, the driving distance is about 60 miles. And not a 70 mile an hour highway to be had. But it is worth the drive. Listening to great jazz (Herding Katz Jazz Nonet) with some of the best players around while eating Southern BBQ at Orlando’s. (Again, some of the best around.) Life just doesn’t get much better. Plus, it’s Friday. And even if I have been retired for 20 years, Friday night is still super special. May you too have a super Friday night. And a great weekend.

Peace and love to all.

3 T. extra virgin olive oil

2 T. fresh lemon juice, or more to taste

1 lg. clove garlic, finely minced 

¼ tsp. dried oregano

½ tsp. fine sea salt

freshly ground black pepper

2 c. cold cooked brown basmati rice (see recipe below)

2 c. baby spinach, roughly chopped  

1 c. cherry or grape tomatoes, sliced in thirds   

½ c. diced cucumber or 1 lg. rib celery, diced (or both, why not?)

¼ c. thinly sliced red onion

⅓ c. sliced kalamata olives

⅓ c. crumbled feta cheese

Whisk the olive oil, lemon juice, garlic, oregano, sea salt, and pepper together in a small bowl.

Gently stir the cooked rice, spinach, tomatoes, cucumber or celery, red onion, kalamata olives, and feta cheese together in a salad bowl. Pour on the dressing, stir gently, and refrigerate until ready to eat.

It’s best to let this salad happily sit covered in your fridge for at least 1 hour before serving. Perfect as aside dish or as the main course.  

RICE COOKER BROWN BASMATI RICE

1 c. long grain brown basmati rice*

2⅓ c. water

1 T. unsalted butter

½ tsp. kosher salt

Wash the rice to remove excess starch and use a colander to drain well. Add the rice, water, butter, and salt to the rice cooker and stir to combine. Select the brown rice setting on your rice cooker. Once finished cooking, fluff before serving.

*Brown Basmati Rice

Most types of rice, particularly white rice, have a high glycemic index. Basmati rice, however, is much lower on the scale. With a glycemic index between 50 and 58, basmati rice is a low to medium glycemic index food. If you have diabetes, small portions of basmati rice can be a part of your healthy diet.

In addition to a lower glycemic index, basmati rice contains a significant amount of fiber. A higher intake of dietary fiber can help to reduce the risk of developing Type 2 diabetes. Or if you have diabetes, when eaten in moderation, it doesn’t cause sugar spikes as much as regular white rice. In addition, the fiber in basmati rice is soluble, meaning it adds bulk and helps move waste along the digestive tract.

Eating whole grains like brown basmati rice is linked to a lower risk of heart disease. Whole grains help to reduce blood cholesterol levels. They also help to reduce the risk of high blood pressure, a risk factor for heart disease.

While both white and brown versions of basmati rice provide vital nutrients, brown basmati rice contains more fiber, phosphorus, zinc, and B vitamins. Brown basmati rice is also lower on the glycemic index. Brown basmati rice from California is also the lowest in arsenic. Arsenic?

Arsenic in Brown Rice

According to consumer Reports “Brown rice has 80 percent more inorganic arsenic on average than white rice of the same type. Arsenic accumulates in the grain’s outer layers, which are removed to make white rice. Brown basmati from California, India, or Pakistan is the best choice; it has about a third less inorganic arsenic than other brown rice.

Rice that’s grown organically takes up arsenic the same way conventional rice does, so don’t rely on organic to have less arsenic.”


CREAMY POLENTA WITH CREAM CHEESE

Sometimes, what you really need for a main dish that is plenty flavorful, but really needs to be served on a bed of something fairly innocuous, is a dish like this creamy polenta. So, this is possibly the recipe you have needed all your life too without knowing how much you needed it! That is, if you are anything like me.

Because, until recently, I tended to be the kind of cook who often got carried away with too much flavor or richness. Fortunately, I have realized the error of my ways, even if it has come a bit late in my cooking career. Take last night for an example of holding back on flavor and richness for the betterment of the finished product.

Jim and Margo were coming to dinner to help us celebrate the 14th anniversary of moving into our home here on Camano Island. And because they had been with us all that move-in day, Jim cooking dinner, and Margo helping daughter Paula put things away in the kitchen, I decided that fixing dinner for them was absolutely called for. Plus, we wanted to see them anyway.

As I was planning the menu, I realized that Parmesan cheese was already going to be used in both the salad (Italian Salad) and as a garnish for the Chicken Cacciatore with Parmesan Polenta. So, to prove an old cook can learn new tricks, I decided not to use Parmesan in the polenta. But how to make it flavorful enough, while possibly skimming off a few calories, but still providing a creamy, tasty base for the chicken.

I had read somewhere that cream cheese would work well in polenta. So, I took my regular recipe, used water instead of milk, lowered the butter by 1 tablespoon, and used half a package of cream cheese in place of the Parmesan. And I was really pleased with the result. Creamy to the max. And delicious without adding more richness or flavor to the already very savory sauce that surrounds the chicken pieces. So, all in all a screaming success if I say so myself!

So, next time you are in a quandary about what to use for a base or side dish instead of pasta or mashed potatoes, give this simple to prepare polenta recipe a try.

Well, it’s sunny and beautiful here in the northwestern part of Washington. Mt. Baker appears to be happily basking in the sun surrounded by a few puffy white clouds who have obviously come to show their respect for this most glorious stratovolcano. Port Susan Bay is so calm it looks like a sheet of light blue glass. Our yard is full of happy looking plants, many of which are in bloom, and I have leftovers to serve for dinner tonight. This is what I define as a perfect day.

May you too have a perfect day. And as always, peace and love to all.

4 c. water

1 tsp. kosher salt

tiny pinch white pepper or freshly ground black pepper

1 c. yellow polenta (not instant) 

2 T. unsalted butter

4 oz. (½ pkg.) low fat, Neufchatel, or regular cream cheese

Heat salted water to a boil in a heavy, covered 2 or 3-quart pan. Slowly whisk the polenta into the boiling water to prevent any lumps from forming.

Lower the heat to a very low simmer and add the pepper. Continue to whisk the polenta until it starts to thicken. Then cover the pan and let the polenta cook for 25 minutes. Stir occasionally with a wooden spoon so that the polenta doesn’t stick to the bottom of the pan. The polenta should be soft and tender when done. If not, let it cook a little longer.

Stir in the butter and cream cheese. Taste and add more salt if necessary.

SOURDOUGH RYE BREAD (added yeast)  

In my quest to eat healthier and stay away from white flour and sugar, I have been doing pretty well. But the main thing I miss is not sweets, it’s bread. Good old fashioned homemade bread. You know, the kind that smells wonderful as it’s baking and tastes even better when slathered in room temperature butter. Bread is totally my downfall. I simply must have bread in my life. So, after doing more research than I care to admit to, I have come to the conclusion that no two diabetic experts agree on mostly anything! Every article I read is a contradiction. Some experts say you can eat this or that, and the next article I read says just the opposite. Although almost every article I read says I can continue to eat leafy greens, fatty fish, eggs, Greek yogurt, nuts, and olive oil. Great! I love them all. But they aren’t bread!

However, another type of edible most articles reference as being good for diabetics are under the classification – whole grain. So, to my thinking, that means that stone-ground whole grain flours (oat, wheat, rye) should be OK. So, I’m going with that.

Now you realize, I am not going to sit down and eat a half loaf and think that’s OK. That would be ridiculous. But a piece of whole grain toast in the morning along with my eggs, homemade granola (lots of oats, nuts, seeds, dried fruit, etc.), fresh fruit, and Greek yogurt should be just fine.

So, as I work out new bread recipes like this one, I will keep you posted. And since I let my old sourdough starter die an honorable death a few months ago, I decided to start a new one without even a teaspoon of white flour to its name. I plan to use this sourdough starter using rye flour in all my future sourdough bread recipes.

And if it gives my other recipes as wonderful and tangy a sourdough flavor as it did with this recipe, I may give up writing this lucrative food blog and start my own bakery. Because this bread is absolutely delicious with all the tang we all so desperately need in our lives. (It must be that the local bacteria are especially fond of rye flour.) Who knows, and more importantly, who cares? It works, that all that matters.

Well, that’s it for now. It’s sunny and warm here on the island. With just enough breeze to allow us to sit outside. Which is just exactly what Mr. C. is doing. I plan to join him shortly.

Peace and love and happy summer to all.

Mr. C. enjoying our courtyard in the late afternoon sun (and shade).

1 c. rye sourdough starter, room temperature (see recipe for rye starter below)

1½ c. stone-ground dark rye flour  

1 c. slightly warm water

2 tsp. active dry yeast

1½ – 2 c. stone-ground whole-wheat flour

1½ tsp. kosher salt

2 T. honey

olive oil

Day 1:

Combine room temperature starter, rye flour, and water in the bowl of your stand mixer. Cover with plastic wrap and let stand on your counter overnight.

Day 2:

Add the active dry yeast, one cup of the whole wheat flour, salt, and honey to the bowl and using your dough hook, beat the mixture until the dough comes together. Knead for several minutes until the dough is smooth and springy. Add the rest of the whole wheat flour, a tablespoon or two at a time during the kneading process as necessary to reduce excess stickiness. However, this dough should remain somewhat tacky. There should be a bit of the dough that wants to stick to the bottom of the bowl.  

Pour a little oil over the dough, the using your hands and a stiff rubber spatula, roll the dough into a lightly greased ball. Cover with plastic wrap and let rise about 60-90 minutes in a warm place or until doubled in size. (When you think it has risen enough, use your finger to make a small dent in the dough near the side of the bowl. If the dent remains, the bread is ready for Baking Option 1 or 2.)

Baking option 1: Baking your bread on a baking stone or greased baking sheet

Punch down dough to release air; shape into a round loaf (boule) or an oval (batard). Place on a baking stone lightly sprinkled with flour or cornmeal or a greased baking sheet. Lightly cover with a tea towel and allow to rise about 30 minutes until almost doubled.

When ready to bake, cut 2-3 deep slashes on top of loaf. Let sit for 5 minutes, then lightly mist with water. Bake in a pre-heated 425 oven for 10 minutes. Reduce the oven heat to 400 degrees and bake another 20-25 minutes or until loaf is browned and sounds hollow when tapped on the bottom. The internal temperature of the bread should be about 205 degrees before it is removed from the oven. Let cool completely on a wire rack before slicing.

Baking option 2: Baking your bread in a clay baker (Cloche) or Dutch oven  

Punch down dough to release air; shape into a round loaf (boule) and place on a rectangle of parchment paper. Lightly cover with a tea towel and allow to rise about 30 minutes until almost doubled.  

Meanwhile pre-heat your oven to 425 degrees with your clay baker or Dutch oven inside. You want to heat the clay baker or Dutch oven as the oven heats. 

When ready to bake, cut 2-4 deep slashes on top of boule. Let sit for 5 minutes. Carefully remove the clay baker or Dutch oven from your oven and take the lid off. Gently pick up the dough using the corners of the parchment paper. Lower the dough onto the clay baker or into the Dutch oven and replace the hot lid. Place in the oven and bake covered for 25 minutes. (I have found that if I use my clay baker, I first set it on a baking pan. It is much easier and safer to lift in and out of the oven, rather than just lifting the clay baker itself. You don’t have to do it my way, but it works well for me.) (For this recipe, I actually prefer my clay baker over my Dutch oven because the bottom doesn’t get as dark when baked on the clay baker.)

After 25 minutes carefully remove the lid and continue baking for about 15 more minutes. The internal temperature should be about 205 degrees when the bread is removed from the oven.

Carefully lift the bread off of the clay baker or out of the Dutch oven. Place on a wire rack and let cool completely before slicing.

RYE FLOUR SOURDOUGH STARTER

1½ c. water

2½ tsp. active dry yeast

2 c. rye flour

In a large glass container, dissolve the yeast in warm water. Let stand 5 minutes. Add the rye flour; stir. Cover loosely with plastic wrap. Let stand in warm place for 2 to 3 days. Stir twice each day.

The starter can be used for baking at this point or placed in the refrigerator for later use.

To use the starter, measure out desired amounts as specified in the recipe. Let refrigerated starter come to room temperature before using; this will take about 4 hours.

Replenish remaining starter with 3 parts rye flour to 2 parts water and 1 teaspoon sugar. Stir until blended. Some lumps may remain.

Cover loosely and let stand in warm place for 10 to 12 hours or overnight. Stir and store in refrigerator. If the starter is not used every week, stir in 1 teaspoon sugar to keep it active. Or replace used starter with equal parts rye flour, water, and a pinch of sugar.

Please note: This starter is a lot thicker than most sourdough starters. So, don’t be surprised if you don’t need quite as much flour as directed in other recipes.


LASAGNE SOUP

Of course, I know it’s technically summer. And finally, and I do mean FINALLY it appears that summer has landed here in the beautiful northwestern part of the great state of Washington. The fact of which I am quite sure my outdoor potted plants will readily attest. (They were really thirsty when I watered them yesterday morning. To the extent that a couple were drooping from lack of turgor pressure.)

Your botany lesson (reminder) for today:  Turgor pressure – the pressure exerted by fluid in a cell that presses the cell membrane against the cell wall. Turgor is what makes living plant tissue rigid. Loss of turgor, resulting from the loss of water from plant cells, causes flowers and leaves to wilt. (Actually, turgor pressure is one of the only things I remember from the college freshman botany class I took in 1962. That and the difference between herbaceous and woody plants. And only then because my lab partner and I gave each other the nicknames “Herby” and “Woody”. But I digress….

Anyway, I served this terrific soup last evening for dinner. Even though the temperature had been in the mid-eighties. Because, basically, I enjoy a good soup year-round. And this, dear friends, is a very good soup. And let me tell you right here and now, that compared with making lasagna from scratch, this dish is a snap to prepare.

I can’t tell you how many times over the years, I have finished making lasagna and swearing never to do it again. And then several months later, forgetting the time involved, end up vowing to not make the same mistake again. Basically, I have been repeating this process for decades now. And yes, you would think the girl could learn. But apparently not! (At least now, I have a reasonable alternative that tastes divine and only takes about a fourth of the time to assemble.)

Now don’t get me wrong. I still love lasagna in all it’s iterations. And because I do love this quint essential Italian dish, I plan to develop other soups that include the basic ingredients from my favorite lasagna recipes. (Roasted Mushroom Lasagna with Béchamel Sauce immediately comes to mind.)

So, a big thank you to Lauren from the tastsbetterfromscratch.com site for the bones of this recipe. I changed her recipe dramatically, but the basic premise is all Laurens.

Well, that’s it for today. You’ve had your botany lesson for today and been provided with a simple recipe for a great soup that I know your entire family will enjoy. Hopefully your day will be wonderful, productive, and bring you pleasure.

If you are like most people, life can get in the way of taking care of yourself. This is something I have only come to realize as I’ve gotten older. Before it was rush, rush, rush to make everyone’s life around me perfect. Nothing is perfect, no matter how hard we as cooks and care givers try to make it so. But when we take good care of ourselves, we have a basis for taking good care of others. Taking care of ourselves should always be a top priority. (Well, that and having fun in our kitchens.)  

Peace and love to all.

1 c. cottage cheese (run through your food processor to make it smooth)

1 c. grated mozzarella cheese

¾ c. freshly grated Parmesan cheese

½ c. roughly chopped fresh basil

1 lb. lean ground beef

1 lb. bulk Italian sausage

1 lg. yellow onion, chopped

5 garlic cloves, finely minced

1 (28-oz.) can tomatoes (preferably Italian)

2 T. tomato paste

6 c. water

1 T. beef base (I use Better Than Bouillon Beef base)  

½ tsp. kosher salt

freshly ground black pepper

2 bay leaves

¼ tsp. crushed red pepper flakes

1 tsp. Italian seasoning 

2 tsp. dried oregano leaves

1 tsp. dried basil

1 tsp. fennel seed

1-2 Parmesan rinds, opt.

4-6 lasagna noodles, broken into small bite sized pieces

3 c. roughly chopped baby spinach leaves 

In a small bowl, stir the processed cottage cheese, mozzarella, Parmesan, and basil together. Set aside.

In a large heavy covered pot over medium-high heat, cook ground beef and sausage until browned. Remove meat from the pot and drain as much grease off as possible. Set meat aside.

In the same pot, add the diced onion and sauté for about 5 minutes, stirring occasionally. Add the minced garlic and cook for another minute.

Stir in the canned tomatoes (plus juice), tomato paste, water, beef base, salt, pepper, bay leaves, crushed red pepper flakes, Italian seasoning, oregano, dried basil, fennel seed, and Parmesan rinds.

Bring to boil, then reduce heat, cover and simmer gently for about 40 minutes. Stir occasionally. After about 40 minutes, remove the bay leaves and Parmesan rind(s), taste and adjust seasoning before increasing heat and adding the broken lasagna noodles. Cook, stirring occasionally, until noodles are al dente.  

Add the spinach and cooked meat. Cook for about 2 minutes, or until the spinach is wilted and the meat is hot.

Ladle the hot soup into bowls and dollop a scoop of the cheese mixture on top.  

CREAMY SMOKED SALMON LINGUINE WITH SPINACH  

OK, OK, this is not a low-calorie dish. And you know I am really trying to be good. But when a friend gifts you with homemade smoked salmon, like our good friend Jamie did lately, you almost owe it to yourself, and your benefactor of course, to do something special with it. So, that’s just exactly what I did. And really, how can you possibly go wrong with a butter, cream, and lemon sauce? It really isn’t possible. And since we have chives coming out of our ears, why not throw some of them in too? And is there ever a time when a tiny pinch of crushed red pepper flakes and freshly ground black pepper isn’t perfect for that subtle taste of spice that most of us hold dear? Of course not! But then, what pasta shape to use? Well, for this dish, I decided linguini would be perfect. And you know what? It was.

And since everything about this pasta dish screamed high fat and high calorie, I decided to give a nod to healthy by adding some fresh spinach. And what a good idea if I do say so myself. It gave the dish a bit of color and in no way detracted from the wonderful flavor of the dish. In fact, it added another flavor dimension that was quite delicious.

Now if you are the kind of person who likes to prepare dishes that take hours to build, you are not going to appreciate this dish. The flavor yes, but not the short bit of time it takes to prepare. Because this dish is truly fast and easy to make. Perfect for after work or for someone who just isn’t in the mood to spend a lot of time in the kitchen. Add a simple salad as a side, and dinner is on the table before you know what hit you!

So, if you too are a pasta lover, and like me, think that smoked salmon is proof positive that there is a God, then this is the dish for you. So easy to prepare and definitely company worthy. Suffice it to say, Mr. C. couldn’t stop eating the pasta until it was all gone. He even scraped the pot so that no remnant of the sauce remained in the pan. Since he does the dinner dishes, he could almost have put the pan away unwashed. Almost!

Well, this is going to be a lazy day for me. Mr. C. has a gig this evening so he will be away at dinner time. So, I am going to fry me up some zucchini (find my recipe for Fried Zucchini on this site) and pig out all by myself. Then I’m going to hunker down with a book by a new author to me that I was introduced to by my sister-in-law Katie. I had never heard of Peter Swanson. But after just reading a few chapters last evening, I’m hooked. The book is entitled Nine Lives. Interesting premise, and the writing is great. So, if you’ll excuse me, I need to find out “who done it”!

Thank you again Jamie for the smoked salmon. It was “heavenly”.

Peace and love to all.

3 T. unsalted butter

zest of 1 lemon

Juice of 1 lemon

freshly ground black pepper

tiniest pinch crushed red pepper flakes

2 T. minced fresh chives  

½ c. heavy cream

¼ c. milk

4-6 oz. smoked salmon, cut into small chunks

6 oz. linguine or fettuccini, cooked al dente (reserve some of the cooking water)

2 lg. handfuls roughly chopped fresh baby spinach

pasta water, if needed

Melt the butter in a large skillet over medium heat. Add the lemon zest, lemon juice, black pepper, crushed red pepper flakes, and half of the chives. Cook for a couple minutes, stirring occasionally. Stir in the cream and milk. Simmer over low heat for about 5 minutes as the sauce begins to thicken.

Stir the smoked salmon, al dente drained pasta, and spinach into the cream mixture. Cook for a few minutes, tossing to coat. Taste for seasoning.

If the sauce looks a too dry, add some of the pasta water, a tablespoon or two at a time until the sauce is very creamy.

Serve immediately, topped with the remaining chives.


GF OATMEAL COOKIES WITH DRIED CHERRIES AND TOASTED SLIVERED ALMONDS

Now, Mr. C. and I are not always going to agree on the relative merits of a new food item I make. Like this cookie, for example. He prefers a lighter cookie when almond flavoring is involved. Me, I think this cookie, based on a recipe I found on the flavourandsavour.com site, is perfect. Plus, it’s a cookie I can eat. (This may have something to do with my finding nothing about this cookie I don’t like.)

Now this isn’t to say that Mr. C. doesn’t like these cookies. He would just prefer them to be shortbread. But as he is quickly finding out, I am going to keep experimenting with healthier cookie recipes that I can enjoy on occasion. And not feel totally guilty about. And then feel good about sharing the ones that work with all of you.

Because even if you aren’t restricting sugar and white flour from your diet, you probably still want to eat healthier just for the sake of eating healthier. And starting out before it becomes mandatory is a really good idea. (Wish I’d have thought of it sooner!)   

The funny thing about my new passion to create healthier cookies, is that I’ve never had a sweet tooth. Until now I rarely ate more than one cookie from even a double batch. But now that I shouldn’t have any cookies, I can’t seem to think about anything else. Now I ask you, is that fair? Of course, it isn’t. Never-the-less, this is my new reality. Grrrrr

So, if you too are being careful about the ingredients you put into your body, this is a good cookie recipe for you. Especially if you are diabetic. Or require a cookie that is gluten free. Whatever! Just make the darn cookies. They are really, really good.

Well, that’s all for today. It’s cloudy outside, but it’s not raining. So, the courtyard and kitchen doors are both open and I can hear the birds singing. Of course, this often drives our poor cats crazy, but today they are in hiding. Andy’s sister Katie and her husband Rick are visiting. And although they have been here many times, our scaredy cats are mainly residing in our bedroom closet. They will periodically show their faces, but only when both Mr. C. and I are in the living room with our guests. Go figure! But what a joy to have Rick and Katie visit. It’s so lovely when your relatives are also close friends.

So, as always, have fun in your kitchen, never hesitate to play with your food, and stay positive. Staying positive is my new prime directive. So, I thought I might remind you to do the same.

Peace, Love, and Understanding to all.

This is a short story about Nick Lowe’s song (What’s So Funny ‘Bout) Peace, Love, and Understanding that I found on the americansongwriter.com site.

“There are some songs that we wish weren’t still relevant, but we’re nonetheless grateful for their existence and the pure catharsis of the truths that they speak. Certainly, if most of us had our druthers, “(What’s So Funny ‘Bout) Peace, Love, And Understanding” would now sound hopelessly dated, as if it were the relic of another time. Instead the song, written by Nick Lowe in 1974 and performed by his band Brinsley Schwarz, is as timely as it’s ever been, its searching questions begging for answers now more than ever.

As Lowe told the A.V. Club in 2011, he originally intended the song to be tongue-in-cheek, only to rethink the tone along the way. “I wrote the song in 1973, and the hippie thing was going out, and everyone was starting to take harder drugs and rediscover drink,” he said. “Alcohol was coming back, and everyone sort of slipped out of the hippie dream and into a more cynical and more unpleasant frame of mind. And this song was supposed to be an old hippie, laughed at by the new thinking, saying to these new smarty-pants types, ‘Look, you think you got it all going on. You can laugh at me, but all I’m saying is ‘What’s so funny about peace, love, and understanding?’ And that was the idea of the song. But I think as I started writing it, something told me it was too good of an idea to make it into a joke. It was originally supposed to be a joke song, but something told me there was a little grain of wisdom in this thing, and not to mess it up.”

Adorned with Who-style power chords and Beach Boys-flavored harmonies, Brinsley Schwarz’s take on the song charges full-on into the breach even as Lowe begs us to stop and consider his pleas. His narrator attempts to navigate “this wicked world” and “searches for light in the darkness of insanity.” He admits that despair is never too far removed: “My spirit gets so downhearted sometimes.”

“Is all hope lost?” he wonders, and he laments about the ubiquity of “pain, hatred and misery.” Yet he suggests that the only way out of this malaise is vigilance, the kind that constantly presses and pushes for something better than the status quo, which he expresses via a series of queries: “So where are the strong? And who are the trusted? And where is the harmony?”

By keeping any kind of specifics out of his tale, Lowe ensured that his song would resonate in times of worldly turmoil or personal angst. It all builds to the scorching common sense of the refrain: “And each time I feel it slipping away, it just makes me want to cry. What’s so funny about peace, love, and understanding.”

Elvis Costello’s 1978 hard-charging, heart-on-sleeve version of the song, which was produced by Lowe, brought it to a wider audience and became one of Costello’s best-known recordings. Lowe, however, probably preferred the 1992 version by Curtis Stigers. Why? Because it appeared on the multi-platinum soundtrack to The Bodyguard, thus producing a royalties windfall for the writer.

In any case, “(What’s So Funny ‘Bout) Peace, Love, And Understanding” endures. Hopefully we’ll reach a day where we can appreciate the song based on its artistic merits alone and not because the title sounds like it could be the headline of an editorial in this morning’s newspaper rather than the lament of a songwriter written fortysomething years ago.”

The lyrics to (What’s So Funny ‘Bout) Peace, Love, And Understanding:

As I walk through this wicked world
Searchin’ for light in the darkness of insanity
I ask myself, is all hope lost?
Is there only pain and hatred, and misery?

And each time I feel like this inside
There’s one thing I wanna know
What’s so funny ’bout peace, love and understanding? Oh
What’s so funny ’bout peace love and understanding?

And as I walked on
Through troubled times
My spirit gets so downhearted sometimes
So where are the strong

And who are the trusted?
And where is the harmony?
Sweet harmony

‘Cause each time I feel it slippin’ away, just makes me wanna cry
What’s so funny ’bout peace, love and understanding? Oh
What’s so funny ’bout peace, love and understanding?

So where are the strong?
And who are the trusted?
And where is the harmony?
Sweet harmony

‘Cause each time I feel it slippin’ away, just makes me wanna cry
What’s so funny ’bout peace, love and understanding? Oh
What’s so funny ’bout peace, love and understanding?

The recipe for this cookie:

½ c. (1 stick) unsalted butter, room temperature

½ c. coconut palm sugar*

½ tsp. pure almond extract

1 lg. egg, room temperature

1¼ c. oat flour, certified gluten-free, if necessary

½ tsp. baking soda

½ tsp. kosher salt

½ c. chopped dried cherries

1½ c. rolled oats, certified gluten-free, if necessary

½ c. toasted slivered almonds  

Line 1 medium sized baking sheet with parchment paper. (The baking sheet should be small enough to fit in your refrigerator.)

Cream the butter and sugar together with an electric mixture until fluffy. Add the almond extract and egg; beat until smooth.

In a separate bowl, whisk the oat flour, baking soda, and salt together. Add the chopped dried cherries and using your hand(s), stir the cherries into the flour mixture. As you stir them in, try to break the cherry bits up as much as possible so that each little bit is covered with flour. Then stir in the rolled oats and toasted slivered almonds. Add the dry ingredients to the butter mixture and beat only until blended. Do not over mix.

Using a #60 (1 tablespoon) ice cream scoop, drop balls of dough on the prepared cookie sheet. Flatten slightly. (They can be close together at this point. They will need more room in between when you bake them off.) Refrigerate the dough for at least 4 hours, but 24 hours is better.

Line a larger baking sheet with parchment paper. Place the balls right out of the refrigerator at least 1-inch apart on the pan. They aren’t really going to spread out very much. But they still need to have a bit of breathing room.

Pop them immediately into a pre-heated 350-degree oven for about 11 minutes or until lightly golden brown. Do not overbake.

Remove from oven and let sit on the baking sheet for 5 minutes before transferring to a wire rack to cool completely. Store in an airtight container. 

*Coconut Palm Sugar has a lower glycemic index than regular sugar, so it won’t spike your blood sugar in the same way. Coconut sugar tastes like caramel infused brown sugar. (Not a bad combination.) It is more grainy than brown sugar, however. So, it really works best in recipes that already offer a lot of texture. So, as in this cookie recipe with oats, dried cherries, and slivered almonds, it is perfect.  

BAKED ITALIAN SAUSAGE MEATBALLS

Yesterday when I asked Mr. C. what he would like for dinner, he gave not a moment’s hesitation before uttering those three little words I love to hear. Spaghetti and meatballs. Now you have to admit, those are three words that can almost always elicit a positive response from everyone. Because who doesn’t love spaghetti and meatballs? Right?? So, with no hesitation on my part, I said – “your wish is my command, or words to that effect”. Anyway, I got right on it.

But always being one to change things up a bit, I decided to make the meatballs using only bulk Italian sausage rather than my usual half and half ground beef and sausage. But stay with my no fail, always delicious, stinkin’ easy to build, why mess with perfection, favorite Marinara Sauce recipe. (See recipe below.) So, that’s just what I did. And there was much rejoicing at our dinner table last evening.

So, it you too are a spaghetti and meatballs fan, and who in their right mind isn’t, give this quick and easy recipe a try. No fancy ingredients, not a lot of fuss and bother to prepare, and a dish that is sure to please everyone in your family.

Well, today is the 4th of July. And I wish I could say that I was looking forward to all the fireworks. But I just can’t get into a celebratory mood this year. I guess I am finally coming to the realization that as a liberal, I am quickly becoming part of the minority. Or so it seems. And even if liberal leaning is still embraced by the majority of our citizens, some conservative politicians and their followers/appointees are making changes regardless of who or what gets hurt in the process. Women’s rights, our environment, deaths by unlimited numbers and types of guns, etc. etc.

So, I am staying home tonight and celebrating in my own way. I’m going to think about the wonderful life I have been blessed with thus far. I am going to remember the friends and family members who are no longer living. And I am going to pray that our nation can once again be represented by people who uphold the constitution and everything it has always stood for. Imperfections notwithstanding!

And lest any of us have forgotten why we even have a constitution, and why we should fight diligently to keep our constitution alive, I will leave you with our constitutions Preamble:

“We the People of the United States, in Order to form a more perfect Union, establish Justice, insure domestic Tranquility, provide for the common defence, promote the general Welfare, and secure the Blessings of Liberty to ourselves and our Posterity, do ordain and establish this Constitution for the United States of America.”

Peace and love to all.

1 lg. egg

1 T. milk

1 lg. clove garlic, finely minced

¼ tsp. fennel seed

tiny pinch crushed red pepper flakes

freshly ground black pepper

¼ c. rolled oats

½ c. finely grated Parmesan cheese

1 lb. bulk Italian sausage

Lightly grease a low sided baking sheet.

In a large bowl stir the egg, milk, garlic, fennel seed, crushed red pepper flakes, and black pepper together. Add the rolled oats and Parmesan cheese. Mix well. Add the sausage and mix until well blended. 

Using a #60 (1 tablespoon) ice cream scoop, plop the meatballs onto the prepared baking sheet. If you don’t have an ice cream scoop, use your hands to form balls.    

Bake in a pre-heated 400-degree oven for 15 minutes. Remove from oven and drop into your favorite marinara sauce or soup just before serving. If you don’t have a favorite marinara sauce or Italian meatball soup recipe, my recipes for both are provided below.     

MARINARA SAUCE

3 T. extra-virgin olive oil

1 c. chopped onion

4 cloves garlic, chopped

2 (28-oz.) cans chopped, whole, or diced tomatoes (Italian tomatoes preferably)

2 bay leaves

pinch crushed red pepper flakes

2 tsp. dried oregano (I use Mexican dried oregano)

1 tsp. kosher salt

freshly ground black pepper

½ c. loosely packed chopped fresh basil leaves

1-2 T. butter, opt.

In a large, covered saucepan, heat the oil over medium heat. Add the onion and sauté until soft and translucent, about 6 minutes. Stir in the garlic and cook for an additional minute. Add the tomatoes, bay leaves, red pepper flakes, oregano, salt, and pepper. Stir to combine ingredients.

Bring to a boil, reduce heat, cover, and simmer for about 30 minutes. (Take the lid off part way if the sauce is thinner than you prefer. As the sauce gently burbles away, it will thicken quickly. So, keep a close eye on it as it reaches your desired thickness.)

Remove from heat, discard bay leaves, add the basil, and adjust seasoning. If the sauce tastes acidic, add butter 1 tablespoon at a time to round out the flavor.  

ITALIAN MEATBALL SOUP

2 tsp. extra virgin olive oil

½ c. diced onion   

2 carrots, thinly sliced

2 stalks celery, thinly sliced

2 garlic cloves, finely minced

½ c. dry red wine (I use Gallo Hearty Burgundy)

4 c. beef broth, or more if the soup appears too thick      

¼ tsp. kosher salt

freshly ground black pepper

1 bay leaf

1 tsp. dried Italian seasoning

½ tsp. dried basil

pinch crushed red pepper flakes

1 tsp. Worcestershire sauce

1 (14.5 oz.) can diced tomatoes (preferably Italian)  

4 T. tomato paste, again preferably Italian

meatballs

1 c. dry macaroni

2 T. chopped parsley

grated Parmesan cheese, for serving (or Pecorino Romano or Asiago)

Heat oil in a medium sized covered pan. Add the onion, carrots, and celery. Cook until the onion is translucent. Add the garlic and cook for 1 minute. Pour in the red wine and cook until almost all the liquid is evaporated. Add the beef broth, salt, pepper, bay leaf, Italian seasoning, dried basil, crushed red pepper flakes, Worcestershire sauce, canned tomatoes (don’t drain), and tomato paste.

Bring to a boil, reduce heat, cover pan, and simmer gently for 30 minutes. Stir periodically. After the soup has simmered for 30 minutes, taste and adjust seasoning (may need more salt).

Add meatballs and dry pasta, and simmer for about 10 minutes or until the macaroni is al dente. Add parsley. Serve piping hot. Pass the grated Parmesan cheese.  


OLD FASHIONED BAKING POWDER BISCUITS WITH RYE FLOUR

I found the bones of this recipe on the food.com site. I modified the recipe by replacing shortening with unsalted butter and used buttermilk instead of milk. The reason I made the changes is because I grew up on a farm which included a couple of milk cows. My grandmother churned our butter and therefore we had both fabulous unsalted butter and buttermilk in abundance. So, that’s what I watched being used in biscuits by both my mom and my grandmother when I was a child.

The original recipe for rye biscuits posted on the food.com site by Chocolatl first appeared in print in 1908. Chocolatl writes “This is one of a number of historical recipes I am posting from my cookbook collection. This recipe is adapted from the Rumford Complete Cookbook. At the time this recipe was first published, ovens did not have heat regulators, so recipes specified only “hot,” “moderate” or “slow/cool” temperatures. This recipe is also unusual in that it calls for a small egg. Rumford Baking Powder is still being made, by the same company that makes Clabber Girl.”

Since lard was the most common form of shortening until around 1911, I would have thought lard would have been called for in the original recipe. And I’m sure lard would be great in this recipe, but I don’t always have lard on hand. And I’m willing to bet you don’t either.

So, I question the use of “shortening” and “regular milk” in the original recipe. Plus, if you churned your own butter, like many women did in 1908, I bet using the buttermilk to make biscuits was a great way of getting rid of it. I know we always had a small pitcher of buttermilk in our refrigerator. And none of us kids were eager to drink it. In fact, we wouldn’t touch the stuff! So, let there be buttermilk biscuits. (We ate a lot of baking powder biscuits when I was a kid.) (I am not complaining!)

OK, I’ve told you about the ingredients, and why I made the changes I did, now I need to tell you how amazingly easy these biscuits are to prepare, and how fantastic they taste. They are one of the best tasting biscuits I have ever eaten. And they use whole grain rye flour, only a small amount of fat, and absolutely no sugar. Praise God!

For more information about rye flour, see below.

So, if you too love biscuits and are trying to stay away from white flour, sugar, and a lot of fat, these are the biscuits for you. And just so you know, these biscuits are great warmed up and served alongside your breakfast bacon and eggs.

As always, peace and love to all.

2 c. whole grain rye flour – I use Bluebird Grain Farms (Winthrop, Washington) organic Heritage Rye Flour   

½ tsp. kosher salt

4 tsp. baking powder

2 T. cold unsalted butter, cut into tiny pieces

1 sm. egg

¾ c. buttermilk

Whisk the flour, baking powder, and salt together. Add the butter and “mix” it in by pinching the small butter pieces between your fingers until most of the butter is smushed into the flour. (Or until you can’t stand playing with your food any longer!)

Whisk the egg and buttermilk together then pour it over the flour mixture. Mix just until combined.

Roll out on a lightly floured board and cut into 8-10 biscuit shapes. Place on a lightly greased baking sheet. Or do what I do. Using a #16 (scant ¼ cup) ice cream scoop, drop level balls of dough on your lightly greased baking sheet. (You should get 10 balls.) Then using a small water glass dipped in a bit of flour, flatten the biscuits slightly.

Bake in a pre-heated 425-degree oven until the bottom of each biscuit is nicely browned, about 15 minutes. Don’t over-bake. Remove from oven and transfer to a wire rack.

Great right out of the oven or lightly warmed in your microwave or toaster oven. Perfect spread with butter and jam or my personal favorite – peanut butter.

The benefits of using rye flour (besides the flavor of course)

Rye contains a myriad of core vitamins and minerals such as potassium and manganese. Moreover, rye has a lower gluten content than wheat, which makes baked goods containing rye flour ideal for those who want to lower the gluten content in the baked goods they consume. In addition, products made with rye flour also make you feel fuller and have less of an impact on blood sugar levels than when white flour is used.

For example, rye bread has a lower glycemic index (48) than wheat bread (70). As you know, the lower the index, the better it is for your health. Because, after the consumption of lower glycemic index food, there is less of a chance of a rapid increase in your blood glucose level. This is especially beneficial for diabetic and obese individuals.