GANACHE FILLED SHORTBREAD SANDWICH COOKIES

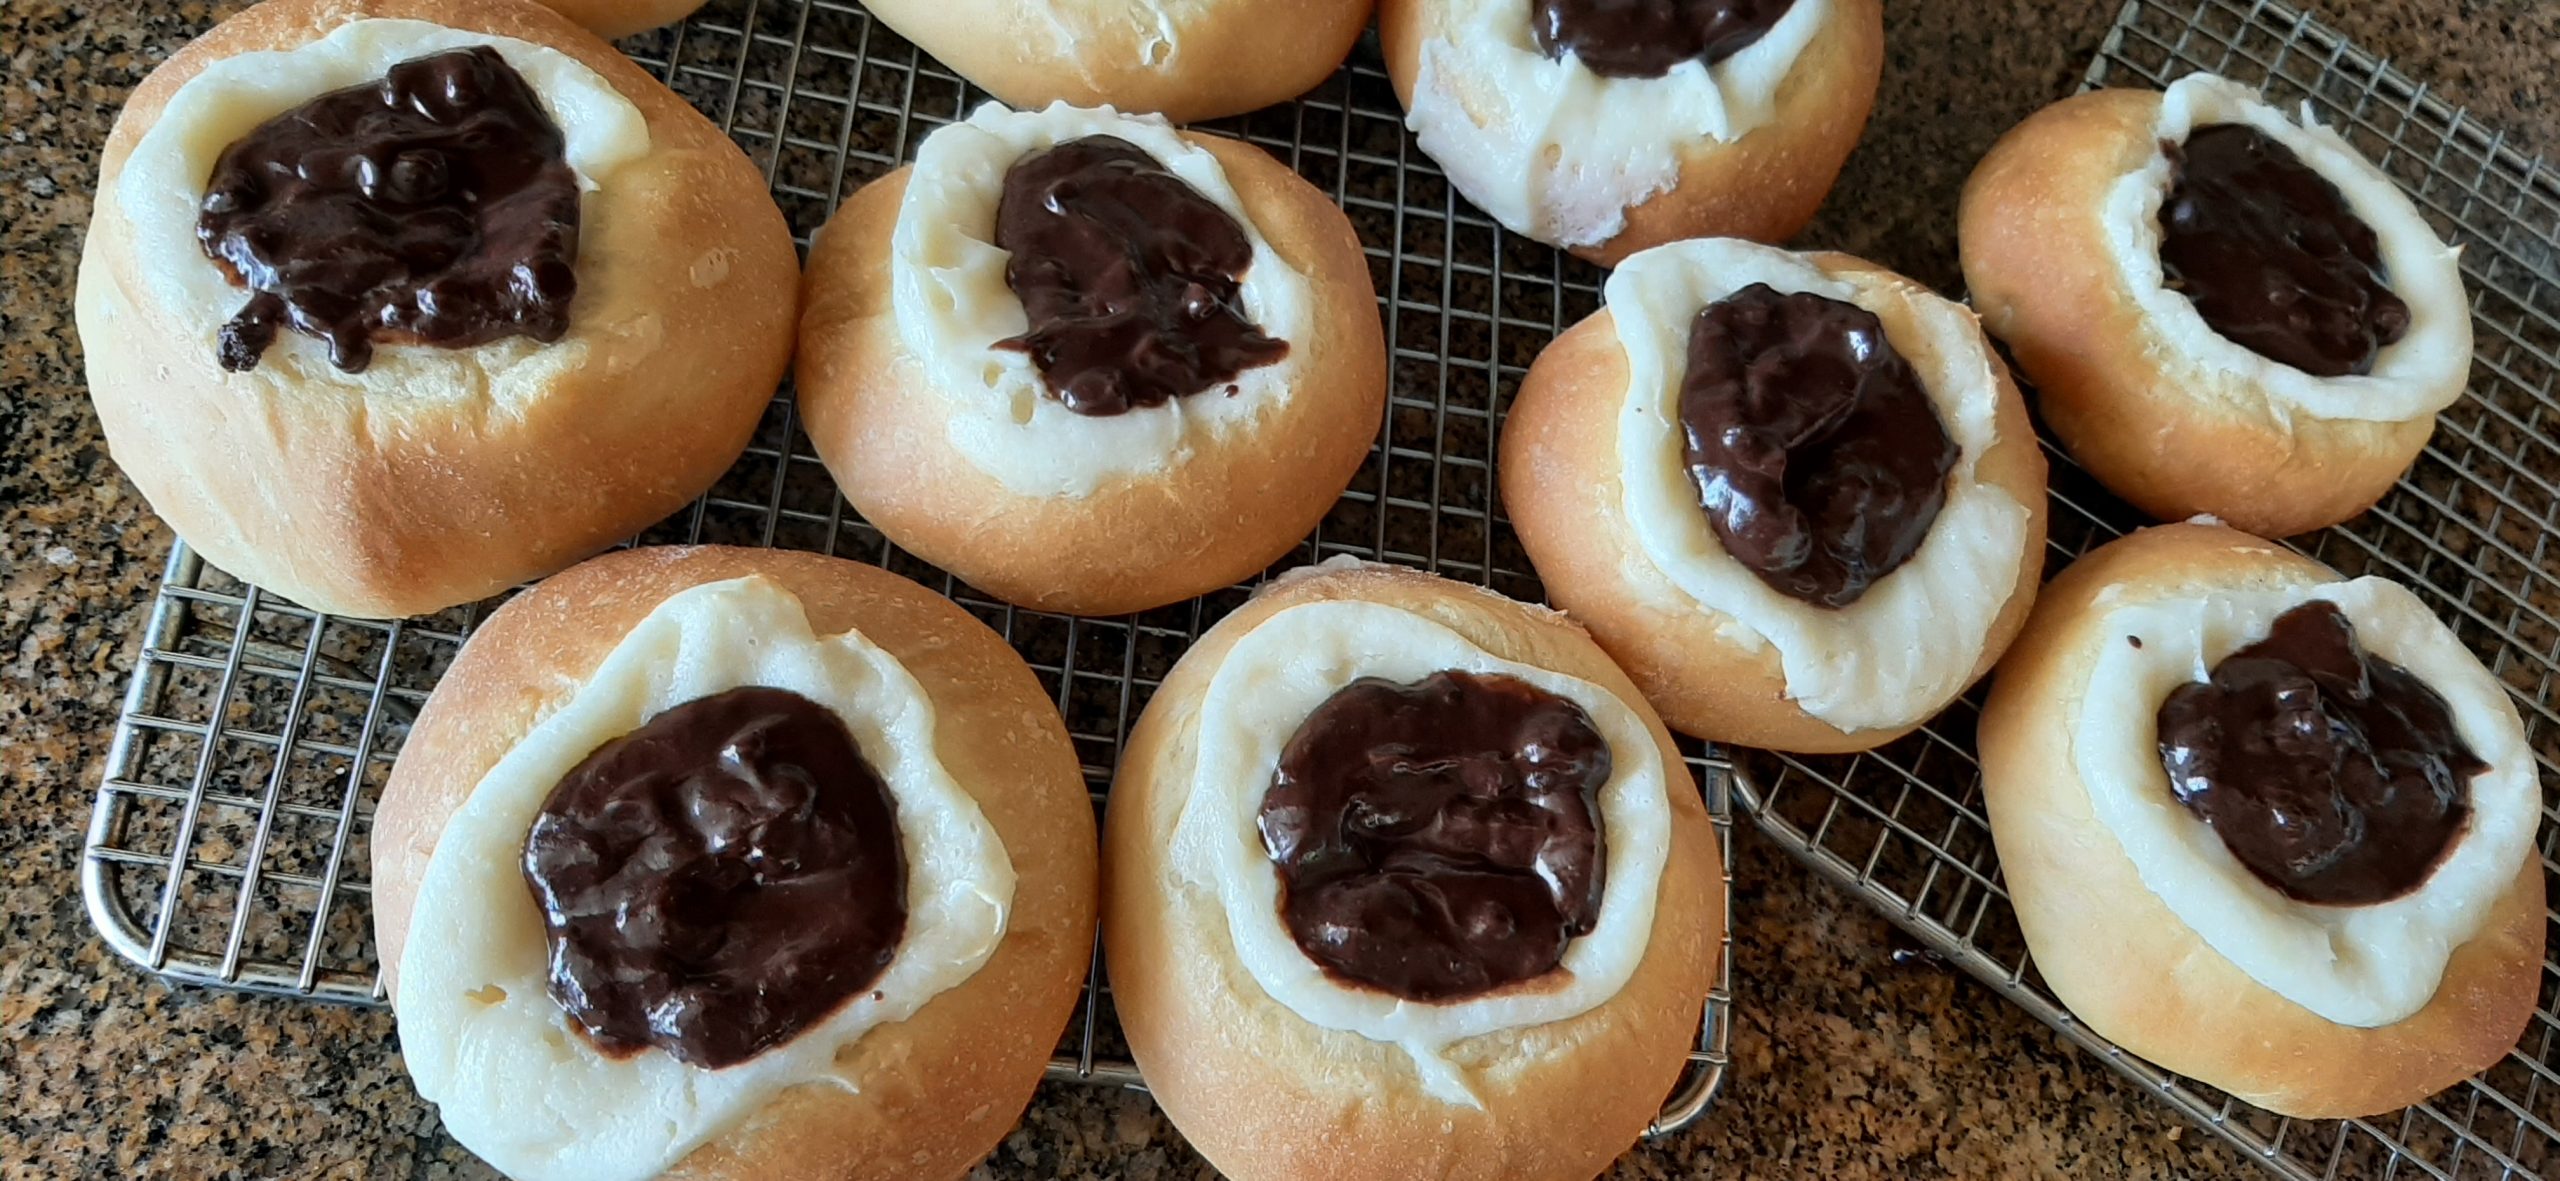
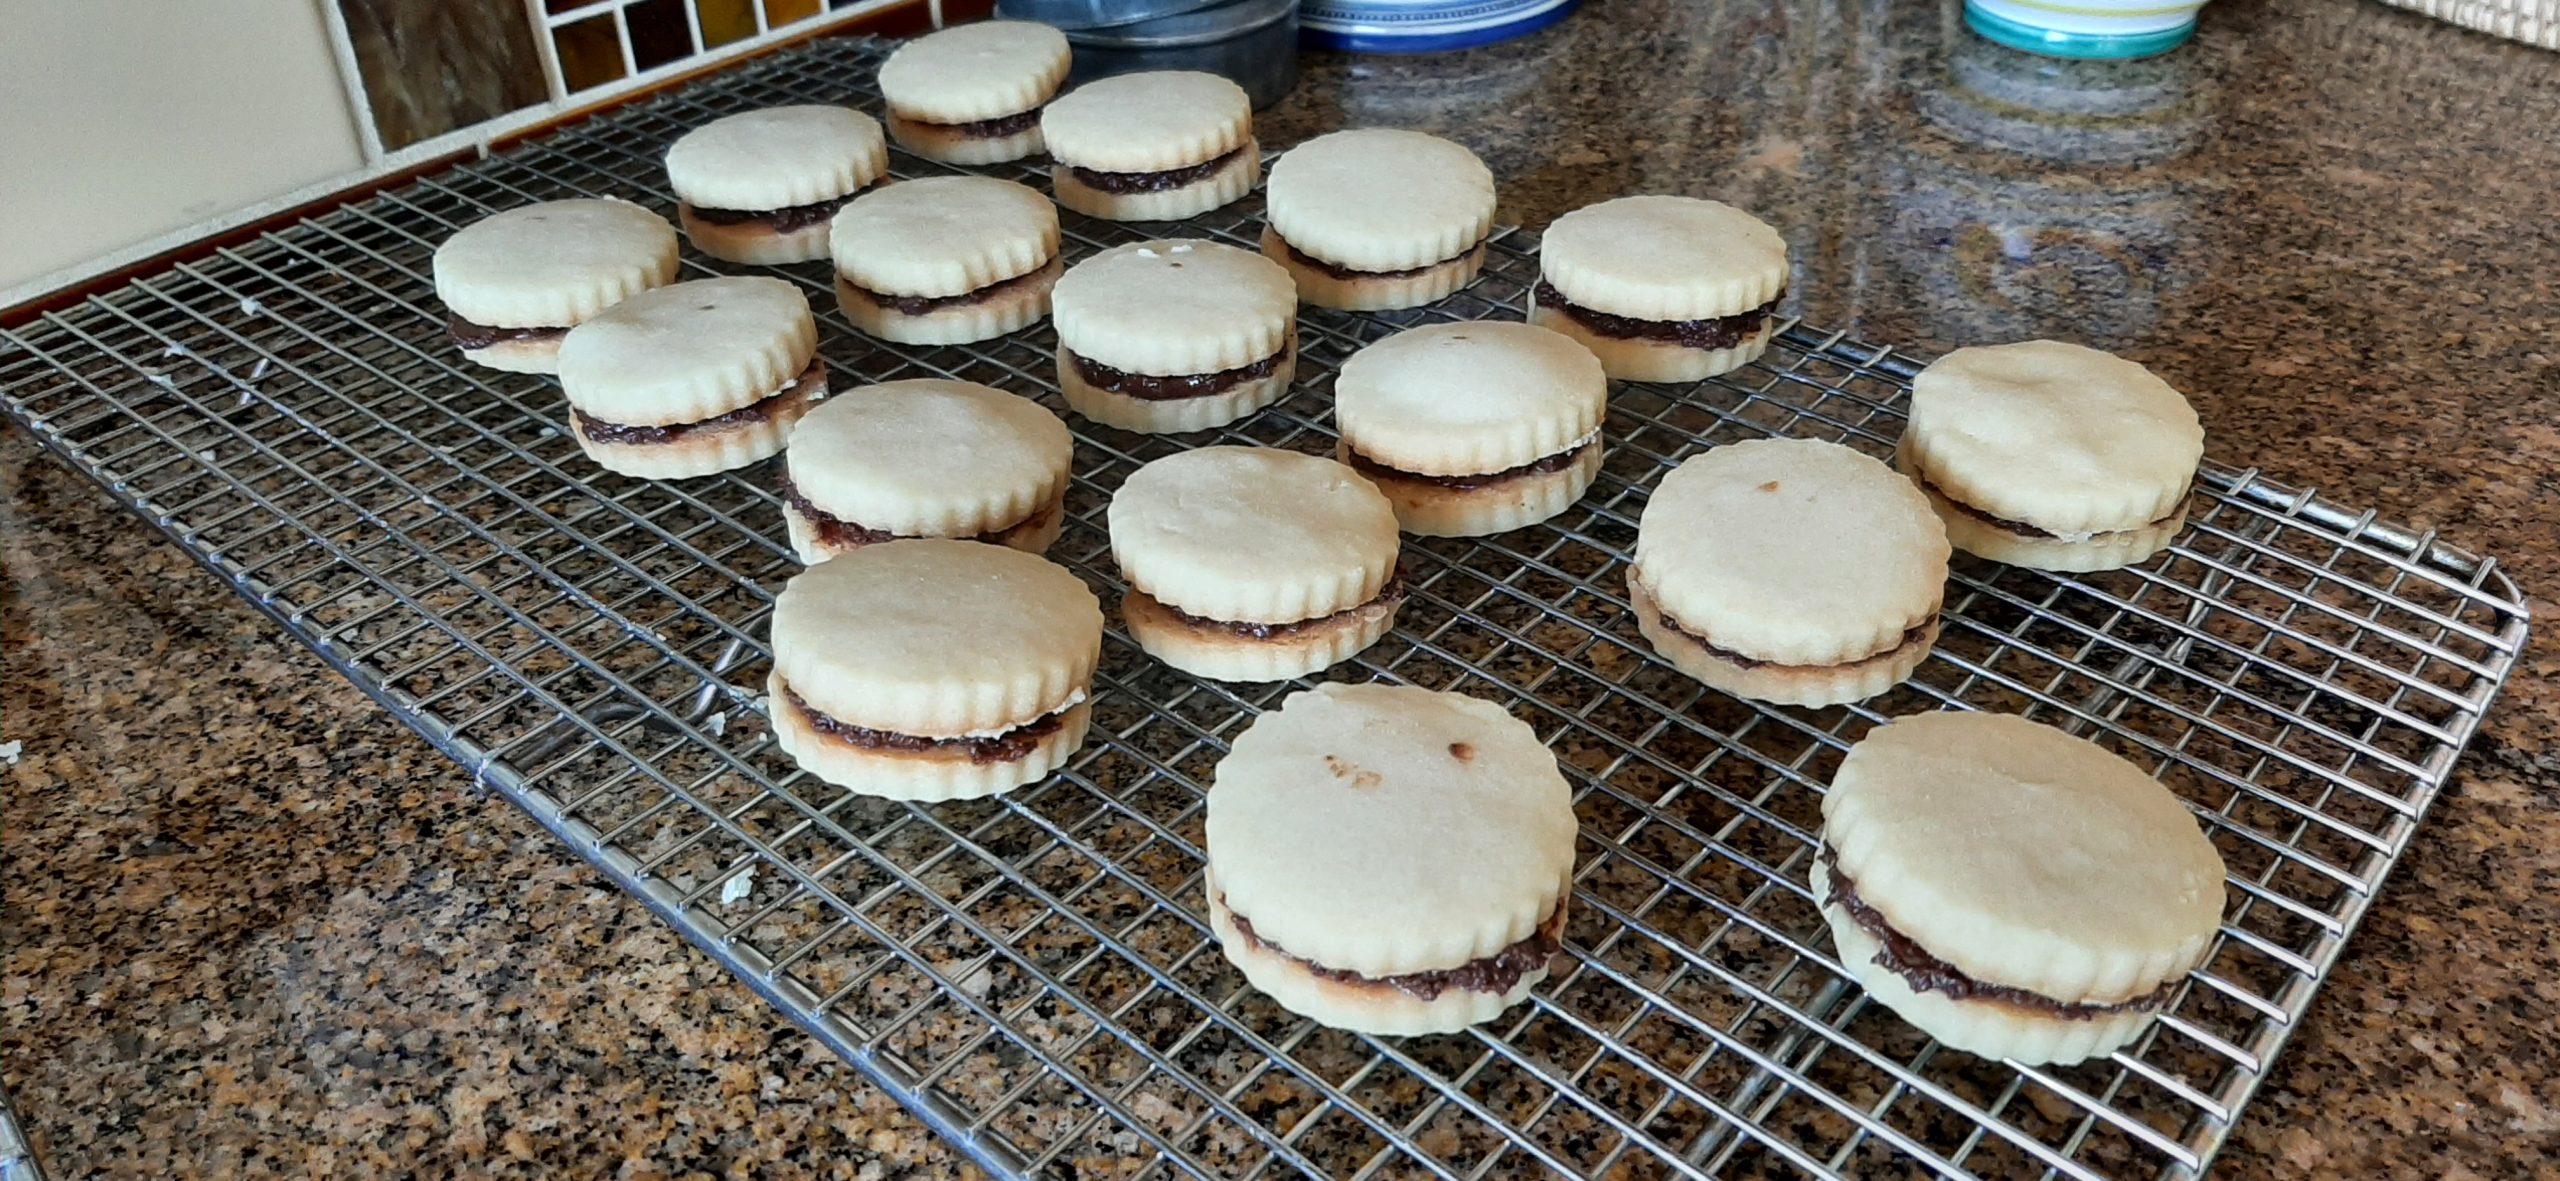
So, what do you do with leftover ganache? (Oh, what a horrible problem to have. Not!) After recently making Chocolate Ganache Topped Cream Cheese Danish Pastries, (recipe on site), I had leftover ganache. But what to do with the ganache? Well, why not use it as a filling for a sandwich cookie. But not a chocolate cookie, because ganache is very rich. And although some would argue that there can never be too much chocolate, I felt that a ganache filled chocolate sandwich cookie would be over kill. So then, why not 2 shortbread cookies stuck together with ganache? So, that’s what I came up with. And it worked. Because who doesn’t love shortbread? No one I know, that’s for sure!

So, if you ever find yourself with extra ganache, (lucky you), give this recipe a try. Or just for grins and giggles you could actually make ganache just for this recipe. Because if you look at the recipe for both the cookie part and the ganache, you will find only 6 ingredients listed. (Butter being used twice, so you can call it 7 ingredients if you must.) But regardless, this is a very easy cookie to make. And perfect for chocolate lovers and as one of your afternoon tea or Christmas cookie offerings. Because frankly, these cookies are darling. And who doesn’t love a darling cookie.

Anyway, just make the darn things and be happy.

Well, that’s it for today. As I am writing up this post, our living room is being used as a rehearsal hall. Mr. C. (piano), Mike (guitar), and Brian (fiddle) are preparing for a gig on Lummi Island. So much fun for me to have live music to listen to as I diligently work to bring you one more way to spend your hard-earned money on a food item with no nutritional value. I should legitimately feel guilty for not posting another recipe with quinoa, kale, beets, lentils, or other totally healthy ingredients. But I feel justified because I do post a lot of recipes that include really healthy ingredients like spinach, lemons, garlic, lentils, raspberries, walnuts, avocados, and salmon. But culinary bliss doesn’t come from just eating healthy. At least for me it doesn’t. I need a treat once in a while. And these cookies are really a treat.

So, may everything you feed your family and friends be a perfect balance of mostly healthy, with an occasional not-so-healthy treat to make life worth living. Life is short my friends. And we must remember to live it to the fullest.

On that happy note, and as always – peace and love to all.

For the Shortbread Cookies:

1 c. (2 sticks) unsalted butter, room temp.

½ c. powdered sugar

2 c. unbleached all-purpose flour, fluffed

¼ tsp. fine sea salt

In the bowl of your stand mixer, combine butter and powdered sugar until well blended. Add flour and salt and mix until well combined.  

On floured surface, roll dough ¼-inch thick. Cut with 1½-inch to 2-inch round or scalloped cookie cutter.

Place ½-inch apart on parchment paper lined cookie sheets.  

Bake in a pre-heated 350-degree oven for 14 to 15 minutes or until set. Don’t over bake.

Remove from oven and cool for 1 minute before removing to a cooling rack.

Cool completely before placing about 1½ teaspoons ganache on bottom of half of the baked cookies. Top with remaining cookies bottom sides down.

Store in an airtight container in your fridge.

For the Ganache:

¾ c. semi-sweet chocolate chips (I use mini chocolate chips)

3 T. unsalted butter, room temp. 

¼ c. whole milk 

In a small mixing bowl, combine the chocolate chips and butter.

In a liquid measuring cup, heat the milk in your microwave until the milk begins to bubble.

Pour the very hot milk over the chocolate chips and butter. Allow to sit for about 3 minutes, then use a whisk to stir until smooth and creamy. (It may take a minute or two to come together; it often looks separated at first. There also might be small chunks of chocolate that never melted. That’s just fine.)  

Allow to cool for about 45 minutes at room temperature before using as the filling for your sandwich cookies.

CHOCOLATE GANACHE TOPPED CREAM CHEESE DANISH PASTRIES

So, what happens when you bet your husband “dollars to doughnuts” on some trivial matter that you can’t even remember but you are sure your husband remembers that you lost? Well, I’ll tell you what happens when I lose a bet in this household. Dollars are disregarded, but a nagging reminder is always present that I owe Mr. C. his reward for winning the bet. And because Mr. C. is the wonderful man that he is, he never even mentions, much less demands his reward. Which is good, because in our relationship I would start laughing at any kind of a demand, walk out of the room, and come back in to discuss the matter in an adult fashion when he too stopped laughing.) (We are, after all, adults!)

Anyway, I decided that since Mr. C. is a devout lover of pain au chocolat, which is basically a chocolate filled croissant, I would work up a recipe for a chocolate topped cream cheese Danish as his reward for winning the bet. And the recipe you find below is the result. (And for those of you who know me, working up a new recipe is always a win. So, in this case, our bet, won or lost was in reality a win/win situation.) But enough about our delightful life and on to this recipe.

The basics for this recipe come from my recipe for Individual Jam Filled Cream Cheese Danish Pastries on this site. I just left off the jam part and added a ganache topping. So, if you too are into pastry and chocolate, I recommend you give this recipe a try.

But be warned, this is not a quick pastry to prepare. It’s easy to make, but it does take some time. Most of it simply waiting for the dough to rise. But you still need significant time to dedicate to the whole process. But truly, it is worth the time and effort. And as a special treat, or reward for a bet, there is nothing finer.

Well, that’s it for today. Mr. C. has a gig in the dining room of the Bellwether Hotel this evening. And I am fortunate enough to be joining Karen, the bass player Tom’s wife, for a lovely evening of fabulous conversation, fine dining, and not incidentally, great music. Life just does not get any better. I am one truly lucky lady.

May you too be lucky in love, friendship, and a life filled with fabulous music.

And as always, peace and love to all.  

Pastry Dough:

1 c. lukewarm whole milk

2 tsp. active dried yeast 

⅓ c. granulated sugar

2 T. sour cream

4 egg yolks

¼ tsp. kosher salt

3 oz. (¾ stick) unsalted butter, room temperature

3½ – 4 c. unbleached all-purpose flour

vegetable oil 

In the bowl of your stand mixer, combine the lukewarm milk, yeast, and sugar. Let sit for 5 minutes.

Add the sour cream, egg yolks, salt, butter, and about 3 cups of flour. Using your dough hook, mix/knead the dough for 6-8 minutes or until the dough pulls away from the sides of the bowl and feels slightly tacky to the touch. (You will probably need more flour. And there will still be a bit of dough that wants to stick to the bottom of the bowl when it’s time to stop the machine.)

Pour a bit of veggie oil over the dough, and using your hands and a stiff spatula, roll the dough into a ball. Make sure the entire ball of dough is lightly oiled. (This helps keep the dough from cracking and drying as it rises.)   

Cover the bowl with plastic wrap and let the dough rise for 70-90 minutes or until doubled in bulk. Meanwhile, prepare the cream cheese filling. Once the dough is doubled, punch it down and divide it into 14-16 equal sized pieces.

Shape each piece of dough into a ball by tucking the ends underneath until you get a smooth surface on top. Set the balls on large parchment paper lined baking sheets evenly spaced. Make sure the pastries are at least 3-inches apart.  Let rest for 10 minutes, then dip the bottom of a glass into the middle of each pastry to form an indentation that goes almost to the bottom of the ball.

Using a medium-small sized ice cream scoop, fill each pastry indentation with the cream cheese filling. Smooth out the filling and place in a warm place to allow the pastries to almost double in size, about 45 minutes.

Bake in a preheated 350-degree oven for 19-22 minutes, or until the outside is golden brown. The internal temperature of the pastry should be at least 190-degrees.

Remove from the oven and transfer to a wire rack to cool completely. When cool, top each Danish with the ganache topping. Then Store in an airtight container on your counter for up to a day. Then move to the refrigerator.

When ready to serve, warm on high for 10 seconds in your microwave. You can also freeze the pastries for up to a month. To thaw, pop them in the oven straight from the freezer for about 5 minutes at 350-degrees.

Cream Cheese Filling:

2 pkgs. (8 oz. each) cream cheese, room temp.

1 c. granulated sugar

1 tsp. vanilla

Beat the cream cheese, sugar, and vanilla together until smooth. Set aside until needed.

Ganache Topping:

1½ c. semi-sweet chocolate chips 

6T. (¾ stick) unsalted butter chopped into small cubes

½ c. whole milk 

In a medium-sized bowl, combine the chocolate chips and butter.

In a liquid measuring cup, heat the milk in your microwave for 1 – 2 minutes, or until the milk begins to bubble.

Pour the hot milk over the chocolate chips and butter (do not stir yet!). Allow to sit for about 3 minutes, then use a whisk to stir until smooth and creamy. (It may take a minute or two to come together; it often looks separated at first.)

Allow to cool for about 30 minutes before topping the Danishes. You will probably have extra ganache. Lucky you!

CREAMY SHRIMP CURRY AND EASY BAKED GARLIC NAAN

Curry

Naan

OK, I’m a sucker for East Indian food. And especially curry. But when you live outside a large metropolitan area it can be very difficult to find good Indian food. And since driving into Seattle is tantamount to driving a nail into my knee (Seattle traffic is horrible), I find my only choice is to make Indian food at home. Which is fine. But darn, I like variety. And that is exactly what a restaurant can provide.

So, what to do? For me, it’s to prepare a curry unlike the one I have been making since my kids were young. (Which BTW, is mighty tasty, but probably not a recipe you would find anywhere in India. Curry Sauce for Chicken, Shrimp, Beef, or Lamb. Check it out. My kids loved this curry sauce.)

Anyway, with this recipe I added traditional East Indian spices and made some naan to go with the curry. And served the curry over brown basmati rice. And the result was very good. In fact, damn good!

So, if you too love curry, but live in an area where a great Indian restaurant is easier to find than a Trader Joe’s (we don’t have one of those close by either), then make this recipe. It tastes like it came from a fancy restaurant but is rather easy to make. Served with naan, life is good.

So, I hope you enjoy this recipe. It does contain a few unique ingredients, but then cuisines from different countries call for ingredients that are new and often times exciting. Embrace the difference. Our world has a lot of wonderful taste experiences just waiting to be tried. So, don’t be afraid to venture into the unknown. Life is to be lived. And new taste sensations are a great way to live your life to the fullest.

On that happy note, peace and love and world cuisine to all.   

Creamy Shrimp Curry

½ tsp. kosher salt

freshly ground black pepper

1 T. Garam Masala

¼ tsp. ground cardamom

2 tsp. paprika

½ tsp. chili powder

1 tsp. turmeric

1 tsp. granulated sugar (opt.)

2 T. unsalted butter

½ white onion, finely diced

4 garlic cloves, finely minced

2 tsp. minced fresh ginger

2 bay leaves

2 T. tomato paste

1 T. flour

1½ c. whole milk

2-3 T. sour cream

1 lb. uncooked shrimp, peeled, deveined and cut into bite sized pieces

1-2 tsp. fresh lemon juice, to taste

In a small bowl, whisk the salt, pepper, Garam Masala, cardamom, paprika, chili powder, turmeric, and sugar together. Set aside.

Melt the butter in a large frying pan. Add the onion and cook until soft and translucent. Add the garlic and ginger and cook for another 30 seconds.

Add the spice mix, bay leaves, tomato paste, and flour. Cook for about 2 minutes.

Whisk in the milk. Bring the sauce to a high simmer and cook for 7-10 minutes or until the sauce has reduced slightly and thickened a bit.

Add the raw shrimp and cook until done. Add the sour cream and lemon juice to taste and adjust other seasonings. Serve over steamed rice. (I like brown basmati rice for this recipe.)

I also like to serve naan with curry. So, below you will find my recipe for Easy Baked Garlic Naan. And when I say easy, I mean EASY!

EASY BAKED GARLIC NAAN  

3 T. hot water 

3 T. whole milk

½ tsp. granulated sugar

1½ tsp. active dry yeast

½ tsp. kosher salt

2 T. sour cream

1¼ c. unbleached all-purpose flour, or more as needed

3 cloves garlic, finely minced

½ tsp. dried parsley

3-4 T. melted unsalted butter

In the bowl of your stand mixer, add water, milk, sugar, and yeast and leave alone for about 5 minutes.

Add salt, sour cream, and about 1¼ cup flour. If more flour is needed, add in tiny increments. Knead the dough with your dough hook for about 5 minutes or until the dough is smooth and soft. Cover and let the dough rise for about an hour or until it doubles in size.

Preheat the oven to 500 degrees.  

Divide the dough into 4 equally sized balls and cover and let rest for 10 minutes.

Meanwhile, mix the garlic, parsley, and melted butter together in a small bowl.

Using a light dusting of flour, roll out the dough into thin, oval shapes. Transfer to a parchment paper lined baking sheet and generously slather most of the garlic butter mixture on top of the naan.

Transfer the baking sheet into the pre-heated oven and bake for 4 minutes or until lightly golden brown. Flip and bake for another 3-4 minutes or until brown spots appear.  

Remove from oven and brush the top of the naan with the remaining butter mixture just before serving.

GARLICY CHEDDAR CHEESE DROP BISCUITS

OK, if you have ever dined at a Red Lobster restaurant, then you have probably made as big a pig of yourself as I have when a basket of their cheesy garlicky biscuits is set in front of you. If you haven’t gone crazy like me, then frankly, I don’t think we can be friends! Because anyone who doesn’t think these are the best biscuits, they ever tasted, is way beyond me culinarily. In fact, as my daughter Paula would say – these biscuits are simply life-changing!

On our way home from a family reunion in Oregon a couple days ago, we stopped at the Red Lobster in Kelso, Washington for a quick lunch. I was hungry for a Crab or Shrimp Louie. And what better place to find a Louie than at a restaurant specializing in seafood? Well, as it turned out, I would have had the same luck if we had stopped at McDonald’s. Not a Louie to be had. But I’m telling you the truth, the cheese biscuits saved the day for me.

So, of course, when I got home, I decided that I had to learn how to make these biscuits. So, the recipe you find below is what I came up with after reading 436 copy-cat recipes I found online. (Apparently, I am not the first person to decide these biscuits just must be a part of their life!)

If you too think cheddar garlic biscuits are the be all and end all, then let me recommend you give this recipe a try. Besides being beyond delicious, they are very easy to prepare. You don’t even have to roll out the dough. Or get out your mixer. Just plop blobs of the dough on a baking sheet, throw it in the oven, and wait the interminable 14 or so minutes until the biscuits can be removed from the oven, slathered with more garlic butter, and devoured before any of the rest of your family is even aware that you have been in the kitchen!

There are just those times when being able to produce an edible that is really amazingly delicious is the greatest feeling in the world. And when the said item is as easy to build as one of these biscuits, I get super/supper excited to be able to share the recipe with you.

So, next time a biscuit would be the perfect addition to a meal, be it breakfast, lunch, or dinner, give this recipe a try. You and your family are in for a treat. That is, if you deem it necessary to share with your family. If not, they will never know what they missed, and I’m sure as heck not going to tell them! This can remain our little secret.

So, regardless of whether your little shoulder angel or devil wins, I wish peace and love to all.

For the biscuits:

2 c. unbleached all-purpose flour, fluffed  

1 T. baking powder

½ tsp. baking soda

½ tsp. kosher salt

1 tsp. granulated sugar

½ tsp. granulated garlic

1 packed c. grated sharp cheddar cheese

½ c. (1 stick) melted unsalted butter

1 c. buttermilk or whole milk (or a combination)

Whisk flour, baking powder, baking soda, salt, granulated sugar, and granulated garlic together in a large bowl. Stir in cheese.

Combine melted butter and buttermilk until small lumps form. Stir into dry ingredients just until combined. Don’t over mix.

Using a #16 ice cream scoop (¼ cup) or two soup spoons, drop quarter cup balls of dough onto a baking sheet lined with parchment paper.

Bake in a preheated 425-degree oven for 14-15 minutes or until golden brown on top. Meanwhile make the topping.

Remove from oven and slather the hot biscuits with the topping.

For the savory garlic topping:

¼ c. (½ stick) unsalted butter, melted

1 tsp. dried parsley

½ tsp. granulated garlic

Whisk together just before biscuits come out of the oven.

SEARED TUNA WITH SAUCE VIERGE  

The other day Mr. C. and I were shopping at our local IGA here on the island. He happened to notice that in the freezer section with all the other seafood options, appeared a shrink-wrapped package of thick, boneless, skinless tuna steaks. He showed it to me and said, “what do you think?” I said, “let’s go for it!”. And oh, am I glad I said that! Because Nagi’s recipe on recipetineats.com for Tuna Steaks served with Sauce Vierge (slightly modified by me) is one of the best and easiest entrées I ever made or eaten. Absolutely delicious! And the whole meal had been exceedingly easy to prepare.

I served the fish with Easy Plain Polenta (recipe below) and steamed broccoli. Yum, yum, YUM!

So, if you too have ever wondered if frozen tuna was worth the effort, I can only tell you, my experience. The tuna was perfect. I let it thaw completely and then used paper towels to dry it off a bit. Then went from there with the recipe below.

I think the main reason the tuna was so perfect is because when fish is frozen within hours of harvest, the freezing process stops deterioration and actually preserves the freshness of the fish. Plus, when seafood is frozen at sea and sold still frozen, we the consumer get to decide when to defrost the fish and can thaw it right before cooking. So, will I be buying more frozen tuna next time I go to the store? You bet your sweet bippy!

And since I’m sure you were wondering – Sauce Vierge is the French version of salsa. Salsa apparently can be traced back to the Inca, Mayan, and Aztec civilizations of Central and South America. Whereas Sauce Vierge was popularized in the 1980s by Michel Guérard, a French chef, author, and one of the founders of nouvelle cuisine.

And since I needed to have “nouvelle cuisine” defined for me, I thought you might appreciate the definition too.

According to the Oxford dictionary, nouvelle cuisine is “a modern style of cooking that avoids rich, heavy foods and emphasizes the freshness of the ingredients and the presentation of the dishes.”

Well, that’s it for today. I am spending my week getting ready for a 3-band picnic here at Chez Carr next Sunday. So, I am spending a bit of time each day baking, mixing, shredding, dicing, whisking, etc., and generally dirtying up my kitchen in preparation for the gang. In other words, I am doing what I love. Feeding people, I know and love, and those I hope to know better. And trying in my own way to spread a little joy.

It’s a tough reality we are living through right now. Most of what is happening to our country makes no sense to most of us. It’s a tumultuous time, to say the least. So, getting together with friends and family and sharing a meal, or going for a hike, or teeing off for a round of golf, etc., can serve as a reminder of what is still wonderful about our own little corner of this crazy world. We need each other. And we all need to know we are not alone.

So, invite a friend over. Bake a batch of cookies and share them with your neighbors. Take someone a bouquet of flowers from your yard. In your own way, let people know how much they mean to you. It’s the simple gestures that make the most impact.

What the world needs now is love, sweet love
It’s the only thing that there’s just too little of
What the world needs now is love, sweet love
No not just for some but for everyone

(Thank you Hal David.)

And as always, peace and love to all.       

For the Sauce Vierge: (make this before you cook the tuna steaks)

3 T. extra virgin olive oil, plus more for drizzling

1 T. fresh lemon juice

¼ tsp. anchovy paste

¼ tsp. finely minced garlic

½ tsp. finely minced parsley

½ tsp. finely chopped basil

1 tsp. capers, drained and roughly chopped

pinch kosher salt, or more to taste

freshly ground black pepper

1 tsp. finely diced shallot

6-8 cherry tomatoes, diced

6 kalamata olives, sliced   

Mix ingredients in a bowl. Taste and add more salt if needed.

For the Tuna Steaks:

8-12 oz. thick, boneless, skinless, tuna steaks

extra virgin olive oil

fine sea salt

freshly ground black pepper

On a small baking pan or dinner plate, drizzle olive oil over the tuna. Smear the oil with your fingers over one side, then lightly sprinkle with salt and pepper. Flip and repeat.

Heat a skillet (preferably a skillet with grill lines) over high heat until smoking hot.

If your skillet is not well-seasoned, brush the skillet with olive oil or take pan off stove and spray with any cooking oil.

Place tuna steaks in the skillet and cook for 45 seconds.

Turn steak 45 degrees. Continue cooking for another 45 seconds.

Flip the tuna carefully, then leave for 1 minute or until the internal temperature in the middle reads 118-degrees. 

Remove tuna from skillet and place on a cutting board. Rest for 5 minutes. (The tuna will cool down to almost room temperature. That’s what you want!) Slice the steaks into 1-inch pieces. Plate the tuna and spoon the Sauce Vierge over the top. Then drizzle just a bit more olive oil over the whole mess. Serve immediately.

Great with Easy Plain Polenta. See recipe below.

EASY PLAIN POLENTA

1½ c. water

½ c. whole milk

rounded ¼ tsp. fine sea salt

freshly ground black pepper

½ c. polenta (not instant)

2 T. unsalted butter 

In a medium saucepan, bring water, milk, salt, and pepper to a boil. Once boiling, turn the heat down to medium. While whisking, slowly pour the polenta into your liquid over the course of about 1 minute. Take it slow! This ensures that there will be no lumps in your cooked polenta.

Once all the polenta is in the liquid, continue whisking until it starts to thicken, about 2 minutes. Then turn down the heat to low and cover the pan. The polenta should be gently bubbling but not fully simmering. Set a timer for 30 minutes and be sure to whisk the polenta every 5 minutes or so to keep it from sticking to the bottom of the pot.

After 30 minutes, test your polenta. It should be soft and creamy, with no lumps or graininess. If you want your polenta to be slightly thicker, let it cook for another 10 minutes.

Remove from heat and stir in the butter. Taste again and add more salt or butter if you want a more savory or salty flavor.

Great side dish or base for any prepared food that would be perfect over mashed potatoes, quinoa, rice, etc.   

SPICY SHARP CHEDDAR CHEESE PIMENTO SPREAD

I know, there are already two cheddar pimento spread recipes on this site. But in my defense, I relish variety in every morsel I put in my mouth. So, even if the differences between Southern Pimento Cheese Spread, Cheese and Pimento Spread, and this recipe are not that great, I still live for the adventure of creating new flavor sensations that hopefully provide my own and other gourmand’s taste buds with yet another positive experience. (Long sentence. But I am reading Fallen into the Pit, written by Ellis Peters in 1951, whom I firmly believe should be posthumously awarded the title – “Queen of long sentences” and am therefore only emulating her style of writing.) But enough about sentence structure and back to this recipe.

Over the years I have been asked innumerable times why I never became a professional cook or chef. Or (God forbid) open my own restaurant or catering business. And the answer has remained the same over 6 decades. 1) I never wanted to work that hard. 2) I never wanted to be away from my family and friends as much as a professional career in food would have demanded. 3) I would have been making the same damn dishes night after night after night! Which would have been tantamount to reading the same 40 books over and over again. Yikes! I would have gone stark raving mad. And probably would have ended up using a meat clever on some poor unsuspecting diner who didn’t like my eggplant preparation! Believe me, I’m crazy enough as it is! So, the food industry would not have been a good choice for me.

So, for me the solution to staving off culinary boredom has always been to prepare all kinds of different edibles in almost every imaginable food category. Be it desserts, appetizers, GF dishes, main dishes, or any other type of sustenance you care to envision.

And since my retirement, I have had the time to pass my food recipe passion onto all of you. As well as inflicting you with my very personal feelings about the world. And the state of our country.

So, thanks for sticking around. I appreciate your diligence.

And as always, peace and love to you and yours.

1 (8 oz.) pkg. cream cheese, room temp.

½ c. mayonnaise

pinch kosher salt

freshly ground black pepper

½ tsp. granulated garlic  

½ tsp. granulated onion  

hot sauce to taste (I use Frank’s RedHot sauce)

½ tsp. paprika, plus more to sprinkle on top

6 oz. diced pimentos, undrained

3 c. grated sharp cheddar cheese

Mix the cream cheese and mayo together in a mixing bowl. Stir in the salt, pepper, granulated garlic, granulated onion, a drop or two of hot sauce (you can add more later if desired), and paprika until well blended. Stir in the pimento and cheddar cheese just until combined. Taste and adjust seasoning.

Place in a pretty bowl, cover, and refrigerate until about a half hour before you plan to serve the spread with your favorite buttery crackers.

Before serving, give the spread a final stir and garnish it with a bit of paprika. (Stirring loosens the spread up a bit and makes it easier to spread.)  

Please note: If you like a smoother consistency, pulse some or all of the mixture, except the diced pimento, in your food processor. I like to blend about half of the mixture, then combine before adding the pimento. Just a personal preference.  

SAVORY MUSHROOM AND GRUYÈRE MINI TARTS

OK, these mini tarts are a bit of a pain in the patootie to make. But well worth the effort. But, and isn’t there always a “but”, the tarts could be a lot more onerous to prepare if it weren’t for this crust recipe. Allow me to elucidate.

Most mini tart recipes require you to prepare a dough, roll it out, cut out all the crusts with a round cookie cutter, and then gently pat them into the tart pans. Without breaking the crusts! (Good luck with that!) Believe me, I’ve been there and done that, and it ain’t – no – fun!

But with this recipe, you make the dough, portion it out with a small ice cream scoop, plop the balls into the pan, and then shape the crusts with your fingers. Ta da. Applause please!!

Plus, and this is important – YOU CAN MAKE THE CRUSTS AHEAD OF TIME AND FREEZE THEM UNTIL YOU ARE READY TO BAKE THEM OFF. And this easy to make tart crust recipe can be used not only for savory tarts like this one, but also for your favorite sweet tarts as well. So, I deem this a sweetheart sweet tart crust recipe. Clever, right?!

Having now touted the virtues of the crust part of this recipe ad nauseum, let me tell you about the filling. It’s YUM! And easy to prepare.

So, if you are hosting a party, be it an outdoor picnic, a fancy New Year’s Eve cocktail party, or anything in between, these savory tarts are a perfect addition to any appetizer table. And while I’m at it, I strongly believe an appetizer or appetizers, are always a perfect way to start a gathering where food is being served.

People come hungry and thirsty to get-togethers when they know food is involved. And most of us, if we are being honest with ourselves, fervently hope that the food will be more exciting than a simple and healthy dinner at home. Healthy meals at home are a necessity. We all need to look after our own and our family’s health. But meals out should be special.

So, when planning your menu for guests, don’t try to make everything a healthy option. Some healthy options – yes. But I can tell you from years of feeding people, that a bare salad is never going to be as popular as a salad drizzled with a yummy dressing and containing ingredients such as bacon, cheese, or glazed nuts. People going to a friend’s home for a meal, or a restaurant usually give themselves permission to “cheat” a little on what they put in their mouth or imbibe. It may not be the right or healthy thing to do. But I feel, subliminally, we all, especially cooks, want that little bit of pampering that comes from someone else doing the cooking. I know I sure do. I love to eat other people’s food. And I love it when appetizers are provided to go along with my martini or whatever the before meal beverage happens to be.

And since I dismissed healthy eating when dining out in my comments above, I’d like to offer a good reason to always offer your guests an appetizer or two from a health perspective. Especially if an adult beverage is being offered.

It is always a good idea to eat a little something before and while you are drinking alcohol. If your stomach is empty when you start drinking, the alcohol will enter your bloodstream faster. Thus, you may feel the effects of your drinks quickly, making it harder to manage your drinking.

So, there you are. My thoughts on staying reasonably healthy, but still having a life!

And as always, peace and love to all.    

For the Mini Tart Crust:

8 oz. (1 lg. pkg.) low-fat (Neufchatel) cream cheese, room temp.

1½ c. (3 sticks) unsalted butter, room temp. (yes, 3 sticks!)

¼ tsp. kosher salt

3¼ c. unbleached all-purpose flour, fluffed

Blend room temperature cream cheese and room temperature butter together. Add the salt and flour and mix well.

Chill for about 30 minutes.

Using a small (#60) chrome handle ice cream scoop, plop balls of dough into ungreased mini tart pans. Then using your fingers, press the balls evenly onto the bottom and up the sides. (Don’t make the sides higher than the pan.)

Use immediately or freeze until needed. If frozen, bring to room temperature before adding the filling.

For the Tart Filling:  

3 T. extra virgin olive oil

½ c. finely diced white onion

4½ c. finely chopped cremini mushrooms

½ tsp. kosher salt

freshly ground black pepper

2 T. unsalted butter

3 garlic cloves, finely minced

2 tsp. finely chopped fresh thyme

2¼ c. finely grated Gruyere cheese 

Heat the olive oil in a large frying pan. Add the onion and cook over low heat until very soft and beginning to brown. And the mushrooms, salt, and pepper. Cook, stirring occasionally until the mushrooms release their liquid and the pan is dry.

Add the butter and garlic to the pan. Cook for about a minute or until the garlic becomes fragrant. Add thyme, cook for a minute, and remove from heat.

Sprinkle the cheese over the crusts and then evenly spread the mushroom mixture overall. Don’t overfill.

Bake the tarts in a pre-heated 325-degree oven for about 25 minutes or until the crusts are a lovely light golden brown.

Remove from the oven and place pans on a rack. Easiest to remove tarts from pans using a small offset spatula when they have been allowed to cool slightly.  

Serve warm or at room temperature.

GF LEMON CHEESECAKE BARS  

Whenever I know that I will have guests that have gluten restrictions, I try to have enough GF dishes available, so they won’t feel cheated. (That’s all about me, because the family and friends I know would never cause a fuss. They just aren’t that kind of person. In fact, they would be unhappy with me for going to the trouble. But that’s tough! If I know ahead, I try my best to accommodate. Whether they like it or not!) Anyway, I had a recent occasion that warranted 2 desserts. So, I made Carrot Cake with Cream Cheese Frosting (recipe on site) and these cheesecake bars. And the GF bars were a hit. Never mind the crust was GF. They gobbled these babies up.

But in all honesty, they would have gone over well even if the crust were made of old shoe leather or the bumper off a 57 chevy. I mean really! Lemon cheesecake filling topped with homemade lemon curd whipped cream. Then dolloped and swirled with more lemon curd. What’s not to like?

But, if GF is not a concern, you can always use your favorite Graham Cracker Crust recipe or my recipe for the perfect 9×13-inch graham cracker crust for this recipe. (My recipe below.) Options, baby! That’s what it’s all about!

So, if you are a lemon cheesecake lover like I am, this is the recipe for you.

And for all you people who are truly gluten intolerant, I am sending you my sincere regrets. But luckily you live in an age where there are wonderful GF cookbooks and GF recipes online from which to choose. Also, quality GF flour mixes. (I like Cup 4 Cup.)

BTW, along with GF, I also try to have vegetarian options available for my guests. But vegan, I draw the line. I only have so much energy left in these old bones. And two out of three accommodations ain’t bad!

So, on that happy note, peace and love to all.  

For the GF Crust:

3 c. gluten free oats

½ c. light brown sugar 

2 T. honey

¼ tsp. kosher salt

¼ c. + 1 T. coconut oil, melted

6 T. (¾ stick) unsalted butter

Mix the oats, brown sugar, honey, salt, and melted coconut oil together in a glass mixing bowl. Spread in an even layer on a parchment paper lined baking sheet.  Bake in a pre-heated 350-degree oven for 30 minutes, stirring every 10 minutes.

Remove from oven and allow the oats to cool completely, about 10 to 15 minutes.  (Oats will harden as they cool to a granola-like texture.)

Transfer to a food processor.  Pulse 2 to 3 times to break up any larger pieces, then process on high for 30 to 60 seconds until the oats resemble coarse crumbs.

Meanwhile melt the butter in the same glass mixing bowl. Stir in the coarse oat crumbs. Once all the crumbs are coated with the melted butter, transfer to a lightly greased 9×13-inch baking pan. (Glass is best.)

Using your fingers, press the crumbs into the bottom of the pan and up the sides about a half inch.  Bake at 350-degress for 5-7 minutes or just until set.  

Remove from oven and let cool completely before adding cheesecake batter.

For the Lemon Cheesecake Bars:

3 (8 oz.) packages full-fat cream cheese, room temp. 

1 c. full-fat sour cream, room temp.

1⅓ c. granulated sugar

1 T. lemon zest

3 lg. eggs, room temp.

2 lg. egg yolks, room temp.

⅓ c. heavy cream, room temp.

½ c. fresh lemon juice

In the bowl of your stand mixer fitted with the whisk attachment, beat the cream cheese and sour cream together until completely smooth. 

Add the granulated sugar and lemon zest and beat until smooth, scraping down the sides and bottom of bowl as needed. On low speed, add in the whole eggs and egg yolks and beat until just combined. Don’t over mix!

Using a rubber spatula, fold in the heavy cream and the lemon juice, mixing just until combined. 

Spread evenly over partially baked crust.

Place in your pre-heated 350-degree oven and bake for 38 to 40 minutes, or until the edges are set, but the middle is still slightly jiggly. (The cheesecake will firm up as it cools.)

Remove from the oven, and park on a wire rack until both the filling and pan are cool. Then carefully cover the pan and refrigerate for at least 5 hours, but better yet 1 or two days.

A few hours before you plan to serve, make the Lemon Curd Whipped Cream. Spread on the bars and dot with additional lemon curd and swirl with an offset spatula. Carefully cover and refrigerate again until ready to serve.  

Using a sharp knife, slice the bars into serving sized pieces. 

For the Lemon Curd Whipped Cream:

2 c. (1 pint) heavy whipping cream

lemon curd, homemade (see my recipe below) or purchased

Whip the cream until stiff peaks form. Whip in lemon curd to taste.

NO FUSS LEMON CURD

1½ c. granulated sugar

4 lg. eggs

2 tsp. lemon zest (from 2 lemons)

½ c. lemon juice (from 3 lemons)

⅛ tsp. salt

½ c. (1 stick) unsalted butter, cut into 8 pieces

In a medium (2-quart) saucepan, whisk the sugar, eggs, lemon zest, lemon juice, and salt together. Set the pan over low heat. Cook, whisking constantly, until the mixture is thickened enough to coat a spoon (about 10 minutes). The lemon curd will thicken best just below a simmer.

Remove from heat, add the butter all at once and whisk until melted and evenly incorporated

Cover and refrigerate until cool and thickened, at least 4 hours or preferably overnight.

Lemon curd will keep in an airtight container in the refrigerator for about 2 weeks. (Good luck with that!)

GRAHAM CRACKER CRUST (for a 9×13-inch pan)

2 c. fine graham cracker crumbs (about 16 full graham cracker sheets)

⅓ c. granulated sugar

7 T. unsalted butter, melted

In a medium bowl, mix the crumbs and sugar together. Pour in the melted butter and stir until fully coated. (The mixture will have a sand like texture.)

Transfer the crumb mixture to an ungreased 9×13 baking pan and use your hands to press it evenly across the bottom and slightly up the sides.  

For baked recipes, pre-bake the crust for about 10 minutes in a pre-heated 350-degree oven. Then proceed as directed above.

NON-ALCOHOLIC SANGRIA PUNCH AND STRAWBERRY MINT LEMONADE  

It’s summer. It’s family and friends over for a picnic weather. So, along with great food, you have a large assortment of beer, wine, flavored water, pop, and mixed drink makings available for your family and friends to help themselves. But what about your guests who don’t drink alcohol or who want to switch to a non-alcoholic beverage or are underage? I feel it’s considerate to provide these guests with a beverage that looks and tastes fancy and interesting too. So, I’ve got a couple of non-alcoholic drink options for you! (And sorry about no pictures. They will be added eventually.)  

Non-alcoholic Sangria Punch. Looks beautiful. Full of fruit and flavor. No added sugar. And can and should be partially made ahead. And who doesn’t like that especially if you are hosting a crowd.

Strawberry Lemonade. Easy to make. Very refreshing. No added sugar. Mostly prepared ahead and finished off just before serving.

Well, that’s it for today so I’m going to make this post short and sweet. (But without any added sugar.)

So, if you too love to entertain and want to serve a beverage that everyone will enjoy, these two recipes are just enough different to be an exciting change of pace for your guests. The punch is just amazingly delicious. And the lemonade is tart and totally refreshing.

So, if I haven’t wished you a happy summer already, I am doing so now. Stay cool. And remember that your kitchen is not the enemy!

I know it’s not easy to think about cooking when it’s too bloody hot to even want to go anywhere near “that” room. So, what I advise is to “cook” early in the day if you are retired or at home at that time. And remember, main dishes do not have to be hot. Cold cuts (as my mother used to call sliced salami, cooked meats, and cheeses), sandwich bread, and various condiments and sliced tomatoes, lettuce, and onion make for a great hot weather lunch or dinner. Add some chips and a green salad and life is good. Remember, sandwiches are our friend when it’s too hot to cook. Big old salads with chopped meat, cheese, and veggies are also great hot weather mains.

So, again – HAPPY SUMMER

And as always, peace and love to all.

NON-ALCOHOLIC SANGRIA PUNCH

1 lemon (sliced, with peel)

1 lime (sliced, with peel)

1 orange (sliced, with peel)

1 cored apple (sliced, with peel)

1 pint whole black berries

1 pint strawberries, sliced

3 c. mixed berry juice

¾ c. apple juice

¾ c. orange juice

1½ T. fresh lemon juice, or more to taste

1 qt. lemon/lime or unflavored sparkling water

Place the cut fruit in a clear pitcher. Add the mixed berry, apple, orange, and lemon juices. Gently mix. Drop blackberries and strawberries on top. Refrigerate for several hours or overnight.   

Just before serving, add the sparkling water. Gently mix and serve. Don’t put ice in the pitcher. It will dilute the punch too much.  Instead, have an ice bucket available for people to add their own ice.  

Other fruit can also be used. Peaches, nectarines, pears, pineapple, etc.  

STRAWBERRY MINT LEMONADE

1 can (usually 12 oz.) frozen lemonade (regular or pink)

1 c. water

1 pint strawberries, divided

1-2 fresh lemons, thinly sliced

8-10 mint leaves, opt.

1 qt. lemon/lime or unflavored sparkling water

Place the frozen lemonade and 1 cup water in a large pitch. Mash up half of the strawberries and add them to the pitcher, along with lemon slices and mint leaves. Refrigerate for several hours or overnight.

Just before serving, slice the remaining strawberries and add them along with the sparkling water to the pitcher. Gently mix and serve. Don’t put ice in the pitcher. It will dilute the lemonade too much.  Instead, have an ice bucket available for people to add their own ice.  

NAVY BEAN SOUP WITH HAM AND KALE

OK, OK – I know it’s not soup season. For some of you. But for both of us, it’s soup season all year round. Why? Because we love soup. It’s easy to make. It’s easy to eat. And it’s even better the next day! And you can use any old ingredients (and I mean “old”) in two ways. Any ingredients your heart desires. And veggies that are experiencing a slow death in your veggie crisper. And another thing you already know about soup – it’s usually full of healthy ingredients. Like dried beans, for example. And as we all know, dried beans are packed with protein, zinc, and iron. And high in soluble and fermentable fiber.

And no, I do not always soak my dried beans overnight as most great cooks recommend. I am simply too spontaneous a dinner planner for that much thoughtful consideration of what’s for dinner the next evening. And frankly, it has never made that much difference. You simmer the soup long enough; the beans will eventually get soft. Caveat: If the beans are several years old, they might never get soft. While most packages of dried beans do not come with an expiration date, they will not last forever. For freshness and quality, dried beans should be used within 1-2 years after purchase. (Your cooking lesson for the day.) So, whereas several years ago I bought dried beans in quantity, I now buy them in 1-pound packages. Then I can feel fairly certain that I will use them before they turn to stones.  

Anyway, yesterday I was hungry for soup. I had some Black Forest ham in the fridge and also some kale that needed to be used before it turned to mush. (And yes, I have turned enough veggies into mush to know when it’s time to use the veggie or give it back to mother earth!)

So, I came up with this navy bean soup variation. And we were both happy with the result. Along with cornbread, the combination made for a very nice dinner. Of course, it didn’t hurt that Mr. C. had earlier served us one of his amazingly delicious margaritas. (We had limes that needed to be used too.) (Oh darn!)

So, if you too ever find yourself with extra kale (that will never happen to you Todd A), I suggest you make soup. And seriously, kale is a wonderful and healthy ingredient. I use it a lot in soup.

Well, that’s it for today.

I am getting ready to turn 80 at the end of the month. And for those of you who have already hit that mark, I salute you. No one told me my entire body would turn on me the closer I got to “80”. But sure enough, I am feeling every one of my years.

But I can still laugh (it’s either that or cry), read books, adore live music, cook and write about food, wake up each morning with the love of my life and best friend, enjoy gatherings with family and friends, and mostly make it to the bathroom in time. (Don’t laugh. It truly becomes a mind over matter situation sometimes when nature calls and you weren’t paying close enough attention.)

So, if you are still young, live every day to the fullest. If you are 80 or over – the same applies. We are only here for a short time. Live every single moment with kindness, forgiveness, empathy, and an open mind. Especially an open mind. And believe me, I must work daily to keep my mind from exploding.

I simply can’t understand why some find heinous and sinful behavior acceptable. Especially when there is proof. And how anyone can abhor the sins but condone the sinner. I have yet to wrap my mind around this irreconcilable viewpoint. But like I said, I’m working at keeping an open mind. But frankly, in this regard, I am fighting a loosing battle!

Peace and love to all.

3 T. extra virgin olive oil

1 lg. onion, diced

3 med. carrots, diced

2 stalks celery, diced (plus leaves)

¼ c. lightly packed chopped parsley

¼ tsp. dried thyme

1 lg. bay leaf (or 2 small)

½ tsp. seasoned salt

¼ tsp. celery salt

freshly ground black pepper

8 c. veggie stock (I use 8 cups water and 6 tsp. Better Than Bouillon Veggie base)

1½ c. dried navy beans (I like Goya brand because the beans are small)

2-3 c. diced ham, divided

2 c. chopped kale (or spinach would work too)

Sauté the onion, carrots, and celery in olive oil in a large, covered pot. Add the parsley, thyme, bay leaf, seasoned salt, celery salt, black pepper, veggie stock, navy beans, and half of the ham.

Bring to boil, reduce heat, cover, and simmer until beans are tender (about 2 hours).

Remove the lid and add the remaining ham and kale. Cover the pot and continue to cook until the kale has softened, about 10 minutes. Taste and adjust seasoning.

Great served with cornbread.