Category Archives: MAIN DISH RECIPES

CREAMY BACON BROCCOLI CHEESE SOUP

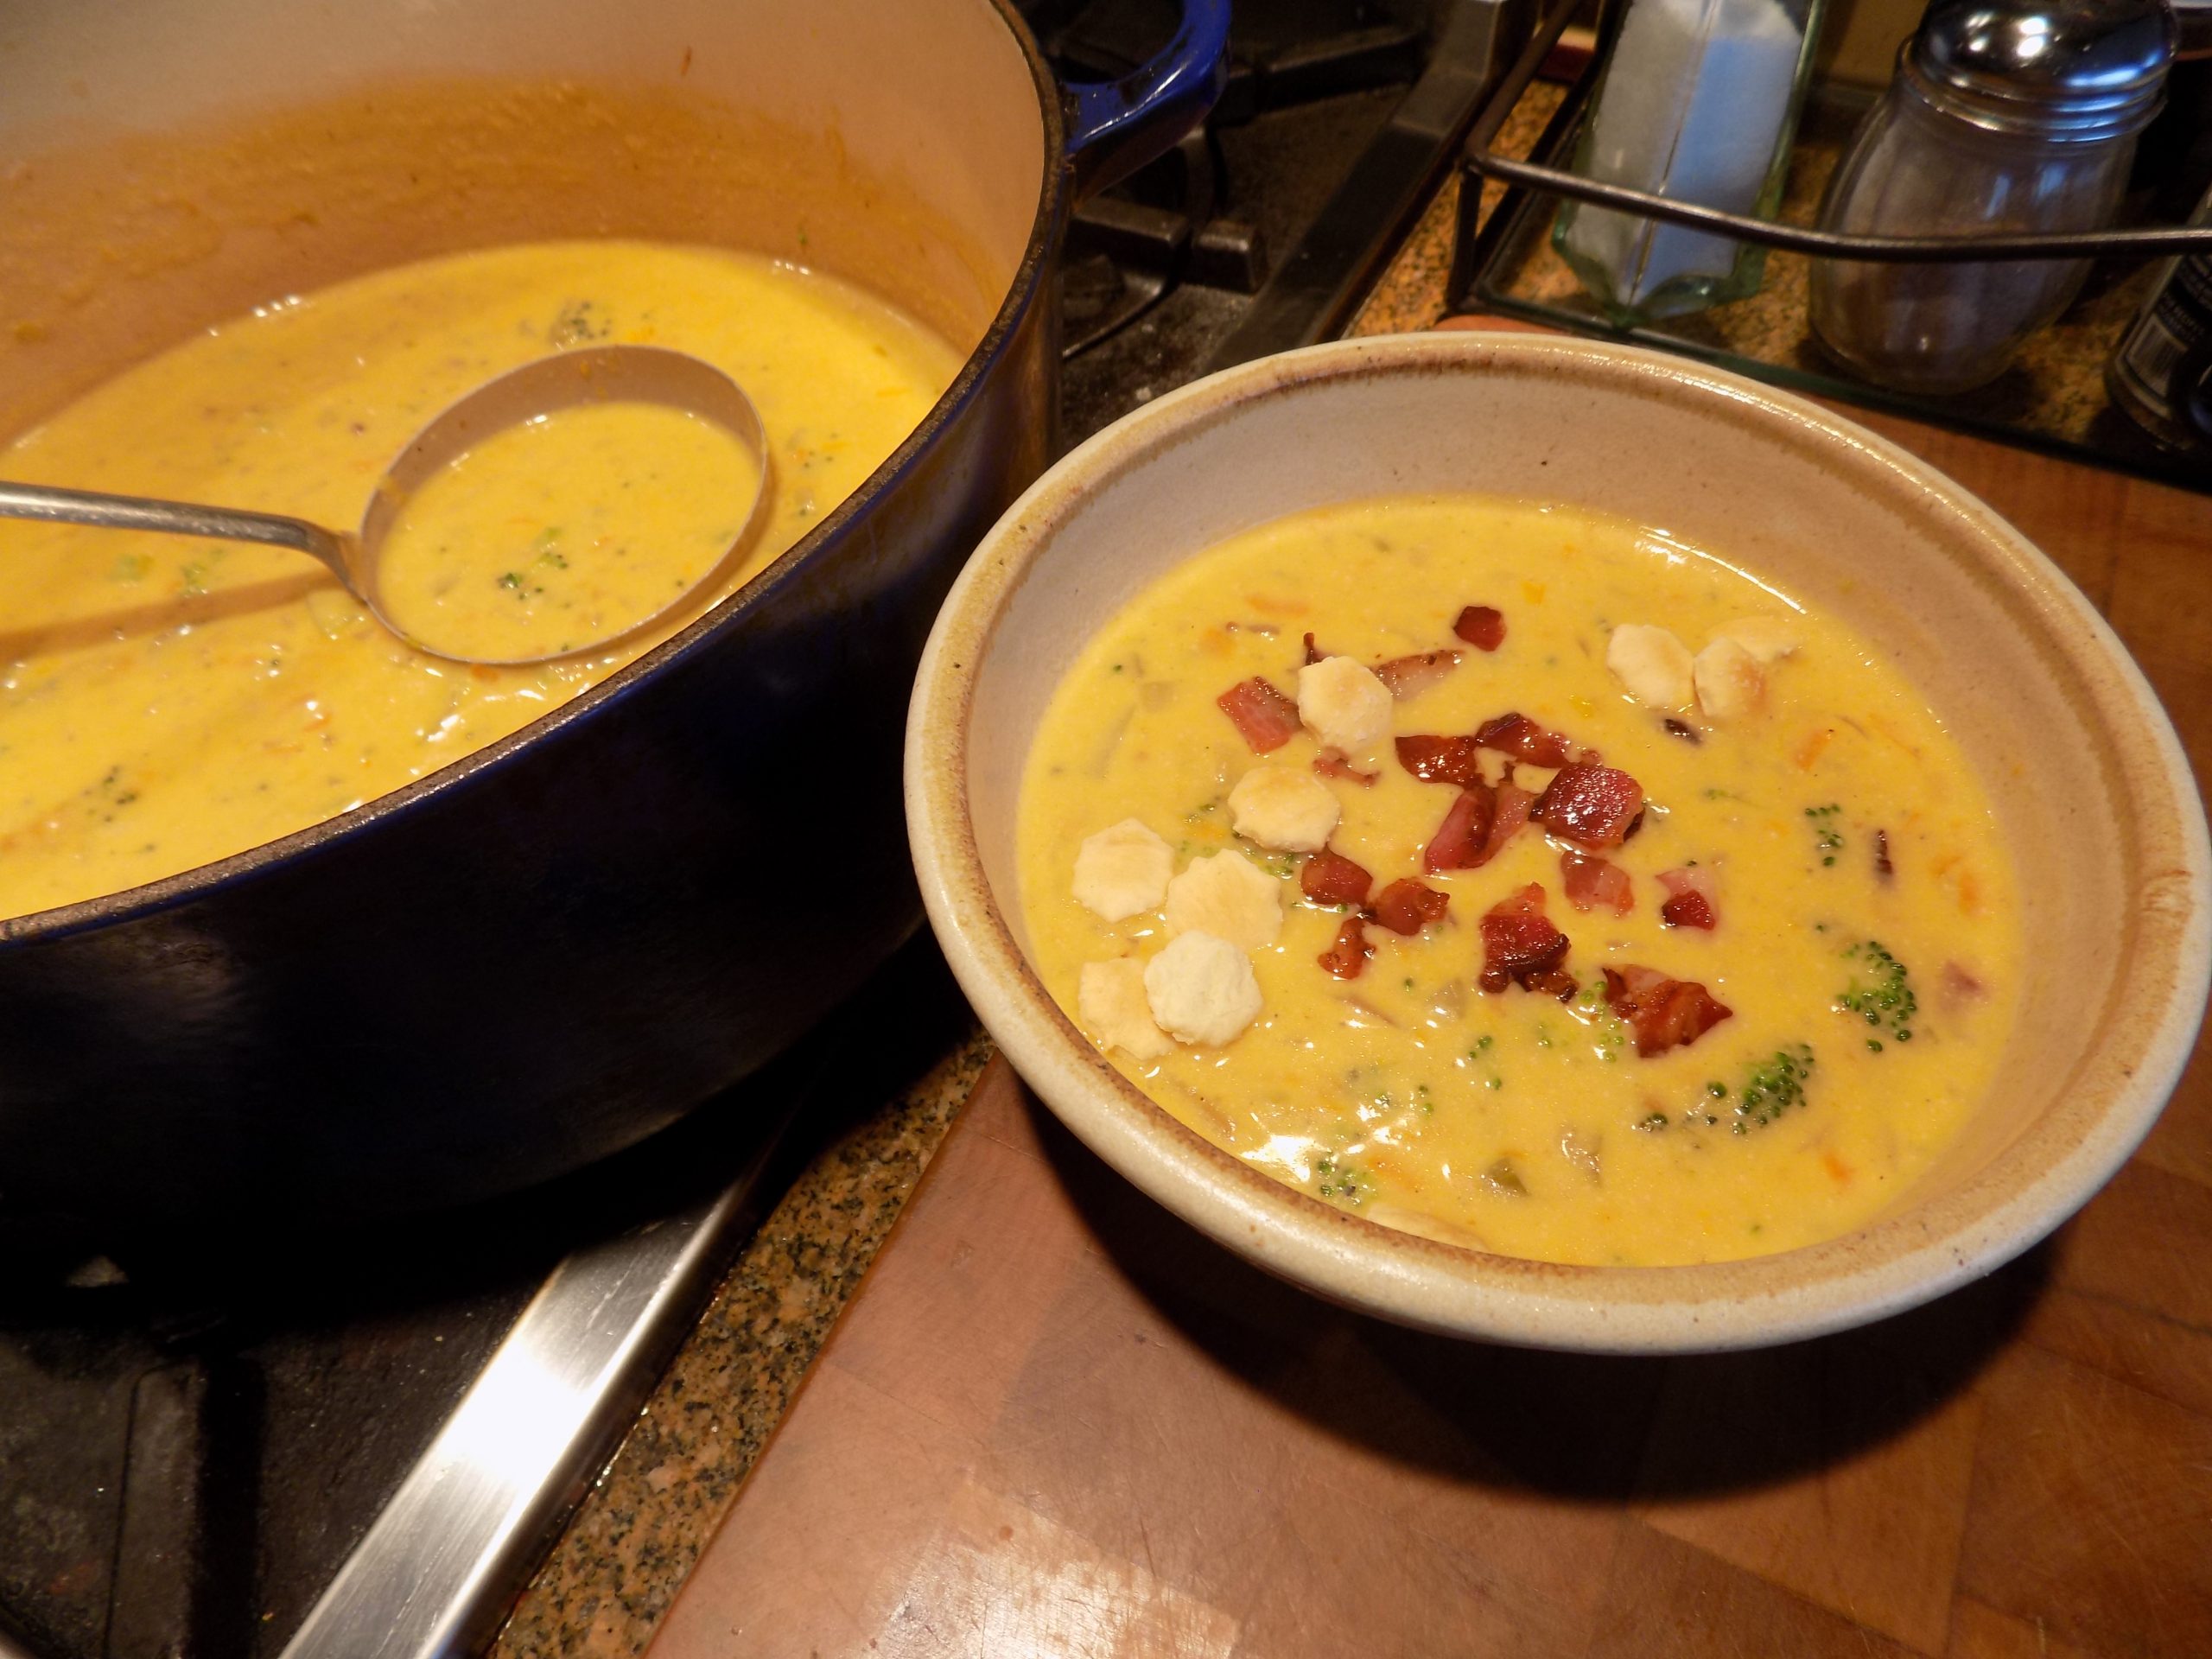
And yes, I know most of you already have a favorite recipe for broccoli cheese soup. In fact, so do I. (Well, now I actually have 3 terrific recipes. Because there are already 2 really great versions of this classic on this site.) But I always enjoy changing things up a bit, hence my latest version. And this one contains a little bit of bacon. And how can you go wrong with bacon? Inconceivable. (Thank you Wallace Shawn.) Anyway, I was wanting to serve soup last evening, and broccoli cheese soup sounded like it would hit the spot. Which incidentally it did perfectly. A few oyster crackers as an accompaniment, and all was well with the world. (Well not really, but our little piece of the world was considerably enhanced by this terrific one dish meal.)

So, if you would like to serve an easy to prepare and soul satisfying soup to your family, I’d say give this recipe a try. There are more veggies in this version than in many, so, of course that’s always a plus. But it’s really the taste that’s foremost. And in the case of this soup, the taste and creamy texture is fabulous.

We just got back from spending a delightful week down in Long Beach, WA, staying at The Breakers where we had previously owned a couple of units when our grandkids were young. Owning the units allowed me to host “camp grandma” every summer for a couple of weeks. Some of my most pleasant memories. It also gave our adult “kids” a place to vacation with their children that didn’t cost them an arm and a leg. So, staying at The Breakers was kind of a nostalgic trip down memory lane. Of course, we routinely visit the area most years when we make our annual spring trailer trip down the Washington, Oregon, and California coasts. So, we are quite familiar with the better dining establishments on the Long Beach peninsula. And one of our favorites is the 42nd Street Café. We have been going there now for almost 30 years. And it is still serving up high quality food in a cozy environment. We love it. So, although I got a break from cooking dinner, I still made breakfast and light lunches. But it was fun to get away. And the other 3 restaurants we visited – The Depot Restaurant in Seaview (just south of Long Beach), the Shelbourne Inn Pub (also in Seaview), and the Pickled Fish (in the Adrift Hotel) also served us wonderful dinners.    

So, as always, have fun in your kitchen. But take a break once in a while. Let someone else cook for you. It only makes you appreciate your time in the kitchen that much more. Plus, you get great ideas for dishes you would like to serve at home.

Peace and love to all.

2 T. unsalted butter

6 slices thick, meaty bacon, chopped

1 lg. carrot, grated

2 lg. celery stalks including leaves, finely diced

1 sm. yellow onion, finely diced

2 garlic cloves, finely minced

⅓ c. unbleached all-purpose flour

¾ tsp. dry mustard

½ tsp. paprika

1 tsp. seasoned salt

freshly ground black pepper

4 c. chicken broth

1 head broccoli, florets and peeled stems cut into small bite size pieces

½ c. whole milk  

½ c. heavy cream (or more whole milk)

16 oz. grated sharp cheddar cheese

⅓ c. finely grated Parmigiano Reggiano  

Melt the butter in a large stockpot or Dutch oven over medium heat. Add the bacon and cook until bacon is crisp. Remove to a bowl with a slotted spoon, reserving as much fat in the pot as possible.

Add the carrot, celery, and onion and cook, stirring occasionally, until the veggies are softened. Add the garlic and cook for 1 minutes. Sprinkle the flour, dry mustard, paprika, seasoned salt, and pepper over the vegetables and stir until no dry bits of flour remain. Let cook for a couple minutes.

Pour in the chicken broth a cup at a time, stirring constantly to prevent lumps. Bring to a boil, reduce to a simmer, and cook, covered, for 10 minutes.

Add the broccoli, milk, and heavy cream. Bring to a gentle boil. Reduce to a simmer and cook, covered, for another 10 minutes, or until the broccoli is soft.

Remove from heat and stir in the shredded cheddar a handful at a time. Stir in the Parmigiano Reggiano. Once the cheese is melted, stir in the reserved bacon, saving a bit to use as a garnish. Taste and adjust seasoning.

Serve hot! Crostini is great on the side. So are oyster crackers!

Max and Miles on our guest room bed. We haven’t had many sunny days lately. But one late afternoon the sun broke out for a couple of hours, and our boys took full advantage. Of course, they were not pleased with me for waking them up. But as soon as I left the room, they were back in dreamland. Rough life!

BAKED CHILEAN SEA BASS IN A LEMON CAPER SAUCE

Just out of the oven before “rolling” it in the sauce
“Rolled” in the sauce after the skin removed

According to the royalgreenland.com site ”The Chilean sea bass (Dissostichus eleginoides) also known as Patagonian toothfish, is beautifully white and offers a pleasant, mild umami flavor with hints of butter, nuts, and sweetness. The Chilean sea bass is perceived a premium quality fish due to the high meat quality – firm and succulent texture flesh, that falls into large tender flakes.” And you know what? Chilean sea bass really is especially delicious. But pretty darn spendy. Even when purchased at Costco. But for a once in a while treat, at least at Chez Carr it’s a rare treat, this toothfish is mighty darn magnificent. And when you bake it with butter, lemon, and capers. Well, there just ain’t nothin’ finer! And nothing easier to fix.

So, the other day Mr. C. decided to make a Costco run. And often when that happens, I ask him to bring home some fish for that evening’s dinner. And I always assure him that whatever he chooses will be perfect. And that when he gets home, I will decide how to cook the seafood. No problem. And of course, this time was no different. Because you really can’t go wrong when you bake seafood with butter, lemon, and capers. Well, that is, unless you over cook the fish. And that’s why every cook should own a digital instant read meat thermometer. When the recipe states “cook to 145-degrees”, how can you possibly do so by just looking at or by touching the meat? Unless of course, you have some kind of superpower. But then, why would you even be looking at this recipe if that were the case?! Anyway, if you are just a normal human being, then buy yourself an instant read thermometer. If of course you don’t already own one. Duh.

So, what makes this recipe superior to other recipes for Chilean bass. Well, mainly because you really can’t mess it up. Honest. Just follow the instructions and you can’t go wrong. The fish will be tender, juicy, and amazingly delicious.

Well enough for today. I’m feeling lazy and all I want to do is get back to my book. And speaking of books, I just finished reading one of the most delightful books I have ever read. (And believe me, I have read a lot of books in my time!) The book is entitled A Man Called Ove. It was written by Fredrik Backman. I highly recommend this book for anyone ages 15 to 105. It will make you laugh, cry, and experience every emotion in-between. A book we all need in our lives right now. A bit of “feel good” in one delightful package.

Peace and love to all.

extra virgin olive oil

1-1½ lb. Chilean bass fillet, dried with paper towels

kosher salt

freshly ground black pepper

Creole seasoning (see recipe below)

2 T. unsalted butter

2 T. fresh lemon juice

2 T. capers

½ tsp. seasoned salt

freshly ground black pepper

Place the bass, skin side down, in a baking pan lightly greased with olive oil. Lightly sprinkle the fillet with salt, pepper, and Creole seasoning.  

Bake in a pre-heated 400-degree oven for about 20 minutes. The internal temperature should read 145-degrees.

Meanwhile, melt the butter in a small fry pan. Add the lemon juice, capers, seasoned salt, and pepper. When the fish is cooked to 145-degrees, remove from oven and lay the baked bass skin side up in the lemon butter. If possible, remove the skin and discard. Carefully flip the fillet so the second side is also bathed in the butter sauce. Remove from pan and plate. Top each portion with any remaining lemon butter. Serve immediately.

Emeril’s Essence Creole Seasoning:

2½ T. paprika

2 T. salt

2 T. garlic powder or granulated garlic

1 T. freshly ground black pepper

1 T. onion powder

1 T. cayenne

1 T. dried oregano

1 T. dried thyme

Combine all ingredients and store in an airtight container.

OVEN BARBEQUED FLANKEN-STYLE SHORT RIBS

So, Mr. C. brought a package of flanken-style ribs (I thought he said “Frankenstein”) (my hearing just isn’t what it used to be) home after a provisioning trip to one of our local butcher shops. As he was rattling off all the meat products he had procured, including the ribs, I promptly forgot everything he said and went on with what I was doing. (I was probably deep into researching a recipe, and not paying Mr. C. the attention he should have been accorded. My bad!) Anyway, jump forward a couple of months, and he casually asks me when I plan to use the ribs? Well, of course I said, “how about tomorrow night”? OK then. Bring them on up from the freezer and let them thaw overnight so I can throw some rib rub on them before you place them in the smoker for a couple of hours and finish them off with a quick fling on the grill. I mean really, isn’t that how I like to fix ribs? Well, when he brought up the package, these ribs didn’t look like anything I had ever seen, much less cooked before. And they weren’t Frankenstein ribs, they were flanken-style ribs. So, how to cook these babies?

Basically, flanken-style ribs are pieces of meat thinly sliced across the rib section of beef bones. Each piece consists of 3-4 small pieces of bone, between sections of flavorful meat. They are marbled with fat and connective tissues and are super tender after being marinated for a short time or as in this recipe, baked after being sprinkled with a dry rub. And then finished off with BBQ sauce.

Another tidbit that you might already know, but I never stopped to consider. Short ribs are beef. The pork equivalent of beef short ribs are spareribs, and are not typically referred to as short ribs. (Why am I only learning this after 57 years of being chief cook and bottle washer in my own home!) Anyway, now I know! But back to this recipe.

For a nice change from a regular “English” cut short rib, give this ridiculously easy to prepare, tender, and delicious short rib recipe a try. Really yummy.

And if you live in the Stanwood/Camano Island area, Del Fox Custom Meats carry “Frankenstein” cut short ribs. Tell them Victor sent you.

Peace and love to all.

Rib Rub:

2 T. paprika

2 tsp. freshly ground black pepper

2 T. kosher salt

2 tsp. granulated garlic

1 tsp. cayenne

1 tsp. ancho chili powder (found in most upscale grocery stores in bulk)

2 tsp. dried oregano

2 tsp. dried thyme

Combine all ingredients together. Store in an airtight container.

Ribs:

4-8 bone-in flanken-style short ribs

dry rub

BBQ sauce (see recipe for my favorite BBQ sauce below)

Cover a sheet tray with aluminum foil and a generous amount of nonstick cooking spray. Place the ribs, evenly spaced, on the tray. Coat one side of each rib with a half teaspoon of the dry rub mixture. Flip, and coat the other side with a half teaspoon more of the Rib Rub. Place the ribs in a pre-heated 275-degree oven for 1 hour.

After one hour, remove the ribs from the oven and using tongs, flip them over. Place back in the oven for 1 hour, or until nicely browned.

After the second hour has passed, remove the ribs from the oven and turn the oven temperature up to 450-degrees. Generously coat each side of the ribs with barbecue sauce. Once the oven has reached 450-degrees, place the ribs back into the oven for 2-3 minutes, or until they are crisp on the outside. Serve immediately.   

BOURBON BBQ SAUCE

¼ c. unsalted butter

¼ c. minced onion

3 cloves garlic, minced

¼ c. brown sugar

2 tsp. whole grain mustard

1 c. ketchup

1/3 c. Worcestershire sauce

¼ c. fresh lemon juice

¼ tsp. hot sauce, or to taste

¼ tsp. cayenne

2 T. bourbon

Melt butter in a medium sized covered saucepan. Sauté onion until translucent; add garlic and cook until garlic releases its aroma, about 1 minute. Add remaining ingredients, bring to a boil, reduce heat, cover pan, and simmer gently for 30 to 60 minutes, stirring occasionally. Basically, cook the sauce until it reaches your desired thickness. (Sauce will thicken as it simmers. If the sauce is still too thin after 60 minutes, remove the lid. But be warned – simmer at a very low temperature or you will have BBQ sauce all over you and your kitchen!) Serve sauce warm or at room temperature.


QUICK AND EASY MARINATED FLANK STEAK

In keeping with my new cooking philosophy, which BTW I fail to adhere to most of the time, I am never-the-less endeavoring to adopt the KISS (Keep It Simple Sister) principle. Which means, I’m trying to spend less time on my feet in the kitchen. So far, my brain still thinks I’m 37, while my legs and feet tell a different story. But every so often the whole team comes together, and I manage to produce a dish that takes little time to prepare but tastes like I’ve been slaving away in the kitchen for hours. And one of the best ways I know to accomplish this feat, is by serving grilled meat that has been marinated. Because while the meat is marinating, not only are the muscle fibers being tenderized, but flavor is also being added to the meat. And well, not to put too fine a point on it, for not much prep time, I still appear to have my cooking act together. And isn’t that a grand thing! But really, it’s the marinade and Mr. C. in front of the grill that does all the heavy work. While I take the credit. (See how that works!)

So, yesterday, while a nice old hunk of flank steak was in the last throes of defrosting, I went in search of a simple marinade recipe. And I found the perfect recipe on the delish.com site. 4 ingredients. (You can’t get much easier than that.) And the result was fantastic. The meat was tender. The flavor was wonderful.

I served the thinly sliced meat with Mediterranean Pearl (Israeli) Couscous Salad. (Recipe to be posted soon.) And the combination worked very well together.

So, once again, I pulled off dinner with a minimal amount of work. And for tonight’s dinner, I have leftover meat and salad. Win/win. Of course, I will mess with the meat and make it into a dish that hopefully takes little effort. (I’m actually thinking of steak burritos. We’ll see what I come up with.)

As far as last night’s dinner, I’m giving myself a B+. An A+ for the meat, but a C+ for the length of time it took me to make the salad. But I can live with a B+. My feet can too.

Peace and love to all.

⅓ c. extra-virgin olive oil

¼ c. reduced-sodium soy sauce

2 T. fresh lime or lemon juice

2 T. brown sugar

2 lb. flank steak, all fat and silver skin removed

kosher salt

freshly ground black pepper

In a large flat container, whisk the olive oil, soy sauce, lime juice, and brown sugar together. Add steak and toss until coated. Marinate for at least 2 hours in the refrigerator. (I marinated mine for 4 hours, and it was perfect.)

Remove steak from marinade. Season lightly with salt and pepper.

Preheat grill to medium-high. Place steak on grill and cook to your liking. For the perfect medium-rare flank steak, grill for 8-12 minutes (depending on thickness of meat), turning about 1 minute before the halfway point. A meat thermometer should read no higher than 130-degrees.

Remove from grill and rest the steak lightly covered with foil for 5 minutes before thinly slicing on the diagonal.


LEFTOVER PORK TENDERLOIN PAPRIKÁS (PAPRIKA) OVER CREAMY PECORINO ROMANO PULISZKA (POLENTA)  

I love Hungarian food. And this is a quick and easy recipe for a really delicious Hungarian paprikás. The combination of sweet and smoked paprika lends an amazing flavor to this creamy, savory, meat studded sauce. And when served over polenta containing a sheep’s milk cheese, the result is a mouth full of heaven.

For this recipe, based on a recipe from katlynskitchen.com, I used leftover pork tenderloin medallions which worked really well. But if you don’t happen to have leftover pork, you can start with uncooked pork with the same result. (Instructions included below for starting with uncooked pork.)

But don’t skip making the polenta. If you don’t happen to have Pecorino Romano in your fridge, you can certainly use Parmigiano-Reggiano. But if you have never tasted Pecorino Romano, this is a great time to learn about this amazing cheese. We love it! And I always have a big old hunk of it (thank you Costco) in our fridge. It is perfect in all kinds of dishes, and it routinely displays the longevity of a Twinkie. (It doesn’t get blue fuzz around the edges even after a couple of months.) For those of you unfamiliar with this marvelous cheese, a bit of information from the Spruce Eats site:

“Pecorino Romano is an ancient Italian cheese made from 100% sheep’s milk. The milk comes from sheep bred in the wild and fed on natural pastures in Lazio, the province of Grosseto in Tuscany, and the island of Sardinia. It is one of four Italian sheep’s milk cheeses that benefits from protected designation of origin (P.D.O.) status and continues to be made using only traditional methods in its areas of origin.

Pecorino Romano is a hard cheese with a smooth, thin, natural rind. It’s white to pale straw in color, and it’s distinguished by its crumbly texture and an intense salty flavor which increases with age. While Pecorino Romano and Parmigiano-Reggiano cheese have similar uses, they are different. Parmigiano-Reggiano is a hard cow’s milk cheese. It’s nuttier and sweeter than Pecorino Romano, which is decidedly saltier. Depending on the recipe, Pecorino Romano and Parmigiano-Reggiano can be interchangeable or combined, and they are both ideal grating cheeses.” 

So, I guess there’s nothing else to say about this recipe. So, I’ll close for today and go make some granola. Dinner is already prepared. Leftovers. (I’m really learning to love leftovers.) Just a simple green salad to complete the meal, and dinner will be on the table. No fuss, no muss. It’s my lucky day!

As always, be happy and stay healthy.

Peace and love to all.

1 T. extra virgin olive oil

½ sm. onion, chopped

6 oz. button or cremini mushrooms, thickly sliced

2 garlic cloves, finely minced

1 (14.5-oz.) can tomatoes, plus juice (preferably Italian tomatoes)

½ c. chicken stock  

½ lb. (plus or minus) leftover* pork tenderloin or pork roast, cut into ¾ inch cubes

1 T. sweet (regular) paprika (use Hungarian or Spanish paprika in a tin for best flavor)

½ tsp. smoked paprika 

¼ tsp. dried thyme

¼ tsp. dried caraway seeds, crushed

¼ tsp. kosher salt

freshly ground black pepper

2/3 c. sour cream

1 T. freshly chopped parsley

Heat the olive oil in a large, covered pan. (I use my Le Creuset Dutch oven.) Add the onion and mushrooms and cook until the mushrooms begin to brown. Add the garlic and cook for 1 minute.

Add the canned tomatoes, chicken stock, diced cooked pork, sweet and smoked paprika, thyme, caraway seed, salt, and pepper. Bring to a boil, reduce heat, cover, and simmer for about 90 minutes, or until the meat is fork tender. Stir periodically. If more liquid is required, add a bit more chicken broth. Taste and adjust seasoning. Just before serving, remove from heat and stir in the sour cream.

Great served over polenta or hot al dente noodles if you prefer. Just before serving, garnish with fresh parsley.

*If you don’t have leftover pork, simply chunk up some uncooked pork tenderloin or roast and brown the meat in a tablespoon of olive oil in a large, covered pan. Then add the onion and proceed as directed.

CREAMY PECORINO-ROMANO POLENTA (PULISZKA)

3 c. chicken broth

pinch sea salt

freshly ground black pepper

¾ c. polenta (coarsely ground cornmeal) (not instant or fast cooking variety)

2-3 T. unsalted butter

½ c. freshly grated Pecorino Romano cheese (or your favorite hard sheep’s cheese)

Bring broth, salt, and pepper to a boil in a medium-sized, covered saucepan. Whisk the dry polenta slowly into the boiling broth until all of the ground corn is stirred in with no lumps remaining.

Reduce heat to low and simmer, whisking continuously until polenta starts to thicken, about 5 minutes. (Polenta mixture should still be slightly liquid.) Cover and cook for 30 minutes, whisking every 7 minutes or so. (When polenta is too thick to whisk, stir with a wooden spoon.) Polenta is done when the texture is creamy, and the individual grains of ground corn are tender.

Remove from heat and gently stir in the butter until partially melted. Then add in the Pecorino Romano until the cheese too has melted.

Cover and let stand 5 minutes to thicken. Stir, then taste to see if additional salt or pepper is required.

PAN SEARED AND SAUCED PORK MEDALLIONS

Now one thing you should know. These days, I am leaning more and more towards recipes that are quick and easy, but still deliver a big bang for the buck! And pork tenderloin remains one of the best ways I know to accomplish this goal. Except for the bit of silver skin, that BTW must be removed prior to cooking, there is no waste. Plus, you can flavor it up any old way you choose. So, the other evening I chose to adapt a recipe I found on the diethood.com site for our dinner repast. And I can hardly wait to share the recipe with you.

This recipe is so blinkin’ easy I’m almost embarrassed to pass it along. Almost! But I simply must provide you with this recipe because even though I’ve been retired for almost 20 years, I still remember coming home from work wanting nothing more than a nice cocktail and a bit of time to rest my weary bones. But as with all of us, there was still dinner to fix. Now that I’m a bit older, there is still dinner to be prepared, and I still want my evening cocktail. But now that same cocktail is my incentive to cook dinner! I sip away while I prepare dinner. Some might consider my evening libation a bribe to cook dinner. I consider it simply a necessary ingredient for whatever I happen to be making! (And no, I don’t have a drink every evening. But it makes for a good story.)   

Anyway, this is an entrée that can be prepared very quickly, but still taste like it was prepared by the head chef of a truly fine restaurant. And the preparation is extremely easy. Serve the medallions with mashed potatoes, rice, or even buttered noodles and a salad or green veggie, and life’s good. And thank you Katerina for this wonderful recipe.

As always, have fun in your kitchen. Make good food. Laugh a lot. And be kind. Mr. C. and I just finished reading Man of Nazareth by Anthony Burgess. A beautifully written historical novel about the life of Jesus. And throughout the entire book, the theme of kindness was upper most. Kindness to others regardless of ethnicity, color, or any of the other aspects of an individual that result in distrust with no real reason. I wholeheartedly recommend this book to anyone who thinks they may have a bit yet to learn about kindness.

Peace and love to all.

scant ½ tsp. kosher salt

freshly ground black pepper

½ tsp. dried thyme

¼ tsp. paprika

¼ tsp. granulated garlic

¼ tsp. granulated onion

1 (1-1½ lb.) pork tenderloin, all excess fat and silver skin removed  

2 T. avocado or vegetable oil

3 T. unsalted butter, divided

½ c. water

½ tsp. chicken base (I use Better Than Bouillon Chicken base)

1 T. chopped fresh parsley, for garnish 

Combine the salt, pepper, thyme, paprika, granulated garlic, and granulated onion in a small mixing bowl.

Cut the tenderloin into 12 equally thick medallions (rounds). Place the medallions on a small baking sheet. Sprinkle half the seasoning evenly over each medallion. Press down on the medallions to secure the seasoning and to flatten them to an even thickness.

Add the oil to a large fry pan set over medium-high heat. Add the pork medallions (seasoned side down) to the skillet and cook for 3 minutes. While the first side cooks, add the remaining seasoning to the top side of each medallion. Please note: if you don’t have a large enough frying pan so the medallions aren’t crowded in the pan, cook the medallions in 2 batches.

Flip the pork medallions and add 1 tablespoon of the butter to the pan; cook for 2-3 more minutes, or until the internal temperature of the medallions register 135-degrees. (Cooking time will depend on the thickness of the medallions.) DO NOT OVERCOOK!

Remove the medallions from the skillet and set aside on a platter.

Slowly whisk in the water and chicken base while scraping up all the browned bits from the bottom of the pan. As the sauce cooks over medium heat, add the remaining 2 tablespoons of butter. Gently stir until the melted butter has slightly thickened the sauce.

Return medallions to the skillet. Gently spoon the sauce over the medallions as they heat. Remember: you don’t want to cook the medallions any longer. You are simply re-heating them a bit.  

Remove from heat, garnish with parsley, and serve the medallions immediately.

HAM HOCK AND NAVY BEAN SOUP WITH FENNEL 

And yes, I make soup frequently. Because – I love soup. It’s easy to prepare, most of the time includes lots of veggie action, and it tastes good. And during the fall and winter months, soup is a comfort. For me it’s a reminder of how lucky I am to be warm and cozy in my own home. And to my mind, soup should be the poster child for comfort food. And you know how I feel about comfort food! Thus – I make soup all the time. Luckily Mr. C. loves soup as much as I do. Otherwise, he’d be on his own for dinner because I’d be serving soup anyway! Of course, you know that’s not true. But it makes for a good story. And it serves as an affirmation of how much I really do love a big old bowl of really good soup. And there in lies the heart of this harangue. I only like soup when it is delicious. And usually that means – homemade. (Or made in a fine restaurant.) And I know. I’m picky. But I’m sorry folks, a bowl of soup that comes from a can, just doesn’t make it for me.

First of all, canned soup is usually too salty. Then, for what you get, it’s expensive. If there is any meat, in a soup that calls itself chicken noodle soup for example, any of us would be hard pressed to find more than just a smidgen of chicken. So, what would we be paying for? I rest my case. (And yes, I know, convenience is worth something.)

Actually, I really shouldn’t be preaching to the choir in the defense of homemade soup. Because if you weren’t into homemade soup in the first place, you wouldn’t even be reading this diatribe!   

Anyway, all blather aside, I truly believe you would find this soup easy to prepare and ever so delicious. Absolutely perfect for a grey, Pacific Northwest dinner. (Or anywhere else for that matter!)

Peace and love to all.

1 T. extra virgin olive oil,

½ lg. onion, chopped

2 carrots, chopped

4 celery ribs plus leaves, thinly sliced

1 lg. fennel bulb, diced

4 lg. cloves garlic, finely minced

½ c. dry white wine

6 c. chicken broth (or 6 c. water and 2 T. chicken base)

1 (8-oz.) can tomato sauce

½ tsp. seasoned salt

freshly ground black pepper

2 tsp. fennel seeds

¼ tsp. dried thyme leaves

4-6 crushed red pepper flakes

1 bay leaf

1 smoked ham hock

1⅓ c. small navy beans, rinsed

2 c. thinly sliced baby spinach

Heat olive oil in a large, covered soup pan or Dutch oven. Add the onion, carrots, celery, and fennel bulb. Sauté only until onion starts to soften. Add the garlic and cook for 1 minute.

Add the wine and cook until any liquid has evaporated.

Add the chicken broth, tomato sauce, seasoned salt, pepper, fennel seeds, thyme, crushed red pepper flakes, bay leaf, ham hock, and navy beans. Bring to a boil, reduce heat, cover, and gently simmer until the beans are soft, about 2 hours. After about 90 minutes, remove the ham hock, let cool, and separate the meat from the bone and fatty tissue. Chop or shred the meat and add it back to the pot.

When the beans are tender, add the spinach. Remove from heat. Taste and adjust seasoning. Discard bay leaf before serving.

Great accompanied by crusty baguette slices or Crostini. See recipe below.  

Please note: For this recipe, beans do not need to be pre-soaked.

CROSTINI

baguette or similar chewy long loaf of bread

extra-virgin olive oil

flaky or coarse sea salt

Pre-heat your oven to 450-degrees. Line a rimmed baking sheet with parchment paper for easy clean-up. 

Slice the bread on the diagonal into pieces no wider than ½-inch. Lightly brush both sides of each slice with olive oil.

Place the slices in a single layer on your prepared baking sheet and bake them on the middle rack for about 9 minutes, until they are crisp and nicely golden on top. Remove from oven and sprinkle lightly with salt. Serve immediately.

CHICKEN ENCHILADA CASSEROLE  

Oh, the siren call of a truly delicious casserole. And yes, I know that part of the definition of “siren call” includes “potentially harmful and dangerous”. And the kind of casseroles I am always drawn to, can be just that for me. Because I am always tempted to eat more casserole (like this one) than is healthy or required by my body to stave off starvation. And let’s face it. My aged body doesn’t need very much nourishment to keep it alive and healthy. But my mouth, has obviously decided to ignore the memo from my brain. Because my mouth keeps wanting more, more, more! So, my common sense is often driven to intercede in my brain’s defense. Which is quite a difficult thing for it to do, as some of you might attest. But, whenever possible, I allow my common sense to prevail. And it absolutely must take over when I am sitting at dinner with a big old pan of this kind of casserole beckoning me to have seconds a mere 6 feet from where I am dining. It isn’t fair, but then, what in life is?!

So, I guess what I am trying to relate, is that this is a very tasty casserole. And quite easy to prepare. And the kind of casserole that everyone in your family will enjoy. And I know that some people have an aversion to casseroles. What’s with that? It’s got to be a holdover from when they were children and forced to eat a dry tuna casserole. (Like the one my mother used to make.) To these people I say – GET OVER IT! Times change, recipes change, and when made correctly, casseroles can be fantastic. And this is a good one to prove that point!

So, even if you have a family member who is casserole resistant, make one anyway. This person will soon learn that a good casserole is a joy and a delight! I’ve got broad shoulders. Tell them, Patti made you do it.

Peace and love to all.

3 T. unsalted butter, divided

2 boneless, skinless chicken breasts, cut into small bite sized pieces

½ c. finely diced onion

2 T. unbleached all-purpose flour

2½ c. water

4-5 tsp. chicken base (I use Better Than Bouillon Chicken base)

12 regular size corn tortillas  

½ c. sour cream (Mexican sour cream is best)

¼ tsp. seasoned salt

freshly ground black pepper

1½ tsp. chili powder

1/8 tsp. cayenne

1 tsp. granulated garlic

⅓ c. diced roasted red peppers

4 oz. can diced green chilies (I use Hatch chilies)

2 c. grated sharp cheddar cheese

1 c. grated Monterey Jack or mozzarella cheese

Melt 2 tablespoons of the butter in a good-sized frying pan. Cook the chicken until still a bit of pink remains. Add the onion and cook for about 3 minutes. Using a slotted spoon, remove the chicken and onion to a small bowl.

Add the remaining 1 tablespoon butter to the pan. Add the flour and whisk together for about 3 minutes. Add the water and chicken base. (And of course, you can skip the water and chicken base and use chicken broth.) Bring to a boil, reduce heat, and let burble for a couple of minutes as the mixture thickens. Before adding the other ingredients, remove a half cup of the mixture and spread on the bottom of a lightly greased 9×13-inch casserole or Pyrex baking dish.

Then stir in the sour cream, seasoned salt, pepper, chili powder, cayenne, granulated garlic, roasted red peppers, green chilies, and chicken and onion mixture plus any residual juice.    

Next add 6 tortillas evenly distributed to the baking dish. Then spread the tortillas with half of the chicken mixture, and half of both kinds of grated cheese.

Repeat with the remaining 6 tortillas, remaining chicken mixture, and top with the remaining grated cheese.

Bake uncovered in a pre-heated 350-degree oven for 35-40 minutes or until bubbly.   

BAKED RACK OF LAMB WITH A SAVORY TOPPING 

This is a simple variation on my Rack of Lamb with Kalamata-Rosemary Crust recipe. (My favorite rack of lamb recipe BTW.) But some days I don’t want to mess around in the kitchen as much as other days when I can hardly wait to start dinner. And I know, for those of you for whom cooking is the antithesis of a pleasurable way to spend your time, you must think I am bat (fill in the blank) crazy! But it’s true. There are days when I truly look forward to my time in the kitchen. But then there are the days I still want to serve up a delicious meal, but putting in the effort to do so, just doesn’t appeal at all! And the evening I served this recipe for rack of lamb just happened to be one of those times.

In truth, I had already prepared Mediterranean Quinoa Salad, which BTW is not only delicious but very easy to prepare.  But my flagging stamina that day had already been taxed. The last thing I wanted was to spend more than 20 minutes more in food prep. Being the rather resourceful person that I am, I brought out my standard recipe, the one mentioned above, and paired it down to the recipe you find below. And to my great delight, the meat was juicy and very well-seasoned. Which along with the salad made for a mighty fine meal.

So, if you too have those days when you would rather do almost anything besides cook, this is the perfect recipe for you. Quick, easy, and delicious.

And lest you think that I am losing my love of all things culinary, fear not. I still love my kitchen and producing different dishes at a prodigious rate. I’m just getting older, and what used to take me an hour, can now take me two or even three hours. But I’m still in the game. Fearless, searching for new and different recipes with which to thrill and delight you, and always up for a challenge. It’s just that now I am no longer the hare, I’m the tortoise!  

Peace and love to all.  

1 garlic clove, finely minced

1 tsp. Dijon mustard  

½ tsp. finely chopped fresh rosemary leaves

2 tsp. finely chopped shallot

¼ tsp. kosher salt

freshly ground black pepper

2 tsp. extra virgin olive oil

4 pitted kalamata olive, minced 

1 (8-rib) frenched rack of lamb, silver skin removed

lemon wedges, for serving

Mix the garlic, Dijon mustard, rosemary, shallot, salt, pepper, olive oil, and kalamata olives together. 

Place the rack of lamb, meaty side up on a small, rimmed aluminum foil covered baking sheet. Coat the top of the meat with the garlic mixture and let sit at room temperature for 1 hour.

Roast the lamb in a pre-heated 450-degree oven for 20 minutes for medium-rare, or until a thermometer inserted in the center reads 120 to 125-degrees. 

Remove from oven, tent with foil, and let rest at least 10 minutes before carving into chops.

Serve with lemon wedges.


GROUND TURKEY AND MEXICAN CHORIZO FILLED GREEN PEPPERS, BURRITOS, AND TACOS  

Stuffed Green Peppers

As promised, here is another recipe featuring Mexican chorizo. This recipe comes straight from our dear friend Jim. Who, BTW, is an amazing cook. And for anyone who has had the pleasure of dining at Jim and Margo’s home, you know of what I speak. You too are blessed. But enough pontificating. I don’t want Jim to get a swollen head. I just want you to know that I am not responsible for this marvelous recipe. I wish I were, but my mother always told me that honesty is the best policy. (Apparently, a lot of politicians never got that same directive from their mothers, but that’s a story for another time!)

Anyway, this versatile filling recipe is absolutely delicious and super easy to prepare. At first glance it looks like the recipe makes a big batch of filling. And guess what? It does! All’s the better as far as I’m concerned. Because this filling freezes beautifully. Besides, what kind of recipe calls for half a pound of ground meat? Ground meat doesn’t come in half pound packages. At least not in the grocery stores I frequent!

Anyway, just make this fabulous filling. Make stuffed peppers, or use it for terrific burritos or tacos, or any other dish that would profit from a spicy, meaty infusion of southwestern flavor. And lest I forget, this is a fairly healthy filling. Lots of veggie action happening and no starchy ingredients.  

So, again, thank you Jim for this terrific recipe. I made Stuffed Green Peppers last night for dinner, and this morning I made Breakfast Burritos. Absolute culinary bliss my friends.

As always, keep smiling. We aren’t out of the woods yet with covid. But we are moving towards the edge of the woods where the trees are further apart, the sun is breaking through, and that just might be a meadow further down the path.

Peace and love to all.

Ground Turkey and Mexican Chorizo Filling:

2 tsp. extra virgin olive oil

1 lb. ground turkey (part white and dark meat, if possible)

1 lb. bulk Mexican chorizo

1 onion, diced

3-4 celery ribs, diced

1 green pepper, diced

1 red pepper, diced

5-6 garlic cloves, minced

1 (28-oz,) can diced tomatoes (Italian are best)

3-4 T. chili powder

3-4 T. taco seasoning

freshly ground black pepper

¾-1 c. chopped fresh cilantro or 2-3 T. dried cilantro*

Heat the olive oil in a large skillet over medium-high heat. Add the ground turkey and chorizo. Fry the meat until cooked through and browned.

Add the onion, celery, green pepper, and red pepper. Cook until the veggies are softened, about 8 minutes. Stir in the garlic and cook for 1 minute.

Add the diced tomatoes, chili powder, taco seasoning, and black pepper. Cook, uncovered, for about 30 minutes to blend flavors and reduce the liquid. Remove from heat and add the cilantro. Taste and adjust seasoning.

*Dried cilantro doesn’t taste like fresh cilantro. Fresh cilantro has a strong lemony and slightly peppery flavor, which some people (like me) find to taste kind of soapy. In other words, fresh cilantro is not my favorite ingredient. I much prefer dried cilantro which has a weak cilantro flavor and is perfect in soups, stews, or any recipe that requires a bit of cooking time to blend flavors.

STUFFED GREEN PEPPERS

4 green peppers (or however many you need)

Ground Turkey and Mexican Chorizo filling

grated cheese (I use sharp cheddar or mozzarella)

Slice the green peppers in half, top to bottom. Carefully cut out the stem, then remove the membranes and seeds.   

Lightly grease a baking pan. Place the half peppers, cut side up in the pan and fill with the meat mixture. You will have extra filling. I suggest freezing it for tacos or burritos. (See recipes below.)   

Bake the peppers in a pre-heated 375-degree oven for 75-90 minutes or until the pepper are soft and starting to brown. (If the filling gets too brown during the baking process, cover with aluminum foil.) About 5 minutes before removing the peppers from the oven, liberally cover the tops with grated cheese.

Remove from oven and serve immediately.

BURRITOS*

tortillas (whole wheat or regular)

Ground Turkey and Mexican Chorizo filling

grated cheese

refried or whole pinto beans, opt.

shredded lettuce

finely diced tomato

sour cream

diced avocado

Stuff lightly warmed tortillas with filling, grated cheese, and a tiny bit of refried beans. Wrap and heat on high for 1 minute in your microwave. Serve lettuce, diced tomato, sour cream, and diced avocado on the side.

Note: I warm the tortillas just before wrapping because warming them makes them more pliable.

BREAKFAST BURRITOS*

tortillas (whole wheat or regular)

Ground Turkey and Mexican Chorizo filling

scrambled eggs

grated sharp cheddar cheese

chopped green onions

Stuff lightly warmed tortillas with filling, scrambled eggs, grated cheese, and chopped green onion. Wrap and heat on high for 1 minute in your microwave. Serve sprinkled with a bit more grated cheese and sour cream on the side.

Note: I warm the tortillas just before wrapping because warming them makes them more pliable.

TACOS*

taco shells

Ground Turkey and Mexican Chorizo filling

refried or whole pinto beans, opt.

grated cheese

shredded lettuce

finely diced tomato

diced avocado

sour cream

Place hot filling in shells. Serve with a variety of additives including refried beans, grated cheese, shredded lettuce, diced tomatoes, diced avocados, and sour cream.

*In my opinion, there is no need for salsa with these dishes. The salsa would just get in the way of the lovely flavor of the Ground Turkey and Mexican Chorizo filling.