Category Archives: MAIN DISH RECIPES

REUBEN SANDWICH

OLYMPUS DIGITAL CAMERAOLYMPUS DIGITAL CAMERA

Ok, St. Patrick has been put to bed for another year, your green cloths are in the hamper, the dishes have almost all been run through the dishwasher, and your recycling bin, full to the brim with empty beer bottles, is at the curb. Congratulations, another successful St. Patrick’s Day dinner has come and gone. But what to do with that small amount of left over corned beef? Well I have the perfect answer to that delightful dilemma my dear reader, and so does my dear friend Jim. The best use for corned beef ever invented (left over or not) is the Reuben Sandwich! There are as many theories as to why this sandwich is called a Reuben, and speculation about who invented it as there are ways in which a Reuben Sandwich is prepared. My favorite account of the creation of this now famous sandwich is as follows:  In 1938, Arnold Reuben gave an interview for the American Life Histories: Manuscripts from the Federal Writers’ Project, 1936-1940, entitled Reuben and his Restaurant. This is an excerpt from that December 18, 1938 interview with Mr. Reuben: “I’ll tell you about how I got the sandwich idea. I owned a delicatessen on Broadway and one day a dame walks in, one of the theatrical dames, and she’s down and out I suppose, and she asks me for something to eat. Her name was Anna Selos. Well, I’m feeling sort of good, so I figure I’ll clown around for the dame. That’s how it all came about. I’m clowning for the dame. Well, what do I do? I take a holy bread that I used to keep and grab up the knife and, you know, clowning like, I cut it right through on the bias. Then I take some roast beef, I don’t remember exactly what. But, anyway, I figure I’ll put anything on. So I take some meat and cheese and I slap it on, and I put on some spice and stuff and I make her up a sandwich; it was a foot high. Well the dame just eats it, that’s all. She must have been plenty hungry. And when she gets through she says, “Mr. Reuben, that’s the best sandwich I ever tasted in my life.” Well, the idea comes to me in a flash. I’ll call it the Anna Selos sandwich, after the dame. Then, one night, she brings some friends up, you know, stage people and a newspaper man, and this guy he goes right behind the counter and makes himself up a sandwich, and then he tells me why I don’t call the sandwich after celebrities? Like what happened with Anna Selos. Why don’t I call it the Anna Selos sandwich? Well, boys, in a flash, I get the idea. Anna Selos! I’ll call it a Reuben Special.” Regardless of who invented this recipe or why it is called what it is, the actual fact of the matter is that the Reuben Sandwich should be classified as the eighth wonder of the world! The modern world that is! It is simply that different from any other sandwich and a true culinary achievement.

A little Northwest history: When Jim was in 2nd grade (about 50 years ago) his parents started taking him to the Crabapple Restaurant at Bellevue Square in Bellevue, Washington. Those of you who have lived in the Seattle area for some time will probably remember that Bellevue Square was one of the nation’s earliest shopping centers. And the Crabapple Restaurant was one of the first establishments to open in the square. The restaurant was designed with an art gallery motif, and its walls were filled with works by Northwest artists. The owner, Carl Pefley apparently found himself acting as an art dealer, selling paintings and then choosing replacements. Both Carl and his wife Pat enjoyed art shows, so it was inevitable that they would want to form one of their own. In 1947, Bellevue’s Pacific Northwest Arts Fair opened for the first time. It was held for 3 days and attracted more than 30,000 visitors. But what attracted Jim’s family to this amazing restaurant was the Reuben Sandwich. Jim said it was truly the first time he realized that some food is really, really good.  The following recipe is a combination of Jim’s and my thoughts on how to build the quintessential Reuben. The only difference being that Jim uses Maries Thousand Island Dressing and I usually make my own. Huge difference, right? (My recipe included.)

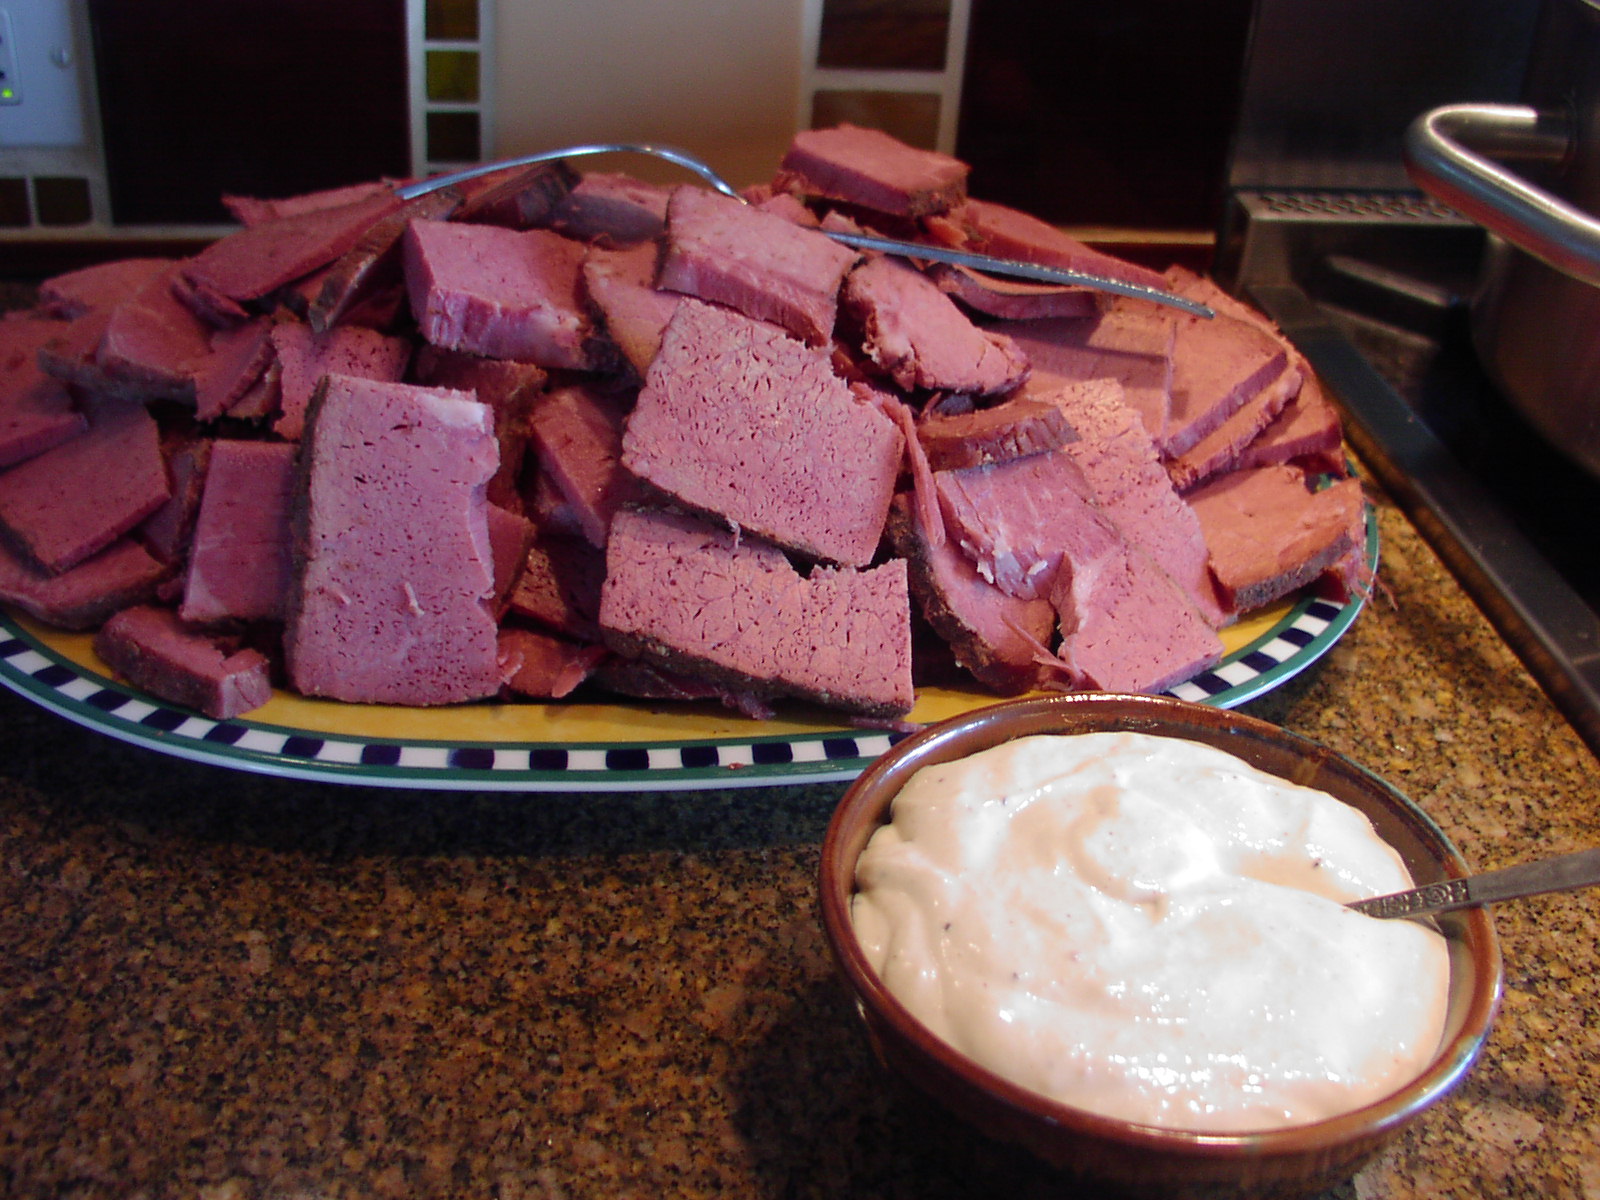
  • thin slices of corned beef, trimmed of any fat (home cooked is the best)
  • sauerkraut (Jim uses S&W canned, I use whatever is in the pantry at the time)
  • Swiss cheese, thinly sliced (Jarlsberg is perfect. And none of that low-fat version. Yikes!)
  • dark Russian rye bread (Brenner Brothers is the best, if you can find it)
  • Thousand Island dressing (either Marie’s or homemade)
  • butter

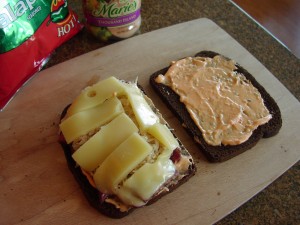
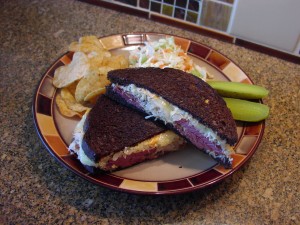
Place about a tablespoon of water in a lidded non-stick pan and place over low heat. Add the corned beef and warm the meat on both sides. Overlap slices of the meat until it is about the shape of the bread you are using. Add a layer of sauerkraut, as thin or as thick as you prefer. Place 2-3 thin slices of Jarlsberg on top of sauerkraut, cover and cook until all is warmed through and the cheese is just starting to melt. Meanwhile slather Thousand Island dressing on 2 pieces of rye bread. Remove the corned beef from the pan and carefully place it on one of the pieces of bread. Top with the other piece of bread, dressing side down. Add a pat of butter to the pan and heat till bubbling. (Use just enough butter to flavor bread and allow it to brown, but not so much that the sandwich tastes greasy.) Put sandwich in pan, place a small plate on top as a weight, and heat until bread starts to toast. Flip the sandwich and repeat the process. (And don’t even think of hotting the whole thing up in the microwave!) Cut in thirds and serve with potato salad, coleslaw or Jim’s favorite – Tim’s Jalapeno Potato Chips and a good stout beer. (Jim recommends a Guinnes.) Oh yes, another Jim recommendation. Eat the middle third of the sandwich last. I’m not quite sure why that is. But when it comes to food and the eating thereof, I never question the big guy. If you knew him and his cooking, you wouldn’t either!

Thousand Island dressing recipe:

  • 1 c. mayonnaise
  • ¼ c. ketchup
  • 1 T. Dijon mustard
  • ½ tsp. creamy horseradish
  • dash hot sauce
  • freshly ground black pepper
  • 3 T. finely minced dill pickle
  • 3 T. finely minced black olive
  • 1 green onion, finely minced
  • 1 T. minced fresh parsley

Combine all ingredients and serve on Reuben Sandwich or any time a Thousand Island dressing is required.


IRISH LAMB STEW WITH ROASTED ROOT VEGETABLES

OLYMPUS DIGITAL CAMERA

Boy howdy, if you are looking for a recipe for really rich stew bursting with flavor, have I got a deal for you! I could not believe how delicious this stew was when I took my first “official” bite last evening. When I say “official bite”, I’m talking about my first bite from my serving bowl at the dinner table. Of course I had made several “quality control” bites during the cooking process (actually more than were absolutely necessary) so I had an idea of the pleasure that lay ahead. But when paired with a chunk of crusty bread and a lovely glass of Cabernet Sauvignon to compliment the richness of the stew, even I was impressed with my version of the lamb stew recipe I found posted courtesy of the Food Network Kitchens. You know, there are just times when you have to pat yourself on the back. And in all modesty (or at least as much modesty as I can muster on this one), you too are undoubtedly going to be pretty darned impressed with me. But be forewarned, this stew is rich! Not just a little rich, or kinda sorta rich, but full blown “Puttin’ on the Ritz” rich. (For those of you unfamiliar with the expression/song “Puttin’ on the Ritz”, please refer to the quintessential version of the song performed by Gene Wilder and Peter Boyle in the movie Young Frankenstein. www.youtube.com/watch?v=co6-tYS9k1U  Ya just gotta love those boys!) You’re also going to fall in love with this fancily dressed up stew, especially when you learn how easy it is to prepare. It’s not a terribly economical dish to make, because lamb isn’t cheap, but a small serving is quite sufficient. For a more formal dinner, along with the chunks of crusty bread, I would serve a fairly simply dressed green salad. Nothing too elaborate. No goat cheese for example. There is more than enough richness happening in the stew itself. To my thinking there’s only one way in which too much richness is desirable, and that’s in an abundance of good friends. In that regard, I’m as rich as Rockefeller!

  • 2 T. olive oil + more for roasted veggies
  • 2 lbs. lamb cut into bite size chunks (I use boneless leg of lamb and cut off as much fat and silver skin as possible)
  • kosher salt
  • freshly ground black pepper
  • 1 lg. onion, chopped
  • 4 garlic cloves, minced
  • 1/2 c. flour
  • ½ c. unsalted butter
  • 1 bottle amber or black ale
  • 3 c. beef stock
  • 1 (14.5-oz.) can diced tomatoes
  • 3 small parsnips, peeled and cut into bite sized pieces
  • 4 medium carrots, peeled and cut into 3/8-inch rounds
  • 2 medium unpeeled potatoes, cut into bite sized pieces
  • 8 (4-inch) sprigs fresh rosemary, plus 1 tsp. chopped

In a heavy covered pan, heat the 2 tablespoos olive oil. When the oil is hot, add the lamb which has been seasoned with salt and pepper and fry until dark brown. (You will probably have to fry the meat in 2-3 batches.) Remove the meat as it browns and set aside. When all the meat is brown the bottom of your pan should be really dark too. That’s what you want! Add the onions and sauté until soft, about 5 minutes. Add the butter and allow it to melt. Whisk in the flour, reduce the heat to low, and cook the roux until it is brown, about 4 minutes. Whisk in the beer and stock. Add the canned tomatoes and the reserved lamb; bring to a simmer, reduce heat slightly and cover. Simmer for 90 minutes, stirring periodically. Meanwhile, place the parsnips, carrots, potatoes, and rosemary sprigs on a shallow roasting pan. Toss with just enough olive oil to lightly coat veggies. Sprinkle with salt and pepper. Place the vegetables in a pre-heated 400 degree oven. Roast for 30-45 minutes or until the vegetables are tender and starting to brown. Remove the vegetables from the oven and strip the rosemary sprigs. Discard the stems. When the meat is tender and the gravy is good and thick, add the roasted vegetables to the lamb mixture. Cook for 10 minutes to blend flavors and textures. Add the chopped rosemary and adjust the seasoning. Serve with crusty baguette pieces, a simple green salad with a piquant dressing, and a full bodied Cabernet Sauvignon or other hearty red wine of choice.


BEER BRAISED BANGERS (SAUSAGES) WITH ONION GRAVY

OLYMPUS DIGITAL CAMERA

While researching and writing this series on food to serve for a typical Irish-American St. Patrick’s Day dinner, I found it almost impossible to locate recipes for salads and veggie side dishes. Don’t get me wrong, there were plenty of recipes for side dishes that included cabbage, carrots, potatoes, onions, and garlic. I even found an occasional nod to tomatoes, but nary a mention of vegetables such as broccoli, zucchini, or eggplant. And even the number of different ways to prepare meat dishes was pretty limited. (Corned Beef and Cabbage, Bangers and Mash, Irish Stew, and Shepherd’s Pie being the prime examples.) So, I readily came to the only conclusion a reasonably intelligent person could come to, and sorry all you Irish food lovin’ folk reading this blog, but in my humble opinion, Irish food is never going to be considered a top world cuisine. Way too limited in its scope. (An amazing realization, right?) However, in defense of Irish food, the dishes that I did try, all modified to reflect my personal taste of course, are really over the top delicious. This perfectly lovely way to serve a simple sausage, aka banger is a great example of Irish food at its finest. And again, I have to ask forgiveness from those of you who are Irish food connoisseurs and possibly Guinness lovers. Most of the recipes I found that called for beer as an ingredient, including this one that I modified from a recipe I found on the Closet Cooking blog, listed Guinness instead of amber or black ale. So call me a wuss (I’ve been called worse, by the way), but I think Guinness has way too strong a flavor and is too overwhelmingly bitter to blend well with the other ingredients in most of the dishes I tried. I know I’m probably in the minority on not preferring Guinness, so if you simply must be as traditionally Irish as possible, go ahead and substitute Guinness any time you read beer in my St. Patti’s day meat dish recipes. Just don’t blame me if the bitterness from the Guinness overpowers the rest of the subtle flavors in the dish!  Tomorrow’s recipe – Irish Lamb Stew with Roasted Root Vegetables. Yet another recipe I butchered modified that originally called for Guinness. At least I’m consistent. Ya gotta give me that!

  • 1 t. oil
  • 1 lb. sausages (I use bratwurst because actual Irish “bangers” are too hard to find)
  • 1 lg. onion, sliced
  • 1 clove garlic, chopped
  • 1 tsp. fresh thyme, chopped
  • 2 T. flour
  • 1 bottle beer (recommend amber or black ale)
  • 2 T. Dijon mustard
  • 1 T. Worcestershire sauce
  • 1 T. brown sugar (light or dark)
  • ¼ tsp. kosher salt

Pour oil into a medium sized covered fry pan. Add sausages when oil is hot. Cook sausages until they are browned on all sides. Remove sausages from pan and set aside. (They won’t be cooked all the way through at this point.) Reduce the heat and add the sliced onion; sauté until tender and just starting to brown. Add the garlic and fresh thyme and sauté until garlic releases its aroma, about 1 minute. Whisk in the flour and cook for about a minute. Add the beer, mustard, Worcestershire sauce, brown sugar, and salt, along with the browned sausages. Simmer covered over low heat for about 20 minutes or until the sausages are cooked through and the gravy is thick. Stir a couple of times during this cooking time to prevent the gravy from burning. Serve sausages nestled on top of Champ or simple mashed potatoes.

Side Dish Suggestions: Champ (or simple mashed potatoes), Braised Green Cabbage or Coleslaw and Soda Bread

Beer Pairing: Amber or Pale Ale (Guinness if you must!)


CORNED BEEF WITH MUSTARD SAUCE

This wonderful recipe is from my good friend Jim. (I refrain from using last names of the people I mention on this site because I don’t want them to lose points with their family and friends because of their relationship with me.) Anyway, this is Jim’s family recipe for Corned Beef with Mustard Sauce and his story.

Jim’s family has been enjoying corned beef at family gatherings for as long as Jim can remember (and Jim ain’t no spring chicken).  Sorry bud, but it’s true!   And throughout the years (over 50) Jim’s family has purchased their beloved corned beef for this recipe from Market House Corned Beef (MHCB) in Seattle. Along with selling corned beef, MHCB also offers fabulous deli sandwiches (corned beef/pastrami/roast beef) with accompaniments like potato salad and pickle spears. According to Jim, the corned beef from MHCB is the only corned beef he and his family will use. The beef is sold in vacuum sealed packages containing large or small pieces which will happily reside in your refrigerator for up to 3 months or for a year in the freezer. (Jim prefers center cut pieces with lots of fat for this recipe.) For convenience, Jim cooks the beef in disposable lidded foil steam table liners that he purchases quite inexpensively from places like Cash and Carry. For big pieces of beef he uses the full size deep liners, and for smaller pieces, the half size deep liners. (BTW, steam table liners are also wonderful to use when you are preparing a crowd size lasagna, macaroni and cheese, or any dish with ingredients that tend to fall in love with their baking container. Just toss the liner at clean up time and save yourself an amazing amount of effort.) For more information about Market House Corned Beef call 206.624.9248 or visit them at 1124 Howell St. in Seattle. Please note: they have very limited hours. 11:00 AM – 2:00 PM, Monday thru Friday; closed Saturdays and Sundays. To top his corned beef, Jim uses the mustard sauce recipe his mother received from a friend more years ago then anyone can remember. According to Jim, this sauce would make even the bumper off a 57 caddie taste good. I’m just going to take Jim’s word on this one, and I would suggest you do the same!

Corned Beef:

  • corned beef, as little or as much as you need
  • Coke Classic soda (no substitutes please)

Place meat in pan or steam table liner, fat side up. Pour any juices left in the bag over the meat and sprinkle with the spices that came with the corned beef. Fill pan ¾ up the side of the beef with Coke. Cover and place pan in a pre-heated 275 degree oven for 3-4 hours for a small (regular Costco or grocery store sized corned beef), or about 6 hours for a large piece of corned beef. Beef should be very tender when it is done and the Coke will appear clear. (Jim doesn’t know where they got the idea for using Coke as the liquid for this recipe, but it works. So why mess with perfection?). Please note: If you are using a foil pan, before adding corned beef and Coke, place the foil container on a sheet pan. This will make it easier and safer to get the meat in and out of the oven. Additional note: meat will happily rest in the oven to stay warm. Just don’t forget to turn the oven off. When ready to serve, cut the meat against the grain into ¼ to 3/8-inch slices. An electric knife works great for this purpose. Serve beef with Mustard Sauce. As accompaniments to the beef, Jim likes to serve scalloped potatoes and grilled asparagus. Many thanks Jim for sharing your treasured family recipe with us.  And on a personal note, special thanks to both Jim and Margo for your friendship lo these many years. Mr. C. and I love you guys and value our close relationship more than you will ever know.

Mustard Sauce:

  • ¼ c. dry mustard (Coleman’s is the best)
  • ½ c. sugar
  • kosher salt
  • white pepper (or black if you don’t have white)
  • 2 eggs, beaten
  • ½ c. evaporated milk
  • ½ c. apple cider vinegar (or white vinegar, if necessary)

Whisk together the dry mustard, sugar, about a half teaspoon of kosher salt and ¼ teaspoon of white pepper in the top of a double boiler or Pyrex bowl. Whisk in the eggs and evaporated milk and place over the bottom of the double boiler or pan containing simmering water. (If you are using either a double boiler or a regular pan for your simmering water, don’t let the simmering water be deep enough to touch the bottom of the top container with the sauce.) Cook until the sauce thickens whisking the entire time to prevent the eggs from curdling. When thick (about the same consistency as a thick gravy), slowly whisk in the vinegar. Remove from heat and adjust seasoning. Serve warm or at room temperature. Recipe doubles or triples beautifully. Serve with corned beef or other baked or broiled meats and as a delicious spread for sandwiches.

SPICY BAKED CORNED BEEF

OLYMPUS DIGITAL CAMERA

Since St. Patrick’s Day is fast approaching, I thought I would do a little mini-series on food we think of as typical St. Patrick’s Day fare. But first, a few interesting tidbits about St. Patrick and St. Patrick’s Day.  First of all, St. Patrick is the patron saint of Ireland. St. Patrick’s Day is observed by the Irish on March 17th to commemorate the day Maewyn Succat (given the name Patrick upon becoming a priest) died.  And although St. Patrick’s Day is not a legal holiday in the United States, it is nonetheless widely recognized and celebrated.  Secular observations of the day include the wearing of the green, parades, parties, and the copious consumption of alcohol. St. Patrick’s Day has been celebrated on the North American continent since the late eighteenth century.  After considering these facts, I just had to ask myself, how in the name of salt brine and pickling spices, did corned beef come to be associated with St. Patrick’s Day? (Of course the food aspect of the holiday would interest me the most!) Well, according to Wikipedia (my favorite source of all things possibly true), corned beef and cabbage isn’t even considered an Irish national dish. The connection with Saint Patrick’s Day originated only as a part of the Irish-American culture. In Ireland, the closest traditional dish is Bacon (more akin to Canadian-style bacon or ham) and Beans. Corned beef and cabbage only became popular in the United States after Irish immigrants living in the northeast used corned beef instead of bacon in the dish. (This substitution was likely due to the low cost of corned beef in the late 19th century.) New England Boiled Dinner (NEBD), prepared by boiling corned beef, cabbage, and vegetables such as carrots, turnips, and potatoes together in water, is still popular today especially in New England and parts of Atlantic Canada. Not to disparage the ever so popular St. Patrick’s Day traditional NEBD, but, I would like to help you notch it up a bit by adding a different spin to some of the main ingredients. (Just the term “boiled dinner” is enough to put me off my feed!)  So, I am going to offer up a couple of alternative corned beef recipes for your consideration, plus some recipes for delicious sides, salads, bread, and maybe even a couple of desserts. Erin Go Bragh!

  • 1 medium sized corned beef brisket (4-5 lbs.)
  • cabbage wedges, opt.
  • carrot pieces, opt.

Corned Beef Rub:

  • 2 T. packed brown sugar
  • 1 tsp. dry mustard
  • freshly ground black pepper
  • ½ tsp. ground nutmeg
  • ½ tsp. ground ginger
  • ½ tsp. ground cloves
  • 1/8 tsp. cayenne pepper

Glaze:

  • ¼ c. packed brown sugar
  • 2 T. soy sauce
  • 1 T. Dijon mustard
  • ½ cayenne pepper
  • ½ tsp. dry mustard
  • ½ tsp. ground ginger

Combine Rub ingredients. Set aside. Remove as much fat and connective tissue on brisket as possible. Place brisket in a large covered Dutch oven. Massage rub into brisket. Pour 2 cups of water into the pan being careful not to pour it over the beef or the rub will wash off. (If corned beef came with a little package of pickling spices, you can add them too.) Cover tightly with lid and bake in a pre-heated 350 degree oven for 1 hour. After 1 hour, remove brisket from pan and discard liquid. Return meat to pan, add 2 cups fresh water, and cover. Bake another hour. After second hour, drain and replace water again. At this point, add cabbage and carrots, if desired. Cover and bake another hour. Meanwhile whisk glaze ingredients together. Remove brisket from oven. Pour off liquid and remove vegetables to a microwave safe container. Brush glaze on meat. Return to oven uncovered for 10-15 minutes. Remove from oven and let rest before thinly slicing. Reheat veggies before serving. Note: This way of cooking corned beef results in a very flavorful tightly grained meat. In a couple of days I will be posting my friend Jim’s corned beef recipe which produces a more traditional soft grained meat. Both ways of preparing corned beef are delicious and I am delighted to be able to share them with you. Both are wonderful in Reuben Sandwiches; another recipe to come later this month.

Another way to serve this corned beef is to eliminate the glaze portion of the recipe and serve the sliced corned beef with a Horseradish-Mustard Sauce. (top picture)

  • 1 c. sour cream
  • 2 T. prepared creamy horseradish
  • 2 T. Dijon mustard
  • 1 tsp. freshly squeezed lemon juice
  • pinch kosher salt
  • freshly ground black pepper

Whisk together and store in the refrigerator.


MUSSELS IN ANCHO CHILI CREAM SAUCE

Mr. C. and I love almost any type of critter that spent its happier days (that is to say alive days) basking in either salt or fresh water. And bivalve mollusks, like mussels and clams, when they are steamed in a lovely broth are at the top of our list of most beloved seafood dishes. And this recipe that I developed after having enjoyed a similar mussel appetizer at a Mexican restaurant in the Ballard district of Seattle is one of our favorites. Most of the time I begin my food experiments (actually knock-off recipes) using the ingredients listed on the menu. In this case the only ingredients listed were (if I remember correctly) ancho chili, shallots, wine, and cream. Not a lot to go on, but never-the-less, a starting point. (My biggest problem was where to find ancho chili powder. Even though, at the time, and this was quite a few years ago, we lived in Bellevue, I couldn’t find ancho chili powder anywhere. (For those of you unfamiliar with the great state of Washington, Bellevue is the 2nd largest city; (really just an unpretentious little burg) located east and just across Lake Washington from Seattle.) I finally located ancho chili powder at Market Spice, a fabulous spice store in Seattle’s famous Pike Street Market. Now thank heaven, you can find it at most upscale markets around the area. After finally finding ancho chili powder, I added the other ingredients that had been listed on the menu and a few others that I remembered either seeing or tasting in the broth. After a couple of near misses, I came up with the recipe I am sharing with you today. It is ever so lovely as an appetizer, but also makes a heavenly main dish if you add al dente cooked pasta. Just place the pasta in the bottom of a large, flat bowl. Scoop some of the mussels, or a combination of mussels, clams, prawns, and calamari rings over the pasta and add some of the broth and topping ingredients. Serve with chewy baguette slices and you have a simple one course lunch or dinner fit for a king!

  • 1 T. extra virgin olive oil
  • 3 shallots, finely chopped
  • 1 stalk celery, finely chopped
  • 3 garlic cloves, crushed
  • 12-15 fresh thyme sprigs tied together with kitchen string
  • 1 bay leaf
  • 1 tsp. or more ancho chili powder
  • 1 c. dry white wine
  • 1 bottle clam juice
  • ½ c. heavy cream
  • 2-3 lbs. mussels, cleaned and de-bearded
  • kosher salt and freshly ground pepper to taste
  • 2 T. chopped fresh parsley
  • 1 small tomato, chopped
  • 1 lemon cut into wedges for garnish
  • chewy Italian baguette, sliced

Heat oil in a large skillet over medium heat; add shallots and celery and sweat until softened, about 10 minutes. Add garlic, sauté for 1 minute. Add the thyme sprigs, bay leaf, ancho chile (start with 1 teaspoon), wine, clam juice, and cream. Bring to a boil. Reduce heat to low and simmer uncovered until liquid is reduced to about ½ cup, 30-40 minutes. If you want a stronger ancho taste, add a small amount more at this point. Remove the thyme sprig bundle and bay leaf from the pan. Discard. Turn up the heat, and add mussels; cover and simmer until mussels open, about 6 minutes. Remove from heat. Discard any mussels that have not opened. Taste broth and season with salt and pepper if required. Sprinkle with parsley and chopped tomato and garnish with lemon wedges. Provide each person with a large flat bowl and a tiny or salad fork. Serve mussels right out of pan with baguette slices for dipping.

WEEKNIGHT TAMALE PIE

OLYMPUS DIGITAL CAMERA

Ok, now that you have my real Tamale Pie recipe, I am going to share my weeknight tamale pie recipe with you. This recipe is especially helpful for working parents.  In fact, this recipe helped save my sanity many times over the years when I would arrive home from work, having already exhausted every fiber in my body, and there was still work to be done, i.e. dinner to fix, laundry, baths to oversee….you know the drill! For all the years my kids were growing up, this was my “I’m too tired to cope and basically I hate everything and everybody” go to recipe. (I’m sure, as a parent, you’ve never experienced that kind of a feeling, but if you ever do, this recipe will be just the thing to help you make it through!) And the best part, Weeknight Tamale Pie is really tasty. Everyone in your family will love it. Now granted, this is not gourmet food, and will never make the likes of Gourmet Magazine or Bon Appétit. Also, it will not win you the “best working mother or father nutritional achievement award”. But I say who cares. It contains enough good, nutritious ingredients for occasional simple dinners; plus your little darlings will love it. And truly, after an exhausting day, do you really want to spend the evening arguing with your children about broccoli or Brussels sprouts? Save those battles for days when you have even a remote chance of winning! So, on the days when it seems that everything that could have gone wrong did, remember this recipe. When you first get home from work, take a package of ground beef out of the freezer and place it in the microwave to defrost. Then change your cloths, tell your family how happy you are to see them, and that you would appreciate their patience while you prepare them a wonderful dinner. Take the meat out of the microwave, place it in a large covered pan, and pour yourself a wee dram of something delicious. Doesn’t even have to be an adult beverage, although why not? Then sit down to dinner with your family and relax. That hideous pile of laundry can wait!

  • 1 lb. extra lean ground beef
  • 1 small onion, chopped or ¼ c. dehydrated chopped onion
  • 1 (8-oz.) can tomato sauce
  • 1 pkg. taco seasoning or 2 T. bulk taco seasoning (or to taste)
  • 1 (16-oz.) can whole kernel corn, drained
  • 1 (6-oz.) can black olives, drained and halved
  • 1 c. shredded sharp cheddar cheese
  • tortilla chips
  • sour cream, opt.
  • salsa, opt.

Fry ground beef in a heavy covered Dutch oven or sauce pan. Add chopped onion and cook until tender. Add tomato sauce, taco seasoning, corn, and black olives. Bring to a boil, reduce heat, cover and simmer for 10 minutes, stirring occasionally. Reduce heat as far as possible.

OLYMPUS DIGITAL CAMERA

Remove lid and sprinkle with cheese and enough tortilla chips to hide the cheese, cover and let sit on low heat until cheese melts, about 5 minutes. Do not stir. Serve as soon as cheese is melted with additional tortilla chips, sour cream, and salsa.  Note: I serve this dish as a stand-alone dish. It may not be as well balanced a meal as it should be, but some nights I’m not as well balanced as I should be either! And do yourself a favor. Since this is a dish that contains mostly pantry ingredients, stock up on cans of tomato sauce, black olives, corn, etc. when they go on sale. And never be without ground beef in your freezer. Or tortilla chips in your pantry.


TAMALE PIE

OLYMPUS DIGITAL CAMERA

Pictured: Tamale Pie, upper right, Refried Beans, and Cheese Enchiladas

OK, I absolutely adore a good tamale. (That old starch addiction of mine, I’m sure.) But I am not about to do the whole corn husk thing, especially when I want to serve tamales to a crowd. (Thank goodness there are actually times when my better judgment and survival instincts work together to save what little bit of sanity I have left.)  So, where does that leave me when I want to serve tamales to the masses, or just want tamales for Mr. C. and myself? Well, of course, Mr. C. and I can always pop off to a Mexican foodatorium, but darn, you only get at the most 2 little tamales stuffed with not even enough meat to upset your average vegetarian. So when I went in search of an easy way to make tamales I stumbled onto this recipe on a site entitled “Please, don’t pass the salt!” I really enjoyed the author’s comments and of course I had to give the recipe a try. So off to the store to buy masa mix I proceeded. I thought I would have a difficult time, but even my local grocery store on the island carried what I needed. (So very nice when that happens.) So armed with nothing more than a burning desire for a tamale and my new found knowledge, I set about making myself (and Mr. C. of course) some tamales for dinner. It turned out that the dough recipe from the site was basically the same recipe as on the Instant Corn Masa Mix bag, but the technique for building the tamale pie was what I found most informative.  So after carefully following the recipe instructions, except for the filling (I chose to use my own recipe because I knew I liked it), my tamale pie went into the oven. As I pulled it out of the oven (carefully by the way), I knew I had a winner. It smelled just like a good tamale should smell. And when I finally bit into the tamale pie, I was immediately lifted to Mexican food heaven. And so what if I didn’t have a sticky corn husk to peel off before eating! (After all, most restaurants don’t serve tamales in their corn husk skins anyway.) Instead, I had a big old lovely piece of tamale pie, thick with meat that was ever so lovingly encased in a flavorful masa crust, and drizzled with a fabulous chili sauce. Final analysis, did I miss the whole corn husk part of making tamales? Not in the least!  (That’s like asking if I miss mosquitoes when I go hiking in late fall? Same answer!) There are just some things in life that are better off not experiencing. I figure corn husk manipulation is just one of those experiences I will gladly forgo.

Tamale Filling (aka Mexican Shredded Meat):

  • 1 lb. lean pork or beef cut into 2-inch cubes
  • 1 1/2 tsp. kosher salt
  • freshly ground black pepper
  • 1 tsp. cumin
  • 1 T. chili powder
  • 2 tsp. granulated garlic
  •  1 tsp. onion powder
  • 1 bay leaf
  • 1 small onion, chopped fine

Put the chunks of meat into a stockpot and add all of the remaining seasoning ingredients, except for the onion. Cover with water plus about a half inch and bring to a boil. Reduce heat and simmer, covered, for 2 hours. Add more water if necessary. Add the chopped onion and continue simmering, covered, for an additional hour. Uncover, stir to begin breaking up meat and continue simmering until liquid begins to reduce and meat shreds easily, about 1 more hour. Let cool.

Tamale Pie:

  • 2 ¼ c. Instant Corn Masa Mix for Tamales (Maseca for Tamales)
  • 1 tsp. baking powder
  • ¼ tsp. kosher salt
  • 2 c. lukewarm broth (I use “Better than Bouillon reduced sodium chicken base” carried by Costco)
  • ½ c. vegetable oil

Combine masa, baking powder, and salt in a large bowl. Add warm broth and oil. Stir together until dough is thoroughly combined. Cover and let rest for at least 15 minutes so the masa can thoroughly absorb the moist ingredients. Butter a 9 x 9-inch square ovenproof casserole dish. Press a little more than half of the tamale dough into the casserole dish. Using your hands (best tools in the kitchen) press the mixture evenly on the bottom and up the sides of the dish, about 1/4 to 1/3 inch thick. Using a slotted spoon, scoop a generous amount of the filling evenly over the dough, being careful not to spoon in too much gravy. (Remaining liquid can be thickened and served over tamales.) Carefully spread the remaining tamale dough over the filling, trying to make the top portion the same thickness as the bottom.  Fill a large roasting pan with about 2 inches of very hot water and put the uncovered tamale casserole in the water bath. Cover both the casserole and the roaster with 2 layers of regular or 1 layer of heavy duty aluminum foil. Carefully set the roaster in a pre-heated 350 degree oven.  Bake for about 50 minutes or until the masa is set. Remove from oven, uncover and let cool a few minutes before serving.  Serve warm with Green Chili Sauce with Pork, Red Chili Sauce, or gravy made from the filling liquid. Garnish with sour cream, shredded cheese, chopped onions, salsa, or whatever your little heart desires. Leftover meat mixture is great for tacos, as a filling for enchiladas or burritos, or to top tostadas. And it freezes beautifully. To fancy things up a bit, try making individual “tamales” in muffin tins.


CHEESE ENCHILADAS WITH RED CHILI SAUCE

OLYMPUS DIGITAL CAMERA

Pictured: Cheese Enchiladas, bottom left, Tamale Pie, and Refried Beans

For years, all I would order when we dined at Campo’s Mexican restaurant in Seattle’s University district (long since closed unfortunately) was their bean dip and cheese enchiladas. Their bean dip was better than any other bean dip I have ever had the pleasure to taste, and the cheese enchiladas, well frankly they were simply divine. But since this restaurant closed (and I will never forgive them for closing without my permission and more to the point, without sharing their recipes first) and I can’t get my monthly fix of their bean dip and cheese enchiladas, I have been forced to make my own. (And no, I still don’t have the perfect bean dip recipe to share with you. I keep experimenting, but nothing I’ve tried so far even comes close to what Campo’s served all warm from the oven, in its own little brick red container and surrounded by warm tortilla chips. I’m really still in mourning over that bean dip, and will probably always feel a little pull on my heartstrings for the bean dip that was. Sigh.) But cheese enchiladas, well that’s a different story. I received this recipe from a friend probably 40 years ago and have been making it ever since. The enchiladas themselves are made with only 3 ingredients – corn tortillas, a little vegetable oil for frying, and Monterey Jack Cheese. But what makes this dish amazing is the Red Chili Sauce. The sauce is easy to make and can be used in many different ways. It’s also great drizzled over refried beans, tamales, any other type of enchilada, or as an ingredient in a perfect burrito. So if you too love cheese enchiladas, give these babies a try. And kid friendly, oh yah! (You might want to skip the fresh onion garnish on your kid’s portion however, but on your own serving, go for it! After all, onion breath is better than no breath at all!)

Cheese Enchilada:

  • 1 lb. Monterey Jack cheese
  • vegetable oil
  • 12 corn tortillas

Red Chili Sauce:

  • 4 T. unsalted butter
  • 3 ½ T. flour
  • 3 ½ c. water
  • 5-6 tsp. beef base (like Superior Touch brand “Better Than Bouillon” – beef base)
  • 1 tsp. paprika
  • 4 T. mild chili powder (yes, tablespoons)
  • 1 tsp. granulated garlic
  • 4 tsp. dried oregano
  • 1 bay leaf
  • freshly ground black pepper

Garnish:

  • chopped onion, opt.
  • sliced black olives, opt.
  • crisp shredded lettuce, opt. 

Red Chili Sauce Preparation: In a medium sized covered sauce pan, melt butter over medium heat. Add flour and cook on low for about 5 minutes to get rid of the “raw” taste of the flour. Add water, beef base, paprika, chili powder, garlic, oregano, bay leaf, and pepper. Bring to just under a boil, reduce heat, cover pan and simmer gently for 30 minutes. Serve over your favorite Mexican dish.

Cheese Enchilada Preparation: Grate Monterey Jack cheese; set aside. Fry 12 corn tortillas is a small amount of oil. Swab fried tortillas in Red Chili Sauce, fill with cheese, roll, and place in a shallow oven proof baking dish. Drizzle with a small amount of the Red Chili Sauce. Bake in a pre-heated 350 degree oven for 20-30 minutes or until cheese melts. Garnish with finely chopped onion, sliced black olives, and crisp shredded lettuce. Serve with additional sauce. Note: You will probably have some leftover sauce. Try drizzling a wee bit on your scrambled eggs the next morning. Just add a tiny bit of salt to your eggs however, as the sauce itself tends to be a bit salty.


GREEN CHILI SAUCE WITH PORK

OLYMPUS DIGITAL CAMERA

(Green Chili Sauce pictured on Tamale Pie, upper right)

For years when I have been in Denver visiting my Aunt Ruth, we have dined at Ruth’s favorite Mexican restaurant. If you have never been to the Denver area, (which is a mistake I might add) you pretty much can’t drive a block without bumping into a Mexican restaurant. (Please note, this is not a bad thing in my book. I truly adore really good Mexican food.) And Denver, unlike some areas of the US that I could mention, has more than its fair share of really good Mexican restaurants. (And I’m sorry if my next comments bring offence to anyone, but I don’t consider most of the food served by large Mexican chain restaurants in our area to be good Mexican food! To me, everything tastes the same. Regardless of what you order, it’s served swimming in an uninspired sauce that tastes like it has been sitting in a steam table container since just after the Mexican revolution ended in 1920.) So when I taste a sauce that is fresh tasting and has a depth of flavor that compliments rather than detracts from my chosen entrée, I am in pure hog heaven. And speaking of hogs, a pork product is usually at the base of a truly good green chili sauce. You can practically bet your share of pickled pig’s feet on that one! But back to dining in Denver……

Mexican restaurants in and around Denver are known for their sauces, especially their green chili sauce. And my aunt’s favorite restaurant served the best green chili sauce I had ever tasted. That is until I started messing around with the one I am going to share with you today. (And no I will not give you the name of the restaurant in Denver! I am not going to advertise for them because they have never, and believe me I have asked several times over the years, even given me the slightest hint as to what goes into their amazing sauce. So call me a baby, but darn it, I live 1350 miles away. It’s not like I would publish the recipe in a cookbook or blog for heaven’s sake!) So, in order to pay homage to one of the truly wonderful world cuisines, and to let you know that there are homemade dishes that are far superior to what is available in most Mexcian restaurants today, I’m goin’ south of the border for the next few days. Today Green Chili Sauce with Pork; tomorrow Red Chili Sauce. After that Cheese Enchiladas, Mexican Shredded Beef, Pork Tamale Pie, Mexican Rice (nary a tomato product in this rice), Margaritas, and a couple of other favorites of mine. So pack your metaphorical bags and join me on my Mexican food adventure.  Open yourself a Negra Modelo or Dos Equis, start reading a book by Carlos Fuentes, and listen to some Carlos Santana. Mexico here we come. Provecho!

  • 1 T. vegetable oil
  • 2-3 bone in pork chops
  • kosher salt
  • freshly ground black pepper
  • ½ medium yellow onion, chopped
  • 4 large garlic cloves, minced
  • 2 tsp. cumin
  • 1 tsp. chili powder
  • ¼ tsp. dried oregano
  • ½ tsp. kosher salt
  • 2 ½ c. chicken stock
  • 1 T. tomato paste
  • 2 lg. tomatillos, chopped
  • 5 Anaheim peppers, charred (skins, seeds, veins removed) and chopped
  • 1 lg. or 2 small fresh jalapenos, charred (skins, seeds, veins removed) and finely minced
  • flour

Heat oil in a large, covered sauce pan. Season chops with kosher salt and freshly ground black pepper. Carefully place in hot oil and fry until very, very brown and there are lots of brown bits in the bottom of the pan. Add onion and cook until translucent. Add garlic and cook for about a minute or until you can smell the garlic. Stir in the cumin, chili powder, oregano, and salt. Add chicken stock, tomato paste, tomatillos, and peppers. Bring to just under a boil, reduce heat, cover, and simmer gently for about 2 hours. Remove chops and allow to cool. When cool, remove bones and as much fat and sinew as possible. Flake the meat into very small pieces and return to the sauce. Discard bones and sinew. You will probably need to thicken the sauce at this point. Take about 1/4 cup of the liquid out on the pan and place in a small mixing bowl. Depending on how thick you like your sauce, whisk in a tablespoon or two of flour into your mixing bowl and gently stir back into the pan. Allow to burble for about 3 minutes. Remove from heat. Allow to cool for about 10 minutes, adjust seasoning, and serve over your favorite enchiladas, tamales, burritos, refried beans, etc.