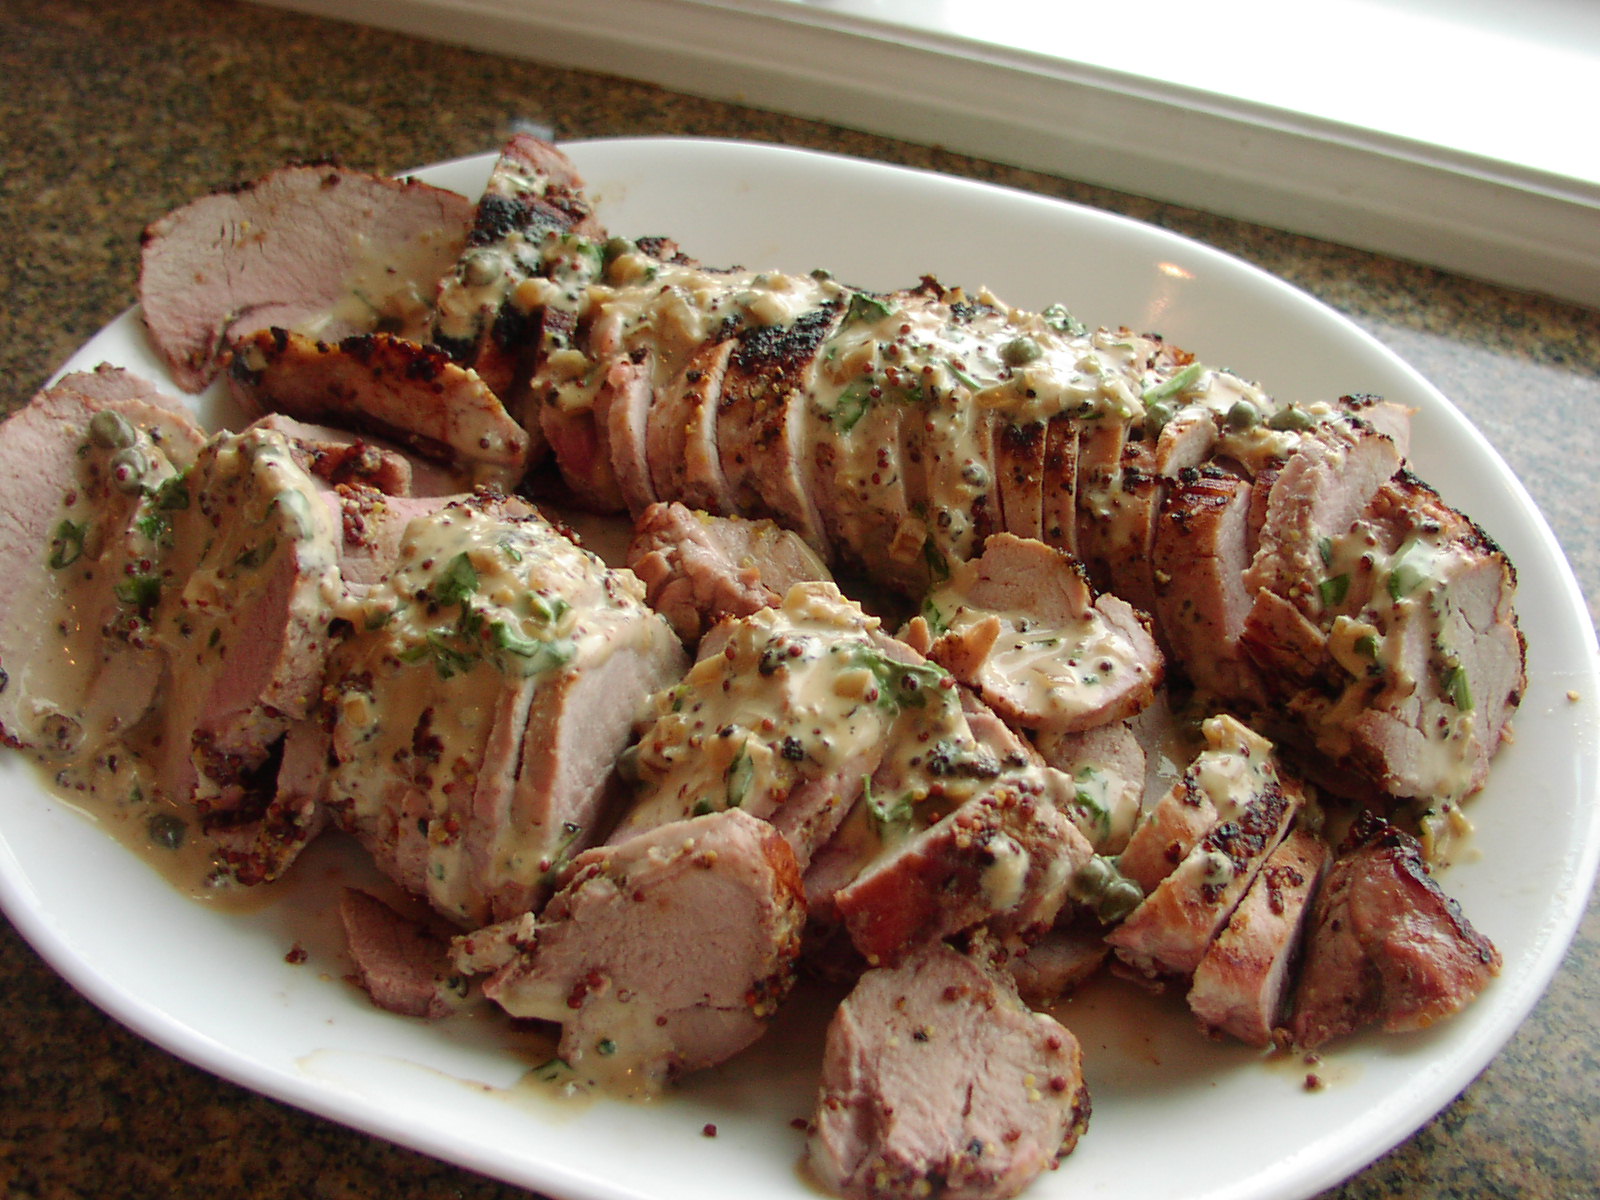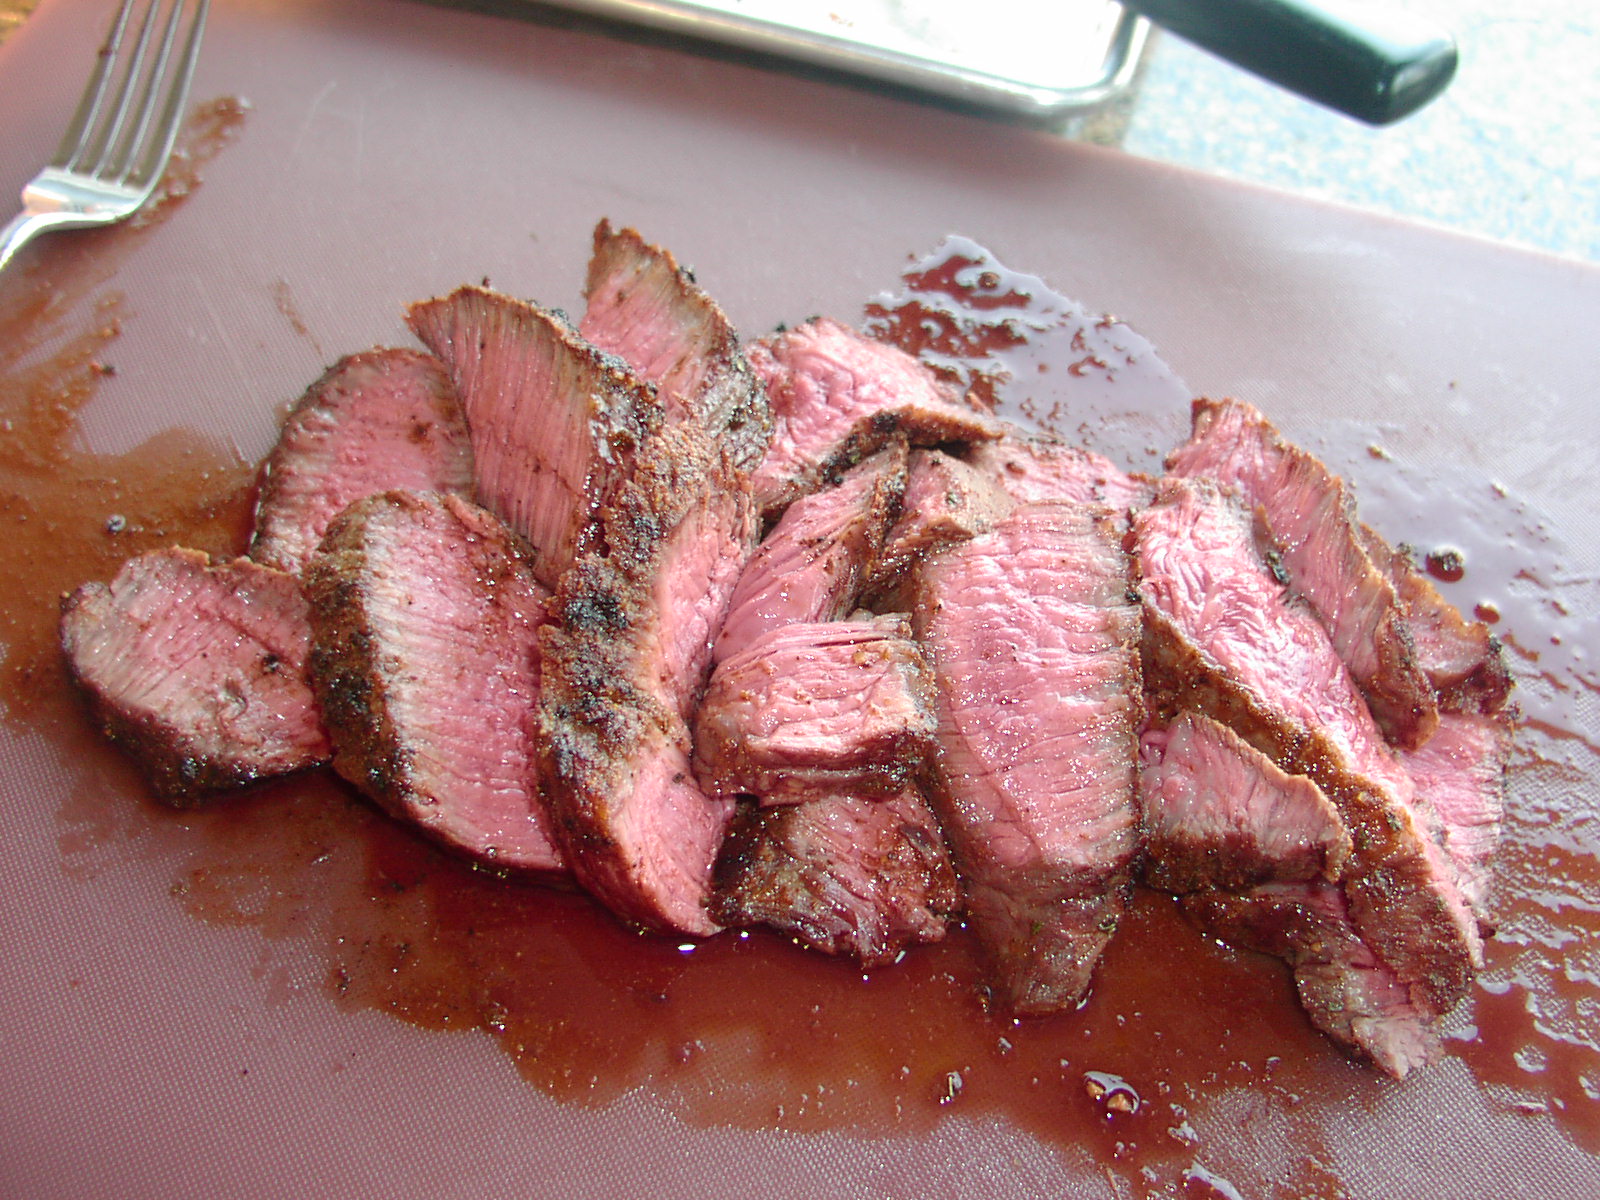
Flat iron and skirt steaks are two of the best cuts of beef available for grilling. They are rich in flavor, extremely juicy, and just amazingly succulent and tender if not cooked to death. Both are perfect when served medium rare. Any more done and you might as well eat shoe leather! So if you are one of those people who want your steak cooked till no semblance of beef flavor remains and you basically have to use a hack saw to cut the pieces into bite size; please move on to another recipe. (I said please, so that makes it OK!) And since I know many of you like your steak really rare, I will give you the same advice I received from a waiter at the now closed Buenos Aires Grill in downtown Seattle. I ordered entraña (grilled skirt steak) rare. The waiter informed me that for cuts of meat like skirt and flat iron, they are at their best when cooked medium rare. I followed his advice and I have never looked back. I now order or cook steaks medium rare regardless of the cut.
Although flat iron and skirt steaks are good when seasoned only with salt and pepper, I think using Adobo Seasoning is absolutely the best way to enhance the natural flavor of the meat. So give this blend of spices and herbs a try. And for heavens’ sake, if you don’t have one or more of the listed herbs or spices at home, don’t buy one of those cute little spice jars or cans at your local grocery store that cost an arm and a leg. Winco, your local food co-op, IGA, Haggen Foods, Central Market and many other grocery stores carry herbs and spices in bulk including the ones used in this Adobo Seasoning blend. And trust me; you will save an incredible amount of money if you buy in bulk. And that doesn’t mean that you have to buy a great deal of product. You can actually scoop out as much or as little into a bag as you need. Just don’t be surprised at how little the bulk spice or herb actually costs.
A few years ago I conducted an experiment when I was writing Spice it Up! I performed a cost comparison at our very own Camano Island IGA. For 1 pound of McCormick oregano, the cost would have been $164.90 ($6.39 for each .62 oz. bottle). For 1 pound of oregano in bulk, the cost would have been $9.19. Buying oregano in darling little glass bottles would cost 1800% more than buying in bulk! Now as I said, this cost comparison was done a few years ago so both the bottled oregano and bulk price have undoubtedly gone up. But I’m sure the price ratio difference is still about the same. Don’t believe me? Put about a half cup of bulk oregano in a bag and pay for it along with your other groceries. If it costs more than a buck fifty, I’ll send you the difference!
But for those times when I need dried herbs or spices that are unavailable at my local grocery stores, or I simply want the luxury of ordering them over the internet, I use www.myspicesage.com. I have always been more than satisfied with the price, delivery method (most of the time free delivery) and products I have received from this company. So basically what I am saying is this. Don’t give me any lame excuse about the cost of dried herbs and spices or how expensive it is to prepare your own herb and spice blends! Because my dears, your own homemade blends are always going to be less expensive to prepare (if you buy in bulk), taste fresher, and not coincidentally be generally healthier for you. Now granted, they won’t contain the likes of cottonseed oil or silicone dioxide, but I’m sure you’ll get over their absence in time!
So if you want to serve your family and friends a steak that will knock their socks off, get yourself to the store and buy a flat iron or skirt steak. Then mix up some Adobe Seasoning, fire up the BBQ, and prepare for a taste treat even an Argentinean would take pride in serving. If you want to send this steak over the top, serve with Chimichurri Sauce. (See recipe below)
- 1½ lbs. flat iron or skirt steak, room temperature, trimmed of silver skin if necessary (skirt steak), cut into 2½-inch wide pieces – basically in half lengthwise (flat iron steak)
- extra virgin olive oil
- Adobo Seasoning (see recipe below)
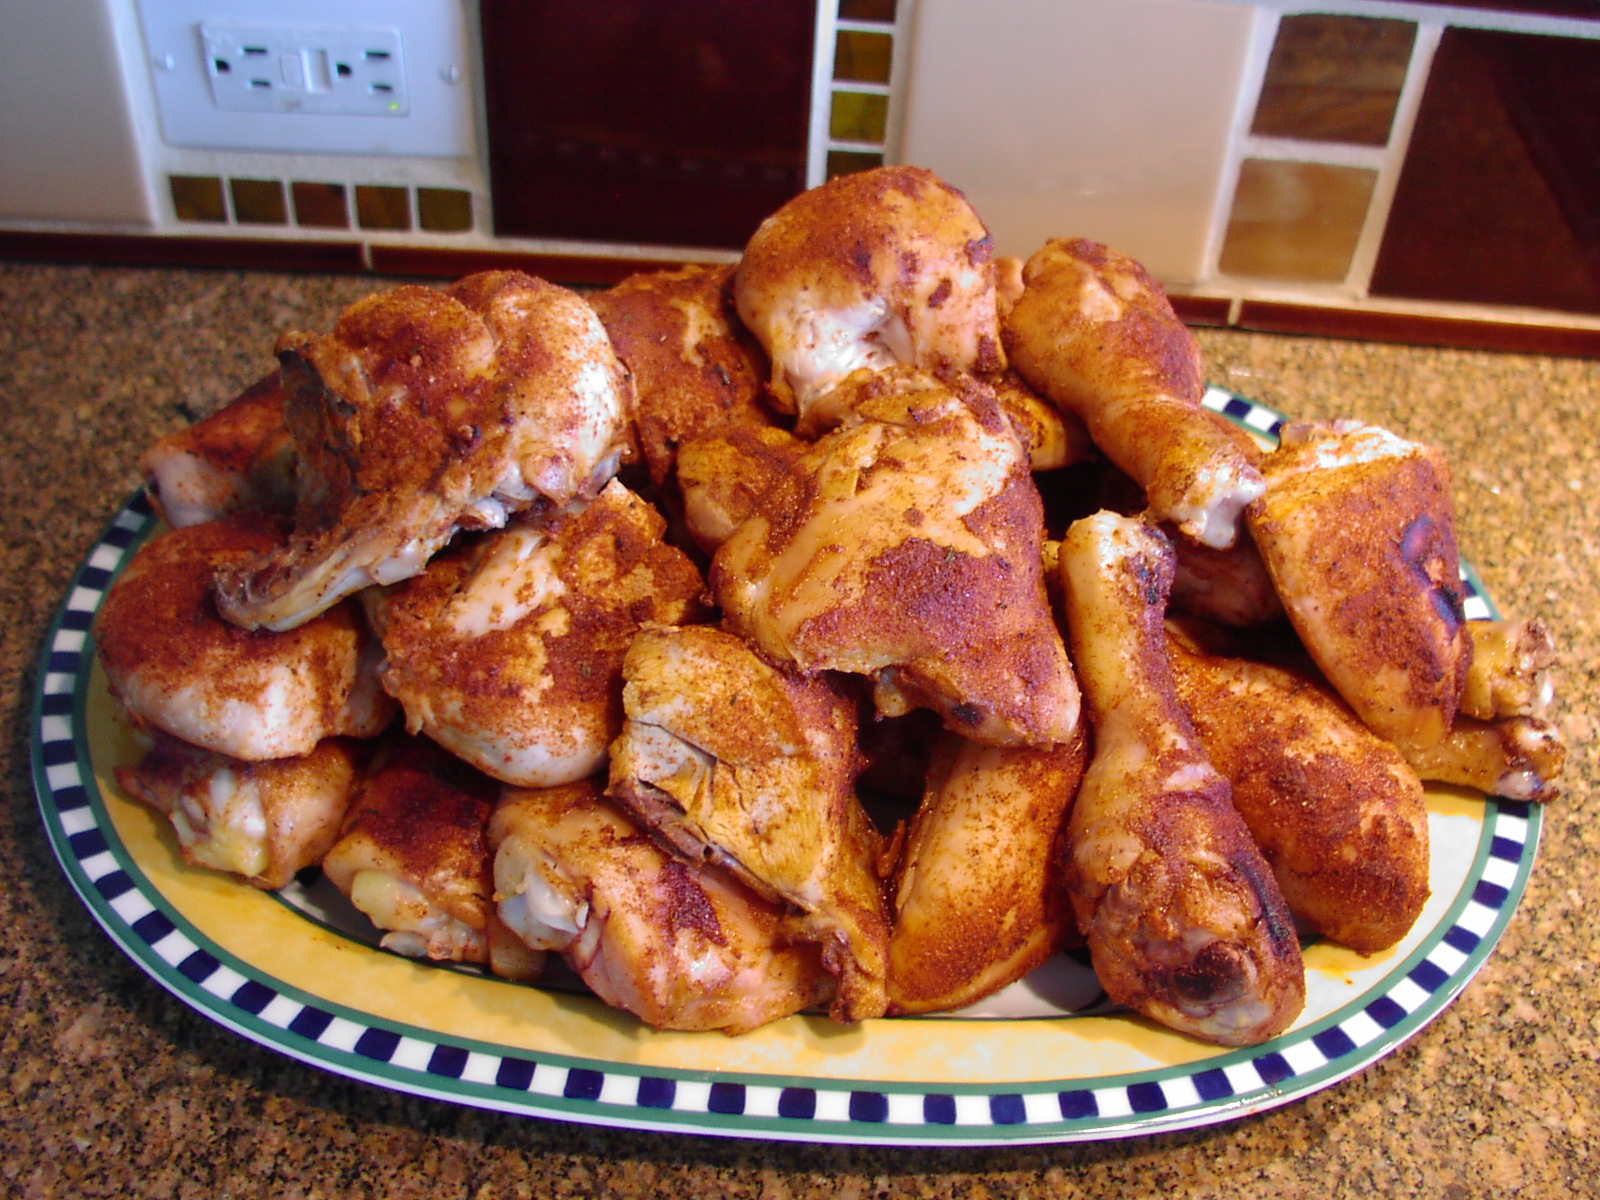
Lay the steak on a baking pan and lightly coat with olive oil. Sprinkle on enough adobo seasoning to almost cover up the meat. (Don’t go hog wild, but don’t be too shy either. You should have over half of the amount from the recipe below left after you are finished decorating the steak on both sides.) Grill over a very hot fire, but don’t cook past medium rare. (With my grill, that’s about 4 minutes on the first side and about 1 minute on the second.) Let rest about 4 minutes before slicing into 1-inch diagonal strips. Use the remaining adobo on any meat, poultry, or fish dish. Or after trying this recipe, use it the following week when your family begs you for more of that wonderful steak!
ADOBO SEASONING
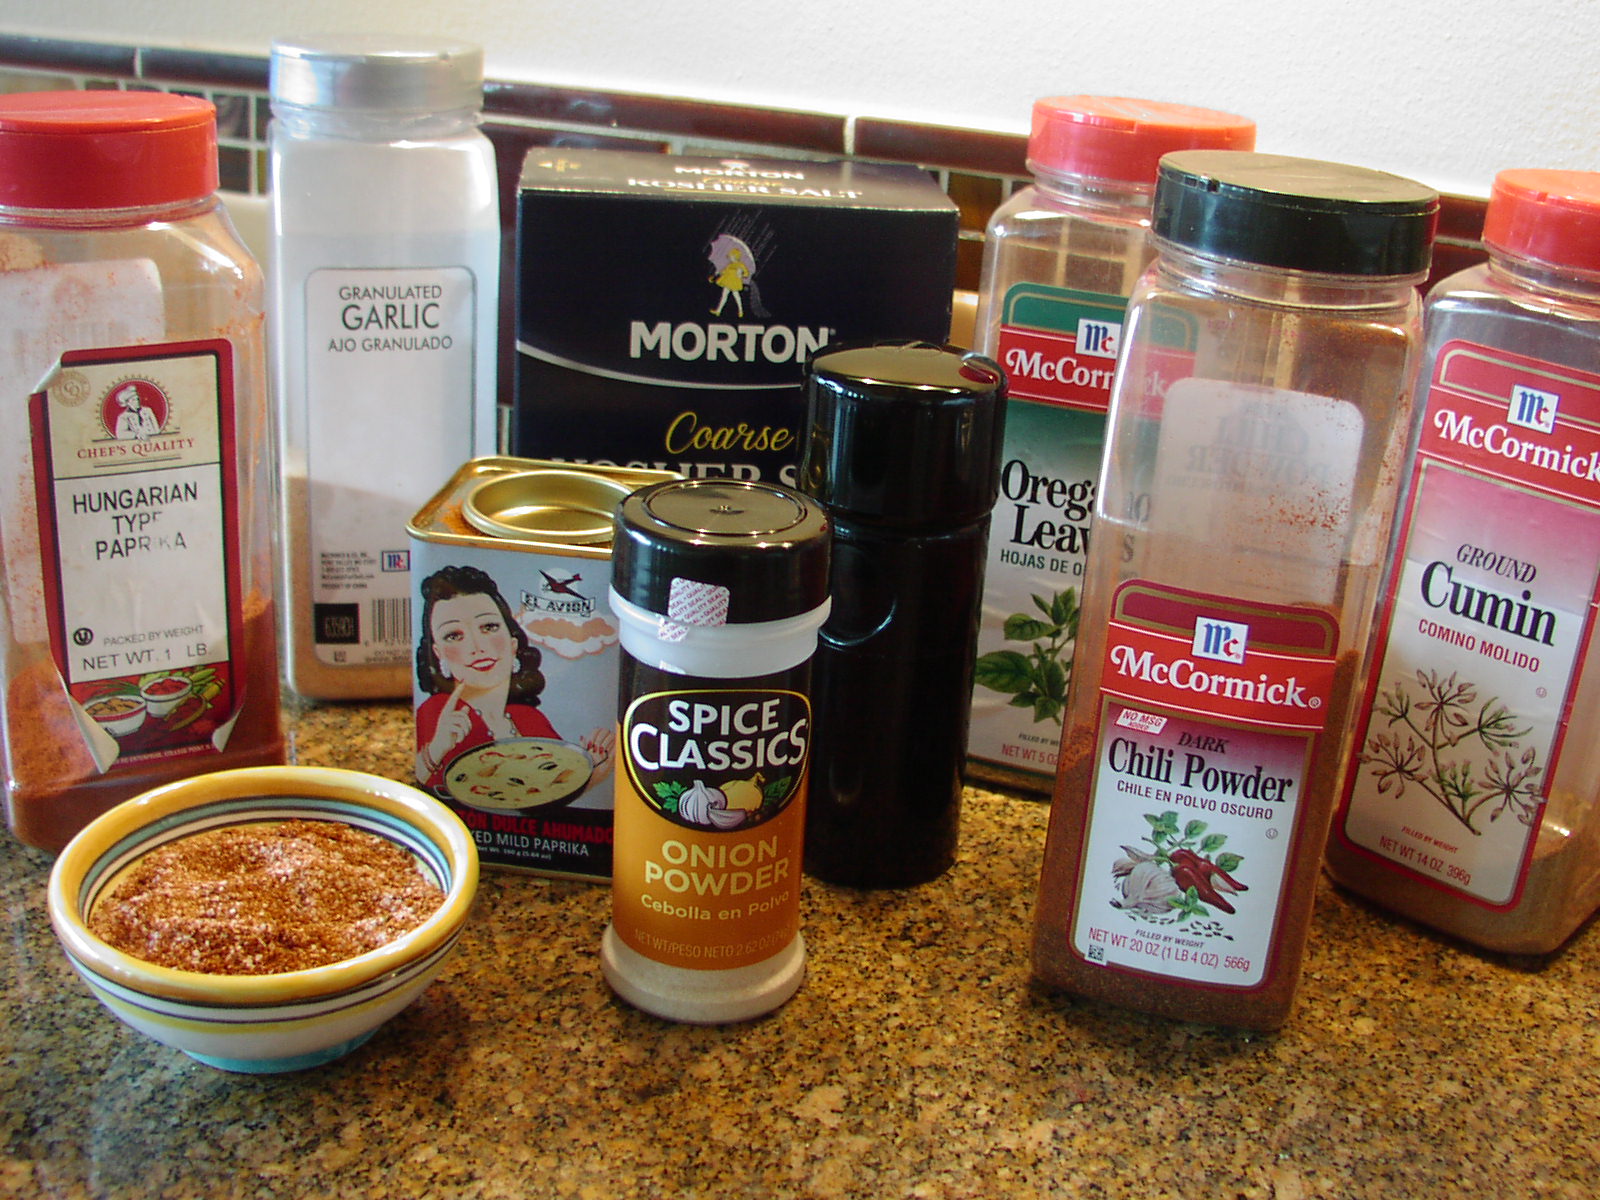
- 2 T. kosher salt
- 2 tsp. regular paprika
- 1½ tsp. onion powder
- 1½ tsp. dried oregano (preferably Mexican)
- 1½ tsp. ground cumin
- 1 tsp. smoked paprika
- 1 tsp. granulated garlic
- 1 tsp. chili powder
- freshly ground black pepper
Whisk all the ingredients together in a bowl. Store in an air tight container in a cool, dry place.
CHIMICHURRI SAUCE
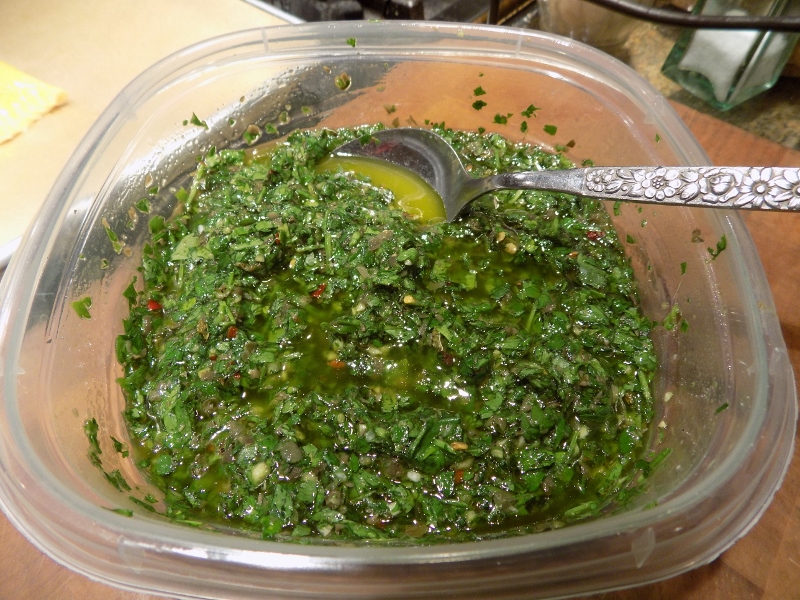
- 2 T. drained capers
- 2 garlic cloves, rough chopped
- 1 bunch Italian parsley
- ½ bunch cilantro
- 2 T. red wine vinegar
- 1 tsp. kosher salt
- freshly ground black pepper
- ½ tsp. dried oregano (Mexican is best)
- ¼ tsp. crushed red pepper flakes
- ½ c. extra virgin olive oil
Place capers and garlic in the bowl of a food processor. Whirl until finely chopped. Add the parsley and cilantro and pulse 4-6 times to rough chop the leaves. (Don’t over process.) Transfer to a bowl. Stir in the vinegar, salt, pepper, oregano, crushed red pepper flakes, and olive oil. Taste and adjust the salt and pepper as needed.
Refrigerate until ready to use (preferably the same day).