Category Archives: DESSERT RECIPES

GF CARROT CAKE WITH CREAM CHEESE FROSTING

20161016_104821

In an effort to include recipes for everyone, young and old, sober or otherwise, vegetarians, gluten avoiders, spicy lovers, and even those poor souls who only eat meat and potatoes, I offer up this adaptation of a Bette Hagman GF recipe for all of my readers who are gluten intolerant. (Usually I can’t abide intolerance, but for gluten, I make an exception!)
And if ever there was a cake that almost everyone loves and should be able to enjoy, it’s carrot cake. My feeling is, if there’s a way around a problem like gluten flour, then let’s go for it. And Bette Hagman, one of the pioneers in GF cooking, did just that.
Now of course, I couldn’t leave even a Bette Hagman recipe alone! (I’d apologize to Bette, but she now resides with the angels, and my direct line to heaven seems to have been severed.) But even if I could apologize I would argue in my own defense. I simply like a spicier base cake, and I happen to think toasted coconut in a carrot cake is essential.
So if you and/or yours happen to be gluten intolerant or simply want to try giving gluten a rest, give this lovely cake a try. It’s moist and delicious, and I promise you, no one will miss the gluten. And really, when you think about it, who knows what gluten tastes like anyway? No one I know walks into my home and begs to be fed a soup spoon full of wheat flour. Or runs up to me, grabs me by the arm, leads me to the pantry screaming “give me flour, or give me death”! So who really gives a buttery French croissant if there is or is not a spec of gluten in a recipe? As long as the end result is delicious, which incidentally is the goal of everyone who spends any time in the kitchen, then life is good. So experiment my friends. And if you have a favorite GF recipe you would like to share with the world, please write it down and send it to my email address www.chezcarrcuisine@wavecable.com. I will gladly prepare the recipe and if it meets the exacting standards of Mr. C., I will post it and take all the credit. Just kidding. The glory and recognition will be all yours. And of course, the undying thanks from my GF readers.

  • 16 oz. crushed pineapple
  • 1 c. golden raisins
  • 2 c. granulated sugar
  • 4 eggs, room temperature
  • 1 c. mayonnaise (yes – mayonnaise)
  • 1 tsp. vanilla
  • 3 c. grated carrots
  • 1½ c. toasted chopped walnuts, divided
  • 1½ c. toasted coconut, divided
  • 1½ c. white rice flour
  • ½ c. soy flour
  • ½ c. potato starch
  • 2 tsp. baking soda
  • ½ tsp. salt
  • 2 tsp. ground cinnamon
  • 1 tsp. ground mace
  • ¼ tsp. ground cloves
  • ¼ tsp. ground nutmeg

Pour the pineapple plus juice into a small saucepan. Add the raisins and simmer over low heat until the raisins are plump and juicy. Remove from heat and allow to cool.

In a large mixing bowl cream the sugar, eggs, and mayonnaise together. Add the vanilla, carrots, 1 cup of the toasted walnuts, 1 cup of the toasted coconut, and the cooled pineapple/raisin combination.

In another bowl, whisk together the flours, soda, salt, cinnamon, mace, cloves, and nutmeg. Stir the flour mixture into the carrot mixture until well blended.

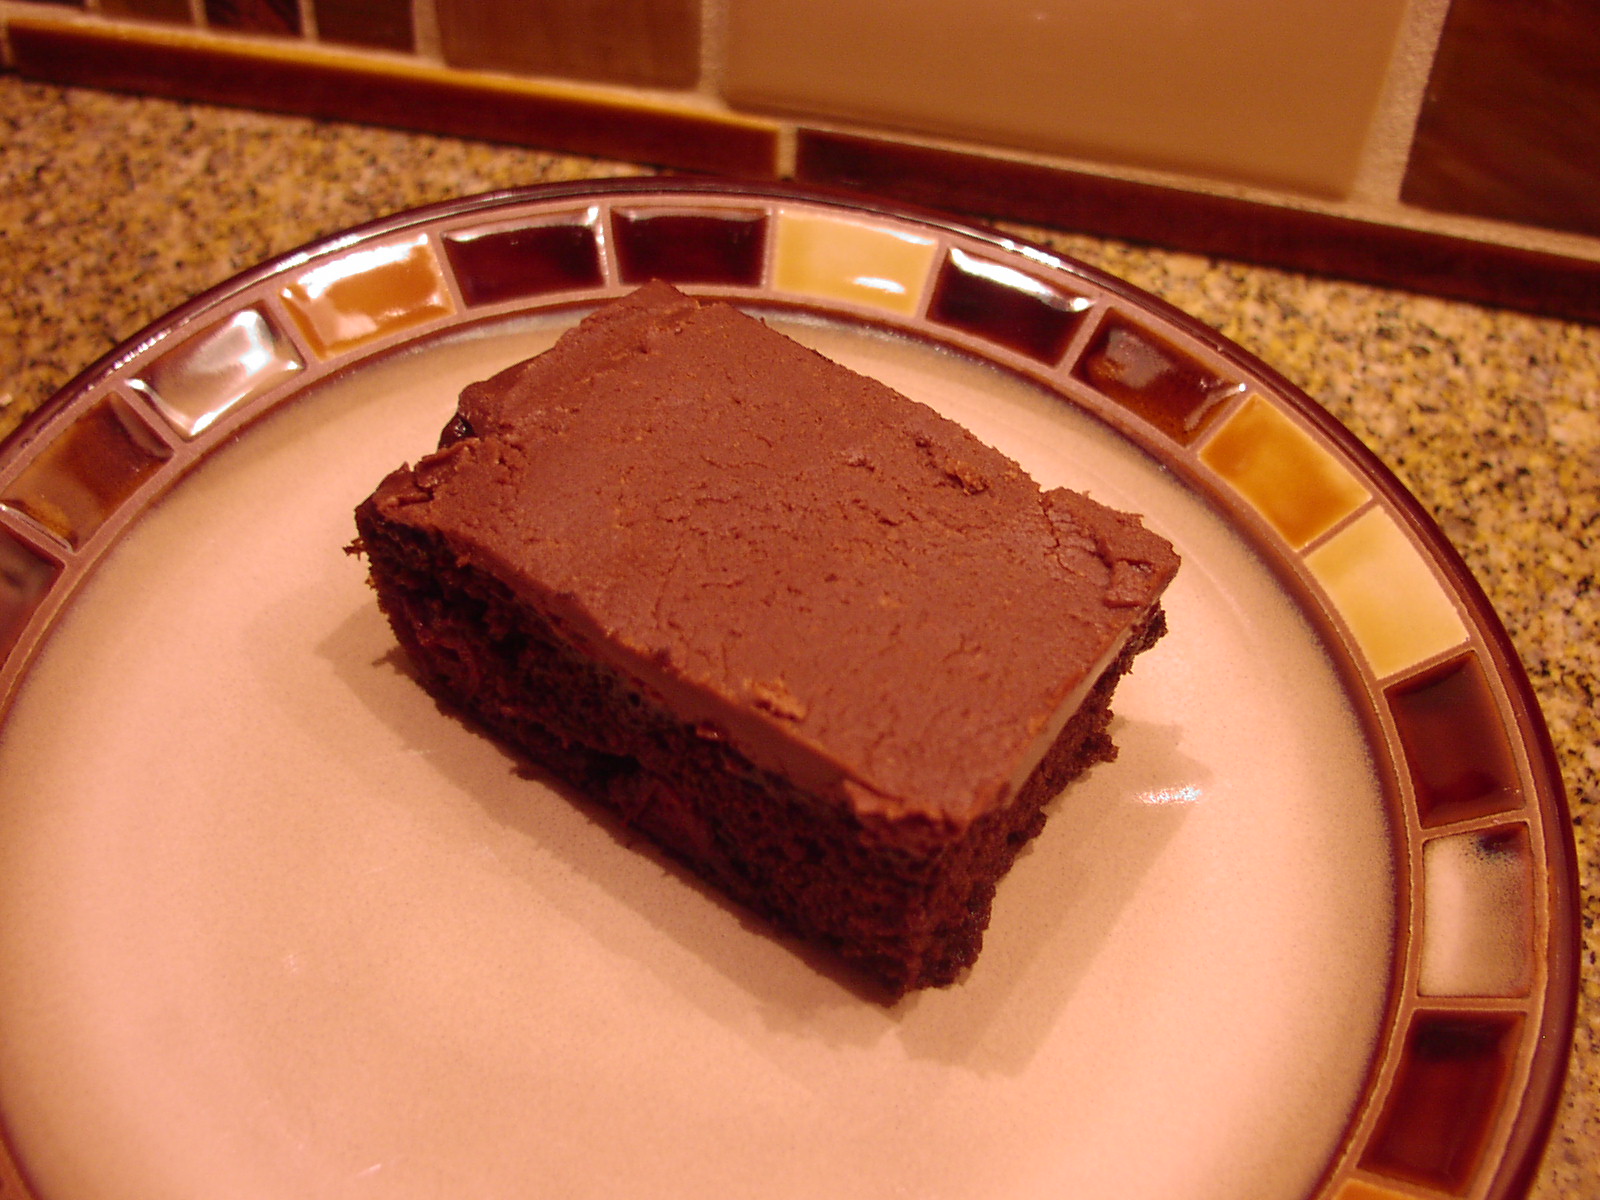
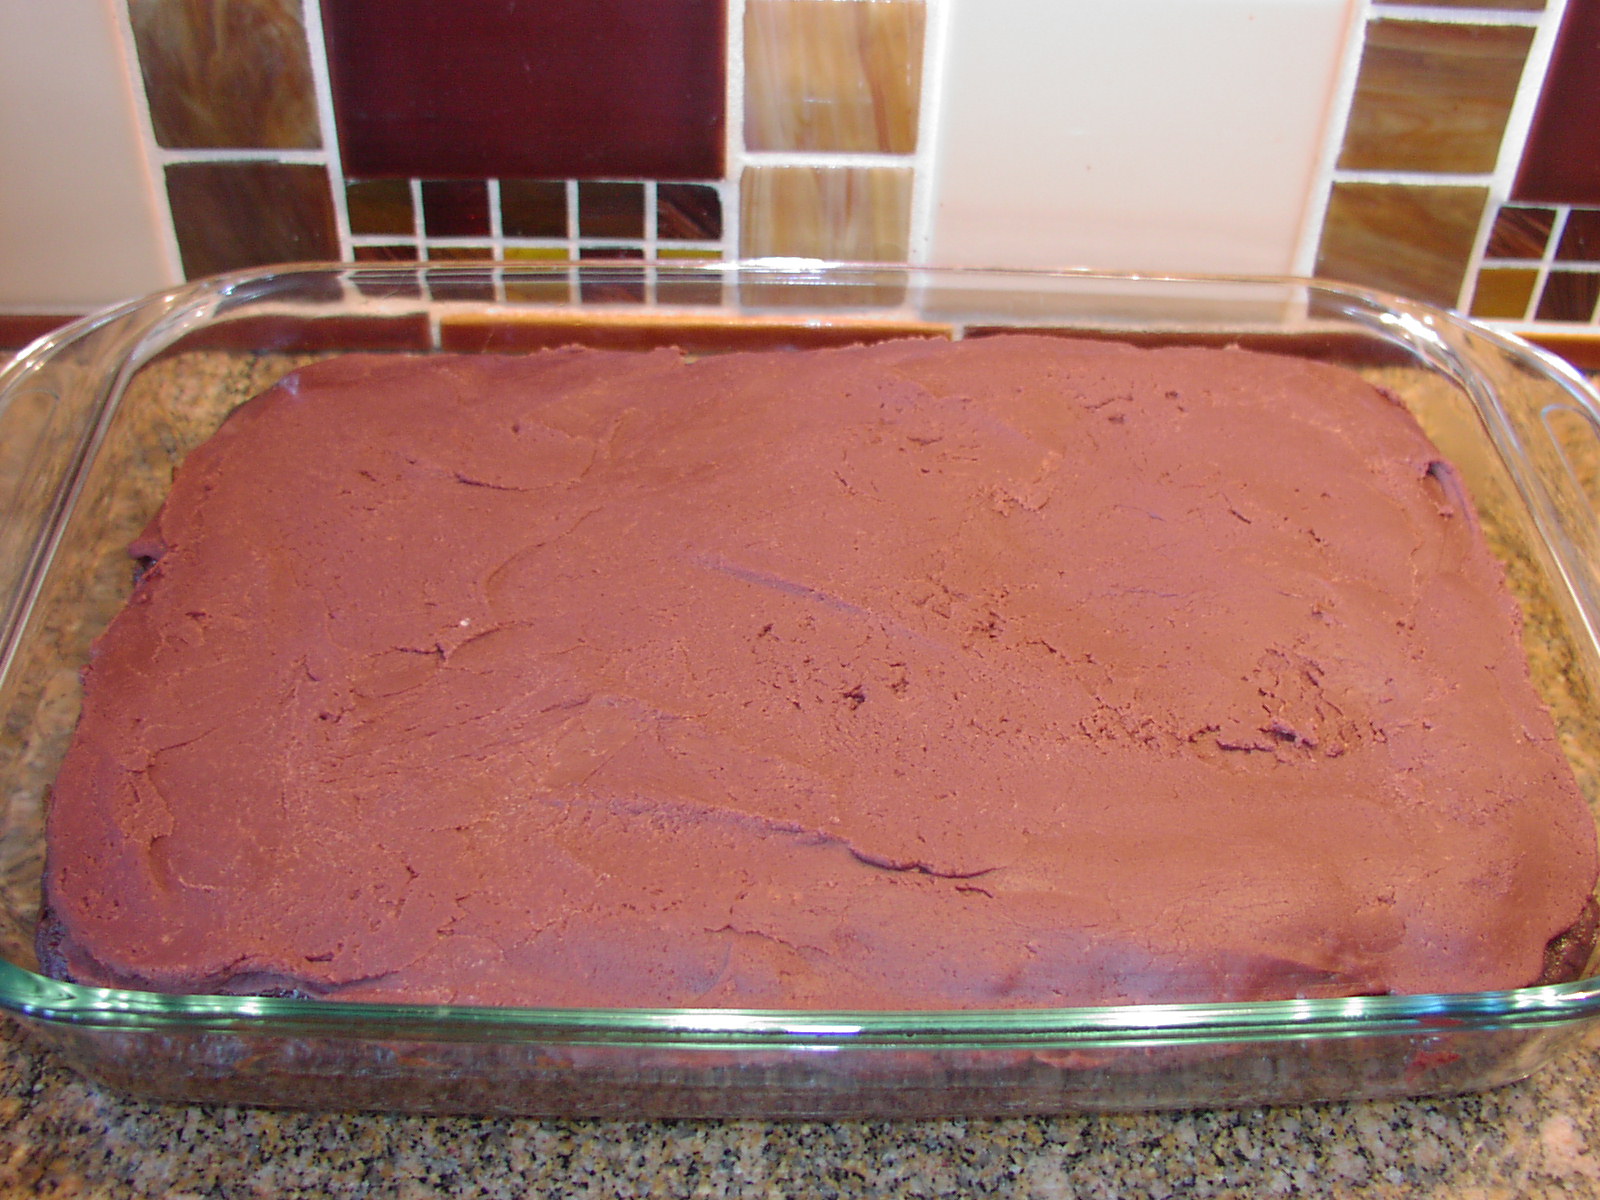
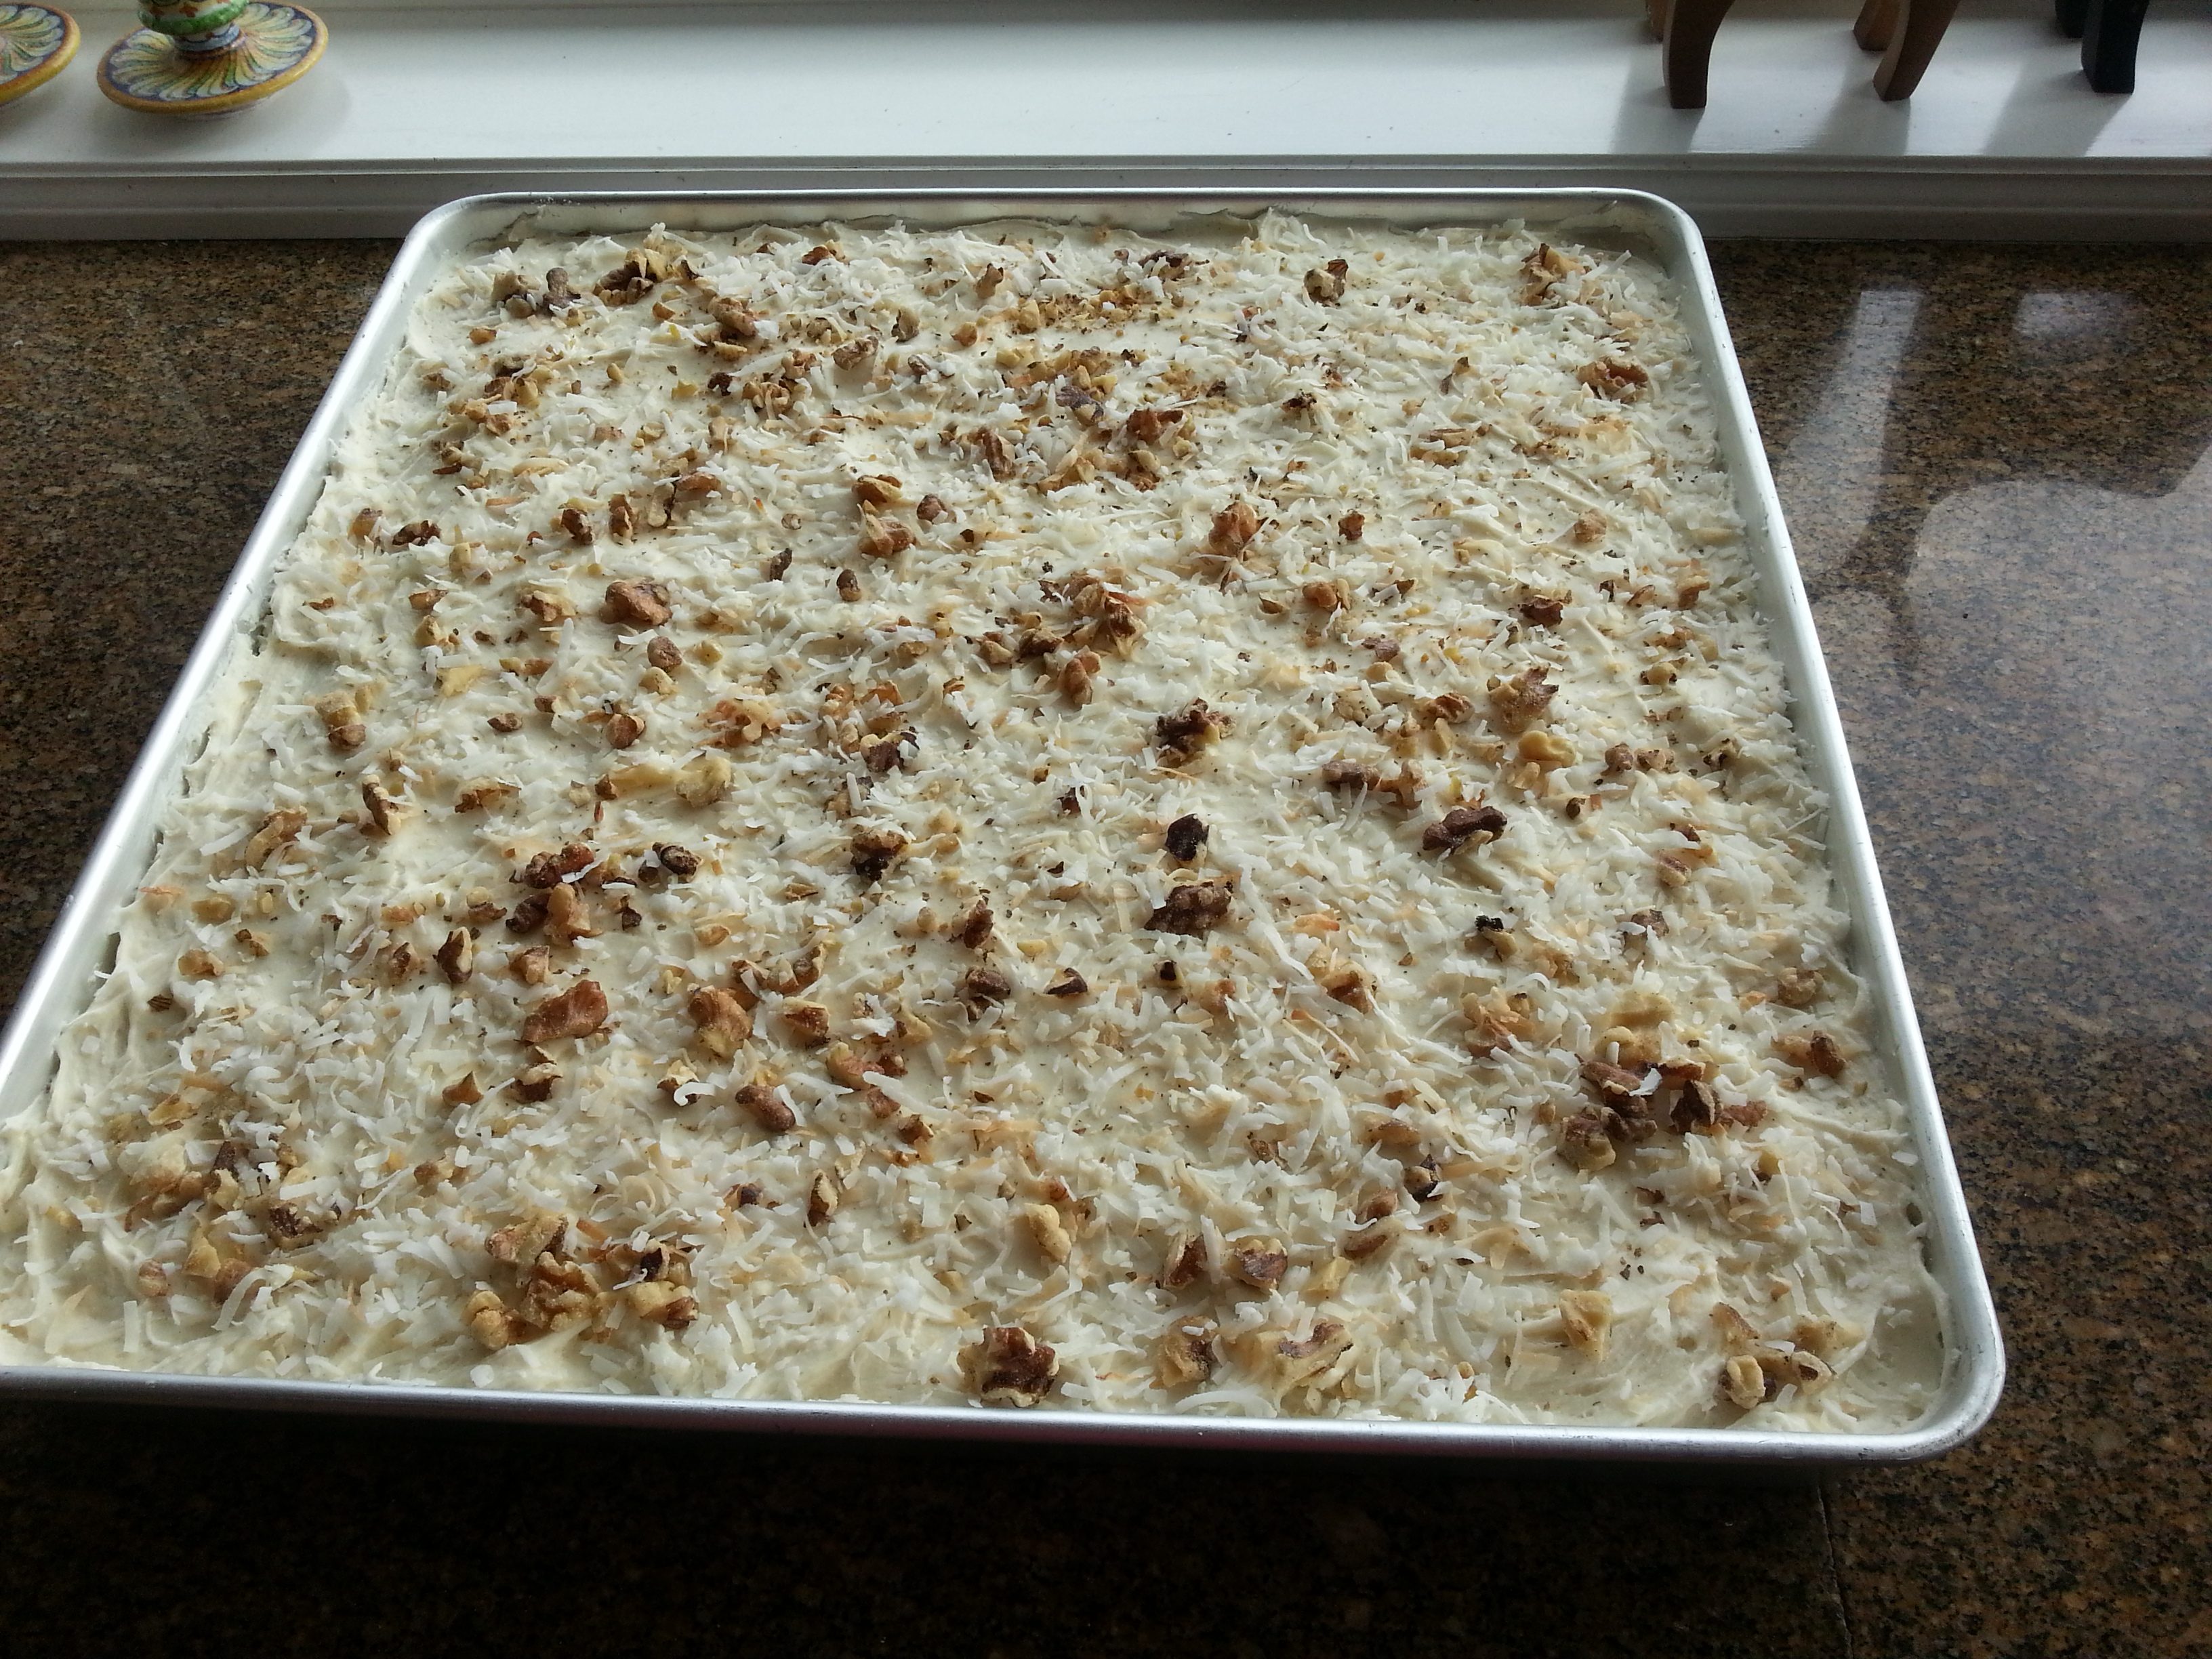
Pour into a lightly buttered and rice floured 10×16-inch glass baking dish*. Smooth top with an offset spatula or table knife. Bake in a pre-heated 325 degree oven* for approximately 40-45 minutes. If already getting brown after 20 minutes or so, gently tent with aluminum foil to prevent further browning. Remove from the oven when a pick stuck in the middle of the cake comes out clean. Place pan on a wire rack. Cool completely before topping with Cream Cheese Frosting (recipe below). Garnish with remaining half cup of toasted coconut and half cup of toasted walnuts.

Please note: Most of the time when I bake cakes or breads that contain veggies or fruit, I freeze them for a couple of days before I frost and serve them. But with this cake, because I am a novice at working with flours other than wheat, I have not frozen the cake before serving. If any of you are GF experts, I would welcome your thoughts on the subject. Thank you.

*If using a metal baking pan, increase heat to 350 degrees and check if done after 35 minutes.

CREAM CHEESE FROSTING

  • ½ c. (1 stick) unsalted butter, room temperature
  • 8 oz. cream cheese, room temperature
  • 1 tsp. vanilla
  • pinch salt
  • 3½ c. powdered sugar or more if needed

Cream butter and powdered sugar together until well blended. Add the vanilla and salt and enough powdered sugar to make a firm but not stiff consistency. Beat until smooth and easy to spread.

GF OATMEAL COOKIES

20161019_130126

My friend and neighbor Marsha made these cookies to share at our annual homeowners meeting. I had been on the board for 6 years serving as president the last year. And Marsha was on the board for my last year serving as a director-at-large. She is a most delightful woman, with a sterling intellect, logical mind, and a terrific sense of humor. In other words, an absolute delight! And, BTW, a fabulous addition to our homeowners board of directors, as well as being a great baker. And speaking of delightful – these cookies definitely fit that category. They are crisp, light, and full of flavor. You would never guess they were GF.

So if you or someone you know needs to stay away from gluten, then these are the oatmeal cookies for you or them. And a wonderful addition to a dessert table when you have no idea whether or not some of your guests might be gluten intolerant. Your only trouble is going to be keeping your non gluten challenged guests from keeping them all to themselves! A bit of hand slapping might be necessary. Or maybe baking a double batch would be the more politically correct course of action. I’m not sure. I used to have a pretty good idea what was and wasn’t politically correct. But this year’s presidential election has thrown everything I felt defined common decency or political correctness right out the window.  (I know, I promised no more commentary on politics, but I set myself up without any intention of going politically postal on all of you again!)

I’m OK now, but I think I need a cookie. And since I just happen to have baked a batch of these cookies for Mr. C. and the other members of the seven piece jazz group (Seabreeze Jazz Band) that are, as I write, rehearsing in our living room, I’m going to leave you now and grant myself an attitude adjustment. You’re on your own. But if you too need your attitude adjusted, these little darlings just might be the ticket. And no, I’m not going to say anything about tickets, political or otherwise! I’m simply going to stop now while I’m ahead.

Thanks again Marsha for this wonderful recipe.

  • 1 c. (2 sticks) unsalted butter
  • 1 c. granulated sugar
  • 1 tsp. vanilla
  • 1 c. GF flour (see note about GF flours below)
  • 1 tsp. baking soda
  • ½ tsp. salt
  • ¼ tsp. nutmeg
  • 2 c. GF oats* (some of them aren’t!)

Cream butter and sugar until pale yellow. Add the vanilla. Whisk the flour, soda, salt, and nutmeg together. Add to the butter mixture and beat just until the dry ingredients are thoroughly blended. Mix in the oats. Drop by small ice cream scoop or rounded teaspoons onto lightly greased cookie sheet two inches apart. Flatten slightly with your fingers.

Bake in a pre-heated 350 degree oven for 12 to 14 minutes or until edges are golden and middle is mostly set. (I found that it helped to turn on the convection option on my oven for the last 3-4 minutes to help brown the center of the cookies.)

Please note: For this recipe, Marsha uses what she calls her “Cookie Flour Blend”. (See recipe below.) It has a sweeter taste overall and is not as dry as other gluten free mixes. For all other cooking she uses GF Cup 4 Cup flour. It is the closest to wheat flour she has ever found. In place of her cookie flour and for easy baking she would have no qualms about using Cup 4 Cup in this or any other cookie recipe. GF flour can usually be found among the other flour varieties, or if not there, the grocery store might have a separate area dedicated to GF products. At least, the GF area is where I found my bag of Cup 4 Cup flour at our local Haggen.

COOKIE FLOUR BLEND (recipe found in a Washington Post article)

Equal parts:

  • mochiko flour
  • sorghum flour
  • tapioca flour
  • cornstarch
  • almond flour

Whisk all together and store in an airtight container. Use in any of your favorite cookie recipes.

*According to the University of Chicago Celiac Disease Center, “oats are technically gluten-free since they aren’t a type of wheat, barley, or rye grain, the three groups of whole grains that naturally contain the protein gluten.

So pure oats themselves are GF and safe for most people with gluten-intolerance. The problem with oats in gluten-free eating is contamination. Most commercial oats are processed in facilities that also process wheat, barley, and rye. So unless the packaging specifically states “GF”, you might not be safe eating just any old oats if you truly suffer from celiac disease. However, many people with just an intolerance to gluten are fine eating oats that are not specifically rated as being “GF”.


CARROT CAKE WITH CREAM CHEESE FROSTING

20161016_104821

So I know, every good cook has a recipe for carrot cake. But does every good cook have a “killer” recipe for carrot cake. (There is a difference you know!) I consider this recipe, which I have been preparing since a few of you were only glimmers in your father’s eyes, the most moist and delicious vegetative cake that I have ever had the pleasure of taking out of my oven. But one thing I must warn you about, besides of course the tendency to become addicted to it, is that this cake only reaches its full potential after it has been frozen. It really needs to spend a short time in your freezer to attain the moist consistency all of us treasure in a truly wonderful carrot cake.

Now I know that statement sounds preposterous. But if you have read any of my other recipes for cakes or breads that contain fruit or veggies, I almost always recommend a short resting period in your freezer as the best way to ensure perfection. (And no, I didn’t learn this trick from my many years studying at Le Cordon Bleu. I learned it from my dear friend Linda’s mother Rhoda. And to the best of my knowledge, Rhoda didn’t learn this trick from her years at Le Cordon Bleu either! (Like either of us ever attended any cooking school, much less Le Condon Bleu!) We both perfected our culinary skills in the school of “what’s for dinner, mom”?

But you truly can’t appreciate this cake until you have sunk a fork down through the not-too-sweet frosting and into the moist and tender crumb of this cake. When it reaches your mouth, you not only have the wonderful mouth feel, you have the depth of flavor from the spices, golden raisins that have simmered in pineapple juice, the toasted coconut, and the lovely tasty crunch from the toasted walnuts.

I am not going to tell you that this cake comes together in 30 minutes, because it absolutely does not. You have to simmer the raisins, toast the coconut and walnuts, grate the carrots, and mix the batter, etc. But, if you want to create a cake that has all the characteristics of that perfect carrot cake that you long for every time you see it on a menu, you have to spend the time and do it right. Of course you can always go to your favorite restaurant or bakery and pay through the teeth for just one piece. Or you can set aside a bit of time and make yourself a treat that can be shared with your family and friends for a fraction of the cost. Of course the advantage of making this cake rather than just buying a piece, is that you get to have seconds. And who in their right mind doesn’t want a second piece of carrot cake, especially around midnight or with their morning coffee?

So do yourself and your family a favor. Make one of these cakes for your next birthday celebration, or as a treat for your family and guests after your next dinner party. Remember, you really need to bake the cake ahead of time, freeze it, and then frost it the day you plan to serve it for dessert. So the hard work is all done ahead of time. That leaves you with plenty of time the day of your get-together to concentrate on the other dishes you are planning to serve. And isn’t that a plus?

So enjoy my friends. And always remember to eat your veggies!

  • 8 oz. crushed pineapple
  • 1 c. golden raisins
  • 2 c. granulated sugar
  • 3 eggs, room temperature
  • 1 c. vegetable oil
  • 2 tsp. vanilla
  • 2 c. grated carrots
  • 1½ c. toasted chopped walnuts, divided
  • 1½ c. toasted coconut, divided
  • 2 c. unbleached all-purpose flour
  • 1 tsp. baking soda
  • ½ tsp. salt
  • 2 tsp. ground cinnamon
  • 1 tsp. ground mace
  • ¼ tsp. ground cloves
  • ¼ tsp. ground nutmeg

Drain the pineapple juice into a small saucepan. Set pineapple aside. Add raisins to the juice and bring to a simmer over low heat. Remove from heat and set aside to cool.   

In a large mixing bowl cream the sugar, eggs, and oil together with a whisk. (No mixer needed for this recipe.) Add the vanilla, carrots, 1 cup of the toasted walnuts, 1 cup of the toasted coconut, the reserved pineapple, and the cooled raisins.

In another bowl whisk together the flour, soda, salt, cinnamon, mace, cloves, and nutmeg. Stir flour mixture into the carrot mixture just until thoroughly blended.  

Pour into a lightly buttered and floured 9×13-inch glass baking dish. Bake in a pre-heated 325 degree oven for approximately 45 minutes or until a pick inserted into the middle of the cake comes out clean. Remove from oven and place pan on a wire rack. Cool completely before covering with plastic wrap and placing in the freezer for no shorter time than 2 days. (I warned you in my introduction!)

The day you plan to serve the cake, remove from freezer and allow to come to room temperature.

Frost with Cream Cheese Frosting (recipe below) and garnish with remaining half cup of coconut and half cup of walnuts.

CREAM CHEESE FROSTING

  • ½ c. (1 stick) unsalted butter, room temperature
  • 8 oz. cream cheese, room temperature
  • 1 tsp. vanilla
  • pinch salt
  • 3½ c. powdered sugar or more if needed

Cream butter and powdered sugar together until light and fluffy. Add the vanilla, salt, and enough powdered sugar to make a firm but not stiff consistency. Beat until smooth and easy to spread. Spread evenly over cake. Garnish with remaining half cup coconut and half cup walnuts.


REVERSE CHOCOLATE CHIP COOKIES

OLYMPUS DIGITAL CAMERA

Some people think that the way to a man’s heart is through his stomach. And to the best of my knowledge, those “some people” are absolutely right! But in my husband’s case, on the way to his heart, many times the food item must first take a little detour past his sweet tooth. Because if ever there was a person who took his sugary treats seriously, it’s Mr. C. Of course he loves savories too, but in his world, each meal must be followed by a little something sweet. Except of course for breakfast. For breakfast he wants his bit of sweet before his eggs and bacon!

Now I realize that Mr. C. is no different than a lot of my friends, both male and female. These sophisticated sugar lovers want to get the most bang for their sugar “buck”.  And I truly have to say, these cookies deliver in every way. They are chocolaty to the max. They are chewy on the inside, and crisp around the edges. But, in all honesty, they do not have a lot of staying power. They are absolutely at their best when they have only been out of the oven for a couple of hours. So sending these in a Christmas package; not such a good idea. Making them in the afternoon to serve as a casual after dinner treat; perfect!

So next time you want a quick and easy cookie, give this recipe a try. And don’t worry about the cookies not having a long shelf life. They are so good, they probably won’t even make it to an airtight container, much less a shelf!

  • 1 c. (2 sticks) unsalted butter, room temperature
  • ¾ c. granulated sugar
  • 2/3 c. packed brown sugar
  • 1 tsp. vanilla extract
  • 2 lg. eggs, room temperature
  • 2¼ c. unbleached all-purpose flour
  • 2/3 c. cocoa
  • 1 tsp. baking soda
  • ¼ tsp. salt
  • 2 c. white chocolate chips (the real white chocolate chips, not the white baking chips)

In a large mixer bowl, beat the butter, granulated sugar, brown sugar, and vanilla extract together until light and creamy. Add eggs, one at a time, beating well after each addition. Whisk together the flour, cocoa, baking soda, and salt in small bowl. Gradually beat flour mixture into butter mixture. Stir in white chocolate chips.

Using a small ice cream scoop, place dough onto ungreased baking sheets. Bake in a pre-heated 350 degree oven for 9 to 11 minutes or until centers are set. Cool on baking sheets for 2 minutes, remove to wire racks and allow to cool completely before storing in an airtight container.


CHOCOLATE KAHLUA ICE CREAM SAUCE

OLYMPUS DIGITAL CAMERA

Now I realize that really good vanilla ice cream doesn’t require a topping, but what the heck – why not? If you are considering ice cream in the first place, you might as well indulge yourself or your family or friends, and go all the way. And if this ice cream sauce doesn’t make a believer out of you, then I don’t know what could! (Unless of course, it’s one of my other sauces (see Caribbean Rum-Raisin Ice Cream Sauce for 3 other delicious sauces.) But back to this recipe.

I made this recently for one of the desserts for a JazzVox pre-concert meal. People loved it. Then I also served it, along with my Caribbean Rum-Raisin Ice Cream Sauce to good friends at our small “open trailer” get together in Anacortes. Again our friends thought it was definitely worthy of posting on this blog.

So you, my dear readers, are getting the benefit of my friend’s unsolicited approval. And don’t you deserve it too! It’s been a rough year. If the presidential race isn’t enough to put you off your feed, there’s always the drought in California, hurricanes all over the world, and the melting ice cap! I tell you, if there ever was a time we all needed (and I mean needed) a little pampering, it’s now. So don’t deny yourself. Eat ice cream and of course vote in the upcoming presidential election.

Pardon the unpaid political proclamation, but if ever there was a time to stand up for what I believe, this is it. And I believe strongly in America and am proud of the humanitarian nation it has always been. But unless we all vote for a reasonable candidate, it could so easily dissolve into a non-respected, joke of a country. Please don’t let that happen. Don’t let hearsay or unverified accusations sway your thinking. Don’t be faithful to a party just because you have always voted their agenda. Now is the time to really think about the lasting effect your vote could make. Take time to read each party’s platform. I want my children and grandchildren to enjoy the same freedom and ability to succeed as I have enjoyed all my life. I want them to be able to go camping in our national parks, and know that the politicians in command care about each and every citizen, not just the people that look and think exactly as they do. And if I’m not mistaken, you probably want the same for your descendants too.

So get out there and vote. Spread the word, and don’t let anyone tell you that by not voting you are making a difference, because they might actually be correct! Your abstinence might just help the one candidate you don’t want in office, to actually win this election. The future of our country is just as much in your hands regardless if you go to the poles or not. But taking the high road and saying that you are not voting because you don’t like any of the candidates is the equivalent to indulging in a  political game of Russian roulette. Remember, no one is perfect. And our candidates are just like everyone else in that regard.  

So please accept my apology if I have offended you or you feel I have over-stepped my position as a food blogger. But I am also a real person who feels deeply about the welfare of our country. I strongly believe, that if we don’t take a firm stand, and vote to retain the integrity and intelligence our leaders have displayed in the past, our country as we know and love it, is going to change dramatically. And I don’t believe it will be for the better!

Again, I know a food blog is not the best place to voice my opinion on something other than the relative merits of dark chocolate over milk chocolate. But being a passionate person, I have interests that far outreach the confines of my kitchen. I do promise however, not to write any more about the upcoming election, at least on my blog.

If you would like to read more about my feelings on the upcoming presidential race, you can follow the steps listed below to a guest editorial I wrote for our local newspaper:

          Search under Stanwood/Camano news

          Choose e-Edition

          Click on Stanwood/Camano News – Updated Aug 29, 2016

          Click on the right arrow in the white circle at the upper right hand corner of the page

          Keep clicking until you get to page A4–the Opinion section (3 clicks, I think)

          My editorial is entitled “Fate of world on the line in U.S. election” (I did not write the title – the newspaper did!)

  • 1½ c. semi-sweet chocolate chips
  • 3 T. unsalted butter
  • tiny pinch salt
  • ½ c. heavy whipping cream
  • 2 T. Kahlua or other coffee-flavored liqueur

Melt the chocolate chips, butter, salt, and whipping cream together in the microwave, being especially careful not to burn the chocolate chips. Remove from microwave and whisk in the Kahlua. Serve warm or at room temperature over vanilla ice cream. And please enjoy the two other ice cream sauce recipes to follow.

DARK CHOCOLATE AND ORANGE ICE CREAM SAUCE

  • ¾ c. Dutch processed cocoa
  • 6 T. sugar
  • 2/3 c. water
  • 4 T. (1/2 stick) unsalted butter
  • 2 tsp. vanilla
  • 2 T. Cointreau or other orange flavored liqueur

Whisk cocoa and sugar together in a medium-sized saucepan. Gently whisk in the water. Slowly bring to a boil and cook for 1 minute. Remove from heat and stir in butter, vanilla, and Cointreau. Serve warm or allow to cool completely and store in the refrigerator. Warm before pouring on ice cream.

FRESH STRAWBERRY ICE CREAM SAUCE

  • 1 qt. fresh strawberries, divided (raspberries, blueberries, Marionberries, blackberries, etc. can also be used)
  • ¼ c. sugar or more to taste
  • ½ tsp. vanilla

Wash strawberries and remove the stems; cut each berry into 4 or 6 pieces, depending on the size of the berry. Combine half the strawberries, sugar, and vanilla in a saucepan. Cook over medium-high heat, stirring occasionally. The mixture will appear too dry for a while, but then the juice will begin to appear and produce the syrup. Cook until sauce thickens, about 15 minutes.

Remove from heat. When the sauce is completely cool, add the remaining strawberries. Store covered in the refrigerator. Also great over shortcake or pound cake with sweetened whipped cream.


CARIBBEAN RUM-RAISIN ICE CREAM SAUCE

OLYMPUS DIGITAL CAMERA

When it comes down to it, there really are no bad ice cream sauces. Well at least not if they are homemade. But once in a while a really amazing sauce comes along, and your taste buds go into overdrive. That’s what happened when I played with a basic caramel sauce recipe to serve with vanilla ice cream for the pre-concert JazzVox meal I served last weekend featuring Caribbean food. I knew that plain rum, both dark and light, were essential to Caribbean cuisine. But I like spice rum for desserts, so I used a combination of rums plus a bit of cinnamon to enhance the spice flavor. What I turned out was pretty darn good if I say so myself. Which of course I am saying. (Believe me, when I try new recipes and they are not worthy of your discerning palate, the paper they are printed on goes straight to the circular file and the “delete” button gets pushed sending the word document to “who knows where or cares”!)  

This recipe however, should find you running to your local emporium for all the ingredients you don’t already own and the largest container of really good vanilla ice cream you can carry. It is just that delicious and so different from other ice cream sauces. I also made a Kahlua Ice Cream Sauce (next recipe to be posted) that turned out great, but it’s more of a standard ice cream sauce. But it’s equally delicious, if you happen to like chocolate and Kahlua that is!               

And just because I care so much about all of you, I’ve included a couple other really delicious ice cream sauces for your edification – Spiced Rum Sauce and Bourbon Caramel Sauce. Both too are easy to prepare, economical, and far above any product sold on the market. (OK, there are some really good ice cream sauces available commercially. But they are really expensive, and you don’t get that happy feeling of a job well done when someone else builds a product you know you can do better, or at least equally as well.)

So enjoy the recipes and have fun with them. Believe me, there is nothing like this sauce out there. But beware. Once you have served this to family and friends, there will be no going back. If I weren’t so lazy, I would start a business selling this to local stores. But doing such a bizarre thing at my age a) sounds like way too much work, b) sounds like way too much of a monetary investment, and c) sounds like way too much work! So if you want rum-raisin sauce for your ice cream, you’re just going to have to make it yourself! At least now you have a recipe! Enjoy

  • ½ c. dark rum
  • ½ c. spice rum
  • ½ tsp. cinnamon
  • ¼ c. golden raisins
  • ¼ c. dark raisins
  • 1 c. brown sugar
  • ¼ lb. (1 stick) unsalted butter
  • pinch salt

Pour the rum into a bowl. Add the cinnamon and raisins, cover, and place in the refrigerator overnight. Just before making the sauce, drain the raisins reserving both the liquid and the raisins.

Whisk the brown sugar, butter, and salt together in a heavy sauce pan until the butter is melted and the mixture starts to go a darker color and develops big frothy bubbles. Usually takes 4-6 minutes.  

Remove from heat and gently pour in the reserved rum. Whisk for about 2 minutes and return the pan to the stove. (The alcohol should have all dissipated by now.) Stir or whisk continuously over low heat about 10 minutes while the mixture gently simmers to a slightly thicker consistency. (The sauce should display tiny bubbles on the surface the entire time the sauce is cooking.) Remove from heat and stir in the raisins.  Serve warm over vanilla ice cream, apple pie, bread pudding, gingerbread, crêpes, pound cake, pumpkin pie, or any other dessert item that takes your fancy. It would also be wonderful served over baked ham or pork tenderloin. And don’t get me started on what this sauce would add to a simple baked sweet potato!

Note: This is a very potent sauce. Use sparingly.

SPICED RUM SAUCE

  • 1 c. packed brown sugar
  • ½ c. unsalted butter
  • ½ c. heavy cream
  • 2 T. spiced rum
  • ¼ tsp. cinnamon

Combine brown sugar and butter in a medium sized heavy saucepan. Cook over medium heat for about 2 minutes or until butter completely melted and mixture is smooth. Add heavy cream, spiced rum, and cinnamon. Bring to a simmer and cook for approximately 5 minutes or until mixture thickens and is reduced to about 1½ cups. Serve warm. Can be made ahead and refrigerated. Bring to a simmer again before serving or gently warm in your microwave.

BOURBON CARAMEL SAUCE

  • ¼ c. unsalted butter
  • ½ c. brown sugar
  • ¼ c. heavy cream
  • 2 T. good bourbon
  • pinch freshly ground nutmeg, opt.

Whisk butter and brown sugar together over medium heat in a small heavy saucepan until brown sugar is dissolved completely. (This happens after the mixture comes to a boil and is allowed to burble for a couple of minutes or until it turns kind of shiny.) Continue whisking the whole time the mixture is on the heat. Remove from heat and gently whisk in the heavy cream, bourbon, and ground nutmeg. Serve warm, or allow to come to room temperature and refrigerate.


CHOCOLATE CHERRY CAKE

OLYMPUS DIGITAL CAMERA

A long time ago, in a world far away, I used to be a mother. Well, actually I’m still a mother, but I’m no longer a “mommy”. Mommies cook meals for their children, do their laundry, and make sure they take a bath at least every other night. Mommies also read bed time stories, tuck their children in with a kiss, as well as chauffer the little darlings all over God’s creation. While, of course, at all times remaining positive, cheerful, understanding, and loving. (My children say I was all those things, but frankly I have no recollection. It’s all just one big happy blur. Not really, but some of it is!)   

But alas, those days are over. My 4 grown children, all amazing BTW, are potty-trained, know how to say please and thank you, and I’m reassured by their partners that they take showers without being cajoled. In other words – my job with them is done!

But while I was still wearing my “mommy” hat, I used to fix this cake periodically because not only was it delicious, it was flat out easy to prepare. And as a working mother of 4, I needed all the help I could get in the kitchen. And especially when I went completely crazy and invited friends over for dinner after a long day working around the house.

It was nothing to clean the house on Saturday morning, run a couple loads of laundry, work in the yard until 3:00 pm and then decide I wanted to have friends over for dinner. Oh the energy in those days!

But life was easier in the 60s, 70s, and 80s. I didn’t have to research a new and improved spaghetti sauce recipe on the computer; I just consulted my Betty Crocker cookbook. I didn’t have to grate the Parmesan; it came all nicely fine crumbled in a big green can. And salad dressing – it came from the grocery store, as did the bread if it was a last minute get-together. All that was needed was a simple call to my friends. They were either home and I got an immediate response, or they weren’t home and we didn’t see them that evening. No leaving a message, then spending time checking the voice mail on my land line or text on my cell phone. No checking my email, and while I’m at it, making certain nothing new had been posted on Facebook! Just a simple, personal phone call that said, “Sorry for the late notice, but I miss you, and can you come for dinner tonight?” Terribly simple and for me, terribly nostalgic – just like this cake.

So next time you need a quick and easy cake perfect for any occasion, whip up one of these babies. This recipe may have been around as long as the Beatles, but just like the Beatles, it has endured the test of time. (Now if only I could say the same thing about myself! Sigh…..)

  • 2 eggs
  • 21 oz. can cherry pie filling
  • 1 tsp. almond extract
  • 1 chocolate fudge cake mix
  • 1 c. sugar
  • 5 T. butter
  • 1/3 c. milk
  • 6 oz. (1 cup) chocolate chips

In a large bowl lightly beat the eggs. Add the cherry pie filling and almond extract. Stir until well combined. Add the cake mix and stir just until combined. Pour into a buttered and floured 9×13-inch glass* baking pan. Bake in a pre-heated 325 degree oven for 35-45 minutes or until a toothpick stuck into the middle of the cake comes out clean. Don’t overbake. Remove from oven and cool on a wire rack.

Meanwhile, combine the sugar, butter, and milk in a sauce pan. Boil for one minute, remove from heat, and stir in the chocolate chips until the frosting is smooth. Pour on cooled cake and allow to harden before serving. (The frosting will be soft but will harden as it cools.)

OLYMPUS DIGITAL CAMERA

*If using a metal pan, increase the temperature to 350 degrees and bake for 25-30 minutes.


RUSTIC PEACH TART

OLYMPUS DIGITAL CAMERA

I love pie. But sometimes I just don’t want to be as fussy about the pie crust as is demanded in a “real” pie. That’s when I make a rustic tart! Now granted, you can’t use just any filling when you make a tart. But peaches, apples, cherries, or other fruits that don’t turn too saucy make perfect tart fillings. And the flavor – just as wonderful as any pie. Because, of course, all the ingredients are the same. (Stating the obvious has always been my forte!)

So next time someone says to you, “I’m hungry for quiche” – make a tart. Allow me to explain.

A couple of weeks ago Mr. C. suggested quiche for dinner. Now as everyone knows, quiche is a one crust (bottom) pie filled with a savory custard and cheese, meat, seafood, vegetables, or whatever takes your fancy. So when I make a quiche and use my favorite recipe for piecrust (recipe below), I am left with enough dough for a tart. Thus when asked for quiche, I also make a tart. (The logic is simple, right?!?!) Almost mathematical. Not quite pie r squared (or as some refer to it – pi r squared), but there are circles involved, and tasty circles to boot!

So do yourself and your family and friends a favor. Bake a tart. And if you still have the energy, make them a quiche too. Not coincidentally, the next recipe I plan to post is for a delicious version of Quiche Lorraine.  (Some would call that good planning. Those who know me would refer to it as happenstance!) Happy baking.

  • 1 pie crust
  • 4-5 ripe but firm peaches, peeled and cut into ¼ inch slices
  • 1 tsp. fresh lemon juice
  • ¼ tsp. almond extract
  • 2 T. unbleached all-purpose flour
  • 3 T. sugar
  • 1/8 tsp. ground cinnamon
  • pinch ground nutmeg
  • pinch salt
  • 1 T. unsalted butter, cut into small pieces

Roll your pie crust into a circle shape (does not have to be perfect) and place on a low sided baking sheet. Combine the cut peaches, lemon juice, and almond extract in a bowl. In a separate bowl, whisk together the flour, sugar, cinnamon, nutmeg, and salt. Pour the flour mixture over the peaches and gently stir until all the pieces of peach are covered with flour. Scoop the mixture onto the pie crust leaving about a 1½ inch edge uncovered. Gently fold the bare edges up over the filling. Dot with the butter.

OLYMPUS DIGITAL CAMERA

Bake in a pre-heated 375 degree oven for 35-40 minutes or until the filling is bubbly and the crust is a light golden brown. Hint: I use the convection setting on my oven for the last 10 minutes or so. This helps the pie crust brown.

PIE CRUST (makes a double crust)

  • ¼ c. very cold water
  • 2 c. flour
  • 1 tsp. salt
  • heaping 2/3 c. Crisco

Step 1 – Pour cold water into a small bowl.

Step 2 – Measure flour and salt into a mixing bowl.

Step 3 – Take 1/3 cup of the flour back out of the mixing bowl and stir it into the water. Make a paste. Set aside.

Step 4 – Add the Crisco (heaping 2/3 cup) to the flour and salt mixture. Mix together. (I use my KitchenAid mixer.)

Step 5 – Add the water/flour paste to the flour/shortening bowl and mix just until blended. Do not over-mix. Roll out dough and place in pie plate. This recipe makes enough dough for a double crust pie, if using a regular sized pie plate, or one large bottom crust with a little left over for pastry cookies or small tart like the one shown below.

Helpful hint: Use a pastry cloth to roll out your pie crust. It really makes a difference. You can find pastry cloths in almost any kitchen wares shop. Well worth the $10 or so.

GERMAN CHOCOLATE SHEET CAKE

OLYMPUS DIGITAL CAMERA

Contrary to popular belief, German chocolate cake did not originate in Germany. Its roots can be traced back to 1852 when American chocolatier, Samuel German, developed a type of sweet baking chocolate for the Baker’s Chocolate Company. The brand name of the product, Baker’s German’s Sweet Chocolate, was named in Mr. German’s honor.

And this delicious cake, which I prefer to serve as a sheet cake, is the ultimate result of Mr. German’s hard work. (And we all thank him to this day.)

And yes, I prefer sheet cakes to layer cakes. Why you ask?  Very simple. We entertain large groups of quests in our home, and sheet cakes are simply easier to build and easier to serve than a layer cake.  (Since entering “the golden years”, I’ve started pulling the “I’m not getting any younger” card to give myself permission to take a few steps here and there to make life easier for myself. And one of those “steps” is to mainly serve only sheet cakes and reserve time consuming layer cakes for very special occasions.)

Now I don’t want you to think that just because this recipe doesn’t call for 3 layers, each frosted with the wonderful caramel pecan and coconut frosting we have all come to love over the years that you will somehow feel cheated. Not going to happen. You are still going to get plenty of that fantastic frosting. So no need to worry. And truly, if you just can’t abide the thought of German Chocolate cake as a sheet cake, by all means, knock yourself out and make a layer cake. (3 – 8-inch pans should work just fine.)

But whatever shape you decide upon, be it the lazy person’s way (mine) or the traditionalist’s way (someone younger with more stamina), you are going to love serving this cake to your family and friends. You know the term “oldie but goodie”, well whoever coined that phrase must have had this enduring cake in mind. Because this cake has been around since I was a kid, and as everyone knows, that was a long time ago.

Actually, the first published recipe for German’s chocolate cake appeared in the Dallas Morning Star newspaper on June 13, 1957 as their “recipe of the day”. It was created by a Texas homemaker, Mrs. George Calay. The recipe was so delicious that it quickly spread to other newspapers and cookbooks, and soon became everyone’s “special” cake for birthdays, anniversaries, etc. And just so you know, June 11th is National German Chocolate Cake Day in America. (The things you learn on this site. Amazing, huh?)

And I know, everyone already has a recipe for German Chocolate Cake. But mine is a tad different. (Now there’s a surprise I bet you hadn’t thought possible.) Chuckle chuckle!

Cake:

  • 4 oz. German sweet chocolate, chopped
  • ½ c. water
  • 1 c. unsalted butter, room temperature
  • 2 c. granulated sugar
  • 4 eggs, room temperature, separated
  • 1 tsp. vanilla extract
  • 2½ c. cake flour
  • 1 tsp. baking soda
  • ½ tsp. salt
  • 1 c. buttermilk

 Frosting:

  • 4 lg. egg yolks
  • 1 (12-oz.) can evaporated milk
  • 1½ c. granulated sugar
  • ¾ c. unsalted butter
  • pinch salt
  • 1½ tsp. vanilla extract
  • 1 T. dark rum, opt.
  • 2 c. sweetened flaked coconut, toasted
  • 2 c. toasted pecans, chopped

Cake:

In your microwave oven, melt the chocolate with water; stir until smooth. Set aside to cool. In the bowl of your mixer, cream butter and sugar until light and fluffy. Add egg yolks, one at a time, beating well after each addition. Beat in the chocolate mixture and vanilla. Whisk the cake flour, baking soda, and salt together in a small bowl. Add to the creamed mixture alternately with buttermilk, beating well after each addition. Beat egg whites until stiff peaks form; fold into batter.

Spread batter evenly in a buttered and floured 9 x13-inch baking pan. Bake in a pre-heated 325 degree oven (if using a glass baking pan) or a 350 degree oven (if using a metal pan) for 35-40 or until a toothpick inserted near the center of the cake comes out clean. Remove from oven and cool completely on a wire rack before frosting. When the cake is cool and the frosting is ready, carefully spread the frosting over the surface of the cake. Let sit for a few hours before cutting into desired sized pieces.

Frosting:

Whisk the egg yolks and evaporated milk together in a large heavy saucepan. Add the sugar, butter, and pinch of salt; cook over medium heat for about 12 minutes or until thickened and golden brown, stirring constantly. (170 to 180 degrees on a candy thermometer.) Remove from heat and stir in the vanilla, rum, coconut, and toasted pecans.  Let stand, stirring occasionally, for 45 minutes or until cooled and the mixture is a good spreading consistency.


SALTED CARAMEL TURTLE BROWNIES

OLYMPUS DIGITAL CAMERA

One of the latest food trends is salted caramel. And although I often refrain from becoming a culinary sheep, I think in the case of salted caramels, I was the first person to follow the leader on this one. (Actually I would have jumped off a cliff with the rest of the sheep, metaphorically speaking of course, had it been necessary to do so!) Because if there ever was a combination made in heaven, it’s the salty sweet caramel. And I am a caramel lover. Milk chocolate covered nut filled caramels are my favorite, but caramel sauce on vanilla bean ice cream runs a close second. (Of course my picky stomach doesn’t appreciate either any longer, but a girl can still dream in caramel, right?)

So last week when I was looking for just that special dessert to serve on Valentine’s Day, I decided to make a turtle brownie. And of course, since I was topping the brownie with chocolate chips, pecans, and caramel – why not go one step further and sprinkle the caramel with a wee bit of finishing salt. So I did and it did. (I salted the top and it tasted mighty fine.)

So if you are ever in the mood for a brownie, (as if there was ever a time when you weren’t in the mood for a brownie), whip up a batch of these little darlings. The brownie itself has a wonderful flavor of its own, with a texture that is both cakey and fudgy at the same time. Then top the brownie batter as described above, pop the whole mess into the oven, let cool completely, (the only hard thing about making these brownies), and cut into desired size pieces. Voilà! You have just created an easy to make, easy to serve, and most definitely, easy to eat brownie. Congratulations!

Brownie batter:

  • 2 c. semi-sweet chocolate chips, divided
  • ½ c. (1 stick) unsalted butter, cut into pieces
  • 3 eggs
  • 1 tsp. vanilla extract
  • 1¼ c. unbleached all-purpose flour
  • 1 c. granulated sugar
  • 1 tsp. espresso powder (I use Medaglia D’oro)
  • ¼ tsp. salt
  • ¼ tsp. baking soda
  • ¾ c. chopped pecans

Caramel drizzle:*

  • ½ c. light brown sugar
  • 3 T. unsalted butter
  • ¼ c. heavy cream
  • ½ tsp. vanilla extract

Finishing touch:

  • coarse finishing salt (like Fleur de Sel or coarse sea or kosher salt)

Brownies: Melt 1 cup of the chocolate chips and butter together in a medium sized saucepan over low heat until the chocolate is melted and the mixture is smooth. Remove from heat and allow to cool. Mix in the eggs and vanilla. In a bowl whisk together the flour, sugar, espresso powder, salt, and baking soda. Add to the chocolate mixture and stir only until the batter is well blended. Pour into a buttered 13 x 9-inch baking pan. (Glass preferably.)

Sprinkle with remaining cup of chocolate chips and the pecans. Bake in a pre-heated 325 degree (for glass) or 350 degrees (for metal) oven on the middle rack for 30-40 minutes or until a tooth pick inserted into the center has just a few moist crumbs clinging to it. Meanwhile, prepare the caramel sauce. When the brownies are done, remove from oven and drizzle with the warm caramel. Very lightly sprinkle with finishing salt. Cool on a wire rack. Can be made up to three days ahead.

Caramel drizzle: While the brownies bake, combine the light brown sugar, butter, and heavy cream in a small saucepan. Cook over medium-low heat whisking constantly until the sugar completely melts and the sauce burbles and just starts to thicken, about 8 minutes. Remove from heat and whisk in vanilla. Allow to partially cool and thicken a bit while the brownies finish baking. (You might have a bit of extra sauce. This is not a bad thing. The sauce is wonderful in coffee or dolloped over ice cream.)

*If you prefer, you can melt 12 caramels with 2 tablespoons of milk in your microwave and drizzle your brownies with this mixture. It is quicker than making your own caramel, but more costly.