Category Archives: COOKIE RECIPES

GINGERBREAD CRINKLE COOKIES

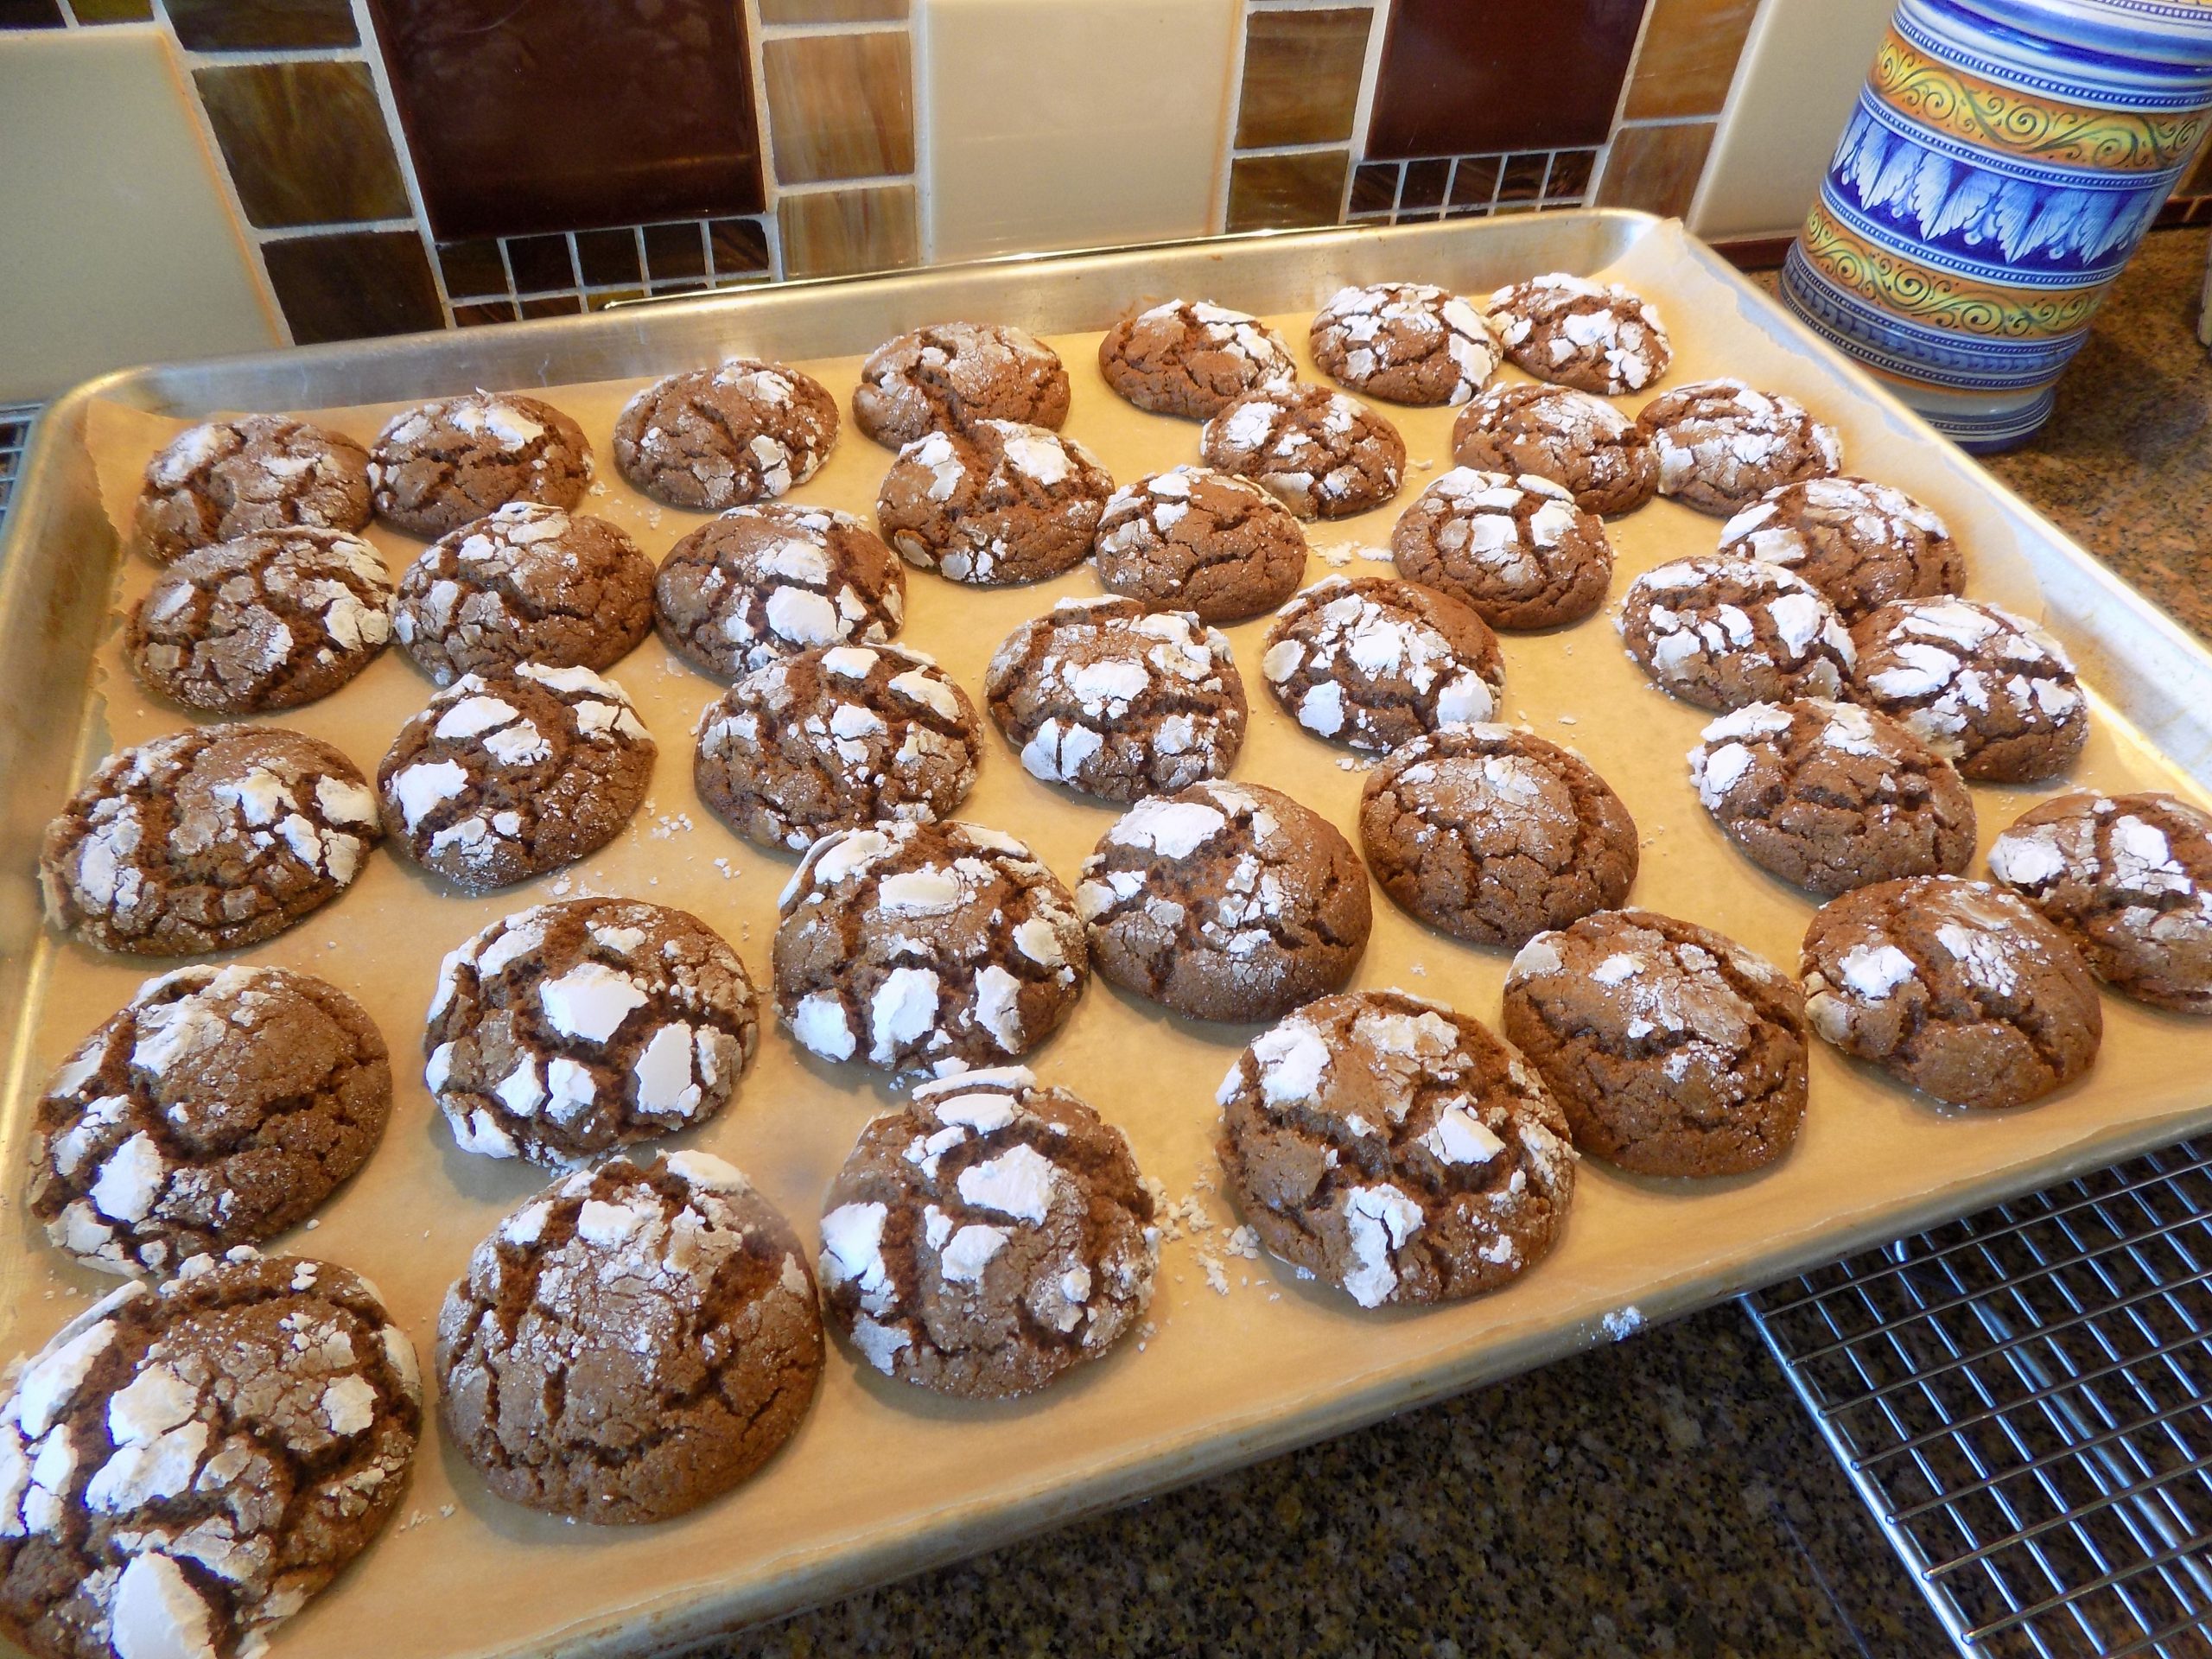
Now, the first thing you should know about these cookies, is that they are not for the faint of heart. These incredible cookies, compliments of the ifyougiveablondeakitchen.com site, are for true lovers of gingerbread and ginger cookies. They are simply the best soft ginger cookies I have ever tasted. And because they are crinkle cookies, they are beautiful as well as delicious. And doesn’t everyone appreciate a beautiful cookie? Of course, we do!

But I must emphasize that these are strongly flavored cookies. The word wimpy could never be applied to them. They are gingery with a capital G. And the texture too is perfect. But because of their pronounced ginger flavor, I doubt they would be the preference of say, a 5-year-old. So, don’t share them with a 5-year-old! Simple solution. Keep them for yourself! (That’s OK to do, you know!) Give the child an animal cracker. (That is, if they even make them any longer.) If not, find some other innocuous cookie to pawn off on the kid. And no, I never did that with my own children, but I think it’s OK if you do! I always made cookies that everyone in the family would enjoy. But I’ve since learned that doing something just for myself is OK. The earth will not stop spinning, summer will still follow spring, and no one really gives a rip anyway! But, whatever you do, make a batch of these cookies. They are really, really tasty.

As always, have fun baking. Have fun cooking. And if you’re like me, try to enjoy preparing salads rather than thinking of them as endurance contests. Because veggie salads are our friend. And don’t forget to make your own salad dressings. First of all, fresh dressings are delicious. And if you build your own dressing you know exactly what you are eating rather than depending on the kindness of strangers not to include unpronounceable ingredients like Phosphoric Guanylate, Disodium Inosinate, Sorbic Acid, and Calcium Disodium Edta! (Whatever they are!) Manufacturers simply have no choice but to add various stabilizers, preservatives, and even synthetic flavorings. It’s what they do! But that doesn’t mean you have to buy their products. You can fight the system and build you own dressings. I call it – using common sense!

Peace and love to all.

3 c. unbleached all-purpose flour, fluffed

¾ c. brown sugar, packed

¾ tsp. baking soda

1 T. ground cinnamon

1 T. ground ginger

½ tsp. ground cloves

½ tsp. kosher salt

12 T. (1½ sticks) unsalted butter, room temperature, cut into ½-inch cubes

¾ c. molasses (not blackstrap)

2 T. milk

granulated sugar

powdered sugar

In the bowl of your stand mixer, stir the flour, brown sugar, baking soda, cinnamon, ginger, cloves, and salt together until combined. Add the butter pieces and beat until the mixture is sandy and resembles fine meal.

Reduce the speed to low and, with the mixer running, gradually add the molasses and milk. Mix until the dough is evenly moistened and thoroughly combined. Don’t over mix.

Using an ice cream scoop (I use my #40 – 1½ tablespoons ice cream scoop), drop balls of dough right next to each other on a waxed paper lined baking sheet. (Make sure the baking sheet you use will fit in your refrigerator.) After you have scooped all the dough, roll each scoop in your hands to form smooth compact balls. (This takes no time at all and is a necessary step.) Place the pan uncovered in your refrigerator for at least 2 hours. 

Meanwhile put a bit of granulated sugar in one shallow mixing bowl, and some powdered sugar in another shallow bowl. (I don’t give specific amounts here because you should start with a small amount of each and add more as required.)

After the two-hour cooling off period, roll each ball in granulated sugar then in powdered sugar. Place 1-inch apart on a parchment paper lined baking sheet.  

Bake in a pre-heated 350-degree oven for 12-14 minutes, or until the top feels set, but you would swear on a bag of Cheetos that the middle was not done! Truly, the cookies will feel a bit squishy in the middle. That’s what you want. Do not over bake.

Remove from the oven and cool on the sheets 2 minutes before transferring to a wire rack to cool completely. Store in an airtight container at room temperature.

Windy and stormy weather while I was baking these cookies. Notice how the trees in front of our house are bent to the North.
Alpenglow on the upper clouds


SALTED DARK CHOCOLATE FUDGE-WALNUT BROWNIES

Based on a recipe from the cafedelites.com site, I offer you this recipe for an extremely moist and fudgy, nutty, and over the top, dark chocolate brownie. But please be warned. If you are not a fan of dark chocolate, this is probably not the recipe for you. Because there is no escaping the fact that these brownies are ultra-chocolaty and super rich. (To my way of thinking, exactly how a brownie should taste. But that’s just me!) And the best part, the dark rich chocolate comes from cocoa. So, no having to melt chocolate! And no having to get out your mixer either. Just a couple of bowls and a short bit of time and you have a pan of brownies fit for a king or queen.

So, really, there’s nothing left to say, except, you simply must prepare a batch of these brownies for yourself. And if you happen to be feeling magnanimous, you might offer a bite to your significant other or a dear friend. But don’t bother offering any to your kids. Children under 12 wouldn’t appreciate them. And a teenager would simply inhale them, not having the sophistication to nibble on them slowly in order to savor every tiny morsel of chocolate goodness. These brownies were simply designed to be eaten by brownie connoisseurs. And not to be wasted on the uninitiated!

So, as always, have fun playing with your food. And sometimes, just for the pure delight factor, have fun baking something that is strictly for yourself!

Peace and love to all.     

½ c.(1 stick) unsalted butter

1 T. vegetable oil

½ c. + 2 T. granulated sugar

½ c. brown sugar, packed

2 lg. eggs

2 tsp. pure vanilla extract

½ c. unbleached all-purpose flour, fluffed

½ c. good unsweetened cocoa powder (I use Valrhono, Scharffen Berger, or Hershey’s Cocoa Natural Unsweetened Cocoa Powder)

½ tsp. espresso powder (I use Medaglia D’Oro)

¼ tsp. kosher salt

½ c. mini semi-sweet chocolate chips

¾ c. chopped walnuts

coarse sea salt

Lightly grease an 8-inch square baking pan (glass preferably) with cooking spray. Set aside.

In a large glass mixing bowl, melt the butter and keep heating it until it is hot. Whisk in the oil, granulated sugar, and brown sugar until well combined. Add the eggs and vanilla; beat for a couple of minutes until the mixture is lighter in color.

In another mixing bowl, whisk the flour, cocoa powder, espresso powder, and kosher salt together. Gently fold the dry ingredients into the wet ingredients just until combined. (Do not over mix.) Then gently fold in the chocolate chips and walnuts.   

Scoop the batter into the prepared pan, smoothing the top out evenly. Lightly sprinkle with coarse sea salt. (Not too much. Just enough to give each bite a tiny hint of salt.)    

Bake on the top rack of your pre-heated 325-degree oven (350-degrees if using a metal pan) for 23-27 minutes, or until the center of the brownies no longer jiggles and the top is just set to the touch. (Forget using a toothpick. It will come out with batter still attached. And you might be tempted to leave the pan in the oven too long! Don’t forget, the brownies will keep baking in the hot pan as they cool). If the top part of your oven tends to capture the heat, bake the brownies on the middle rack.

Remove from oven and allow to completely cool before cutting into squares. Store in an airtight container.

DARK CHOCOLATE MINT CHIP COOKIES

So, this started out to be my recipe for knockoff Levain Bakery dark chocolate peanut butter chip cookies. But alas, there were no peanut butter chips in my freezer. I had used every single peanut butter chip I owned at Christmas time, and obviously failed to add them to my grocery list. Well, slap my hand for that senior moment! (And yes, peanut butter chips are now on my current shopping list. At least I remembered to do that. And yes, mental acuity comes and goes when you get to be my age!) So, I decided to make the same cookie batter but use mint chips in place of peanut butter chips. After all, how bad could that be? And as it turned out, I may have to write Levain Bakery offering to share my recipe with them. Because frankly, I think they’re making a grave mistake by not offering this cookie in their remarkable line up of cookies. Because these cookies are amazing. And yes, I am tooting my own horn. But when fair is fair, then I go for it!

Now for those of you who have never experienced a real Levain Bakery cookie (and that would probably include most of you since the bakery is in New York City) or even a knockoff Levain Bakery cookie, you are in for a treat. First of all, these are big cookies. They have a crisp outer layer with an extremely chewy, doughy center that melts in your mouth. (Think not quite set cookie dough that doesn’t fall apart!) Levain Bakery cookies are simply the best cookies imaginable. And very different from any cookies I had ever made or eaten before. And for the life of me I can’t remember where I heard or read about this bakery. But I will forever be grateful for whatever it was that turned me on to these cookies. And after you try one, I know you will be too! So, for your gastronomic edification, I offer you two other recipes for knockoff Levain Bakery cookies. Knockoff Levain Bakery Chocolate Chip Walnut Cookies and Almost Knockoff Levain Bakery Oatmeal Raisin Cookies. Both are super yum!

So, as always, keep having fun in your kitchen. Keep thinking positive thoughts. And keep baking cookies. Because I don’t know anyone who doesn’t feel better with a cookie in their hand. Peace and love to all.  

And yes, look for my recipe for Knockoff Levain Bakery Dark Chocolate Peanut Butter Chip Cookies in the near future.

1 c. (2 sticks) cold unsalted butter, cut into small cubes

1 c. brown sugar

½ c. granulated sugar

2 lg. eggs 

1 tsp. vanilla extract

½ c. good dark cocoa powder

1 c. cake flour, fluffed 

1½ c. unbleached all-purpose flour, fluffed

1 tsp. cornstarch

¾ tsp. baking soda

1 tsp. coarse sea salt (I use coarse salt because it gives each bite of cookie just a lovely little burst of salt)

1½ c. mint chips

Place the butter, brown sugar, and granulated sugar in the bowl of your stand mixer. Using the paddle attachment, beat the butter and sugars on medium low speed until smooth and completely blended, about 4 minutes. Add the eggs and vanilla. Beat just until the eggs and vanilla are incorporated with the butter/sugar mixture.

In a small mixing bowl, whisk the cocoa powder, cake flour, all-purpose flour, cornstarch, baking soda, and salt together. Add to the wet ingredients and mix only until combined. Add the mint chips, and again, mix only until combined. Chill the dough for 10 minutes.

Divide the dough into 16 equal parts. Or as equally portioned as possible. (I cheat. I gently round the dough in my #16 (1/4 cup) ice cream scoop.)

Drop dough onto parchment paper or silicone mat lined baking pans about 3 inches apart. (I used three half sheet (roughly 18 x 13-inch) baking pans. Six cookies on sheets 1 & 2. Four cookies on sheet number 3.) Refrigerate for about an hour. (To make life easier on myself, and because I don’t have room in my refrigerator for 3 sheet pans, I plop the balls of dough close together on one of the parchment paper lined pans. Then I refrigerate the whole mess. When I’m ready to bake the little darlings, I take 6 from the fridge and place on another of the parchment paper lined baking sheets. The others dough balls I just leave in the fridge until I am ready to bake them off.)  

Bake in a pre-heated 400-degree oven for 9-12 minutes or until the top looks set. The inside will still be a little under-baked. That’s exactly what you want.

Remove from oven and let the cookies rest for at least 10 minutes before transferring to a wire rack to cool completely. (They finish baking and set up a bit during their 10-minute time out.)

Store in an airtight container at room temperature.

CHOCOLATE PEPPERMINT SHORTBREAD REFRIGERATOR COOKIES

Ok, ok! I know. Everyone is totally done with baking cookies, making candy, and building sweet treats of every sort for the year! I get that. Believe me, I get that! My kitchen counter is still piled with Christmas tins containing all sorts of edible delicacies. But I just had to share this recipe with you for next Christmas.

I know, by then you will have forgotten about this recipe and will be sunning yourself somewhere in the Caribbean rather than baking 500 cookies to send and give to friends and family. And I plan to be right there with you. Using plenty of sunscreen of course. (Had to write that so my dermatologist wouldn’t get on my case.) But I have myself to think about too. I need to get this recipe off my desk because every time I look at it, I’m reminded of the tin, just a few steps away, wherein the last few of these cookies reside. So, like I said, I need to file this recipe away. Kind of a “get thee behind me Satan” reflex on my part.  

Of course, part of me simply wants to share this recipe with you because it turned out pretty darn good. And the cookies are stinkin’ easy to build. The flavor is fabulous, the shortbread is crunchy, and who can resist soft peppermint candy? No one I know. In fact, our good friend Jim would never forgive me if I didn’t build him some kind of chocolate peppermint cookie every year for Christmas. We all have our sacred seasonal treats, and for Jim its chocolate cookies decorated with peppermint. Of course, Mr. C. is also a great fan of peppermint. So, on all counts, baking chocolate peppermint cookies at Christmas time is a no brainer.

So, I hope you give this recipe a try. And for the sake of variety, I also have 3 other chocolate and soft peppermint cookie recipes on this site. Chocolate Chip Peppermint Shortbread Cookies, Chocolate Peppermint Sandwich Cookies, and Peppermint Candy and Chocolate Chip Biscotti. All are delicious and sure to make someone’s Christmas even brighter.

So as always, here’s to happy times in your kitchen. Stay safe. We still have a long way to go in our fight against covid-19. Please don’t let your guard down. I know how hard it is not to hug your grandchild or have your nearest and dearest over for dinner. Or go visit your grown kids. Or travel to foreign lands. Or go to a play or concert. Believe me, I know. But we simply can’t put ourselves or our loved ones at risk. The consequences are just too great.   

There’s an old saying that I have lived by my entire adult life. “This too shall pass.” Apparently, it’s an old Persian adage. And where I first heard it, I have no idea. Probably from my dad. I know it’s the kind of phrase he would have flung my way when I was being my usual obstreperous teenage self all those many years ago. (How he survived those years I will never understand.) Anyway, regardless of where and when I first heard the saying, it has helped me through several life altering incidents. And it still applies today. So dear friends, what we are living through right now shall eventually pass. So, stay strong. Peace and love to all.     

1 c. (2 sticks) unsalted butter, room temperature

1 c. powdered sugar

½ tsp. kosher salt

1 tsp. good peppermint extract

1½ c. unbleached all-purpose flour, fluffed

½ c. good quality cocoa powder

2/3 c. milk or semi-sweet chocolate chips, or more as needed

soft peppermint candy*, crushed  

Beat the butter until pale and creamy in the bowl of your stand mixer. Add the powdered sugar, salt, and peppermint extract; beat until well combined. Whisk the flour and cocoa powder together in a small bowl. Add to the butter mixture and mix until a soft dough is formed.  

Place the dough on a long piece of plastic wrap. Using your hands, wrap the dough into the plastic wrap gently shaping it into a round log 1-1½-inches wide. (Your choice.) Refrigerate for at least 1 hour. Preheat oven to 350-degrees.  

Un-wrap logs and using a serrated or thin knife, slice dough between ¼-⅓-inch thick. (If dough feels too hard, leave at room temperature for 10 to 15 minutes before slicing).

Arrange slices, about 1-inch apart on a parchment paper lined baking sheet. Bake until set, 15-18 minutes. (Do not under-bake.) Cool on baking sheets 1 to 2 minutes, then transfer to a wire rack to cool completely.  

Melt the chocolate chips in the microwave. Spread the top of each cookie with the melted chocolate.  Sprinkle the warm chocolate with crushed soft peppermint candy.  Allow the chocolate to set completely before storing in an airtight container.

*I use King Leo Soft Peppermint Sticks or See’s Peppermint Twists. I don’t use regular candy canes because they are not of the same quality. Soft peppermint is the way to go.   


NOT YOUR ORDINARY GINGERBREAD MEN (AND WOMEN)

Ok, you know I am always up for a cooking adventure. But today my good karma must have been hiding in a closet, or my stars were not in alignment, or I simply drew the short straw. Whatever!! Because in trying my hand at decorating the delicious gingerbread men and women I made with this recipe, I not only made a ginormous mess, my decorated gingerbread “people” came out looking demented. I’m not kidding. (The picture below will attest to the fact. And these were the best of the lot!) But then, I was trying out a new icing recipe.

The frosting recipe I use for decorating cookies like “Pink Cookies” (delicious BTW), has cream cheese in it. I just didn’t know how that frosting would hold up being stuffed into a container and mailed across the states. So, I wanted an icing that would set up really well. Well, it set alright. So much so, that I could barely entice it out of the brand new, super duper, guaranteed to make decorating easy enough for any normal 6 year-old, squeeze bottle. Now granted, my hand strength isn’t what it used to be. But I’m not a weakling either. And apparently, from the looks on the faces of the cookies I did manage to “decorate”, they were as glad I was finished massacring them as I was! Not a good working relationship when the cookies themselves are begging for mercy!

Good grief! Who left me alone with these poor babies. I have humbly apologized to these cookies, if that makes you feel any better. But rightly so, they are still not speaking to me.

So, before I could totally mess up the entire population of perfectly wonderful gingerbread men and women I created, I threw the whole mess of icing down the drain. And even that wasn’t easy! The icing resisted every attempt I made to dislodge it from the squeeze bottles. I finally just blasted them with hot water and set them in the sink to think about the error of their ways. They are still there. I am simply too tired to go another round with them until after I’ve had my before dinner martini! And perhaps if I wait long enough, Mr. C. will get tired of looking at them and try his hand at dislodging the edible (I think) plaster of Paris like icing I inadvertently concocted. But enough about my trials and tribulations. Sigh…. And more about these cookies.

This is basically my favorite spice cookie recipe. I’ve been making these cookies – Speculaas (Dutch Spice Cookies) since I was introduced to them in 2004 by our dear friends Nile and Sarah at a cookie exchange party we hosted at our Bellevue home. And yes, I make them every year. I’m actually fearful that if I don’t send these cookies in my kids Christmas goodies packages, things might turn ugly. So, I’ve never taken the chance.

So dear readers, if you want to make a fantastic cookie to share with your friends and family that travels well and stays fresh for weeks, this is the cookie to build. And no, you don’t need to cut the cookies into gingerbread men and women. You can choose any shape you wish, or just cut into squares. That works too.

As always, stay happy and healthy. Keep remembering that for many of us, the true meaning of Christmas is in Christ’s own message of peace and goodwill towards man.

There’s a wonderful old gospel song, “This Little Light of Mine” that I feel is very relevant for our world today.  It became an anthem of the civil rights movement in the 1950’s and 60’s. People sang it and other spirituals during the Civil Rights Movement as a way of expressing unity as they fought for equal rights and freedom for everyone. So, dear readers, let your own little light shine. Bring the joy of the holidays to as many people as you can. Peace and love to all.

1 c. unsalted butter, room temperature

1½ c. brown sugar, packed

3 T. brandy or rum (I use brandy)

3 c. unbleached all-purpose flour

4 tsp. baking powder

1 T. ground cinnamon

1 tsp. ground cloves

1 tsp. ground nutmeg

½ tsp. ground ginger

½ tsp. salt

Beat butter and brown sugar together until light and fluffy, about 4 minutes. Add the brandy. Whisk the flour, baking powder, spices, and salt together and add to the butter mixture. Beat until completely combined. 

Form dough into a ball. Knead the ball on a surface sprinkled with a bit of flour. Roll the dough between ¼ – ⅓ inch thick. (I go more towards the ¼-inch thickness). Using your gingerbread men and women cookie cutters, cut as many cookies as possible and place on an ungreased cookie sheet one inch apart. With the dough that is left, form it into another ball and roll out as before. Keep going until all the dough is used. (The last bit can always just be rolled into a flat circle and enjoyed by the cook.)

Bake in a preheated 375-degree oven for 12-15 minutes or until brown and firm. Do not under-bake. Cool on baking sheets 1 to 2 minutes, then transfer to a wire rack to cool completely. Decorate when completely cool if so inclined. Just don’t ask me for an icing recipe. I am ill equipped for that task.

 Store the cooled cookies in an airtight container. And then, nibble away.


CANDIED GINGER REFRIGERATOR SHORTBREAD COOKIES

And yes, I know I already have a couple of recipes for candied ginger shortbread on this site. And they too are fine recipes, yes indeed they are. One is just a little different from this recipe and found under Christmas Refrigerator Shortbread Cookies. With the other, you bake the dough in a more traditional manner. That is to say, like a bar cookie. And most of the time, that’s how I make shortbread, regardless of what additives I choose to use that day. But for shipping, bar cookies are not the best way to ensure freshness. All of those cut edges and all. So, this recipe came into being. And I really like how these cookies turned out. But then, I love candied ginger. And shortbread. I mean really, what’s not to like? Anyway, these cookies are going to be part of my Christmas goodie packages this year. That is of course if we don’t eat them all first! But they’re so easy to build, I can easily make more.

Speaking of making life easy for yourself. (We weren’t, but we are now.) When building multiple types of cookies for gift exchanges, bake sales, Christmas gifts, etc., I have found what works best for me, is to make it a two-day process. One day building the dough, and the next day baking them off.

So, first day, you have a messy kitchen, but can re-use many of the same measuring cups and bowls over and over throughout the day. Same with ingredients. Designate an area in your kitchen to place all the supplies needed that day. Then as an ingredient is called for, you go to your stash, measure out what you need, and return the rest to its assigned place. Makes life so much easier. And believe me, it took me years to figure this out. My first inclination is always to clean up after myself as I go along. And this includes putting everything away after I’ve used it. And washing all the dishes before I go onto the next dish. That’s really how I normally work in the kitchen.

But like the other day when I was making 5 different kinds of cookie dough, I would have run myself ragged returning the flour to the pantry after every use. As if was, I just turned around, set it on the back counter, and proceeded to the next ingredient. And when that dough was complete, on to the next with all the necessary ingredients close at hand. Same thing with the measuring cups. Is it absolutely essential to wash out the measuring cup I use just for flour every time? Of course not! So why go to the bother?

Now I do realize that not everyone makes 5 kinds of cookies in one day. Most people are smarter than to do that to themselves. But even if I were only making 2 types of cookies, I would still use the same principal. Just a practical way to use my time more efficiently. And to save my body a few steps here and there. And that’s getting mighty important as I pack on the years. So, anyway I can save myself both effort and time, I do it! But on to the fun part of this 2 day adventure.

Day 2 of this process. Yeah team! No mess, just cookies going in and out of the oven for a few hours. (Kind of like a reward or a day off for good behavior.)

So, if you too are planning edible gifts for family and friends, I suggest you try my method for keeping sanity a reality. And make this one of the cookies you decide to gift to family and friends. And if you have quite a few goodie packages to put together, I would suggest doubling this recipe. You are definitely going to want to keep a few of these cookies for yourself.

As always, think giving not getting, think blessed if you have a roof over your head and enough food to feed your family, and think how you can make life better for those around you. Baking and sharing cookies is an easy way to lift both your own spirit and the spirits of the person or persons who are the lucky recipients of your largess. Peace and love to all.

1 c. (2 sticks) unsalted butter, room temperature

1 c. powdered sugar

1 tsp. vanilla

½ tsp. salt

½ tsp. ground ginger  

2 c. unbleached all-purpose flour

½ c. finely chopped candied ginger

granulated sugar

With an electric mixer, beat butter, powdered sugar, vanilla, and salt together until smooth and creamy. In a separate bowl whisk the ground ginger and flour together. Add the chopped ginger to the flour mixture and make sure every little piece of ginger is coated with flour. Add the whole mess to the butter mixture. Mix only until dough forms.

Divide the dough roughly in half. Place each piece of dough on a long piece of plastic wrap. Sprinkle granulated sugar over and around the dough. Using your hands, wrap the dough into the plastic wrap gently shaping it into a round log 1-1½-inches wide. (Your choice.) Refrigerate for at least 1 hour. Preheat oven to 350 degrees.

Un-wrap logs and using a serrated knife, slice dough 3/8-inch thick. (If dough feels too hard, leave at room temperature for 5 to 10 minutes before slicing).

Arrange slices, about 1-inch apart on a parchment paper lined baking sheet. Bake until lightly golden on the bottom and around the edges, 13-15 minutes. (Do not under-bake.) Cool on baking sheets 1 to 2 minutes, then transfer to a wire rack to cool completely. Store in an airtight container.   

ALMOST KNOCKOFF LEVAIN BAKERY OATMEAL RAISIN COOKIES

First off, I know Levain Bakery doesn’t put walnuts in their oatmeal raisin cookies. I got that. But I love walnuts in my oatmeal raisin cookies, so my recipe – my choice. And to be completely up front with you, I’ve surmised that Levain Bakery doesn’t use vanilla either. But I just couldn’t see myself building an oatmeal cookie without vanilla. (Hence the “almost knockoff” part of the recipe title.)

Now another thing you should know. I have never actually tasted a Levain Bakery cookie. So, I thought to remedy the situation, I would order a package. I quickly changed my mind. $27 for 4 – 6 oz. cookies, plus a $49 shipping charge. Well then, that sure as heck wasn’t going to be happening. At least not on my watch! Holy moly! I could build several batches (16 count each for the size I prefer, 8 count for a full 6-ounce cookie) for that amount of money and enjoy them any darn time I felt the inclination. So, I would just have to build my own unsubstantiated “Levain Bakery” cookies. Possible warts and all! Like I did with my Knockoff Levain Bakery Chocolate Chip Walnut Cookies. (See recipe on site.)

I started by comparing several knockoff recipes on-line. Then after much deliberation and a fair bit of cookie baking knowledge, I cobbled this recipe together. And I must say, these are the best oatmeal raisin cookies I have ever tasted or produced. They are semi gooey in the middle (the trademark of a Levain Bakery cookie) and sweet, but not too sweet. With a bit of crunch from the nuts. And a delicate hint of the essence of the vanilla bean. In other words – perfect. I also enjoy the occasional burst of salt from using coarse sea salt. Just another dimension of yummy as far as I’m concerned. (And remember – it’s really, just all about me!)

Anyway, I would love to have you bake up a batch of these delicious cookies. And because I couldn’t make up my mind about golden versus regular raisins, I used a combination. (Nothing like compromise for finding the perfect solution.) And no, you don’t have to include nuts. Just add a few more raisins. And if you don’t choose to use vanilla, I won’t think less of you either. You would be wrong, but that’s on you!

So as always, have a blast in your kitchen. Try new recipes to keep yourself invested in the whole business of keeping everyone in your family well fed. If nothing else, it might help stave off boredom for yourself and your family. And boredom is a serious concern for many of us right now, especially with the holidays so close at hand.

I miss going to plays, concerts, live music performances given by Mr. C. and his musician buddies, restaurants, and all the other cultural events that are such a vital part of our lives. I miss getting on an airplane and visiting foreign lands. (Well not the airplane part, but you catch my drift!) I also really miss all the places and natural wonders that we can visit while towing our travel trailer all over God’s creation. But mainly I miss visiting our family and friends and having them in our home. (My normal minimum weekly hug quotient is way off the bottom of the scale and I am severely feeling the loss! I know. Everyone is in the same boat.)

So, I continue to pray daily, to every deity I can think of, for a speedy resolution to the covid-19 crisis. But I know until that happens, I can’t let down my guard. So, I mainly stay at home, continue to cook up a storm, try new recipes, and if they work – post them on my blog. That’s how I have chosen to keep joy alive in my life. (Plus keeping myself on the right side of sane while this crazy world sorts itself out! I pray about that daily too!)

I fervently hope you too have found joy, peace, and love in your life. Happy Thanksgiving.

1 c. (2 sticks) cold unsalted butter, cut into small cubes

1 c. light brown sugar, packed

½ c. granulated white sugar

2 lg. eggs

1 tsp. vanilla extract 

½ c. cake flour (fluffed)

2 c. unbleached all-purpose flour (fluffed)

1 T. cornstarch

1 tsp. baking soda

1 tsp. coarse sea salt

½ tsp. ground cinnamon

1½ c. old-fashioned oats 

1½ c. raisins (golden, regular, or a combination)

1 c. chopped walnuts, opt. (but why?) 

Place the butter, brown sugar, and granulated sugar in the bowl of your stand mixer. Using the paddle attachment, beat the butter and sugars on medium low speed until smooth and completely blended, 2-3 minutes. Add the eggs and vanilla. Beat just until the eggs and vanilla are incorporated with the butter/sugar mixture.

In a small mixing bowl, whisk the cake flour, all-purpose flour, cornstarch, baking soda, salt, cinnamon, and oats together. Add to the wet ingredients and mix only until combined. Add the raisins and walnuts and slowly mix until combined. Refrigerate dough for 15 minutes.  

And now the hard decision has to happen. Do you want cookies the size that made the Levain Bakery in NYC famous? Or do you wish to make a smaller, more manageable version? My choice – smaller. But for those purists out there, I’m providing both ways to enjoy these incredible cookies.

Purist (8 cookies per batch)  

Divide the dough into 8 equal parts, about 6-ounces each. Line two half sheet baking pans (roughly 18 x 13-inches) with parchment paper or silicone baking mats.  Use your hands to shape the dough. Place in a staggered pattern, 3″ apart on the baking sheet with only 4 cookies to a pan. Do not flatten the dough. The cookies are meant to be roughly shaped. Refrigerate for about an hour. Start heating your oven to 400 degrees after the cookies have been cooling in the refrigerator for about 45 minutes.  

Bake one sheet at a time on the middle rack of your pre-heated 400- degree oven for 9-12 minutes or until the cookies appear dull and light golden brown on top.  Do not over-bake. The top should look done, but the cookies should not be fully set. 

Remove from oven. Cookies will continue to finish cooking as they set and cool on the baking sheets for at least 20 minutes before removing to a wire rack to cool completely. The cookies are quite delicate after just baking, so handle them carefully. They should still be plenty gooey inside.

Bigger than normal cookies, but half the size of Purist (16 cookies per batch)

Divide the dough into 16 equal parts, about 3-ounces each. (Or as equally portioned as possible.) Drop dough onto parchment paper or silicone mat lined baking pans about 3 inches apart. (I used three half sheet (roughly 18 x 13-inch) baking pans. Six cookies on sheets 1 & 2. Four cookies on sheet number 3.) Do not flatten the dough. (I round the dough in my #10 ice cream scoop and proceed from there. Cheating I know, but I’m lazy!) Refrigerate for about an hour. (To make life easier on myself, and because I don’t have room in my refrigerator for 3 sheet pans, I plop the balls of dough close together on one of the parchment paper lined pans. Then I refrigerate the whole mess. When I’m ready to bake the little darlings, I take 6 from the fridge and place on another of the parchment paper lined baking sheets. The others dough balls I just leave in the fridge until I am ready to bake them off.) 

Bake in a pre-heated 400-degree oven for between 8-10 minutes. I found, after baking each of the three pans of cookies a different way, that 5 minutes regular heat and 4 minutes convection heat worked the best for me. But you may find your oven works differently than mine.  Just don’t over-bake the cookies. The top should look done (browned), but the cookies should not be fully set.  

Remove from oven and let cool for at least 15 minutes on the baking sheet before transferring to a wire rack to finish cooling completely.

Store the cookies in an airtight container on your kitchen counter.    

KNOCKOFF LEVAIN BAKERY CHOCOLATE CHIP WALNUT COOKIES

I looked at a lot of online knockoff or copycat recipes for these cookies. All the recipes were pretty much the same, but I decided to go with my own slightly different conglomeration. But the main thing all of the recipes had in common, was that every author almost guaranteed that these would be the best chocolate chip cookies you would ever taste. And I have to admit, they are totally amazing. These babies make it completely clear why Levain Bakery has helped put New York City on the map. And why you should spend absolutely no time deciding to whip up a batch at your earliest convenience.

When you look at the ingredient list, almost all of the ingredients are exactly what you would expect to find. Ok, not the use of cold butter or necessarily a bit of cornstarch, or even the use of cake flour. But there certainly aren’t any peculiar ingredients, like half a cup of parsnip puree or anything like that. Pretty standard ingredients found in many baked goods. So what makes these cookies different? Well first of all, they’re big cookies. And I bake mine half as large as the Levain Bakery offers. And these cookies are pulled out of the oven before the center gets fully set. And the ratio of nuts and chocolate chips to dough is greater than called for in most of the chocolate chip cookie recipes I have previously made. And believe me, I have made a lot of chocolate chip cookies over the years!

So are these now my favorite chocolate chip walnut cookies? You bet your sweet – – – they are! And I believe they will become your favorite too. They are just that delicious. And very easy to prepare, especially if you have a #10 ice cream scoop.

Now you know I don’t have any advertisements on this site. And I am not specifying any brand of scoop that I think you should purchase. But if you do a lot of cookie baking, or make meatballs, muffins, and cupcakes, to name a few uses for ice cream scoops, you should own a few scoops in different sizes. Makes life a lot easier when you have the right tools. Remember, Christmas is coming. And I know my Mr. Santa always loves hints at about this time of year. And being the good wife, I never fail to help him out! And usually my hints are for gifts that most people would find unromantic. But I figure, that’s their problem. Anything that makes my life easier or more pleasant is a gift I would never think to discourage. Besides, romantic gifts are overrated in my opinion. Give me practical gifts. Like a round trip ticket to Iceland, for example. That and a new frying pan are practical gifts I would never consider turning down! 

So as always, make life pleasant for those around you. Create a home atmosphere that is comfortable, cozy, and inviting. I don’t know anyone who doesn’t appreciate a smile or a kind word. Simple gestures, but very effective ways to spread joy to those you love. Peace and love to all.   

1 c. (2 sticks) cold unsalted butter, cut into small pieces

¾ c. light brown sugar

½ c. granulated sugar

2 lg. eggs

1 tsp. vanilla

1½ c. cake flour (fluffed)

1¼ c. unbleached all-purpose flour (fluffed)   

1 T. cornstarch

1 tsp. baking powder

¼ tsp. baking soda

1 tsp. coarse sea salt

2 c. walnut halves, roughly chopped

2 c. semi-sweet chocolate chips (a 12-ounce bag) (I prefer Guittard semi-sweet baking chips)  

Place the butter, brown sugar, and granulated sugar in the bowl of your stand mixer. Using the paddle attachment, beat the butter and sugars on medium low speed until smooth and completely blended, 2-3 minutes. Add the eggs and vanilla. Beat just until the eggs are incorporated with the butter/sugar mixture.

In a small mixing bowl, whisk the cake flour, all-purpose flour, cornstarch, baking powder, baking soda, and salt together. Add to the wet ingredients and mix only until combined. Add the walnuts and slowly mix until combined. Add the chocolate chips, and again, mix only until combined.

And now the hard decision has to happen. Do you want cookies the size that made the Levain Bakery in NYC famous? Or do you want to make a smaller version for us normal folks. My choice – smaller. But for those purists out there, I’m providing both ways to enjoy these marvelous cookies.

Purist (8 cookies per batch) (these would make some humongous damn cookies!)

Divide the dough into 8 equal parts, about 6-ounces each. Line two half sheet baking pans (roughly 18 x 13-inches) with parchment paper or silicone baking mats.  Use your hands to shape the dough. The cookies are meant to be roughly shaped. Place 4 on each pan. Do not flatten the dough. Refrigerate for about an hour. Start heating your oven to 400 degrees after the cookies have been cooling in the refrigerator for about 45 minutes.

Bake in the pre-heated 400 degree oven for 11-13 minutes on regular bake or a bit shorter time on convection bake. The cookies are done when the top is a bit golden and the bottom is also golden. The top should look done, but the cookies should not be fully set. Do not over bake.

Remove from oven and let cool for at least 15 minutes on the baking sheet before transferring to a wire rack. This allows the inside of the cookies to bake a bit more and helps prevent breaking the cookies while they are being transferred to the cooling rack. They should still be plenty gooey inside. Serve slightly warm if possible.   

Bigger than normal chocolate chip cookies, but half the size of Purist (16 cookies per batch)

Divide the dough into 16 equal parts, about 3-ounces each. (Or as equally portioned as possible.) Drop dough onto parchment paper or silicone mat lined baking pans about 3 inches apart. (I used three half sheet (roughly 18 x 13-inch) baking pans. Six cookies on sheets 1 & 2. Four cookies on sheet number 3.) Do not flatten the dough. (I round the dough in my #10 ice cream scoop and proceed from there. Cheating I know, but I’m lazy!) Refrigerate for about an hour. (To make life easier on myself, and because I don’t have room in my refrigerator for 3 sheet pans, I plop the balls of dough close together on one of the parchment paper lined pans. Then I refrigerate the whole mess. When I’m ready to bake the little darlings, I take 6 from the fridge and place on another of the parchment paper lined baking sheets. The others dough balls I just leave in the fridge until I am ready to bake them off.)  

Bake in a pre-heated 400 degree oven. I found, after baking each of the three pans of cookies a different way, that 6 minutes regular heat and 4 minutes convection heat worked the best for me. But you may find your oven works differently than mine. Just don’t overbake the cookies. So anywhere from 9 minutes all convection, or 11 minutes regular oven should work out fine for you. Just be aware, the top should look done, but the cookies should not be fully set.   

Remove from oven and let cool for at least 15 minutes on the baking sheet before transferring to a wire rack.

Store the completely cooled cookies in an airtight container on your kitchen counter. Then you will always be reminded that they are there just for lifting the lid. You don’t want them to go stale after all!  

GF SALTY CHOCOLATE COOKIES

Ok, I am not a dark chocolate lover. And I know, that definitely defines me as a non-gourmet, but I can’t help it. I know what I like, and dark chocolate ain’t something I enjoy. Until this cookie came along, that is. I don’t think I have ever bit into anything starring chocolate (be it milk, white, or dark) that I like any better than one of these cookies. OMG. They are beyond delicious. And as it turns out, very easy to prepare. Don’t even need a mixer. And for all of you out there who find wheat flour intolerable, this recipe is going to set you free. You will be in your kitchen making these delightful treats at every opportunity.

We first had a taste of one of these little darlings on our recent trailer trip. Mr. Cs sister Katie brought them along to share with us while both couples were camped at Wanapum State Park. Andy and I fell madly in love after just one bite. So of course, I just had to have the recipe. Not only so that I could bake these for our own enjoyment, but I could also share this wonderful recipe from Alison Roman published on the cooking.nytimes.com site with all of you. I truly like nothing better than either discovering or being given a recipe like this, and then being able to pass it along to each of you. And this recipe, ladies and gentlemen, is truly a gem. (Thank you again Katie.)

So don’t hesitate. Bake up a batch of these wonderful cookies at your earliest convenience.

As always, have fun in your kitchen and live each day to the fullest. Peace and love to all.

6 T. (¾ stick) unsalted butter

2½ c. powdered sugar

¾ c. unsweetened cocoa (I use either Valrhona Cocoa Powder or Ghirardelli Premium Cocoa Powder)

1 tsp. kosher salt

2 lg. egg whites

1 lg. egg

8 oz. bittersweet chocolate (at least 67% cacao), chopped (I use 1⅓ cups roughly chopped Guittard 63% cacao extra dark chocolate baking chips)

½ c. finely chopped nuts (pecans, walnuts, almonds, hazelnuts)

flaky salt, such as Maldon or Pacific Blue Kosher Flake Sea Salt

Line 2 large baking sheets with parchment paper.

Melt the butter in a small pan, whisking frequently until foam appears and the butter starts to brown. Remove from heat and allow to cool.

Using a fine mesh strainer or sifter, combine the powdered sugar, cocoa, and salt in a medium sized mixing bowl.

Using a spatula, mix in the egg whites, whole egg, and cooled browned butter until the mixture is smooth. Add the chopped chocolate and nuts.

Using a very small ice cream scoop* (I use my #100 scoop for these cookies), drop balls of dough at least 2 inches apart on the prepared cookie sheets. Sprinkle with flaky salt.

Bake in a pre-heated 350 degree oven for about 10 minutes, or until the cookies are flat and look baked through and a bit wrinkled.

Remove from oven and let sit on the pan for about 4 minutes before carefully transferring to a wire rack to cool completely. Store in an air-tight container at room temperature.  

*The scoop on Ice Cream Scoops:

I use ice cream scoops for all kinds of cooking projects. But mainly I use them to make certain all the cookies from a batch are of similar size. Let’s face it, it’s much easier and more efficient to form cookies using a scoop. Takes about a third the time of dropping it by spoonfulls. Anyway, I have 4 scoop sizes that I mainly use. (OK, I only own these 4 sizes of scoops. But none-the-less, they work for me.)

#100 – 2 teaspoons (which means that if you are dishing up ice cream, you would get 100 scoops from 1 quart of ice cream) I use this scoop not only for this recipe, but anytime I want tiny little cookies.

#60 – 1 tablespoon. I use this scoop for small cookies and meatballs

#40 – 1½ tablespoons. I use this scoop for larger cookies

#10 – 3/8 cup. I use this scoop for muffins, cupcakes, and ice cream  

SOFT AND CHEWY OATMEAL, DRIED APPLE, GOLDEN RAISIN, AND WALNUT COOKIES

So when I thought about what kind of cookie I wanted to make for our upcoming trailer trip, I decided an oatmeal cookie would be absolutely perfect. But I wanted an oatmeal cookie that was just a little different than how I usually doctor up my oatmeal cookies for more flavor. So no chocolate chips. No peanut butter. But maybe introduce a lot more spice action.

So I thought some kind of dried fruit would be nice. But not the usual suspects, like dried cranberries, or dried cherries, or dried blueberries. It just happened that I had a few thin slices of dried apple in my stash of dried this and that. Not enough to feature in a major cooking project. But too much to simply discard. So I thought, why not an apple presence in an oatmeal cookie? But the apple slices, in many ways, except flavor, resembled shoe leather. (OK, I’ve never tasted shoe leather, but I’m pretty sure it doesn’t taste like dried apples!) So I knew that something had to be done to soften up the chopped up apple slices a bit. And what better way to macerate fruit than by a small application of some type of booze. And since I just happened to have some spiced rum on hand, I felt it was the best bet since the cookie recipe I was developing already had ground cinnamon and ground nutmeg as important flavor additives. And really, can a bit of spiced rum ever hurt? I think not! And of course, you can’t really taste the rum. It’s more like you just kinda sorta know there is a just a little something extra in the mix. 

So if you too are a fan of oatmeal cookies, you are going to love these babies. They are soft, but chewy, sweet, but not too sweet, and between the golden raisins and the dried apples, there is just a nice fruit note in every bite. And of course there is a delightful crunch from the chopped walnuts. In other words, these cookies are yum!

So as always, keep having fun in your kitchen, keep helping your friends and family cope with the devastating circumstances of life right now, and take especially good care of yourself. You can’t be of any value to anyone, including yourself, if you let down your guard or start feeling that all is out of your control. Everything is not out of your control. You can still choose to be happy. You can still choose to be positive. You can still choose to be that one person who helps lift the spirits of those around you. And yes it’s not fair. Why should you always have to be the designated good guy? Well, dear readers, first of all, let me explain that life is not always fair. (You’ve probably already figured that out for yourself.) But we are cooks. We are used to nourishing bodies and minds through the food we fix. But there is even more that we can do. We can smile. We can say please and thank you. We can liberally offer praise. We can offer help, when help is needed. We can refuse to let the little everyday “revoltin’ developments” (thank you Chester A. Riley) get to us. And no it isn’t easy. But it is so much better than the alternative. And of course after a long day of helping others and listening to and watching all the news about fires, the pandemic, racial injustice, and the current political catastrophe, there’s always the option of quietly going into your bedroom closet to let out a silent scream. I find that often helps me when dealing with all of life’s little unpleasantries. Well that and a big old bowl of Ben and Jerry’s Cherry Garcia ice cream.

Peace and love to all.  

2 T. spiced or regular rum

½ c. chopped dried apples (I use thin dried apple slices, cut into small pieces)

1¾ c. unbleached all-purpose flour (fluffed)

½ tsp. baking soda

½ tsp. baking powder

½ tsp. fine sea salt

2 tsp. ground cinnamon

½ tsp. ground nutmeg

1 c. (2 sticks) unsalted butter, softened slightly 

1 c. brown sugar, packed

½ c. granulated sugar

2 lg. eggs

1½ tsp. vanilla extract

3 c. rolled old fashioned oats

¾ c. chopped walnuts

½ c. golden raisins

Mix the spiced rum and apples together in a small bowl. Set aside.

Lightly grease or line baking sheets with parchment paper. Set aside.

In a small mixing bowl, whisk the flour, baking soda, baking powder, salt, cinnamon, and nutmeg together.  

In the bowl of your electric stand mixer, cream the butter, brown sugar, and granulated sugar together until soft. Mix in one of the eggs, then blend in the second egg and vanilla extract. Add flour mixture and mix just until combined. Add the oats, chopped walnuts, golden raisins, and the macerated dried apples (including any liquid that may remain).

Form dough balls with a small ice cream scoop, and place on prepared baking sheets about 2-inches apart.

Bake in a preheated 350 degree oven until golden brown on edges and nearly set, about 10-12 minutes. (Center should look a bit under-baked.)

Remove from oven and transfer to a wire rack to cool completely. Store in an airtight container at room temperature.