Sorry for not posting for such a long time, but because of vacation, visiting a daughter post-surgery, breaking my nose, planning a trip to southern Oregon to attend my son’s wedding, and planning and booking camping reservations for our fall trailer trip, I haven’t had the opportunity to share recipes in my usual carefree and frequent style. And yes, I have been missing sharing great recipes with you all. But as with everyone, I must prioritize my time wisely. But I think I am finally at the point where I can resume my passionate incidence that you should have access to the best possible recipes an internet search can provide. So, basically – I’m back! (Well at least until our next vacation or until I break some other part of my body.) Good grief! And I thought I was invincible! Huh! Anyway……….
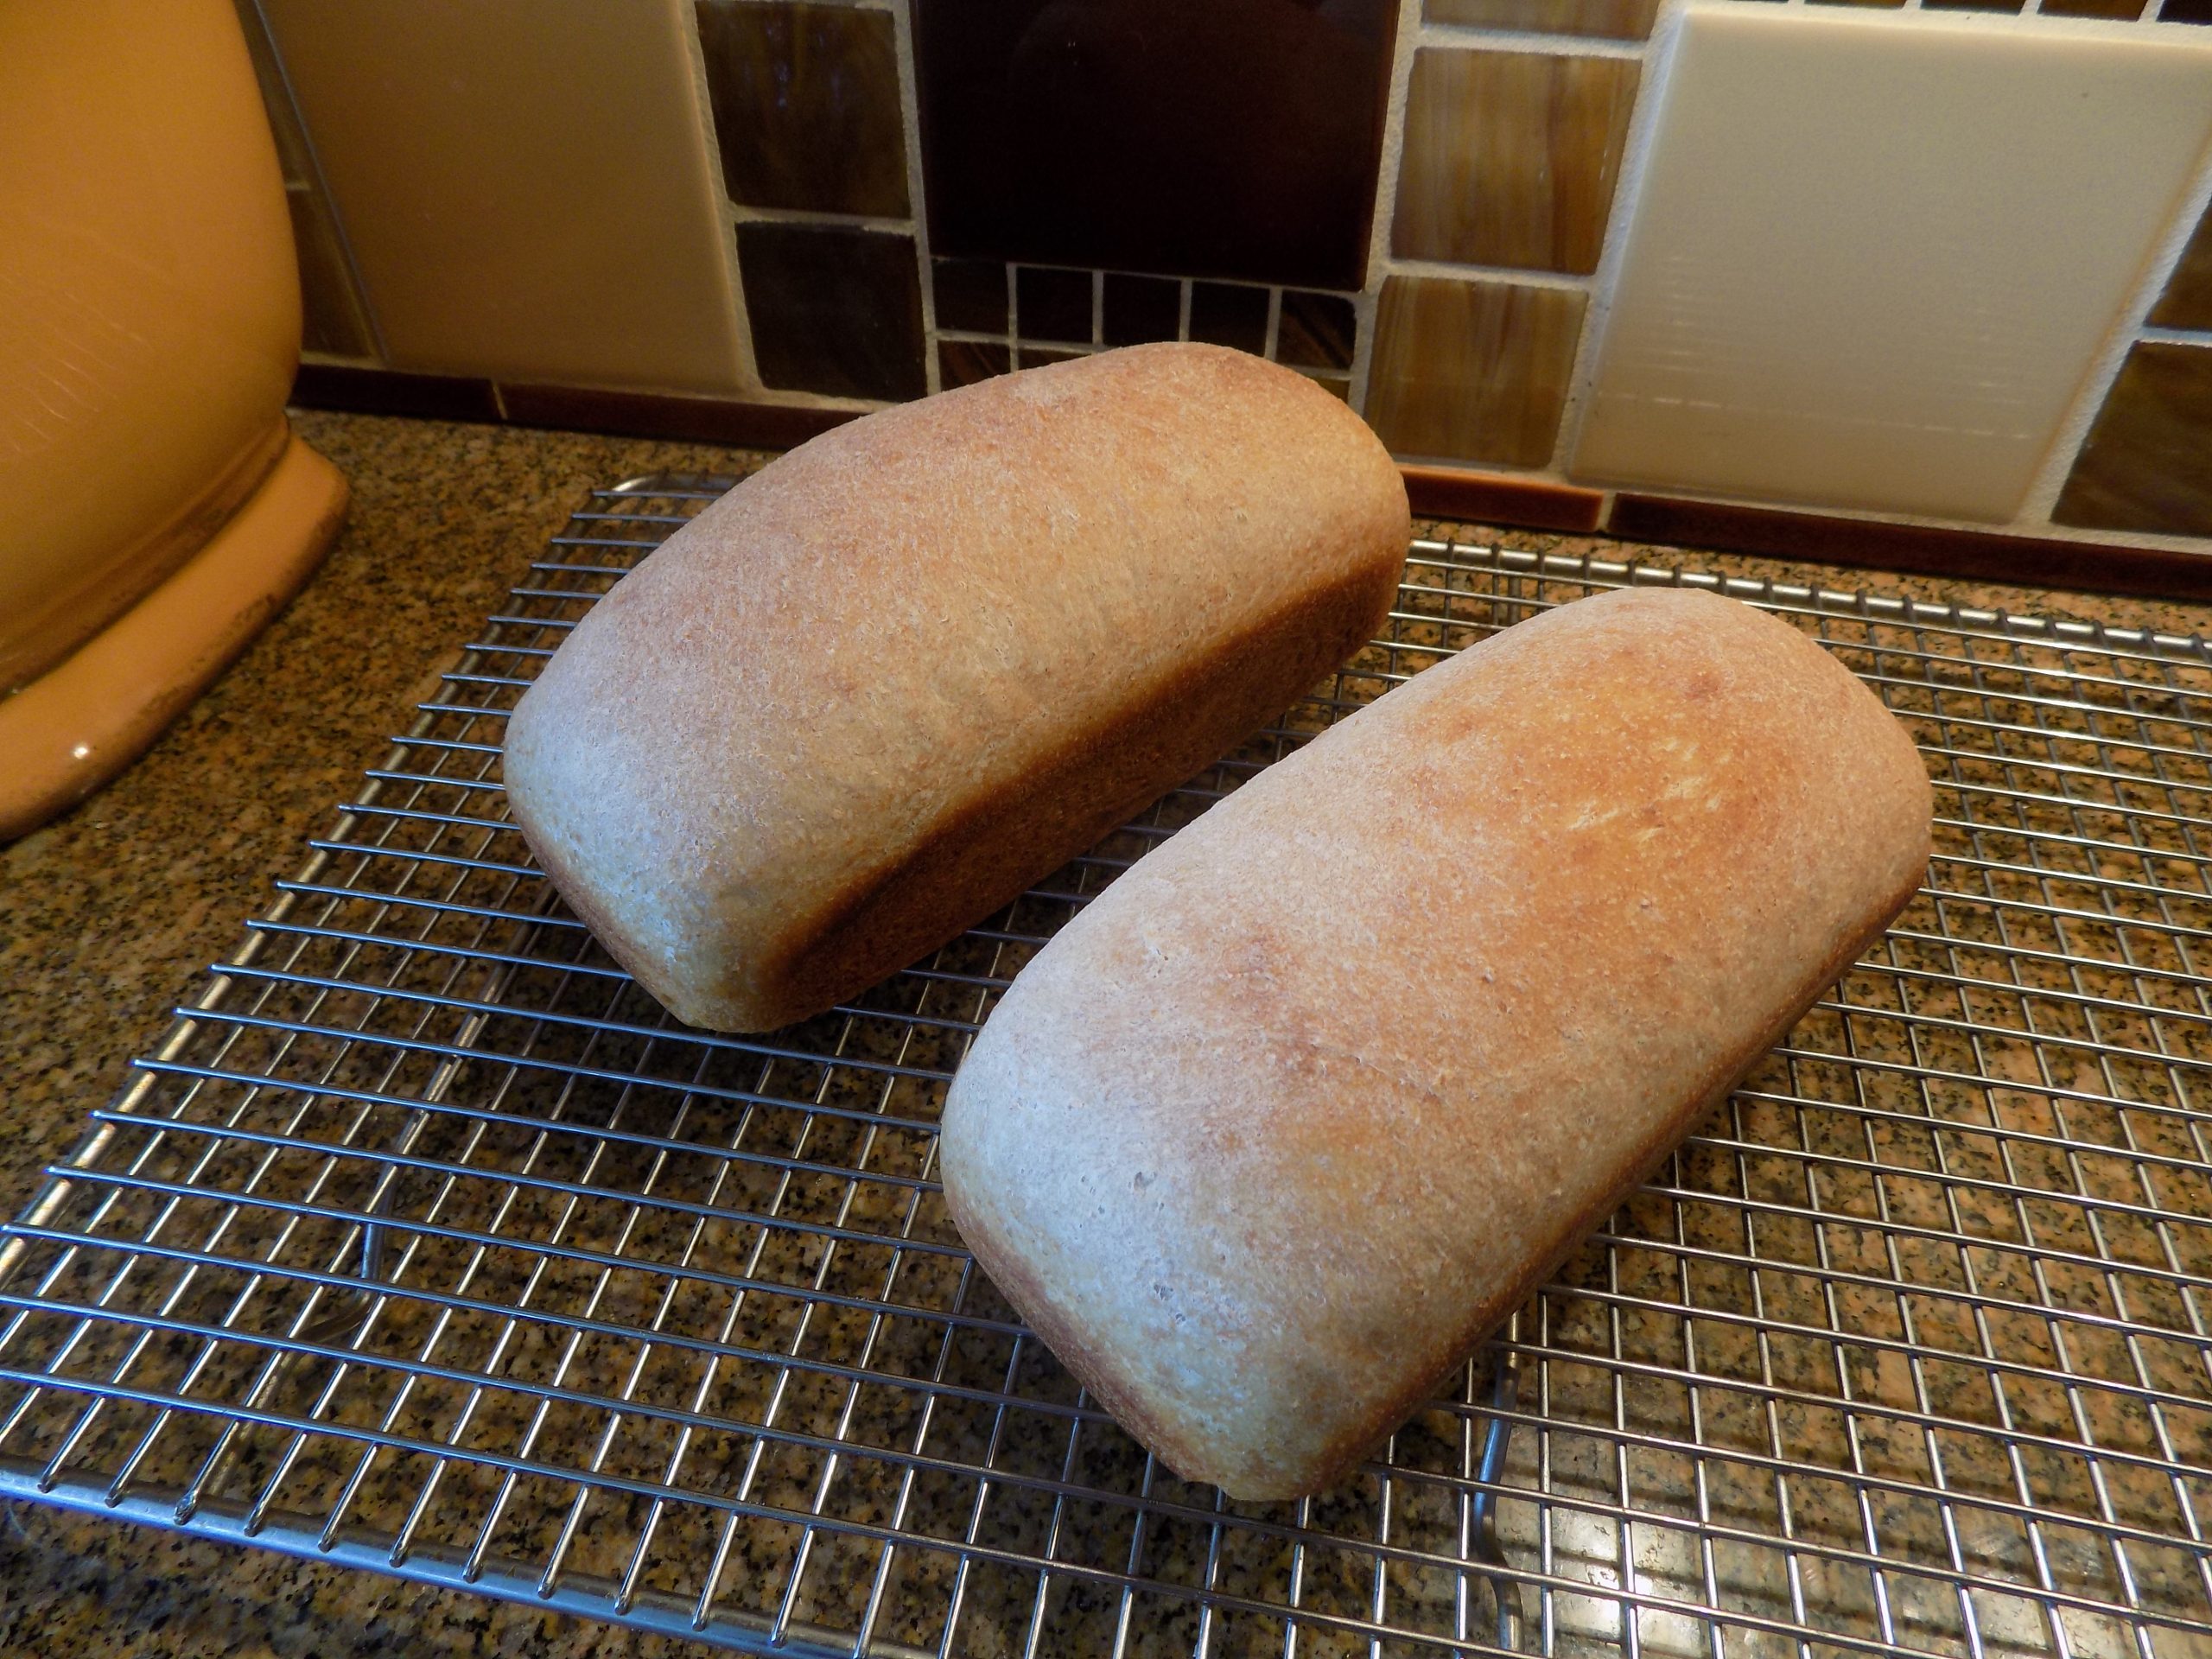
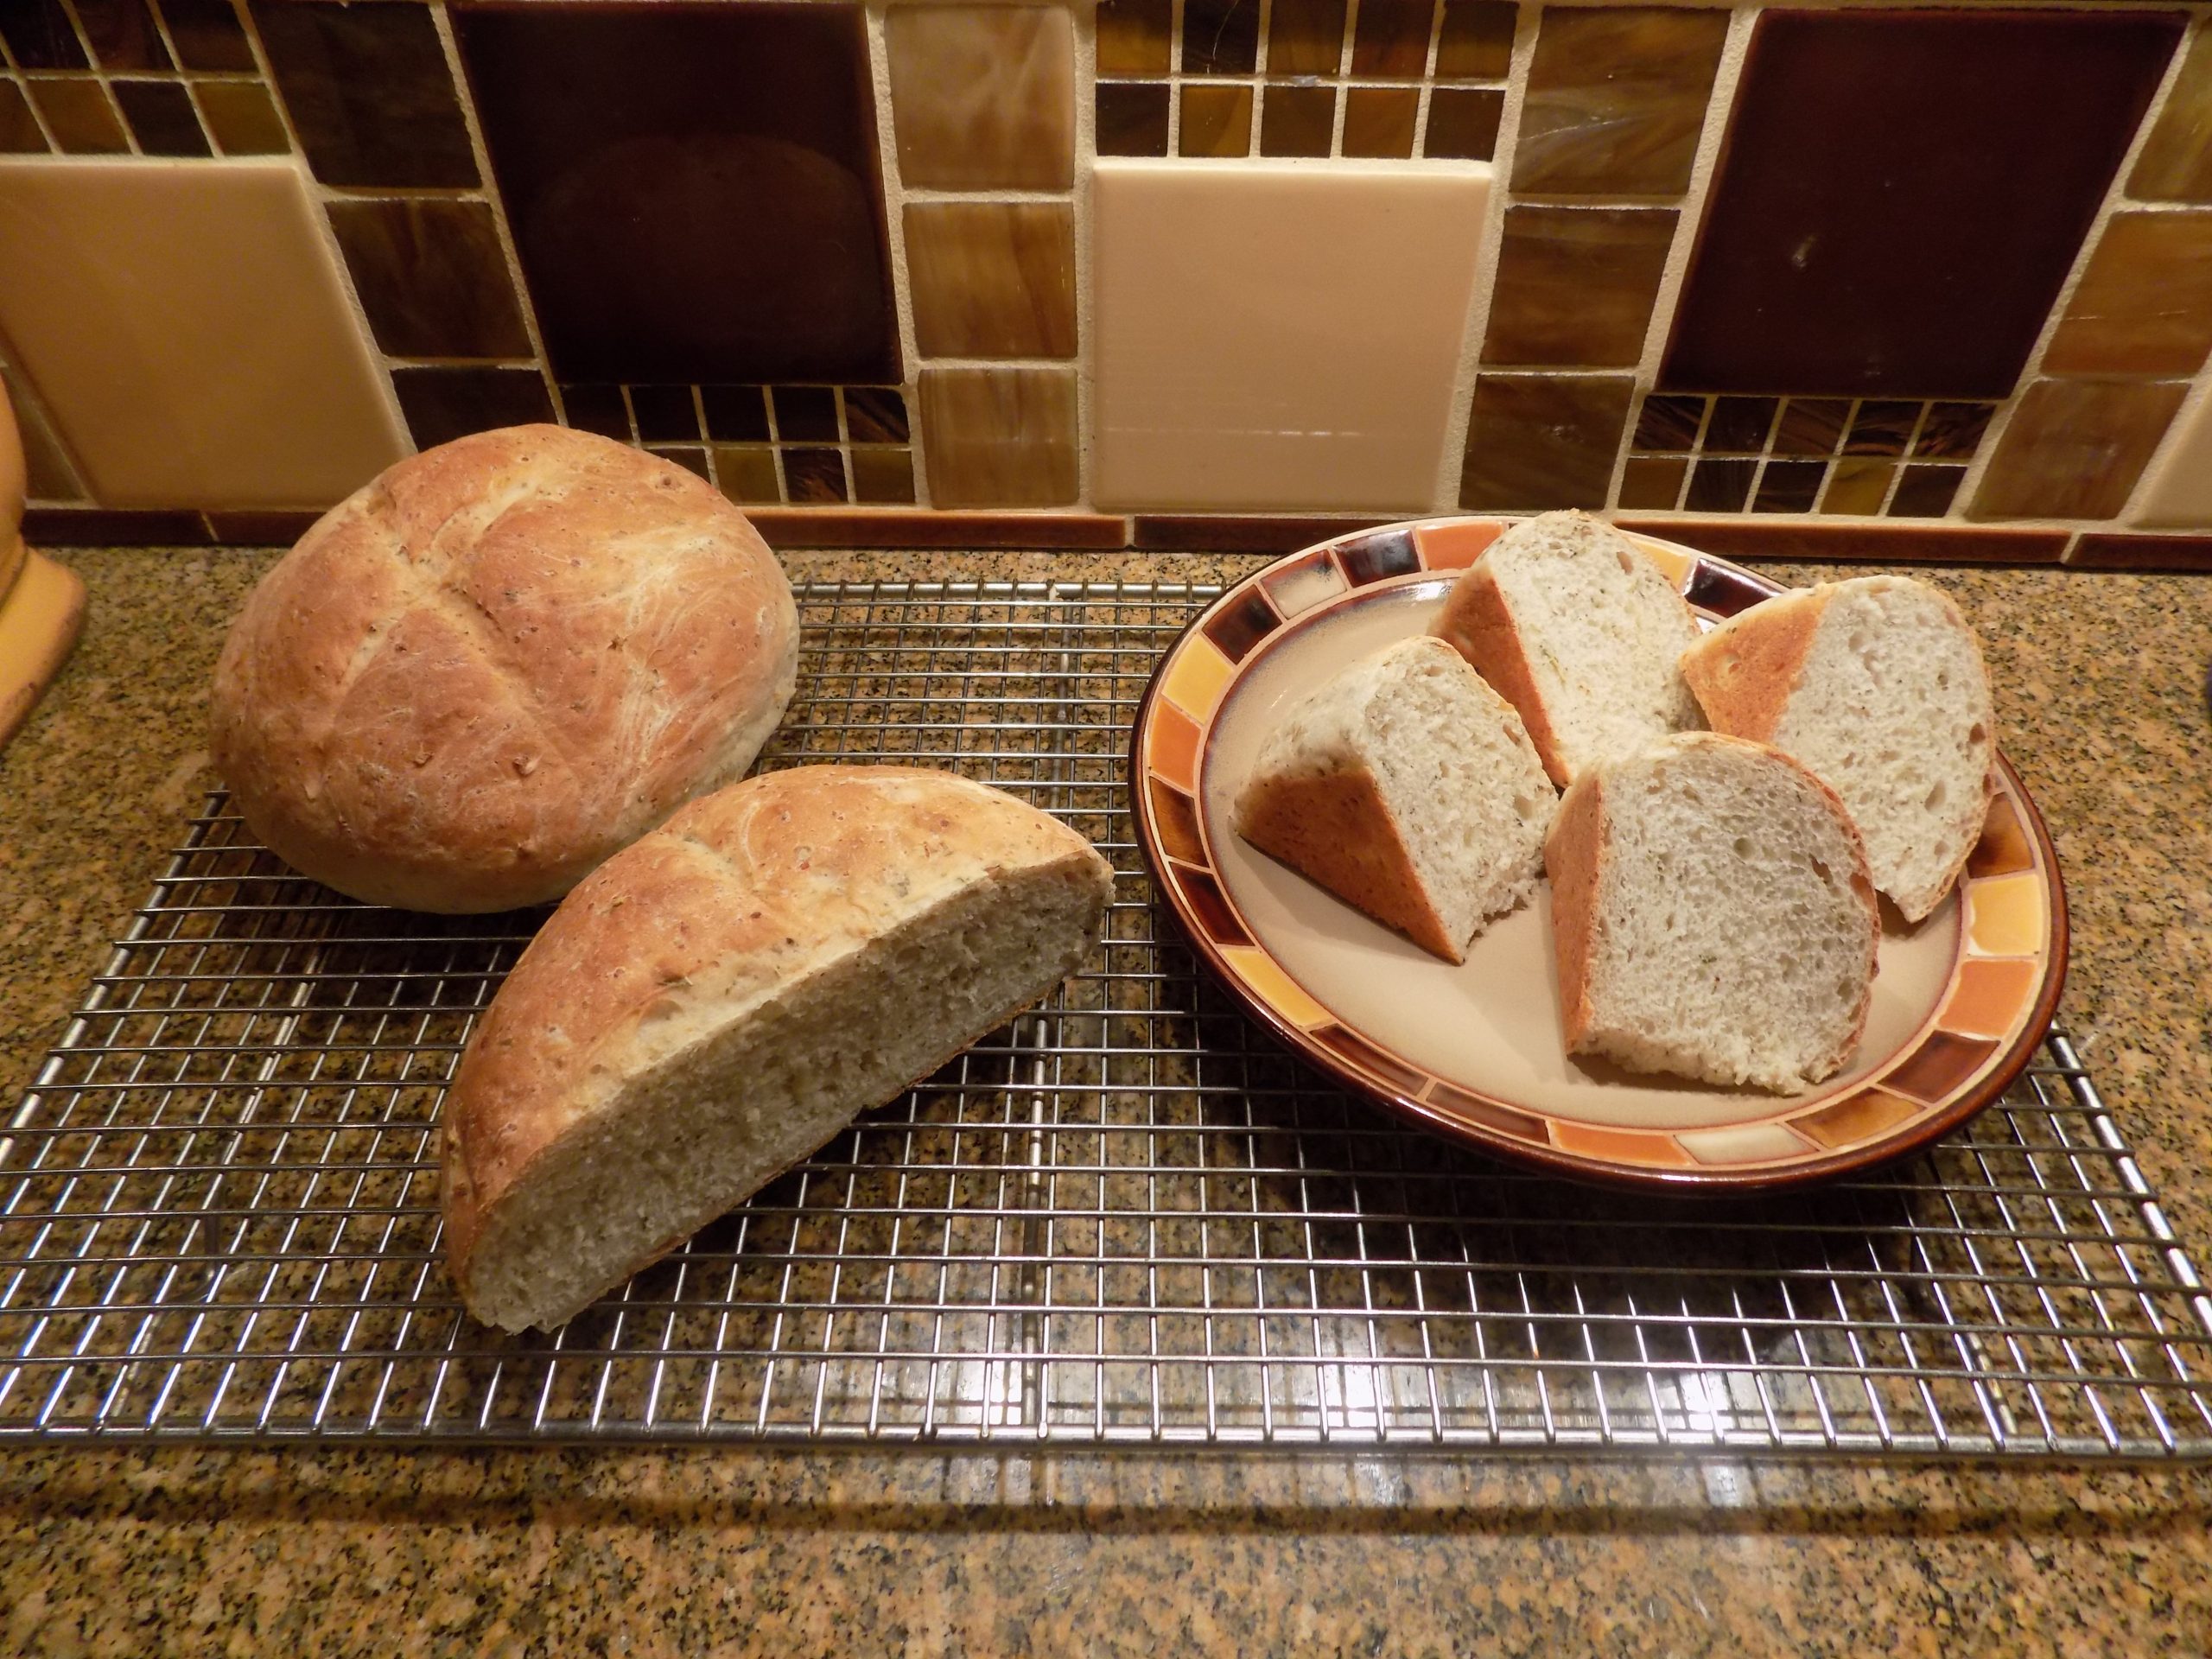
I’ve had this recipe ready to post since late March. But for all the reasons listed above, I am only getting to it today. But that doesn’t mean that it isn’t a first-rate recipe. Because it is! So, if you are a sourdough bread lover and have a sourdough starter languishing away in your fridge, you are in for a treat.
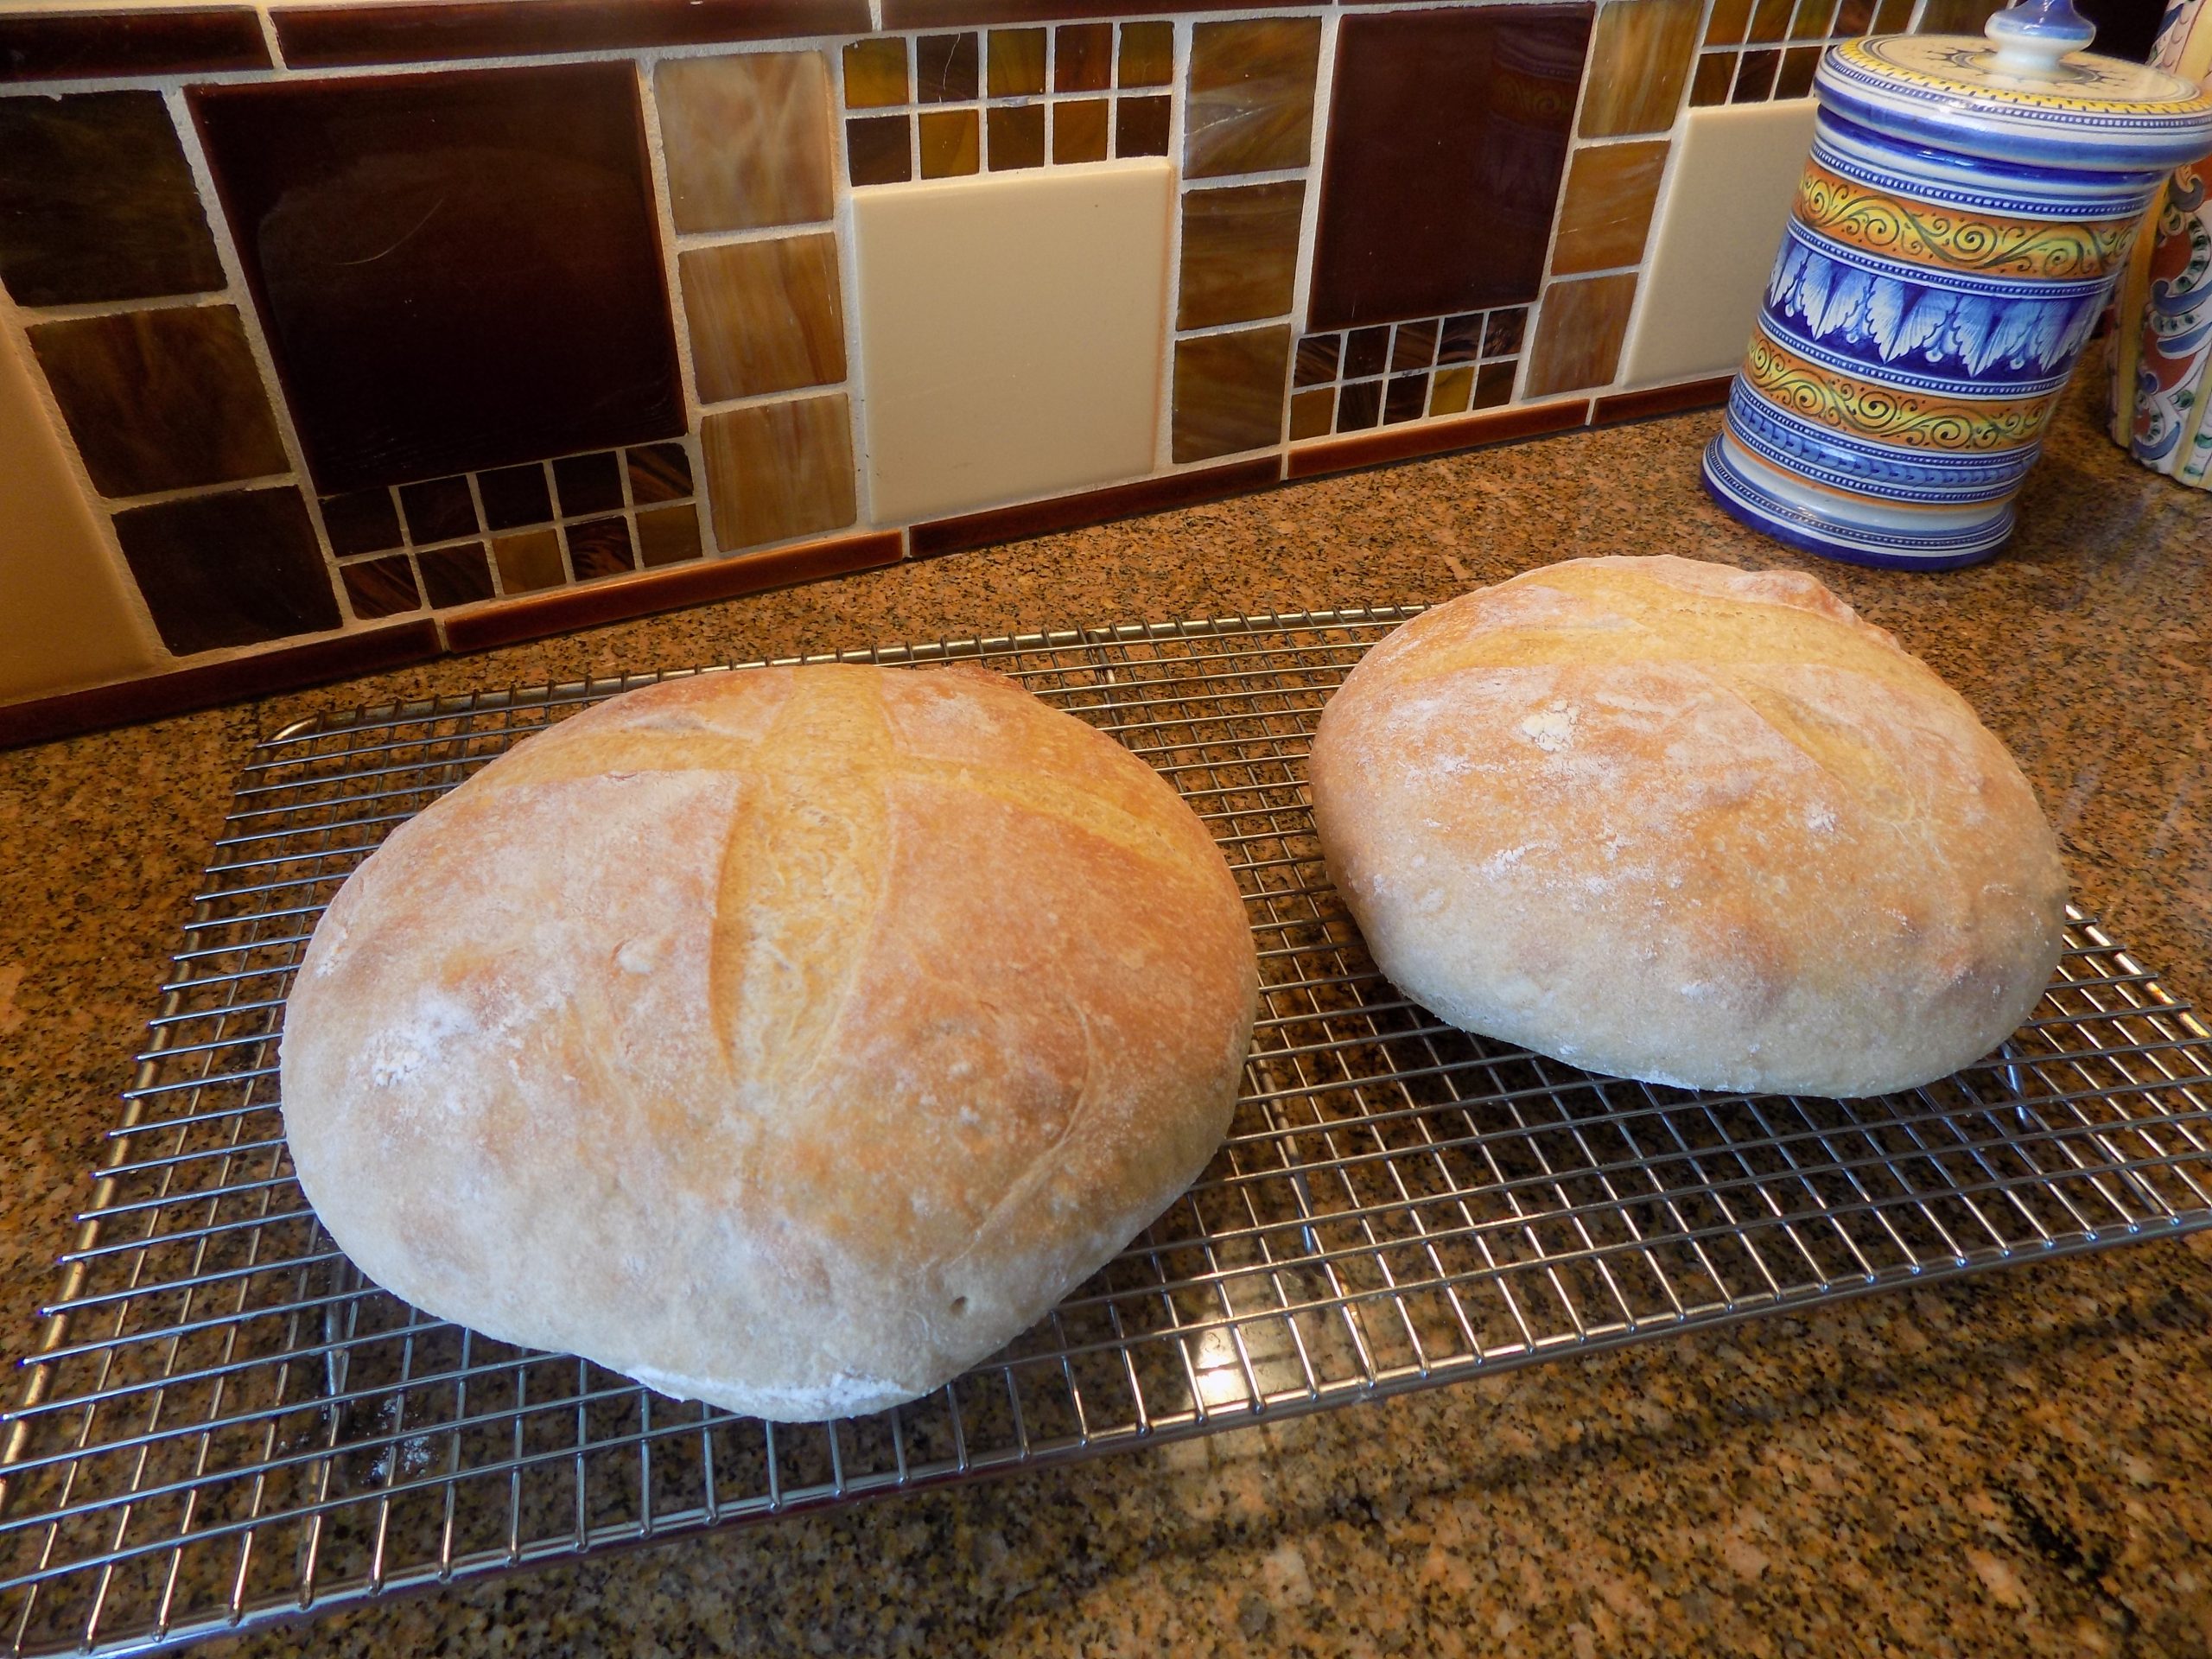
This bread is very easy to build, and it tastes like it came from a fancy bakery. When we were hosting jazz concerts in our home, and I would provide a full meal before the concert, I almost always served homemade bread to our guests. At one of the concerts one of the ladies asked me where I bought my bread. I told her I had made it myself. She stopped, looked at me for a few seconds, then said “wait – you mean people can make bread like this at home?” I quickly assured her that if I could make bread, then almost anyone who could read could do the same. That baking bread just took a little practice.
She was totally flabbergasted. She had obviously never contemplated such a thing. Where I on the other hand, I had never considered not making bread. Same planet, different world.
But, since you are reading about this recipe, you are either a friend catching up on what’s going on in my life, or you are a bread baker. If you are a maker of bread, I hope you enjoy this simple recipe. If you are a friend, I send you love from Chez Carr.
As always, have fun in your kitchen, but don’t forget to spend some time each day outdoors. Because it’s SPRING! And if you have the time, inclination, and a bit of ground or a nice large planter, plant some seeds. It is so fun and rewarding to experience the magic mother earth can perform with just a bit of tender care from you. Now please excuse me, I have some rhubarb to harvest. Rhubarb crisp – coming soon to Chez Carr.
Peace and love to all.
1½ c. warm water
¾ c. sourdough starter discard, room temperature
2 tsp. active dry yeast
1 tsp. granulated sugar
1½ tsp. kosher salt
¼ c. dark rye flour
¼ c. whole wheat flour
1 T. vital wheat gluten flour
3 c. bread flour, plus more as needed
extra virgin olive oil
Place the warm water, sourdough starter, yeast, and sugar in the bowl of your stand mixer. Let sit for 5 minutes. Add the salt, rye flour, wheat flour, vital wheat gluten flour, and 1 cup of the bread flour. Mix together with your bread hook. Let sit for 5 minutes.
Add enough remaining bread flour to make a soft, elastic dough. Dough should ball up around the bread hook, leaving just a bit stuck to the bottom of the bowl. The dough should be a bit sticky, but not tacky. Pour a bit of oil in the bowl and using your hands and a stiff rubber spatula, form the dough into a ball, completely greased with the oil.
Cover with plastic wrap and allow to rise until doubled in volume, about 90 minutes. Punch down once during this rising.
Cover a baking sheet with a rectangle of parchment paper. Gently shape the dough into two balls, using flour as needed, but avoid kneading. Place the dough balls on the parchment paper. Dust with a bit of flour and cover with a clean tea towel. Place in a warm spot for an hour. In the last half hour of rising, preheat your oven to 400-degrees.
Once the oven comes to temperature, slash an “X” on the top of each boule. (Don’t use too much force or you will deflate the bread.) Just let the weight of the knife do the work.
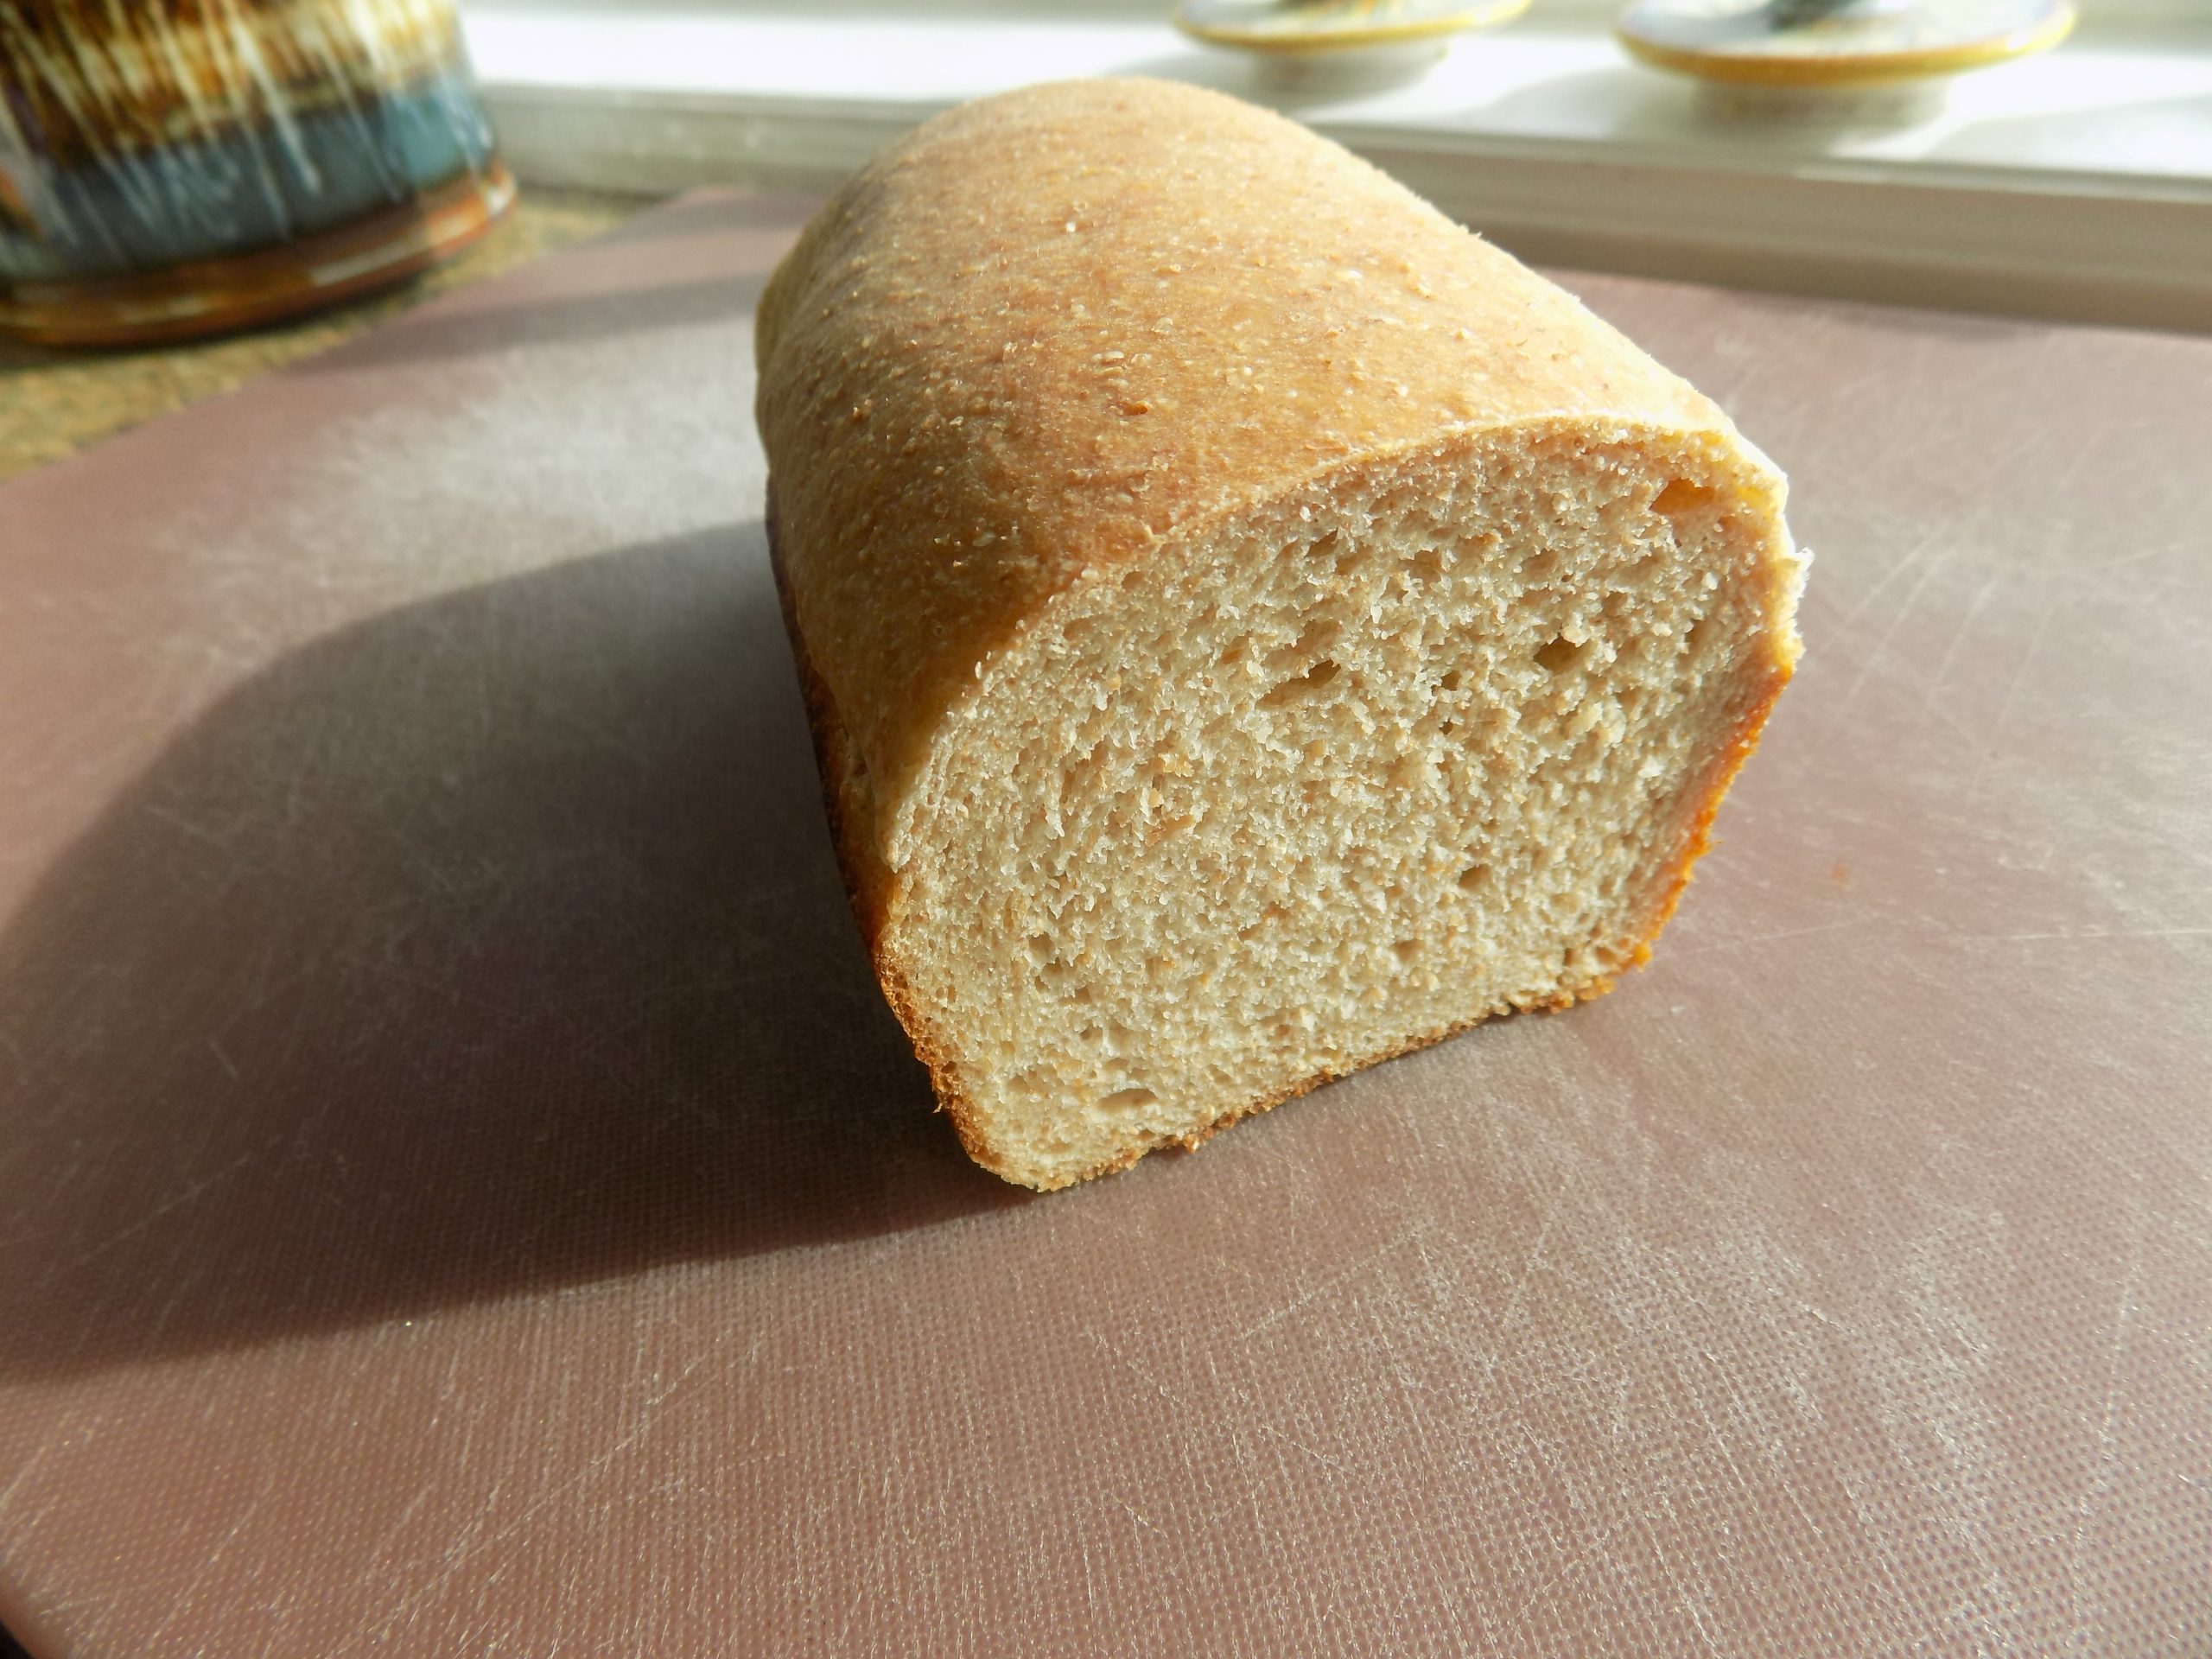
Bake for 24-27 minutes, or until golden brown and the internal temperature reaches at least 205 degrees. Remove from oven and cool completely before slicing.