“Blues is to jazz what yeast is to bread. Without it, it’s flat.” Carmen McRae the jazz singer
“A loaf of bread, the Walrus said, is what we chiefly need: Pepper and vinegar besides are very good indeed.” Author Lewis Carroll
Having pretty much stated the obvious, there should be no doubt in your mind that I am, always have been, and will continue to be an ardent bread lover. And when the bread is as easy to make as this one, well all I can say is BRING IT ON!
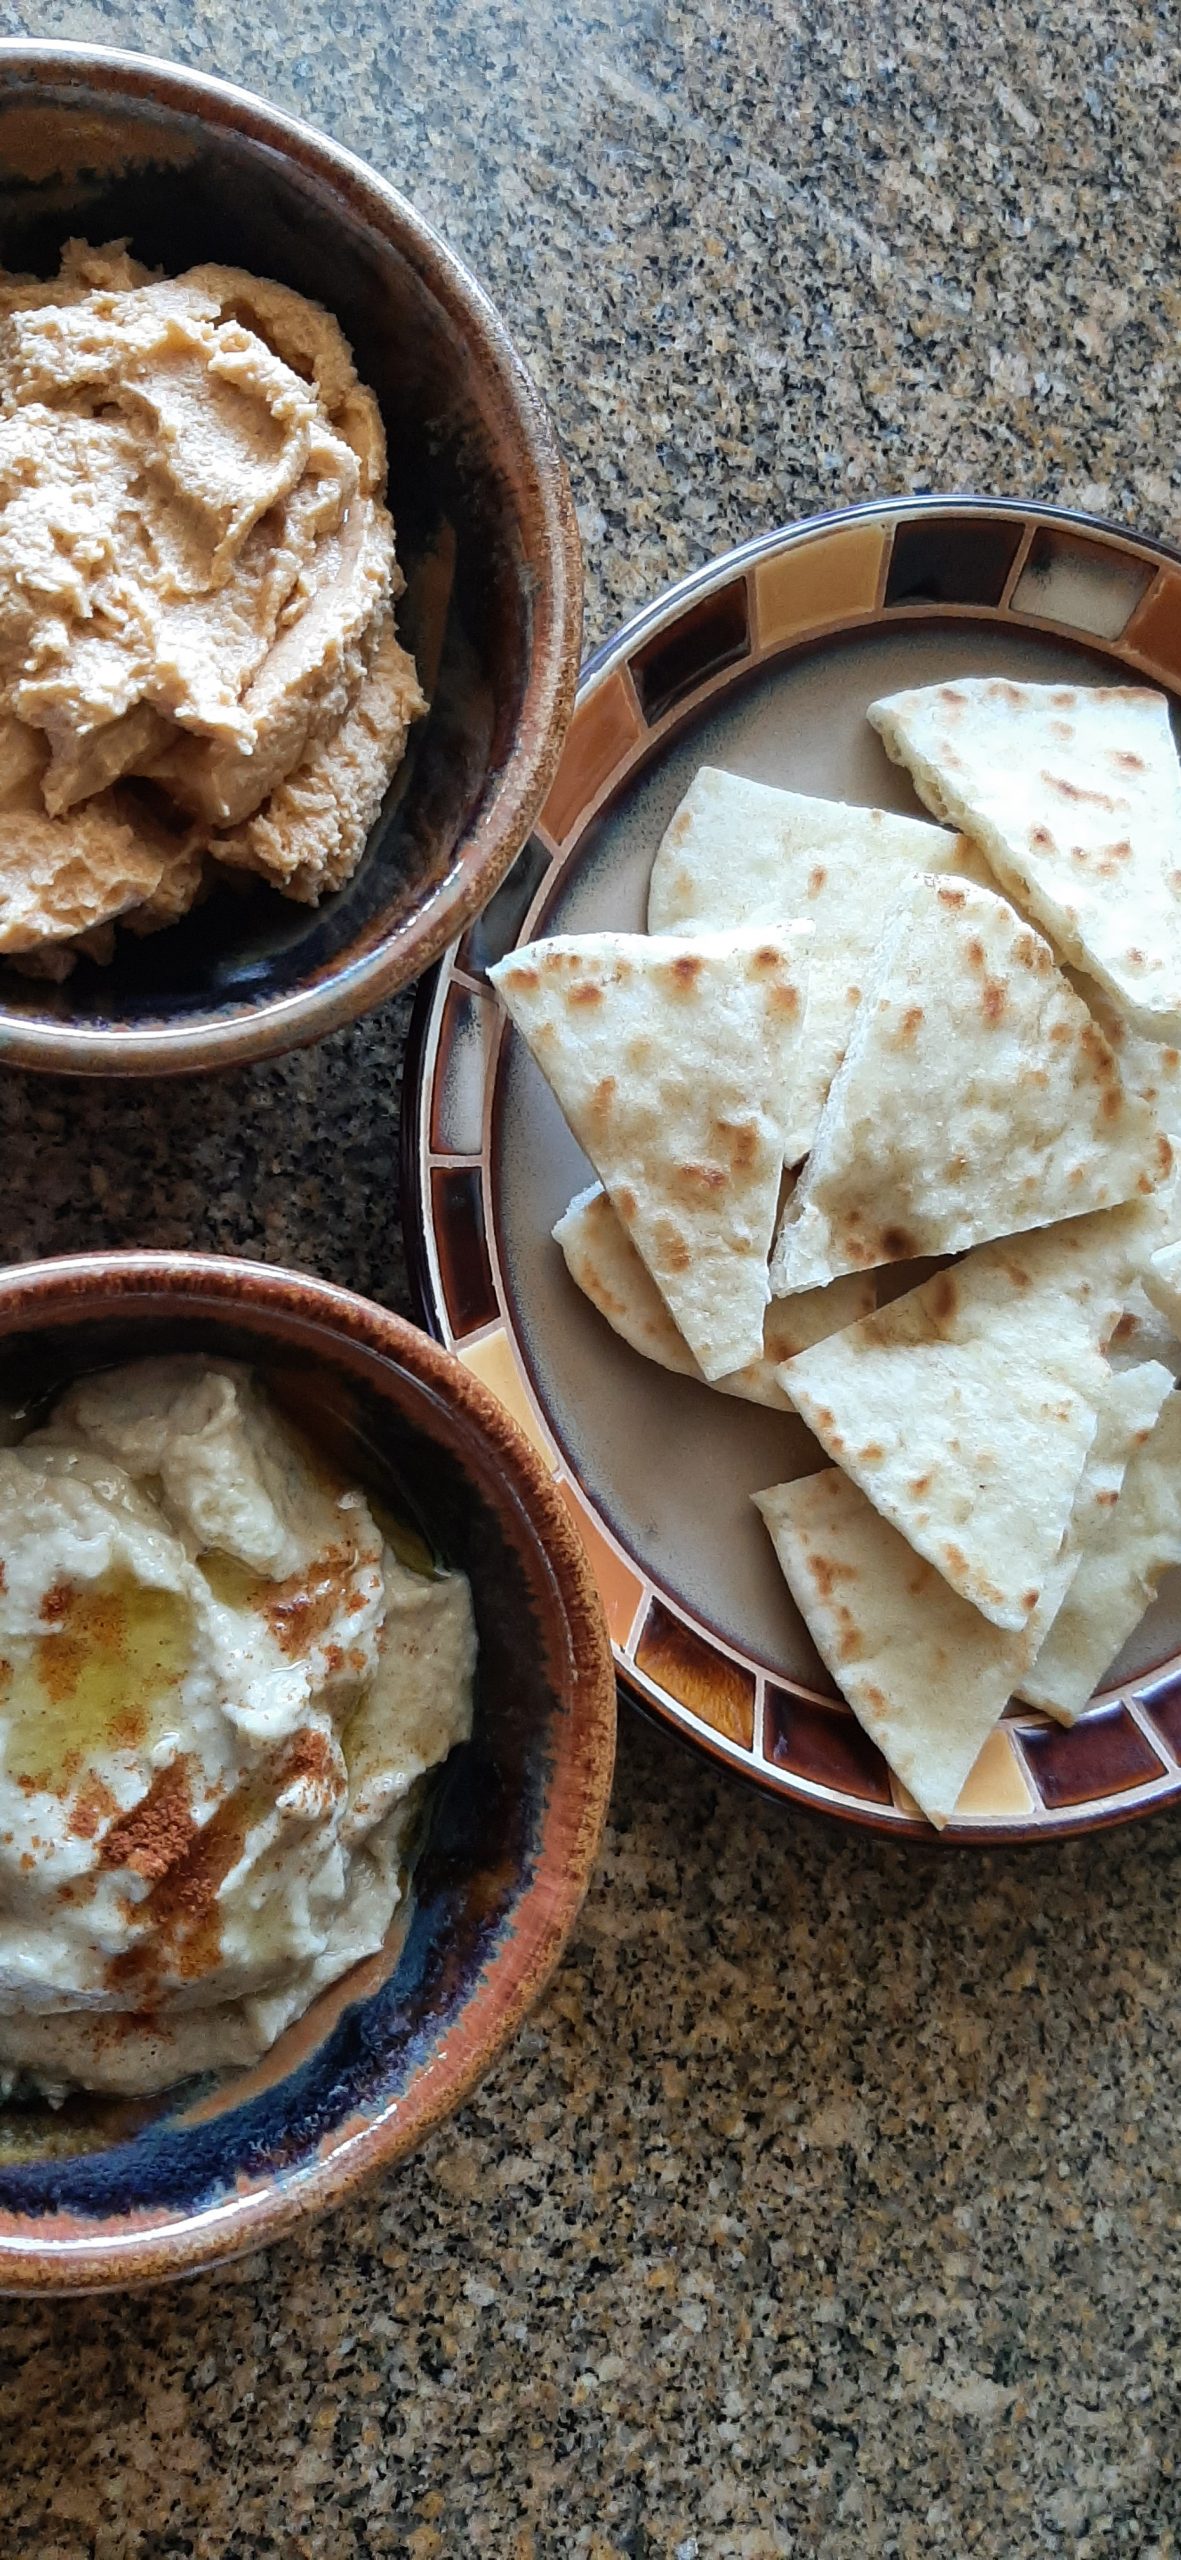
So, the other afternoon I decided to try, for the umpteenth time, making baba ganoush that was not only palatable but downright delicious. And I succeeded. (See my recipe under Oven Baked Baba Ganoush.) And just because there are certain foods that are perfect together, I made some hummus too. (Also, several recipes on site for hummus.)
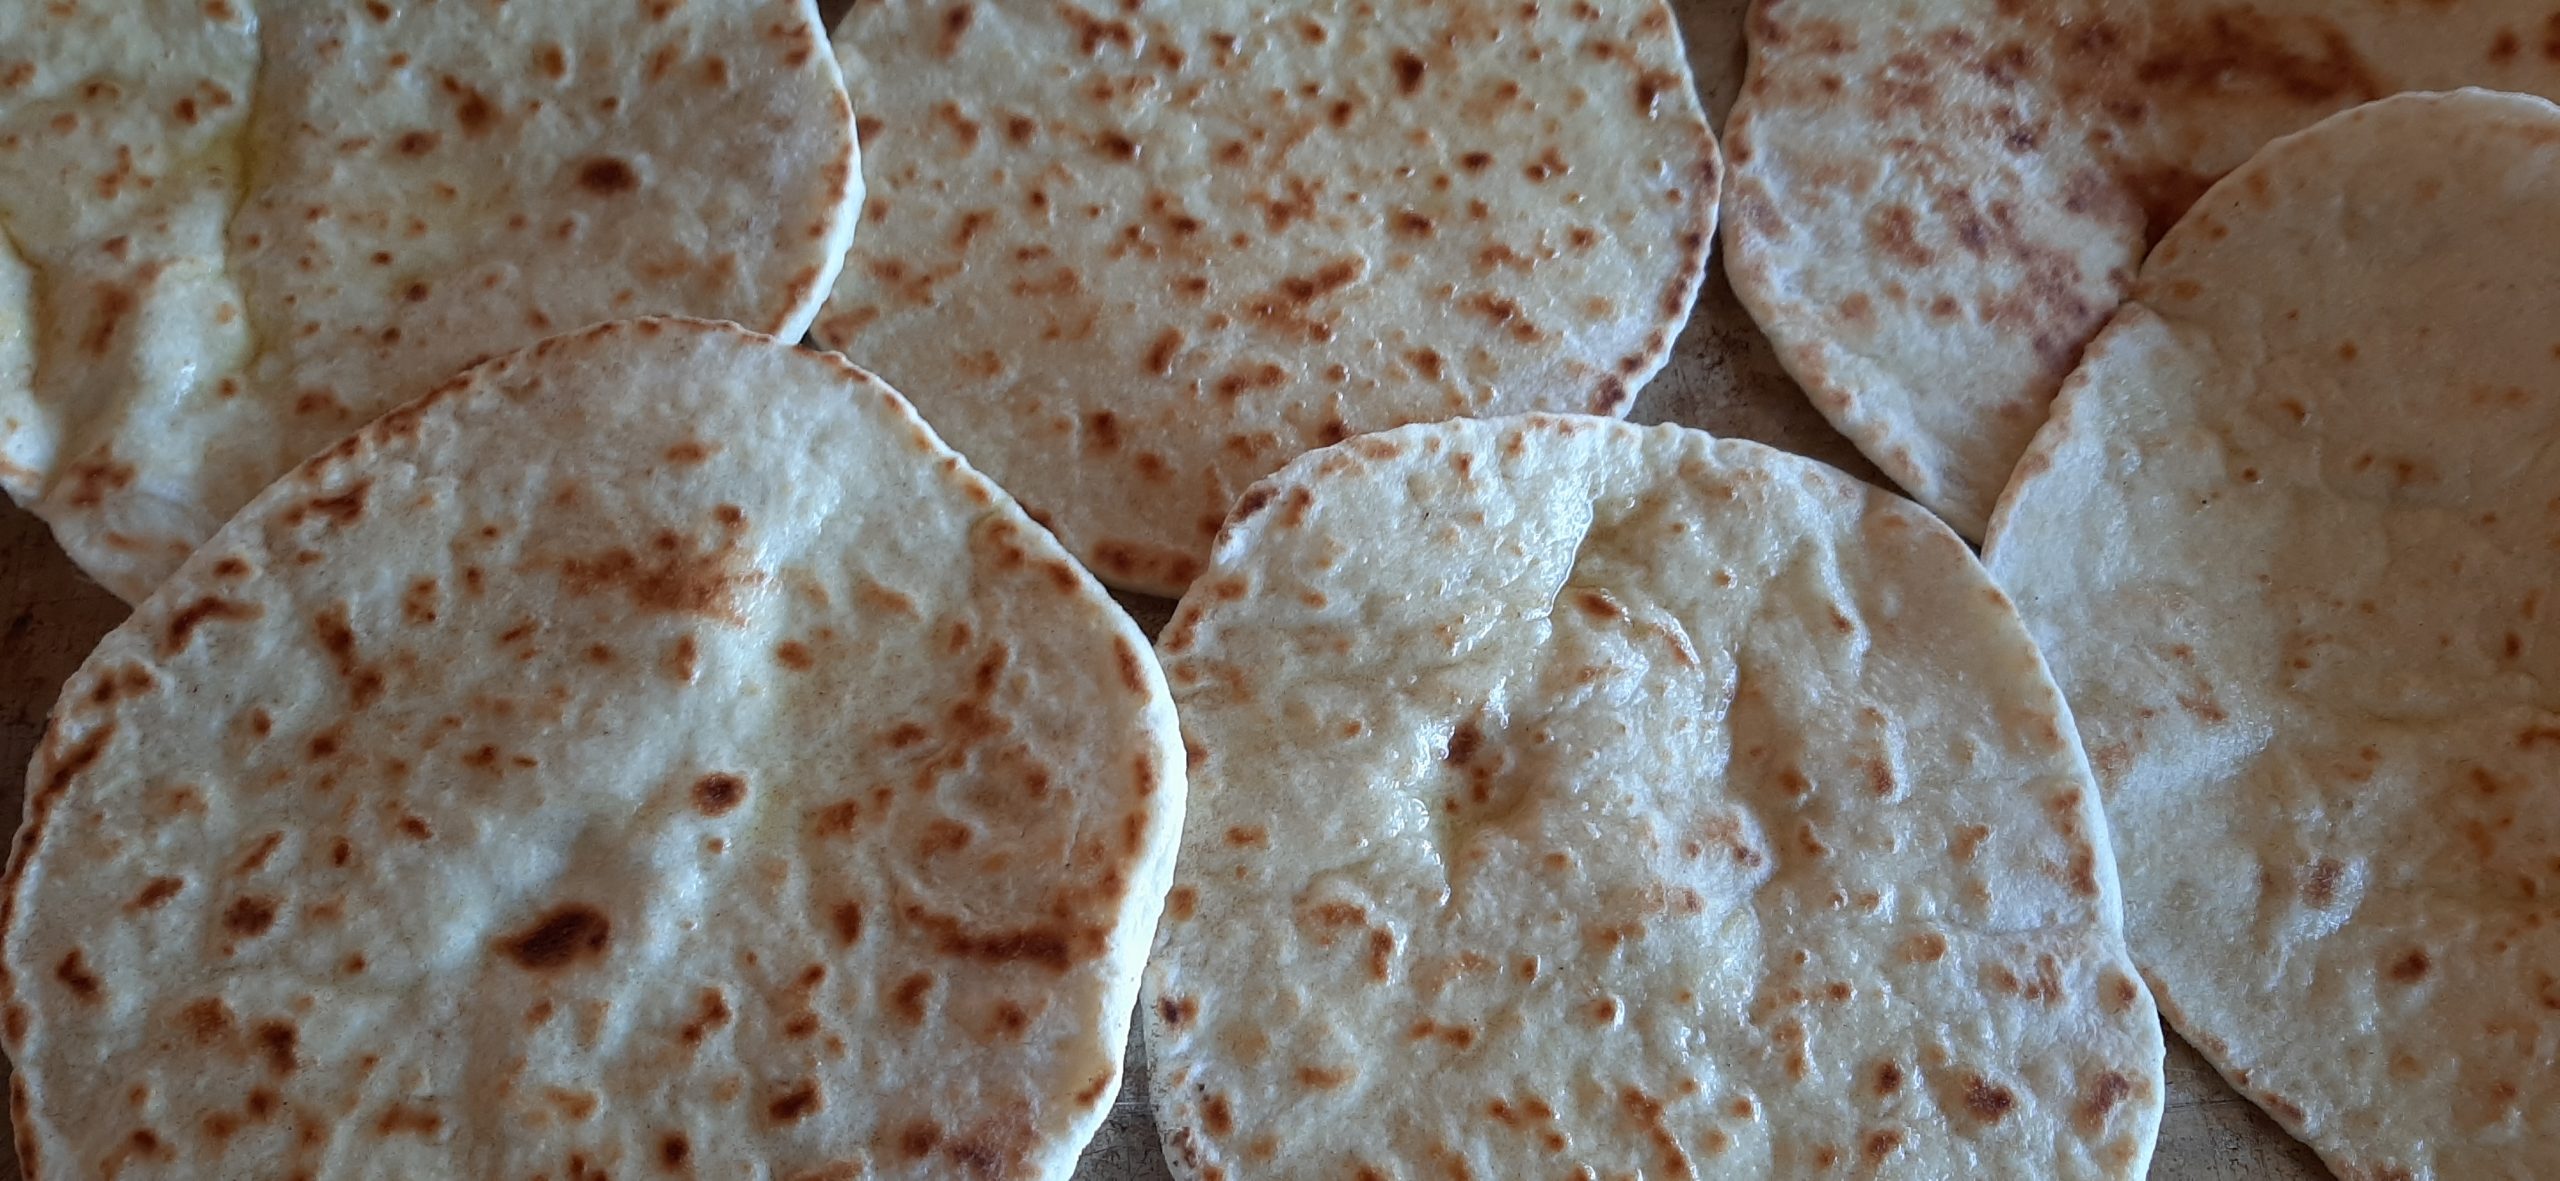
But then, what to serve these two amazing dip/spreads with besides crudité? (Raw veggies are always great, but perfect flatbread or naan is not only a compliment but a foundation.) (Hard to keep baba ganoush on a carrot stick!)
So, with these three middle eastern dishes in front of us, we feasted in style.
And the flatbread had been so very easy to make. In fact, the preparation really could not have been more effortless. No mixer involved, and simple straightforward ingredients. And the result – perfect base for hummus and baba ganoush. And this flatbread will be perfect next time I serve Ground Lamb Patties w/Rosemary and Thyme, Ćevapčići (Serbian Grilled Sausages), or Grilled Lamb Patties w/Tzatziki. (All 3 recipes on site.)
So, I am absolutely thrilled to be able to share this recipe with you. And I hope you like this flatbread as much as I do.
Well, it’s sunny and warm here today. While I am inside writing this post, Mr. C. is power washing our driveway. Which is both steep and long. So, while I am doing what I love, he is doing what needs to be done. Therefore, the only fair thing to happen in a situation like this is to 1) thank him for all his effort and 2) build him something he loves. And I’m thinking some kind of bar cookie would do the trick. So, on that happy note, I will bid you farewell for today, and get off my duff and into the kitchen!
Peace and love to all.
½ c. warm water
½ tsp. granulated sugar
1 tsp. instant yeast
½ tsp. kosher salt
2 c. unbleached all-purpose flour, fluffed
3 T. milk
1 T. extra virgin olive oil, plus extra for brushing on flatbread
In a small mixing bowl, combine water, sugar, and yeast. Let stand for 5 minutes.
In a large mixing bowl, combine salt, flour, milk, 1 tablespoon olive oil, and the yeast mixture. Stir to combine until dough comes together. (I use a regular table knife to stir the dough.)
Divide the dough into six equal pieces. Roll each piece in a ball with your hands. Arrange the balls on a small parchment paper lined baking sheet and cover with plastic wrap that has been lightly coated with cooking spray. Let the dough rise for 1 hour.
Heat a large griddle or skillet over medium heat.
Roll the dough balls out on a floured surface to a ¼-inch thickness and place 1 at a time on your ungreased heated skillet. Cook the flatbread until it starts to bubble. (And no, the bubbles won’t pop.) Flip the bread and brush the cooked side with olive oil. Cook the second side for another minute or two or until the bubbles are nicely browned.
Remove to a baking sheet or plate. Serve warm. (I love to serve this simple flatbread with hummus and baba ganoush.)
Store leftover bread in an airtight container at room temperature. Heat flatbread a bit before serving if not enjoying it immediately.
So, if you are like me, then you know how hard it is to make a really good baba ganoush. At least, after many tries, I had never made one that I wanted to make again, much less share with all of you. Until the day before yesterday, that is.
I think one of the mistakes I kept making was grilling the eggplant to get that lovely smokey flavor that is so important to a great baba ganoush. Which invariably resulted in the flesh semi-burning at the surface before the rest of the eggplant tenderized.
Now, I don’t know about you, but I am much better at using an oven than I am at grilling. So, based on several recipes I perused, I decided to take the advice of cooks much better and wiser than myself, and put my oven to work rather than my grill. And then cheat a little by adding a couple of smokey ingredients to offset the lack of the smokiness that comes with grilling.
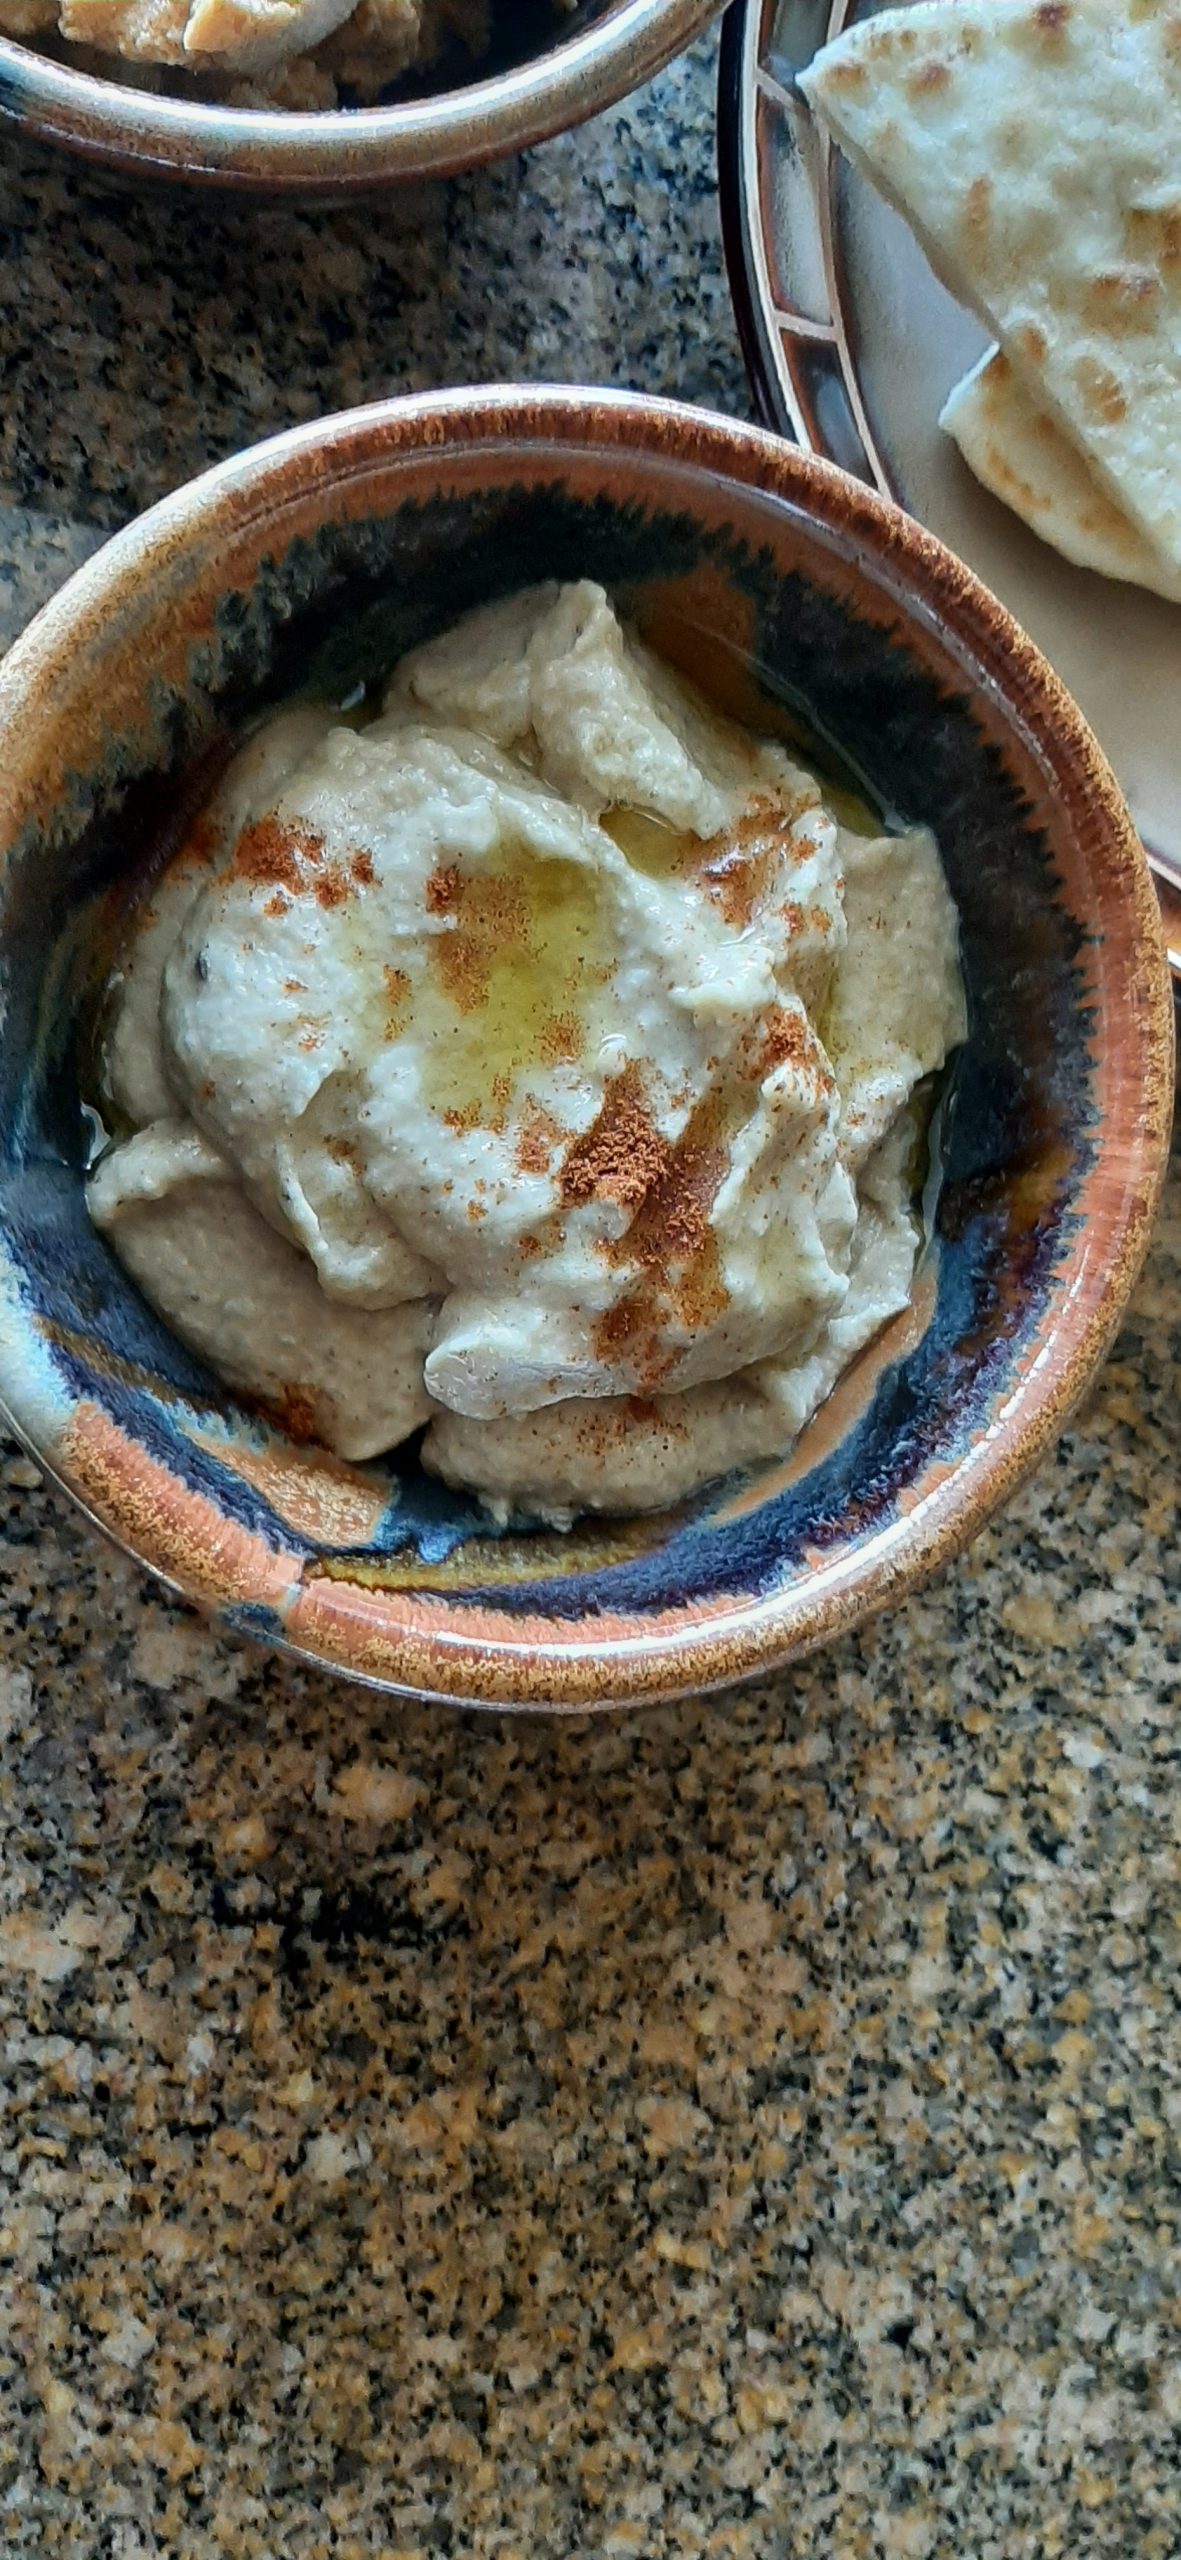
In truth, I started by leaving the baba ganoush chunky. It tasted OK, but I kept chewing on small pieces of roasted garlic that I found less than appealing. (Hard to smash up roasted garlic using a potato masher.) The rest of the mix was delicious, so I decided, what the heck, and got out my small food processor. This resulted in a lovely, smooth dip which made all the difference. The garlic was still evident, but only in a good way. And with just a drizzle of olive oil and a light sprinkling of smoked paprika on top, the baba ganoush was a winner.
I served the baba ganoush with hummus (several recipes on site under Hummus a Tune Mr. C. and my new favorite Quick and Easy Flatbread. (Find recipe below.)
So, if you too are an ardent fan of baba ganoush, I hope you give this recipe a try. It is simple to prepare, but it does take a bit of taste testing along the way to reach perfection. So, try very hard not to eat the whole batch before it is made available for others to also enjoy.
And as always, dear friends, peace and love to all.
2 med. eggplants
extra-virgin olive oil
4-5 lg. cloves of garlic
2 T. fresh lemon juice, or more to taste
3 T. tahini, or more to taste
pinch ground cumin, or to taste
¼ tsp. baking soda (if baba ganoush is bitter)
smoked paprika, for garnish
Line a large, rimmed baking sheet with parchment paper.
Halve the eggplants lengthwise. Brush the cut side very lightly with olive oil. Place the eggplant halves on the prepared pan, cut side down.
Cut off the top of the garlic cloves. Place garlic onto a square of aluminum foil. Pour a little olive oil over the exposed tops of the cloves and wrap tightly in the foil. Place the garlic packet on the baking sheet with the eggplant.
Roast the eggplant and garlic in a preheated 425-degree oven for 35 to 40 minutes or until the eggplant is tender. Remove from oven and allow to cool.
You will find that the baked eggplant has a darkened skin on the cut side from baking flesh side down on the baking sheet. I advise you to carefully cut around the edge of each eggplant half with a paring knife. Then carefully lift the burned skin off the eggplant and scrape off as much of the unburned flesh as possible into a fine mesh strainer set over a bowl. (And no, the burned part will probably not come off in one nice piece. No one is that lucky! So be patient. This step takes a bit of time. But it’s important.) Discard the burned parts. Then scoop out the remaining flesh into the strainer. Discard the skins.
Let the eggplant sit in the strainer for a few minutes to release some of the unwanted liquid. Remove any blackened parts that might remain. Then stir the eggplant a bit. This will help get rid of any residual liquid. Transfer the flesh to the bowl of your food processor and discard the liquid in the bottom of the bowl.
Gently squeeze the roasted garlic cloves out of their peels and into the food processor.
Add the lemon juice, tahini, cumin, and 2-3 tablespoons of olive oil. Process until smooth. Taste and add additional salt, lemon juice, tahini, or olive oil. (You will probably need more salt Or even some of each ingredient.) If your baba ganoush is a bit bitter, try adding just a smidge of baking soda and give the whole thing another whirl. Taste again and make further adjustments as required.
Scoop into a serving bowl, cover, and refrigerate for a couple of hours. Just before serving, garnish with a drizzle of olive oil and a light sprinkle of smoked paprika.
Great served with my Quick and Easy Flatbread, pita chips, and/or crudité.
QUICK AND EAST FLATBREAD
½ c. warm water
½ tsp. granulated sugar
1 tsp. instant yeast
½ tsp. kosher salt
2 c. unbleached all-purpose flour, fluffed
3 T. milk
½ tsp. fresh lemon juice
1 T. extra virgin olive oil, plus extra for brushing on flatbread
In a small mixing bowl, combine water, sugar, and yeast. Let stand for 5 minutes.
In a large mixing bowl, combine salt, flour, milk, lemon juice, 1 tablespoon olive oil, and the yeast mixture. Stir to combine until dough comes together. (I use a regular table knife to stir the dough.)
Divide the dough into six equal pieces. Roll each piece in a ball with your hands. Arrange the balls on a small parchment paper lined baking sheet and cover with plastic wrap that has been lightly coated with cooking spray. Let the dough rise for 1 hour.
Heat a large griddle or skillet over medium heat.
Roll the dough balls out on a floured surface to a ¼-inch thickness and place 1 at a time on your ungreased heated skillet. Cook the flatbread until it starts to bubble. (And no, the bubbles won’t pop.) Flip the bread and brush the cooked side with olive oil. Cook the second side for another minute or two or until the bubbles are nicely browned.
Remove to a baking sheet or plate. Serve warm. (I love to serve this simple flatbread with hummus and baba ganoush.
Store leftover bread in an airtight container at room temperature. Heat leftover bread a bit before serving.
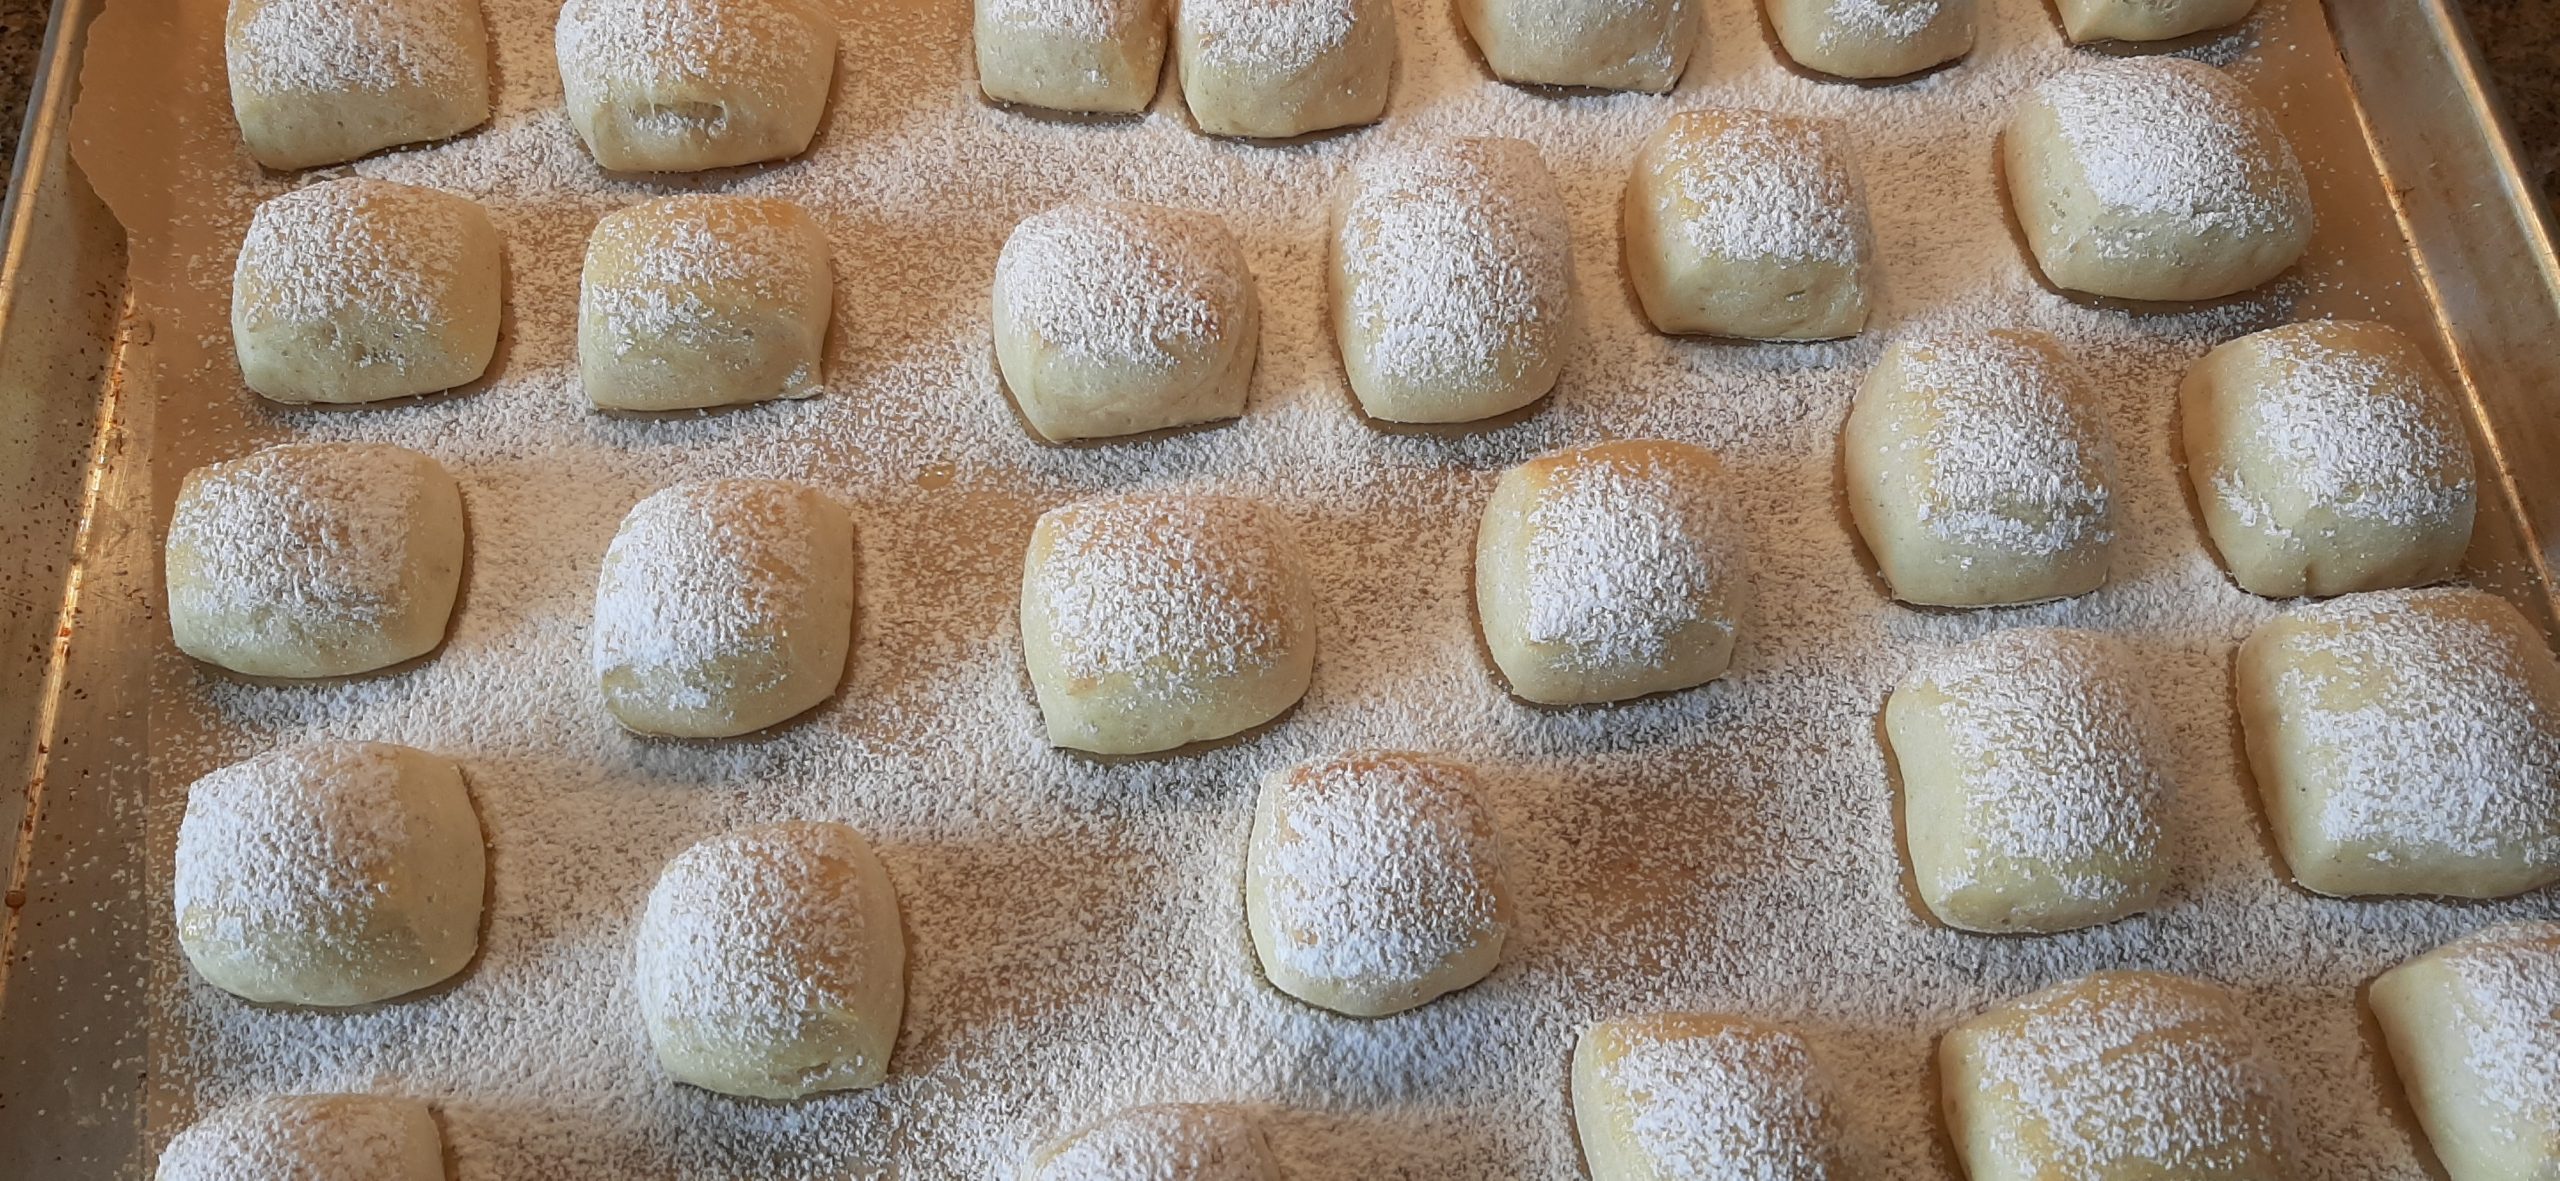
Top picture, beignets just out of the oven. Second picture, after sprinkled with powdered sugar.
Just so you know, New Orleans style beignets are different from classic French beignets in that the dough for New Orleans beignets includes yeast to help the dough rise. True French beignets are a choux pastry (no yeast) that relies on moisture content instead of yeast to facilitate rising. (And yes, Café du Monde uses yeast in their beignet dough. And of course, they deep fat fry their beignets, and serve them hot out of their oil bath liberally sprinkled with powdered sugar. But we aren’t going in that direction today. Except for the powdered sugar sprinkling. We are all in on that part!)
Now, if you are not familiar with beignets, allow me to elucidate. Beignets are a type of donut, but with a bit more of a yeast risen texture. And the flavor on the inside is not as sweet as a traditional donut. Which I especially appreciate. But for some, beignets are not as sweet and therefore not as well-known or well-loved as glazed or frosted donuts.
So, in order to make everyone happy, I have given you the recipe for baked beignets topped with powdered sugar. But for those of you who prefer a sweeter overall flavor, I have provided 3 topping recipes to sweeten these basic donuts up a bit. So, below you will find my recipes for Vanilla Glaze, Spiced Rum Glaze, and my crazy good Maple Frosting. If choosing one of these options or your own favorite topping, no need to brush with melted butter and sprinkle with powdered sugar. Just let the baked squares (or your choice of shape) cool completely before adding the glaze or frosting.
The difference with this recipe from other recipes for beignets is not the ingredients in the dough, but the method of turning them from dough into an edible product. In this happy journey to beignet/donut paradise, there is no hot oil used in the making of these tasty morsels. Your oven fulfills that responsibility. Plus, you can choose to make the dough the day before or the same day. Whichever method works best for you. And wait until you read how easy the dough is to prepare. You are going to be blown away. (Hopefully towards your kitchen.) Because this simple recipe makes for some extremely delicious treats that everyone you serve them to is going to love.
One thing I should mention however, which is true for either baked or fried beignets or donuts; they are at their best the day they are made. So, plan to serve them the same day or if that isn’t possible, gently warm them the next day. But be prepared to re-sprinkle them with more powdered sugar. (Like that’s a bad thing. Not!)
So, without further ado (drum roll please), welcome to the world of baked beignets. Or baked glazed or frosted donuts. Regardless of which way you go, you are in for a new and (slightly) healthier way to enjoy a donut.
As always, peace and love to all.
¾ c. lukewarm water
¼ c. granulated sugar
1½ tsp. active dry or instant yeast
1 lg. egg
½ c. buttermilk
4 T. (½ stick) unsalted butter, melted, divided
½ tsp. kosher salt
2 tsp. vanilla bean paste or vanilla extract
3½ to 3¾ c. unbleached all-purpose flour, fluffed, or a tiny bit more as needed
veggie oil (for greasing the mixing bowl)
1 T. milk
powdered sugar (for dusting)
In the bowl of your stand mixer, combine the water, sugar, and yeast with your dough hook and stir until well combined. Let sit for about 10 minutes or until the yeast starts to get foamy on the surface.
Add the egg, buttermilk, 3 tablespoons of the melted butter, salt, and vanilla; mix to combine. Add 3½ cups of fluffed flour and stir on medium-low speed until the dough comes together. The dough should be slightly sticky to touch, but a bit of the dough should still be sticking to the bottom of the bowl. (Resist the urge to add too much flour.) Then turn on medium speed and knead for about 5 minutes.
Pour a small amount of oil into the mixing bowl, and using your hands and a stiff rubber spatula, form the dough into a ball lightly coated with the oil. Cover with plastic wrap.
To bake beignets the same day:
Let the dough rise until doubled in size. (About 2 hours.)
Roll dough to ¼-inch thickness and cut into 1½-2-inch squares. (This is easy to do with a pizza cutter.)
Place the squares on baking sheets lined with parchment paper 1-inch apart. Let the dough rise for about 60 minutes or until the dough is puffy and about doubled in size.
Brush each square lightly with milk and bake in a pre-heated 350-degree oven for about 15 minutes, or until very lightly browned. Don’t overbake.
Remove from oven and while the beignets are still warm (after about 5 minutes), brush them with remaining melted butter and generously dust* with powdered sugar. If possible, eat while still warm.
To bake beignets the next day: Place the covered mixing bowl in the refrigerator overnight. The dough will double or triple in size while it’s in the fridge. Remove from the fridge at least 45 minutes before you plan to roll out and cut the dough.
On a lightly floured surface, roll the dough to ¼-inch thickness and cut into 1½-2-inch squares. (This is easy to do with a pizza cutter.)
Place on parchment paper lined baking sheets at least 1-inch apart. Let the dough rise for about 60 minutes or until the dough is puffy and about doubled in size.
Brush each square lightly with milk and bake in a pre-heated 350-degree oven for about 15 minutes, or until slightly browned. Don’t overbake.
Remove from oven and while the beignets are still warm (after about 5 minutes), brush them with remaining melted butter and generously dust* with powdered sugar. Eat while still warm.
Please note: If you don’t plan to eat all the beignets in one sitting, warm them in your microwave for about 10 seconds just before serving. Then sprinkle with more powdered sugar if necessary.
*An easy way to sprinkle/dust powdered sugar is to place a small amount in a fine mesh strainer and then shake the strainer over whatever you wish to decorate. This same technique works well with cocoa for chocolate dusting.
VANILLA GLAZE
2 c. powdered sugar
⅛ teaspoon salt
1 tsp. vanilla bean paste or vanilla extract
5-6 T. whole milk or cream
Whisk all the ingredients together in a medium bowl until smooth.
Place the beignets on a wire rack over a baking sheet. Coat the beignets with the glaze by dunking each one into the glaze. Place back on the wire, glazed side up, to set completely before storing in an airtight container.
SPICED RUM GLAZE
1 c. powdered sugar
1 tsp. rum
tiny pinch cinnamon
tiny pinch nutmeg
2–3 T. whole milk
In a small bowl, whisk the powdered sugar, rum, cinnamon, nutmeg, and 2 tablespoons milk together. If needed, add more milk to achieve desired consistency.
Place completely cooled beignet pieces on a large baking sheet. Drizzle on the glaze. Allow glaze to harden before storing in an airtight container.
MAPLE FROSTING
2 T. unsalted butter
¼ c. brown sugar, packed
2 T. whole milk
1½ tsp. corn syrup
1 tsp. good maple extract
1 c. powdered sugar
In a small saucepan, melt the butter, then whisk in the brown sugar. When the brown sugar starts to dissolve whisk in the milk and simmer for about 3 minutes over medium heat, stirring continuously until the brown sugar is completely dissolved.
Remove from heat and whisk in the corn syrup and maple extract. Then whisk in the powdered sugar until the frosting is smooth and free of powdered sugar lumps.
Using a large spoon, ladle frosting onto each cooled beignet piece.
Warning: Work quickly or the frosting will start to set up before you get to the last piece. (Take my word for this!)
I’m sure I’ve mentioned my addiction to maple bars somewhere along the line in one of my stream-of-consciousness introductions to a recipe. But if not, let me state unequivocally – I LOVE MAPLE BARS. And have since 4th grade when right across the street from our hilltop grade school in Bothell, Washington (can’t remember the real name of the school) was a small convenience store that sold among other things, maple bars. (I actually have no idea what other items were sold in the store because I was mainly interested in the maple bars. I do have a vague recollection that there were candy bars and ice cream bars available too. But if there was anything else that didn’t resemble something sweet that a kid could put in their mouth, I’m not at all sure what that would be!) And if I recall correctly, the maple bars were a great whacking 5 cents. So, as often as I could, I availed myself of those scrumptious treats. And I have adored them ever since.
Now don’t get me wrong. I have literally gone years without a maple bar coming anywhere near my mouth. But as I’ve gotten to the stage of life when my remaining years are far less than the exceedingly large number of years I’ve already experienced, I’ve come to the conclusion that denying myself the pleasure of a maple bar now and then is ridiculous. Thus, my decision to learn to build my own maple bars in the privacy of my own kitchen!
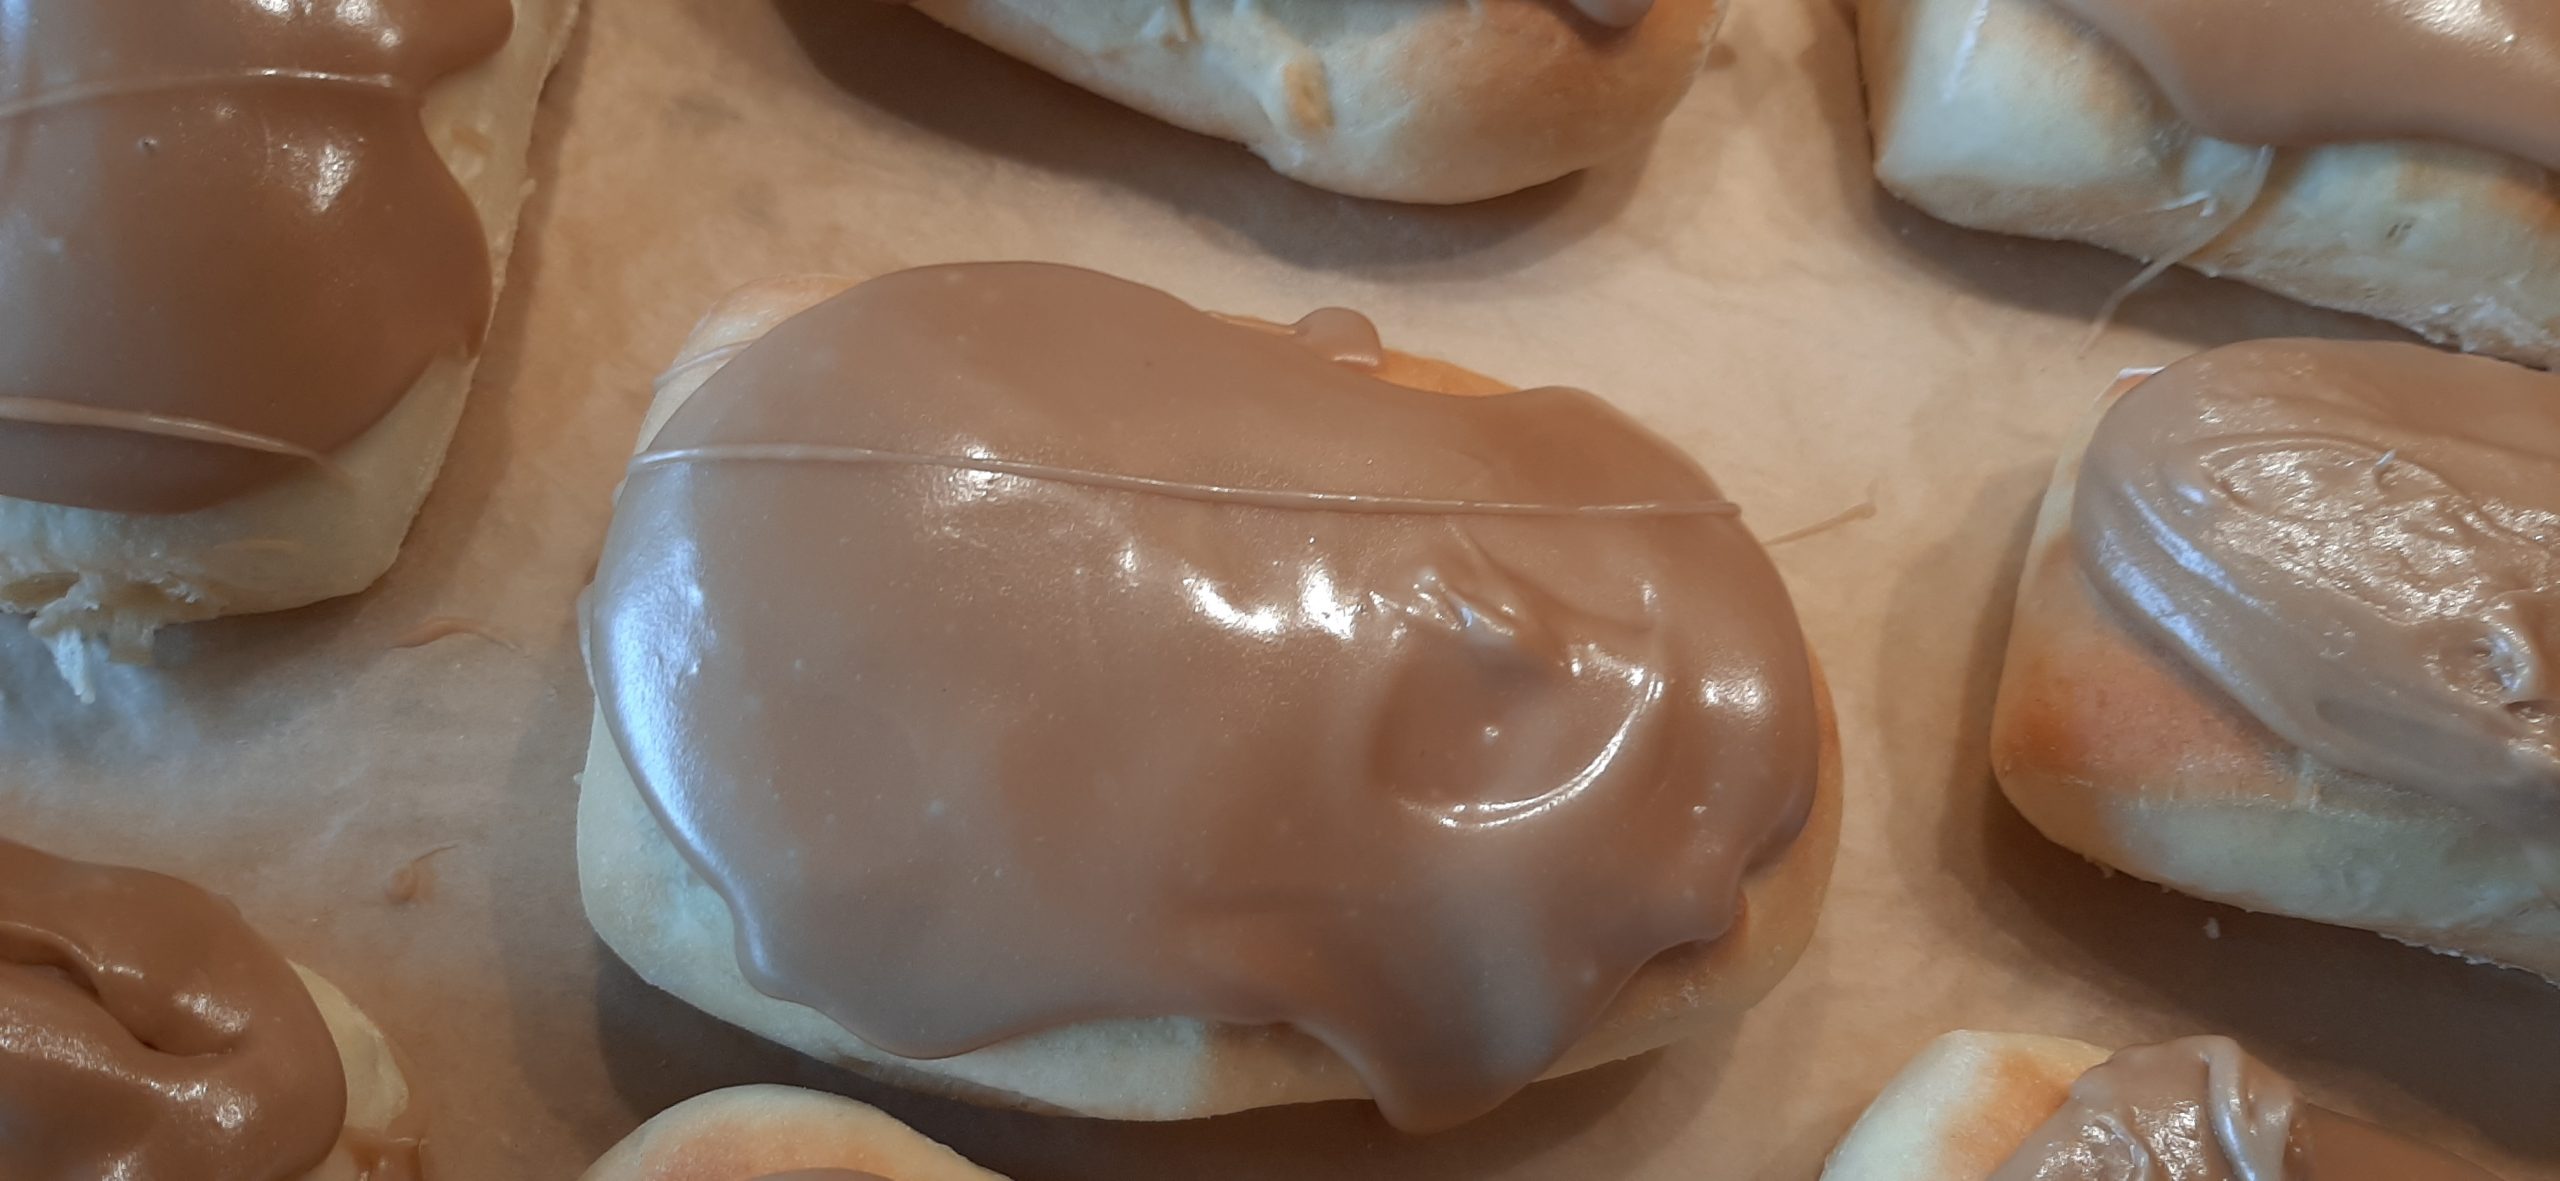
The first thing I wanted to perfect was the dough for a fabulous donut like base for the frosting. And then of course, figure out how to make the maple frosting just like it’s made in bakeries. And believe me, I’ve tried making maple frosting several times throughout the years. And although the previous tries were OK, they were not what my 9-year-old mouth remembered. Until today, that is!
And truly I don’t remember where I originally found the bones for the frosting recipe. But I messed with the original recipe a bit, and by golly, the kid buried deep within me, was doing cartwheels right in our living room after the first bite. OK, mental cartwheels, but if I were still 9 years old, it would be the real thing!
So, if you too or someone you love has a maple bar addiction, let me introduce you to this quick and easy recipe. The dough is baked not deep fried, so there is a bit of redemption in that regard. However, the frosting is sinfully sweet and has absolutely no healthy redeeming qualities. It is just pure heaven. And definitely should be classified as a guilty pleasure.
Well, that’s it for today. It’s still off and on drizzling outside so I can’t work off any of the calories I took in while savoring today’s maple bar. But hopefully tomorrow I will be able to do more hacking and slashing of shrubs that have become an impediment to anyone wanting to get to our front door or onto our deck. Mainly because my plan is to have another maple bar tomorrow morning along with my over easy egg.
And as always, peace and love to all.
¾ c. whole milk
3 T. unsalted butter
2 T. granulated sugar
1 tsp. kosher salt
2 T. warm water
1 pkg. or 1 scant T. instant dry yeast
1 lg. egg
2½ c. unbleached all-purpose flour, plus more as required
Scald the milk in a small saucepan. Remove from heat and add the butter, granulated sugar, and salt. Stir together and cool to just slightly warm.
In the bowl of your stand mixer add the yeast to the warm water. Add the cooled milk mixture and the egg. Stir together using the dough hook.
Add the flour and knead until the dough is soft and elastic. (You will probably need a good bit more flour. You want the dough to pull away from the sides of the mixing bowl, but still leave a bit stuck to the very bottom of the mixing bowl. The dough will be soft to the touch but not at all tacky. Cover the bowl with plastic wrap and let rise for 1 hour.
Punch down and pat out into a 1″ thick square on a floured surface.
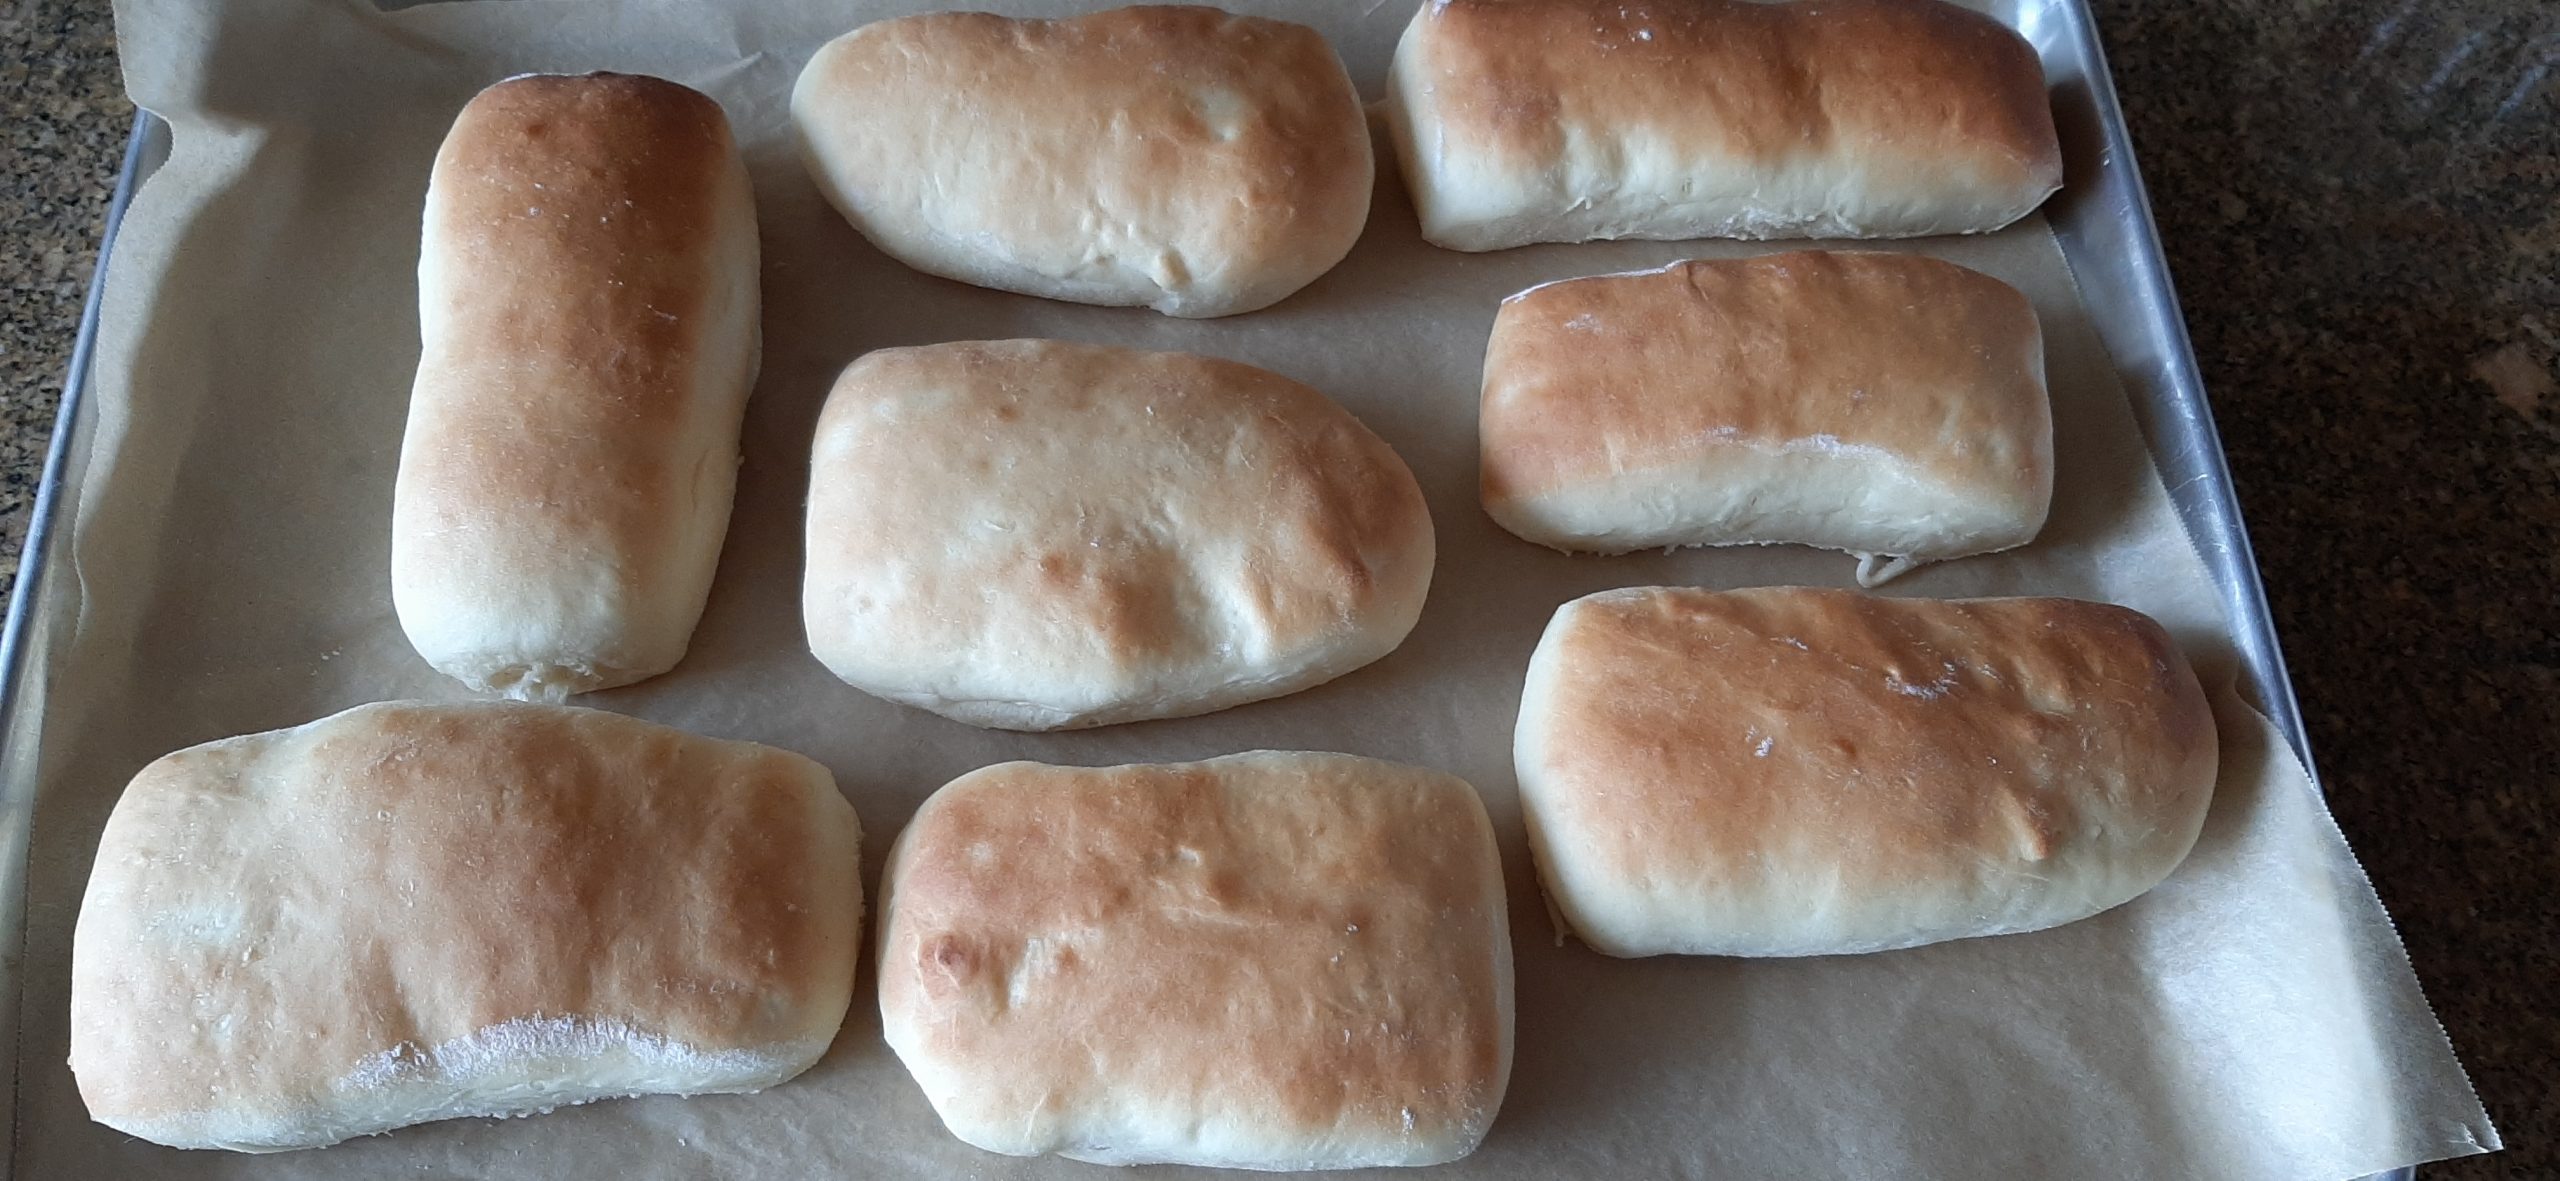
Cut into 8-10 rectangles and let rise again covered for about 30 minutes on a parchment paper lined baking sheet.
Bake in a pre-heated 425-degree oven for 7-8 minutes or until light golden brown. Do not overbake.
Remove from oven and allow to cool for a few minutes before spreading with the Maple Frosting. Then cool the frosted bars completely before eating or storing in your fridge or freezer.
Please note: I start making the frosting as soon as the bars are out of the oven. If you prepare the frosting too far ahead of time, it will be too hard to spread nicely and evenly on the cooling bars.
MAPLE FROSTING
¼ c. unsalted butter
½ c. brown sugar, packed
3 T. whole milk
1 T. corn syrup
2 tsp. good maple extract
2 c. powdered sugar
In a small saucepan, melt the butter, then whisk in the brown sugar. When the brown sugar starts to dissolve whisk in the milk and simmer for about 3 minutes over medium heat, stirring continuously until the brown sugar is completely dissolved.
Remove from heat and whisk in the corn syrup and maple extract. Then whisk in the powdered sugar until the frosting is smooth and free of powdered sugar lumps.
Using a large spoon, ladle frosting onto each warm bar.
Warning: Work quickly or the frosting will start to set up before you get to the last bar. (Take my word for this!)
Please note: This makes a lot of frosting. You may not need all of it. If so, refrigerate the remaining frosting and see what kind of inventive use you can come up with for the rest.
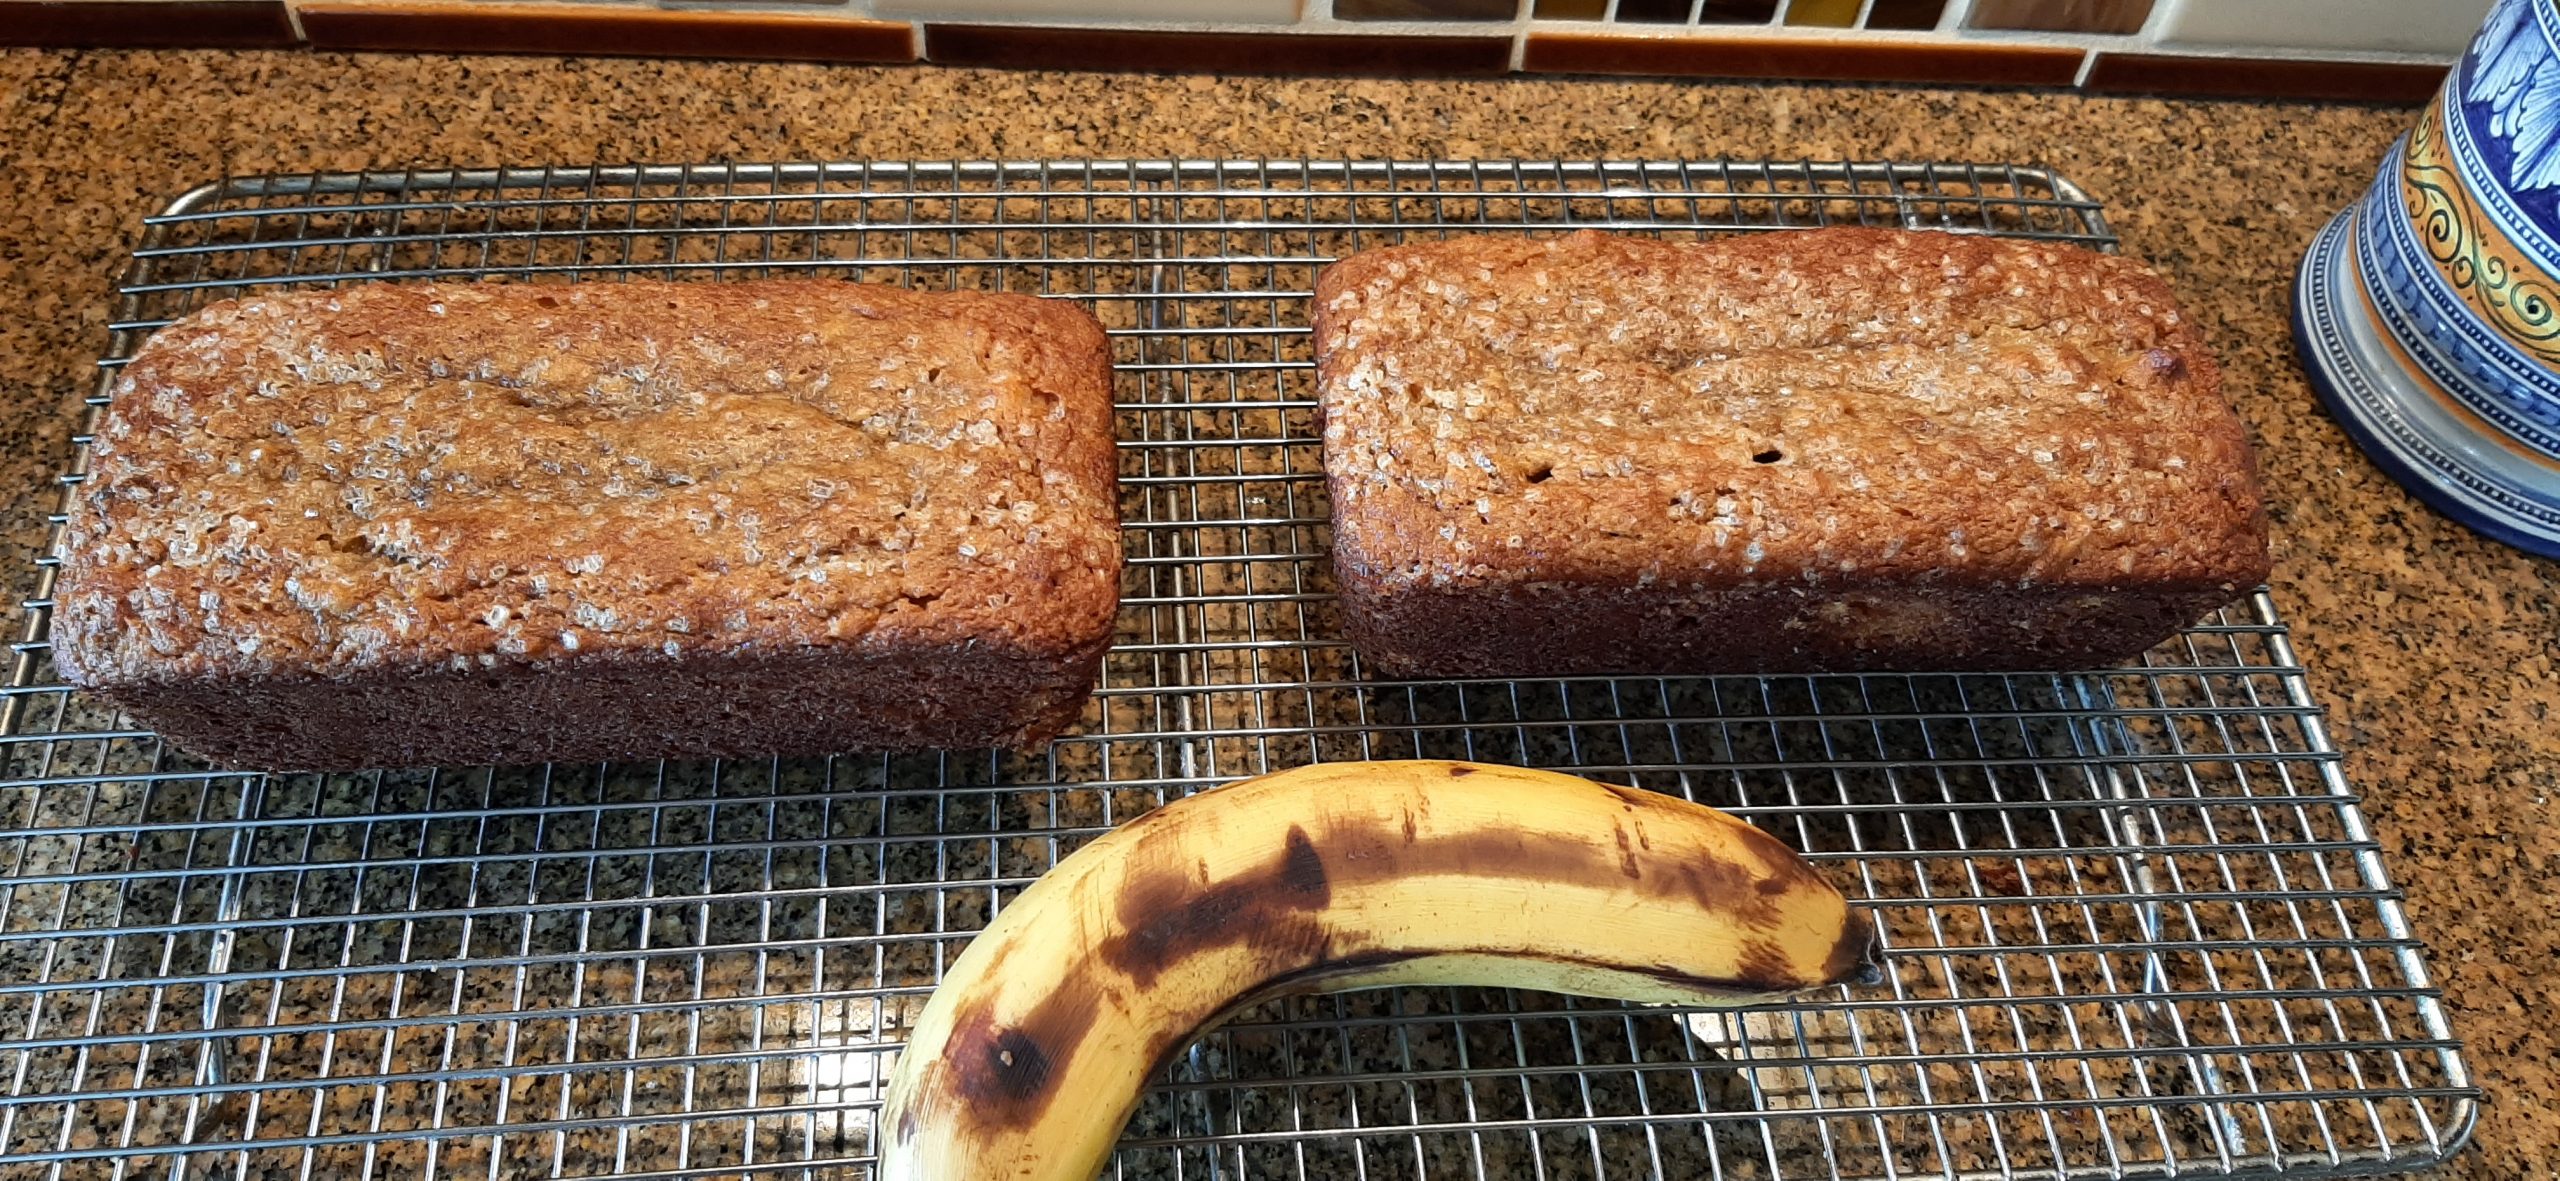
You need really ripe bananas. Black spots and streaks are our friend!
OK, the first thing you should know is that I have a strong aversion to bananas. You couldn’t get me to eat a plain banana even for the cost of a round trip ticket to Witchita. (Like I would want to go there anyway!) (But, that’s not the point.) But, for some unknown reason, I love banana bread. (I know. It makes no sense at all.)
So, when I decided that what I needed was a recipe for a banana bread that was a bit healthier than my other two delightful recipes already on this site, I went on line for inspiration. And I found this great recipe on one of my favorite sites – cookieandkate.com. Of course I messed with a couple of the ingredient amounts and added chopped walnuts and a sprinkling of coarse sugar on top to add a little bit of crunch to the bread. Because, who doesn’t like crunch? But the bones of this recipe are all on Kate.
And by golly, this recipe makes for one darn good banana bread. And it’s healthier for us than my other two recipes, so I feel less guilty eating it. And serving it to Mr. C.
And this super moist bread is very easy to make. Doesn’t even require a mixer. Just the use of a whisk and a tiny bit of elbow grease.
So, if you too would appreciate experiencing a little less guilt when biting into a tender and delicious quick bread, then this is the recipe for you.
Well there’s a cloud covering over our part of western Washington today, but it’s not raining. We did have a bit of rain the last couple of days, but not enough to dampen our spirts. Just enough to give the plants and trees in our yard a nice soft watering. Of course with the clouds we can’t see the mountains. But they’ll come back and bless us with their beauty when the clouds decide to visit another part of the world.
Isn’t it wonderful to know that there are things that we can count on to make our lives more pleasant. Like mountain sightings, and noisy creeks, and sandy beaches. And tree blossoms in the spring, and fresh veggies and fruits available to us year-round in our local grocery stores.
Because of all the treasures that are a part of my daily life, I try very hard not to take anything for granted. Instead I endeavor to remain thankful for all the wonderful blessings I receive on a daily basis. I am so very, very lucky. As I hope you are too.
Peace and love to all.
¼ c. extra-virgin olive oil
⅓ c. maple syrup
1½ tsp. vanilla extract
4 lg. eggs
slightly rounded cup of mashed ripe bananas (2 lg. bananas)
1 tsp. baking powder
½ tsp. baking soda
½ tsp. ground cinnamon
½ tsp. fine sea salt
2½ c. almond flour
¾ c. chopped walnuts
2 tsp. coarse sugar, for sprinkling on top
Lightly spray 1 (9×5-inch) non-stick loaf pan or 2 (7½ x 3½-inch) non-stick loaf pans with cooking spray. Then cut a piece of parchment paper to fit the bottom of pan or pans. Lightly coat the parchment paper with cooking spray. Set pan or pans aside.
In a large mixing bowl, whisk the olive oil, maple syrup, and vanilla together until well blended. Add the eggs and whisk until the mixture is thoroughly combined.
Add the mashed bananas, baking powder, baking soda, cinnamon, and salt. Whisk to combine.
Add the almond flour and stir just until the batter is well blended. Stir in the chopped walnuts. Pour the batter into your prepared loaf pan or pans. Evenly sprinkle the coarse sugar over the top of the dough.
Bake in a pre-heated 325-degree oven for 55 to 65 minutes (single loaf) or 45-50 minutes for 2 pans. Or until the center of the loaf springs back when touched with your fingers and the internal temperature reads between 200 to 205-degrees.
Remove from oven and place the pan or pans on a wire rack for at least 20 minutes. (This bread is delicate while still warm.)
Use a butter knife or offset spatula if necessary to loosen the edges of the bread from the pan, then carefully turn out onto your wire rack. Cool completely before slicing.
Store in an airtight container at room temperature. Warm slightly before serving.
OK, if you are new to this site, then the first thing you should know about me is that I am a bread fanatic. I love it all. Sourdough, whole grain, quick, cornbread, overnight, you name it, I will eat it with pleasure. But I am especially eager to enjoy bread that has at least some redeeming qualities. Besides of course tasting wonderful!
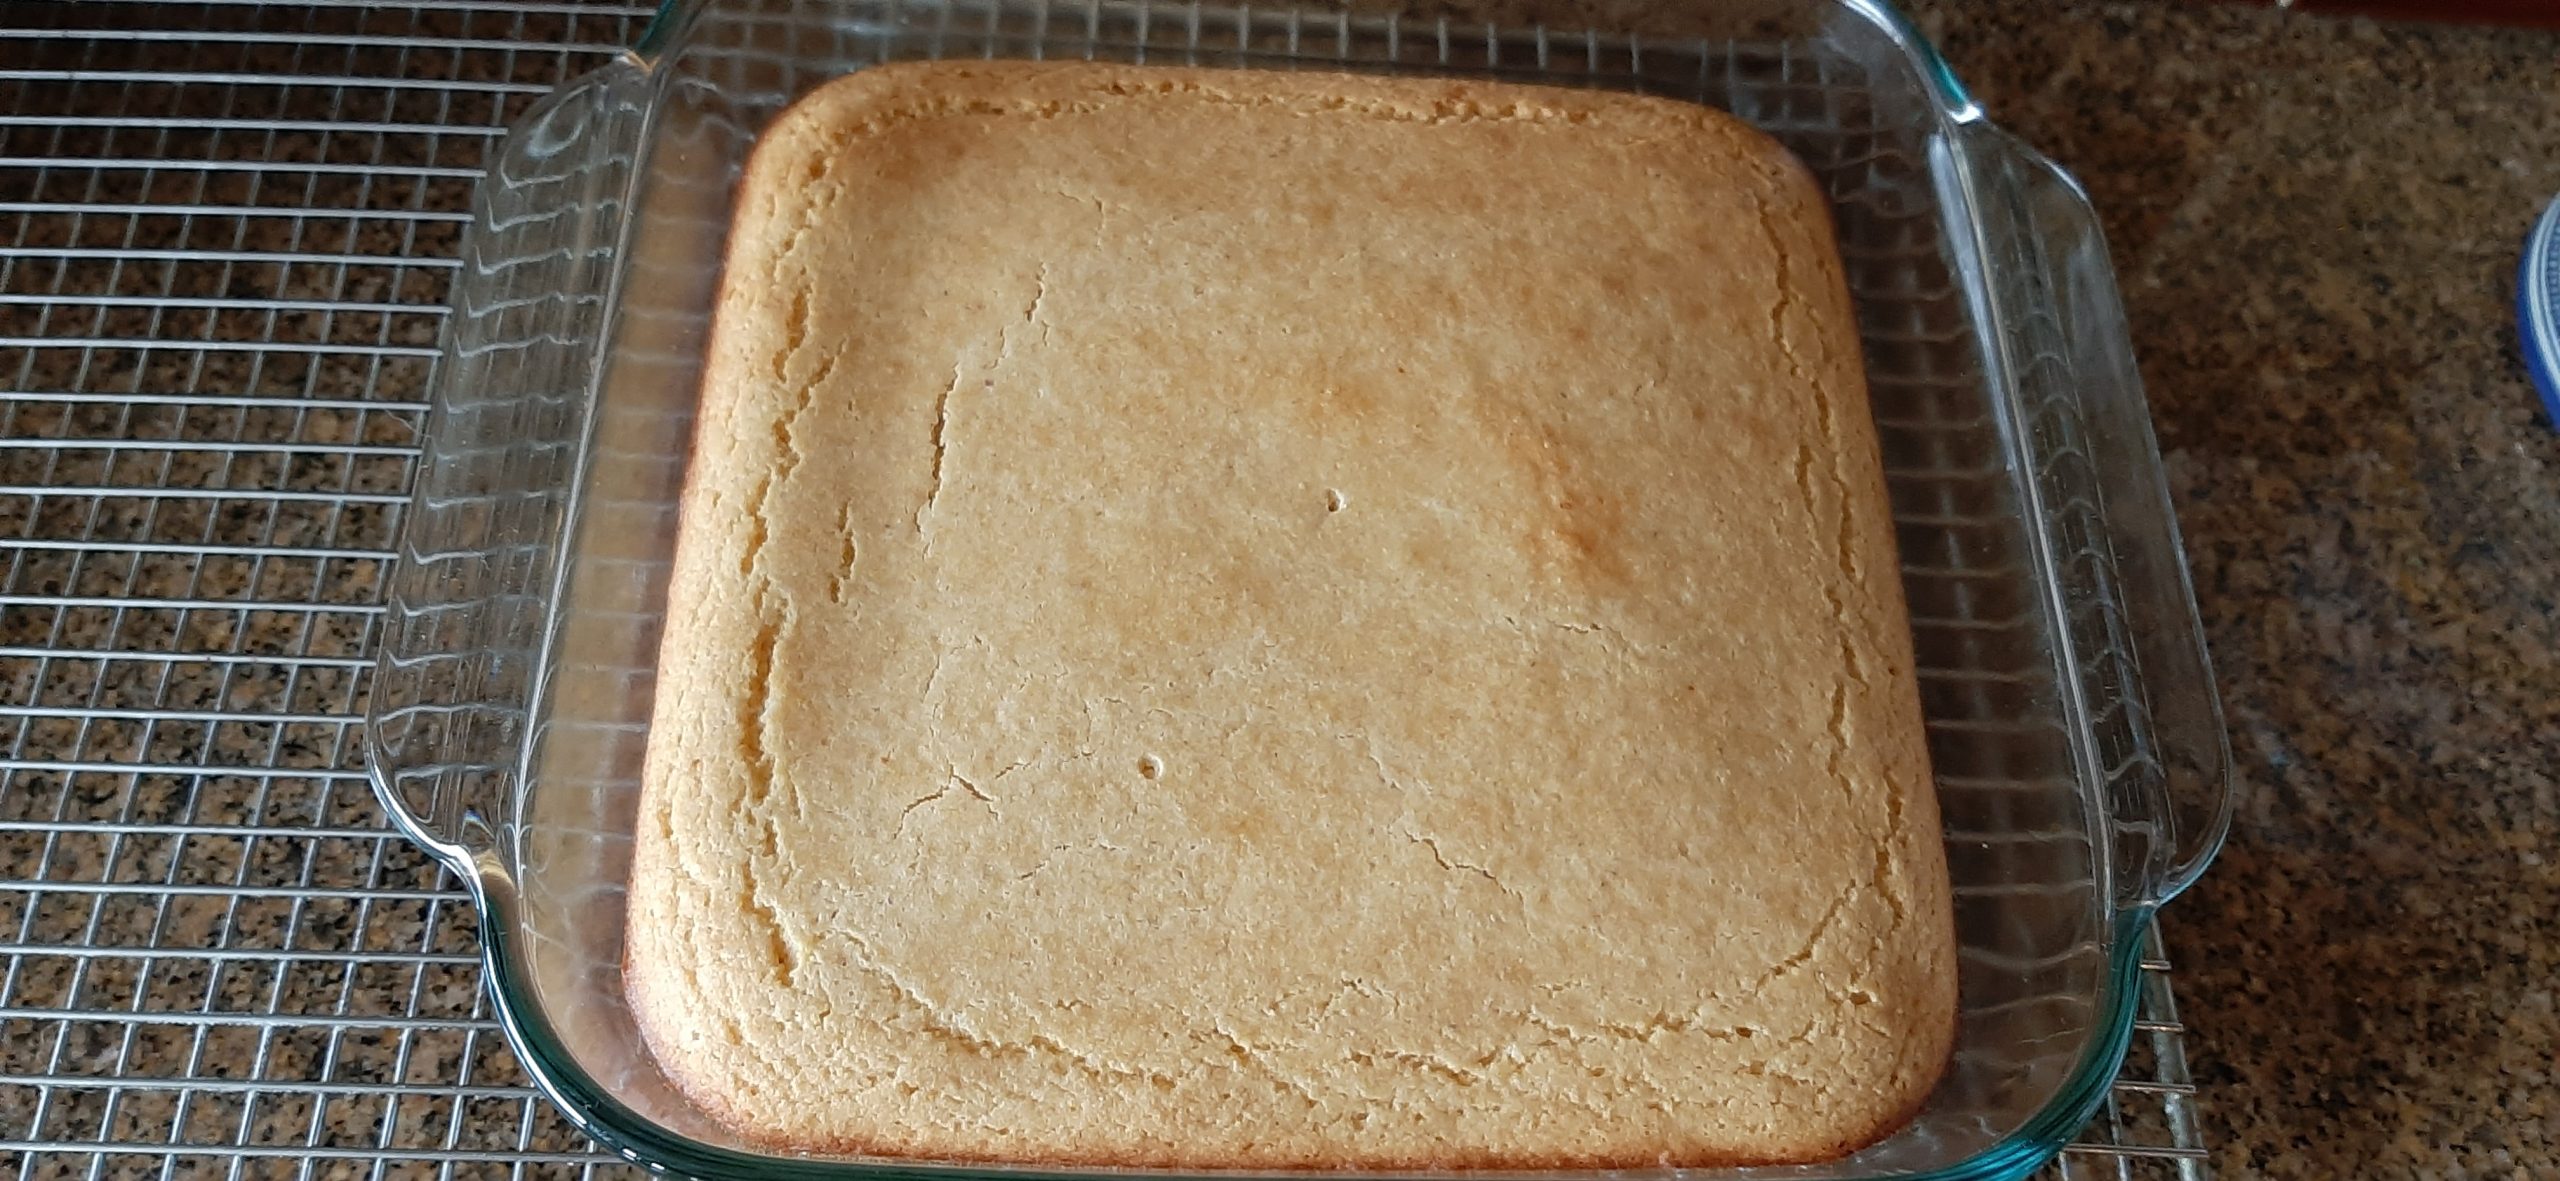
Doesn’t mean I always succeed in staying clear of those breads which have no nutritional value whatsoever. Because, bottom line, I am only human. But I honestly do endeavor to eat bread that is not only pleasantly palatable but would be moderately acceptable to a hard-nosed dietician. (Which BTW, is not an easy feat to accomplish!) So, in this recipe, I am using whole wheat pastry flour in place of all-purpose flour, raw honey rather than processed sugar, and veggie oil instead of butter. (I’m pretty sure a dietician would still frown on me even considering this to be a quasi-healthy cornbread. But there are just some things I do not intend to discuss with anyone who relies on scientific facts rather than how I want to perceive a situation.)
Wait! I sound just like many Americans who disvalue science in favor of what’s easier for them personally. Or believe what some nut case tells them is true. So, perhaps I should take a step backward.
So, in full disclosure, this cornbread is quick and easy to build and ever so tasty. And it is possibly healthier than other cornbread recipes. But it is never going to be considered a health food or better for you than steamed broccoli, spinach, or a naked green salad. (But it’s still really good.)
Peace and love to all.
1 c. fairly finely ground cornmeal
1 c. whole wheat pastry flour
½ tsp. kosher salt
2 tsp. baking powder
1 lg. egg
¾ c. whole milk
¼ c. sour cream
3 T. raw honey
¼ c. veggie oil
Whisk the corn meal, flour, salt, and baking powder together in a large bowl.
In a medium bowl, whisk the egg, milk, sour cream, honey, and oil together.
Pour wet ingredients into the dry ingredients and mix until the batter is lump free.
Pour into a buttered 8×8-inch pan. Bake in a pre-heated 400-degree oven for 25-28 minutes or until a toothpick comes out clean.
Remove from oven and cool on a wire rack. Warm before serving.
Miles had been enjoying the sun with his brother. But when I came in to take their picture, he had to move and then pose for me. Such a darling boy.
The true sun worshiper in the family. Max will follow the sun wherever it happens to appear. Love this little critter.
I often serve leftovers from the previous dinner when I have overachieved on the amount I prepare. (This happens more often than not! We simply can’t eat as much as days of yore.) So, in an effort to change things up a bit, I often add a new and different side dish to stave off gastronomic boredom. And this is the result of wanting a new and exciting addition to thrill and delight our tastebuds as we slurped down the leftover Creamy Chicken Noodle Soup (on site) that I had served the night before.
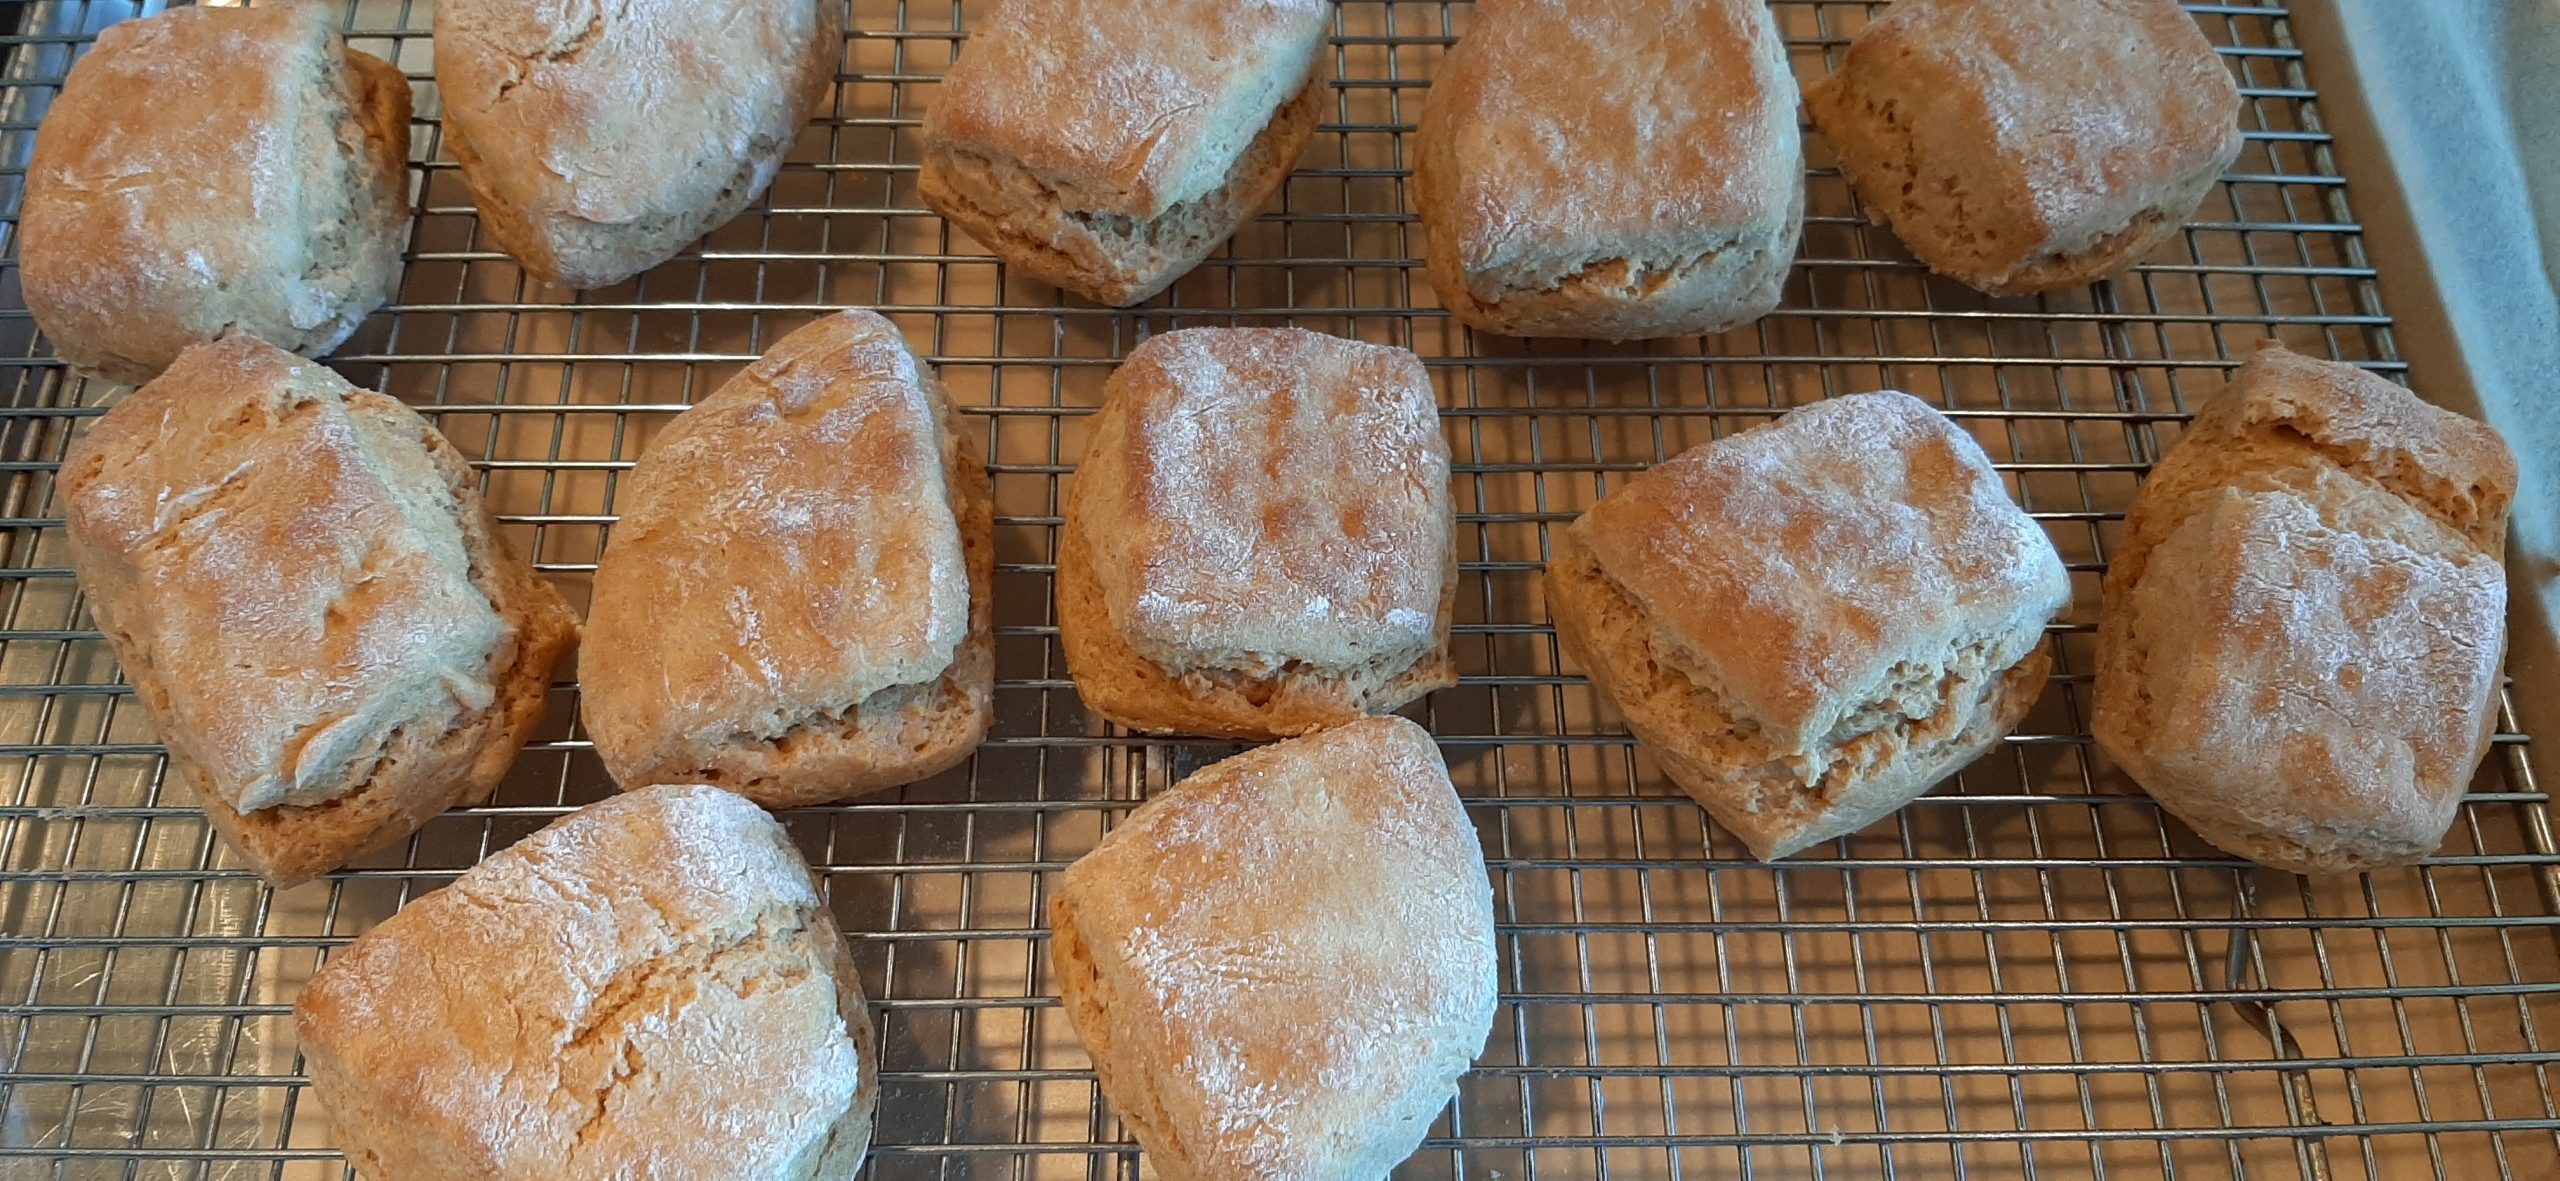
I knew what I wanted was a bread product that leaned towards the nutritious side. Well as much as possible and still taste great and not at all like buttered cardboard! (Believe me, in all my years of trying to bake low calorie, nutritious bread products, I have baked my fair share of edible cardboard. So, I know whereof I speak!) Anyway, I researched several on-line recipes and came up with this recipe. And we both thought the biscuits were wonderful. Full of flavor, tender and moist, and a wonderful base for butter and jam (Mr. C.) and honey (me). And the biscuits had been ever so easy to make.
You will notice that in many of my biscuit, cookie, cake, muffin, and quick bread recipes, my instructions remind you to not overbake whatever it is your baking. I find that one of the mistakes many otherwise excellent cooks make is that they tend to leave certain baked goods in the oven just a few minutes too long. So, a quick reminder for us all.
For tender and moist Biscuits: If you are unsure if a biscuit is done, use an instant read thermometer and remove from the oven when the internal temperature reaches between 205 and 210-degrees. Once out of the oven, immediately transfer to a cooling rack.
For perfectly baked Cookies: Pull the cookie sheet out of the oven when the cookies are just set unless otherwise directed. Underbaking is better than overbaking. And the good folks at Southern Living recommend letting your cookies cool right on the baking pan instead of on a separate cooling rack. The only exception is shortbread cookies. They need to be overbaked just a bit to provide that lovely crunch we all appreciate.
For perfectly moist Cakes and Muffins: When the top of your cake or muffins becomes more golden or darker and starting to pull away from the side of the pan, gently press on the top with your fingers and check to see if the cake or muffin springs back fully. That’s a good sign to reach for your instant read thermometer.
For most cakes the internal temperature should read between 200 and 205-degrees. For muffins, 205-degrees. Just be sure to avoid 212-degrees and beyond, because that’s the temperature that water turns to steam, which means you’ll start losing precious moisture very quickly. And loss of moisture results in a dry or tough consistency in both cakes and muffins.
For moist and tender Quick Breads: Quick breads are perfectly done when the internal temperature hits between 200 and 205-degrees. Most recipes almost always give the baking time rather than the temperature. So, to ensure perfectly baked quick breads, start checking the internal temperature at 20 minutes if the recipe bake time is stated between 20–30 minutes.
OK, that was my quick and dirty lesson on not overbaking some types of baked goods. And do forgive me if I seem to be preaching to the choir. But as a choir director with over 20 years’ experience, preaching to the choir just comes naturally to me. But then I figured that everyone needs a quick reminder occasionally. I know I sure do.
Well, my work is done here for the day. It’s still sunny and warm outside so I thought I might forget about all things kitchen and treat myself to a bit of a read in our courtyard. May you also make the time to treat yourself to whatever it is that brings you pleasure.
I found this on Facebook when I went online this morning. It pretty well sums up my philosophy on life as an older person. So, I thought I would share it with you.
And as always, peace and love to all.
By Mário Raul de Morais Andrade
(Oct 9, 1893 – Feb 25, 1945)
Brazilian poet, novelist, musicologist, art historian and critic, photographer
“I counted my years and found that I have less time to live from here on than I have lived up to now.
I feel like that child who won a packet of sweets: he ate the first with pleasure, but when he realized that there were few left, he began to enjoy them intensely.
I no longer have time for endless meetings where statutes, rules, procedures and internal regulations are discussed, knowing that nothing will be achieved.
I no longer have time to support the absurd people who, despite their chronological age, haven’t grown up.
My time is too short:
I want the essence, my soul is in a hurry.
I don’t have many sweets in the package anymore.
I want to live next to human people, very human, who know how to laugh at their mistakes, and who are not inflated by their triumphs, and who take on their responsibilities.
Thus human dignity is defended and we move towards truth and honesty.
It is the essential that makes life worth living.
I want to surround myself with people who know how to touch hearts, people who have been taught by the hard blows of life to grow with gentle touches of the soul.
Yes, I’m in a hurry, I’m in a hurry to live with the intensity that only maturity can give.
I don’t intend to waste any of the leftover sweets.
I am sure they will be delicious, much more than what I have eaten so far.
My goal is to reach the end satisfied
and at peace with my loved ones
and my conscience.
We have two lives.
And the second begins when you realize you only have one.”
Whole Wheat Buttermilk Biscuits
2¼ c. whole wheat pastry flour, fluffed
1 T. baking powder
1 tsp. baking soda
¾ tsp. kosher salt
4 T. (½ stick) frozen unsalted butter, cut into ½-inch cubes
1 c. cold buttermilk (if you don’t have buttermilk on hand, see recipe below)
Pre-heat the oven to 425-degrees. Line a medium sized baking sheet with parchment paper.
In the bowl of your food processor, mix the pastry flour, baking powder, baking soda, and salt together. Add the cold butter and whirl just until the butter is evenly distributed and the dough resembles coarse meal. Whirl in the buttermilk until just blended. The dough will be quite wet. Refrigerate the dough for 20-30 minutes.
Transfer the dough to a lightly floured countertop or pastry cloth. Knead the dough 4 to 5 times until it comes together, dusting the dough lightly with flour as needed.
Pat the dough gently with your hands into a disc and fold the dough over itself 2 to 3 times. This will help create layers in your biscuits. Then pat the dough into a roughly 1-inch-thick square. Cut the biscuit with a sharp knife that has been dipped in flour. (I got 12 various sized biscuits.)
Transfer the biscuits to the prepared sheet pan leaving about 2-inches apart.
Increase the heat to 450-degrees and place the biscuits in the oven. Bake until a light golden brown, about 10 minutes. Do not overbake. The internal temperature should be about 205-degrees.
Remove from oven and transfer to a wire rack. Biscuits are best served warm slathered with a bit of butter and either honey or jam.
To warm the biscuits, place in microwave on high for about 25 seconds. Store in an airtight container at room temperature.
BUTTERMILK SUBSTITUTE
1 T. white vinegar
milk (I use whole milk)
Pour the vinegar into a one cup liquid measuring container. Add enough milk to make exactly one cup. Gently stir to combine. Allow the mixture to sit for 15 minutes before using. You might see some light curdling, so stir the mixture again just before using. Even if you don’t see a texture change, the acid in the milk will still work its magic in the recipe.
I usually make some type of quick bread before we head out on a trailer trip. Maybe some muffins too. And a couple kinds of cookies to munch on any time a goodie is called for, along with 3 or 4 appetizer spreads for happy hour. And of course, homemade granola. And marinara sauce, meat loaf, etc. etc.
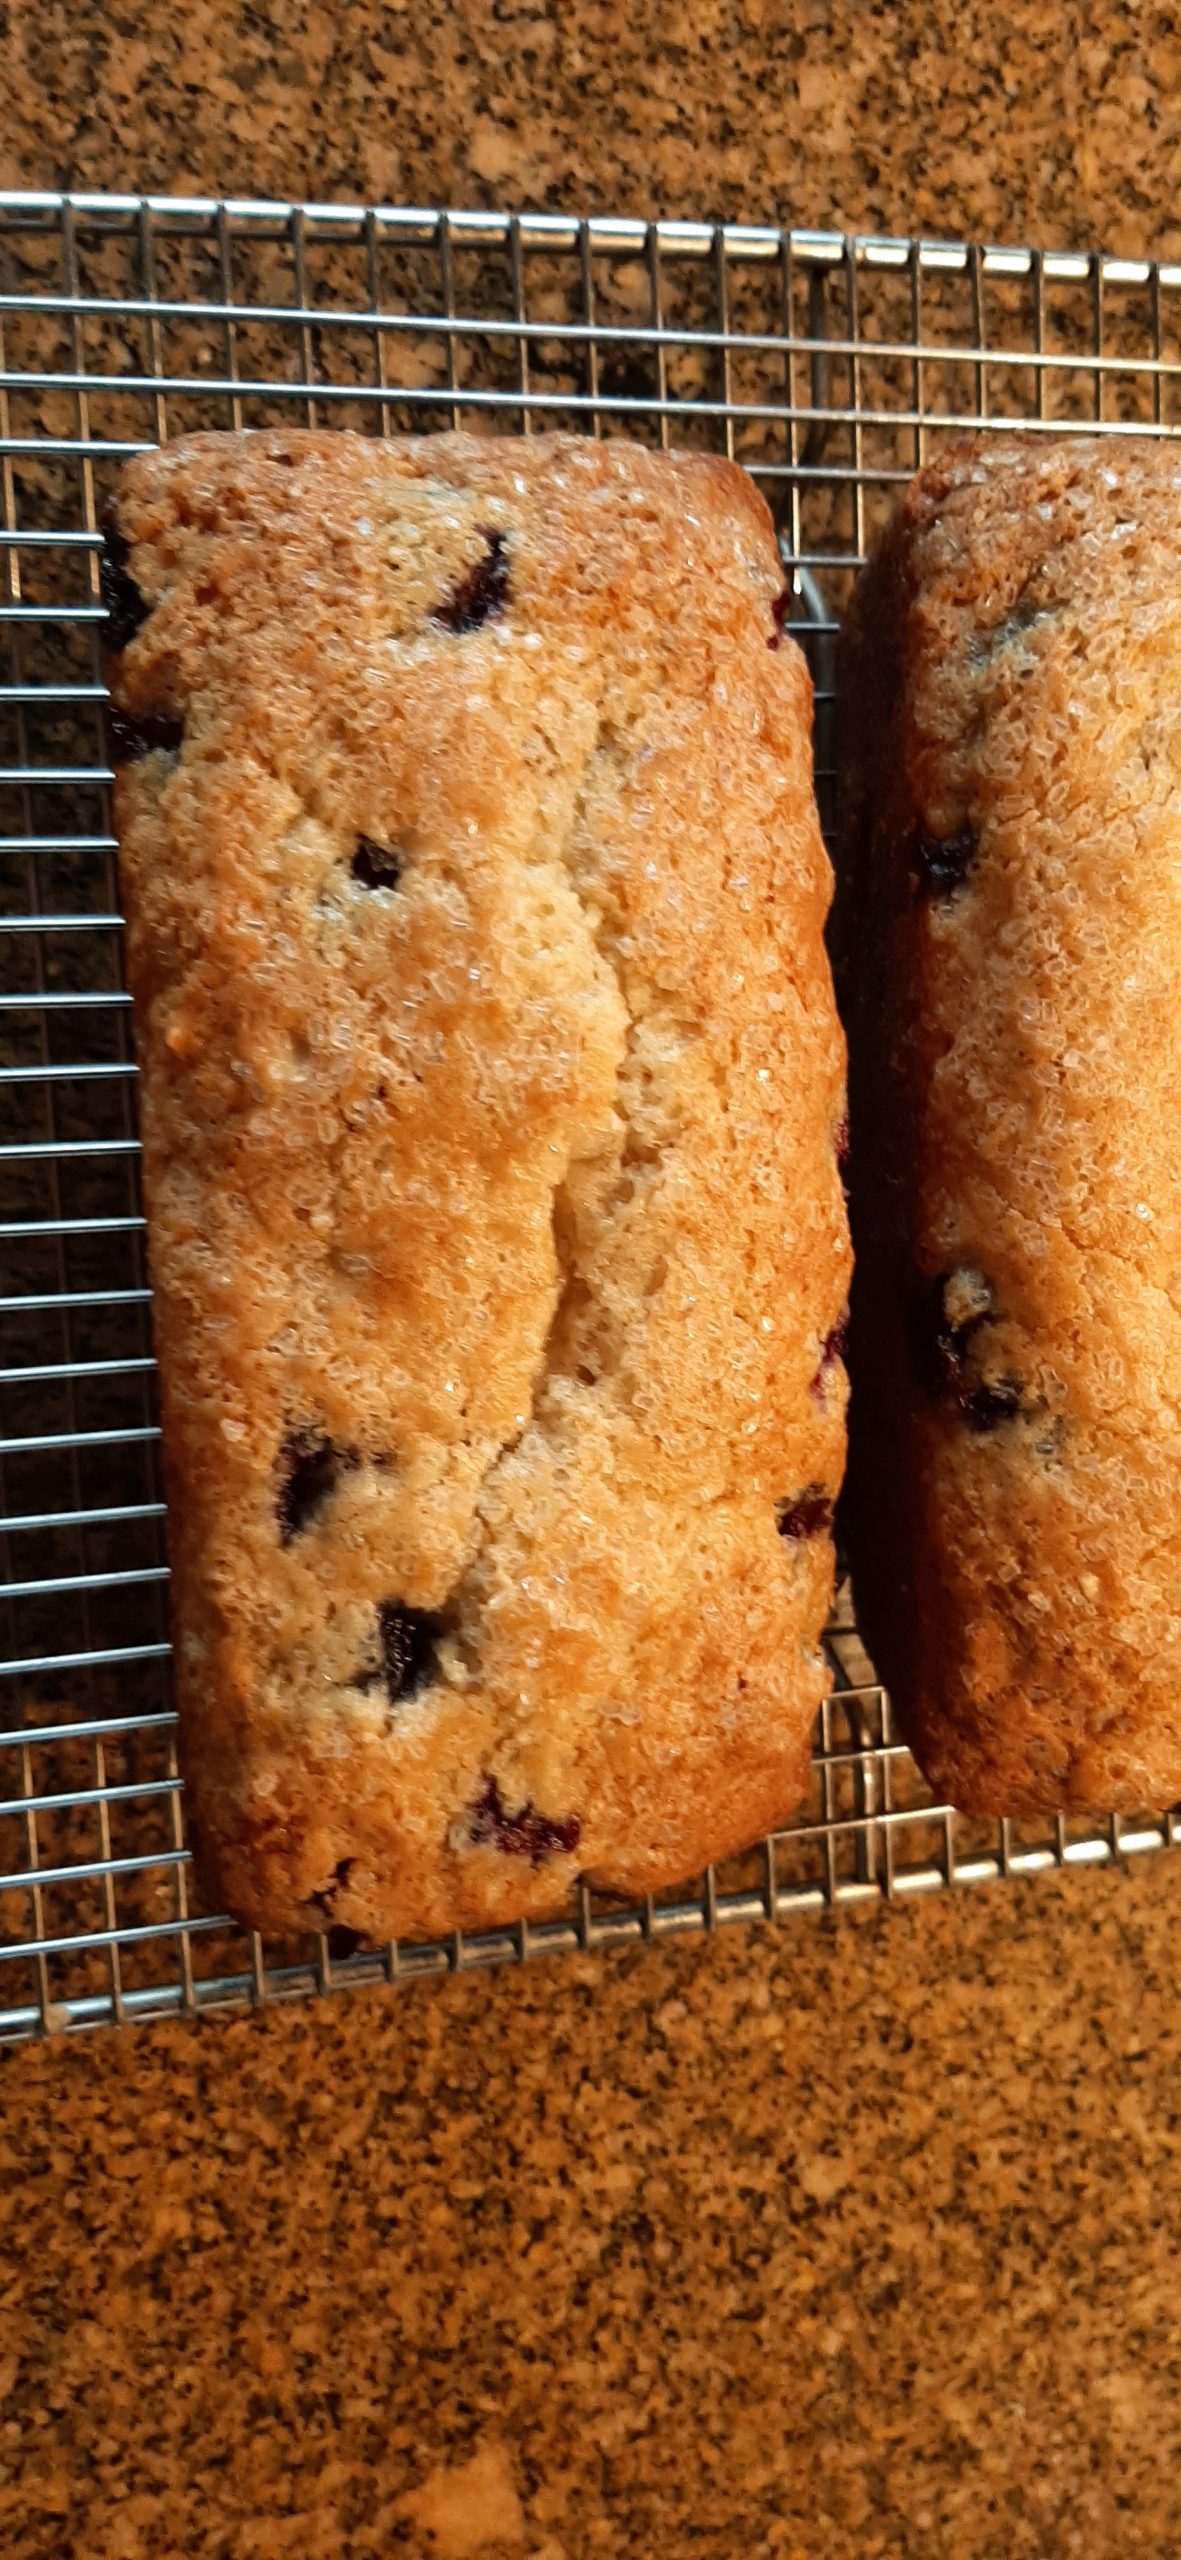
But for our recent month-long adventure, I wanted to change things up a bit. And I decided that blueberry bread would be perfect. So, onto the internet I went in search of the perfect blueberry bread recipe. And I found this recipe on thebestblogrecipes.com. I made a couple of minor changes, but all our thanks for this great recipe go to Shauna and Bailey.
I made two small loaves for the trip. I froze one and kept the other in the trailer’s fridge. And I was amazed at how well the one in the fridge stayed fresh. Of course, I had to ration out thin slices or the first loaf would have been totally consumed within 2 days. This bread is just that good. And I don’t know what made me think to include a bit of almond extract and place sliced almonds on the top along with the coarse sugar to give the bread a tiny bit of crunch. But boy did it work. And this bread had been so stinkin’ easy to build. I didn’t even have to get my mixer dirty.
So, next time you need a yummy treat for either breakfast or coffee breaks, I recommend you give this recipe a try. Easy and quick to prepare, and absolutely delicious.
Well, that’s it for today. Mr. C. and 4 other guys are rehearsing in our living room for an upcoming gig. So, after preparing a sandwich and chips lunch and two peach pies for the guy’s break, my body is telling me that what it needs now more than anything else is a nap. So, I’m going to give my body what it wants. Dynamic and scintillating rhetoric will just have to wait for another recipe preface when I can hopefully keep my mind focused and my eyes open. And my thoughts directed at my writing rather than towards my pillow.
But as always, peace and love to all.
2 c. fresh blueberries, washed and air dried
2 tsp. unbleached all-purpose flour to coat the blueberries
2 c. unbleached all-purpose flour, fluffed
¾ c. granulated sugar
2½ tsp. baking powder
½ tsp. baking soda
½ tsp. kosher salt
2 lg. eggs
½ c. + 2 tsp. whole milk
½ c. vegetable oil
1 tsp. pure vanilla extract
1 tsp. pure almond extract
½ c. sliced almonds
2 tsp. coarse sugar, for sprinkling on top
Lightly spray 1 (9×5-inch) loaf pan or 2 (7½ x 3½-inch) loaf pans with cooking spray. Set pan or pans aside.
In a small mixing bowl, sprinkle the 2 teaspoons of flour on top of the fresh blueberries, and gently stir them together.
In a large mixing bowl whisk the 2 cups of flour, sugar, baking powder, baking soda, and salt together until combined.
In a medium-sized mixing bowl whisk the eggs, milk, veggie oil, vanilla, and almond extract together until all the wet ingredients are thoroughly blended.
Slowly stir the wet ingredients into the dry ingredients. Stir until no flour streaks are visible. Do not over mix. Carefully fold in the blueberries, taking care not to crush the berries while mixing.
Spoon the blueberry batter into the prepared loaf pan or pans. Evenly sprinkle on the sliced almonds. Sprinkle the 2 teaspoons of coarse sugar on top of the bread for garnish.
Bake the single loaf in a pre-heated 350-degree oven for 45 to 50 minutes or until a toothpick inserted comes out clean. Bake the two loaves for 30-35 minutes or until a toothpick inserted comes out clean.
Remove from oven and allow the blueberry bread to rest in the pan or pans for 20 minutes before removing to a cooling rack.
Store in the fridge in an airtight container. Gently warm before serving. Great for breakfast or with your late morning or afternoon coffee or tea.
I love to bake bread because it is so darn forgiving. I mean truly, bread is really, really hard to mess up. In fact, you have to go out of your way to make a bad loaf of bread. Take this bread for example.
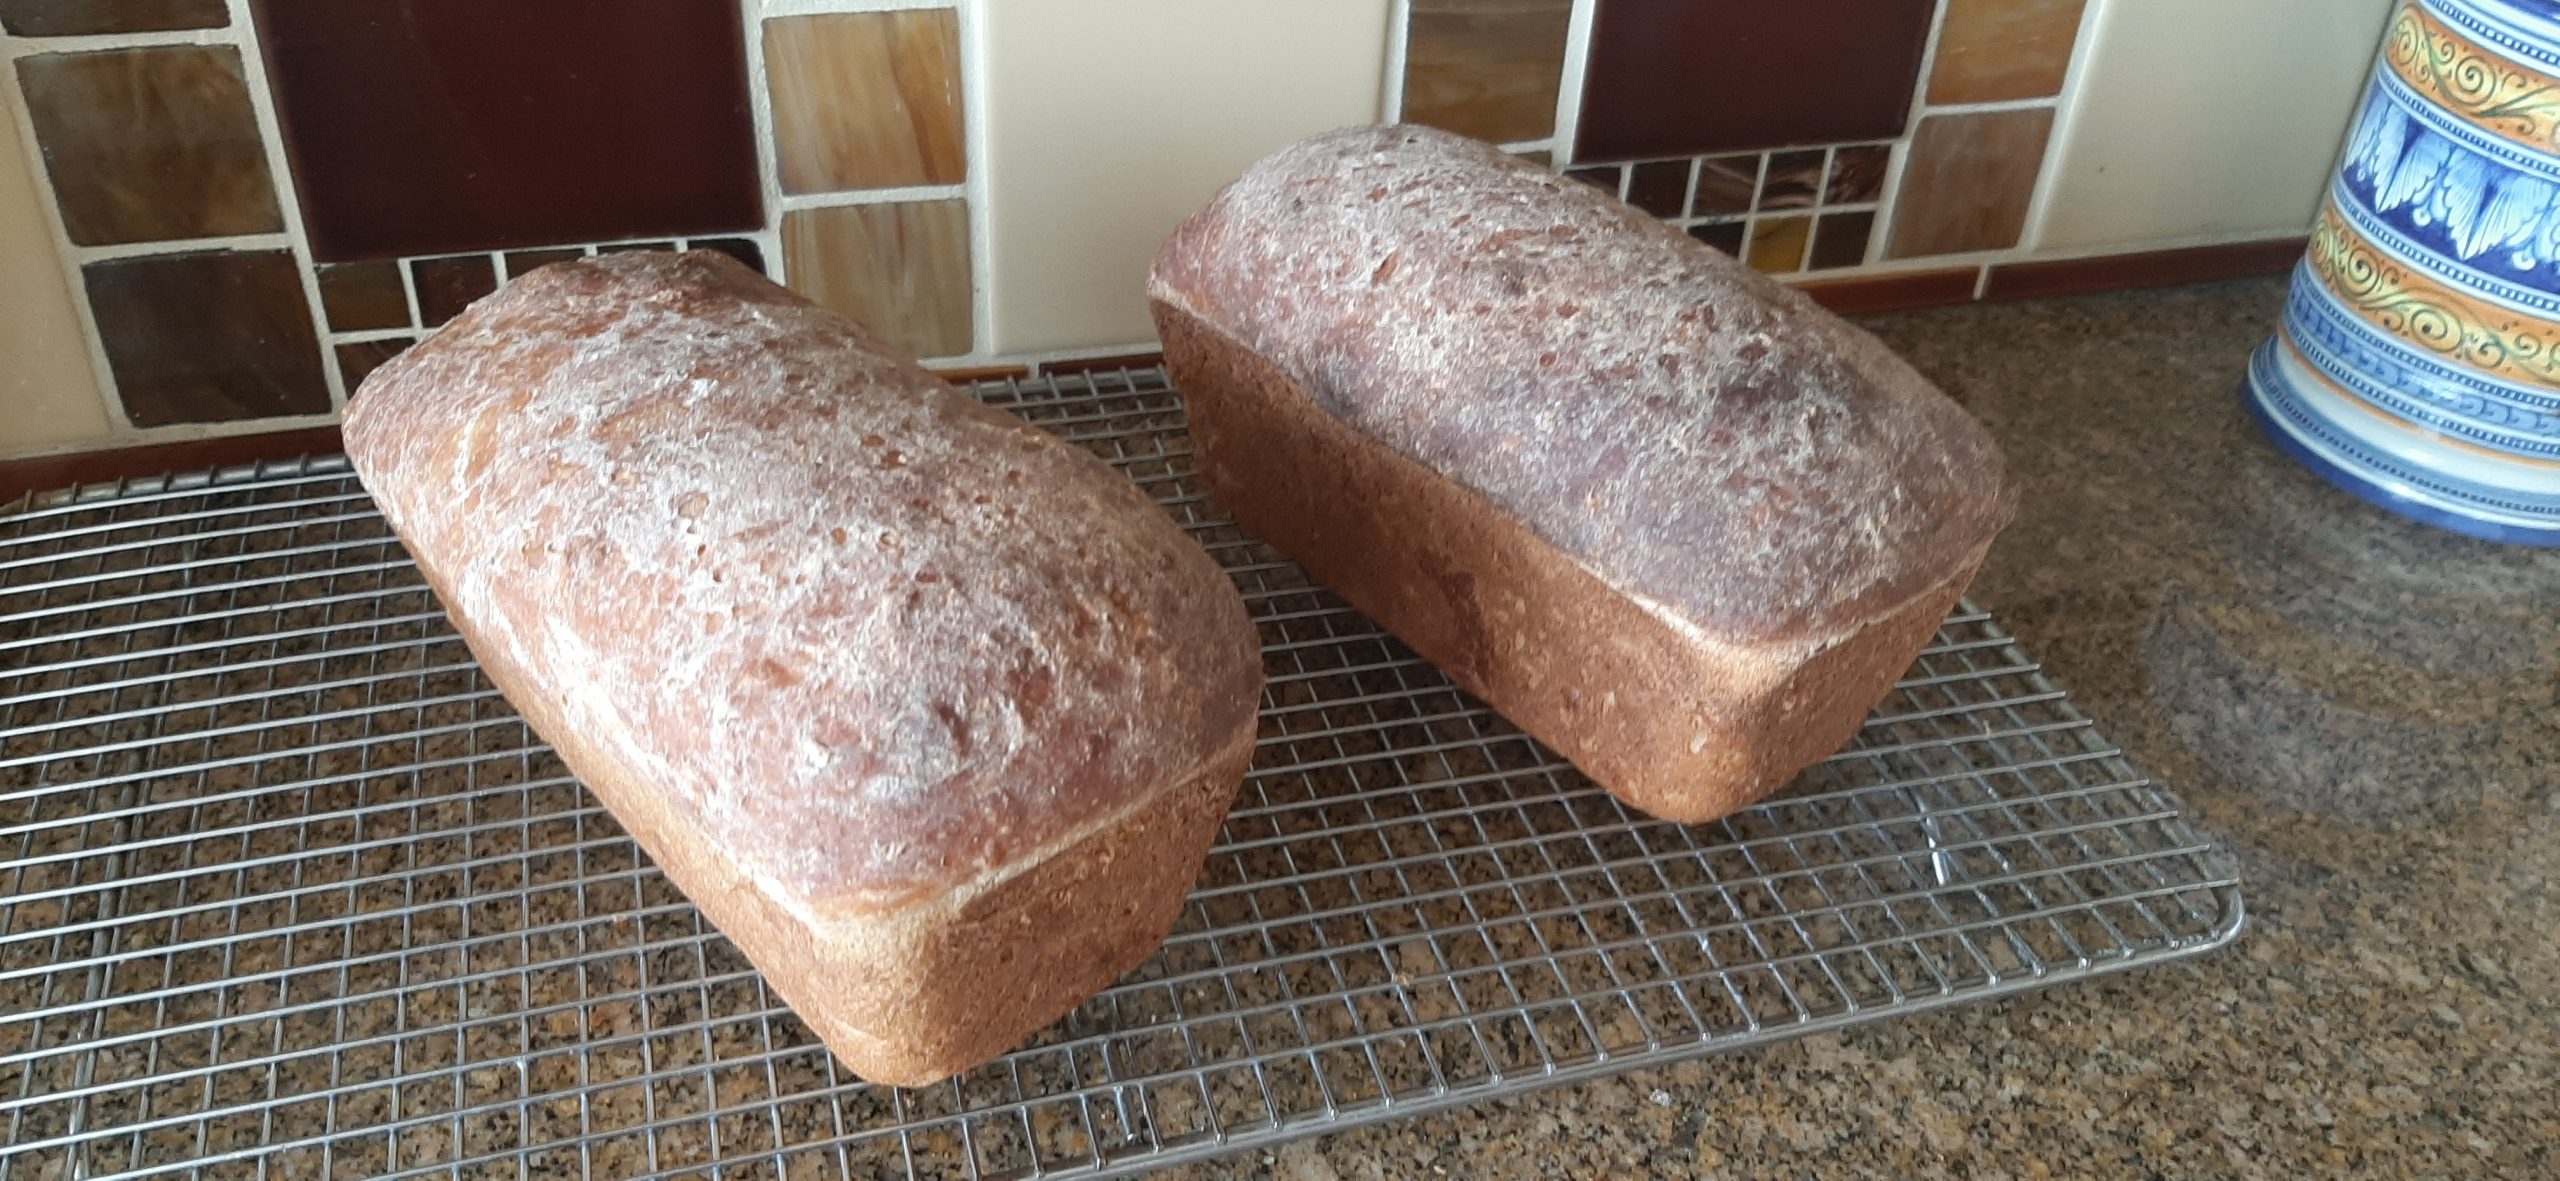
I wanted to explore the wonderful world of oat bread, but I didn’t want to use either some type of oil or butter. So, for my liquid I used whole milk. Of course, there is a bit of fat in whole milk, but not as much as churned butter or oil. I also wanted to use my sourdough starter and whole wheat flour. And of course, since I was thinking healthy, I decided to add a bit of wheat germ to the mix. Why not? And because whole wheat bread almost cries out for a bit of sweetener, I used 3 tablespoons of real maple syrup. And the result – great! Moist and flavorful bread. And I was able to build the dough and shape the bread the day before I needed it.
I often make bread dough ahead, shape it, and place it in the refrigerator overnight. Especially if I have other commitments the next day. Then all I have to do is remove the bread from the fridge the next day, let it sit out on the counter for a couple of hours to come to room temperature and perhaps rise a bit more, then bake it off. And the prep work from the day before, just a fleeting memory. And fresh out of the oven homemade bread on the day it’s needed.
Now I know some of you are new to bread baking. If that’s the case, I recommend you go to my post entitled Bread Baking 101. It is full of information and step-by-step instructions. And it might even be of help!
And for those of you who build bread on a regular basis, 2 thumbs up! You are doing the right thing. As you already know, homemade bread is easy and inexpensive to build, contains no ingredients even a person with a PhD in linguistics can pronounce, makes your entire home smell wonderful as it bakes, and tastes fantastic. What more could anyone possibly ask from the 4 basic ingredients in bread – flour, water, yeast, and salt? Bread truly is the “staff of life”! And found in virtually every society. So, I plan to keep “society” with bread for the rest of my life. And make it from scratch as much as possible.
As always, peace, love, and understanding to all.
1 c. old-fashioned rolled oats
½ c. warm water
¾ c. sourdough starter (fed or discard)
1½ tsp. active dry yeast
1 c. whole milk
3 T. maple syrup
1½ tsp. kosher salt
¾ c. whole wheat flour
2 T. wheat germ or wheat bran, opt. (wheat germ is healthier, but I use both)
2½ c. bread flour, more or less
veggie oil
cooking spray, for greasing the loaf pan or pans
Instructions:
Combine the rolled oats and warm water. Set aside.
In the bowl of your stand mixer, combine the sourdough starter, active dry yeast, whole milk, and maple syrup. Let sit for 5 minutes.
Then add the oat mixture, salt, whole wheat flour, wheat germ, and 2 cups of the bread flour.
Using the bread hook, mix and knead the dough until the dough is fairly sticky and part of the dough adheres to the bottom of the mixing bowl. Add additional flour as needed.
Pour a bit of oil around the dough, and using a stiff rubber spatula and your hands, round the dough into an evenly greased ball. Cover with plastic wrap and allow to rise for 1½-2 hours or until doubled in size. Punch down the dough.
Grease 1 (9×5-inch) loaf pan or 2 (7½ x 3½-inch) loaf pans with cooking spray. (Divide the dough in half if you are using smaller pans.) Shape the dough, place in pan(s), cover with plastic wrap (I grease the plastic wrap before placing on the loaf or loaves), and place in refrigerator overnight.
Remove from fridge and place on counter for 1-2 hours or until the dough is about ½ inch over the top of the pan or pans.
Bake in a pre-heated 400-degree oven for 35-40 minutes for a single loaf. (25-30 minutes for 2 loaves). If making a single loaf, check after about 25 minutes to make sure the top is not getting too brown. If the top is already brown, place a piece of aluminum foil over the top. Continue baking until the internal temperature of the bread reaches at least 195-degrees.
Remove from oven and let cool for about 10 minutes before removing from pan or pans. Allow the loaf or loaves to cool completely on a wire rack before slicing.
Store in an airtight container at room temperature.
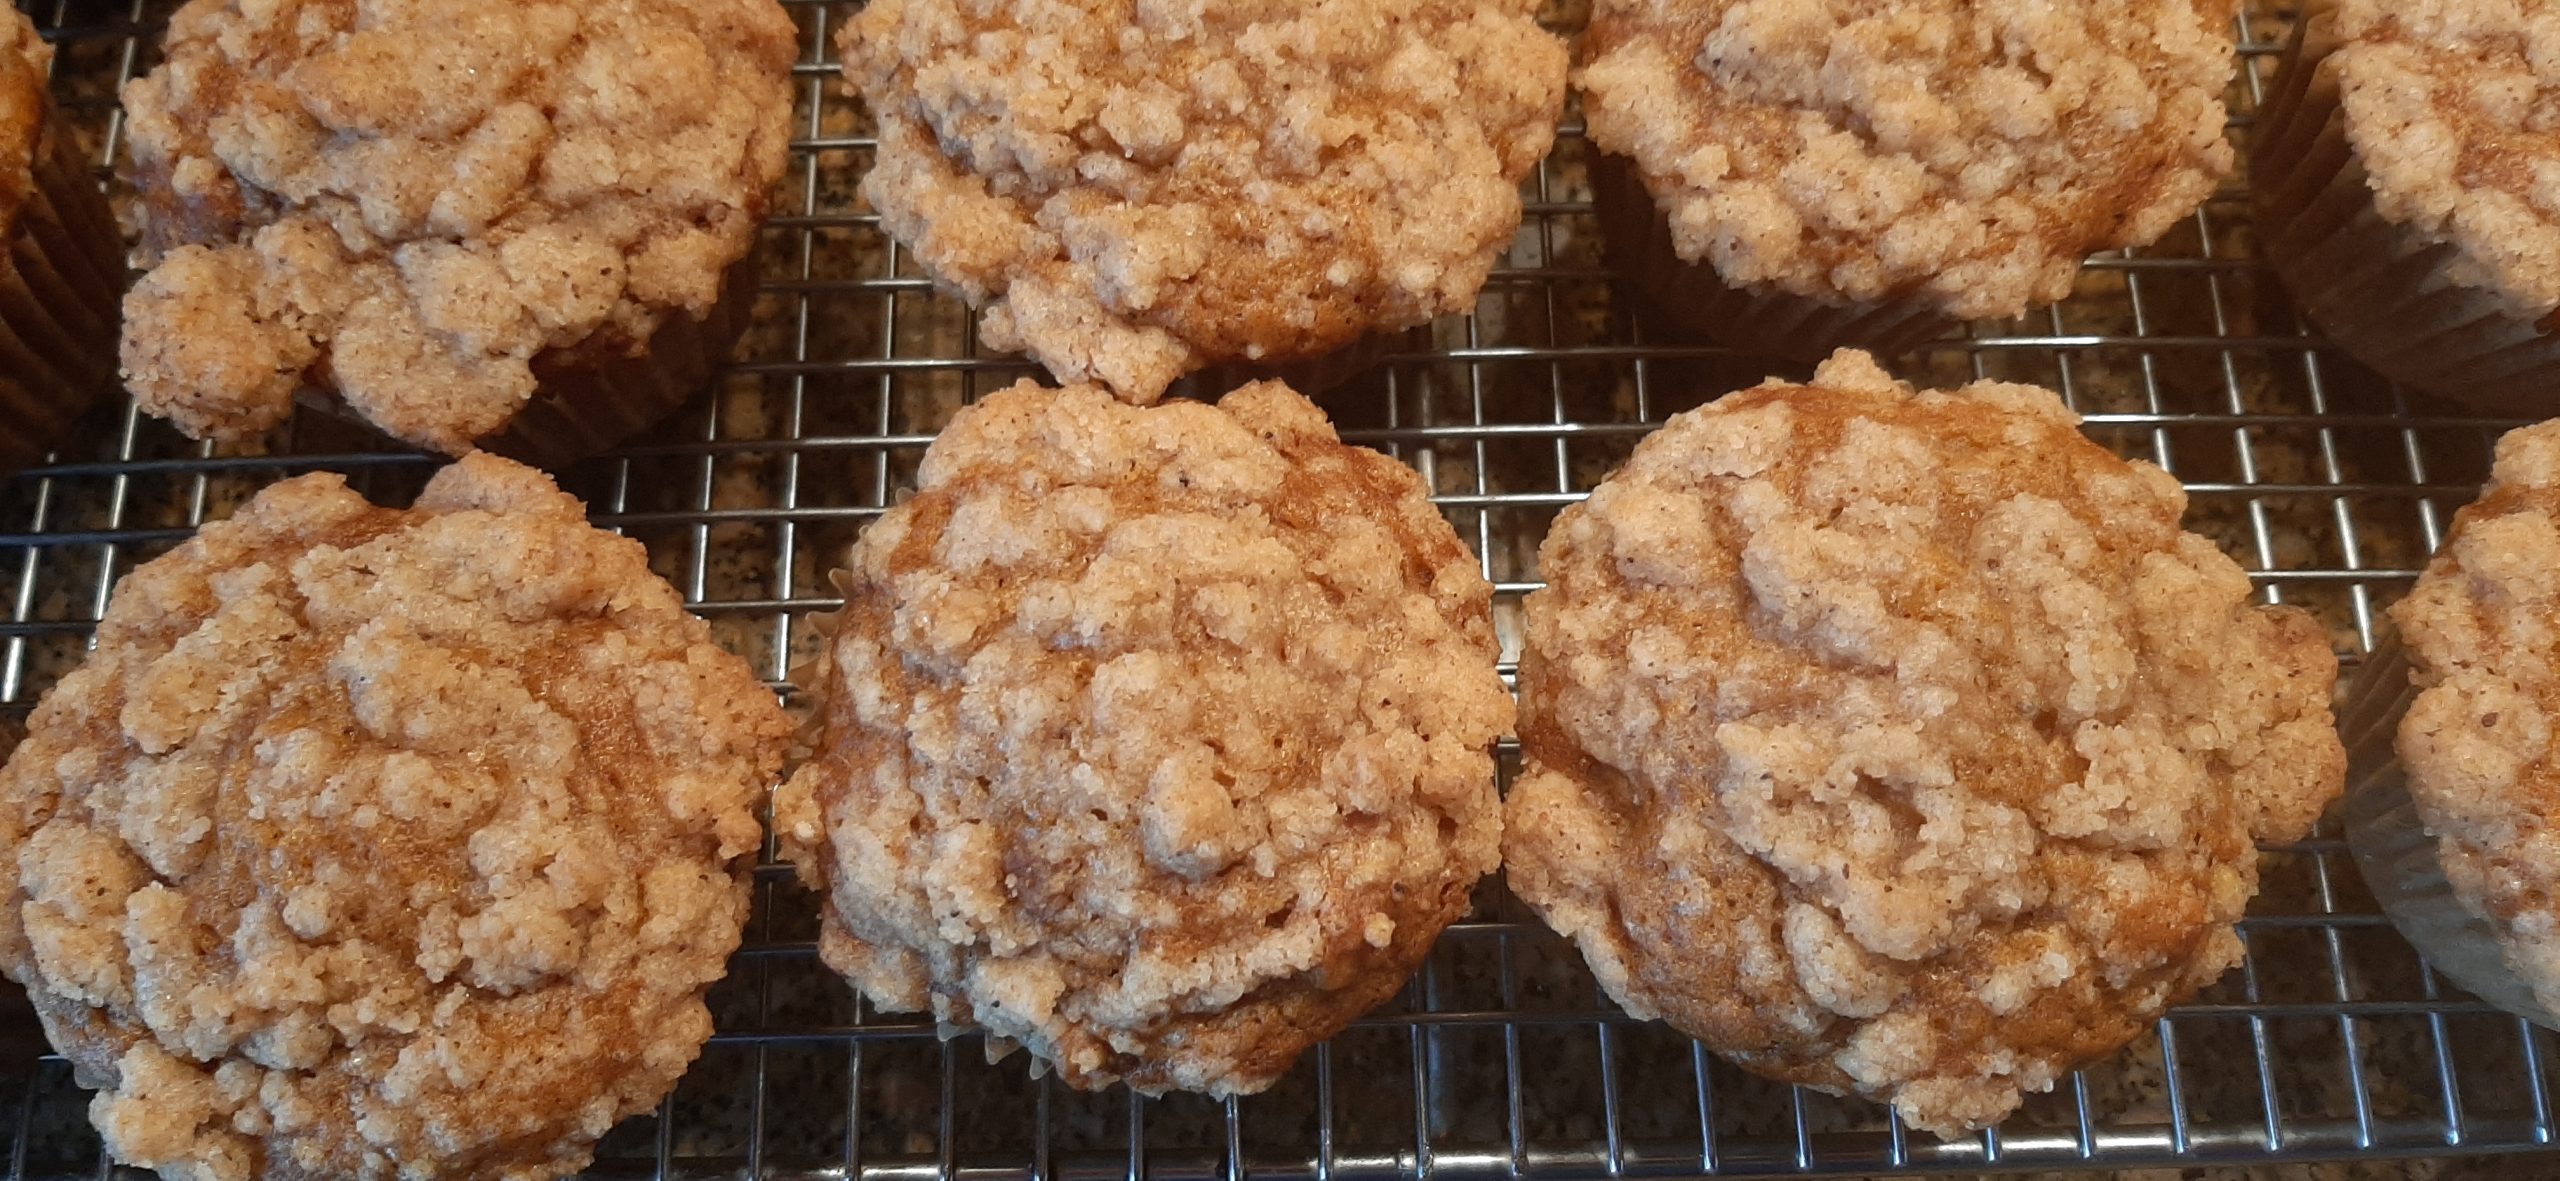
These muffins came about because I made Curried Pumpkin and Peanut Soup (recipe on this site) for dinner the other evening. What is the connection, you might wonder? Well, the only pumpkin I had in the pantry at the time was a large (29-oz.) can. And all I needed for the soup was two cups. That left me with a surplus of about a cup and quarter of pumpkin. And knowing myself as well as I do, unless I did something with that tiny bit of pumpkin right away, it would undoubtedly reside in a small container in our freezer until which time I decided the freezer needed cleaning out. Then I’m reasonably sure I would throw the pumpkin out just on general principle. So, I’m sure as you can clearly understand why I needed to do something with the extra pumpkin right away. And what better use of pumpkin than in a pie, or bread, or muffins.
So, never having worked up a pumpkin muffin recipe, I decided it was jolly well about time! And the recipe you find below is what I came up with.
And of course, because I have a propensity towards gilding a lily, I figured a crunchy crumble topped muffin would be preferable to just a regular, run of the mill unadorned muffin. And guess what? I was right! Because this recipe makes for a wonderful, tasty treat.
Now I am not going to fool you into thinking that this is a healthy treat. Because you can find hundreds of healthier ways to make a pumpkin muffin. But, if you are like us, we don’t eat muffins very often. So, when we do, we want to go first cabin. (So to speak.) And if this isn’t a “first cabin” muffin, then I never learned to drive when I was 12. And I did learn to drive when I was 12! On my uncle and aunt’s farm in Nebraska. On the narrow lanes that accessed various fields of corn in my parent’s brand new 1956 Ford station wagon. And because I couldn’t go very fast, I couldn’t have hurt myself or the car even if I had tried. The 8-foot stalks of corn were obviously at risk, however. But somehow, I managed to keep the car in the middle of the lanes. And boy oh boy was that fun. I still remember that exhilarating experience. And I still can’t begin to believe my parents actually let me drive the car all by myself. Now, would I have let my own children do anything like that at 12 years old? Heck no. But I’m still glad that my parents were crazy enough to put their trust in me.
So, if you too want to bake a muffin that is sure to please anyone who is lucky enough to sample your largesse, then may I suggest you give this recipe a try. And the crumble part, it would be perfect for just about any type of muffin. Sure, it adds unnecessary calories to any muffin. But hey, life’s short. We need to treat ourselves periodically. So, I say – go for it!
Peace and love to all.
Crumble Topping recipe:
½ c. unbleached all-purpose flour
¼ c. granulated sugar
¼ c. brown sugar
pinch kosher salt
½ tsp. ground cinnamon
4 T. (½ stick) unsalted butter, slightly melted
Combine the flour, granulated sugar, brown sugar, salt, and cinnamon in a small mixing bowl. Slowly drizzle the butter into the bowl while stirring the mixture with a fork until crumbles form. Do not over-mix. (You want chunks of dough.)
Store in the refrigerator until ready to use. (It will harden.) Then, evenly drop bits of the mixture across muffins just before plopping the muffins into the oven.
Muffin Batter recipe:
1⅔ c. unbleached all-purpose flour, fluffed
½ c. granulated sugar
½ c. light brown sugar
1 tsp. baking soda
1½ tsp. ground cinnamon
slightly rounded ½ tsp. ground ginger
slightly rounded ¼ tsp. ground nutmeg or freshly grated nutmeg
½ tsp. kosher salt
¾ c. chopped walnuts
2 lg. eggs
½ c. vegetable or canola oil
1¼ c. canned pumpkin
¼ c. whole milk
Line a muffin tin with muffin liners.
In a large bowl mix the flour, granulated sugar, brown sugar, baking soda, cinnamon, ginger, nutmeg, and salt together. (I do this with my right hand making sure all the brown sugar lumps are broken down and evenly distributed.) Then stir in the chopped walnut pieces.
In a medium bowl, whisk the eggs, oil, pumpkin, and milk together until well blended.
Pour the pumpkin mixture into the flour mixture and mix gently just until combined. Do not overmix.
Using a #16 levered (scant ¼ cup) scoop, plop the pumpkin mixture into the paper liners filling them a little over ¾ full. Just before baking, sprinkle evenly with crumble mixture.
Bake in a pre-heated 375-degree oven for about 20 minutes or until a toothpick inserted into the center of a muffin comes out clean.
Remove from oven and allow to cool for 5 minutes in the pan, then transfer to a wire rack to cool completely.
The muffins will stay moist for up to 5 days. Keep them in the fridge in an airtight container. Bring them to room temperature before serving. The muffins can also be frozen for up to 2 months. Makes 16 muffins.