Category Archives: BREAD, ROLL, AND MUFFIN RECIPES

ITALIAN FLATBREAD

OLYMPUS DIGITAL CAMERA

OK, so as you know, I love all things bread. And in Italy, the bread is heavenly. Every meal begins with a big old basket of bread. Butter is rarely served. (It’s really only served when a crazy from the States or Canada asks for it. And that does not include me, let me assure you.)

The bread in Italy is always fresh, usually chewy, and always irresistible. But of all the bread I ate while recently in Italy, the best was in a very small ristorante in Francavilla Al Mare (near Ortona, on the east coast of Italy, slightly north and east of Rome.) The following recipe is as close as I can get to that perfect bread without owning a bread oven. (That’s a broad hint Mr. C.) But to completely set the stage for this recipe, I must tell you the whole story of one absolutely perfect meal we experienced while in the Italian region of Abruzzo.

We arrived at our destination (the Setteventi B&B – 40 Euros a night) after a leisurely drive along the Adriatic from our previous night’s stay in Vieste. The seaside town of Vieste is on the beautiful Gargano Peninsula which is lovingly referred to as the spur of the Italian boot. Not as many tourists from America visit this incredible part of Italy, which in my opinion is a real mistake. The people are charming and the terrain and food incredible. But I digress.

We checked into our room at the B&B (a very modern home) and asked the manager where we could eat dinner that evening since our B&B was on a semi-country road on the hill above the main part of town and we really didn’t want to drive any distance for dinner. She asked us if we enjoyed seafood. We said yes. She told us the ristorante just across the street from the B&B was wonderful. Works for us.

Since it was late afternoon and we had been in our car all day, we decided to take a walk and explore our environs. So off we went to explore. We quickly realized that zoning must not be an issue in Italy, because in less than a km, we walked by individual villas, multi-family residences, vineyards (people actually picking grapes that had grown along an overhead trellis), 2 working wineries (saw grapes being crushed), our B&B, and a small elegant 7 table ristorante that provided us with one of our most cherished dining experiences ever.

But first let me continue setting the stage for this amazing meal. Our B&B hostess had told us the restaurant was right across the street, or at least that is what we had gathered from her pretty good English. So at 7:30 we headed out the door of the B&B (actually at the back of the building) and walked up the driveway to the road. We had not really seen any evidence of a restaurant when we had gone out for our afternoon walk, except for a small graveled area reserved for restaurant guests to park. We just assumed that in the evening the restaurant entrance would be quite evident. Well it was not. The building we thought housed the restaurant really just looked like a three story villa. Luckily a gentleman came out of a nearby residence and we asked him for the location of the restaurant entrance. He indicated that he really didn’t know how to get in except to ring the buzzer and wait. Well he rang the unnamed buzzer alright, along with the other two that were labeled with people’s names. Great! Your first night in town and you become your own worst nightmare, a pain in the — tourist! But luckily, as soon as the un-labeled buzzer was pushed the garage gate opened and we were admitted. The restaurant owner came to greet us from the side entrance path and we were escorted down into the restaurant. Even though the ristorante didn’t officially open until 8:00pm, we were made to feel like honored guests. (Actually when we left the restaurant, the side gate was open and the small unassuming name plate of the restaurant (L’Angolino sul mare) was dimly lit making it appear much more like a restaurant entrance than just a lighted path to the ground floor apartment. Well of course it looked different. The restaurant was actually open when we left. Silly Americans!) But back to our amazing dining experience….

Once we sat down at our table the fun began in earnest. As in many Italian restaurants, a little something complimentary is provided as an appetizer or a small glass of lemoncello is offered after the meal. But at this restaurant, they raised “complimentary” to an art form. At L’Angolino sul mare, our first complimentary item was a little nibble in the form of a gorgeous and tasty mini slider bun filled with perfectly cooked shrimp in a delicate sauce. Just large enough for 2 small bites. Along with this came a complimentary glass of Prosecco, along with a basket of flatbread (thin with a very crunchy top crust) and pieces of bread studded with black olives. After that we ordered our primi and secondi. (We usually shared our first and second courses.) For our primi we chose Carbanara de Mare Al Lemone (small pieces of shellfish in a light lemon cream sauce with pasta). OMG – amazing. For our second course we ordered Misti al Forno with Creamy Potato (perfectly prepared salmon, tuna, shrimp, scallops, sardine, calamari, and white fish, with a small ultra creamy potato cake on the side). Again, absolute perfection. We also ordered a lovely bottle of the local wine Trebbiano d’Abruzzo to go along with our meal.

As on many other Italian menus, the dolce (sweet) offerings included cheesecake. We had resisted cheesecake until this evening, but when the cheesecake was presented as “della casa”, we ordered one serving to share. But before our cheesecake arrived, we were each brought a complimentary dolce. The five little bite sized sweets were served on a raised thin rectangular clear glass tray with indentations for each individual item. The items included a creamy chocolate nut ball rolled in cocoa, a small chocolate mousse topped with a tiny macaroon square, a dark chocolate peanut ball, a tiny green meringue filled with lemon cream, and a perfectly candied whole almond. Fantastic presentation and each bite a culinary miracle.

Then we were served our cheesecake in a bowl. The cheesecake was about the consistency of Zabaglione and of the most delicate cream cheese (probably part Mascarpone) flavor imaginable; lightly sprinkled with slightly sweet dried bread crumbs and tender dried cherries. As each of us spooned up a bite of this delicious mixture we practically moaned out loud. Absolutely too delicious to be true.

And last but not least, we were brought a complimentary aperitif sized glass of Passito, a delightful sweet dessert late harvest wine made from grapes that have been dried on straw. This deep yellow-gold hued wine tasted of honey, sweet vanilla, apricot nectar, and fragrant flowers. (Actually Passito is very reminiscent of Vin Santo, another sweet dessert wine we love traditional to Tuscany.)

Of all the fantastic meals we shared in Italy, this meal I truly hope will remain in my memory until I take my last breath. And all for 65 (including tip) Euros. When we reached our room Mr. C looked and me, and with a big happy grin on his face said, “If I complain about the visa bill when we get home, just remind me of C. da Setteventi #14 (our B&B) and the ristorante across the street!”

Buon Appetito!

  • 1 1/3 c. warm water
  • 1 T. active dry yeast
  • 2 ½ tsp. kosher salt, divided
  • 3 T. extra virgin olive oil, plus more as needed
  • 3 1/2 c. all-purpose flour

Combine the warm water, yeast, and 2 teaspoons salt in a mixer bowl and let proof for about 5 minutes. Add olive oil and enough flour to make a soft dough. Let rise covered with plastic wrap until doubled, about an hour. Punch down and spread out on an olive oil greased 13×17 (or larger) pan. (Pour enough olive oil on the pan to make a rather slick surface. In other words, don’t be stingy. You are not lightly greasing the pan!) Add dough, then turn dough over and spread out with your hands. (Use some of that nice olive oil on the pan to grease your fingers so they don’t stick to the dough.) The dough should look more like you are making a thick pizza crust than bread. Cover again with plastic wrap and let rise until the dough is soft and puffy, about 45 minutes. Using a pastry brush, gently slather top of dough with olive oil and sprinkle with remaining ½ teaspoon salt.

Bake in a 20 minute pre-heated 500 degree oven (reduce to 450 when you place the dough in the oven) on top of a pizza baking stone, if you own one. Bake for about 10 minutes, then, if you have the option, turn on the convection setting and bake until golden brown, about 5 minutes more. Total baking time should be about 15 minutes.

Serve the flatbread warm or at room temperature. No butter or additional olive oil required. Great served with antipasto or any of your favorite pasta dishes.  Also great served with soup.

And yes I wish the top was as crusty and crunchy as the bread I had at the ristorante in Francavilla Al Mare, Italy, but until I get my own bread/pizza oven, this version will have to do. At least the flavor is as I remember. You gotta give me credit for that!


BREAD BAKING 101

OLYMPUS DIGITAL CAMERAOLYMPUS DIGITAL CAMERA

The first thing you need to know about baking yeast bread is that it is really easy. It does not require a chemistry degree or a diploma from a fancy cooking school. Honest! It just takes time and a few simple, inexpensive ingredients. In fact, I think yeast bread is easier to bake than cake or cookies because it doesn’t contain baking soda or baking powder.

With any type of recipe that requires baking powder or baking soda, you can’t mess around with the ingredients as much as you can when you are using yeast as your leavening agent.  Baking soda (sodium bicarbonate) is alkaline in nature, and when combined with an acid and a liquid like buttermilk, for example, it creates carbon dioxide bubbles, giving rise to the dough. Baking powder, which is basically a blend of an acid like sodium acid pyrophosphate and an alkali (sodium bicarbonate – baking soda), produces the same chemical reaction when added to a liquid. Again, carbon dioxide is the byproduct. The interesting part about baking soda when mixed with an acid liquid, and baking powder when mixed with any liquid, is that in both cases, gases begin to be released immediately. (No waiting time required.) And in the case of double-acting baking powder (which is mostly what you find in your average grocery store), it releases leavening gases on contact with moisture and again during the baking process. A double whammy of leavening action! When a recipe calls for both baking powder and baking soda, the baking powder does most of the leavening. The baking soda is mainly added to neutralize some of the acid and to help ensure a tender crumb. When using baking soda or baking powder, you have to use ingredients in a fairly exact proportion.

Yeast on the other hand, is a living organism that really likes to eat. Active dry yeast (a living microscopic fungus) is activated by giving it a nice warm bath and then something yummy to eat.  Yeast works as the leavening agent in bread dough by eating the sugars (sucrose and fructose) or by converting the starch in flour into sugar. The byproduct of all this sugar being gobbled is CO2. When CO2 is released it is trapped in the bread dough’s elastic web of gluten, in much the same way air is trapped when a balloon is inflated. And although yeasty beasties are hungry little cuties, they can only eat so fast! Thus the time it takes for yeast bread to rise. But unlike other leavening agents, yeasty beasties won’t stop eating until they have metabolized every possible bit of sugar available. So when you are baking bread, if you add a little extra ingredient here and there like extra oil, some dried onion or an herb or two, or need a little more flour than the recipe calls for – no problem. (In fact your little friends the yeasty beasties will love you all the more!) So it is truly pretty darn hard to mess up bread dough.

There are some bread bakers out there who swear by their bread machine. I had one once, and yes there was swearing involved. But in my case the words were aimed at the machine, not to offer it praises. The bread wasn’t bad, it was just boring. Frankly all the bread machine recipes tasted the same. And the texture or crumb was disappointing. Give me a KitchenAid mixer complete with a bread hook attachment any day over a bread machine. And yes, I cheat. I use my mixer because I’m lazy and frankly my hands aren’t as strong as they used to be! But in my defense, I know after 40 some years of using a heavy duty mixer to prepare bread dough that my mixer is never going to do me wrong. But if you enjoy kneading bread by hand, by all means please do so. (More about kneading bread in the Glossary and to follow in the Bread Baking Instructions.)

So in order to help you with your first few loaves of bread, or to help you improve your bread baking technique, I am going to include some recipes for very basic breads and I’m going to tear the recipes apart, bit by bloody bit. (If you are not a novice, please bear with me as I try to help those who are beginners.) And just for the record – no one is born gluten impaired. Everyone can learn to make great bread. There is no such thing as a predisposition to fail when working with gluten!

So have fun baking bread. It truly is not rocket science (although there is some science involved). And if you get stuck, just send me an email and I will help any way I can. apcarr08@wavecable.com

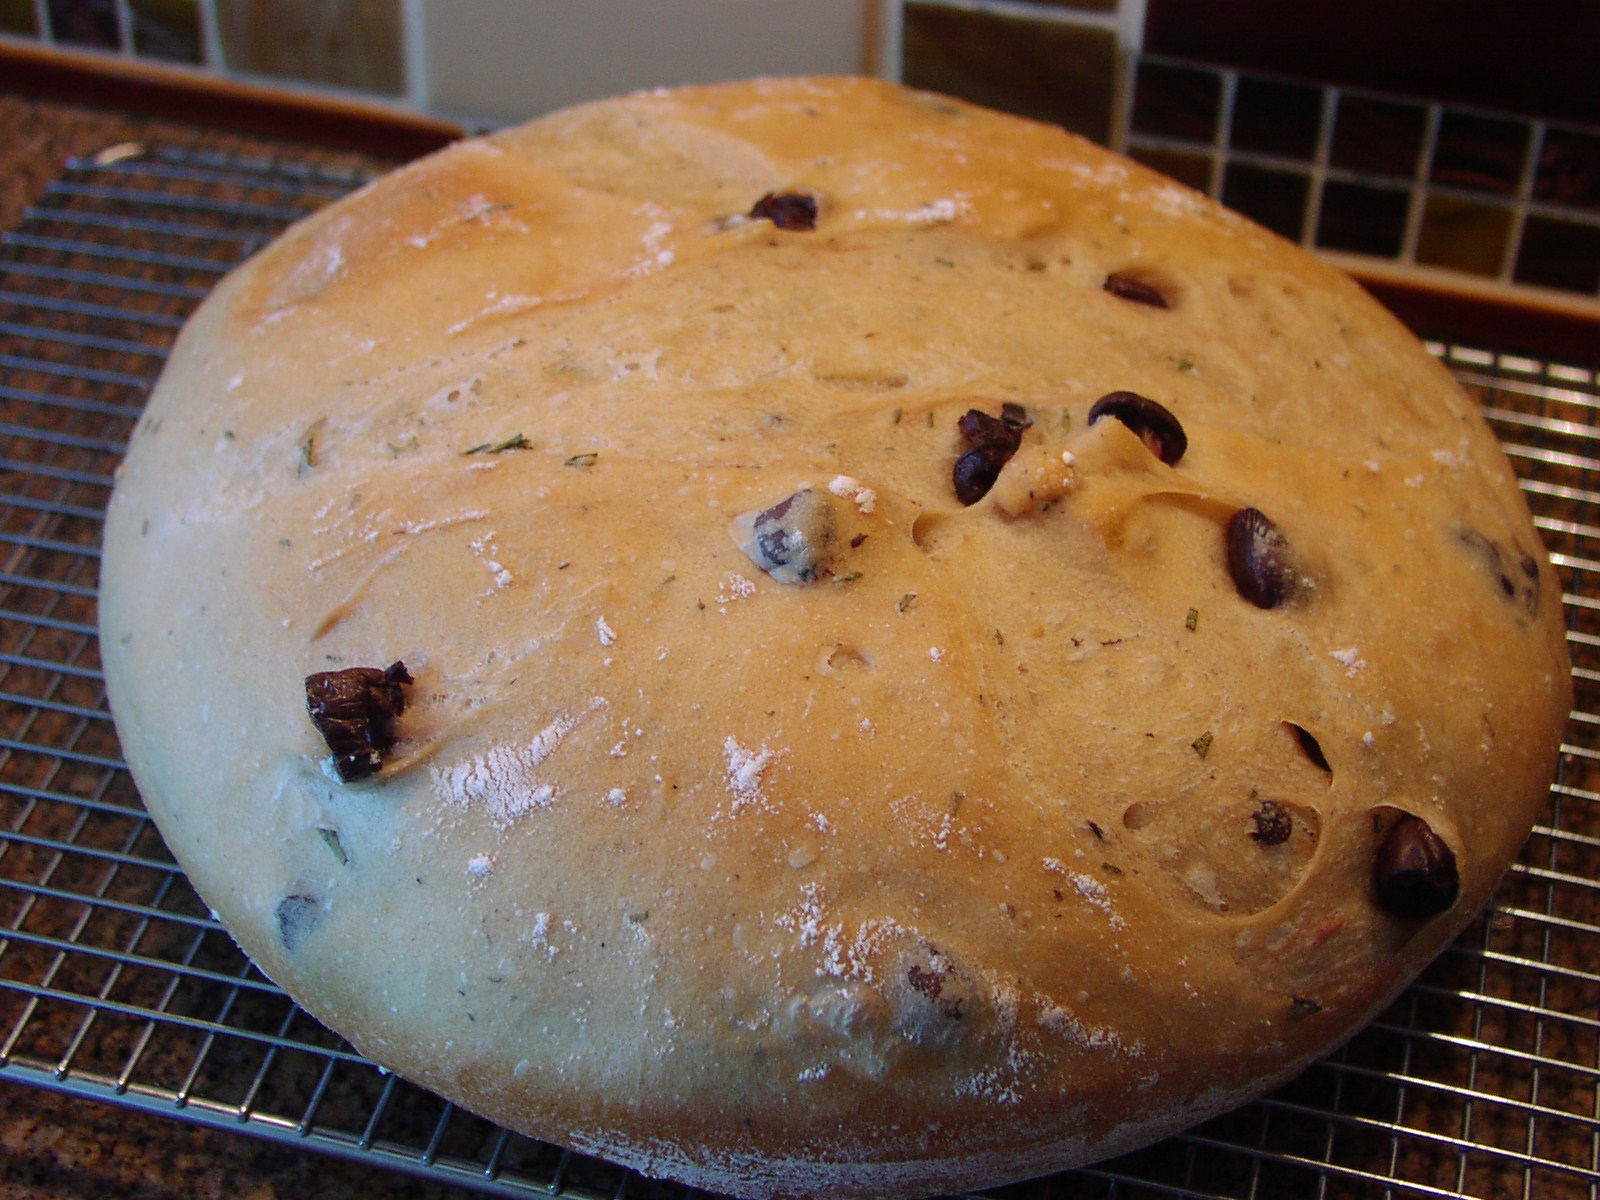
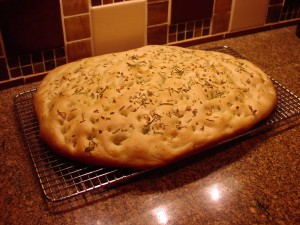
The first recipe we are going to make together is Foccacia. I choose this recipe because at first sight it appears to be terribly complicated with lots and lots of ingredients. But when you stop to really examine the ingredient list and the instructions, they are really quite straight forward and there are only 6 ingredients in the bread itself. 6 ingredients!

But before we go any further, I thought it best for you to become acquainted with the basic ingredients you will be using to bake yeast bread. (Not all breads have all of the ingredients listed below.)

BASIC YEAST BREAD INGREDIENTS:

Eggs – Eggs add richness, color, and wonderful flavor to bread.   

Fats – Oil, butter, and shortening add flavor to bread and make for a tender crumb. (Do not use reduced fat products, whipped butter, or margarine when baking bread because they contain water and the composition of the dough will be weakened and the quality of your bread will be negatively affected.)    

Flour – Flour is the basis of good bread. Be sure to use a good quality flour; one that is untreated with either bleach (powdered bleach belongs in your laundry, not in your bread), or potassium bromate, a suspected carcinogen. The flour you choose for your bread makes a difference in the quality of the final product. If you are a beginning bread baker, I would advise following recipes as written.   

Unbleached all-purpose flour works just fine in most bread recipes.

Bread flour usually makes for a superior loaf, but for rustic bread, unbleached all-purpose flour is your best choice.

Whole grain flours and other types of flour add color, texture, and flavor to breads. These flours don’t usually contain enough gluten to produce a perfect loaf on their own, so usually all purpose or bread flour is added to provide structure.

Cake flour does not work for bread because there isn’t enough protein, or gluten, to withstand the pressure of the gasses created by the metabolizing yeast.

Liquid – When liquid is added to flour, two proteins, glutenin and gliadin, combine to form gluten. Gluten forms a network of proteins that stretch through the bread dough like a web, trapping air bubbles that form as the yeast ferments. This creates the characteristic air holes of perfect bread. The type of liquid you use will change the bread characteristics. Water will make a loaf that has more wheat flavor and a crisper crust. Milk and cream-based breads are richer and possess a finer texture. They also brown more quickly because of the additional sugar and butterfat added to the dough.

Salt – Salt is essential to every bread recipe. It helps add flavor, contribute to good texture, and control yeast development which prevents bread from over rising.

Sweeteners – White sugar, brown sugar, corn syrup, agave, molasses, honey, maple syrup, concentrated fruit syrup are all examples of the type of fuel that is needed by yeast in order to produce carbon dioxide. (Some bread recipes don’t use sugar, but depend on sugars in the flour to provide food for the yeast.)

Yeast – the leavening agent used to make bread dough rise. (I use Active Dry Yeast purchased in bulk (4-oz. jars which equals 16 envelopes) which tends to be fresher and definitely less expensive than buying the individual little packages.  I don’t recommend rapid-rise yeast (unless it is specifically called for in a recipe) because the longer the rise (and fermentation process), the better the flavor.

BREAD RECIPES:

FOCCACIA

OLYMPUS DIGITAL CAMERA

  • 1 1/3 c. warm water
  • 1 T. or 1 pkg. active dry yeast
  • 2 tsp. sugar
  • 1 ½ tsp. kosher salt
  • about 1/2 c. extra virgin olive oil, divided
  • 3 1/2 c. unbleached  all-purpose flour

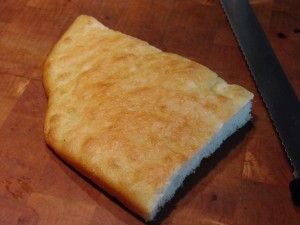
Pour warm water into a mixing bowl, sprinkle with yeast, and stir in sugar, salt, and ¼ cup of the olive oil. Let rest (proof) for 5-8 minutes. (Refer to Basic Instructions #1 below) Add two and a half cups of the flour and knead (Refer to Basic Instructions #2) for 4-5 minutes adding flour as needed to make a smooth and soft dough. (Refer to Basic Instructions #3)  Round dough up in the bowl, pour a little olive oil over the top, and turn dough with your hands (the best tool in your kitchen, by the way) until the entire surface is coated. (Refer to Basic Instructions #4) Cover with a tea towel and let rest for an hour or until it has doubled in size. (Refer to Basic Instructions #5) Pour about a tablespoon of the remaining olive oil on a rimmed baking sheet. Punch down the dough (Refer to Basic Instructions #6), remove it from the bowl, and place it on the greased baking sheet. Pat dough out until it is about ½-inch thick. (It should not be a perfect rectangle.) Poke deep indentations all over the surface. Slather enough of the remaining olive oil over the dough to completely cover the surface. Sprinkle with salt and pepper and toppings of choice. (see below) Let rest for about 30 minutes. (Refer to Basic Instructions #7), Bake in a pre-heated 425 degree oven for about 15 minutes or until golden brown. Let bread cool on pan for about 5 minutes before transferring to a cooling rack.  Serve warm or at room temperature.

Toppings:

large crystal sea salt or kosher salt, freshly ground black pepper

Vegetable Choice (pick one or more)

chopped onion,coarsely chopped pitted kalamata olive, sun-dried tomato packed in oil, 3-4 garlic cloves, chopped, sliced mushrooms

Cheese Choice (pick one or more)

crumbled feta, shredded parmesan cheese, diced goat cheese, shredded mozzarella cheese, crumbled blue cheese

Herb Choice – 1 tsp. (pick one or more)

rosemary, basil, oregano, thyme, chives

BEER BREAD

OLYMPUS DIGITAL CAMERA

  • 12-oz. bottle of beer (I like Alaskan Amber)
  • ¼ c. water
  • 2 tsp. kosher salt
  • 2 T. sugar
  • 2 T. butter
  • 2 T. yeast (or 2 pkgs.)
  • 5 c. flour
  • cornmeal

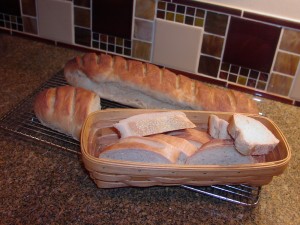
Heat beer, water, salt, sugar, and butter until very warm. Pour into the bowl of your stand mixer. Allow to cool to proper temperature for yeast to be added, about 105 degrees F. Add yeast; allow liquid mixture to sit (proof) for about 5 minutes. (Refer to Basic Instructions #1) Add enough flour to make a stiff dough. (almost feels dry to the touch) Knead for about 5 minutes. (Refer to Basic Instructions #2&3) Add a tiny bit of vegetable oil to the bowl and coat the entire surface. (Refer to Basic Instructions #4)  Cover and allow dough to rise until doubled, about 45 minutes; punch down. (Refer to Basic Instructions #5) Let rest 15 minutes. Shape in 2 long rolls on cornmeal covered pan. (Refer to Basic Instructions #8) Let rest another 15 minutes.  Meanwhile, place a pan with 2-3 cups of water on the bottom rack of your oven and preheat the oven to 425 degrees. (Refer to Basic Instructions #9) When the oven is hot and the bread is risen and ready to be baked, place bread pan on a rack in the middle of the oven. Quickly close the oven door to capture the steam.  Bake for about 25 minutes or until loaves are golden brown and sound hollow when lightly tapped. (Refer to Basic Instructions #10) Serve bread warm with lots of lovely, room temperature butter.

LIGHT RYE BREAD

OLYMPUS DIGITAL CAMERA

  • 2 T. or 2 pkgs. active dry yeast
  • 2 1/2 c. warm water
  • 2/3 c. molasses
  • 1 T. kosher salt
  • 1/4 c. vegetable oil
  • 1/4 c. cocoa powder
  • 2 c. rye flour
  • 5 c. bread flour
  • cornmeal

In the bowl of a heavy duty mixer, dissolve the yeast in the warm water; add the molasses. Let proof for about 10 minutes. (Refer to Basic Instructions #1) Add salt, vegetable oil, cocoa powder, 2 cups of the rye flour and 2 cups of the bread flour. Mix until all of the flour is absorbed. Add the remaining 3 cups bread flour until the dough pulls away from the bottom of the bowl and the dough is smooth and elastic. (This step may take more or less than 3 cups of bread flour.) (Refer to Basic Instructions #2) Pour a small amount of vegetable oil over the dough, turning it so it gets coated in the oil. (Refer to Basic Instructions #4) Cover the bowl with plastic wrap. Let rise at room temperature until it has doubled in size, about 90 minutes. After 90 minutes, gently punch down the dough and divide it into 2 equal parts. Shape each half into a torpedo shaped loaf (Refer to Basic Instructions #8) and place both loaves well separated on a greased baking sheet that has been lightly sprinkled with corn meal. Cover with a clean tea towel. Let rise again for about 45 minutes. Just before placing in a pre-heated 350 degree oven, cut 5 shallow diagonal slashes across each loaf. Bake for 40-50 minutes or until the bread sounds hollow when gently tapped. (Refer to Basic Instructions #10)

PICNIC BUNS

OLYMPUS DIGITAL CAMERA

  • ¼ c. warm water
  • 1 T. or 1 pkg. active dry yeast
  • ¾c. warm, scalded milk (not too warm or your yeasty beasties won’t be happy)
  • ¼ c. sugar
  • 1 tsp. salt
  • 1 egg, room temperature
  • ¼ c. Crisco (sometimes I use butter – sorry grandma)
  • 3 ½ c. or more flour
  • vegetable oil

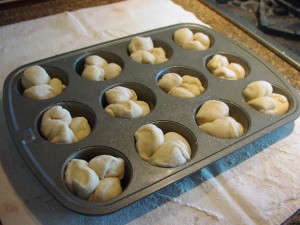
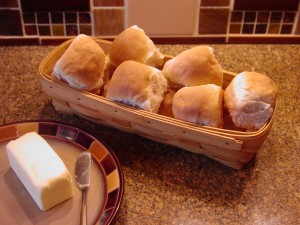
In a large mixing bowl, (I use the bowl of my Kitchen Aid mixer), combine the water, yeast, milk, sugar, salt, egg, and Crisco. Let proof for about 10 minutes. (You’ve got the idea by now!) Add 2 cups of the flour and mix thoroughly. Add enough remaining flour to form a medium stiff dough. (Not sticky when you touch it with your finger, but not dry feeling either.) Pour about a teaspoon of oil over the dough and roll into a ball. When dough ball is completely greased, cover the mixer bowl with a tea towel, let rise for about 90 minutes or until doubled. Punch down and let rise again until doubled, about 30 minutes. Butter a 9×13-inch pan. Punch down dough again and divide into 18 pieces. (I just squeeze off small balls of dough as I place them into the prepared pan.) Cover with a tea towel again, and let rise for 30 minutes or until doubled in size. Bake in a pre-heated 400 degree oven for 12-15 minutes or until a nice golden brown. Serve warm.

BASIC INSTRUCTIONS

1)      The secret to getting your yeast to perform as required is to treat it right. Yeast loves warm liquid and just gets all warm and fuzzy if at the same time it is sitting in the tepid liquid, it is given a little nibble of something on which to munch. In most cases, it’s a wee bit of sugar or honey, but sometimes it’s just some flour. If the yeast is behaving properly, and you haven’t given it too hot a bath or it’s already gone to its happy home in yeasty heaven, after a couple of minutes you will see little bubbles form around the rim of the bowl. Then after a few more minutes it will look like the liquid is alive. This is what you want. You have proven that the yeast is not only happy, it is alive and well. It is safe to go on to the next step in your recipe. BTW, if your liquid doesn’t start to churn, you either used water which was too hot, or your yeast is dead. Pay close attention to the expiration date on your package or container of yeast. If the yeast is past its prime, toss it and start over with a fresh package.

2)      To knead bread dough by hand, place it on a floured surface.  Pick up the far edge of the dough and fold it over the bottom edge. Press down with the heels of your hands, pushing the dough away from you. Turn the dough one quarter turn and repeat the process. Add additional flour as needed. When properly kneaded, bread dough will be smooth and satiny, stretchy and no longer sticky. This process takes anywhere from 5-10 minutes.

To knead bread dough using a heavy duty mixer like a KitchenAid, add most of the flour called for in your recipe. Continue adding the remaining flour in very small increments until all of the dough pulls away from the bottom of the bowl. (It will look like someone cleaned the bowl for you.)

3)      Will look smooth and slightly shiny, almost satiny.

4)      Many recipes will instruct you to get a clean bowl, grease it with shortening, and place the kneaded dough in the new bowl and turn it so all surfaces are greased. Ridiculous! Use the bowl in which you originally mixed your bread ingredients! Pour a little oil down over the bread, and with your hands roll the dough into a ball making sure that every bit of the surfaced is lovingly covered with a thin film of oil.

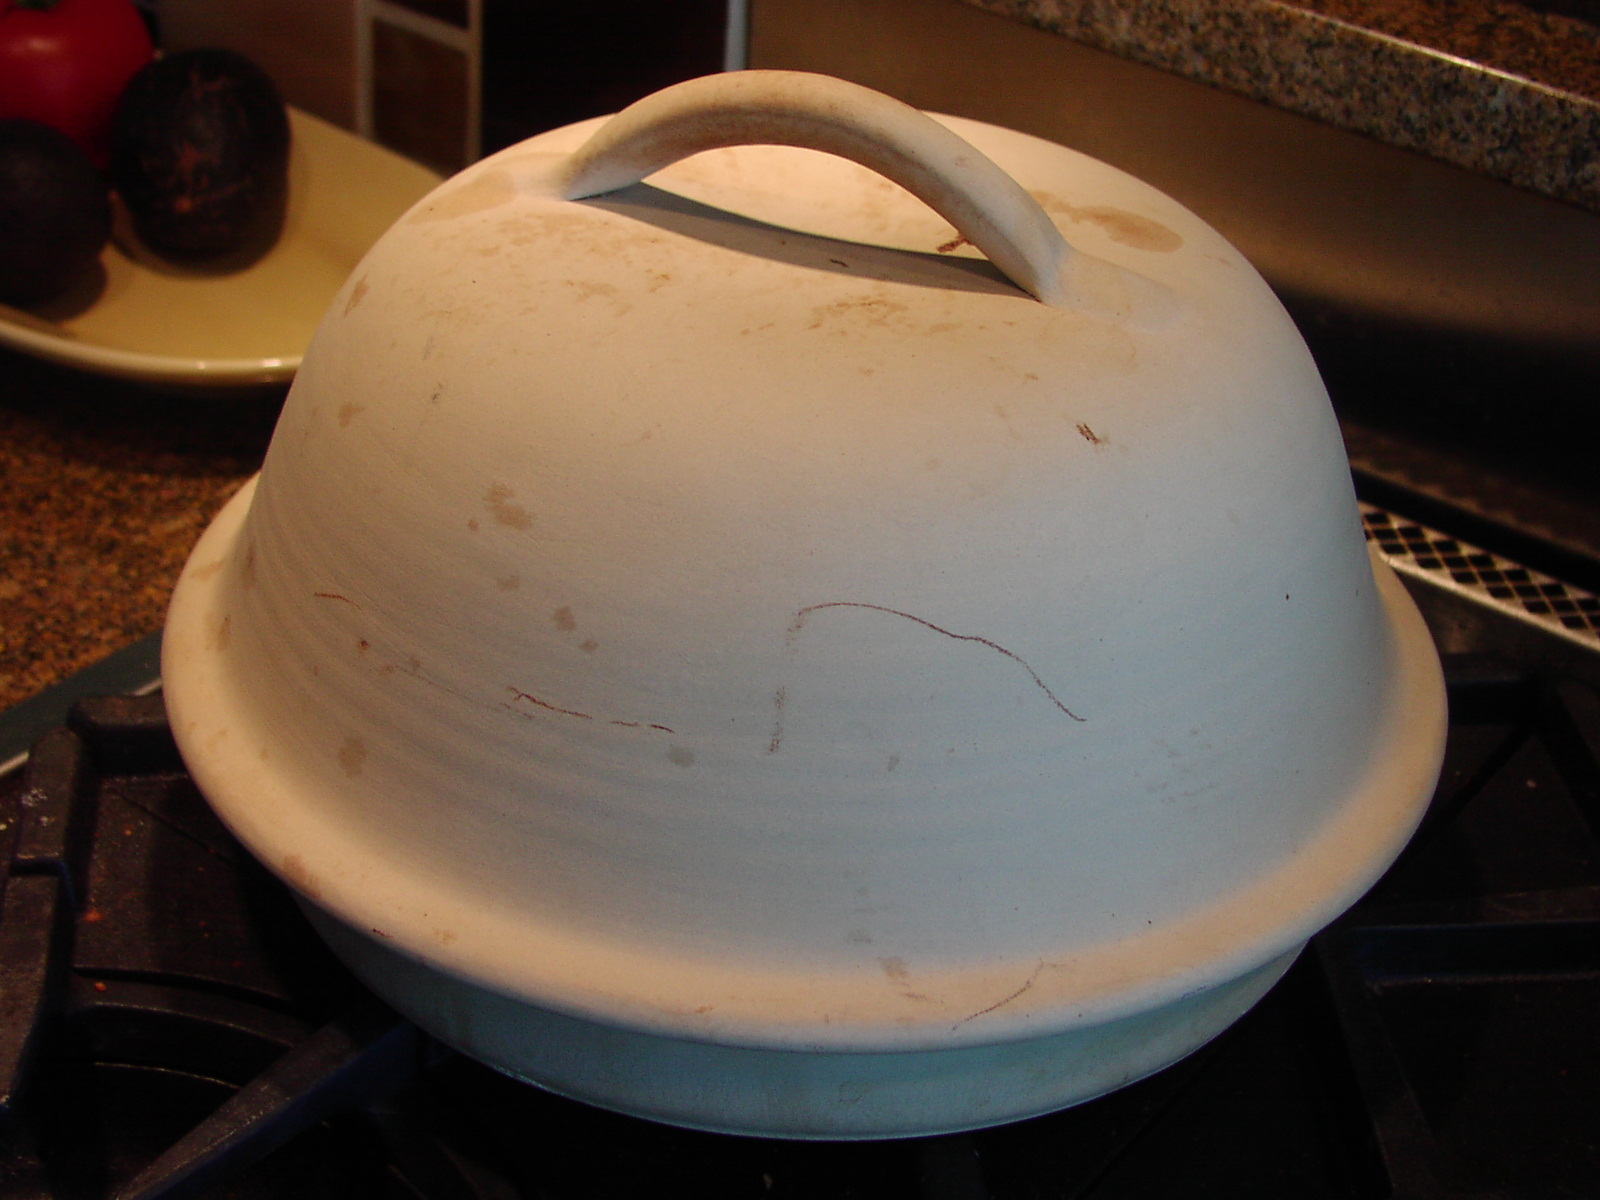
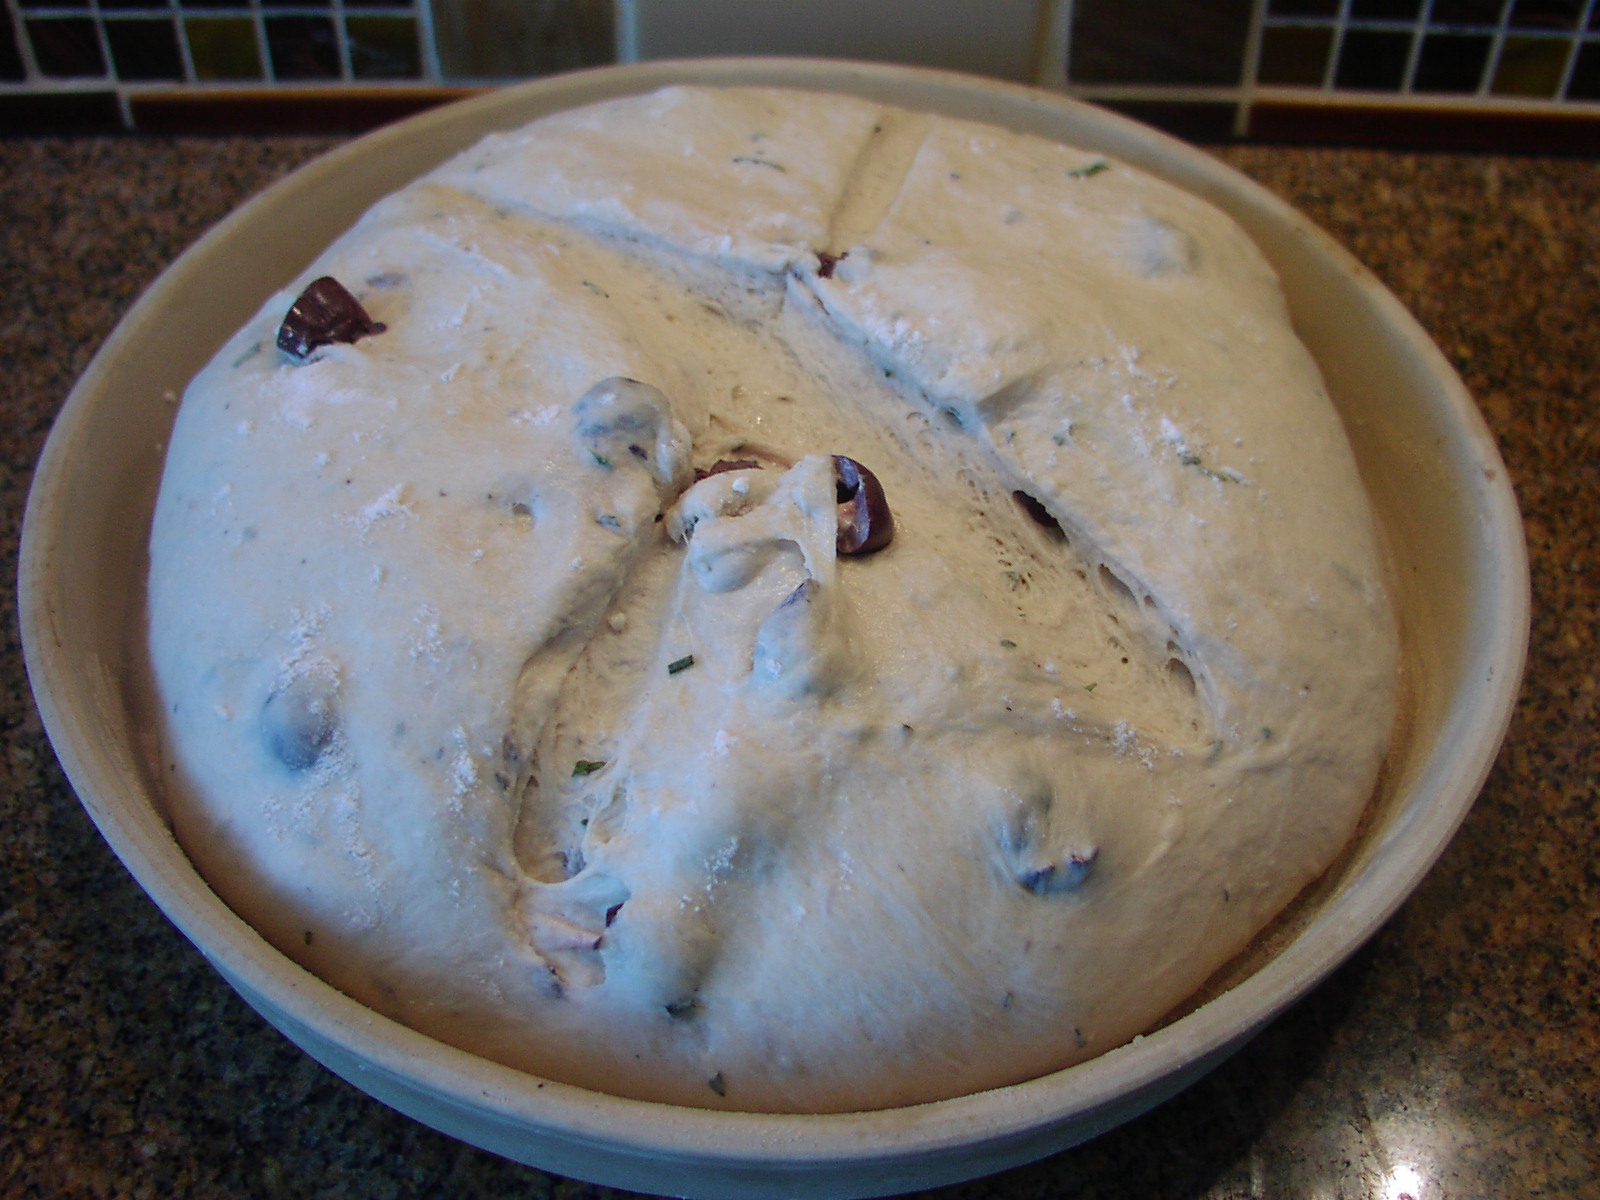
5)      Tea towels or plastic wrap help keep the dough warm and draft-free while the yeast does its magic. During this time the dough should double in size. To make sure your dough has risen sufficiently, poke it with 2 fingers. If the dough holds the indentation, it’s ready.

6)      We punch dough down after the initial rising for several reasons: to relax the gluten, get rid of some of the carbon dioxide formed by the yeast, and to equalize the temperature. A couple of gentle punches are sufficient. (This is not the time to think of the IRS!)

7)      Allowing the bread dough to rise again just adds volume and makes for a softer crumb.

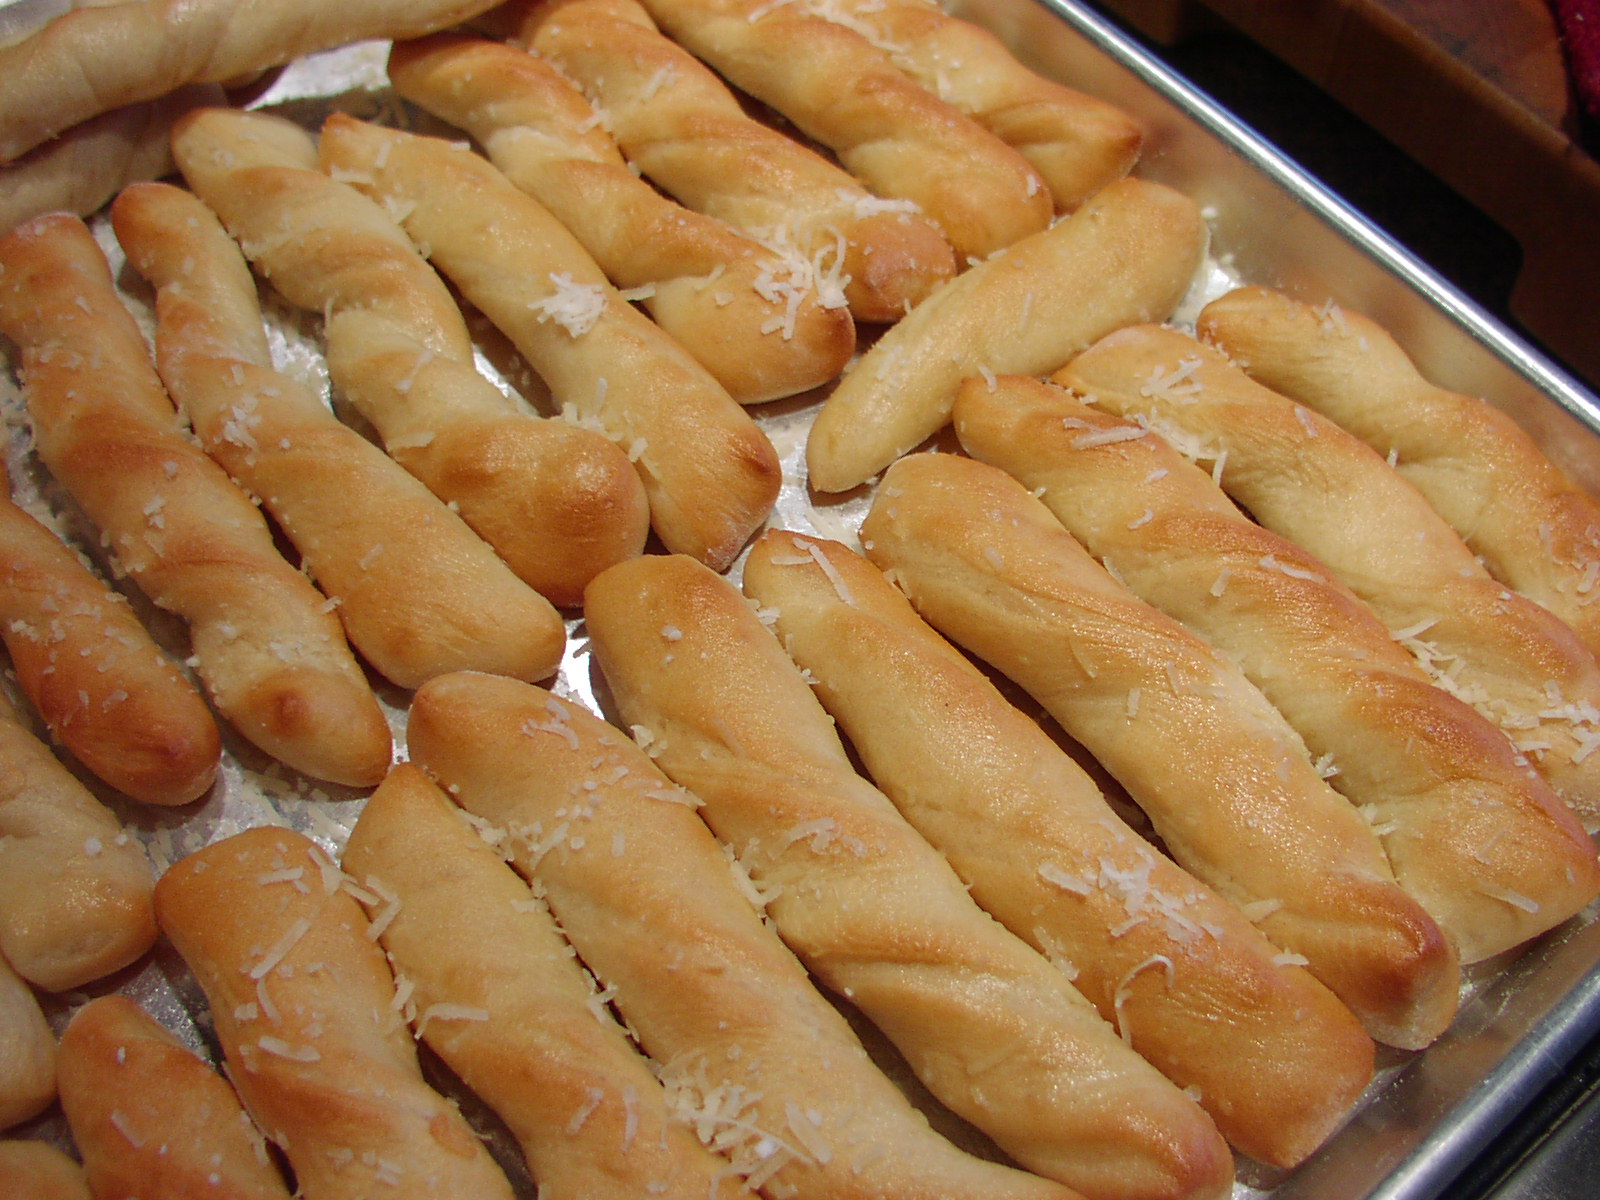
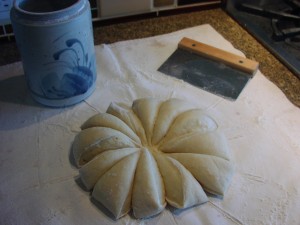
8)      Use your hands to shape the dough. Divide the dough in half and basically just roll each piece and stretch it in the air with your hands to the desired shape before placing it on prepared baking sheet. (Refer to the picture to see general desired shape.)

9)      In the first few minutes of baking, loaves of bread will rise rapidly as the gases trapped inside expand and the yeast has a final burst of activity. Steaming within this time helps keep the crust soft. This allows the bread to continue expanding freely. The steam that has settled on the surface of the bread also dissolves sugars in the dough. As the bread stops expanding and the steam begins to evaporate, the sugars are left to caramelize and create a glossy crust.

10)      Bread literally sounds like a hollow drum when it is baked. But tap gently, don’t pound on it like you are trying to wake up a teenager by knocking on his or her bedroom door at 11:00 on a Saturday morning.

GLOSSARY

CRUMB – the soft inner portion of a bread (distinguished from crust)

FIRST RISE – This is the initial fermentation when yeast produces carbon dioxide bubbles that leaven the bread. The first rise (fermentation) usually takes about 1 to 1 1/2 hours. After the first rise, the dough is punched down to get rid of some of the carbon dioxide formed by the yeast, to relax the gluten a little, and to equalize the temperature.    

KNEAD – Bread dough is kneaded to distribute the yeast and develop gluten for an even texture or crumb.

To knead bread dough by hand, place it on a floured surface.  Pick up the far edge of the dough and fold it over the bottom edge. Press down with the heels of your hands, pushing the dough away from you. Turn the dough one quarter turn and repeat the process. When properly kneaded, bread dough will be smooth and satiny, stretchy and no longer sticky. This process takes anywhere from 5-10 minutes.

To knead bread dough using a heavy duty mixer like a KitchenAid, add most of the flour called for in your recipe. Continue adding the remaining flour in very small increments until all of the dough pulls away from the bottom of the bowl. (It will look like someone cleaned the bowl for you.)

PROOF – Measure out the yeast and mix it with the water called for in the recipe. Yeast is happiest at about 75°-80°, so the water should feel barely warm or lukewarm to the touch. Add just a pinch of sugar or whatever ingredients are called for in the recipe to give the yeast something on which to munch. Let the yeast and water sit for a few minutes. First, the water will dissolve the dry coating around the granules of yeast, releasing the active yeast inside. The active yeast will go to work on the sugar and a bubbly foam will start to form on the surface from the carbon dioxide being released. This foam is “proof” that the yeast is active, and once you see it, you know the yeast is alive and well and will leaven your dough.

SECOND RISE (PROOFING) -After you’ve punched down the dough, you want to gently knead it again while it is still in the bowl. Then shape the bread according to the recipe instructions and let it rise again until it nearly doubles in size (which will take less time than the first rising). Sometimes bread will not rise as much the second time as the first. Again, it’s important that the bread rise in a warm, draft-free area. To test for doneness, again use the finger test. Poke it with 2 fingers; if it holds the indentation, it’s ready. 

WARM (TEPID) WATER – Yeast needs a warm liquid to wake up. I define the perfect temperature for yeast to be happy as about the same temperature in which you would bathe a new born baby. Lukewarm. Not hot. Not cold. Slightly warm.

YEAST – the leavening agent used to make dough rise. Yeast is actually a living microorganism.  And this darling little critter lives just to convert fermentable sugars into (among other things) carbon dioxide.    


LIGHT RYE BREAD

OLYMPUS DIGITAL CAMERA

When I think about bread, and I think about bread a lot, my thoughts always drift to the types of bread I have yet to perfect. And light rye has always been one that I could never get just right.

I have a great recipe for pumpernickel, but I could never get a light rye to come out with just that perfect balance of sweet and pungent. And as much as I like caraway seeds in some things, I just don’t like them in rye bread. So never one to be discouraged, I went on line and tried once more to find the rye bread of my dreams. And believe me, there are lots of recipes out there for light rye bread. But only one caught my eye. So I decided to give it a try and see if I could finally check light rye bread off my list. And yes indeed ladies and gentlemen, I made the perfect loaf of rye bread this weekend, thanks to George. I found the recipe on a great blog www.simplyrecipes.com and I recommend visiting this wonderful cooking resource at your earliest convenience. And yes, of course, I changed the instructions to fit my way of bread baking, but the ingredients, except for the optional 2 tablespoons caraway seeds (and yes, you can add them if you must), is right off George’s recipe. So thank you George, whoever and wherever you are, for this amazing recipe. I will send good thoughts your way every time I sit down to a Reuben sandwich or smear soft butter over a warm piece of your incredible bread.

  • 2 T. or 2 pkgs. active dry yeast
  • 2 1/2 c. warm water
  • 2/3 c. molasses
  • 1 T. kosher salt
  • 1/4 c. vegetable oil
  • 1/4 c. cocoa powder
  • 2 c. rye flour
  • 5 c. bread flour
  • cornmeal

In the bowl of a heavy duty mixer, dissolve the yeast in the warm water; add the molasses. Let proof for about 10 minutes. Add salt, vegetable oil, cocoa powder, 2 cups of the rye flour and 2 cups of the bread flour. Mix until all of the flour is absorbed. Add the remaining 3 cups bread flour until the dough pulls away from the bottom of the bowl and the dough is smooth and elastic. (This step may take more or less than 3 cups of bread flour.) Pour a small amount of vegetable oil over the dough, turning it so it gets coated in the oil. Cover the bowl with plastic wrap. Let rise at room temperature until it has doubled in size, about 90 minutes. After 90 minutes, gently punch down the dough and divide it into 2 equal parts.  Shape each half into a torpedo shaped loaf and place both loaves well separated on a greased baking sheet that has been lightly sprinkled with corn meal. Cover with a clean tea towel. Let rise again for about 45 minutes. Just before placing in a pre-heated 350 degree oven, cut 5 shallow diagonal slashes across each loaf. Bake for 40-50 minutes or until the bread sounds hollow when gently tapped.


SOFT PRETZEL BITES

So once upon a time I went to the Bellevue Mall and saw a shop offering soft pretzels for sale. Being a sucker for soft pretzels I felt duty bound to help this struggling new business get a foot hold in an arena that caters to the terribly sophisticated Bellevue elite. (I only went there about 3 times after is became Bellevue Mall. I was simply not worthy. I felt much more suited to the old Bellevue Square. But I digress.)

So I ordered a plain pretzel and took my first bite. Now, I am not a sugar person. I like salt. And I like bread. And I like butter. And this chewy, salty, savory pretzel was just about the best thing I had ever tasted. And to this day, I simply can’t resist a warm, soft pretzel. So when I was preparing the Oktoberfest menu for our JazzVox (www.jazzvox.com) concert this past weekend, I decided to see if I could locate a recipe. Well not only did I find a recipe, I found the recipe. And through one of the best sites out there for all things baked – www.bobsredmill.com

I of course changed the instructions a bit to make them work for me, but the basic recipe is all Bob’s. Hopefully you too will enjoy preparing this simple recipe for soft pretzels. They are just unbelievably delicious.

  • 2 1/4 tsp. instant yeast  
  • 1 tsp. kosher salt
  • 1 tsp. sugar
  • 7/8 to 1 cup warm water*
  • 2 c. (or more) unbleached all-purpose flour
  • 1 c. water
  • 2 T. baking soda
  • coarse salt, kosher or pretzel, opt.
  • 3 T. butter, melted
  • mustard for dipping, opt.

*Use the greater amount in the winter, the lesser amount in the summer, and somewhere in between in the spring and fall.

Combine yeast, salt, sugar, and the warm water in heavy duty mixer bowl. Let proof for 5 minutes. Add enough flour to make a soft dough. Pour a little flour in bowl, coat dough, cover with plastic wrap and let rise for 30-40 minutes. While the dough is rising, prepare the water and soda bath. Pour water into a medium sized frying pan. Bring water to boil, turn off heat and stir in baking soda, stirring until the soda is totally (or almost totally) dissolved. Allow to cool to lukewarm (or cooler). After the dough has risen for the allotted time, punch down and transfer to a lightly greased work surface. Divide into 8 equal pieces with a bench scraper or a sharp knife. Allow the pieces to rest, uncovered, for 5 minutes. Roll each piece of dough into an 8-9 inch thin rope and cut in 4ths. Working with a few pieces at a time, place them in the pan with the baking soda/water for 2 minutes, spooning the water over their tops. (This baking soda “bath” will give the pretzel bites a nice, golden-brown color. And yes, they will get a little mushy from their bath, but they will be just fine.)

Place the pretzel bites on a baking sheet lined with parchment paper or sprayed with vegetable oil. Sprinkle lightly with coarse salt and allow them to rest, uncovered, for about 10 minutes while you pre-heat the oven to 475 degrees. Bake the pretzels for about 6 minutes. If you have a convection oven, bake them for 4 minutes on the regular oven setting, and the last 2 minutes using the convection option.

RUSTIC GREEK BREAD – PSOMI

OLYMPUS DIGITAL CAMERA

When I start to prepare a menu for a dinner party or for a special event, I always know that I am going to have the most fun finding just the perfect bread to serve with the meal. And that’s because I love everything about bread. I love how it goes together so easily in my KitchenAid mixer, I love how it smells while it’s baking, and I love how it tastes right out of the oven smothered with butter. I also really love the fact that baking bread is such an inexpensive alternative to buying truly good artisan bread at a grocery store, bakery, or farmer’s market.

I’m always astounded at the amount of money artisans get for a loaf of homemade bread. Now granted, some artisan breads I can’t make at home because I don’t own a brick bread oven. (I asked for one for my birthday, but Mr. C. just laughed at me. They run in the 5 to 10 thousand dollar range you see. But still, he shouldn’t have laughed!) So when I find bakers who advertise brick oven baked breads, I usually can’t resist and give in to their blackmail demands. (Want to see this loaf of bread in your kitchen lady; then show me the color of your money!) And usually, I’m not disappointed. But when I can bake 2 loaves of bread that are almost as good, and I’ve only spent 50 cents on the ingredients (if that), I feel on top of the world.

I know I keep writing and telling people how easy it is to bake bread. So what I’ve decided to do is write a “cooking class segment” on bread baking. So for the next few days, I’m going to take a break from posting recipes and concentrate on “Bread Baking 101”.  It’s not going to be a dissertation, the likes of which would earn me my first PhD, but it will have enough common sense information to start or expand your knowledge of baking the perfect loaf.

And yes I know, bread is caloric and not really “in” right now. But “bread” is the staff of life, and in some form or another is enjoyed by almost every ethnic group on this planet. And if prepared with nutritional ingredients and eaten in moderation (I am such the expert on moderation), bread can be healthy and provide needed vitamins and fiber our diets so desperately need. Now, if someone will just hide my butter container!

  • 1 T. or 1 pkg. active dry yeast
  • 2 c. warm water
  • 2 tsp. kosher salt
  • 3 tsp. sugar
  • 1 T. + 2 tsp. olive oil
  • 5 1/2 – 6 cups all-purpose flour
  • 1 T. cornmeal
  • spray olive, coconut, or vegetable oil

In a large mixing bowl, (I use the bowl of my Kitchen Aid mixer), combine the yeast, warm water, salt, sugar, 1 tablespoon olive oil, and about 2 cups of the flour. Let proof until the mixture becomes frothy, about 15 minutes.  Add enough remaining flour to form a medium stiff dough. Pour the remaining 2 teaspoons olive oil over the dough and roll into a ball. When dough is completely greased, cover the mixer bowl with plastic wrap and let rise for about 90 minutes or until doubled. Punch down and divide dough into 2 pieces. Form each into a torpedo-shape and place both loaves well separated on a greased baking sheet that has been sprinkled with cornmeal. Cut 4-5 diagonal slashes across each loaf; cover with a tea towel, and allow to rise again for about an hour or until doubled. Place a pan of water on the bottom rack of the oven. Turn on the oven and bring it to 375 degrees. (The water will get hot as the oven heats.) Spray bread lightly with oil and bake in the pre-heated oven for approx 35-40 minutes or until the bread sounds hollow when you gently thump it and the top is a nice golden brown. After the first 15 minutes of baking time, spray the loaves again lightly with oil, and then again 10 minutes later.  Remove bread from oven and cool on a rack.

OATMEAL PANCAKES

My daughter Paula asked me if I had any good gluten free recipes. One of the ladies she works with recently discovered that she can no longer tolerate gluten. I reminded Paula that “gluten free” was not really my specialty, but that I did have a few fabulous recipes I would be happy to share.

The first recipe that came to mind is this recipe for Oatmeal Pancakes from Bob’s Red Mill Flour. Now, the foremost thing you need to know about my choice of featuring this recipe is that I basically hate oatmeal. I could no more eat a bowl of oatmeal than I could, for example, ride a horse for eight hours downhill! (If you have never ridden a horse, then you haven’t had the joy of being over 60 with knees that scream at the merest suggestion of an incline or decline to begin with! Then multiply that by 100, and you will know how I was feeling after I got off a horse after only riding 2 hours, the last 30 minutes of which were downhill!) So for me to tell you that oatmeal pancakes are my favorite should give you some indication that they are very, very good indeed!

I found this recipe a few years back when I was researching a gluten free diet. I thought I might possible have an intolerance, but tests revealed that gluten was not the problem. And even though I am not sensitive to gluten, a few of the recipes I found during my “gluten free” phase are still part of my life. During that time I also discovered that cornstarch and potato starch/flours are fine thickening agents for sauces, gravies, and soups. That rice pasta isn’t half bad (beats no pasta at all)! Polenta and grits are food from the Gods. And soy bean and sorghum flours are about the worst tasting ingredients I ever tasted!

So setting my scary memories of bread made with sorghum flour aside, I am going to swear off gluten for the next couple of weeks, and feature a few fantastic recipes that contain not a hint of protein composites found in foods processed from wheat or related grain species.

So please join me as I explore the gastronomic gourmet world of “gluten free”. You might even find that you can actually reduce the amount of gluten in your life without feeling like you have lost your best friend. And don’t forget – “gluten free” is trendy. It’s totally hip, cool beans, groovy, the bee’s knees, and in-like-Flynn. Be there or be square!

  • 1 c. milk
  • ¾ c. quick cooking rolled oats
  • 2 eggs, separated
  • ¾ c. oat flour
  • 2 T. sugar
  • 2 tsp. baking powder
  • ½ tsp. salt
  • 1 T. vegetable oil

Heat milk in a saucepan until it feels very hot to the touch. Remove from heat and stir in the oats; let stand for 5 minutes. Meanwhile whip the egg whites to stiff peaks; set aside. Combine the oat flour, sugar, baking powder, and salt in a medium sized bowl. Stir in the cooled oat/milk mixture, egg yolks, and oil. Fold whipped egg whites into batter. Fry as you would any pancake. Serve with butter and your favorite syrup. Hint: Always warm syrup before serving. It’s just the right thing to do!


SLIDER BUNS (REGULAR HAMBURGER BUNS TOO)

Now that spring is definitely here it’s time to think about picnics and fun food. And a slider, one of my favorites, is fun to both prepare and consume. First of all, sliders are just stinkin’ cute! Now I don’t usually go for “cute” food, but even those of you with a cynical bent have to admit that sliders are nothing if they aren’t cute! And when they taste great too, well that’s just all the better. And although Mr. C. and I don’t usually go out for happy hour (we live on an island and the local restaurants aren’t exactly notorious for being outstanding “happy hour” purveyors), we have had occasion to sample a couple of sliders that are just out of this world.

So I thought I would share two of my favorites with you over the next couple of days. And in my humble opinion, the filling of a perfect slider isn’t worth its weight in ground meat without a perfect bun. And I know, some of you think a perfect bun isn’t all that necessary. Well, too bad. It’s my blog and I am not going to leave the rest of you searching for slider buns at your local grocery store! Because, undoubtedly you will find what I did when I was in a hurry recently and decided to purchase buns rather than prepare my own. For some ungodly reason, grocery stores charge an exorbitant price for slider buns that are fully half the size of regular hamburger buns. Now, I may not be a math genius, but I know when I am being hoodwinked! Let’s see, half the ingredients, twice the price. What about this equation just does not compute? And that’s if your grocery store even deigns to carry slider buns in the first place! Now granted, the slider buns I have purchased (not from my local grocery store, I assure you) have been really good. Pricey, but good. Not as wonderful as homemade of course, but tasty none-the-less.

So next time you get a hankering for a truly fabulous slider, remember this recipe. The buns are inexpensive to make and terribly easy to prepare. If you have yet to tackle yeast bread, this recipe would be a good place to start. And because it’s just the size of your cutter that determines how small or large your buns eventually become, you can use this same recipe for regular sized burger buns too. Of course there is the old adage that “the larger the buns you consume, the larger your own buns become”, so I think personally, I’d better stick to the smaller cutter. Wish me luck on that one!

  • 1 c. warm water
  • 1 T. or 1 pkg. active dry yeast
  • ¼ c. sugar
  • 1 ¼ tsp. salt
  • 4 T. butter, room temperature, divided
  • 1 egg, room temperature
  • 3 ½ c. flour (or more)
  • vegetable oil

Combine warm water, yeast, sugar, salt, 2 tablespoons butter, and egg in the bowl of your stand mixer. Let the mixture sit for 5-10 minutes to *proof. Add enough flour to form a soft dough. Pour a very small amount of oil over the dough, form a large ball with your hands, cover the bowl with a clean tea towel, and let rise for 1-2 hours or until nearly doubled in bulk. Punch down and divide in half. Shape each half into a rough disk. Roll dough to about 1/4-inch to 1/3-inch thickness. Cut out with a 1 1/2- to 3-inch cutter, depending on whether you want slider buns or regular sized hamburger buns. Repeat with the remaining dough. You will end up with quite a bit of left over dough. Combine it into a ball and let the ball rest for about 20 minutes. Roll out again and make as many more buns as possible. Arrange on a lightly greased baking sheet about 2 to 3 inches apart. Cover with a towel and let rise until doubled in size, about 30 minutes. Melt the remaining 2 tablespoons butter; brush each bun. This will give them a soft, golden crust. Bake the buns in a pre-heated 350 degree oven for 10-12 minutes, or until they are a light golden brown. Cool on rack. Split and use with any of your favorite fillings.

Proof: After 5 or 10 minutes, the yeast should begin to form a creamy foam on the surface of the water. If there is no foam or any apparent action in the bowl, the yeast is dead. Time to start over with a new packet of yeast.

TOASTED COCONUT AND LEMON SCONES

OLYMPUS DIGITAL CAMERAOLYMPUS DIGITAL CAMERA

Mr. C. and I recently spent the day on Orcas Island. Mr. C. had been wanting to go on this one particular hike on Mt. Constitution for some time. So when a beautiful spring day presented itself, we jumped in the car and headed up to Anacortes to catch a ferry.  While Mr. C. was playing mountain goat (I don’t do mountain goat hikes anymore), I drove into the big town of Eastsound and tried desperately to spend some of the kids inheritance on a piece of art, but nothing followed me out of a shop except a lemon coconut scone. And as it turned out, it actually wasn’t a lemon coconut scone. It was a blackberry scone. Thus begins my little tale of the pleasantries associated with rural life.

Since we retired from our jobs in Seattle and moved from the big city of Bellevue about 5 years ago to a rural setting, I have learned to truly appreciate how pleasant it is to be treated with respect by people working retail. Unlike what often passes for “customer service” in a city, most people who wait on the public in small towns actually treat their customers as friends. (How weird and refreshing is that?) And living on an island seems to further deepen that bond. There just seems to be something that happens to folks when they live on an island. People change gears, life slows down, and strangers aren’t assumed to be bad folk just waiting to do you wrong. And good customer service is rampant. I mean you can’t walk in a parking lot or into a store without someone saying hi or offering you an unexpected level of thoughtfulness. Which brings me back to scones. (Isn’t thoughtfulness always a natural progression to scones?)

Anyway, I had parked my car a couple blocks back from the town’s main drag which runs along the water in Eastsound. After slowly sauntering around town I realized I still had about an hour before I needed to pick up my weary hiker. So knowing that there would not be time to get dinner before we needed to catch our return ferry, I decided to go into a nearby coffee shop and fetch us a little nibble to tide us over until we reached Anacortes and the safety of a good hot late dinner. While I was in the shop buying my scone, I asked the nice proprietress where I could go to enjoy a view of the water while I read my book? I told her I wanted to leave my car parked where it was and walk. She directed me to a lovely place to sit and enjoy both the afternoon sun and the amazing water view. I thanked her for both the scone and the information and went on my merry way. Since my car was right there, I stashed the un-tasted scone in the car and started my long 3 block walk to my reading destination.

I was walking along the waterfront road (Main Street), when a gentleman on a bicycle peddles up to me and asked if I was the lady who had just bought a scone at Teezer’s? I said I was indeed that woman. He then preceded to hand me a scone explaining that I had been given a blackberry scone by mistake. I told him I didn’t have the other scone with me; that I had left it in my car. He said he didn’t want the wrong scone back. The shop keeper merely wanted me not to be disappointed when I realized I had not received what I had ordered. Now that my dear readers, is what I call fabulous customer service!

So next time I am on Orcas Island and need an espresso or a sweet, you can bet your last chocolate covered coffee bean that I will head directly to Teezer’s Cookies and Coffee House, 330 North Beach Rd., in Eastsound. And even though I enjoyed bites of both the scones, the lemon coconut scone was simply off the charts good. So of course, I had to recreate this fabulous scone at home. So in gratitude to the lovely folks at Teezer’s for both their superior customer service and baking skills, I dedicate this recipe and this post to them. And next time I’m in town, I will be stopping by to say hello. And yes, I will probably order another lemon coconut scone, because they are just that delightful. So if you ever find yourself on Orcas Island, in the charming little town of Eastsound, stop in at Teezer’s and tell them Patti sent you!

  • 2 c. flour
  • 4 tsp. baking powder
  • 3/4 tsp. salt
  • 1/3 c. sugar
  • 4 T. cold butter, cut into small dice
  • 2 T. vegetable shortening
  • zest of 2 lemons
  • 1 c. toasted coconut*
  • 3/4 c. whipping cream
  • 1 egg
  • lemon juice
  • powdered sugar

Combine flour, baking powder, salt, and sugar in the bowl of your food processor. Whirl until mixed well. Add the butter and shortening. Pulse until butter broken down into small bits. (Don’t over process.) In a separate bowl, whisk together the cream and eggs. Stir in the lemon zest and toasted coconut.  Add the dry ingredients and stir just until combined with a table knife. (One of the best stirring tools in your kitchen, by the way!) Dough will be very moist. Turn dough out onto a well floured surface. Pat dough out with your flour covered  fingers into an 8×8-inch square. (Using a bench scraper dipped in flour works great to create straight sides.)  Cut the dough into 16 pieces and place on a parchment paper lined baking sheet fairly close together.(As the scones bake they will spread into each other.)  Bake in a pre-heated 375 degree oven for 15 minutes or until firm to the touch. Remove from oven and allow to cool completely. Whisk about a tablespoon of lime juice with enough powdered sugar to make a semi-stiff frosting that can be drizzled easily. (I make my drizzle in a glass measuring cup with a spout. Makes drizzling frosting easy.) Add more lemon juice and/or powdered sugar if you feel you need more drizzle. Some people like just a tiny amount of drizzling frosting; others want almost all the top covered. Remember, you can always start small and make more drizzle as needed. Allow drizzle to harden before storing the scones in an airtight container.

*To toast coconut, place it on a baking sheet in a single layer. Place pan in a pre-heated 375 degree oven for 6-7 minutes or until some of the flakes start to turn a nice golden brown. Watch carefully the last couple of minutes. Cool before adding to recipe.

CRANBERRY ORANGE SCONES

OLYMPUS DIGITAL CAMERAOLYMPUS DIGITAL CAMERA

Since I am getting close to the end of my St. Patrick’s Day recipe series, I thought I better include a recipe for scones. Now, to be perfectly honest, I don’t think these scones would actually qualify as Irish.  They are just a little too healthy to be categorized as such. But before you abandon this recipe because of what it isn’t, first let me tell you about what it is! First of all, these scones are delicious! When I first bit into one, I thought I might have made a mistake in not using more sugar; that the scones weren’t sweet enough. I also found the scone to be a bit on the heavy side because of the whole wheat flour; not as tender as most of the scones I prepare.  But the more I chomped away, the more I began to enjoy actually being able to taste the whole wheat flour and the lovely tartness of the fruit. By the time I had finished my scone, I was hooked. The scone was actually sweet enough and the complimentary tartness of the fruit was refreshing. And because these scones are prepared with less sugar than most, and contain at least some whole wheat flour and fruit (don’t forget we are supposed to eat several servings of fruit a day), they are in general healthier for us than some varieties. And yes I know no scone is the embodiment of nutritional virtue. That’s a given. But some scones are inherently less harmful to our bodies than others. (That’s my justification for eating these scones, and I’m sticking to my guns with reduced capacity ammunition clips on this one!) Happy St. Patrick’s Day everyone!

  • 2 c. whole wheat flour
  • 1 ½ c. unbleached white flour
  • 6 T. sugar
  • 5 tsp. baking powder
  • 1 tsp. salt
  • 1 tsp. allspice
  • 10 T. unsalted butter, chilled, cut into pieces
  • 1/2 c. dried cranberries   
  • 1/2 c. diced candied orange peel
  • 2/3 c. half and half
  • 2 T. orange juice
  • 2 large eggs, room temperature
  • milk
  • course white sugar, opt.

In a medium-sized mixing bowl, sift together the flours, sugar, baking powder, salt, and allspice. Take about a quarter cup of the flour mixture out and combine it with the dried cranberries and candied orange peel in a separate bowl. Set aside. (Coating sticky fruit with part of the flour in a recipe helps ensure that the fruit doesn’t clump together when you add it to your batter or dough.) Add the cold butter pieces, and using your fingers, rub the mixture until it resembles coarse meal. Stir in the reserved fruit. In a separate bowl, whisk together the half and half, orange juice, and egg. Add the liquids to the flour mixture and stir till the dough just comes together. (I use a plain table knife for this purpose. It does a wonderful job without over-mixing the dough.) Transfer the dough to a thoroughly floured work surface, knead it a couple of times, and shape it into a 9 ½ x 11-inch square. Cut the square into 24 scones. (The best implement for this task is a bench scraper.)  Transfer the scones to a parchment lined baking sheet. Brush with milk, and sprinkle with coarse white sugar, if desired. Bake the scones in a pre-heated 400 degree oven for about 15 minutes, or until they are a nice golden brown. Serve warm or at room temperature unadorned or if you are feeling particularly worthy, with a smearing of unsalted room temperature butter and a dollop of honey. Life is good my friends, life is good!

SODA BREAD

OLYMPUS DIGITAL CAMERAOLYMPUS DIGITAL CAMERA

I love quick breads because they are well, quick. (The department of redundancy department is going to love that sentence!) And this lovely bread is my “go to” bread when I don’t have time for a yeast bread to rise. (Darling little yeasty beasties take time to work their magic, after all!)  And since you were wondering why that is, I thought I’d offer you a brief explanation of how leavening agents work. (Think of this as really simple baking chemistry 101.) Active Dry Yeast (a living microscopic fungus) is activated by giving it a nice warm bath and then something yummy to eat. (Sounds like the start of my day, but without the coffee!) Yeast works as the leavening in bread dough by eating the sugars (sucrose and fructose) or by converting the starch in flour into sugar. The byproduct of all this sugar being gobbled is CO2. When CO2 is released it is trapped in the bread dough’s elastic web of gluten, in much the same way air is trapped when a balloon is inflated. And although yeasty beasties are hungry little cuties, they can only eat so fast! Thus the time it takes for yeast bread to rise. In this recipe I am using 2 other types of leavening agents, baking soda and baking powder. Baking soda (sodium bicarbonate) is alkaline in nature, and when combined with an acid and a liquid, in this case the acidic buttermilk, it creates carbon dioxide bubbles, giving rise to the dough. Baking powder, which is basically a blend of an acid like sodium acid pyrophosphate and an alkali (sodium bicarbonate – baking soda), produces the same chemical reaction when added to a liquid. Again, carbon dioxide is the byproduct. The interesting part about baking soda when mixed with an acid liquid, and baking powder when mixed with any liquid, is that in both cases, gases begin to be released immediately. (No waiting time required.) And in the case of Double-acting baking powder (which is mostly what you find in your average grocery store), it releases leavening gases on contact with moisture and again during the baking process. A double whammy of leavening action! When a recipe calls for both baking powder and baking soda, like this recipe does, the baking powder does most of the leavening. The baking soda is mainly added to neutralize some of the acid and to help ensure a tender crumb. Note: baking soda and baking powder are not considered interchangeable in a recipe. Bottom line (and what would be on a pop quiz if I were mean enough to give you one): Yeast takes time to release enough gas to raise dough. Baking soda, a simple alkaline, has to be paired with an acidic liquid to begin its task of immediately releasing leavening gases. And baking powder, since it is a combination of both an acid and an alkali just requires liquid to start its gaseous behavior.  Whew – that hurt my brain! So now that you know more about leavening agents than you ever wanted to know, give this bread a try. It’s delicious, even if it does contains bicarbonate this and acidic that.

  • 2 c. flour
  • 4 T. sugar + 1 tsp. for sprinkling
  • 1 ½ tsp. baking powder
  • 1 tsp. salt
  • ¾ tsp. baking soda
  • 3 T. cold butter
  • 1 c. buttermilk

Whisk together the flour, 4 tablespoons sugar, baking powder, salt, and baking soda. Using your cheese grater, grate the butter on top of the flour mixture. (Butter right out of the refrigerator is at the perfect temperature for grating.) Then using your hands, gently squish the butter into the flour until the mixture resembles coarse meal. Make a well in the flour and add the buttermilk. Gently mix the buttermilk into the flour. Do not over mix. (I find the best implement for mixing soft, sticky dough like this one is a regular table knife.) Gently scoop the dough into a lightly greased 9-inch cake pan. Don’t bother smoothing out the dough or trying to make it pretty in the pan. As it bakes it will smooth out and look lovely. Sprinkle the dough with the remaining 1 teaspoon sugar. Bake in a pre-heated 375 degree oven for about 30 minutes or until the top is brown and a toothpick inserted into the center comes out clean. Cool for about 10 minutes in the pan before transfering to a rack. Serve warm or at room temperature.