Category Archives: BREAD, ROLL, AND MUFFIN RECIPES

SOFT FRENCH BAGUETTES

OLYMPUS DIGITAL CAMERA

As everyone knows, bread is the staff of life. And no group of people are in touch with their inner “must have bread” like the French. One of the best things about visiting France is watching people go about their business snacking on big old chunks of freshly baked baguettes. They rip off a piece and somehow manage to get at least the majority of the bread in their mouths. They carry the baguettes in bags, back packs, the little baskets on the front of their bicycles, anywhere their hands can reach with the least amount of effort. It’s amazing to watch how contorted their bodies can become when their mission is to eat the bread and maneuver through traffic at the same time. Boggles my mind, I’ll tell you that! And because of that, French bread has a special place in my heart. (Well that, and the fact that I am a sucker for good bread!)

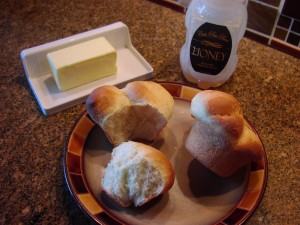
This recipe, unlike most of the baguettes you see being consumed on the run, (so to speak), produces a soft and tender loaf of bread. The crust and crumb (inner portion) are both soft, with just enough “chew” to be interesting. And the preparation could not be easier or the final result more delicious. (And I know I have already given you plenty of recipes for bread. But buying good bread is just ridiculously expensive. And when you consider that basic bread is just yeast, water, sometimes a little something sweet to encourage the yeast, salt, and flour; well highway robbery immediately springs to mind!)

So I’m not going to bug you this posting about baking your own bread. I’m just going to remind you that there are no preservatives in home baked bread. There isn’t too much salt or sugar. And, it only costs pennies to produce. (That’s as close as I can come to “not bugging” you. And yes, it was very hard to show even that much restraint. But then, I’m not your mother! Or if I am, please let me take this opportunity to tell you once again how much your mamma loves you.)

  • 1½ c. warm water
  • 2 pkgs. or a scant 2 T. active dry yeast
  • 2 T. honey
  • 3½ to 4 c. unbleached all-purpose flour
  • 2 tsp. kosher salt
  • olive oil, for greasing the bowl
  • cornmeal, for baking pan

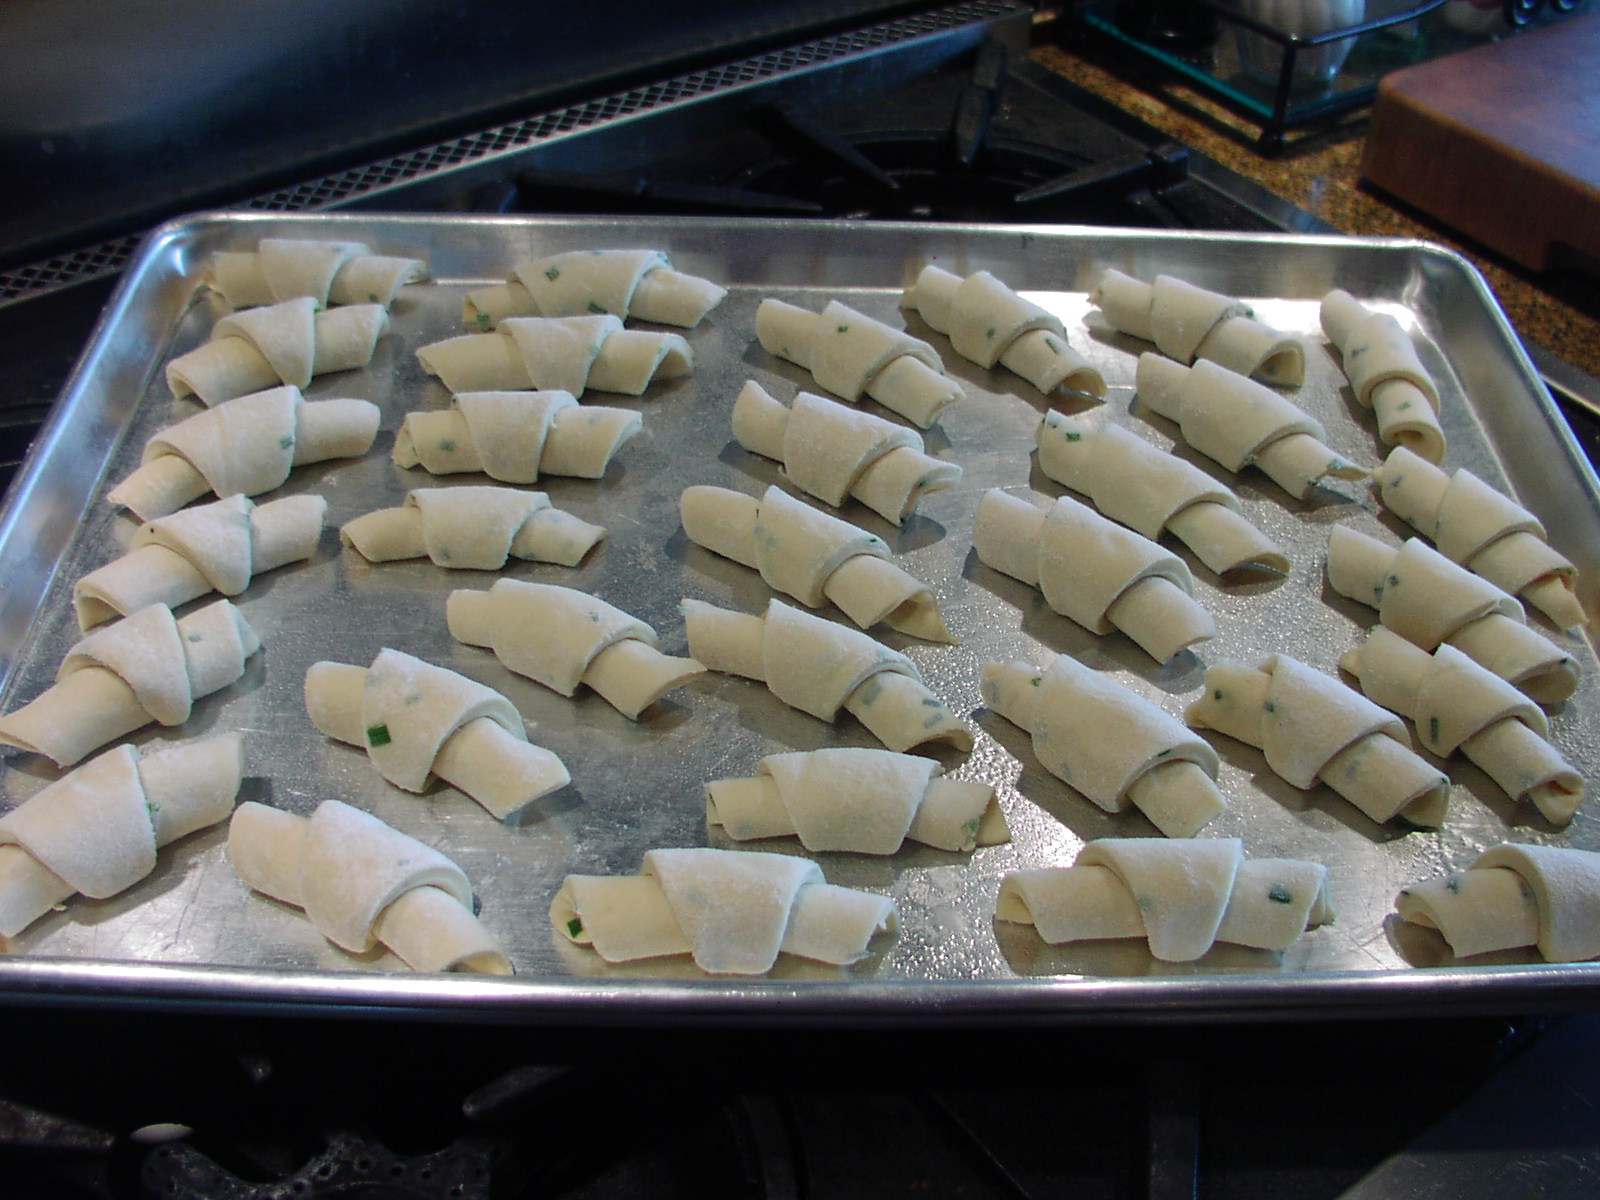
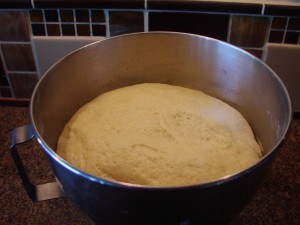
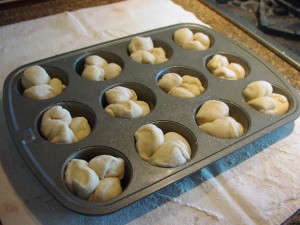
Combine the water, yeast, and honey in a large mixing bowl, preferably the bowl from your stand mixer. Let proof for about 5 minutes or until the mixture looks foamy. Add about half of the flour and the salt and mix until all of the flour is incorporated. Slowly add enough remaining flour to make a dough that is not too wet or sticky. Knead for about 4 minutes. Form the dough into a ball and pour a small amount of olive oil down the side of the bowl. Using your hands, lift the dough from the bottom of the bowl and coat with the oil. Cover the bowl with a tea towel and let rest in a draft free area until doubled in size, 25 to 30 minutes. Meanwhile, lightly sprinkle a baking sheet with cornmeal and set aside.

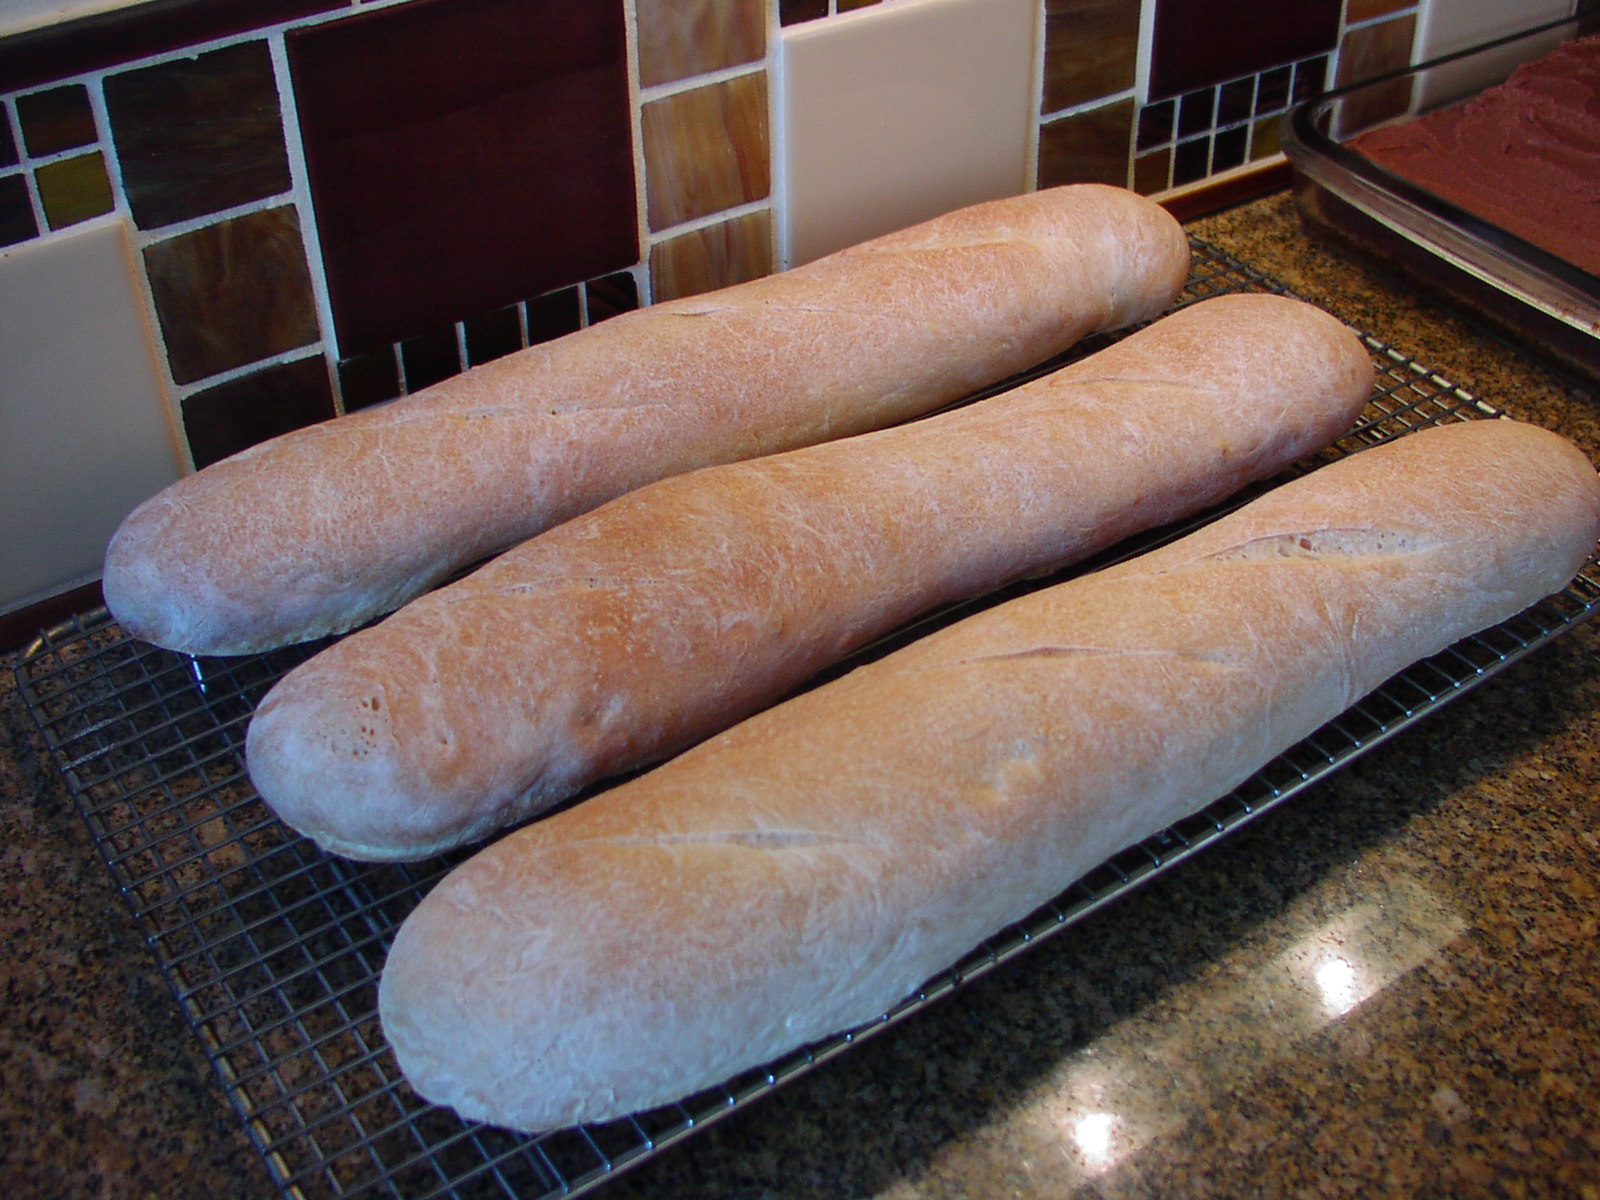
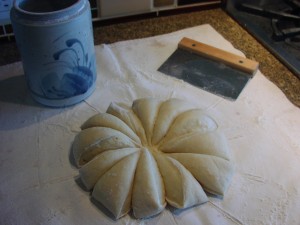
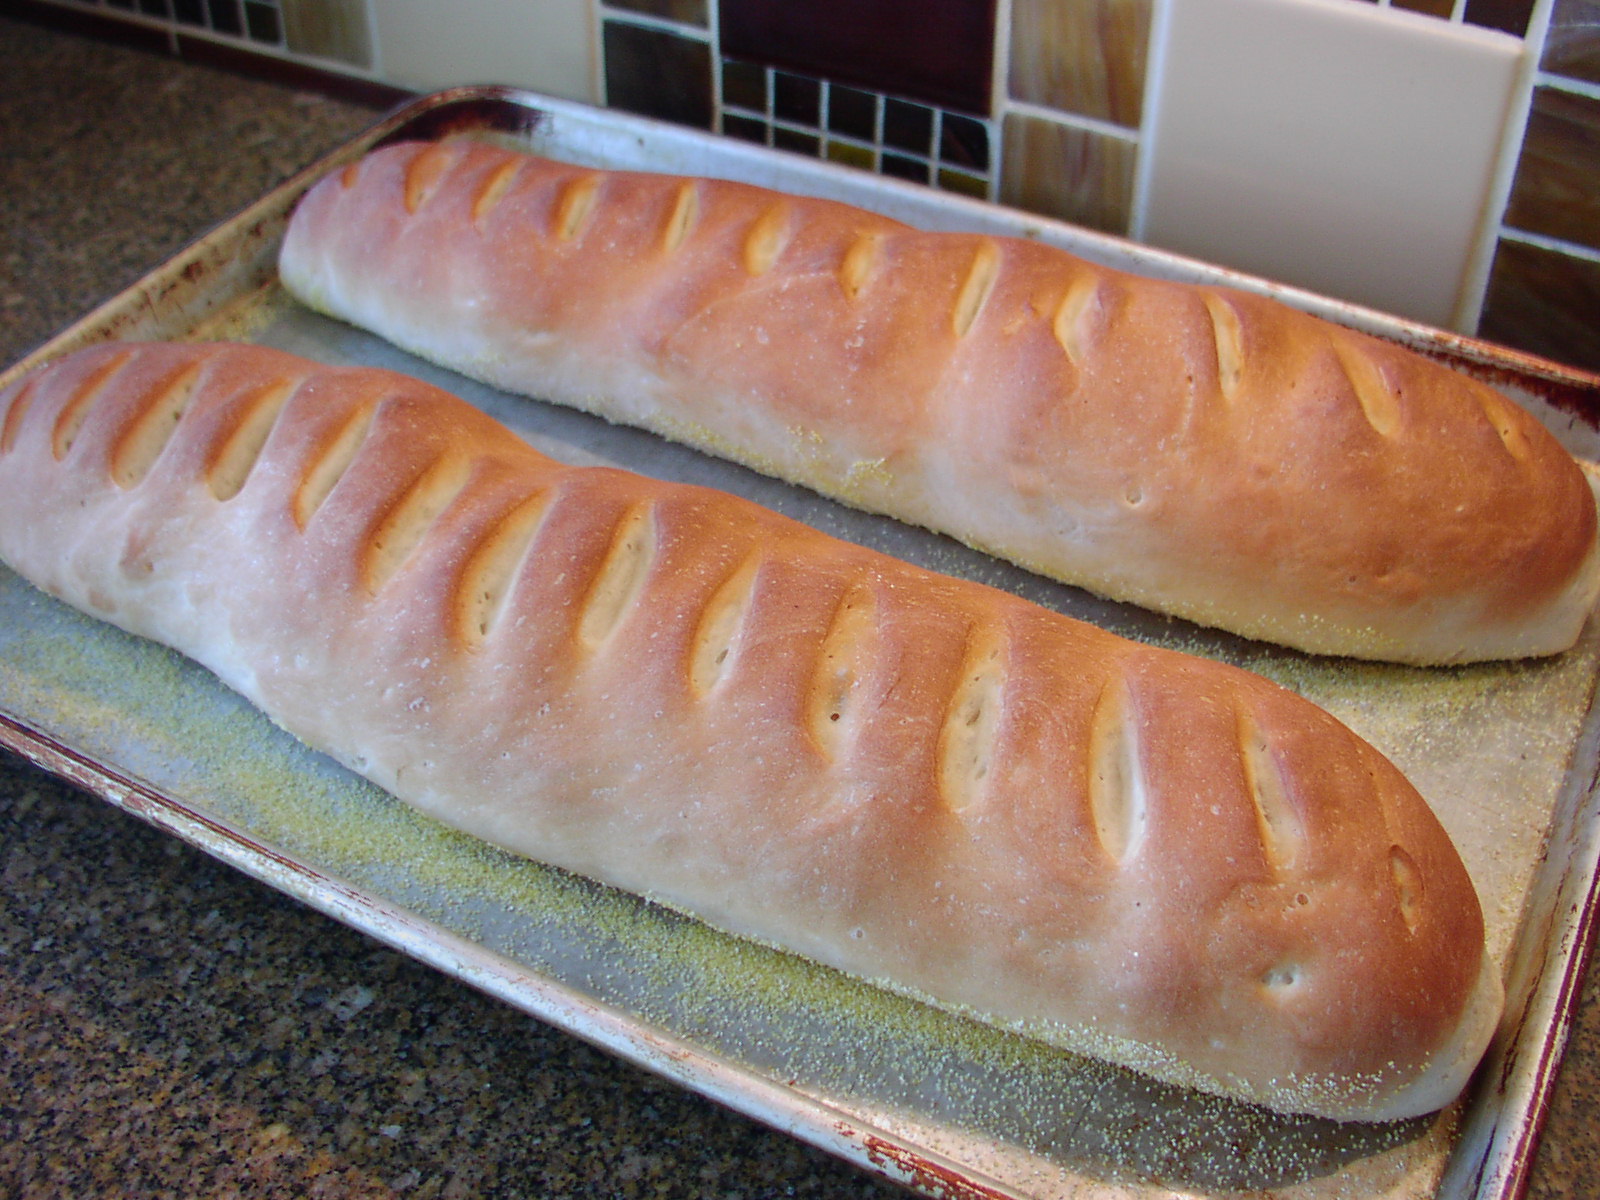
After the dough has doubled in size, punch down and divide in half. Using your hands, form each half into an elongated, 12-14 inch loaf and place on the prepared pan. (To shape the dough, I hold the dough with one hand and using the other hand I squeeze the dough up and down its length until I have the desired size I need. Then I finesse it a bit once I have it on the pan. A little additional shaping here and there until it is roughly symmetrical.)

Once the baguettes are on the baking sheet, make diagonal cuts along the top at about 1-inch intervals. Cover the baguettes with the tea towel again, and let double in size. This takes about 30 minutes. Meanwhile, place a pan of water on the bottom rack of your oven. Set the other rack in the middle of the oven. Pre-heat the oven to 450 degrees. When your bread has doubled for the second time, remove the towel and place the pan in the pre-heated oven. Bake for about 15-20 minutes or until the crusts are a lovely golden brown and the loaves sound hollow when you thump them with your knuckles. Allow to cool before they are devoured.

BUTTERMILK BISCUITS

OLYMPUS DIGITAL CAMERA

There are just times when nothing will do but a biscuit. And I know, there is nothing wrong with toast, or muffins, or bagels – you name it. But sometimes, you need just that perfect vehicle for butter and honey or jam. And when that happens, there is no other bread type as perfect as a warm, straight from the oven, good old fashioned biscuit. And I’m not talking just for breakfast either.

The other evening I served a cold salad for a family dinner gathering and decided that biscuits would be just the perfect side. (I mean really, what do you serve as a side with a main dish salad?) Especially one like the Chicken and Wild Rice Salad on this blog that has the starch, meat, and all the veggies you can eat already represented. So I decided on biscuits. First of all, they’re easy. And they are just enough different to add a special quality to a meal. (Plus this recipe makes a lot of biscuits and I could serve them again for breakfast the next morning.) Luckily, they ended up being a nice side for the salad. And for breakfast, perfect with sausages and scrambled eggs.

So consider making biscuits the next time you want to change things up a bit at the dinner table. Your family and friends will love the soft texture and the depth of flavor imparted from the buttermilk. And I can’t begin to tell you how wonderful these biscuits are for breakfast all smothered with room temperature butter and jam. So be advised. If you serve your friends biscuits for dinner and they see that some are left, your friends might still be around in the morning. Make a note: Buy extra eggs when serving biscuits for dinner!

  • ½ c. lukewarm water
  • 1 pkg. active dry yeast or 1 scant tablespoon if you buy your yeast in bulk
  • 1 T. sugar
  • 5 c. flour
  • ¾ tsp. salt
  • 1 tsp. baking soda
  • 1 T. baking powder
  • ¾ c. vegetable shortening
  • 2 c. buttermilk

Place warm water in a medium sized bowl. Sprinkle on the yeast and sugar. Set aside to proof. Meanwhile whisk together the flour, salt, baking soda, and baking powder in a large mixing bowl. (I use my KitchenAid mixer bowl.) Cut the shortening into the flour mixture until the mixture resembles coarse meal. Add the yeast mixture and the buttermilk and mix just until combined. Do not over-mix.

Scoop dough onto a floured pastry cloth or a floured clean work surface. Allow dough to rest for about 10 minutes. Dust top with additional flour. Using your hands pat the dough to about ¾-inch. Cut into round or square biscuits as large or as small as you desire. Place on a lightly greased baking sheet and let sit while you heat your oven to 400 degrees. Bake for about 10-12 minutes. (Since I have a convection option on my oven, I start the biscuits in a regular oven for 7 minutes and then turn on the convection option for the next 3-4 minutes or until a light golden brown.) Don’t over-bake. Serve warm with butter, honey, or jam.

Based on a Paula Deen recipe.


SOUR CREAM AND CHIVE CRESCENT ROLLS

OLYMPUS DIGITAL CAMERA

Whenever I make these rolls I think about my mother-in-law Betty. She loved these rolls, so whenever we had a family get-together, and I was assigned the bread duty, I would make these especially for her. Not that all the rest of us didn’t love them too, it’s just that she was especially fond of them.

When you think how easy it is to make someone feel loved simply by fixing one of their favorite dishes, it’s a shame we don’t take the time to do it more often.  It’s such a simple way to say “I love you”. For example, all I have to say to Mr. C. to see his face light up is “would you prefer something with pesto or Chicken Paprika for dinner?” He practically starts to purr at the mere mention of either of these two favorites.

That’s why I feel particularly sad for children who don’t grow up with parents that make an effort to cook tasty and healthy food; children for whom fast food is their primary source of sustenance.  Not only are they undoubtedly not receiving the nourishment their bodies require, they aren’t receiving the nourishment I personally feel their souls need too. (Is there anything more reassuring or comforting to a person of any age than good smells emanating from the kitchen?) I can still hear my kids’ voices when they would ask me what was for dinner and I would answer with the name of one of their favorites. There would always be loud happy exclamations that for me were worth all the effort I had expended and more!

So next time you are thinking about what to fix for dinner, pick a dish that you know is one of your family’s favorite. The same thing goes for your elderly relatives. Make dishes that you know are their favorites too. I would love to be able to make another batch of these for my mother-in-law, but I’m glad I made as many as I did while I still had the opportunity.

I hope you enjoy this recipe. The rolls are easy to make and perfect for holidays or dinner parties because the mixing is done the day before. Then roll them out, leave them alone for a couple of hours and pop them in the oven just before dinner. Pillsbury dough boy – eat your heart out!

  • ½ c. butter
  • 1 c. sour cream
  • ½ c. warm water
  • 1 tsp. sugar
  • 1 tsp. salt
  • 2 (.25-oz.) pkgs. or scant 2 T. active dry yeast
  • 2 eggs, room temperature
  • 4 c. bread flour
  • ¼ c. chopped fresh chives

Melt butter in small saucepan. Remove from heat and whisk in sour cream. Meanwhile, pour water into a large mixing bowl, add the sugar, salt, and yeast. When the sour cream mixture is lukewarm, add to the yeast mixture. Add the eggs, flour, and the chives. Knead for about 3 minutes. Cover with plastic wrap and refrigerate overnight. (Dough can be left in refrigerator for up to 3 days before baking.)

Divide dough into 4 parts. Knead and roll each piece into a 10-inch circle.

OLYMPUS DIGITAL CAMERACut circle into 8 pie-shaped wedges. Roll each piece from and wide end to the point.

OLYMPUS DIGITAL CAMERAPlace on a lightly greased baking sheet pointy end down.

OLYMPUS DIGITAL CAMERACover with a light weight tea towel. Allow to rise until doubled in size, about 2 hours. Bake in a pre-heated 375 degree oven for 12 to 15 minutes. (I start the rolls in a regular oven and then turn the oven to the convection setting about the last 5 minutes of baking! This produces a nicely browned roll.) Best served within a few hours of baking with room temperature butter.

CLASSIC ITALIAN BAGUETTE

OLYMPUS DIGITAL CAMERA

This recipe from King Arthur Flour takes about 20 hours from start to finish. OK, 99% of the time you are not on active duty, but I still think it only fair to let you know that this is definitely not a quick bread! But, boy oh boy is it good. I served it at one of our recent JazzVox pre-concert dinners, and all three baguettes were gone before I even had a chance to snag a piece. (I hate it when that happens, but love that my guests appreciate homemade bread.) I actually try to have some kind of homemade bread with every JazzVox meal I serve. First of all, people love homemade bread, and being the cheap frugal cook that I am, I like to save a buck or two where I can. And three really good baguettes from the store would cost me over $10, whereas I can bake 3 baguettes for about $1. (I will leave you to do the math!)

So the first time I made this bread, I knew I had a winner. I actually have several recipes for baguette style breads on this blog because every one of them is delicious in their own right. And even though I live in fear of being considered a nag, but going forward anyway, BREAD IS EASY TO MAKE!

So next time you have a dinner party, consider making homemade bread. Even, or maybe I should say especially people who are truly conscientious about what they put in their mouths are not going to be afraid of a piece of homemade bread, unless of course they are gluten intolerant, but that’s another story. Homemade bread has no preservatives or funny ingredients that most people can’t even pronounce much less want to consume.  And many recipes for baguette type breads contain no sugar, or if the recipe calls for any, a very small amount. (Usually just enough to start the yeasty beasties on their happy feeding frenzy!)

So if you are postponing bread making because you don’t think it will be well received, think again. Bread is the staff of life. Frankly, I don’t know anyone who can resist a piece of bread straight out of the oven. So get out your KitchenAid mixer or a large bowl, buy yourself some yeast and bread flour, and whip up a batch using either this lovely recipe or any of the other bread recipes on this blog.

For more information on making bread, please visit my Bread Baking 101 post.

Starter:

  • ½ c. room temperature water
  • 1/16 tsp. active dry yeast
  • 1 c. unbleached bread flour  

Dough:

  • 1 c. + 2 T. lukewarm water
  • 1 tsp. active dry yeast
  • all of the starter
  • about 3½ c. unbleached bread flour
  • 2 tsp. kosher salt
  • extra virgin olive oil

Starter instructions:

Mix the yeast and water together. Stir in the flour. Cover and let rest at room temperature for about 14 hours. (Overnight works great.) After the 14 hours the “starter” should have risen a bit and appear “bubbly”.

Dough instructions:

Pour lukewarm water into a large prep bowl or into the bowl of your stand mixer. Sprinkle on the yeast. Let sit for a couple of minutes. Add all the starter, 3 cups of the flour, and the salt. Mix and knead everything together by hand or with your stand mixer for about 5 minutes adding additional flour as needed  to achieved a soft, smooth dough. Pour a little bit of olive oil on top of the dough, and using your hands, roll the dough into a ball with all sides very lightly greased with the oil. (Your hands should be nicely greased also!) Cover the bowl, and let the dough rise for 3 hours, gently deflating it and turning it over after 1 hour, and then again after 2 hours.

Ever so lightly grease a large baking sheet with olive oil. Divide the dough into three equal pieces and shape each piece into a rough, slightly flattened oval and place on the baking sheet. Cover with either greased plastic wrap or a piece of parchment paper. Let the dough rest for 15 minutes.

Working with one piece of dough at a time, fold the dough in half lengthwise, and seal the edges with the heel of your hand. Flatten it slightly, and fold and seal again. With the seam-side down, cup your fingers and gently roll the dough into a 15-inch log. Place the logs seam-side down on your baking pan. Repeat with the other two pieces. (Try to keep the baguette dough pieces evenly spaced on the pan.) Cover them again and allow the loaves to rise till they’ve become very puffy, about 1½ hours. Towards the end of the rising time, preheat your oven to 450 degrees.  Using a very sharp knife held at about a 45° angle, make three 8″ vertical slashes in each baguette. Spray the baguettes very lightly with cooking spray. (I use olive oil spray.) Bake the baguettes until they are a very deep golden brown, 25 to 30 minutes. Remove from the oven and cool on a rack.


BANANA BREAD

OLYMPUS DIGITAL CAMERA

The first time I tasted my sister-in-law Evelyn’s banana bread I was hooked. First of all, I am not the banana lover everyone assumes me to be. OK, yes, I do almost always have bananas in the fruit basket I keep on my kitchen counter, and I do have half a banana most mornings, but that doesn’t mean I like them! Bananas are just convenient. You don’t have to cut them or core them or get all sticky from their juice, so like I said, they’re convenient. Add that to the fact that I am lazy, and you have a winning combination. And really it isn’t just that I don’t fully appreciate the taste of bananas, it’s just that I have always preferred veggies to fruit (with one notable exception discussed below.) Just the way I was made, I guess. And it’s not because I wasn’t exposed to fruit as a child.

We lived on 2½ acres when I was growing up and we grew every type of fruit imaginable (at least imaginable for western Washington).  We had several types of apple tree, a peach tree, cherry trees, a pear tree, a crabapple tree, and my favorite, a green Gage plum tree. According to the Raintree Nursery site, “Gage plums came from Italy to France in about 1520 where they were named “Reine Claude”. Brought to England in 1720 by Sir William Gage, he soon lost the labels. These delicious fruits, ideal for dessert or jams, have thereafter been named after him.” (A little bit of plum trivia that has absolutely no relevance to today’s post.)

Green Gage plums may be perfect for dessert or jams, but the best way to eat them is fresh off the tree. I can remember every year spending days harvesting plums, one plum at a time, and eating them until I was practically sick. I can still hear my mom calling to me from the front porch of our home warning me that one day I would eat too many plums and make myself sick. Never happened. And now, it’s hard to find these little darlings in the grocery store or even at a farmer’s market. Sigh…..

So I guess I’ll have to stick with bananas as my “get the minimum requirement of fruit in my daily diet” go to fruit. And of course, bananas will always possess that one redeeming quality that makes them worth appearing in every super market in America. They are, and will always be, the star of one of our most beloved quick breads. And if you can find even one person who doesn’t like banana bread, you will be one up on me. Auntie Evelyn, again a big thank-you for this easy and delicious recipe.

  • ½ c. butter, melted
  • 1 c. sugar
  • 2 eggs, room temperature
  • 1 c. mashed very ripe bananas (about 3)
  • 1 c. unbleached all-purpose flour
  • 1 c. whole wheat flour
  • 1 tsp. soda
  • ½ tsp. salt
  • 1/3 c. hot coffee
  • ½ c. chopped walnuts, opt.

Cream butter and sugar together until light and fluffy. Beat in eggs one at a time. Add mashed bananas. In a separate bowl, whisk together the flours, soda, and salt. Add to the banana mixture alternately with the hot coffee until mixture is thoroughly combined. Stir in nuts. Pour into a lightly greased loaf pan and bake in a pre-heated 325 degree oven for 60-70 minutes or until a toothpick inserted into the middle of the loaf comes out clean. Let sit for a couple of minutes then gently turn out onto a cooling rack.

ONION DILL BREAD

OLYMPUS DIGITAL CAMERA

As I wrote in my Rosemary Olive Bread post, the use of a clay baker is really wonderful when you bake round loaves of Italian style bread.

When I say Italian style bread, I mean the type of bread you can find in practically every bakery all over Italy. It has a fairly thick, chewy crust, and a pleasant coarse texture, full of small holes perfect for sopping up pasta sauce or soup broth.

And this onion dill bread is indeed perfect with soup. The dill, although prevalent, is not overwhelming. It just lends a richness to the bread, as does the dehydrated onion. And for just the best taste treat imaginable, slather a piece of warm out of the oven bread with room temperature butter. Bite into this culinary delight and you will be ever so glad you took the time to bake your own bread.

I served this bread a couple of months ago for one of our pre-concert JazzVox lunches. I was a little concerned because I had no idea if my guests would appreciate the dill flavor as much as I do. But why I even bothered to concern myself is now way beyond my comprehension. Ours guests finished off the entire loaf before either Mr. C or I had a taste! You’d have thought I was feeding a bunch of teenagers rather than the very sophisticated, well educated group of vocal jazz lovers who were in attendance that day! But when it comes to homemade bread, there are few who can resist. And my guests that day were no exception.

For more information about clay bakers (as I call them), please read the blog post referenced above. And if you love vocal jazz and live in the Puget Sound area, please visit www.jazzvox.com for more information about home concerts in your area.

  • 2 c. warm water
  • 1 pkg. or 2 ½ tsp. active dry yeast
  • 2 ½ tsp. salt
  • 3 T. dehydrated chopped onion
  • 3 T. dill seed
  • 5 T. gluten flour
  • 5 c. bread flour
  • vegetable oil

In the bowl of a heavy duty electric mixer, combine the warm water, yeast, and salt. Let sit for about 5 minutes. Add onion, dill seed, gluten flour, and 4 ½ cups of the bread flour. Knead dough on medium speed, adding more bread flour as necessary, until dough is smooth and soft, about 8-10 minutes. Pour a small amount of oil into the bottom of the bowl and using your hand coat the bread with the oil and round into a ball. Cover with a tea towel and let rise in a warm place until doubled, about 1 hour. Punch down and let rise again until doubled, about 45 minutes. Remove dough from bowl. Stretch sides of dough down and under to form a tight, round shape. Place dough in bottom of floured cloche or on a floured baking sheet. Dust top with flour. Cover with lid of baker or tea towel. Let rise 30 minutes. Cut a large shallow X on the top of the loaf using a serrated knife.

To bake using a clay baker: Bake in a pre-heated 400 degree oven for 40 minutes, remove the lid, and continue baking for an additional 10 minutes or until done. When done, loaf will be golden brown and sound hollow when tapped on the bottom.

To bake on a floured baking sheet: Bake in a pre-heated 400 degree oven for 40-50 minutes or until done. When done, loaf will be golden brown and sound hollow when tapped on the bottom.


ROSEMARY OLIVE BREAD

OLYMPUS DIGITAL CAMERA

I guess while I am on my high horse about homemade bread, I might as well post a couple more of my favorite bread recipes. (Getting down off a horse any more is quite difficult, so while I am up here, I might as well make the most of my stay!)

I have been making this rosemary olive bread for about 20 years, and each time I serve it people can’t believe it was produced in my home rather than in a bakery. But I have a secret weapon! It’s called a round clay baker or if you want the official title – a Sassafras Superstone™ La Cloche Round Bread Cloche. (The name was obviously approved through the Department of Redundancy Department, but I digress.)

OLYMPUS DIGITAL CAMERA

Regardless of how fancy you want to be about the name, this product replicates the benefits of baking in a brick oven. Ceramic bread cloches turn out loaves with tender, moist interiors and crispy, evenly golden crusts. The unglazed clay absorbs heat to ensure even baking on all sides, while the porous surface absorbs moisture to give the crust a crispy bite.

Now granted, unless you plan to bake bread on a regular basis, investing in a bread cloche (about $60) might not be the smartest use of your money. But if you do bake bread, even on a semi-regular basis or just for company, purchasing one of these babies will help guarantee a perfect bakery like bread every time. Ever figure out the difference between the cost of a purchased large round loaf of artisanal bread and what it costs you to bake a similar loaf at home? Unless you are of strong constitution, don’t do it. The cost difference is enough to make even the most stoic man or woman break into tears.

And yes of course you can use this recipe even if you don’t have one of those thingamajigs. Just place a shallow pan of water on the bottom rack of the oven before your turn on the oven. The moisture created by evaporation will help give the crust a crispy texture. And needless to say, the flavor will still be wonderful. Happy Baking!

  • 2 c. warm water
  • 1 pkg. or 2 ½ tsp. active dry yeast
  • 2 ½ tsp. salt
  • ¾ c. pitted kalamata olives, halved
  • 1 T. chopped fresh rosemary
  • 5 T. gluten flour
  • 5 c. bread flour
  • vegetable oil

In the bowl of a heavy duty electric mixer, combine the warm water, yeast, and salt. Let sit for about 5 minutes. Add olives, rosemary, gluten flour, and 4 ½ cups of the bread flour. Knead dough on medium speed, adding more bread flour as necessary, until dough is smooth and soft, about 8-10 minutes. Pour a small amount of oil into the bottom of the bowl and using your hands coat the bread with the oil and round into a ball. Cover with a tea towel and let rise in a warm place until doubled, about 1 hour. Punch down and let rise again until doubled, about 45 minutes. Remove dough from bowl. Stretch sides of dough down and under to form a tight, round shape. Place dough in bottom of floured cloche or on a floured baking sheet. Dust top with flour. Cover with lid of baker or tea towel. Let rise 30 minutes. Cut a large shallow X on the top of the loaf using a serrated knife.

OLYMPUS DIGITAL CAMERA

To bake using a clay baker: Bake in a pre-heated 400 degree oven for 40 minutes, remove the lid, and continue baking for an additional 10 minutes or until done. When done, loaf will be golden brown and sound hollow when tapped on the bottom.

To bake on a floured baking sheet: Bake in a pre-heated 400 degree oven for 40-50 minutes or until done. When done, loaf will be golden brown and sound hollow when tapped on the bottom.


SOFT AND CHEWY BREADSTICKS

OLYMPUS DIGITAL CAMERA

So, what’s not to love about homemade bread? And when the bread comes in the form of a soft yet chewy breadstick that has been liberally slathered with garlic infused butter and sprinkled with finely grated Parmesan, what could be better? Pretty much nothing comes to my mind. But then, I am a bread gal. I don’t believe I have ever turned down a piece of homemade bread. Well, except for a few pieces that came out of a friend’s bread machine. This was years ago when bread machines were new to the market; when every other cook book writer was touting the enjoyment of baking your own bread with the same ease and convenience as preparing an unforgettable dinner using your crock pot! (Throw some ingredients in a machine before you leave for work, and walk away. Come home and your main course and fresh bread are ready when you walk in the door.)

Now granted, the idea of saving time in the evening was truly appealing. What wasn’t appealing, at least to me, was the consistency of the bread and some of the strange flavors introduced to make the breads appear more exotic. Tomato Soup Bread and Curry Bread are just two examples of bread recipes that I remember from the early days of bread machines. Scary, but true!

Although I haven’t tried a bread machine for 30 years, and frankly don’t intend to in the future, if that is how you build your bread – go for it! What matters is that you have control of the ingredients when you make your own bread. No preservatives, not too much salt, no sugar if you so choose, etc. etc. However you build bread, do so at every opportunity. Not only will it save you buckets of money, your family will think you are the best thing since sliced bread! (Now I “wonder” how that phrase ever became part of the vernacular!)

  • 1 c. warm water
  • 2 1/2 tsp. active dry yeast
  • 2 T. brown sugar
  • 1 tsp. kosher salt, plus more for sprinkling on baked breadsticks
  • 3 c. bread flour
  • extra virgin olive oil
  • 2-3 T. butter
  • 2 thinly sliced garlic cloves
  • finely grated Parmesan cheese

Pour the water into a mixing bowl, sprinkle with yeast, and stir in the sugar and 1 teaspoon salt. Let rest (proof) for 5 minutes. Add 2 1/2 cups flour and knead for 4-5 minutes adding flour as needed to make a fairly stiff dough. Round dough up in the bowl, pour a little olive oil over the top, and turn dough with your hands until the entire surface is coated. Cover with a tea towel and let rise for an hour. Remove the dough from the bowl; roll into a 10×12-inch rectangle. Cut into strips about ¾-inch wide, then cut strips in two. Give each strip a twist and place on a lightly greased baking sheet. Cover and let rise for about 30 minutes.  Bake in a pre-heated 375 degree oven for 10-15 minutes or until just done. Do not over bake. Meanwhile melt butter and add garlic cloves. Heat until the garlic cloves begin to sizzle. Remove from heat. When the bread sticks are finished baking, remove from oven and brush liberally with the garlic infused butter and sprinkle about half of the breadsticks with grated Parmesan (go light on the Parmesan) and all of the breadsticks with a very light sprinkle of kosher salt. Serve warm or at room temperature.


FROSTED PUMPKIN PECAN MUFFINS

OLYMPUS DIGITAL CAMERA

Something you should know about me.  Unlike most people, I truly don’t like donuts and I don’t much care for muffins either. However, there are a few exceptions. (Aren’t there always?) I absolutely adore maple bars (really just a donut in rectangular form with maple icing) and have learned to really like a few kinds of muffins. Like this muffin for example. It has substance and flavor. It has a lovely dense yet moist consistency. In other words, it has something to offer besides airiness and idle calories. Any muffin I find myself drawn to usually contains bran or dried fruit or has some other redeeming ingredient that sets it apart from the average offering in any coffee shop display case. And truly I don’t understand why I love most cakes and dislike most muffins. They are very similar when it comes right down to the ingredients list. But I guess there is just no explaining an individual’s taste in food. And in that regard I am no different than anyone else. (Just proves what I have always said – “humans are nothing if not inconsistent!”)

So just in case there are any readers who share my eccentricity about muffins, I’m going to post a few really outstanding muffin recipes I have learned to make over the years. I’m not going to post them in any kind of sequence or series. Even though I have learned to really like them, they will simply never hit my every day or even every week “must have, absolutely crave” list. None-the-less, they are very good and in some cases, fairly nutritious too. And muffins are easy to make, keep very well, and most normal people think are just a delightful treat. And at this busy time of year, almost indispensible as a tasty sweet to serve friends and neighbors who drop by with holiday greetings.

Because I have been so frank about my general dislike of muffins, I feel compelled to say I’m sorry to any muffin lovers out there if I have in any way offended you. Also, if your meaning of life comes from jelly donuts, I offer my heartfelt apologies for casting aspersions on something so near and dear to your heart. In fact, I’m feeling so contrite I’d be willing to make it up to you. Let’s meet for a maple bar!

Muffin Ingredients:

  • 2 c. whole wheat flour
  • 1½ c. all purpose flour
  • ¾ c. granulated sugar
  • 2 tsp. baking soda
  • 1 tsp. baking powder
  • 1 teaspoon each cloves, cinnamon, and nutmeg
  • ½ tsp. salt
  • ½ c. chopped toasted pecans
  • 1 (15-oz.) can pure pumpkin (or 2 cups puree)
  • ½ c. olive oil
  • ¼ c. real maple syrup
  • 3 T. milk
  • 3 eggs, room temperature

Frosting Ingredients:

  • 2 T. butter
  • 1¼ c. powdered sugar
  • 1 tsp. vanilla
  • 1 T. maple syrup
  • 1-2 tsp. water

Muffins: Combine the flours, baking soda, baking powder, cloves, cinnamon, nutmeg, salt, sugar, and nuts in a large mixing bowl. In a separate bowl, whisk together the pumpkin, oil, maple syrup, milk, and eggs. Add the wet ingredients to the dry ingredients in the large mixing bowl and stir only until combined. Do not over-mix.

Lightly grease each muffin cup with cooking spray. Using an ice cream scoop, fill each muffin tin almost to the top with a scoop of batter. (If you don’t have a large ice-cream scoop, just fill using a large spoon.)

OLYMPUS DIGITAL CAMERABake in a pre-heated 350 degree oven for 25 minutes or until a toothpick inserted into the middle of one of the muffins comes out dry. Remove the muffins from pan and let cool before frosting. (If you have time, bake the muffins ahead and let them take a cold vacation for a few days in your freezer. Baked goods that contain fruit or vegetables are almost always more moist and flavorful after being frozen. However, if you do freeze them, don’t frost them until just before serving.

Frosting: Melt butter in a small saucepan. Add powdered sugar and vanilla. Stir in the maple syrup. Add water until desired consistency is reached. Drizzle over cooled muffins. Allow the frosting to harden and store in an airtight container.

BREAKFAST ROLLS

OLYMPUS DIGITAL CAMERA

One of the joys of traveling in Italy is the continental breakfast that is almost always provided as part of the cost of your hotel or B&B room. And as can reasonably be expected, the size and amount of dishes offered depend almost entirely on the size of the hotel or B&B. So in a small B&B you might just get cold cereal, yogurt, individually wrapped croissants, fresh fruit, juice, and coffee. While in a larger hotel, the variety and choices can be almost endless.

In a medium sized hotel (we didn’t stay in any large hotels) you are almost always presented with a cheese and sausage platter or two, wonderful chewy baguette slices, plastic wrapped biscuits and Melba toast, various pastries including croissants, hard boiled eggs (or sometimes scrambled eggs), fresh fruit, yogurt, cereal (both corn flakes and cocoa puffs), juice (often fresh squeezed), and espresso drink(s) of your choice.

But by far the best breakfast bread I tasted was in our first hotel in Rome. It was a not too sweet, hollow brioche type roll made I’m sure by forming several small balls of dough and placing them together in some sort of a large cupcake shaped pan to bake. So when you broke them open, you had several lovely little concave pockets on which to spread your butter and contain the honey. I’m tellin’ you, these babies were enough to make a grown woman swoon. OMG they were good.

So of course when I arrived home, one of the first things I wanted to duplicate were these wonderful rolls. The difficult part of finding a recipe for a one of a kind roll is, well duh, they’re one of a kind! I have spent hours looking, believe me. But when I do figure it out, you, my faithful readers will be the first to know!

In the meantime I’m going to share the recipe for my first attempt. This recipe is easy to make and produces an absolutely divine tasting roll. And when spread with butter and honey, well it’s just a heavenly experience. These would also be fabulous served at Thanksgiving. So give them a try.  But keep posted (so to speak). I have only begun to search for the roll of my dreams.

  • 1/2 c. milk
  • 1/4 c. butter
  • 1/2 tsp. salt
  • 2 T. sugar
  • 1 pkg. or 1 T. active dry yeast
  • 2 T. warm water
  • 2 eggs, room temperature
  • 3 c. unbleached all-purpose flour
  • small amount of vegetable oil
  • melted butter

Scald milk; stir in butter, salt, and sugar. Cool to lukewarm. Sprinkle yeast on warm water in the bowl of your heavy duty mixer; stir to dissolve. Add the lukewarm milk mixture along with the eggs. Beat in flour a little at a time, to make a soft dough. Knead with your mixer or turn onto a floured surface and knead lightly until dough is smooth and satiny. Pour a small amount of oil over the dough in your mixing bowl and turn dough to coat all of the surfaces. Cover with a tea towel or plastic wrap and let rise in a warm place free from drafts until doubled, about 90 minutes.

OLYMPUS DIGITAL CAMERA

Punch down and turn out on a floured surface. Butter 12 standard (1/3-cup) muffin cups. Divide dough into 12 equal pieces using a bench scraper; cut each piece into thirds.

OLYMPUS DIGITAL CAMERA

Roll each small piece into a ball. Place 3 balls in each prepared cup (dough will fill cup).

OLYMPUS DIGITAL CAMERA

Place muffin pan in a warm draft-free area; lay sheet of waxed paper over the rolls. Let dough rise until almost doubled (dough will rise 1/2 inch to 1 inch above top rim of muffin cups) about 45 minutes.

Melt about a tablespoon of butter in your microwave. Gently brush melted butter over each roll. Bake rolls in a pre-heated 400 degree oven for about 15-18 minutes or until golden brown. (Check after the first 10 minutes. If rolls are already golden brown, cover with aluminum foil for the remaining baking time.) Allow rolls to cool for a few minutes in the baking pan then transfer to cooling rack. Serve warm or at room temperature.