Every
year at Christmas time, there are a few of us who live in the same neighborhood
that exchange a little something sweet with each other. We dearly treasure
these people, so of course I treat them like I would if they were family
members. That means I experiment on them just like I would if we were related.
Now
sometimes my “experiments” turn out better than I expected. Other times, not so
much. This year, I gifted these dear friends with a version of an eggnog bread
that I read about on the On Sutton Place food site. I changed a couple of things
here and there, but the essence of the recipe remained true to the original. And
I am very pleased to announce, that in my humble estimation, this bread recipe is
a winner.
The
bread is ever so tender, moist, and the flavor is absolutely lovely. So even
though Christmas has come and gone, or as they say in the common vernacular ‘so
yesterday’, I’m providing you with this recipe as an early Christmas present for
next year! This bread is simply that delicious. It is definitely gift worthy,
even if the one gifted is just you!
So before eggnog no longer appears in your local grocery store dairy case, bake a batch, freeze 2 of the loaves, and every 4 months or so, take one out of the freezer and make an otherwise uneventful weekend breakfast a special occasion. Cheers!
½
c. (1 stick) unsalted butter, room temp.
1
c. granulated sugar
2 eggs, room temperature
1½
c. eggnog (not the low fat
variety)
1 tsp. vanilla extract
1 tsp. VS cognac*
1
tsp. dark rum*
2¼
c. unbleached all-purpose flour
1 small pkg. (3.4-oz.) instant
vanilla pudding mix
2 tsp. baking powder
½
tsp. salt
½ tsp. ground nutmeg
¼ tsp. cinnamon
Butter
and flour 3 small loaf pans. Set aside until needed.
In
the bowl of your stand mixer, whip the butter and sugar until light and fluffy.
Add the eggs and beat until combined. In a glass measuring bowl, whisk the
eggnog, vanilla, cognac, and dark rum together.
In
another bowl, whisk the flour, pudding mix, baking powder, salt, nutmeg, and
cinnamon together.
Add
the dry ingredients and eggnog mixture to the butter mixture in 3 batches,
mixing well after each addition. The batter will be thick. Divide the batter evenly into the prepared
pans.
Bake
in a pre-heated 350 degree oven for 25-35 minutes or until a toothpick inserted
into the middle of each loaf comes out clean. Do not overbake.
Remove from oven and cool in pans for 5 minutes before turning out onto racks to cool completely. Or, if you are giving the loaves as gifts, and have used disposable aluminum pans, they can remain in their pans.
Cognac Glaze
1
c. powdered sugar, or more as needed
1
T. eggnog, or more as needed
1 tsp.
cognac, dark rum, or bourbon (whichever you use in the bread batter)
freshly grated nutmeg, opt.
Whisk
the powdered sugar, eggnog, and cognac together to form a pourable, but not
runny mixture. If your glaze is too thin, add a little more powdered sugar. If
it’s too thick, add a tiny bit more milk. Drizzle glaze over cooled loaves. Sprinkle lightly with freshly grated nutmeg. Let set
completely before wrapping each loaf in wax paper and aluminum foil. Store at
room temperature.
*Or you can use all cognac, dark rum, or bourbon. All work well in this recipe.
It has been a tradition in our family since my children were very young, to enjoy cinnamon rolls with our Christmas morning breakfast. (And it’s a fine tradition I have to say!) Of course it’s one more thing for Mrs. Santa to do on Christmas Eve. But I’ve been making these rolls for so long, they practically throw themselves together. And never being one of those people who has a favorite cinnamon roll topping, I sometimes make sticky buns and other times it’s frosted rolls. I love them both ways, so it’s a dozen of one or a dozen of the other. (I think that’s how the saying goes!) Anyway, this year I decided to make Sticky Buns. And for the life of me, I have no idea why I haven’t previously posted this recipe. Perhaps it has something to do with PCSD – Post Christmas Sleeping Disorder (my need for at least a solid 12 hours of sleep each night between Christmas night and New Year’s Eve). But regardless of the reason, I am not going to let any more time pass without providing you with my recipe for these yummy cinnamon rolls.
I believe the original recipe came out of my Betty Crocker cookbook. I would verify that belief, but I’m pretty sure the cookbook pages would self-destruct if I tried to pry them apart. I am certain however that I made a couple of ingredient changes a while back. I substituted butter for shortening, and bread flour for all-purpose flour. (Got to stay up to date with the ever changing world of nutrition. BTW – it’s once again OK to eat up to 3 eggs and 70g of beef daily! Well, that is, until “they” change “their” minds again!) But back to cinnamon rolls.
So do yourself a favor, and bake a batch of these rolls for your family or friends. And no, you do not have to wait until next Christmas! These babies are delightful any old day of the year. But beware. They are addicting. And yes, if you are a lot more organized than I am, which isn’t difficult I might add, you can make these rolls ahead and freeze them until needed. Happy New Year.
STICKY BUNS
Dough recipe:
¾
c. scalded, room temperature whole milk (see how to scald milk below)
1
pkg. or 1 scant tablespoon active dry yeast
¼
c. room temperature water
¼
c. granulated sugar
¾
tsp. salt
1
egg
¼
c. (½ stick) unsalted butter, room temp.
3½
c. bread flour
veggie
oil
2
T. unsalted butter, melted
½
c. packed brown sugar
2-3
tsp. ground cinnamon
½ c. golden raisins
In the bowl of your stand mixer, dissolve the yeast in the room temperature water. Add the sugar. Let sit for 10 minutes. (The yeast should foam up a bit during this time.) Add the cooled milk to the yeast mixture along with the salt, egg, butter, and half of the flour. Mix until smooth. Add enough of the remaining flour to form a soft, but not sticky ball. Knead for about 5 minutes.
Pour
a small amount of oil over the dough and roll into a ball with your hands. Cover
the bowl with plastic wrap and allow to rise until doubled in size, about 90
minutes. Punch down and let rise again for 30 minutes. While the dough is rising, make the sticky
part.
When
the dough is ready, roll into a 15 x 9-inch rectangle. Spread the dough with
the melted butter. Sprinkle the brown sugar over the butter, then sprinkle evenly
with the cinnamon and golden raisins. Roll up tightly, beginning at one of the
wide ends. Slice into 12 rolls (about 1-inch slices.) Place slices in the
baking pan over the “sticky part”. Cover with plastic wrap or a tea towel and
let rise until doubled, about 45 minutes.
Bake
in a pre-heated 375 degree oven for 25-30 minutes. Remove from oven and
immediately turn upside down over a tray or aluminum foil. Let pan stay over
the rolls a minute or so to allow the “sticky stuff” to run down over the
rolls. Anything remaining in the pan can be removed and spread over the rolls.
Serve warm.
If you make ahead, allow to cool completely and cover with foil and store on your counter. When you are ready to serve, heat the rolls gently in your oven or microwave. Don’t expect any leftovers!
Sticky Topping:
1/3
c. unsalted butter
½
c. packed brown sugar
1
T. corn syrup
½
c. chopped pecans or walnuts
Melt the butter in a small saucepan. Stir in the brown sugar and corn syrup. Pour in to a buttered 9 x 13-inch pan (glass preferred). Sprinkle with pecan pieces. Set aside.
CREAM CHEESE FROSTING TOPPED CINNAMON ROLLS
Dough recipe:
¾
c. scalded, room temperature whole milk (see how to scald milk below)
1
pkg. or 1 scant tablespoon active dry yeast
¼
c. room temperature water
¼
c. granulated sugar
¾
tsp. salt
1
egg
¼
c. (½ stick) unsalted butter, room temp.
3½
c. bread flour
veggie
oil
2
T. unsalted butter, melted
½
c. packed brown sugar
2-3
tsp. ground cinnamon
½
c. golden raisins
½ c. chopped pecans or walnuts
In
the bowl of your stand mixer, dissolve the yeast in the room temperature water.
Add the sugar. Let sit for 10 minutes. (The yeast should foam up a bit during
this time.) Add the cooled milk to the yeast mixture along with the salt, egg,
butter, and half of the flour. Mix until smooth. Add enough of the remaining
flour to form a soft, but not sticky ball. Knead for about 5 minutes.
Pour a small amount of oil over the dough and roll into a ball with your hands. Cover the bowl with plastic wrap and allow to rise until doubled in size, about 90 minutes. Punch down and let rise again for 30 minutes.
When
the dough is ready, roll into a 15 x 9-inch rectangle. Spread the dough with
the melted butter. Sprinkle the brown sugar over the butter, then sprinkle evenly
with the cinnamon and golden raisins. Roll up tightly, beginning at one of the
wide ends. Slice into 12 pieces (about 1-inch slices). Place in a buttered 9 x
13-inch pan (glass preferred). Cover
with plastic wrap or a tea towel and let rise until doubled, about 45 minutes.
Bake
in a pre-heated 375 degree oven for 25-30 minutes. Remove from oven, place on a
cooling rack, and allow to cool completely before slathering with the frosting.
Sprinkle the pecans evenly over the frosting.
Cover with foil and store on your counter. When you are ready to serve, heat the rolls gently in your oven or microwave. (You don’t want to warm them too much or too fast. You don’t want the frosting to melt completely. It may melt a little. Not such a bad thing!) As with the Sticky Buns, don’t expect any leftovers!
Brown Sugar and Cinnamon Cream Cheese
Frosting:
½ c. (1 stick) unsalted butter, room temperature
8 oz. cream cheese, room
temperature
2 T. brown sugar
1 tsp. vanilla
pinch salt
¼ tsp. ground cinnamon
3½ c. powdered sugar or more
if needed
Cream butter, cream cheese,
and brown sugar together until light and fluffy. Add the vanilla, salt, cinnamon,
and enough powdered sugar to make a firm but not stiff consistency. Beat until
smooth and easy to spread.
*How to and why is it necessary to scald
milk:
In a small pan, heat the milk to just below the boiling point (180 degrees). (Milk will have just begun to simmer at this point, and will give off steam while small bubbles form at the edge of the pan.) Remove from heat. The temperature of the milk at this point is actually higher than the temperature at which milk is pasteurized (161 degrees). Milk actually needs to be scalded for this recipe to help the dough rise up better and produce a firmer, lighter textured roll. For the scientific reasons behind scalding milk, consult the internet.
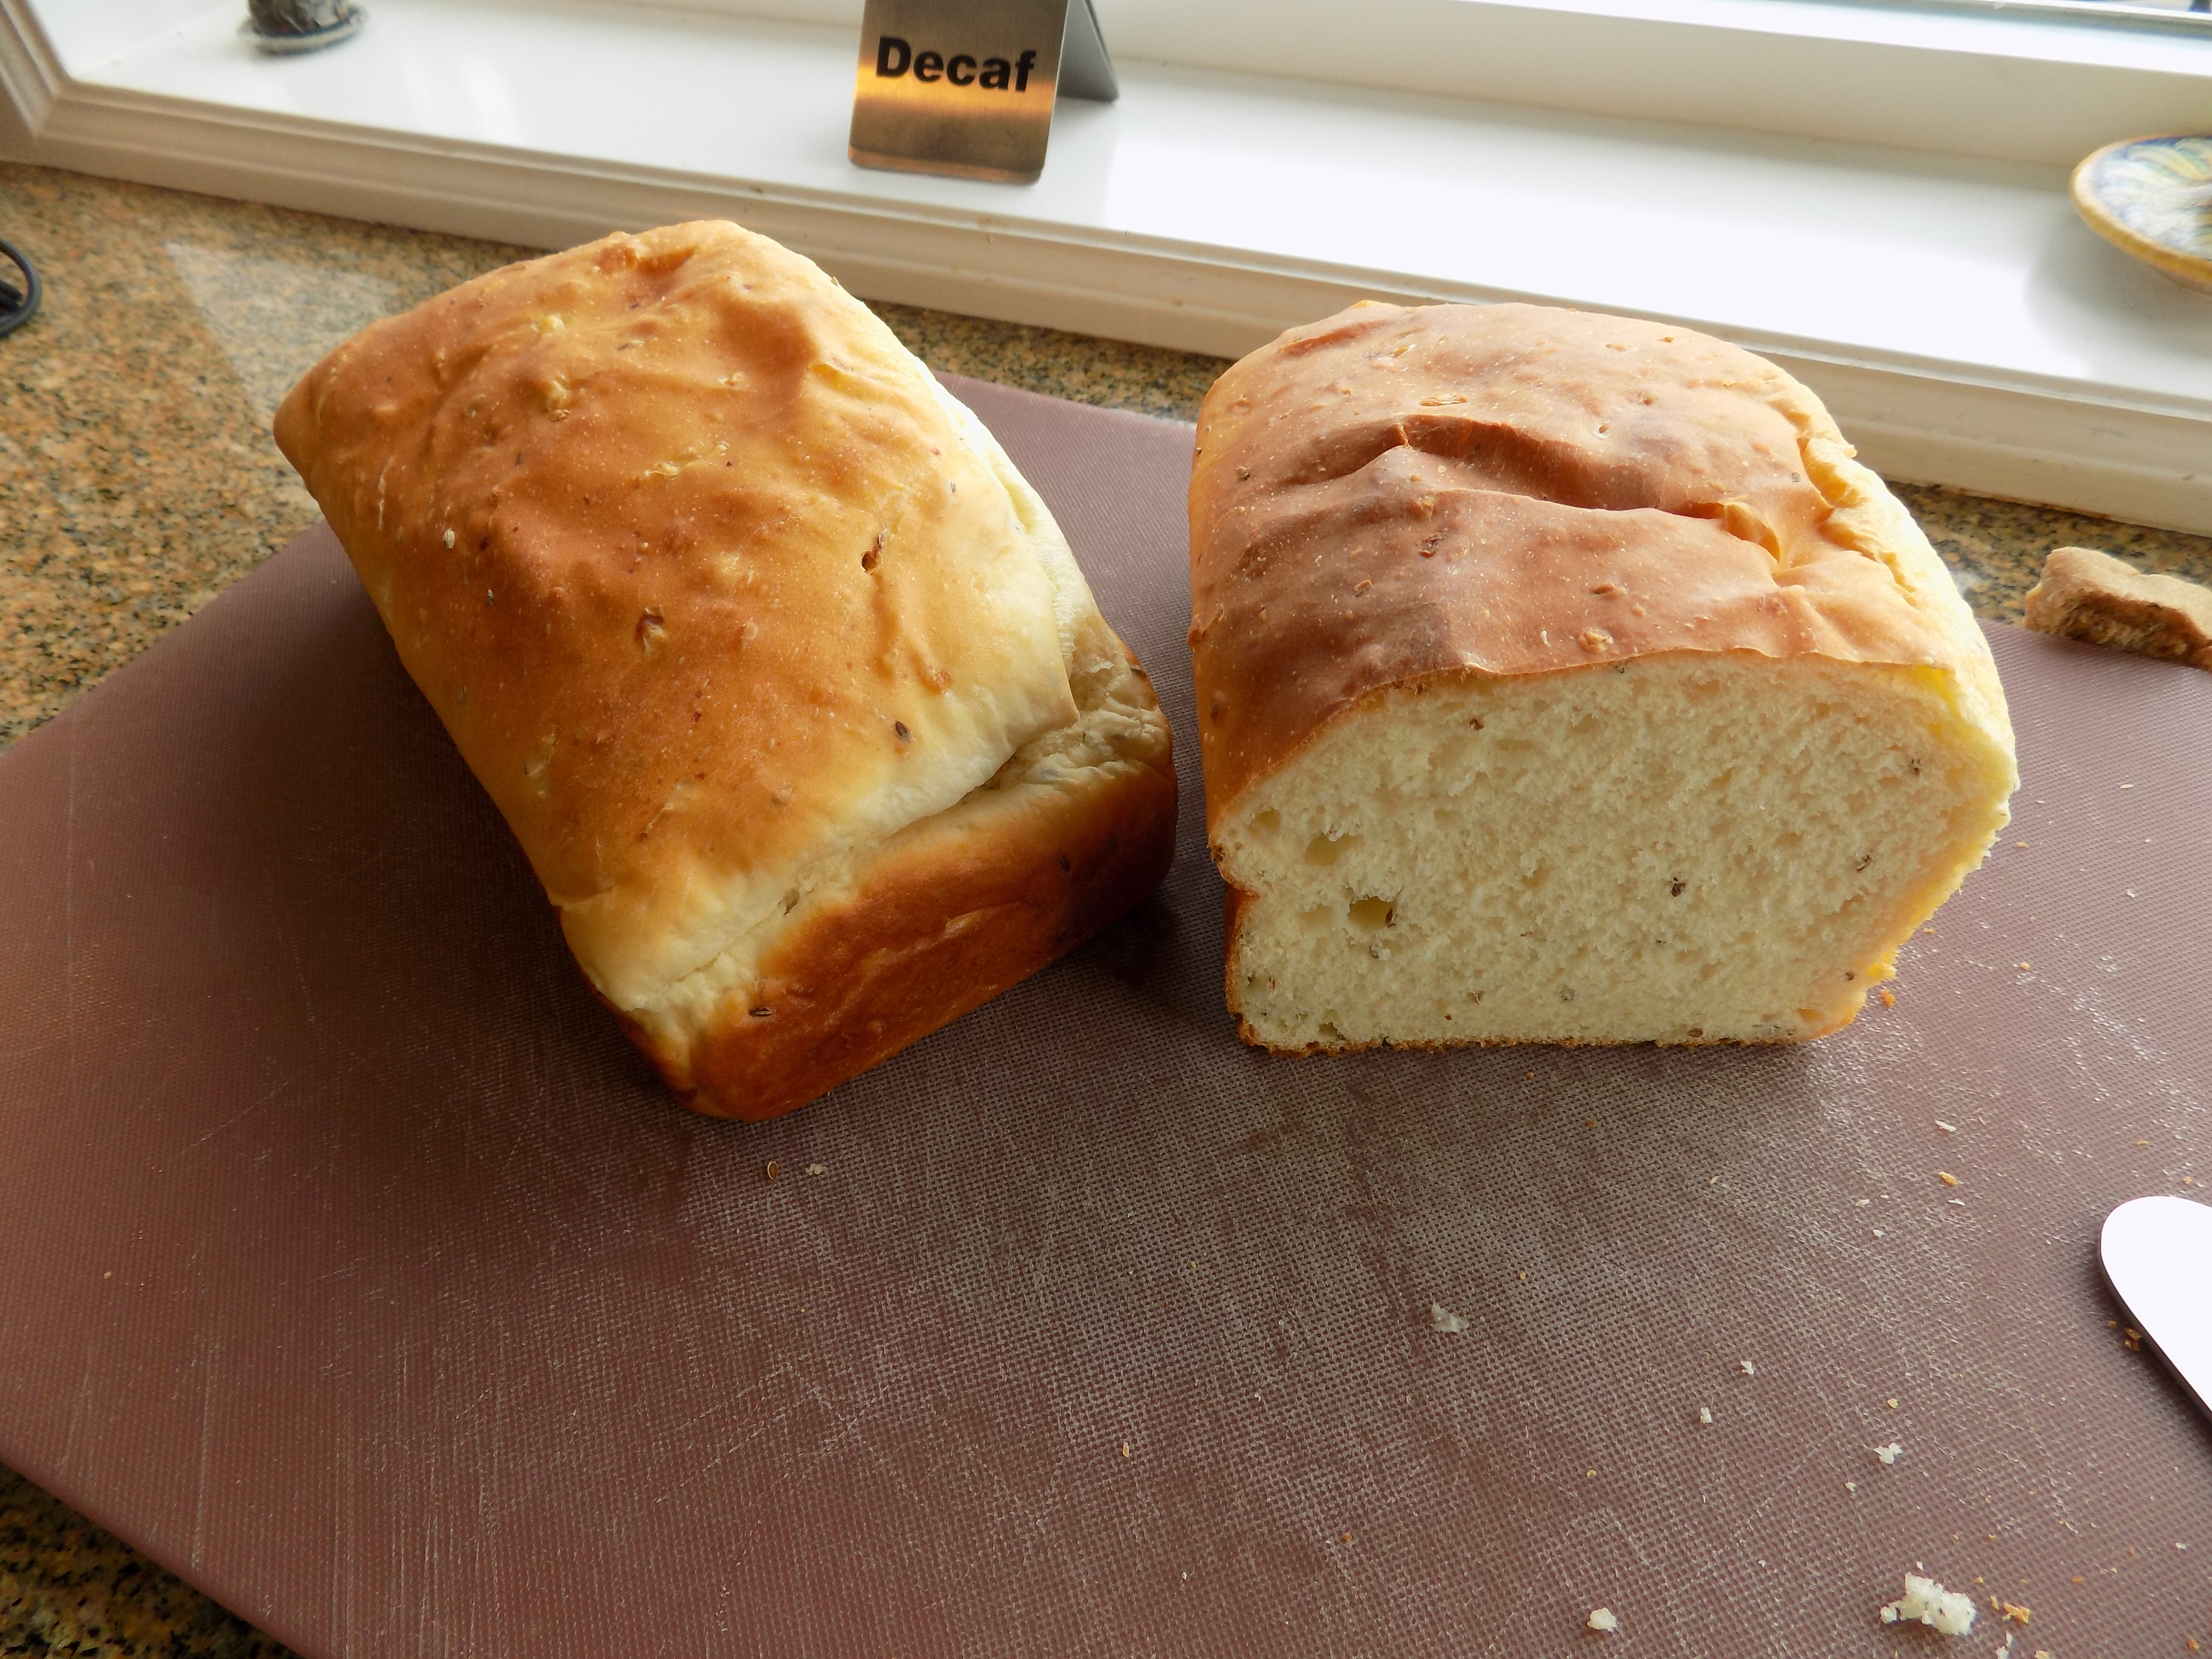
As I sit at my desk writing this preface, I see grey skies, grey water, and leaves on deciduous trees in shades anywhere from rusty red to a lovely golden yellow. The leaves are beautiful, the grey – not so much! All of which however serve to remind me that it is fall, with winter just around the corner. But the one redeeming feature that makes enduring these upcoming soggy and dark months semi passable for me, is that I get to prepare soups and stews. Because I truly love to both cook and eat these hot and savory dishes. Especially when accompanied by a lovely piece or two of homemade bread. So knowing that everyone seems to love comfort food especially during the dreary months, I decided to share with you one of my favorite bread recipes. This recipe is both easy to prepare and absolutely delicious.
I have been making this bread since my children were very young. In fact, when I made this bread, or any kind of bread for that matter for an extended family dinner gathering, my son Sven would fill up on the bread, generously spread with soft butter I might add, and totally ignore the rest of the dishes I was serving. (Except dessert, of course!) But those were wonderful times, and an occasional dinner of just bread didn’t seem to hurt my son or anyone else in the least.
This recipe is straight out of my then new Stone-Buhr Kitchens 1971 cookbook entitled Cooking with Gourmet Grains. Still one of my favorite cookbooks BTW. (OK, I did reduce the amount of sugar, but that is the only change I made.)
So next time you decide to serve soup or stew, give this incredibly delicious bread a try. After all, most soups and stews take a fairly long time to cook. So while your soup or stew is happily burbling away on the stove, you could be making a loaf or two of this bread! Now wouldn’t that thrill your family and friends? After all, “Nothing says lovin’ like something from the oven”! Quote from the Pillsbury Doughboy (aka Poppin’ Fresh). Actually, at 42 years old, the Pillsbury Doughboy should now be referred to as the Pillsbury Doughman. But I’ll never win that argument with the makers of advertisements, so I might as well leave that subject unassailed! Enjoy the bread.
¼ c. barely warm water
1 pkg. or 1 T. active dry yeast
1 T. sugar
1 c. lg. curd cottage cheese
1 T. dehydrated onion
1 T. unsalted butter
1 tsp. kosher salt
¼ tsp. baking soda
2 tsp. dill seed
1 lg. egg
2¼ – 2½ c. unbleached all-purpose flour
Pour water into the mixing bowl of your stand mixer. Sprinkle with yeast and sugar. Allow to sit for 10 minutes.
Meanwhile, heat the cottage cheese to lukewarm and stir in the onion, butter, salt, baking soda, and dill seed. When the mixture is cool to the touch, add the egg. Add the cottage cheeses mixture to the yeast mixture; blend with your dough hook.
Add enough flour to make a stiff batter. Knead for a couple of minutes. Cover the bowl with plastic wrap and let rise until doubled, 50-60 minutes. Punch down and turn into a well-greased 1½ qt. casserole dish or loaf pan. (When making a double batch, I divide the batter between 3 loaf pans. Makes for nice sized loaves.) Cover and let rise in a warm place for 30-40 minutes or until almost doubled.
Bake in a pre-heated 350 degree oven for 35-45 minutes or until the internal temperature reaches about 200 degrees. (You may need to place a piece of aluminum foil over the bread for the last 10-15 minutes to prevent the top crust from getting too brown.)
Remove bread from casserole or loaf pan; cool on a wire rack. Serve at room temperature with lots of soft butter.
And yes, this is yet another zucchini recipe! (I’m on a roll, and at this point, there’s no stopping me. At least until friends stop gifting me with home grown zucchini!) But even if I didn’t have zucchini in both my refrigerators, and a couple of cupboards in my unheated garage, I would want you to have this recipe. This zucchini bread is simply that good. And very easy to prepare.
The back story: A few years ago at a Labor Day family campout, daughter Ursala brought several loaves of this zucchini bread to share with her dear mother, Mr. C, her siblings and family, and the rest of our extended community. Well (and I’m still not proud of myself for this), it got time to pack up and leave, and one of the things that “left” was an absconded loaf of this delicious bread. I just walked over to her camp site and “lifted” one of the loaves. (What kind of mother does that?)
Now anyone who has the good fortune of being acquainted with my darling Ursala, knows that she would have gladly given me a loaf, had I but asked. But I was desperate! I absolutely had to have a loaf of this bread to take home.
Well the upshot is that, a) she knew immediately who had taken the bread, b) she was happy that I liked her bread so much, and c) SHE SENT ME THE RECIPE!
So dear readers, if someone gives you home grown zucchini, or you have to drive to your local grocery store to procure a zucchini or two, please make this delicious bread at your earliest convenience. It is just lovely.
Thanks again for the recipe my dearest Ursala. I love you to the moon!
2 c. unbleached all-purpose flour
1 c. whole wheat flour
1 tsp. salt
1 tsp. soda
¼ tsp. baking powder
2 tsp. ground cinnamon
¼ c. sesame seeds
¼ c. sunflower seeds
¾ c. chopped walnuts
3 eggs
1 c. vegetable oil
1½ c. granulated sugar
½ c. brown sugar
2 c. packed grated zucchini (skin on)
2 tsp. vanilla
In a medium sized bowl, whisk together the flours, salt, soda, baking powder, and ground cinnamon. Stir in the sesame seeds, sunflower seeds, and walnuts.
In a large mixing bowl, whisk together the eggs, oil, and sugars. Stir in the grated zucchini and vanilla. Add the flour mixture and stir until just combined.
Pour into 2 or 3 lightly greased loaf pans. Bake in a pre-heated 350 degree oven for 45-60 minutes (depending on how many pans you use) until a pick comes out clean when inserted into the middle of each loaf.
Remove from oven and let rest for 10 minutes before carefully removing from pans onto a wire rack. Cool completely before cutting.
Note: Believe it or not, this bread is best after it’s been frozen for a couple of days or longer. Of course you can eat it the same day it’s baked, but I’m tellin’ you true, it’s better after its spent some quality time with your ice cream!
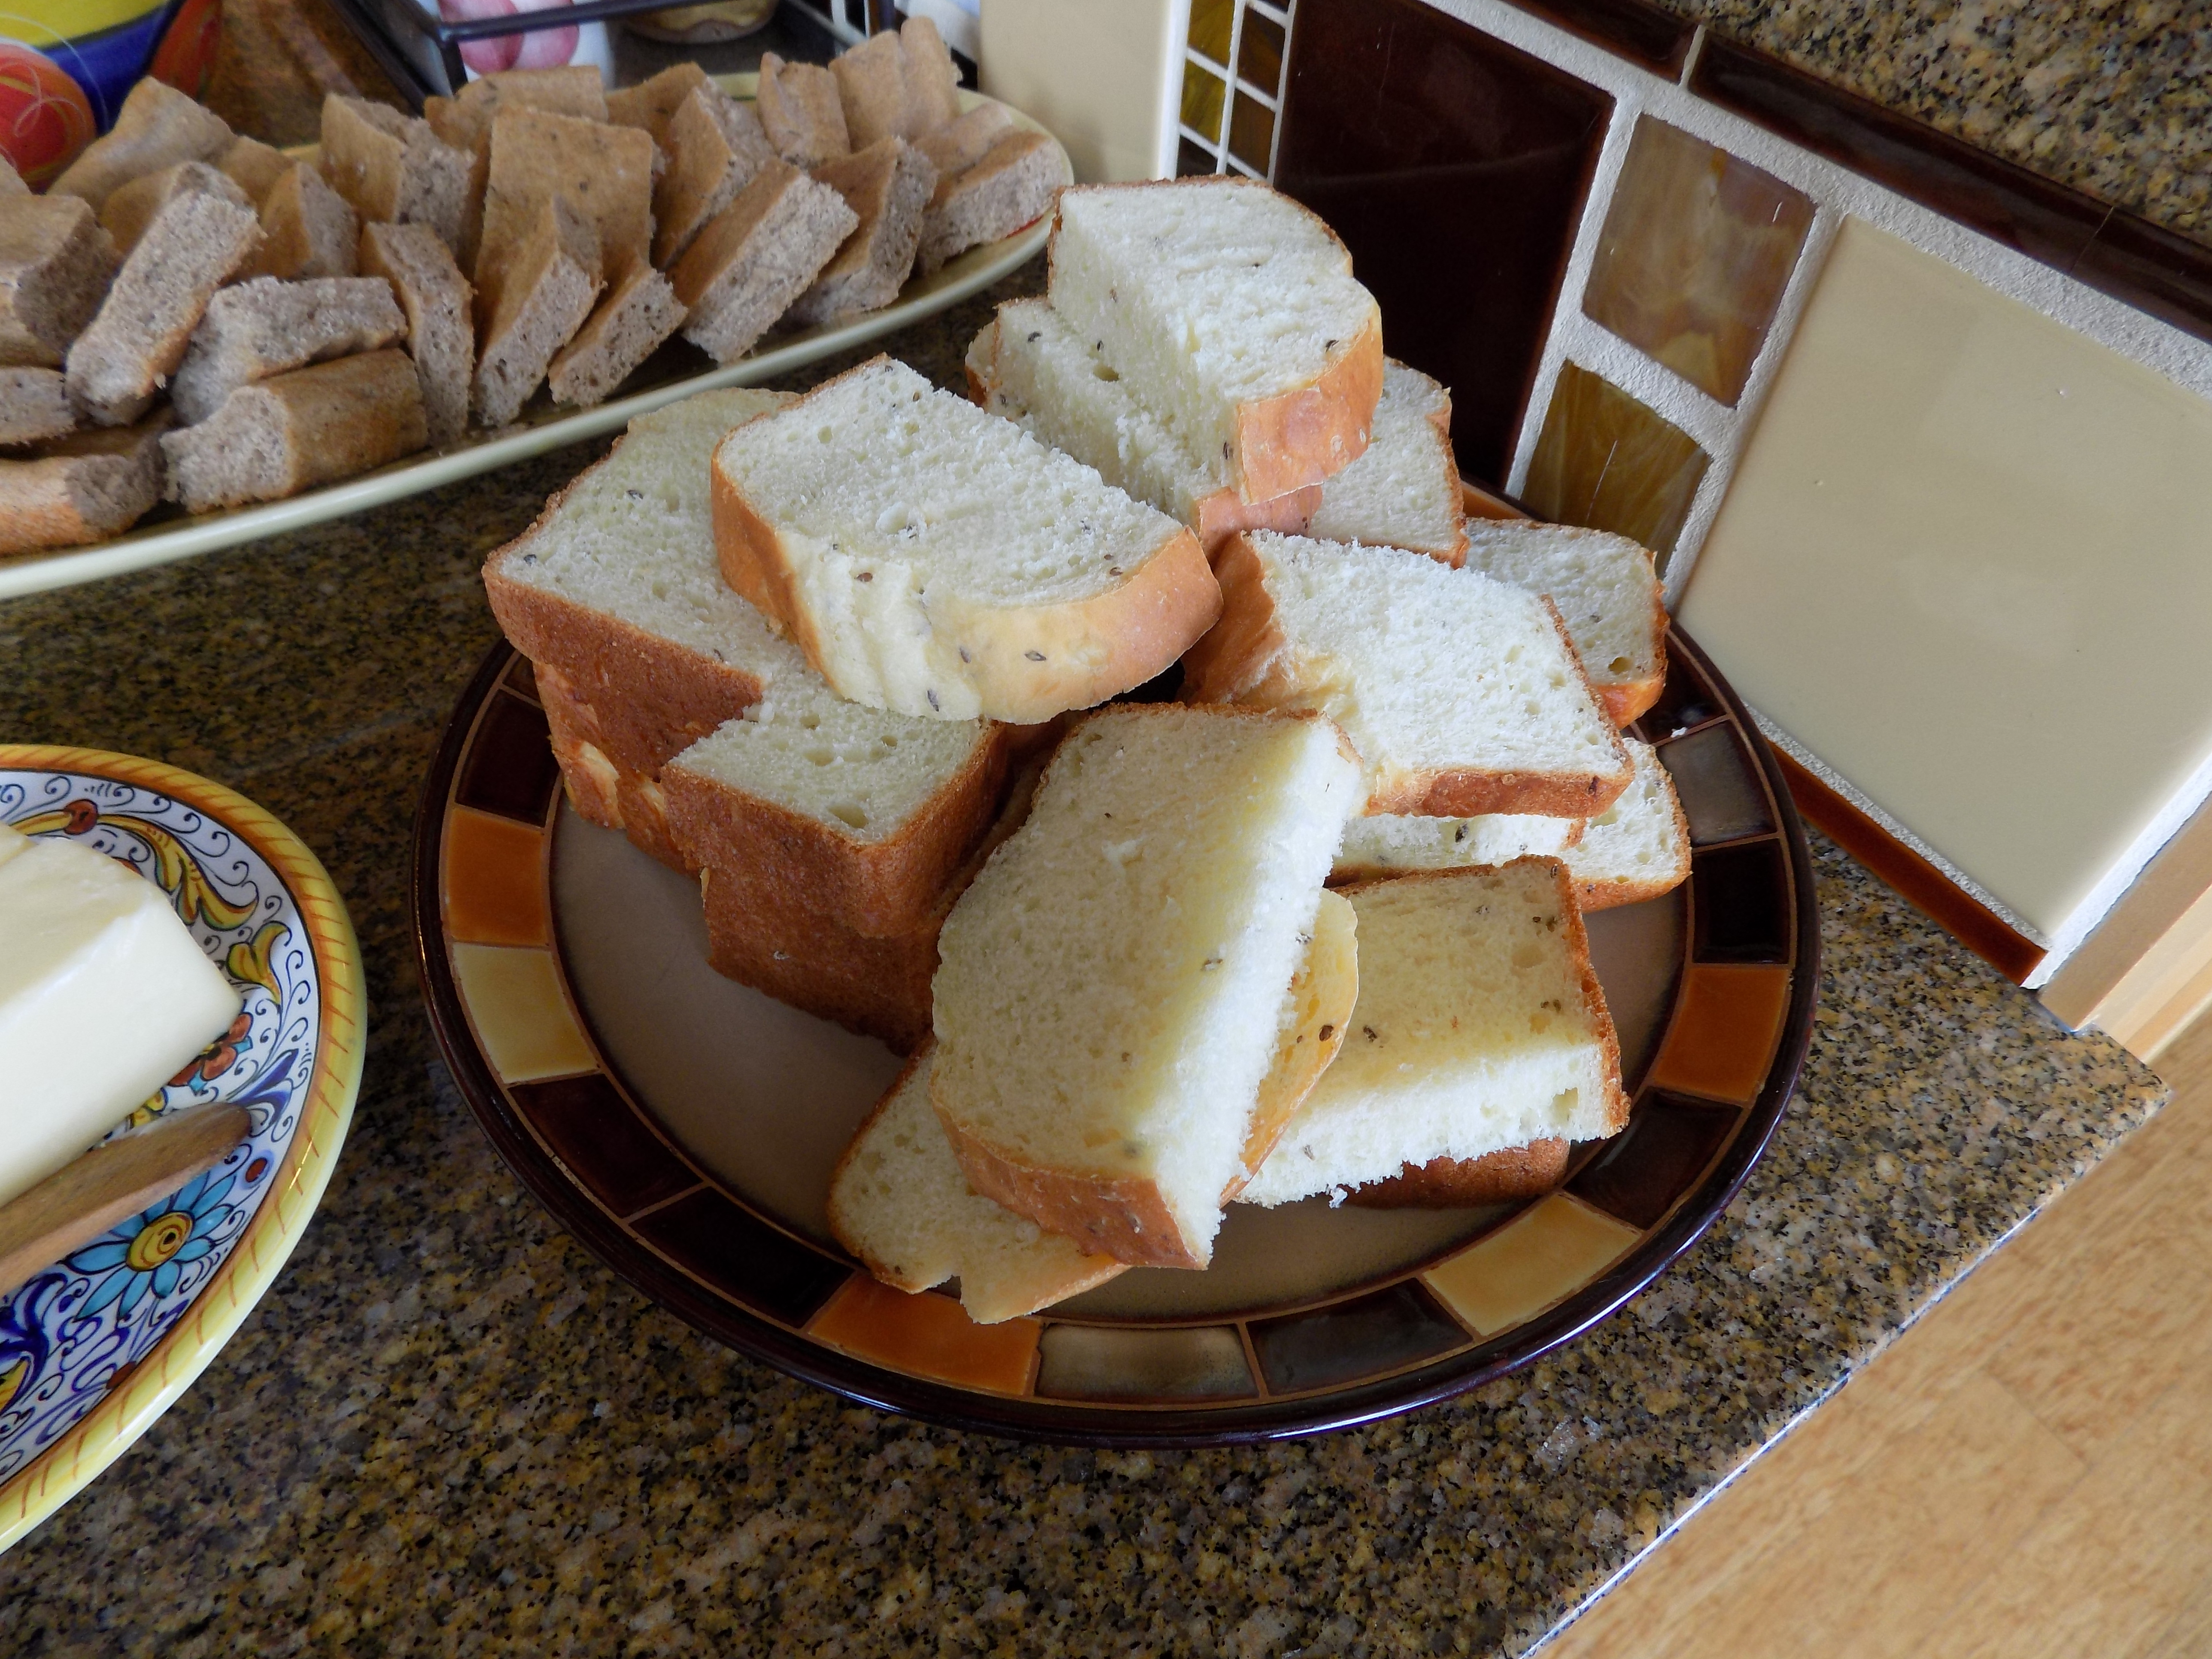
And yes, I love bread. And that my dear friends includes white bread. Good white bread that is! Because there are just those times when nothing is better than a sandwich made with two slices of wonderful homemade white bread. Think the day after Thanksgiving. For me, the best sandwich in the world contains few ingredients. White bread generously spread with soft butter and mayonnaise. (Both pieces.) Then tender, thin slices of leftover turkey lightly sprinkled with salt and pepper layered between those perfect pieces of bread. If that isn’t heaven, then I don’t know what is!
Or a perfect tuna sandwich made with white bread. (See my recipe for a perfect Tuna Salad Sandwich below.) These too are heavenly.
Or how about fabulous French toast. Thick slices of white bread, dipped in a combination of eggs, milk, vanilla, and cinnamon, then fried until golden brown and served with soft butter and warm maple syrup. Yum!
And for those of you who might still be resisting bread baking because you feel it would be too daunting, this bread could not be easier.
So next time you think about discrediting white bread, because well – it’s white, think again. This is not like cheap white bread from a grocery store. This is the real thing. This is what white bread should taste like. Bake some and see for yourself.
1 (¼-oz.) envelope active dry yeast or 1 scant tablespoon active dry yeast
1 tsp. sugar
1 c. warm water
2 T. olive oil, plus more for greasing bowl
1 tsp. kosher salt
2½ – 3 c. bread flour
Combine yeast, sugar, and warm water in the bowl of your heavy-duty stand mixer; let proof for 5 minutes.
Then add the olive oil, salt, and 2 cups of the flour to the bowl. Using your dough hook, beat until ingredients are combined. Gradually add additional flour until dough begins to leave the sides of the bowl and pull together. Knead for about 5 minutes or until dough appears soft and smooth.
Pour a small amount of olive oil over the dough, and using your fingers, form the dough into a ball, making sure the entire surface is covered with the oil. Cover bowl with plastic wrap, and let stand in a warm place until doubled in bulk, about 1 hour. Punch down, and let stand an additional 10 minutes. Form per instructions below.
Loaf or Loaves:
Shape dough into a loaf shape and place in an olive oil greased 9 x 5-inch loaf pan. (For smaller loaves, cut dough in half, shape each piece into a loaf shape, and place each in a greased loaf pan. Let sit for 10 minutes.
Bake in a pre-heated 400 degree oven for 16 minutes or until golden brown. (The internal temperature should be around 200 degrees.) Cool on a wire rack before slicing.
Note: I prefer 2 small loaves, then I cut the bread fairly thick for our morning toast with butter and honey.
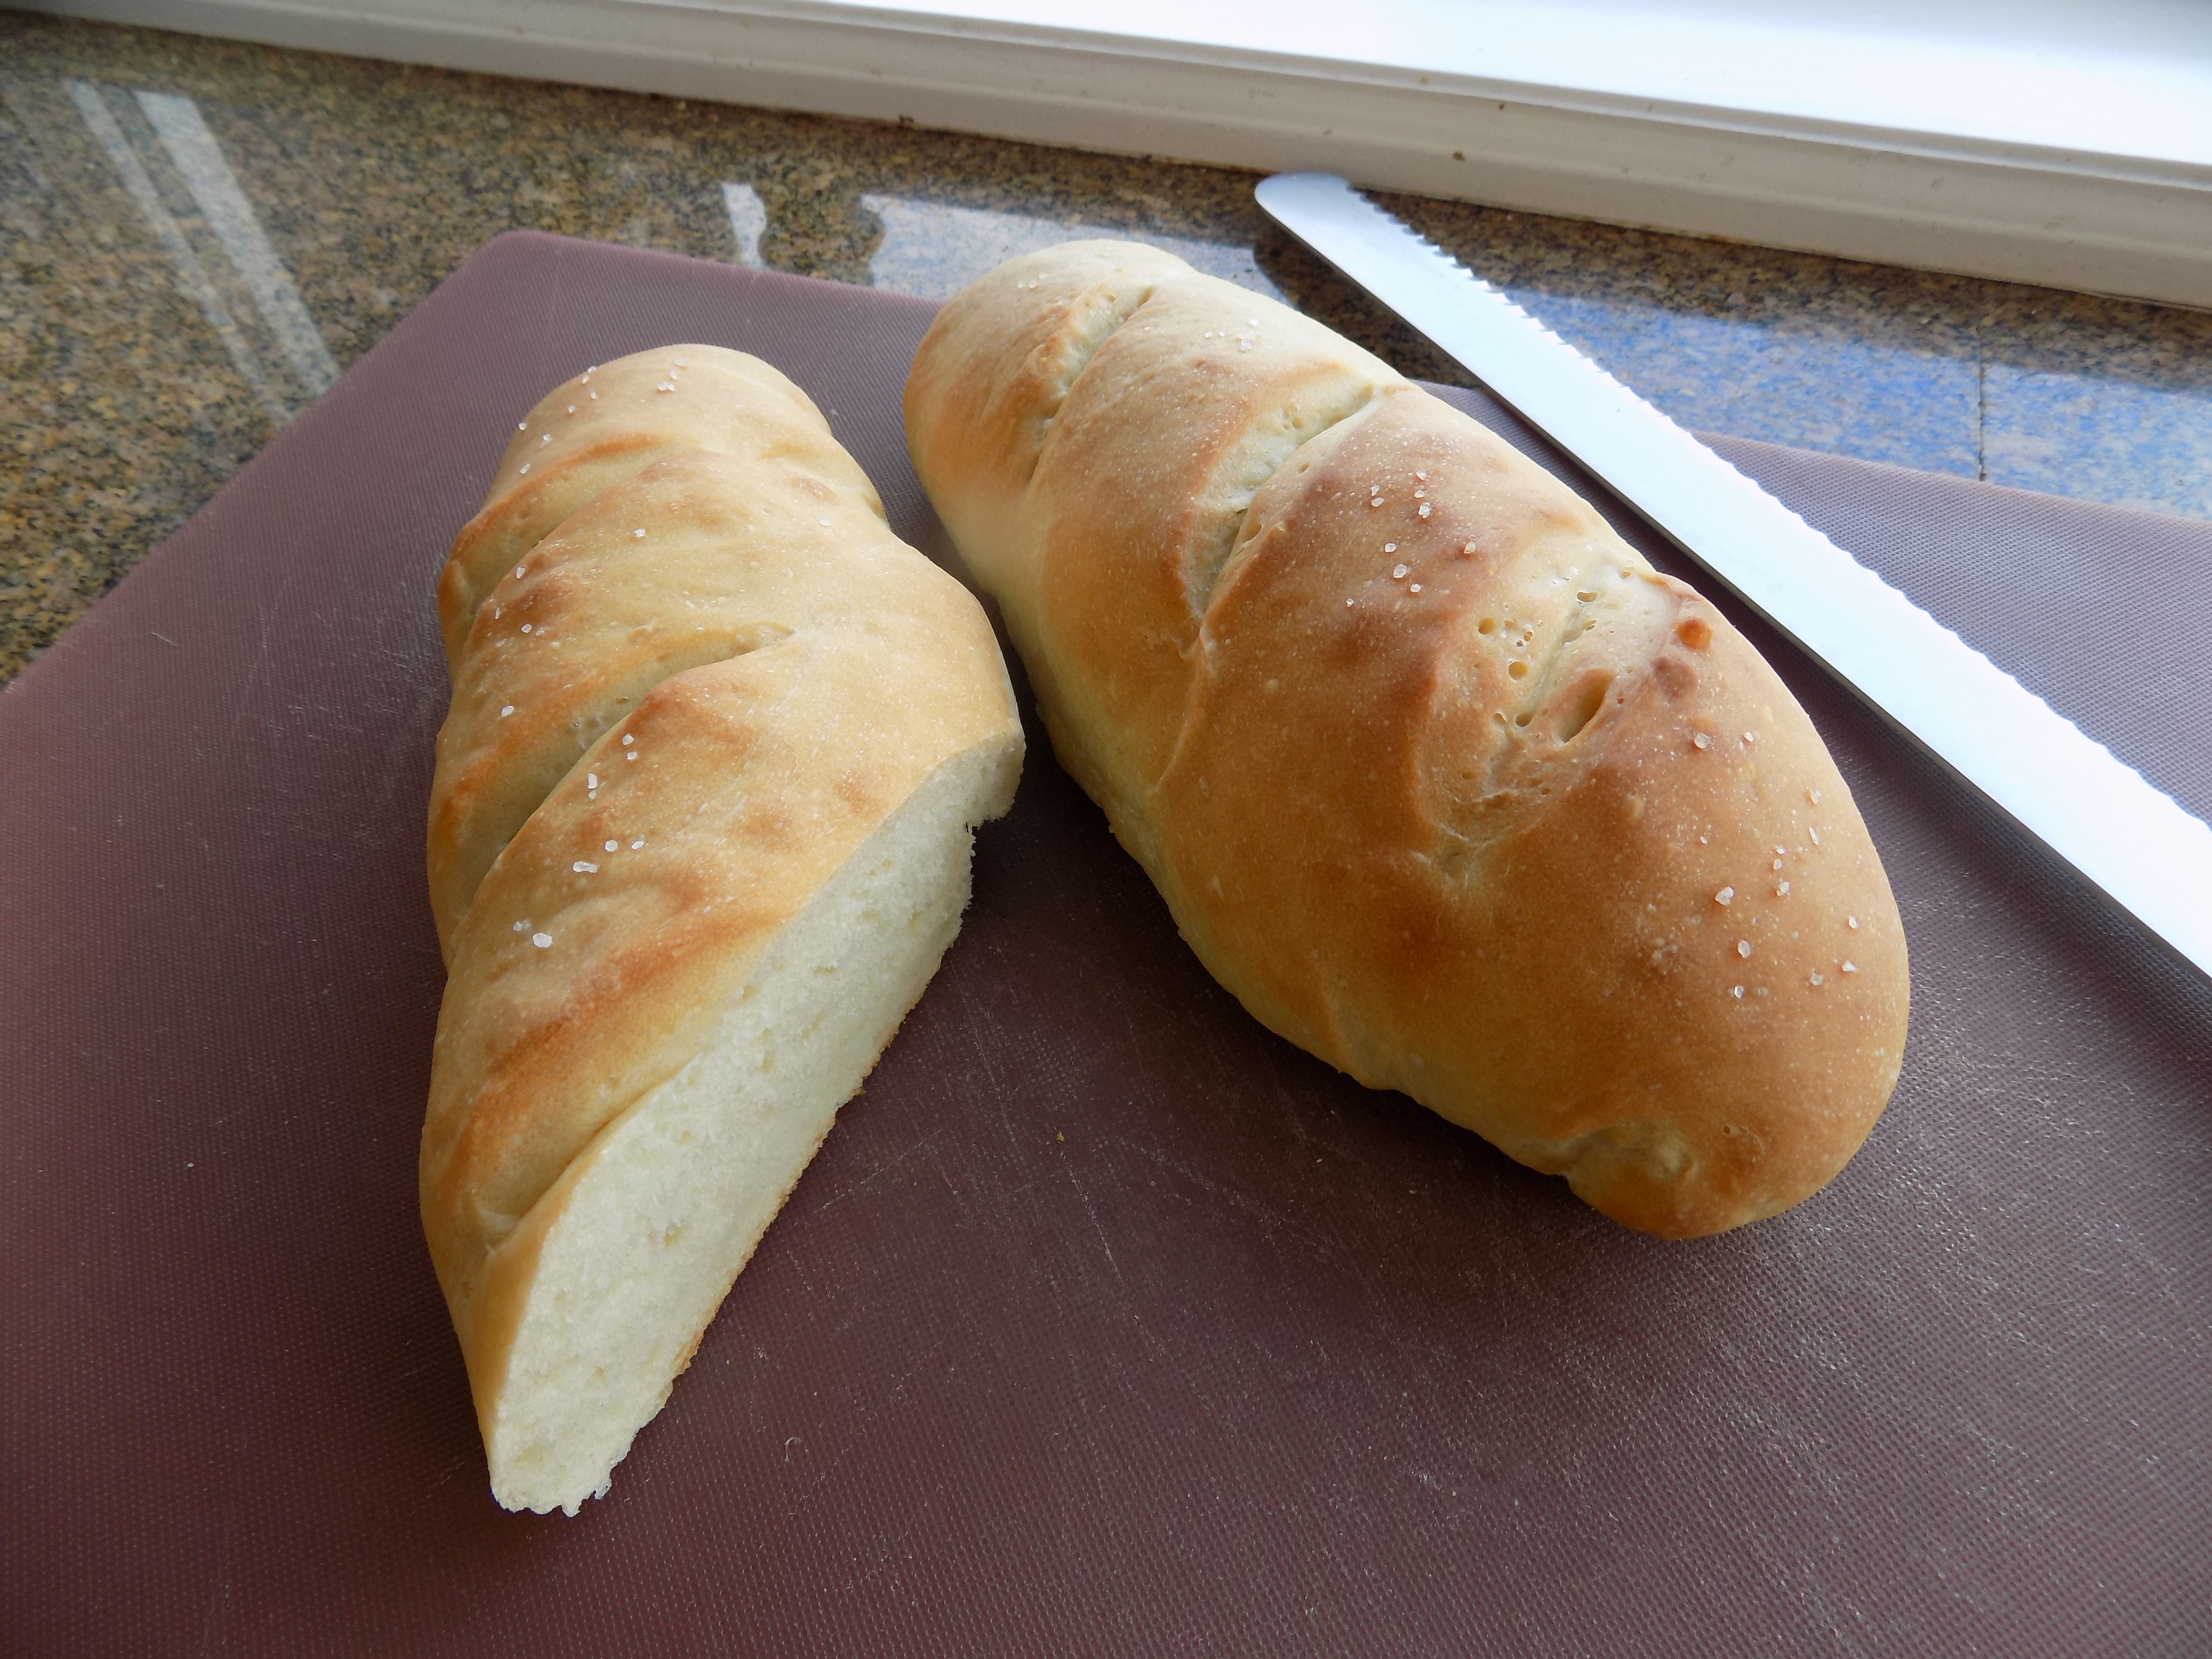
Bâtard Shaped: (think small football shaped)
Shape dough into 2 fairly thin and short baguettes. Place on a lightly greased baking sheet, and cut 3 (¼-inch deep) slits across top of dough with a sharp paring knife. Let sit for 10 minutes.
Bake in a pre-heated 400 degree oven for 16 minutes or until golden brown. (The internal temperature should be around 200 degrees.) Cool on a wire rack before slicing.
Note: the picture above is of bâtard shaped loaves.
TUNA SALAD SANDWICHES (2)
1 T. dehydrated onion
1 tsp. Dijon mustard
¼ c. light mayonnaise, or more as needed
¼ tsp. seasoned salt
freshly ground black pepper
1 can water packed albacore tuna
4 slices white bread
lettuce, opt.
dill pickle slices, opt.
thinly sliced tomato, opt.
Combine onion, mustard, mayonnaise, seasoned salt, and pepper in a small mixing bowl. Let sit for a couple of minutes for the onion to soften. Stir in drained tuna. Add more mayonnaise if the mixture seems dry. (You want the mixture to have a soft, creamy texture. You know. The kind of sandwich filling that drips onto your plate or shirt while you are taking big bites.)
Spread mixture over 2 pieces of the bread. (Yes the filling will be real thick.) Then layer on lettuce, pickle slices, and thinly sliced tomatoes. Top each with the other slices of bread and dive in. Great served with potato chips.
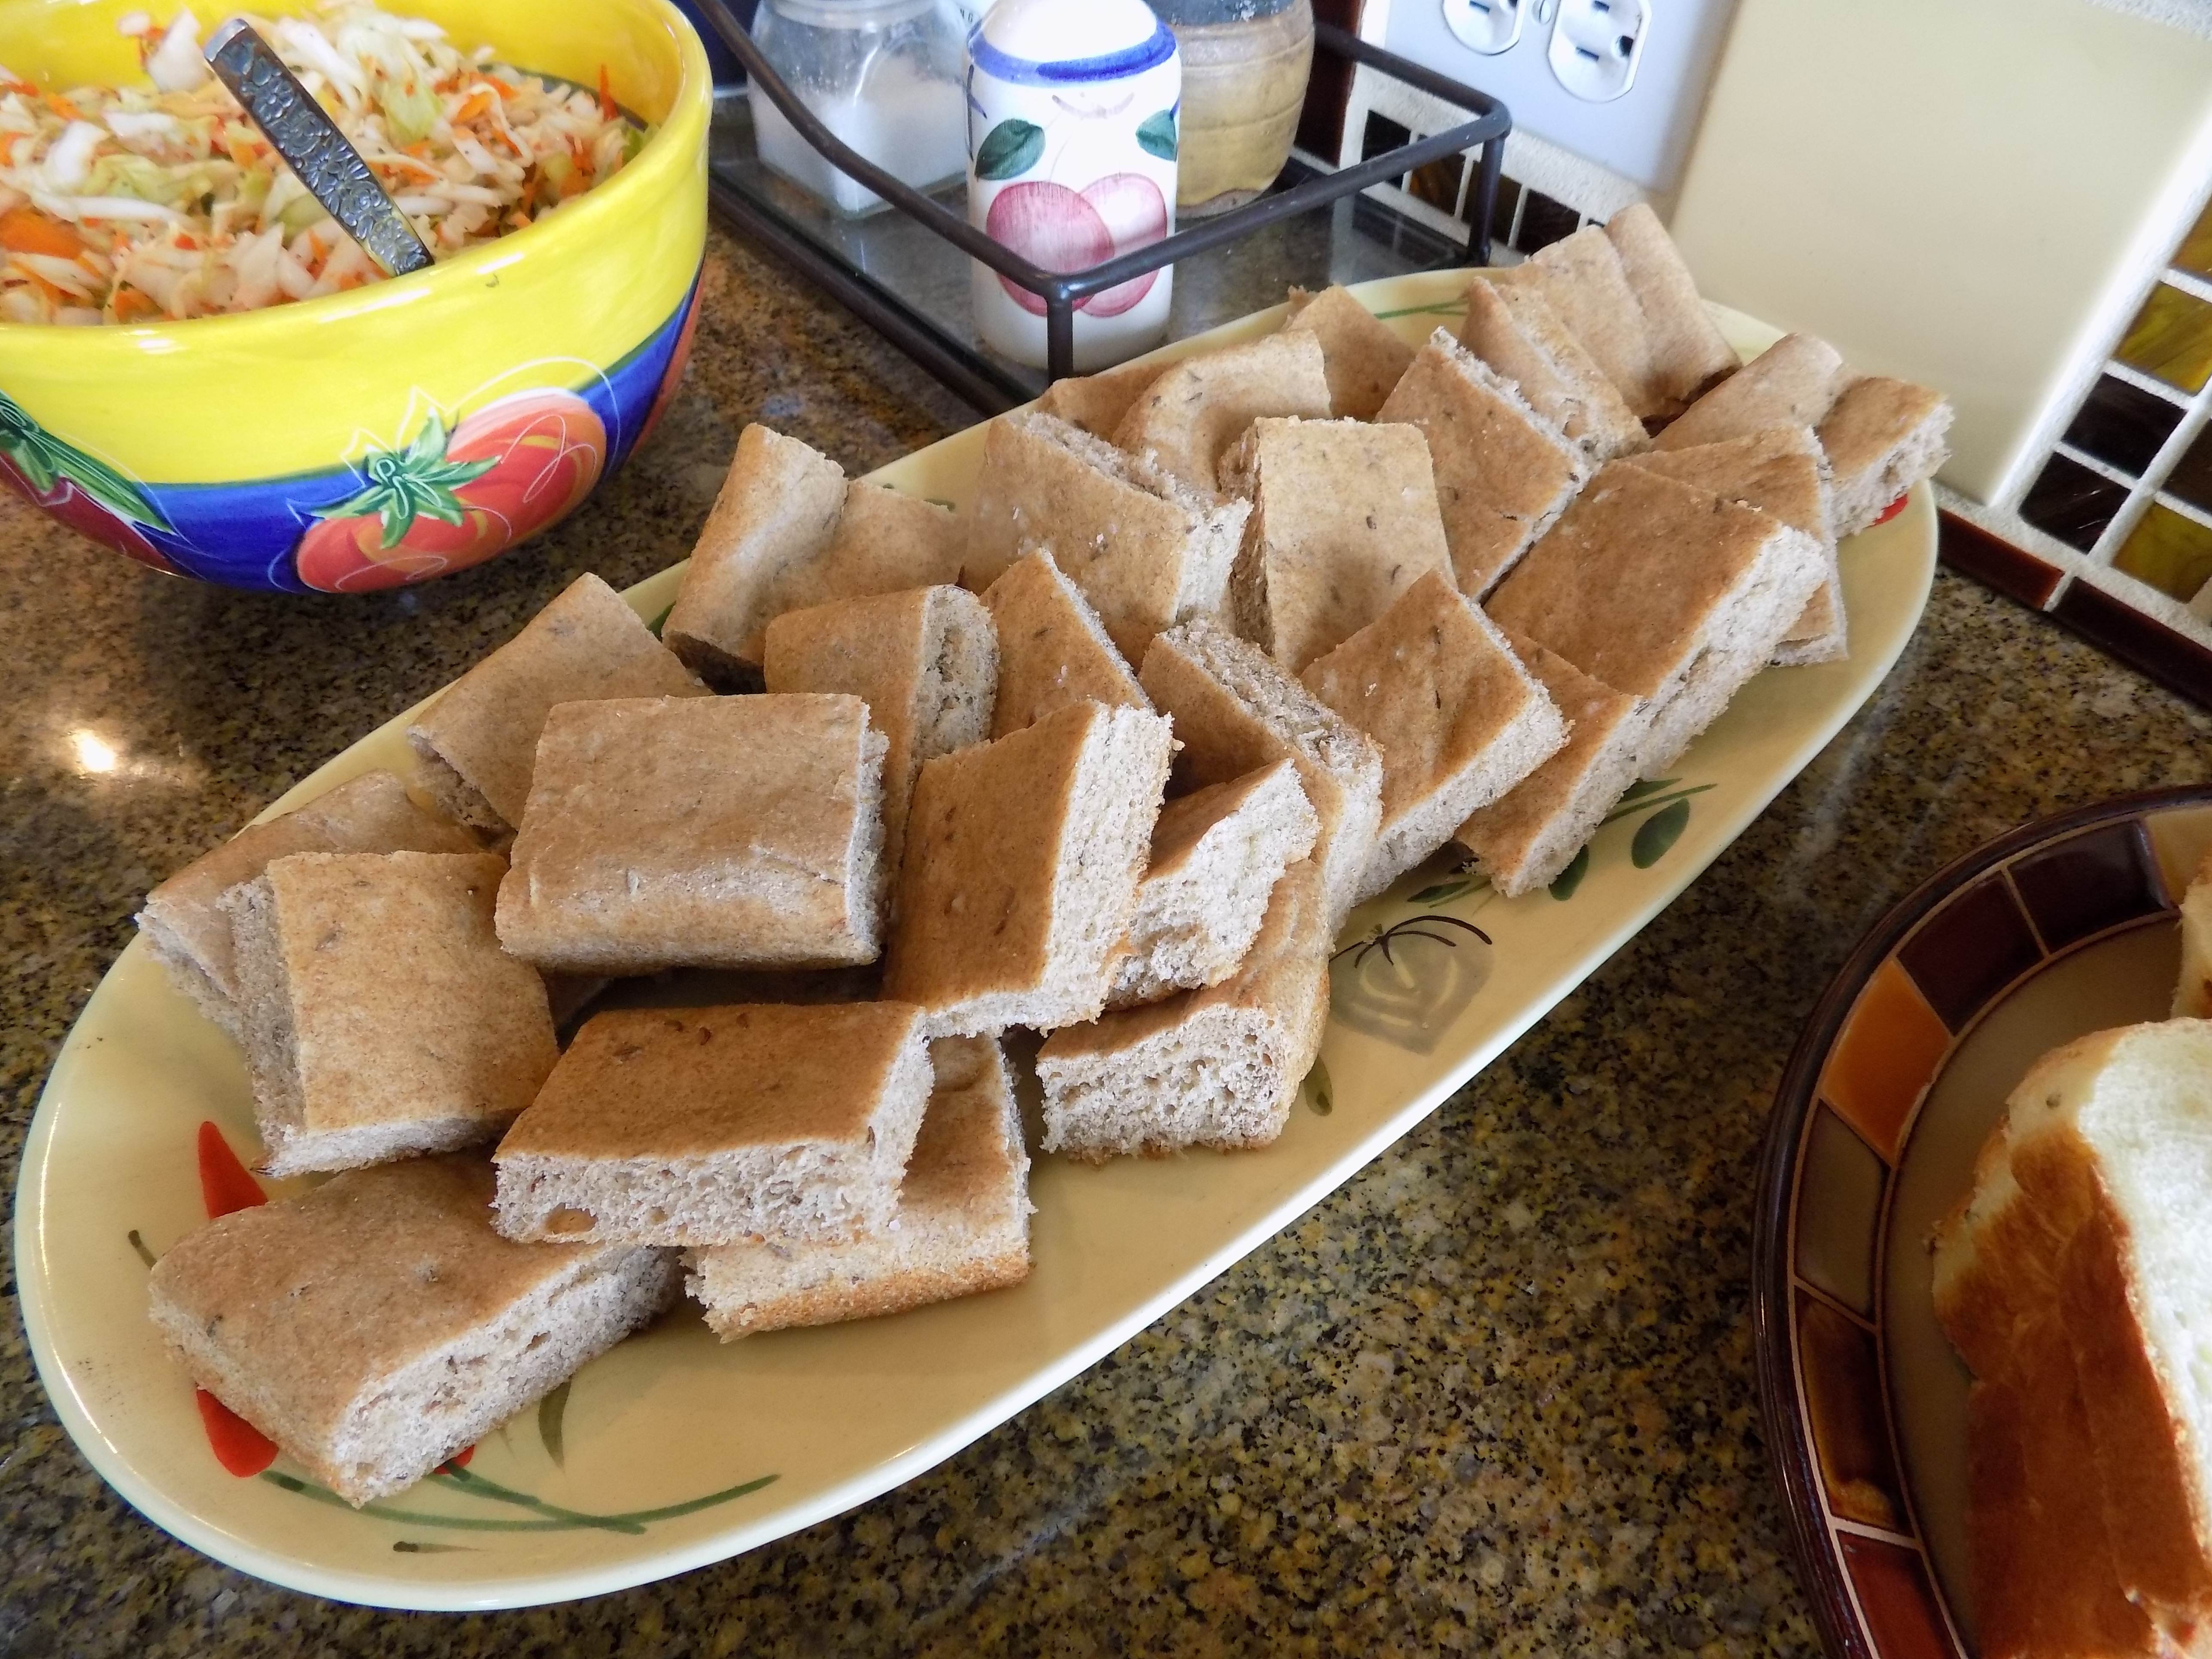
I glommed this recipe together to serve with a Hungarian themed meal. I wanted to serve rye bread, but in an easy to eat little piece since I was also serving Dilly Casserole Bread (recipe coming soon) that would be baked in a loaf pan. (I always try to keep food visually interesting as well as delicious.)
So I decided to pat the bread dough into a half sheet pan (13x18x1-inch) and see what happened. Well the bread turned out delicious, really chewy, and just tall enough to make a perfect size piece of bread when cut into squares or rectangles. And easy to prepare? Oh-my-gosh yes! This would be the perfect bread to fix if you were considering giving bread baking a try.
And don’t worry about the caraway seeds. They are there, but not in your face crazy. Just subtle and splendid.
So give this easy bread a try. We had some toasted for breakfast this morning, and what a treat to go along with our eggs and sausage. Yum, if I do say so myself!
2 c. warm water
2 pkgs. or 2 scant T. active dry yeast
2 tsp. sugar
1 T. kosher salt, plus more for sprinkling
4 tsp. caraway seeds
1 c. rye flour
2½ c. whole wheat flour
¾ c. bread flour, or more as needed
olive oil
Sprinkle the yeast and sugar over the warm water in the bowl of your stand mixer. Let sit for 10 minutes. Add the salt and caraway seeds. Mix using your dough hook.
Add the rye and whole wheat flours and mix until well combined. Add as much of the ¾ cup bread flour as needed to make a stiff dough. (The ball of dough should completely pull away from the bowl.)
Pour a little olive oil over the dough, and using your hands, form dough into a ball and spread the oil all over. Cover with plastic wrap and let rise for 1 hour.
Pour a bit of olive oil on a 13x18x1-inch baking pan. Spread the dough out with your fingers. Slather a bit more olive oil over the dough and sprinkle lightly with kosher salt.
Let rest again for 30 minutes.
Bake in a pre-heated 400 degree oven for 15 to 20 minutes or until golden and crusty. Let cool completely before cutting into squares or rectangles.
Note: If in doubt whether or not your bread is done, stick it with an instant read thermometer. If it registers 190-200 degrees, your bread is baked to perfection. Take it out of the oven – immediately!
OK, I know. Another darn bread recipe. But I love bread and really enjoy making it. So if you must, switch channels and stop reading this very minute! But, if you are like me and love good bread, please join me as I elucidate on the deliciousness of this bread.
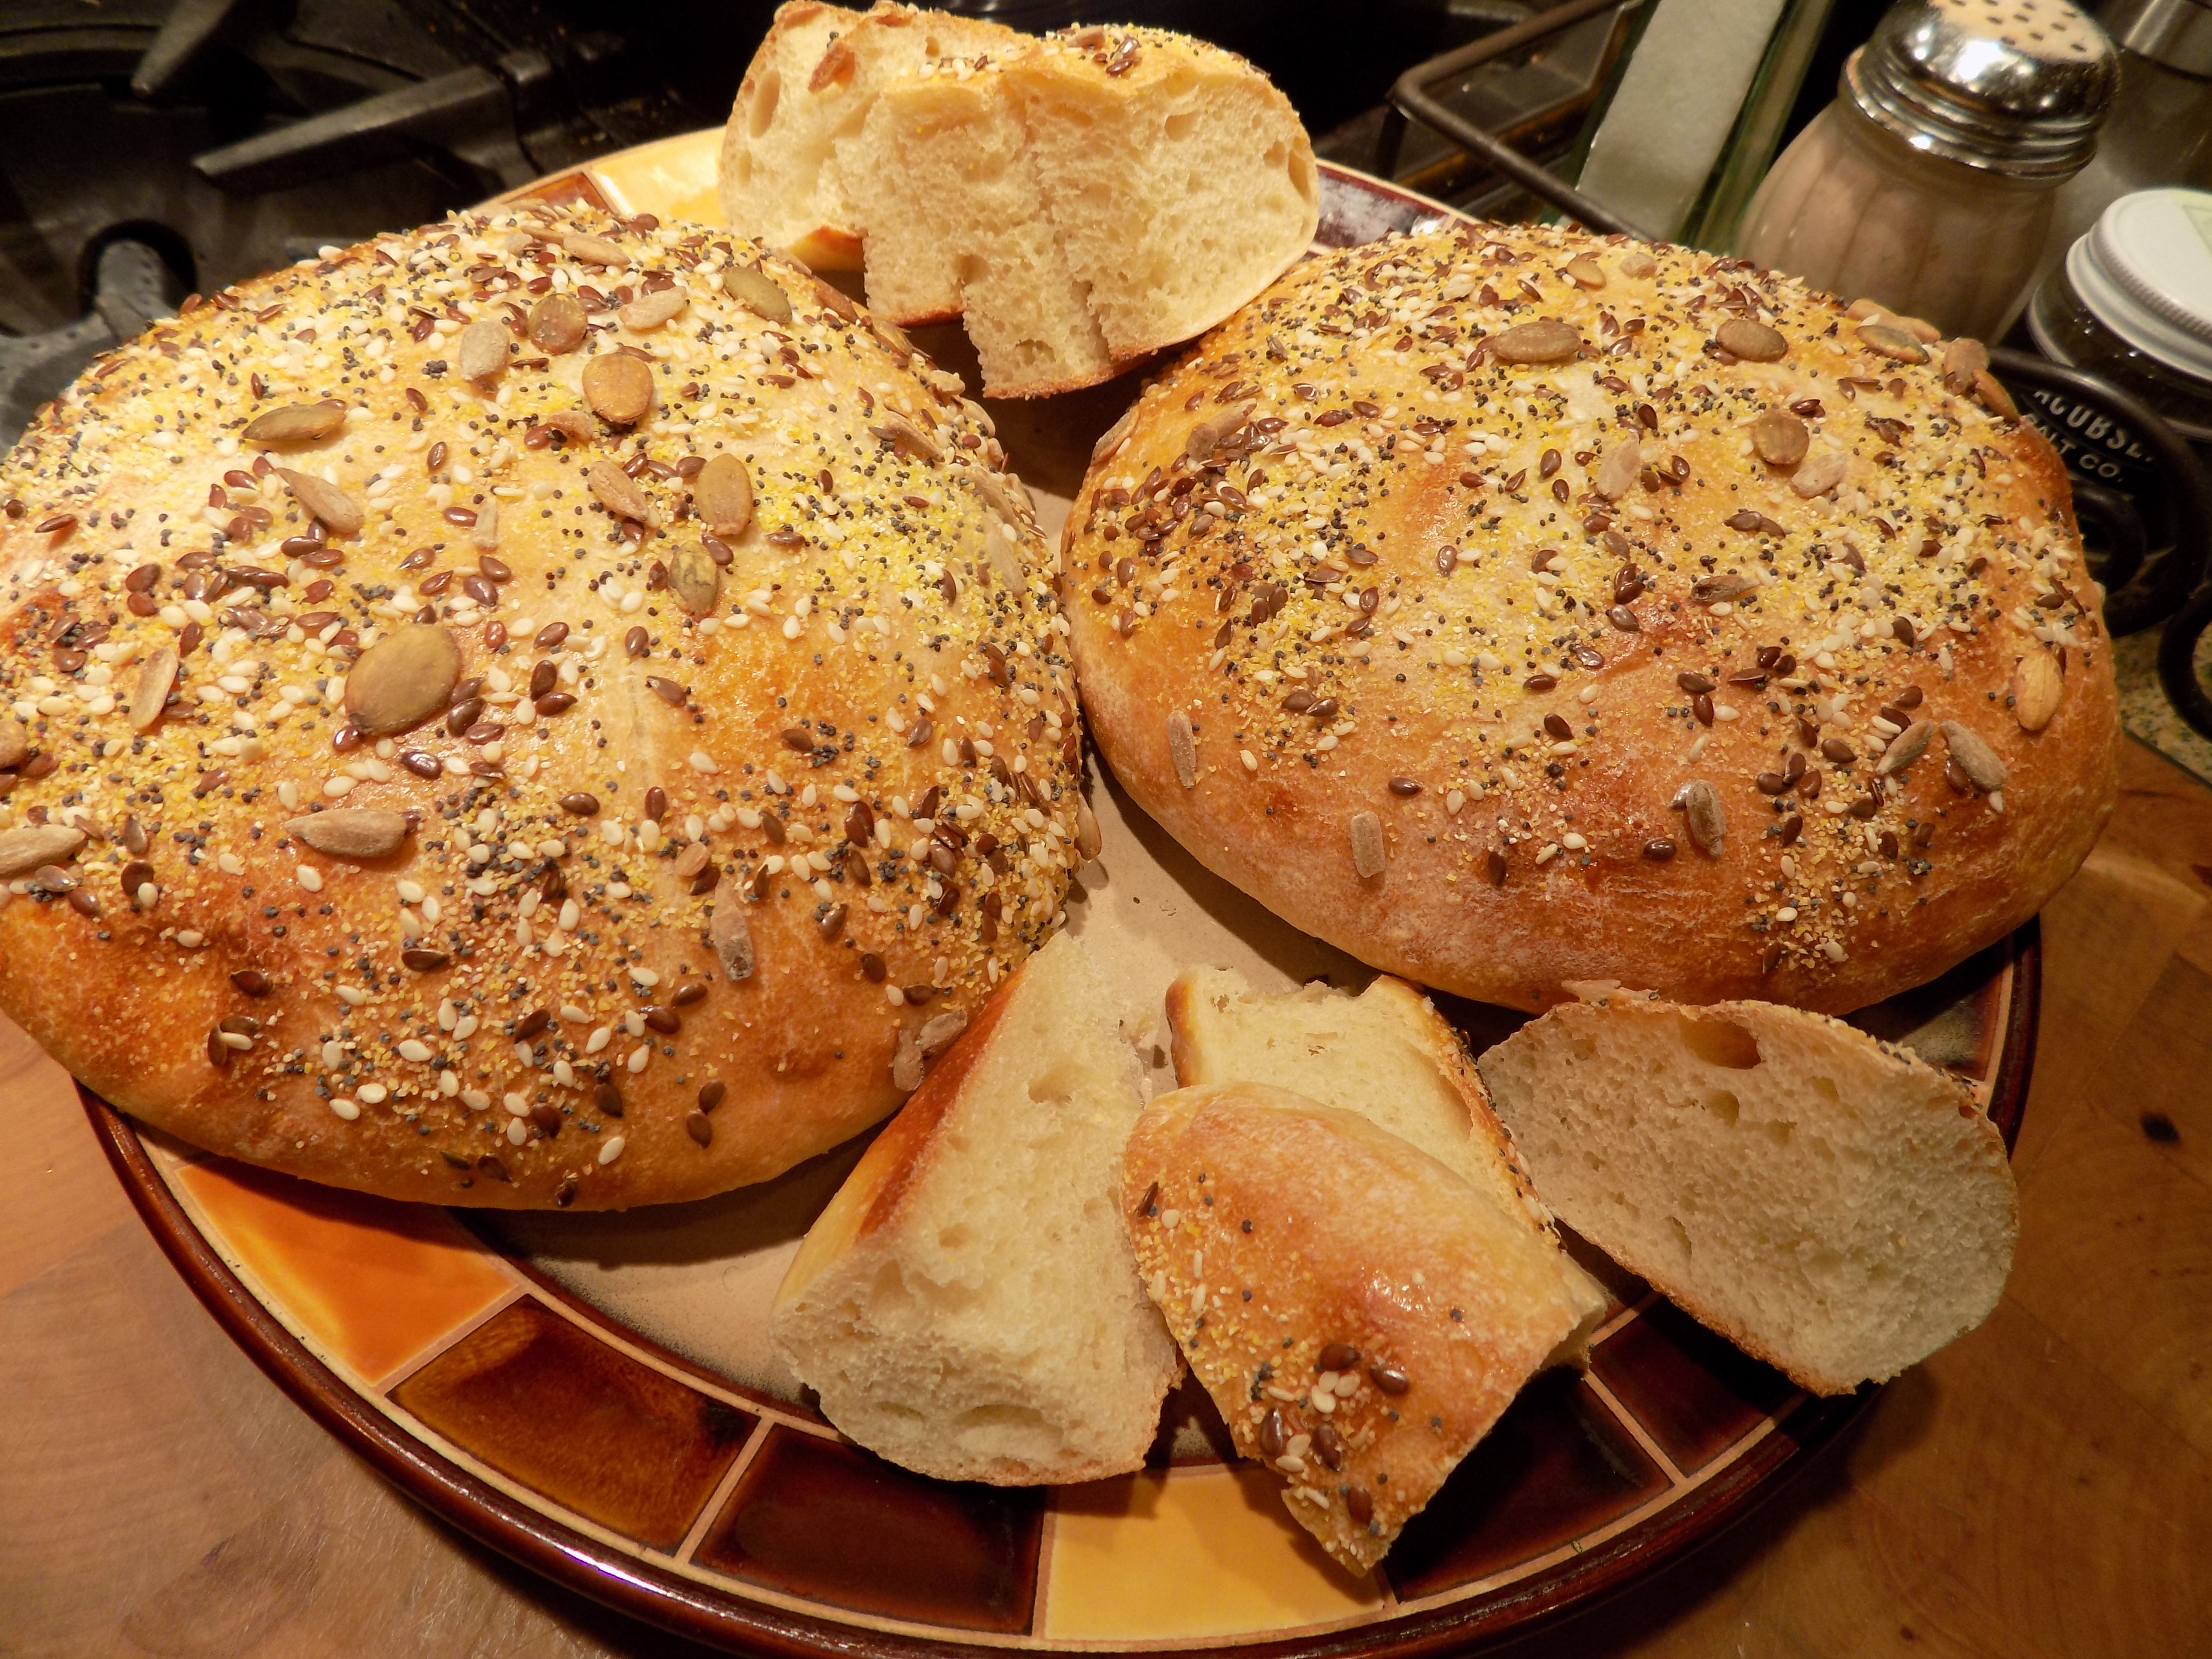
First of all, what’s not to like about sour dough bread? Nothing, right? And this bread with its gentle sourdough flavor, wonderful texture and nutty, seedy topping is worth every second you spend in the kitchen.
I think that’s enough said! Thank you King Arthur Flour for this wonderful recipe.
Oh I forgot – this bread freezes beautifully. It also has a very nice appearance. (Looks like it came from a bakery!)
1¼ c. lukewarm water
2 c. sourdough starter (see recipe below)
4½ -5 c. unbleached all-purpose flour, divided
2½ tsp. kosher salt
2 tsp. sugar
1 T. active dry yeast
4 tsp. vital wheat gluten
olive oil
1 egg yolk
1 T. water
¼ c. brown flax seeds
2 T. sunflower seeds
2 T. sesame seeds
2 T. pumpkin seeds
1 T. poppy seeds
2 T. yellow cornmeal
In the bowl of your stand mixture, combine the water, sourdough starter, and 3 cups of the flour, mixing until smooth.
Stir in the salt, sugar, yeast, and vital wheat gluten, then an additional 1½ to 2 cups of flour. Knead until the dough pulls away from the sides of the bowl, adding only enough additional flour as necessary.
Knead the dough for about 7 minutes. Pour a small amount of oil over the dough, and using your hands, roll the dough into a ball. Make sure the olive oil lightly coats the ball. Cover the bowl with plastic wrap, and let the dough rise until doubled in bulk, about 90 minutes.
Gently deflate the dough, and divide into four pieces.
Shape each piece into a round and place the boules, at least 4″ apart, on parchment-lined baking sheets.
Cover the boules with lightly greased plastic wrap, and let them rise for 1½ hours, or until they’re nice and puffy.
Meanwhile, whisk together the egg yolk and water; set aside. Also combine the flax, sunflower, sesame, pumpkin, and poppy seeds together with the cornmeal; set aside also.
When the boules are nice and puffy, gently brush with the egg yolk glaze, and sprinkle with the seed and cornmeal mixture.
For a classic look, slash an “X” on each boule, cutting about 1/4″ deep.
Bake the boules in a pre-heated 450 degree oven for about 25 minutes, or until they’re a rich golden brown. Remove the bread from the oven. Place on wire racks to cool before slicing.
If not using the same day, cover gently with a tea towel and leave on your counter or in your bread box. Do not refrigerate! Slices make marvelous toast.
Sourdough Starter
2 c. unbleached all-purpose flour
2 T. sugar
1 T. or 1 pkg. active dry yeast
2 c. warm water
Combine all ingredients in a plastic juice pitcher using a wooden or plastic spoon. (Don’t worry about lumps because the little yeasty beasties will make short work of dissolving the lumps!) Cover with lid, turning strainer in lid to pouring lip. (This allows air to reach the starter.) Let ferment 3 days at room temperature, stirring several times daily. After the third day, transfer starter to a covered glass container and refrigerate.
To use, remove desired amount for recipe and replenish starter by stirring in equal amounts of flour and water or follow the instructions for the particular bread you are making. Let stand at room temperature overnight. Return to refrigerator.
If a clear liquid forms on top, stir back into starter. Every time you use, replenish with equal amounts of flour and water. Even if you don’t use every week, replenish every 7 – 10 days with equal amounts flour and water. (First remove about ½ cup of the existing starter. This allows room in your container for the new flour (yeast food) and water.)
Use in any of your favorite bread, muffin, or pancake recipes.
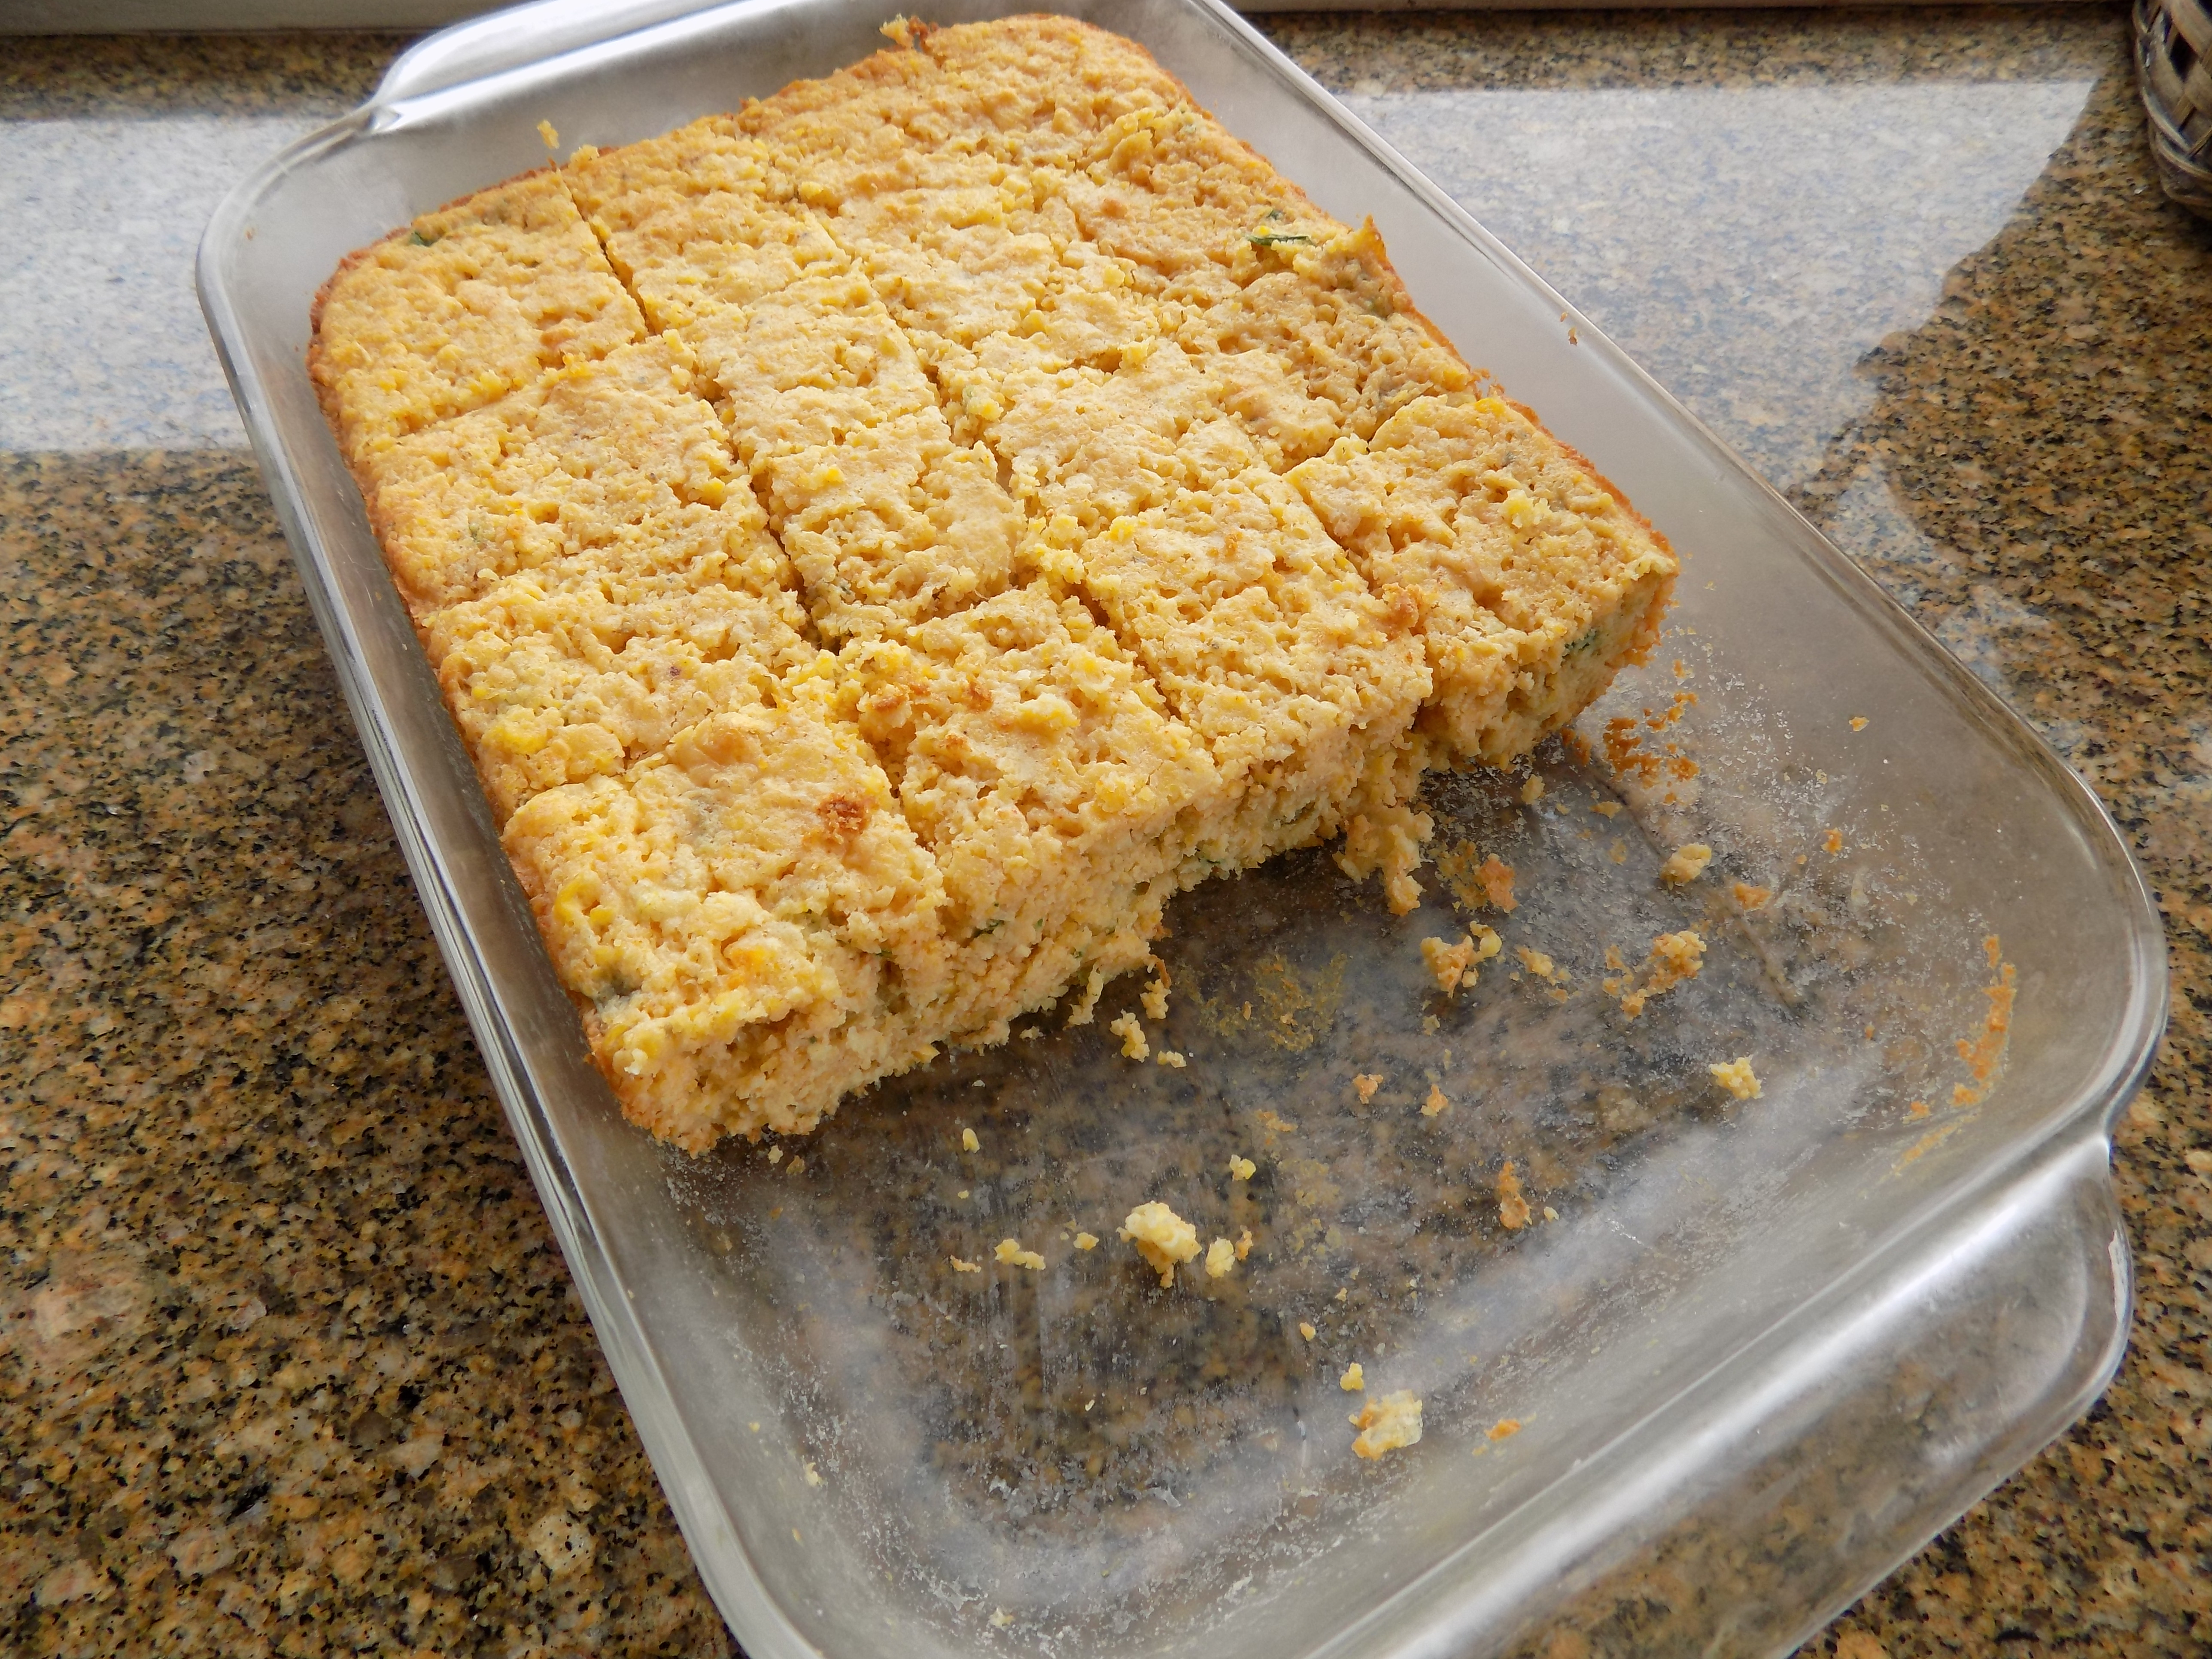
So, this is basically the corn bread I served my kids while they were growing up. I say basically because I changed the recipe just a bit to better fit today’s standards for culinary excellence and nutritional integrity. In other words, I greatly reduced the amount of sugar and substituted butter for the margarine called for in the original recipe. I also added a can of creamed corn and some corn kernels because they help keep cornbread moist without adding additional fat. But, the basic flavor in this updated version is still very similar to the cornbread I fed my kidlets, so that’s what really matters!
Now I say “original recipe” with my fingers crossed because the real original recipe I found in my copy of Cooking with Gourmet Grains, copyright 1971 Stone-Buhr Milling Co. Seattle, Washington. But even in 1971 when I was only 27 years old, I was changing recipes left and right. So at least for this recipe, I’m going to use “original” with a bit of poetic license. (BTW, the Stone-Buhr website is a great resource for wonderful recipes. All tried and true.) But I digress…..
Anyway, this cornbread is really tasty, moist, and simple to prepare. You don’t even need a mixer. It’s absolutely wonderful with chili, stew, or any hearty soup.
1 c. yellow cornmeal
½ c. unbleached all-purpose flour
1 T. sugar
2 T. baking powder (yes, 2 tablespoons)
1½ tsp. seasoned salt
¼ tsp. granulated garlic
1 tsp. chili powder
½ c. finely grated Parmesan cheese
2/3 c. half & half
2 lg. eggs
1/3 c. melted unsalted butter
1 (14-oz.) can creamed corn
1 c. frozen corn, thawed and dried on paper towels
1 (4-oz.) can diced green chilies
3 finely diced green onions (green stems and all)
Whisk together the cornmeal, flour, sugar, baking powder, seasoned salt, granulated garlic, chili powder, and Parmesan cheese in a bowl. In a separate bowl, whisk together the half-and-half, eggs, melted butter, creamed corn, corn kernels, green chilies, and green onions.
Pour wet mixture over the dry ingredients; mix just until blended. Scoop batter into a lightly greased 9×13-inch pan.
Bake in a pre-heated 375 degree oven for about 35 minutes or until a pick inserted into center comes out clean. Serve warm if possible. Can be made ahead and refrigerated until ready to serve. Great warmed for breakfast and served alongside ham and eggs.
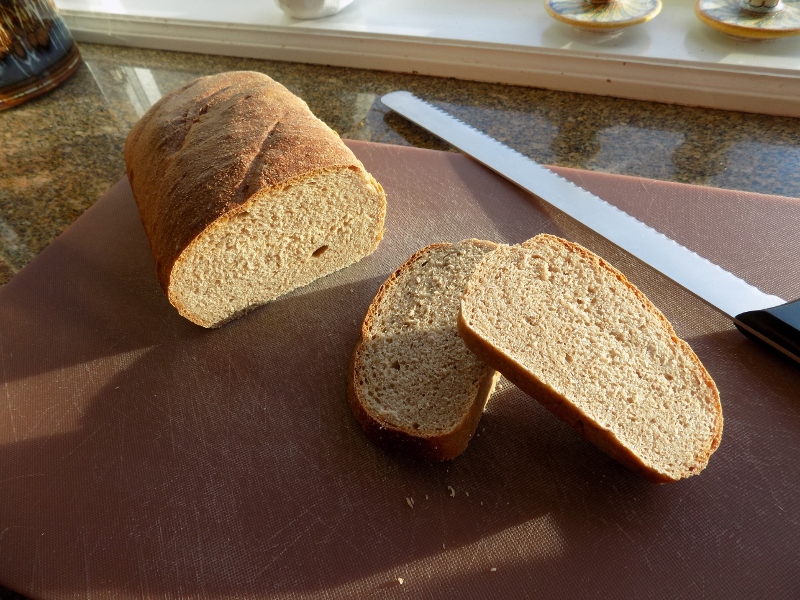
So its breakfast time and I have a loaf of this bread to use for our morning toast. I am actually excited! Because with a dab of honey on the toasted bread, this makes for a heavenly repast when served with an easy-over egg and a small bowl of homemade granola topped with vanilla yogurt. And so our day begins.
Now I realize that the only reason you are reading this post is because you are either already a bread baker or have a passing interest in becoming a bread baker. Well let me tell you, this bread is just about as easy as it gets. No fancy ingredients, well if you don’t count the sourdough starter that is. But even then sourdough starter is no harder to take care of then say an older neighbor who occasionally asks you to come over and carry groceries into their house. Certainly it takes less time to care for a sourdough starter. (A sourdough starter doesn’t care if you talk to it even though it is alive and probably shows more zest for life than your elderly neighbor!) A simple feeding once a week is all it requires. And how difficult is that?
So if you are thinking about playing with sourdough, this is the bread for you. The recipe makes a fairly small loaf which is perfect for us. I cut the slices about 5/8-inch thick and toast them until they are quite brown. Then I don’t even use butter, just wonderful local or Turkish honey. The combination of the whole wheat flour in the bread and the honey on top is marvelous. And yes I know, I probably could use honey in the recipe, but I think maple syrup is perfect with the other ingredients. But by all means, use honey if you prefer. Honey would actually make perfect sense if you plan to serve it with honey on top like I do. But then, when have I ever made sense? And I’m much too set in my ways to start now! Hopefully there’s still hope for you.
½ c. lukewarm water
1 tsp. active dry yeast
2 tsp. pure maple syrup
1 c. sourdough starter (easy recipe below)
1½ tsp. kosher salt
1¾ c. whole wheat flour
½ c. bread flour, or more as needed
olive oil
Place the water, yeast, and maple syrup in the bowl of your stand mixer. Stir gently with your dough hook. Let proof for 15 minutes, or until foam appears on top.
Add the starter, salt, and whole wheat flour. Stir well with dough hook. Add enough bread flour to make a shaggy dough. Let the dough rest for 20 minutes.
Add additional bread flour if needed to form a smooth, slightly sticky, and springy dough. Knead for 3-4 minutes.
Once the dough has been kneaded, lightly grease the dough with a small amount of olive oil. Cover the bowl with a tea towel. Let rise 90 minutes or until almost doubled in size.
Punch down the dough. (The dough should be smooth and springy, but not too sticky at this point.)
Shape into a loaf and place in a parchment paper lined bread loaf pan (8.5 x 4.5-inches). Cover again with a tea towel and let rise for 75 minutes.
Preheat the oven to 425 degrees. Pour water in a shallow oven-safe pan and place on the bottom rack of the stove. Just before placing the dough in the oven, make 2 or 3 cuts along the top of the loaf.
Bake for 35-40 minutes, or until golden brown and firm. (If in doubt if the bread is done, take the breads temperature with an instant-read thermometer. It should read at least 190 degrees.) Remove from oven and turn out of the pan onto a wire rack. Let cool on the wire rack completely before slicing. Store loosely wrapped in plastic bag at room temperature. Absolutely wonderful toasted and slathered with butter and honey! Do not refrigerate. Will stay fresh for several days.
Sourdough Starter
1 c. unbleached all-purpose flour
1 T. sugar
1½ tsp. active dry yeast
1 c. warm water
Combine all ingredients in a plastic juice pitcher using a wooden or plastic spoon. (Don’t worry about lumps because the little yeasty beasties will make short work of dissolving the lumps!) Cover with lid, turning strainer in lid to pouring lip. (This allows air to reach the starter.) Let ferment 3 days at room temperature, stirring several times daily. After the third day, transfer starter to a covered glass container and refrigerate.
To use, remove desired amount for recipe and replenish starter by stirring in equal amounts of flour and water or follow the instructions for the particular bread you are making. Let stand at room temperature overnight. Return to refrigerator.
If a clear liquid forms on top, stir back into starter. Every time you use, replenish with equal amounts of flour and water. Even if you don’t use every week, replenish every 7 – 10 days with equal amounts flour and water. (First remove about ½ cup of the existing starter. This allows room in your container for the new flour (yeast food) and water.) Use in any of your favorite bread, muffin, or pancake recipes.
I know, another bread recipe! But in my defense, I have a new sourdough starter that I am trying to keep alive. So I’ve decided that I am going to bake bread weekly. That way I can use my starter (my sister-in-law named the starter Geneviève) and monitor the nutritional value in every single piece of toast we eat each morning. And yes, there is a huge difference in the nutritional value of different types of bread. Even homemade bread. Mostly it’s from the type and brand of flour used, and of course the added ingredients such as raisins, seeds, oats, and nuts.
King Arthur, Red Mill, Stone-Buhr, Bluebird Grain Farms (Winthrop, WA), and the Central Milling Company organic unbleached, all-purpose flour carried by Costco are my personal favorites. And as much as possible I plan to incorporate organic whole wheat and rye flour into my recipes for both their flavor and nutritional contribution.
Both white and wheat flour are made from wheat berries. Wheat berries have three nutrient rich parts – the bran (outer layer), the germ (the inner most part), and the endosperm (the starchy part in between). White flour consists of just the endosperm, while whole wheat (thus its name) uses all three parts. Therefore whole wheat flour is much higher in fiber, folic acid, chromium, zinc, magnesium, vitamin B6, and vitamin E. And rye berries just happen to be one of the healthiest grains in the world. Using rye flour reportedly helps fight against diabetes, cardiovascular disease, weight gain, cancer, inflammation, and high blood pressure. (Source – Dr. Axe)
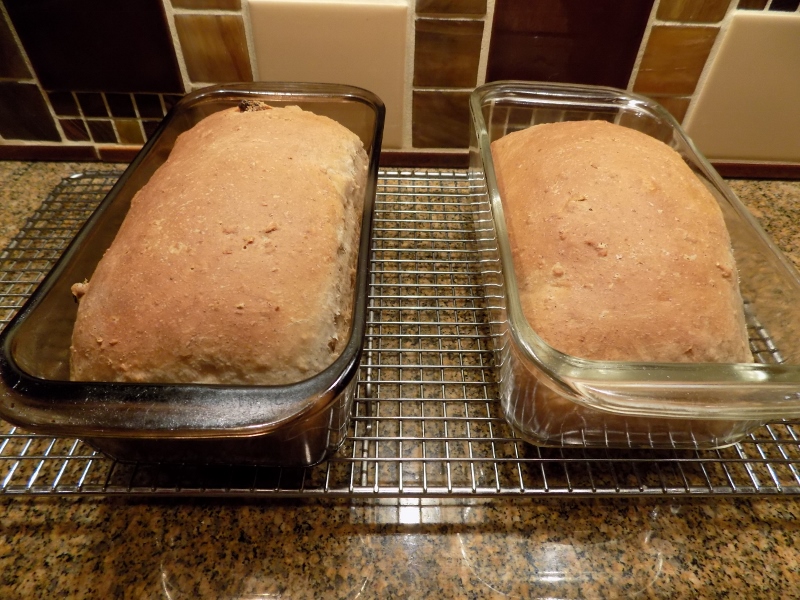
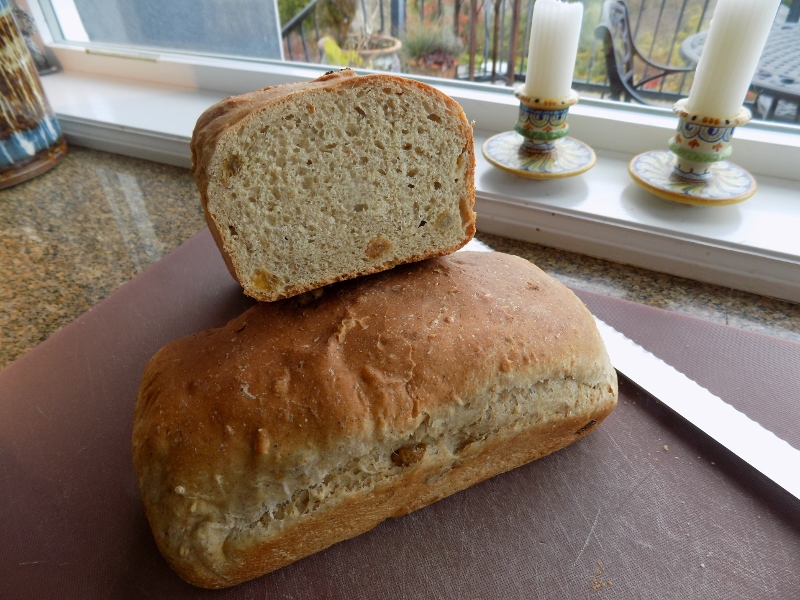
Most of the time we only have bread with breakfast. Occasionally we will share a sandwich for lunch, but only on rare occasions. So mostly we eat a slice a day in the form of toast. So when deciding what type of bread to try this week, I decided on raisin bread.
During my research, many of the recipes for raisin bread had you create a swirl by flattening out the dough and then sprinkling on the raisins and rolling the loaf like a cinnamon roll. Nice presentation, but too much work. So I just incorporated the raisins and cinnamon into the dough. (Same flavors, but less work.) So really, this bread comes together very quickly.
So, in short, this is not the only bread recipe I am going to post in the next few weeks. And yes I know, there are thousands of wonderful homemade bread recipes already on the internet. But I try to keep my bread recipes as healthy and easy to prepare as possible. And you’re right! Many of you are never going to bake your own bread, either because you have no desire to do so, or simply haven’t got the time. I truly understand. But for those of you who are teetering towards bread baking, I hope you give any of the bread recipes on this site a try. They are mostly quite easy to prepare and in the long run can save you money.
I did a quick and dirty cost analysis based on a basic French bread using King Arthur flour. I came up with about $1.70 worth of ingredients and cost to run our oven. ($.80 flour, $.38 yeast, $.02 salt, water, and fuel $.50.) To buy a truly good artisanal loaf weighing over a pound, you can expect to spend anywhere from $4-8. And even then, the quality of the ingredients used to prepare the bread is unknown. So if you want to have your bread and eat it too, get thee to the kitchen at your earliest convenience. If you have bread baking questions, you can always direct them to me by clicking on the “leave a reply” link. If you have questions about ship building or sports statistics for example, don’t bother!
¾ c. sourdough starter (see recipe below)
2½ tsp. active dry yeast
2/3 c. room temperature water
¼ c. brown sugar
5 T. unsalted butter, room temperature
1¼ tsp. fine sea salt
1 tsp. ground cinnamon
1 lg. egg
1 c. whole wheat flour
½ c. old-fashioned rolled oats
½ c. golden raisins
1½ – 2 c. unbleached all-purpose flour
veggie oil
Combine the sourdough starter, yeast, water, and brown sugar in the bowl of your stand mixer. Stir with your dough hook and let sit for 15 minutes.
Add the butter, salt, cinnamon, egg, whole wheat flour, and oats; beat until well combined. Add the raisins and enough of the all-purpose flour to make a smooth, soft dough.
Add a tiny bit of oil to the mixing bowl, and using your hands, gently form the dough into a ball making certain that the entire surface is lightly coated with the oil. Cover the bowl with plastic wrap and allow it to rise for 1½ to 2 hours, or until just about doubled in bulk.
When the dough is ready, gently deflate the dough, divide in half, form into 2 loaves, and place in two lightly greased 4½ x 8½-inch loaf pans. Cover with a clean tea towel and allow the dough to rise for 1½ hours or until nicely plumped.
Bake in a pre-heated 350 degree oven for 35-40 minutes. When done, the bread’s crust should be a beautiful golden brown, and the interior should measure at least 190 degrees on an instant-read digital thermometer.
Remove the bread from the oven, and gently loosen the edges. Turn onto a wire rack and allow to cool completely before slicing.
Sourdough Starter
1 c. unbleached all-purpose flour
1 T. sugar
1½ tsp. active dry yeast
1 c. warm water
Combine all ingredients in a plastic juice pitcher using a wooden or plastic spoon. (Don’t worry about lumps because the little yeasty beasties will make short work of dissolving the lumps!) Cover with lid, turning strainer in lid to pouring lip. (This allows air to reach the starter.) Let ferment 3 days at room temperature, stirring several times daily. After the third day, transfer starter to a covered glass container and refrigerate.
To use, remove desired amount for recipe and replenish starter by stirring in equal amounts of flour and water or follow the instructions for the particular bread you are making. Let stand at room temperature overnight. Return to refrigerator.
If a clear liquid forms on top, stir back into starter. Every time you use, replenish with equal amounts of flour and water. Even if you don’t use every week, replenish every 7 – 10 days with equal amounts flour and water. (First remove about ½ cup of the existing starter. This allows room in your container for the new flour (yeast food) and water.) Use in any of your favorite bread, muffin, or pancake recipes.