OK, I know, I already have several ginger cookie recipes on this site. But, as far as I’m concerned, you can never have too many ginger cookie recipes from which to choose.
So, yesterday I decided to make a couple changes to one of my existing recipes and came up with these cookies. And it being fall and all, they just fit in perfectly with the season.
Fall means starting to hunker down for winter. And the warm spices (ginger, cinnamon, nutmeg, cloves, allspice, etc.) are especially delightful this time of year. They just make you feel warm inside.
So, if you too are a ginger cookie lover, this recipe may just be what you need. Because it was exactly what I needed. And the cookies were very easy to build.
Along with baking these cookies, I also decided to bring a bit of autumn into our home.
When we got back from our recent trailer trip, our good friend and house sitter/cat sitter Peggy had a nice vase filled with leaves, foliage, and blossoms waiting for us. And I wondered why I had never thought to use all those late blooming and color changing stalks with leaves before in an arrangement.
So, I thought seeing a picture of what I subsequently put together might inspire you to do the same thing. It’s really a nice feeling to be able to bring a bit of color and texture into your home. And when it’s free of charge, all the better!
Well, that’s it for today. We are getting ready to go to the Lincoln Theater in Mount Vernon to see Arsenic and Old Lace. One of my favorite plays of all time.
So, on that happy note, I am going to “charge” into my bedroom and change into the proper clothing to attend this theatrical production. (In other words, I’m going to change into my dress jeans!)
And as always, peace and love to all.
¾ c. (1½ sticks) unsalted butter, room temperature
½ c. granulated sugar
½ c. brown sugar
1 lg. egg
¼ c. molasses
2¼ c. all-purpose flour
1 tsp. baking soda
1/8 tsp. salt
2 tsp. ground ginger
¾ tsp. ground cinnamon
½ tsp. ground cloves
½ c. finely chopped candied ginger
sparkling sugar, opt.
In a large bowl, cream butter and sugars until well combined. Beat in egg and molasses. Whisk together the flour, soda, salt, ginger, cinnamon, cloves, and chopped candied ginger. Add to the creamed mixture; mix well.
Using an ice cream scoop (your choice for size), form balls and dip top into sparkling sugar before placing on a parchment paper lined baking sheet, sugar side up, and refrigerate several hours or overnight.
Bake in a pre-heated 350-degree oven for 10-12 minutes or until the cookies are just set. Do not overbake.
Remove from oven and allow to sit on the hot pan for 3-4 minutes before transferring to a wire rack to cool completely before storing in an airtight container.
Part 5 – Salt Creek Recreation Area, Port Angeles, WA
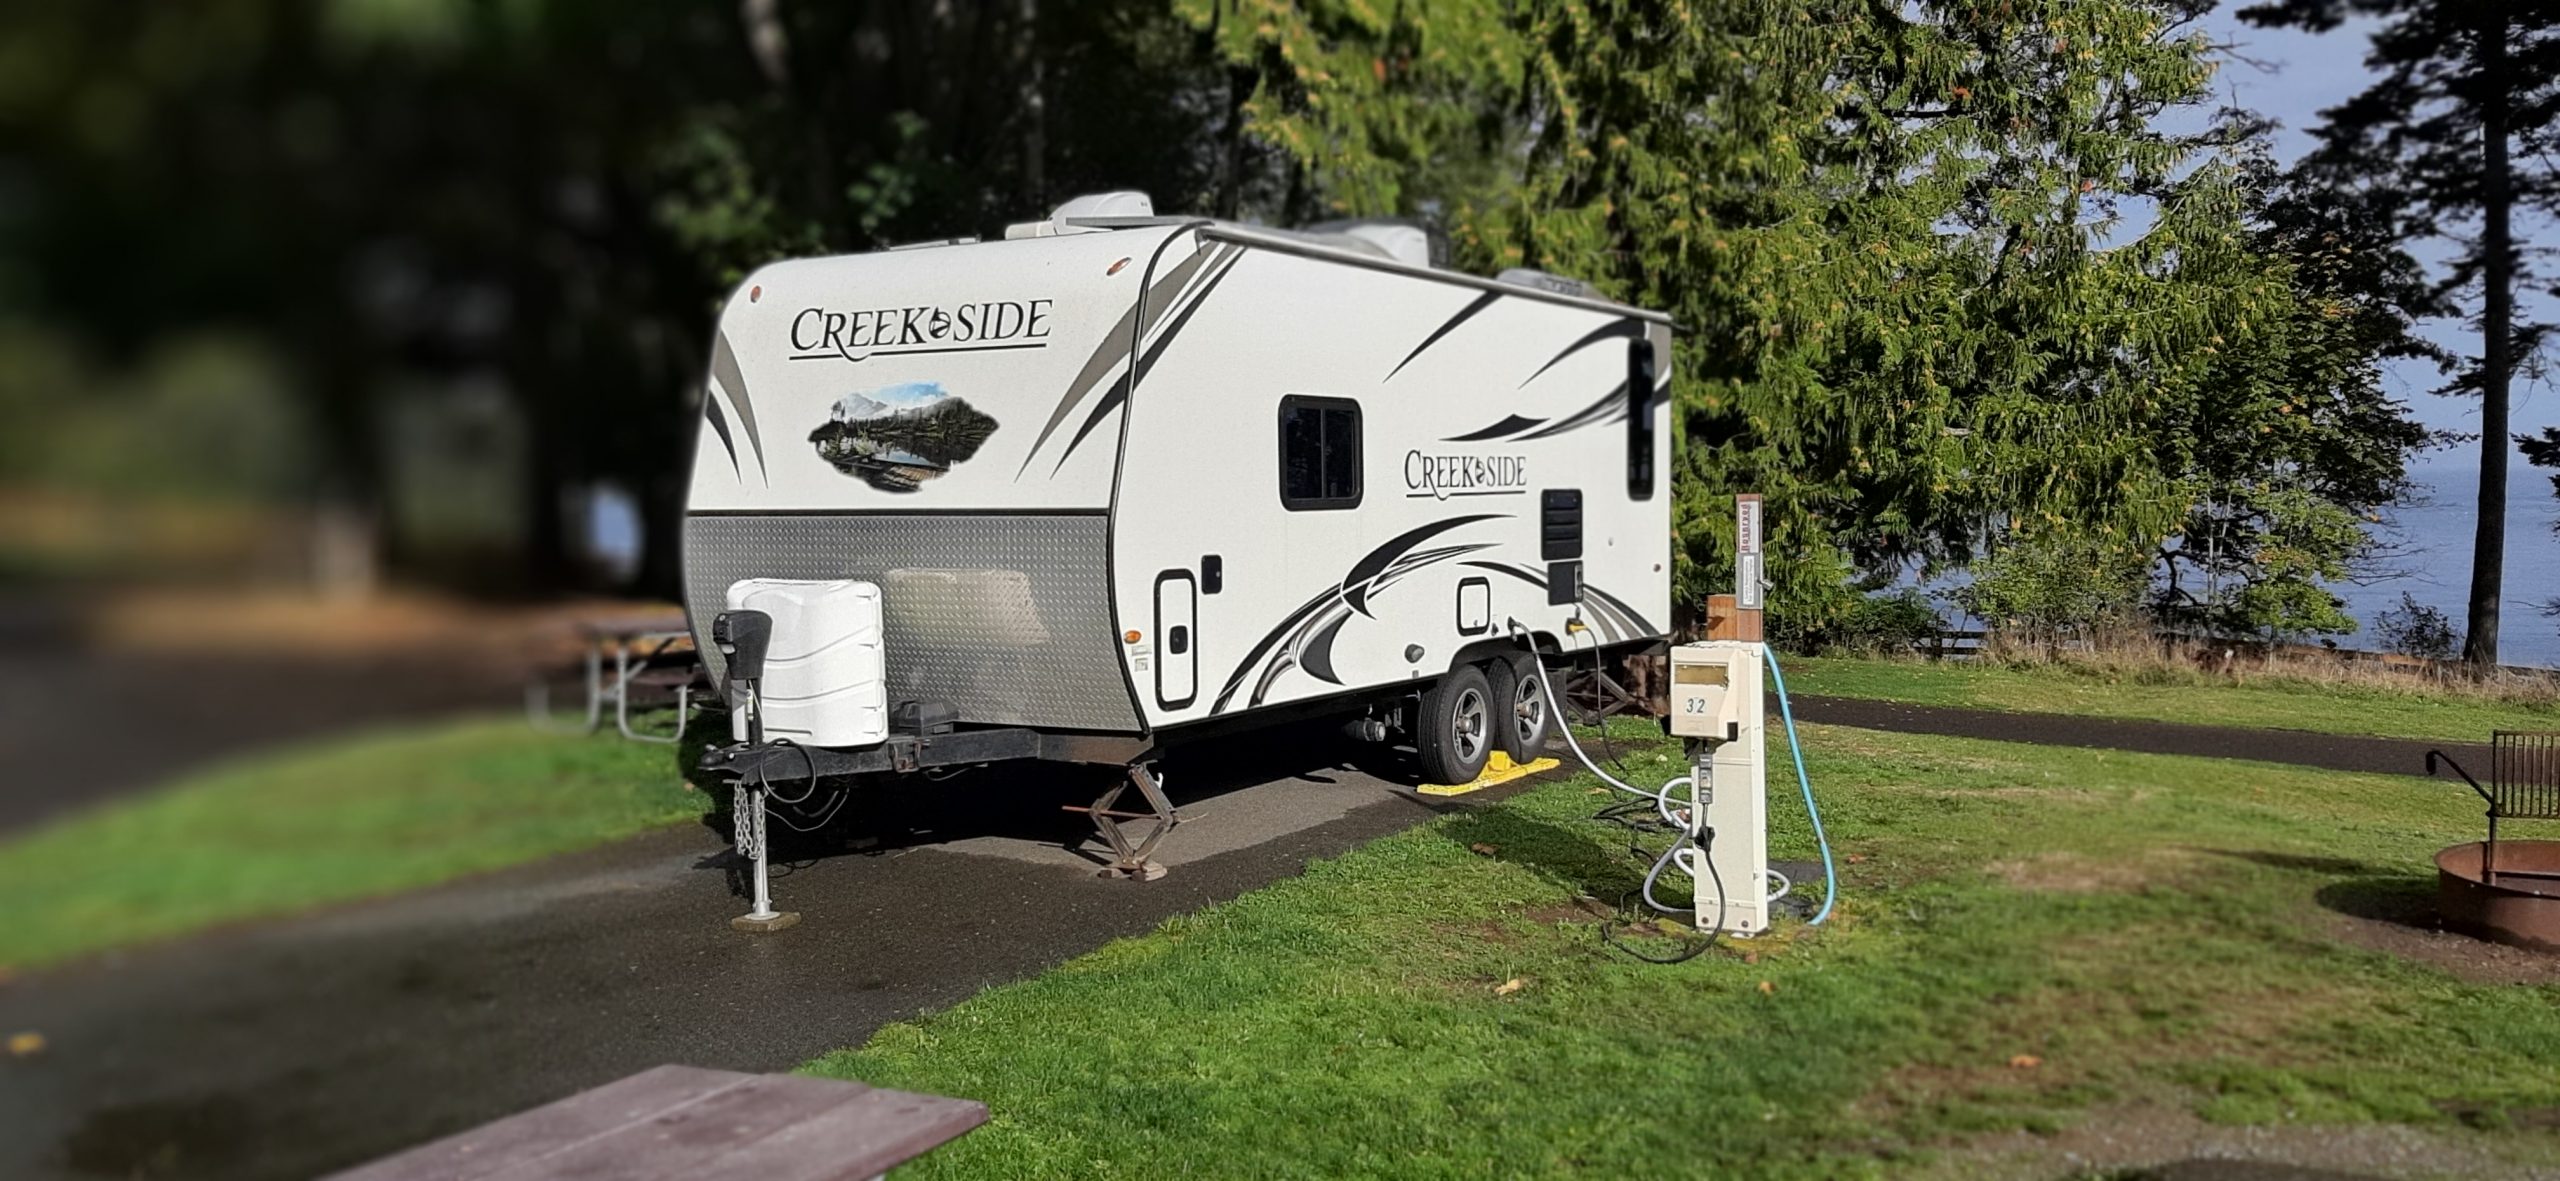
Wednesday, September 25, 2024 – Salt Creek Recreation Area, Port Angeles, WA – site 32
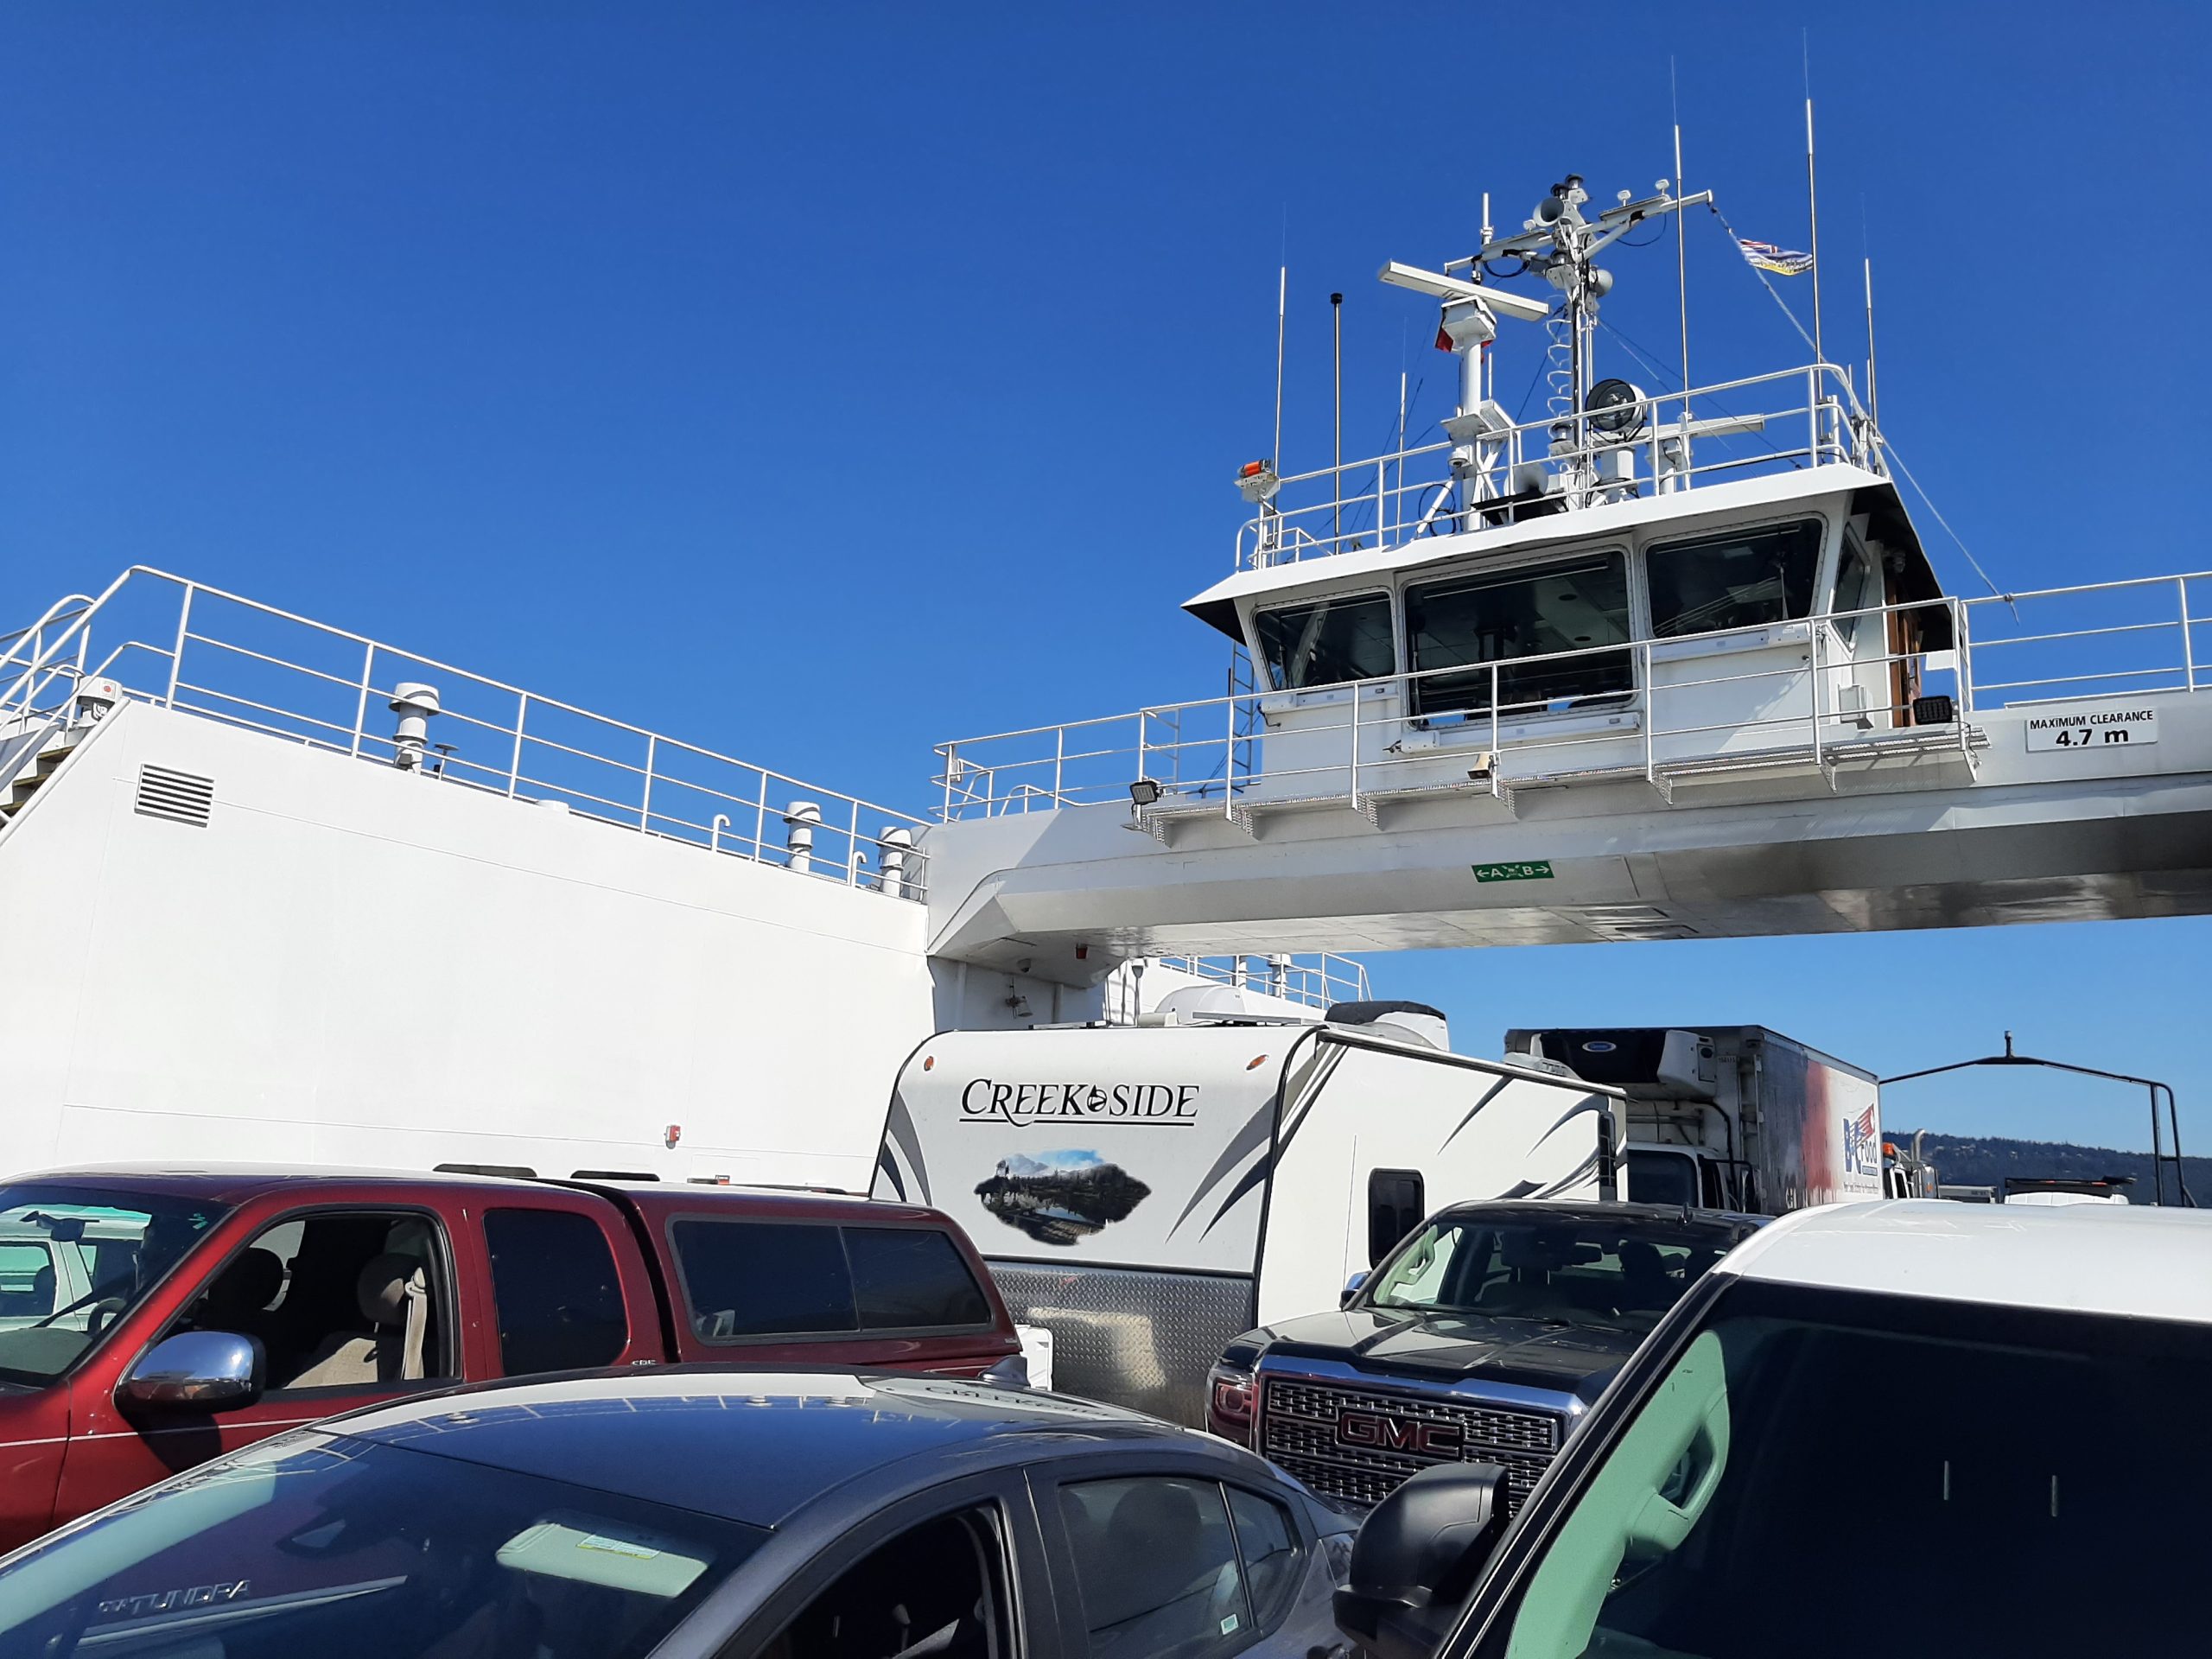
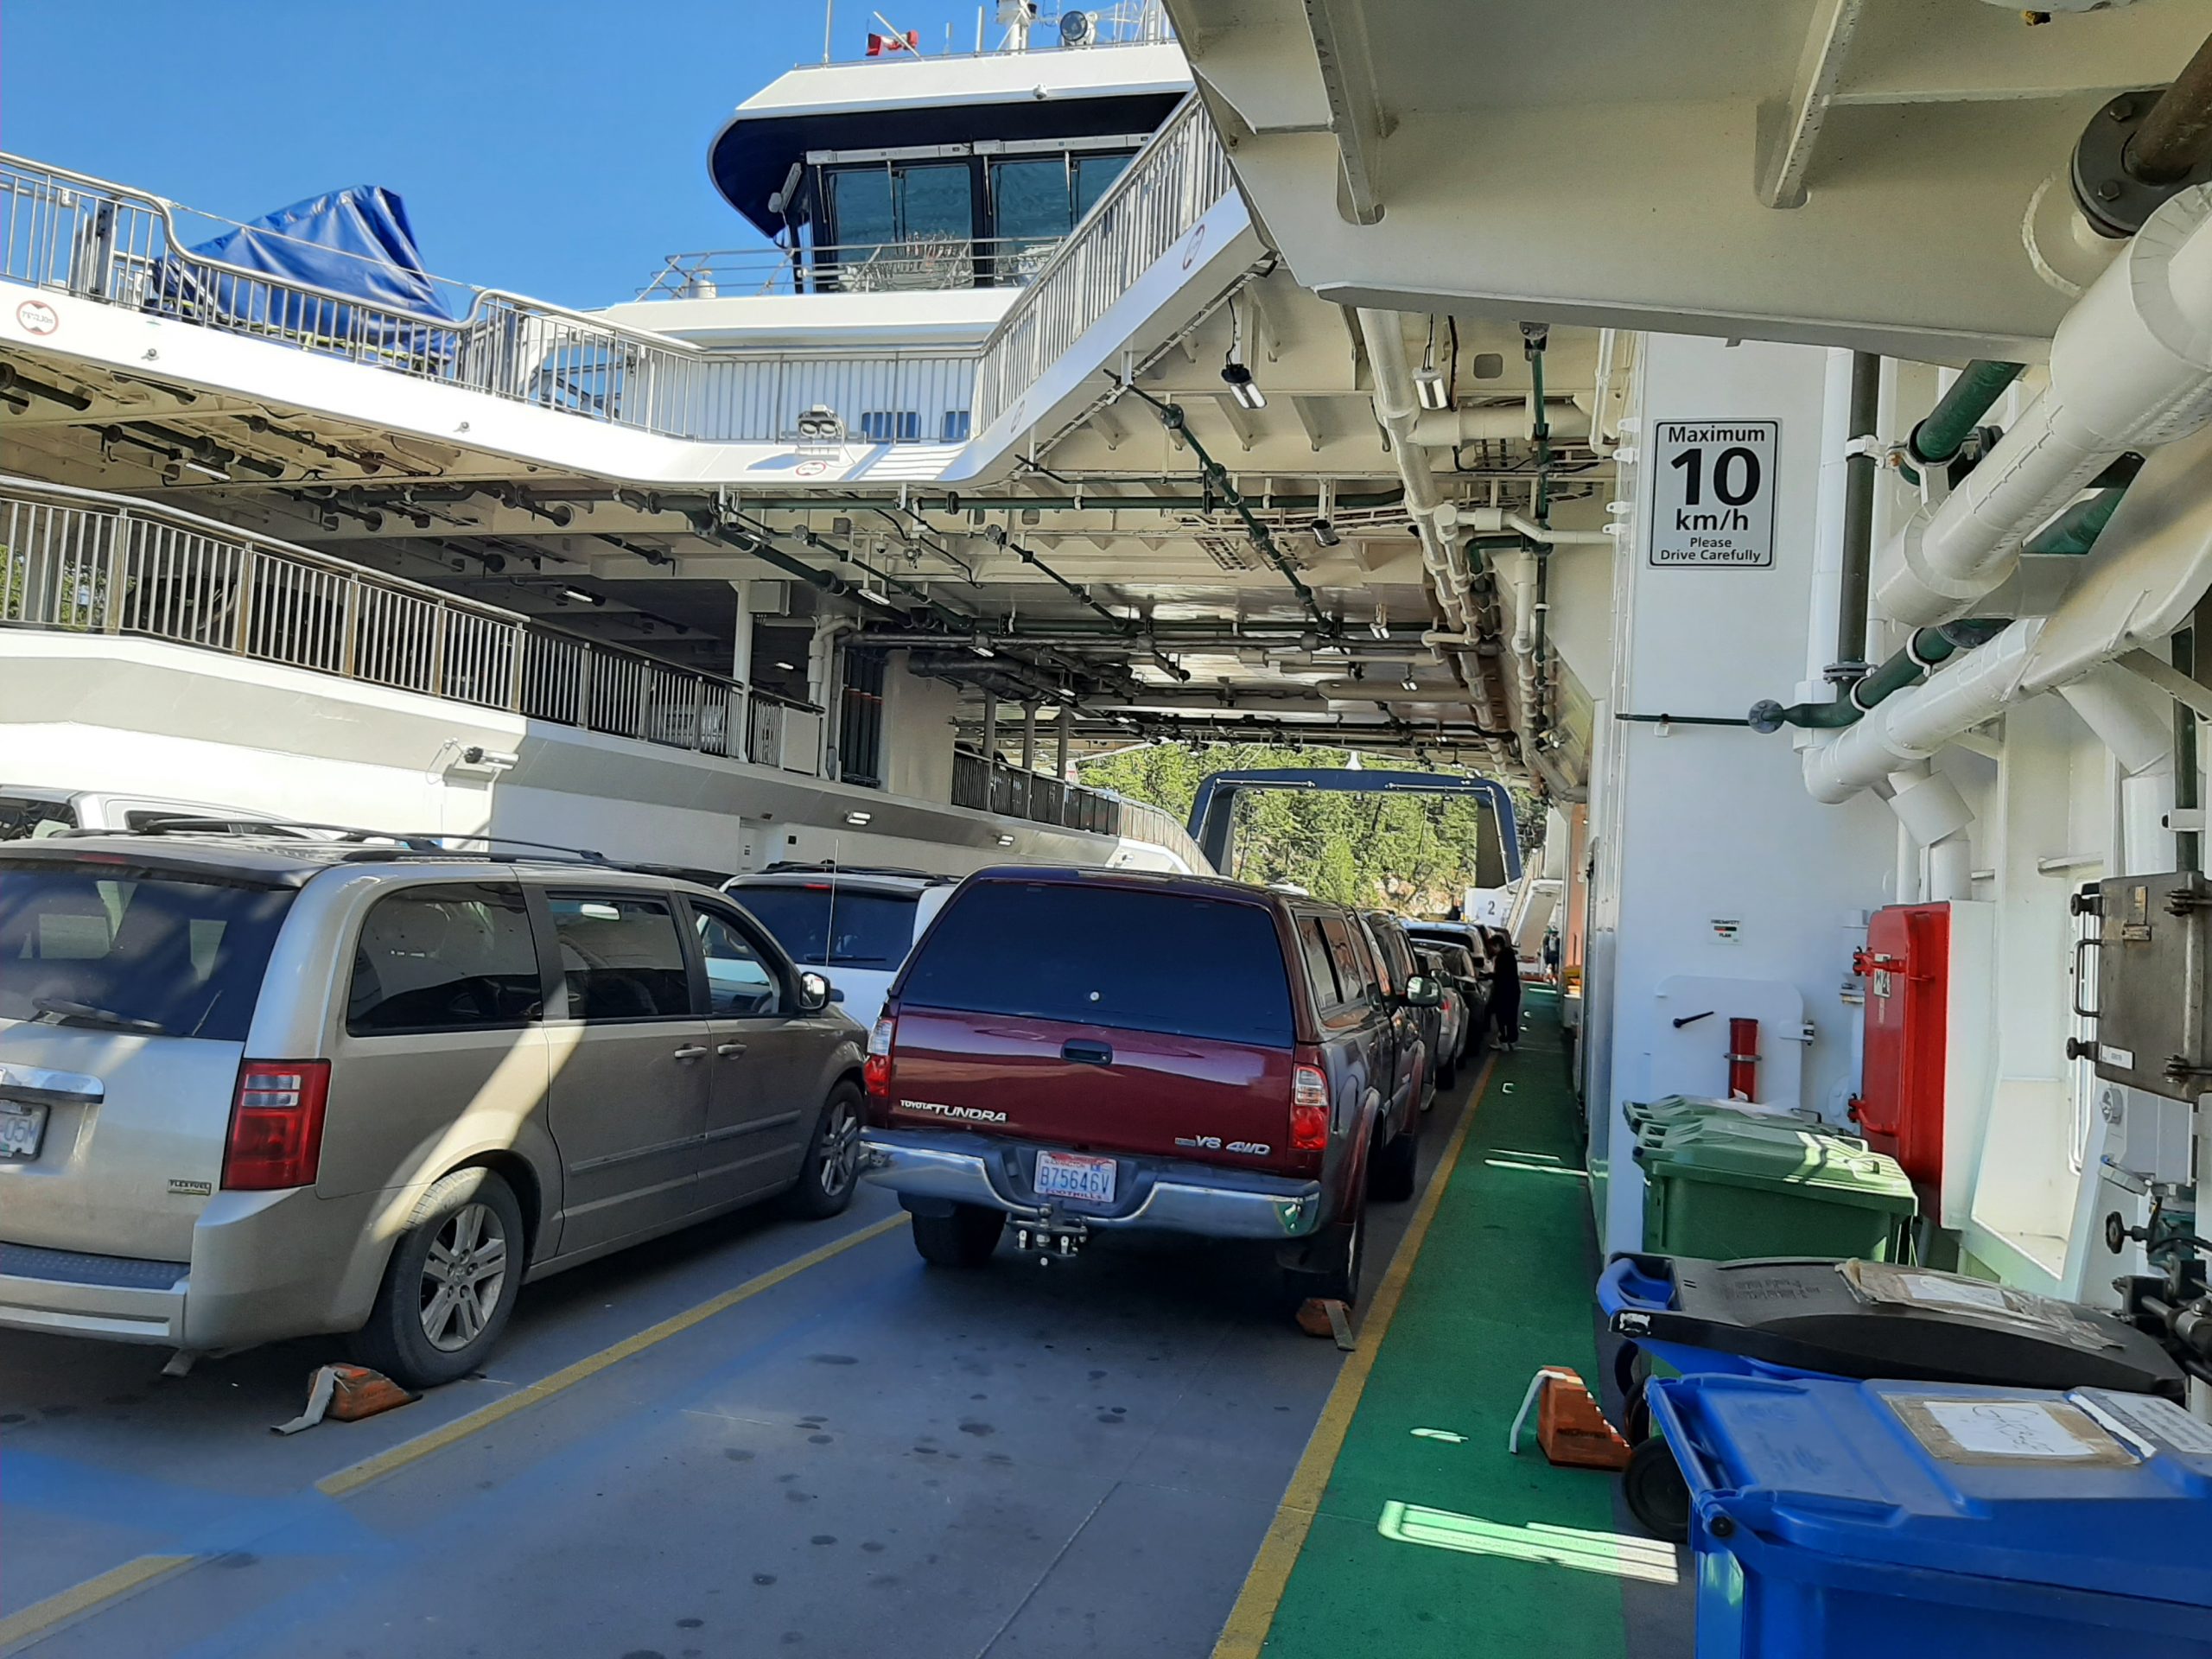
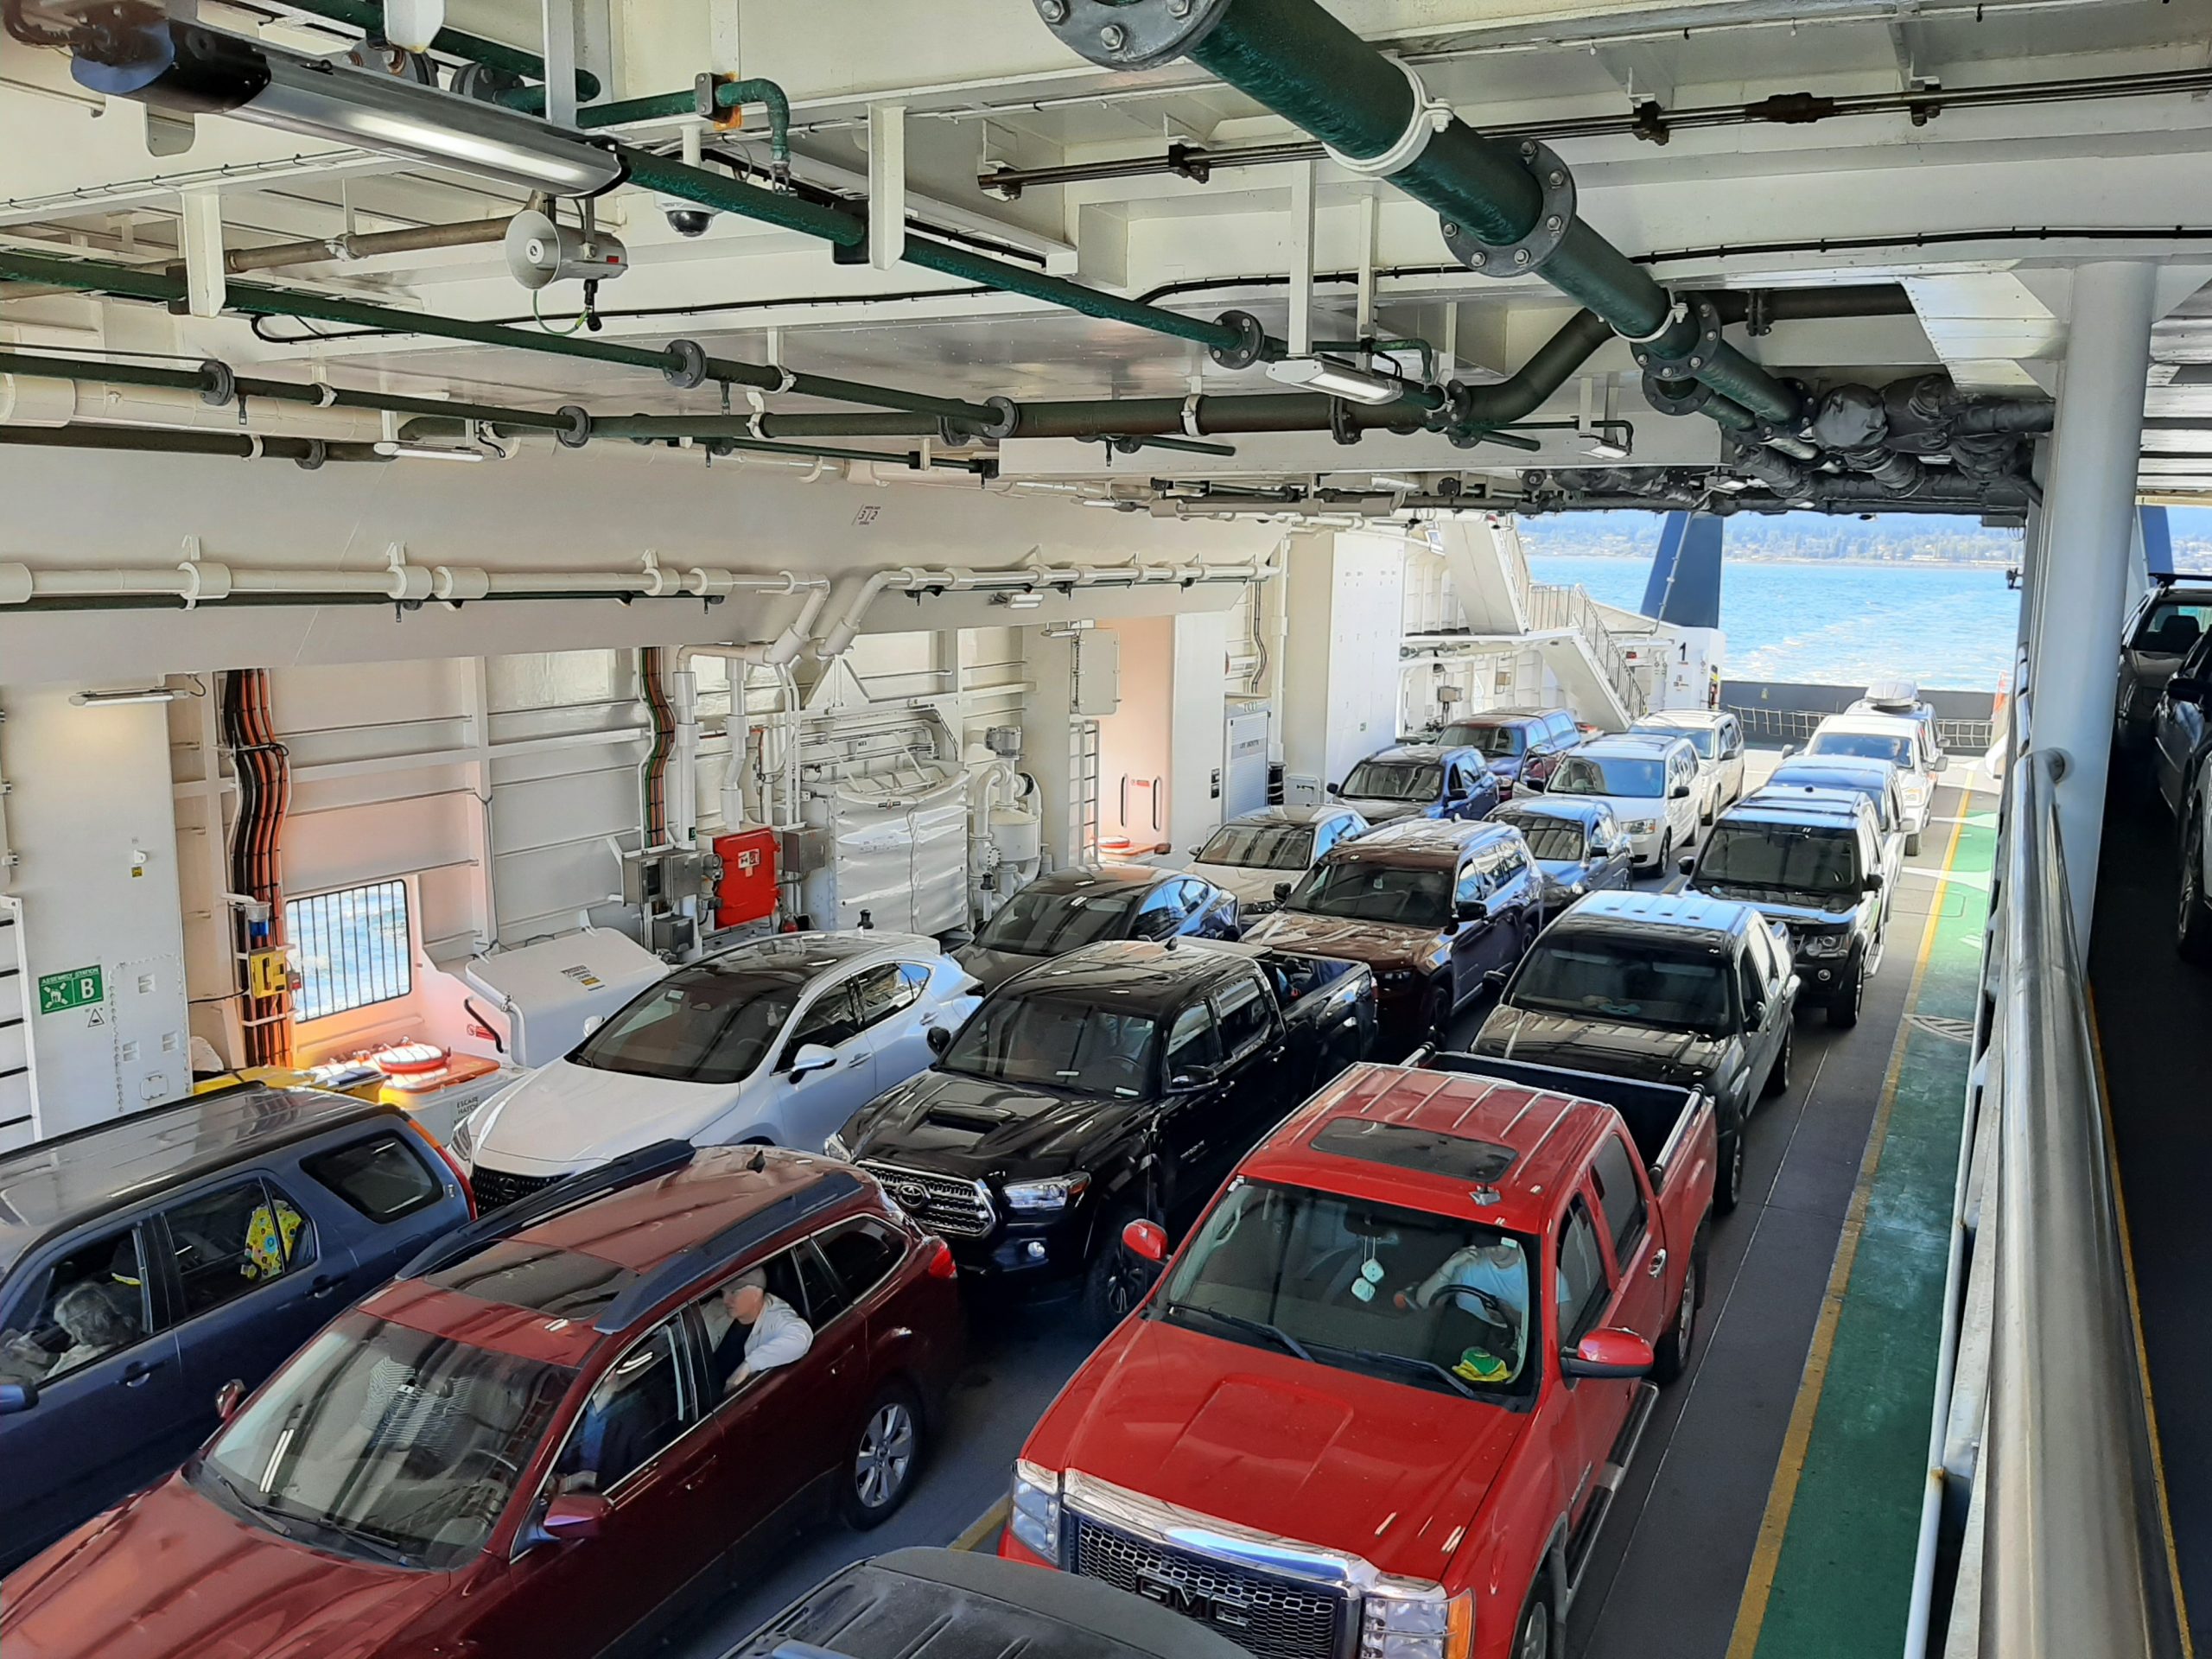
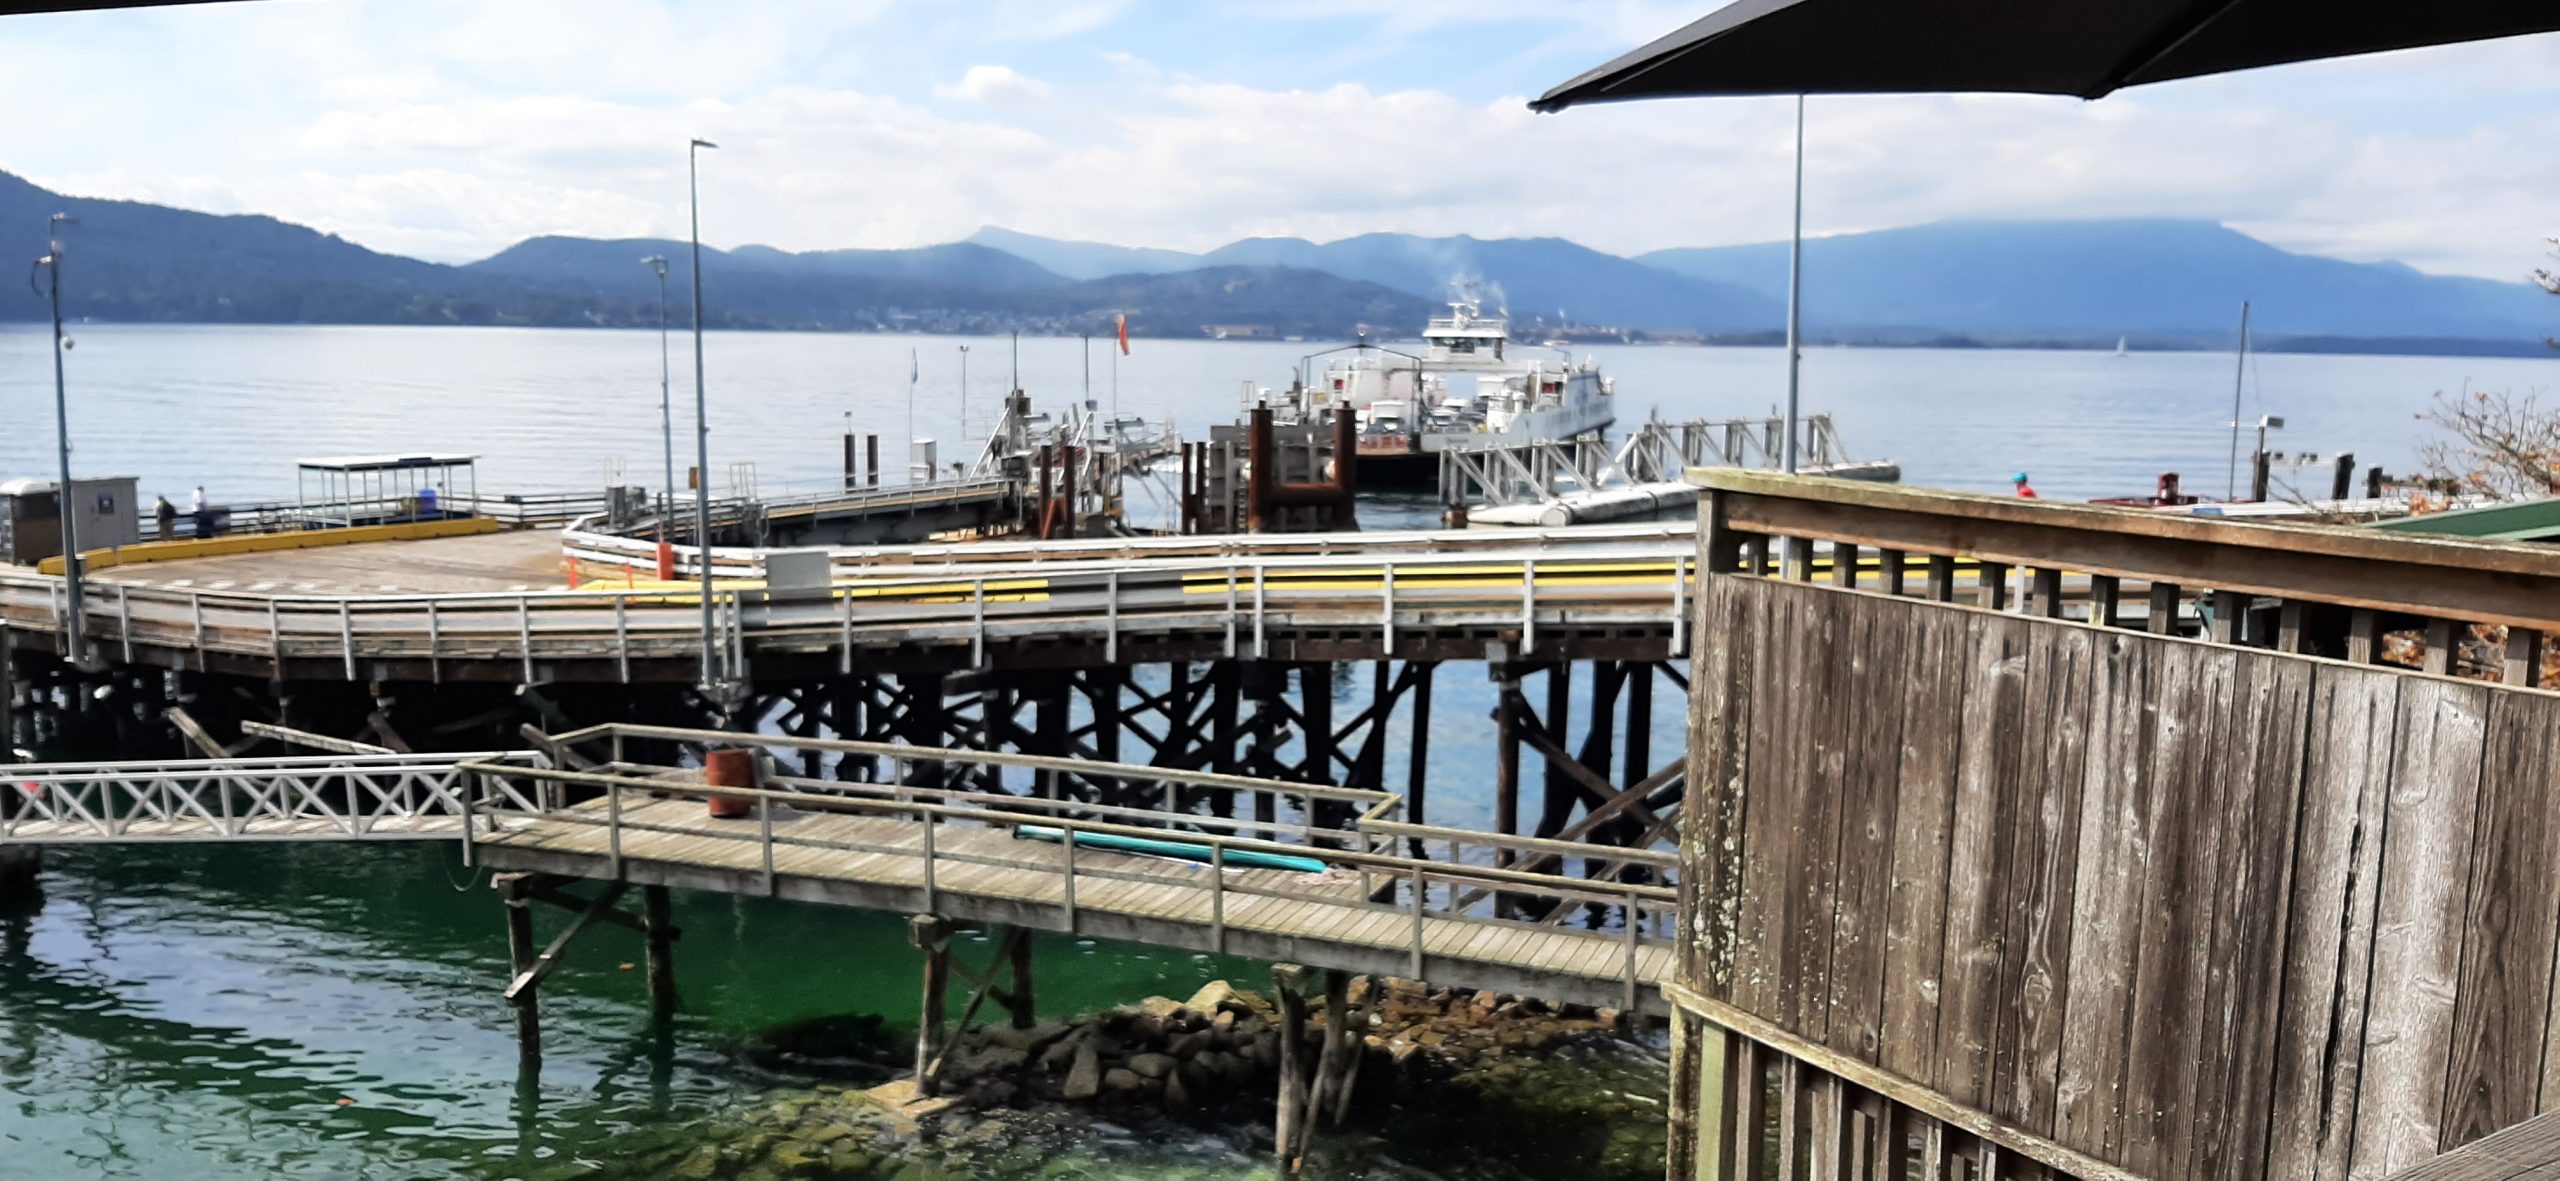
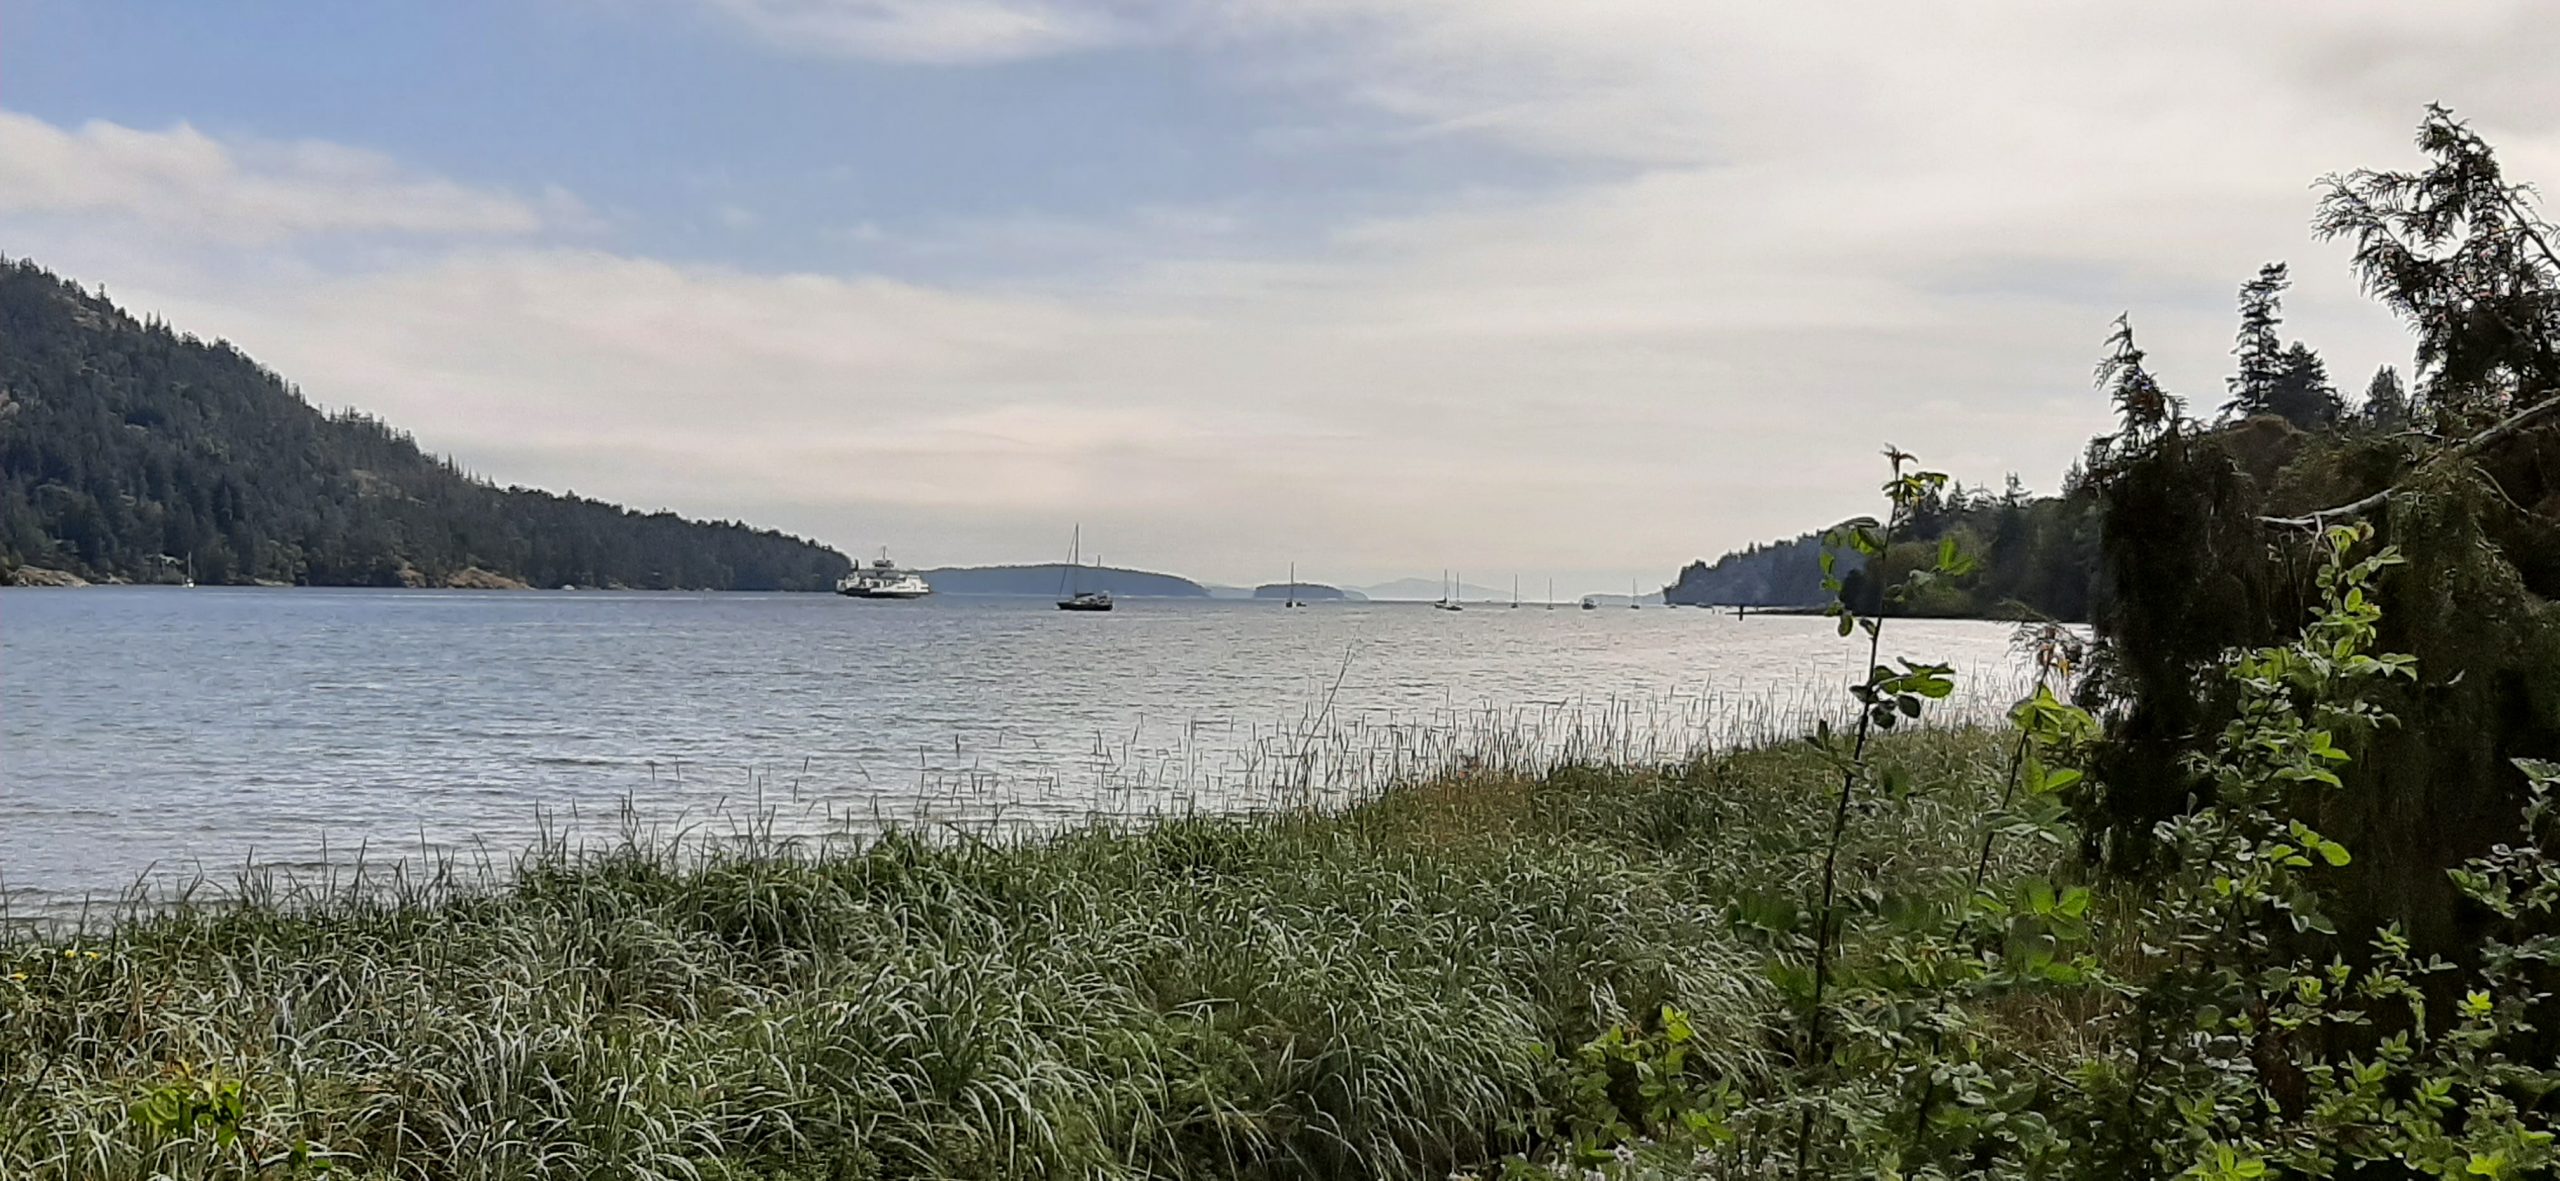
Well, rain was forecasted, and rain it was. What a lovely way to hitch up a trailer and set off on yet another day of traveling from point A to point B. In this case, Vancouver Island, BC to Port Angeles, WA via the Black Ball ferry. So, having to be out of camp by 11:00 am, meant that we would be in line at the Black Ball ferry dock at around noon for the 3:00 pm sailing. But what were we to do in Victoria towing a trailer. There are no parking garages for truck and trailer, nor any areas where trailers are welcome. So, thinking we might just be turned away and asked to move on down the road when we approached the ticket booth for the ferry because we were so early, we were greeted with open arms and told to just get in line. So, once parked, we moved into our trailer, had a nice lunch, and waited patiently for 1:30 pm when the border patrol would come through and check our passports. While we waited, we took a few pictures.
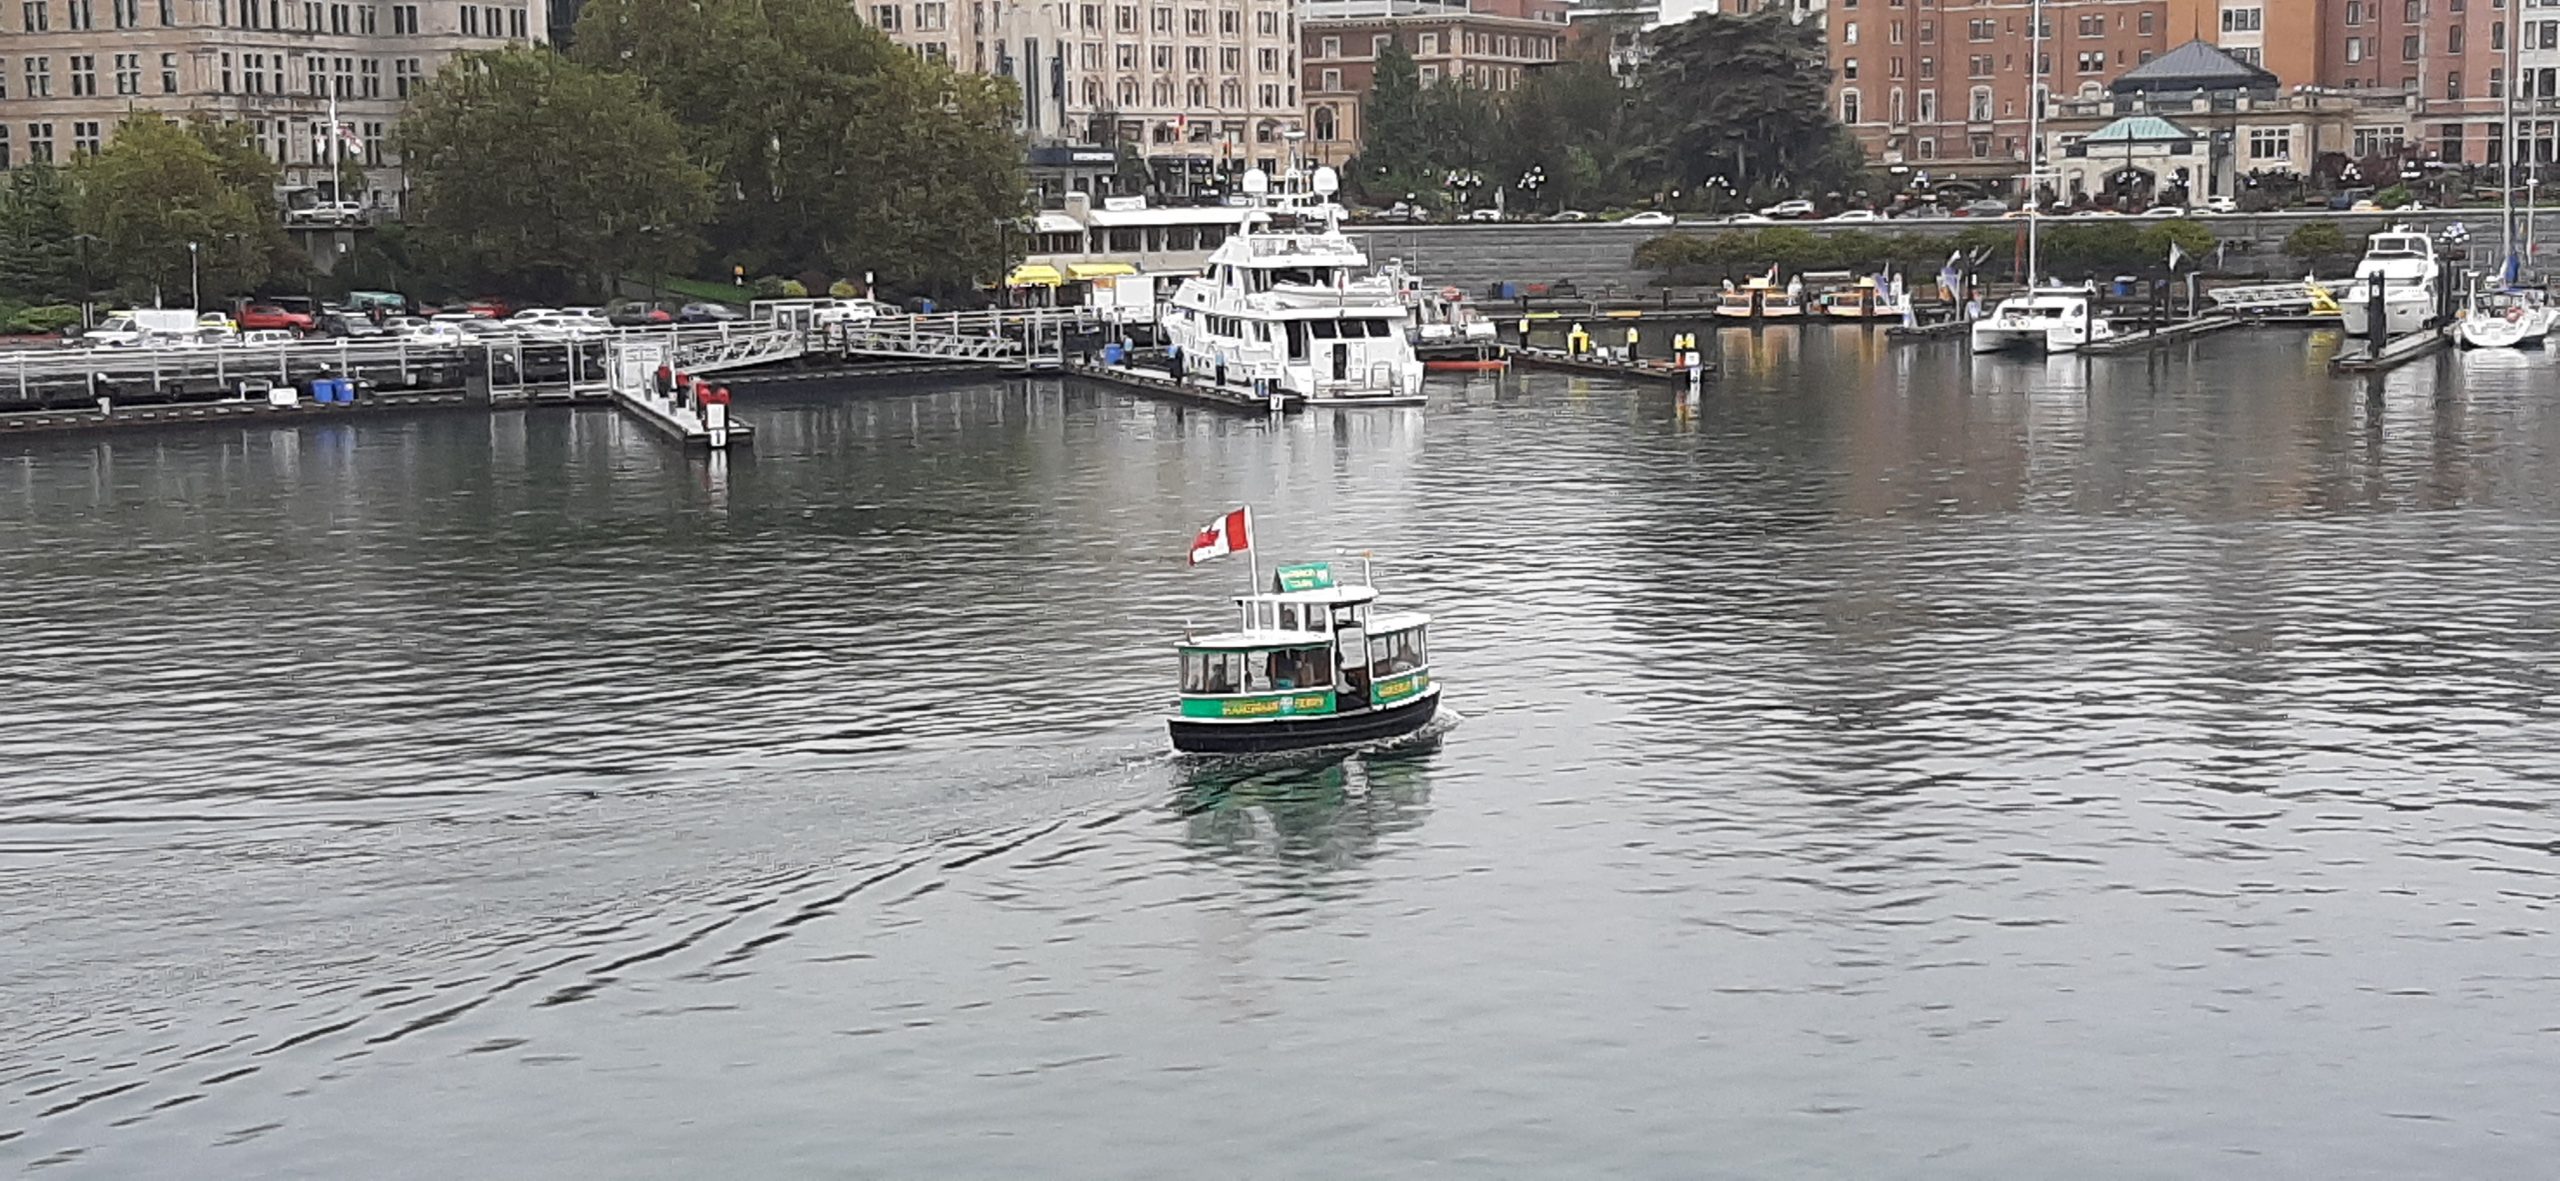
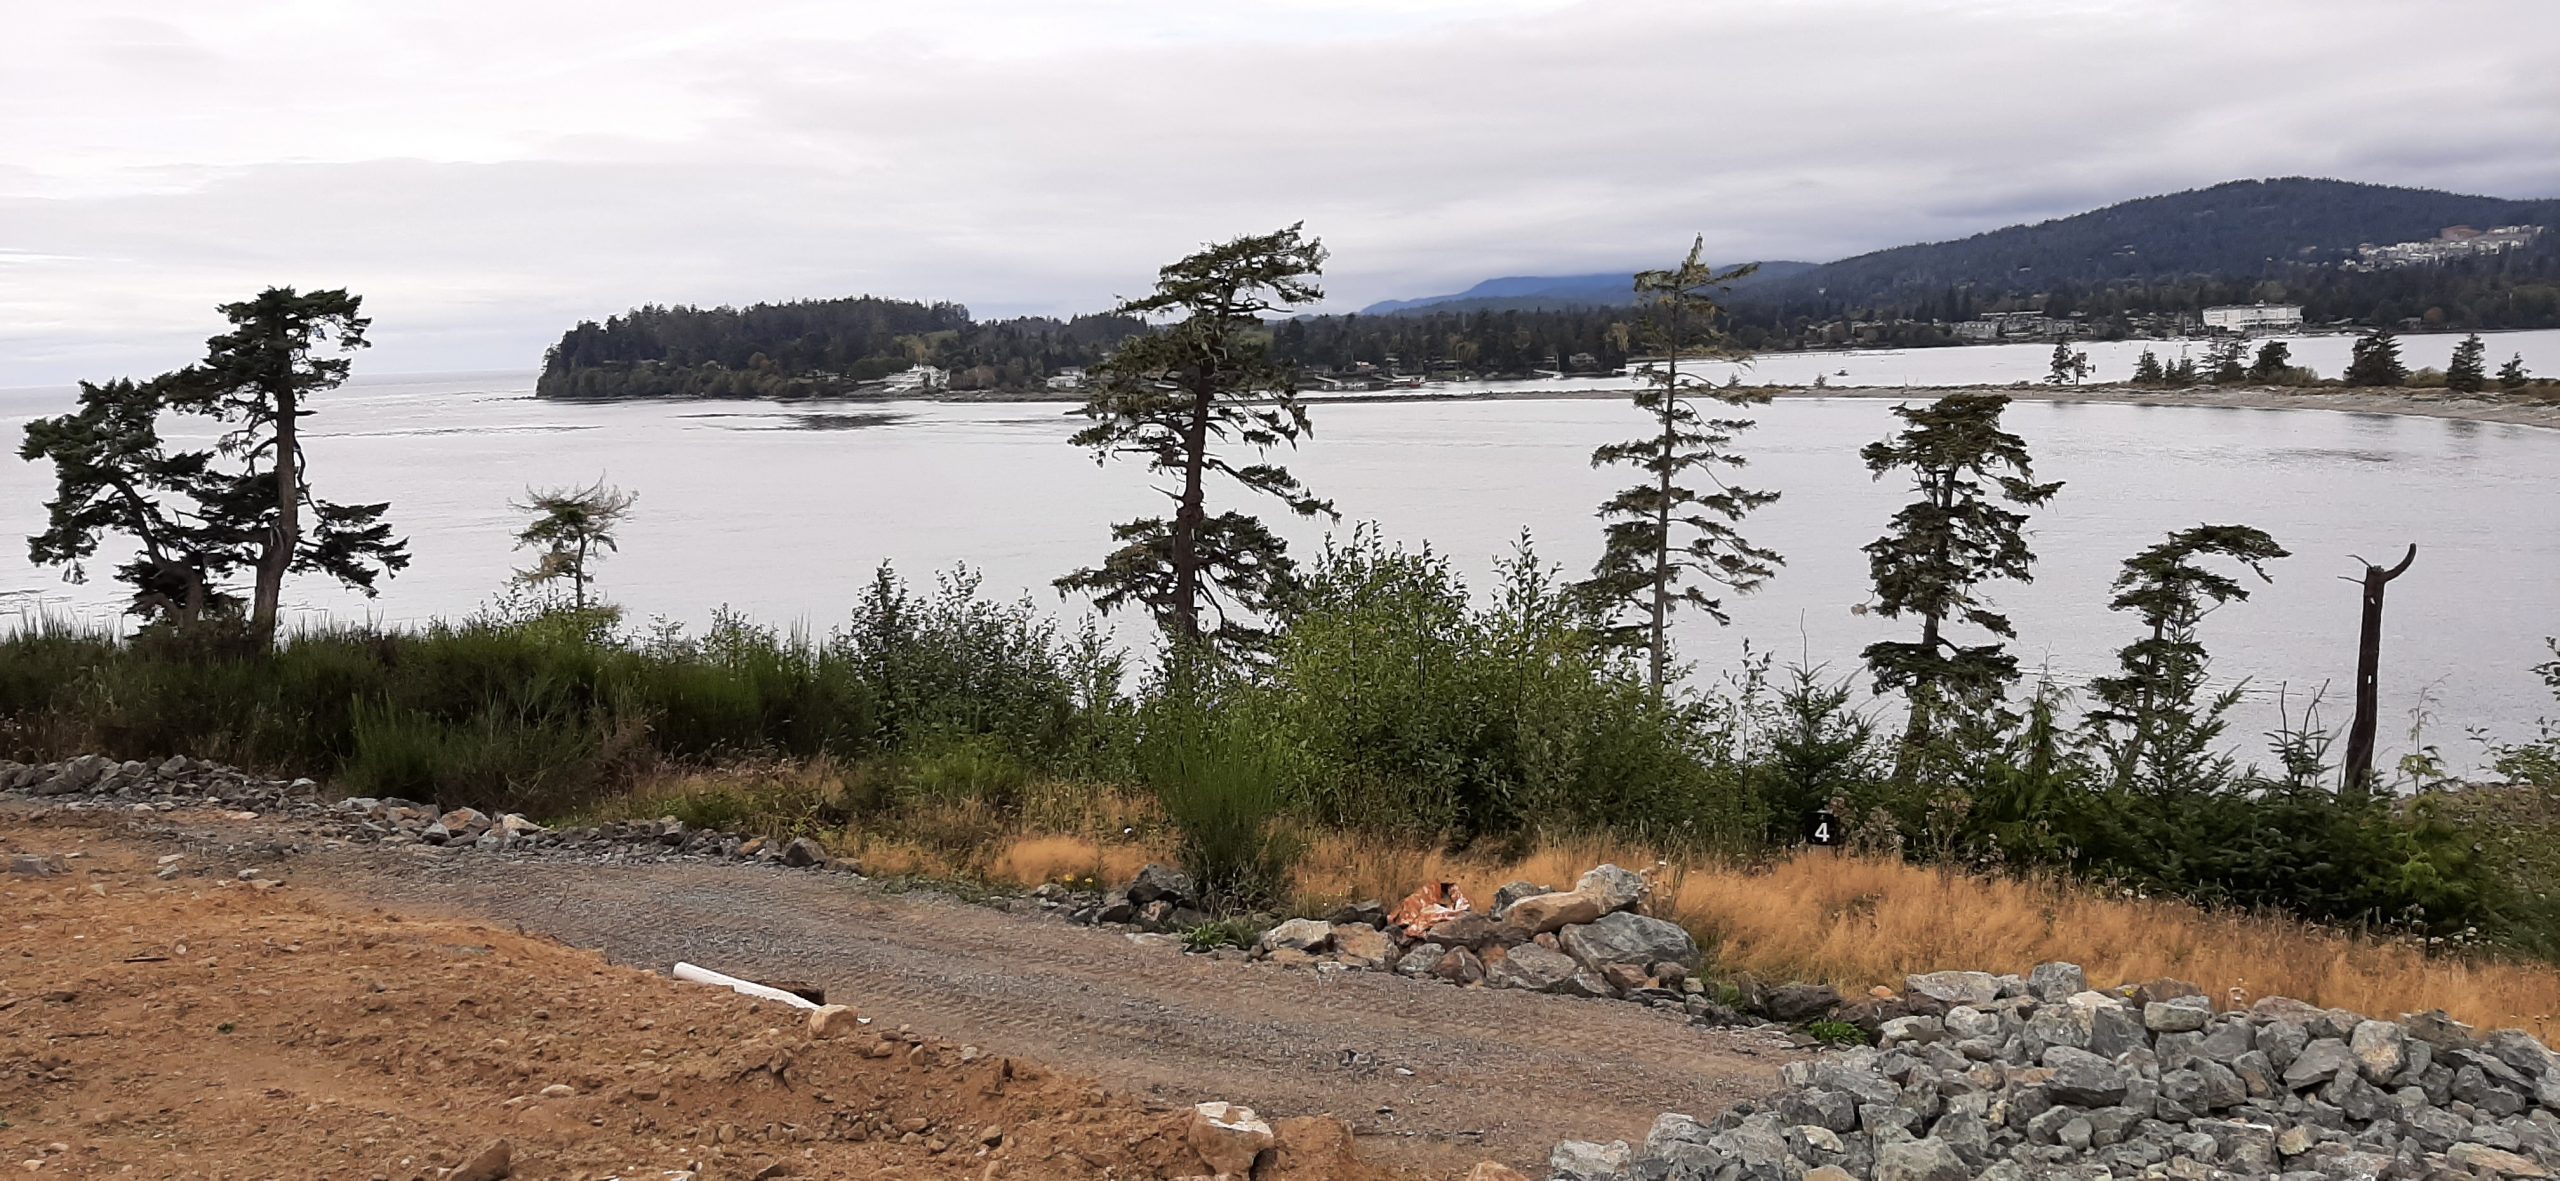
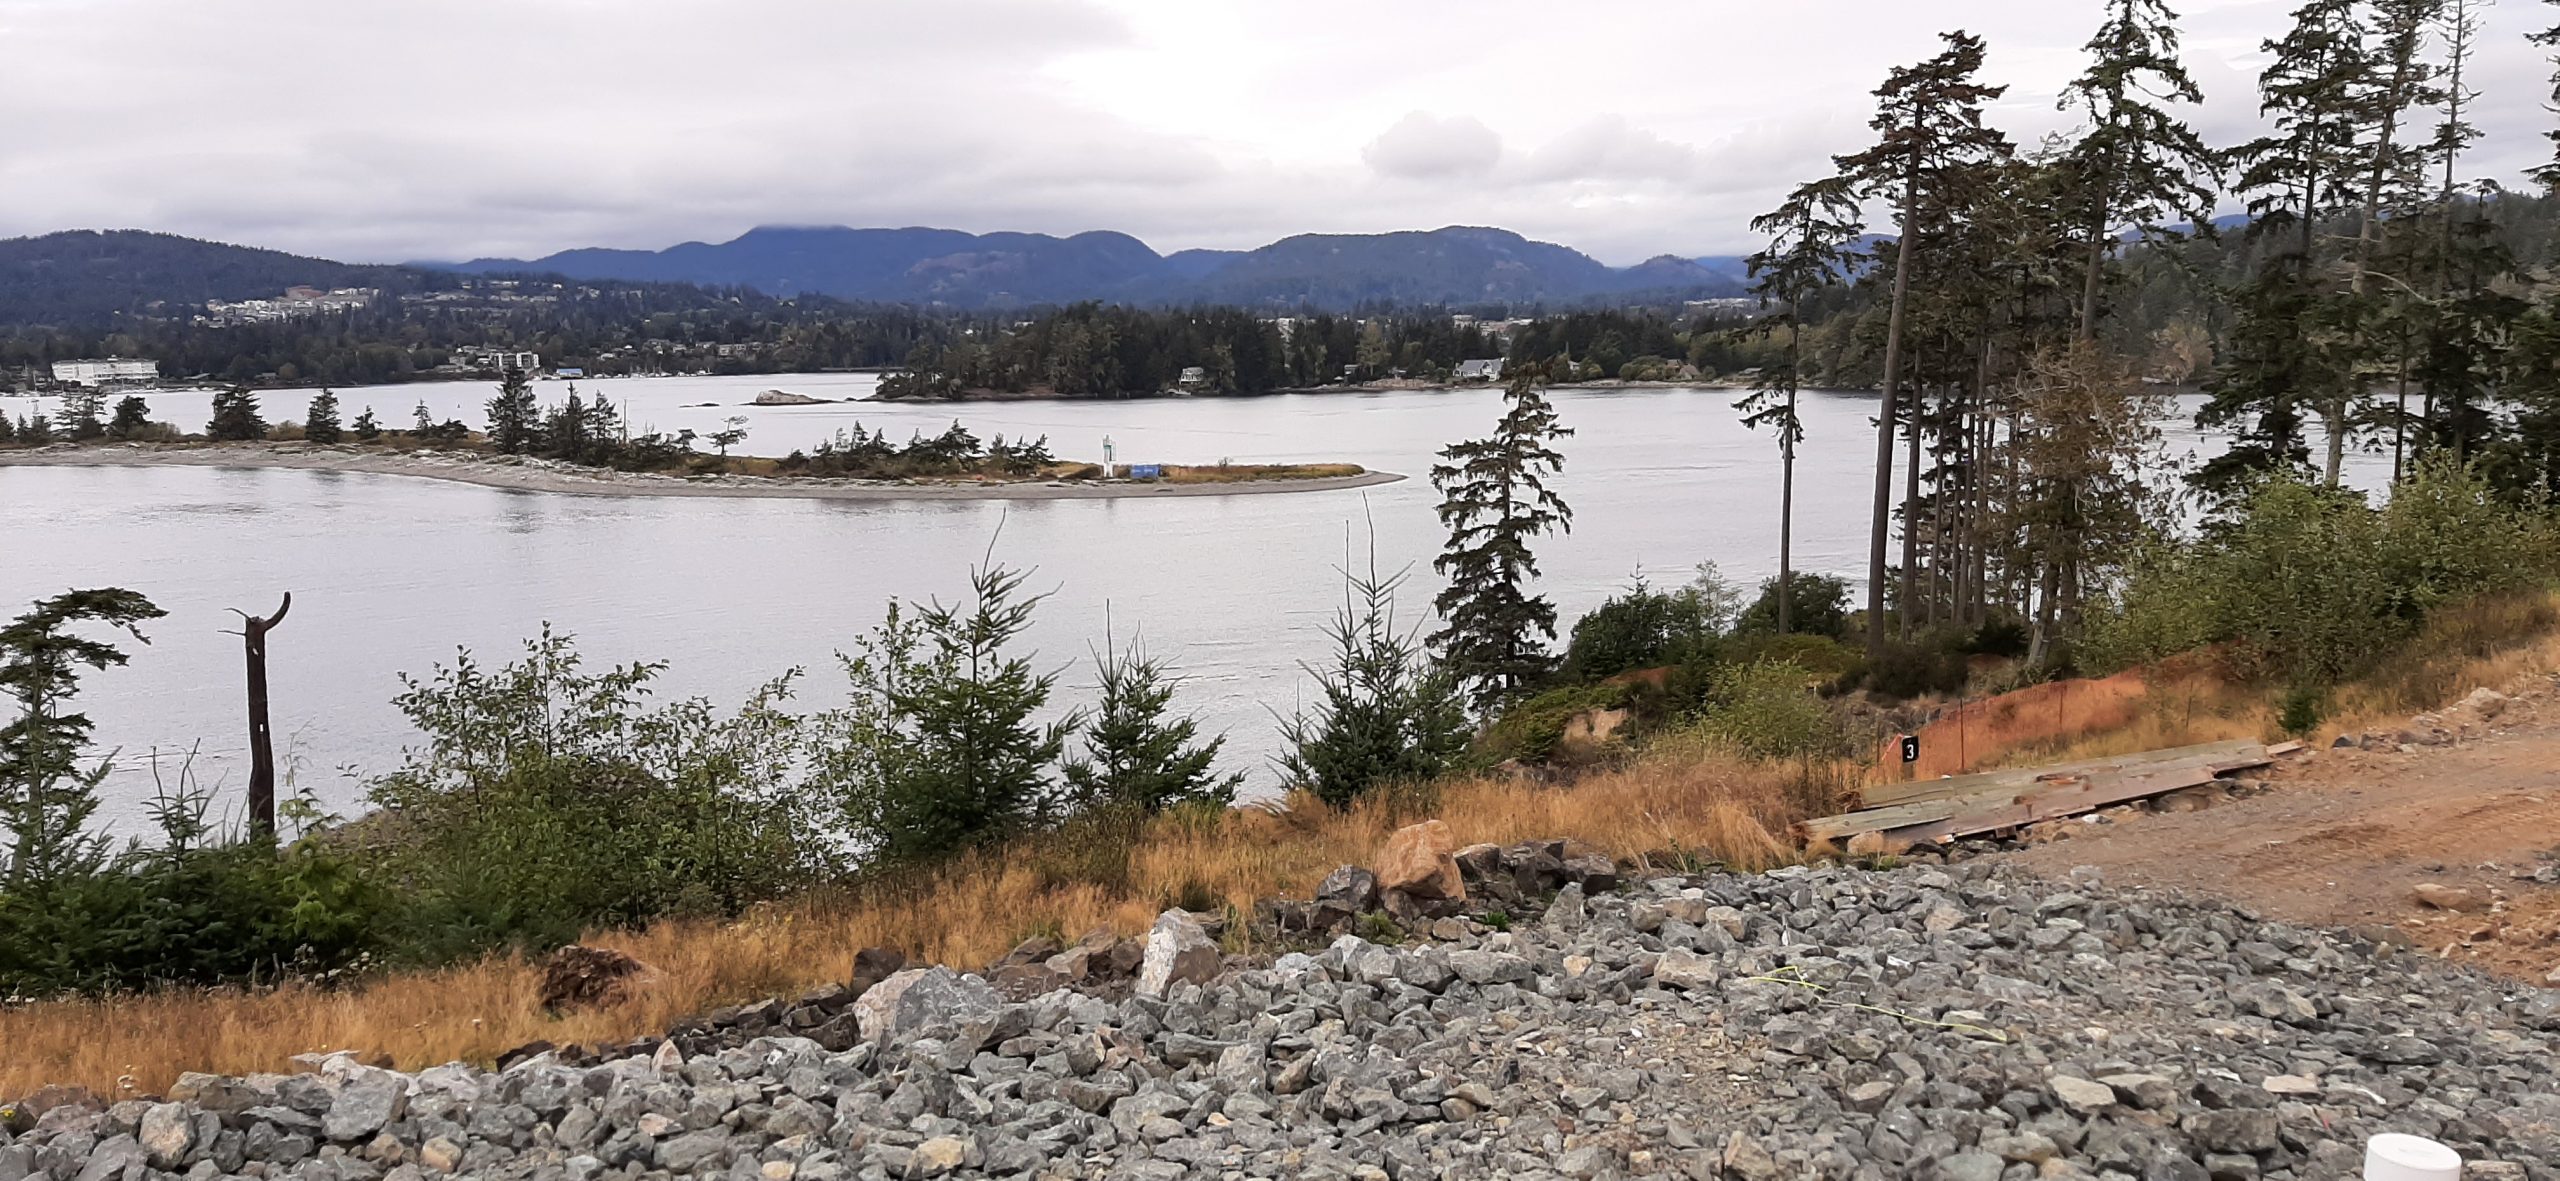
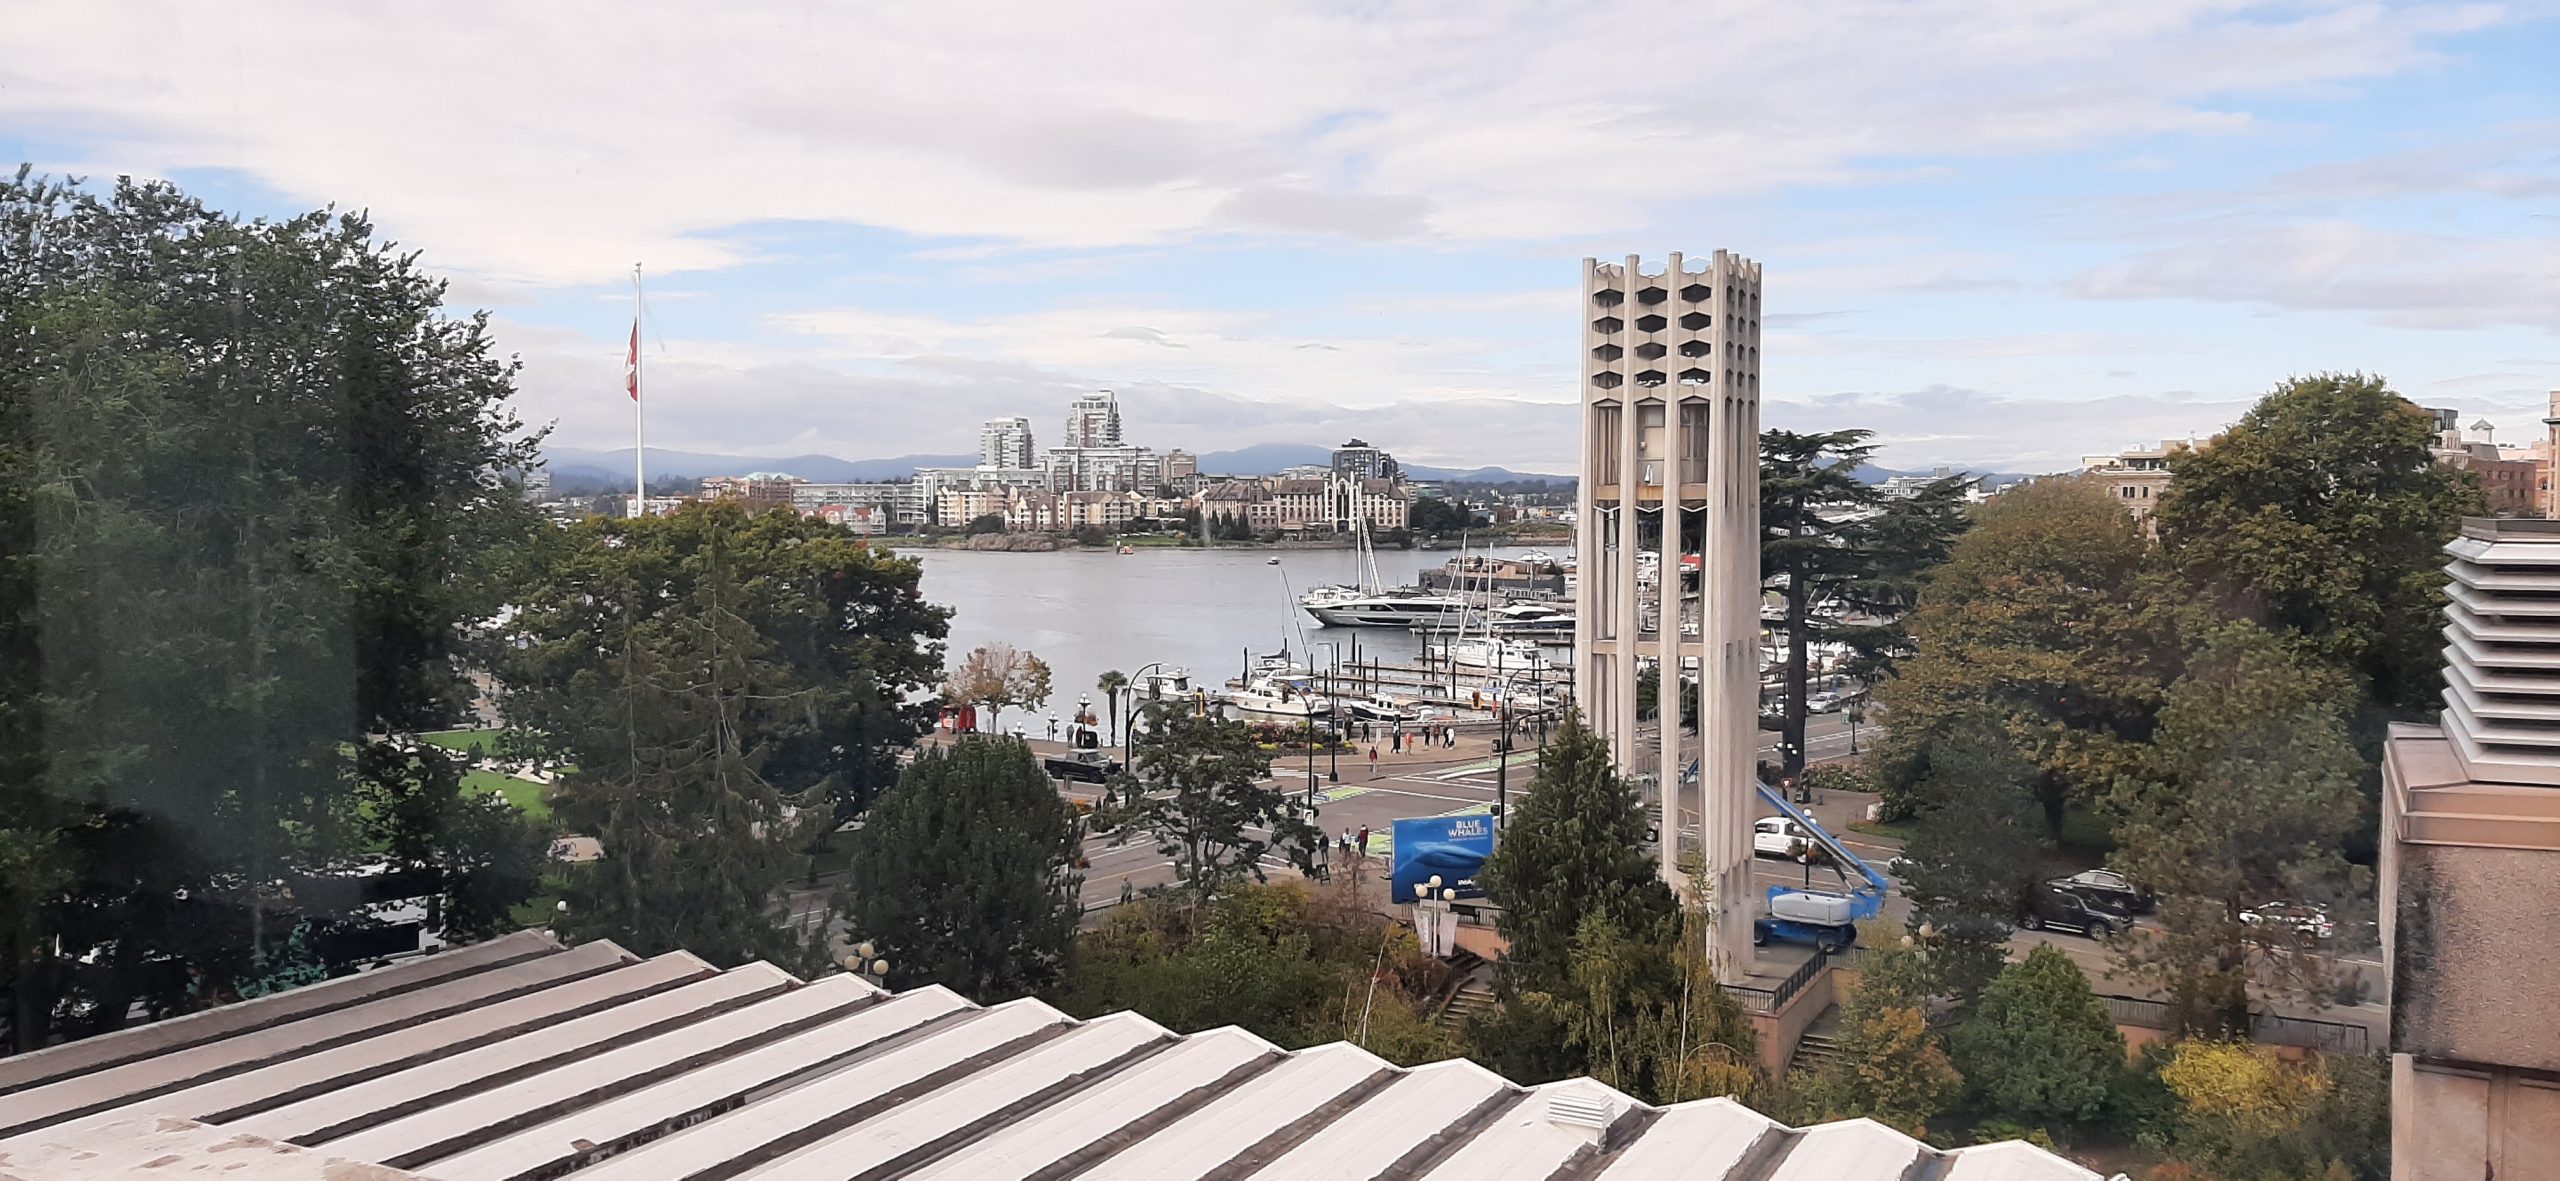
View across the harbour. (And yes, I spelled harbour correctly. We are still in Canada thank you very much!)
Cute little water taxi.
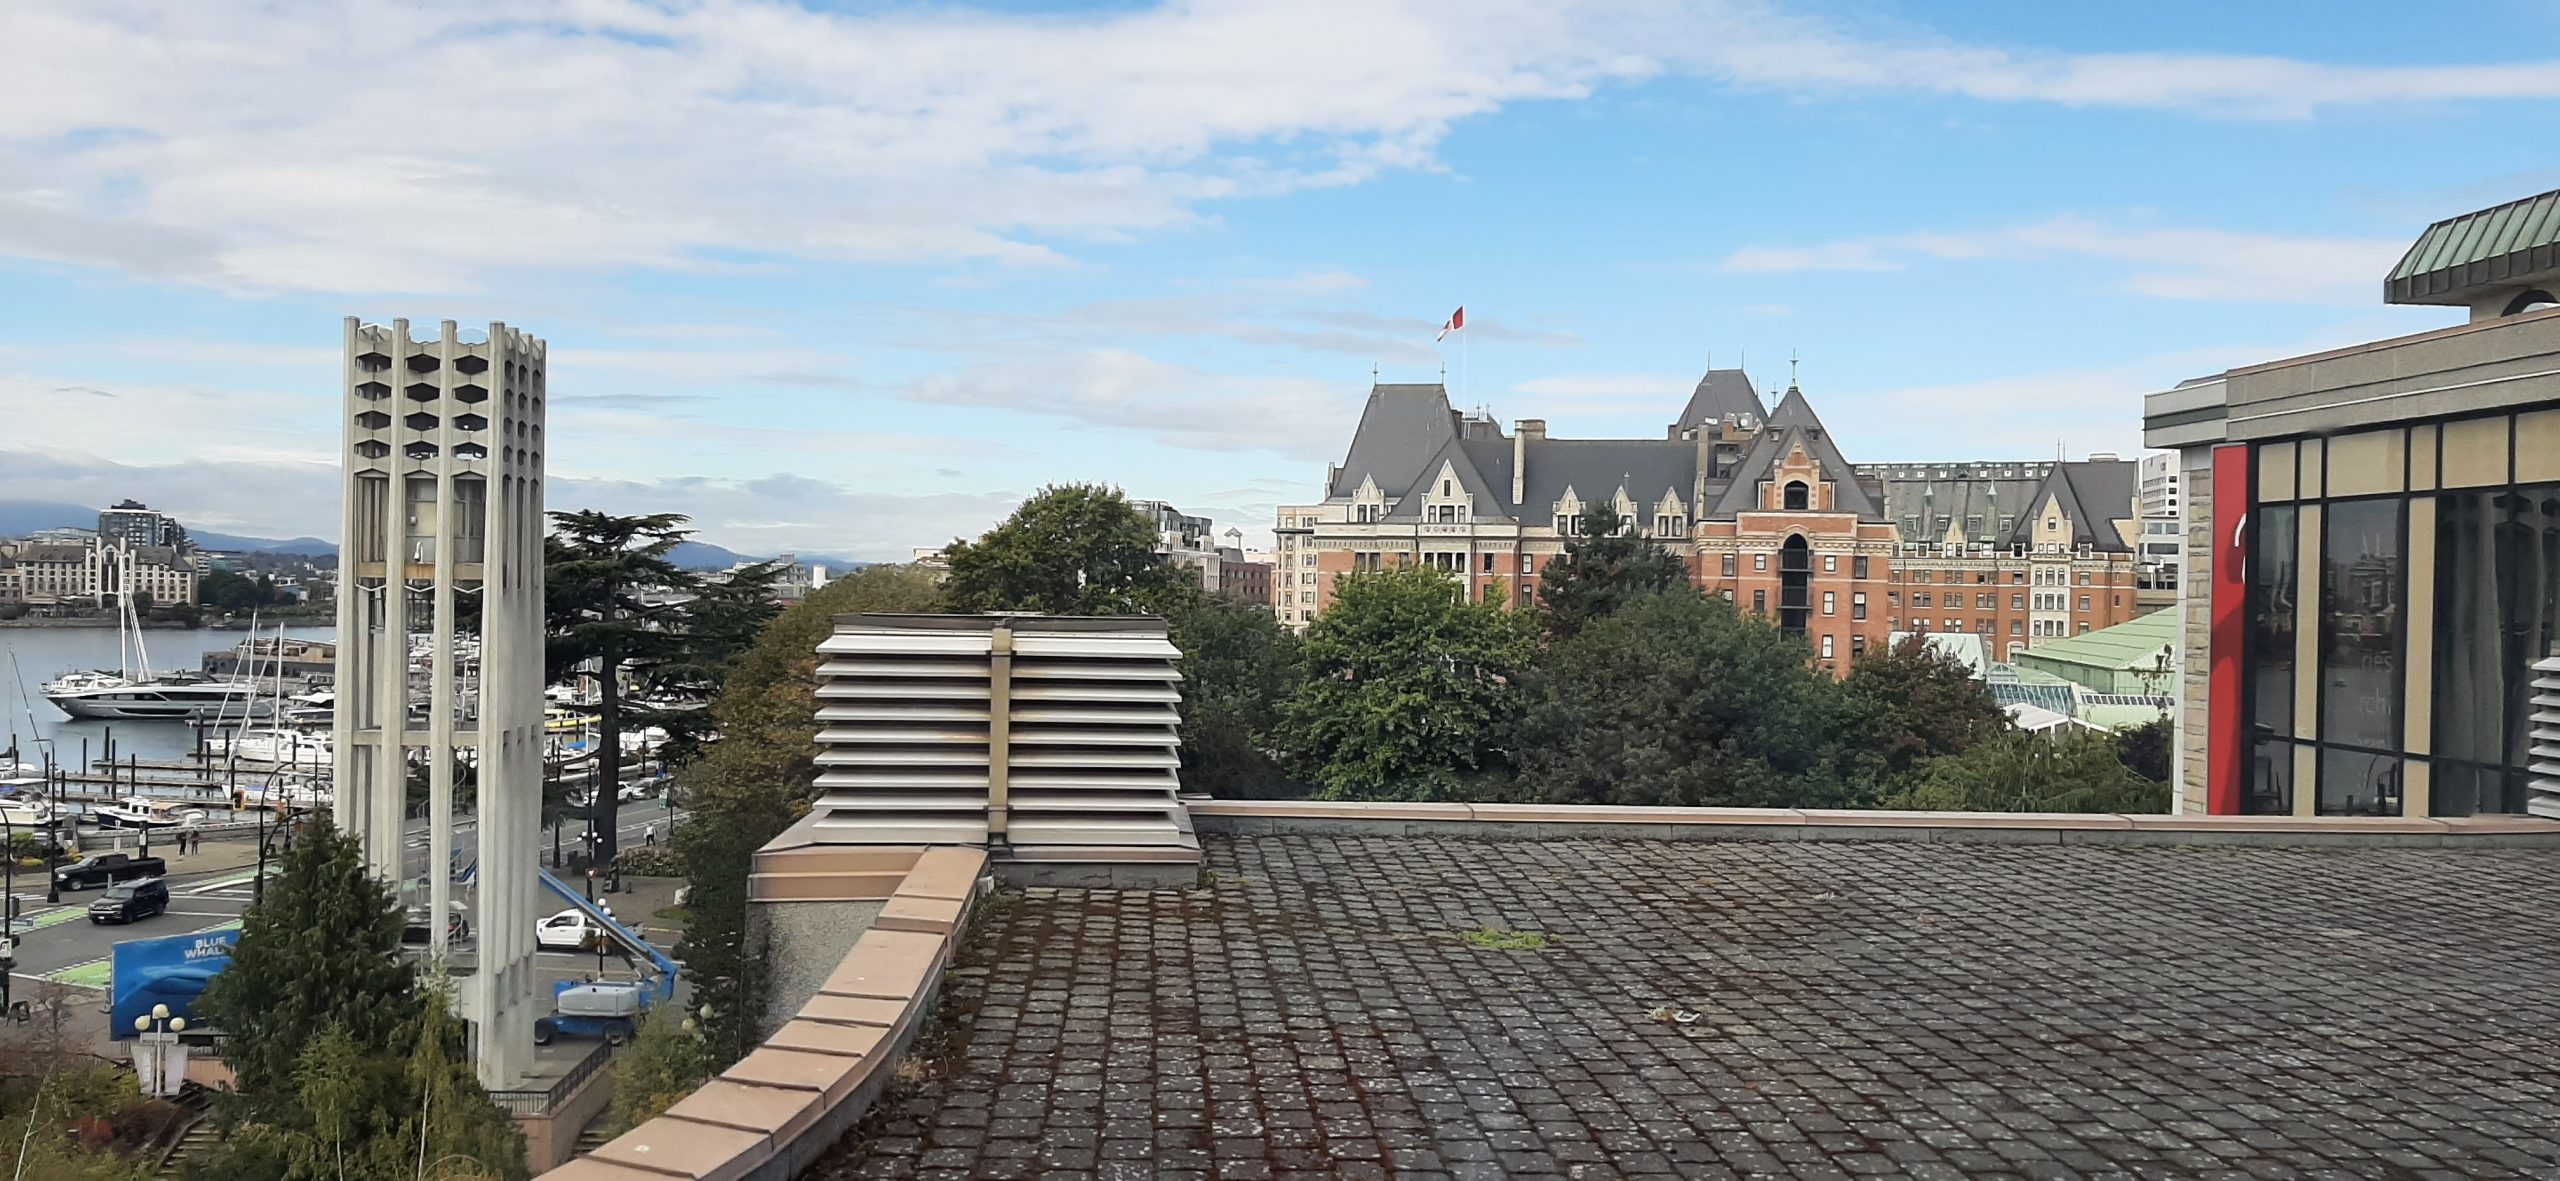
The “Empress” herself.
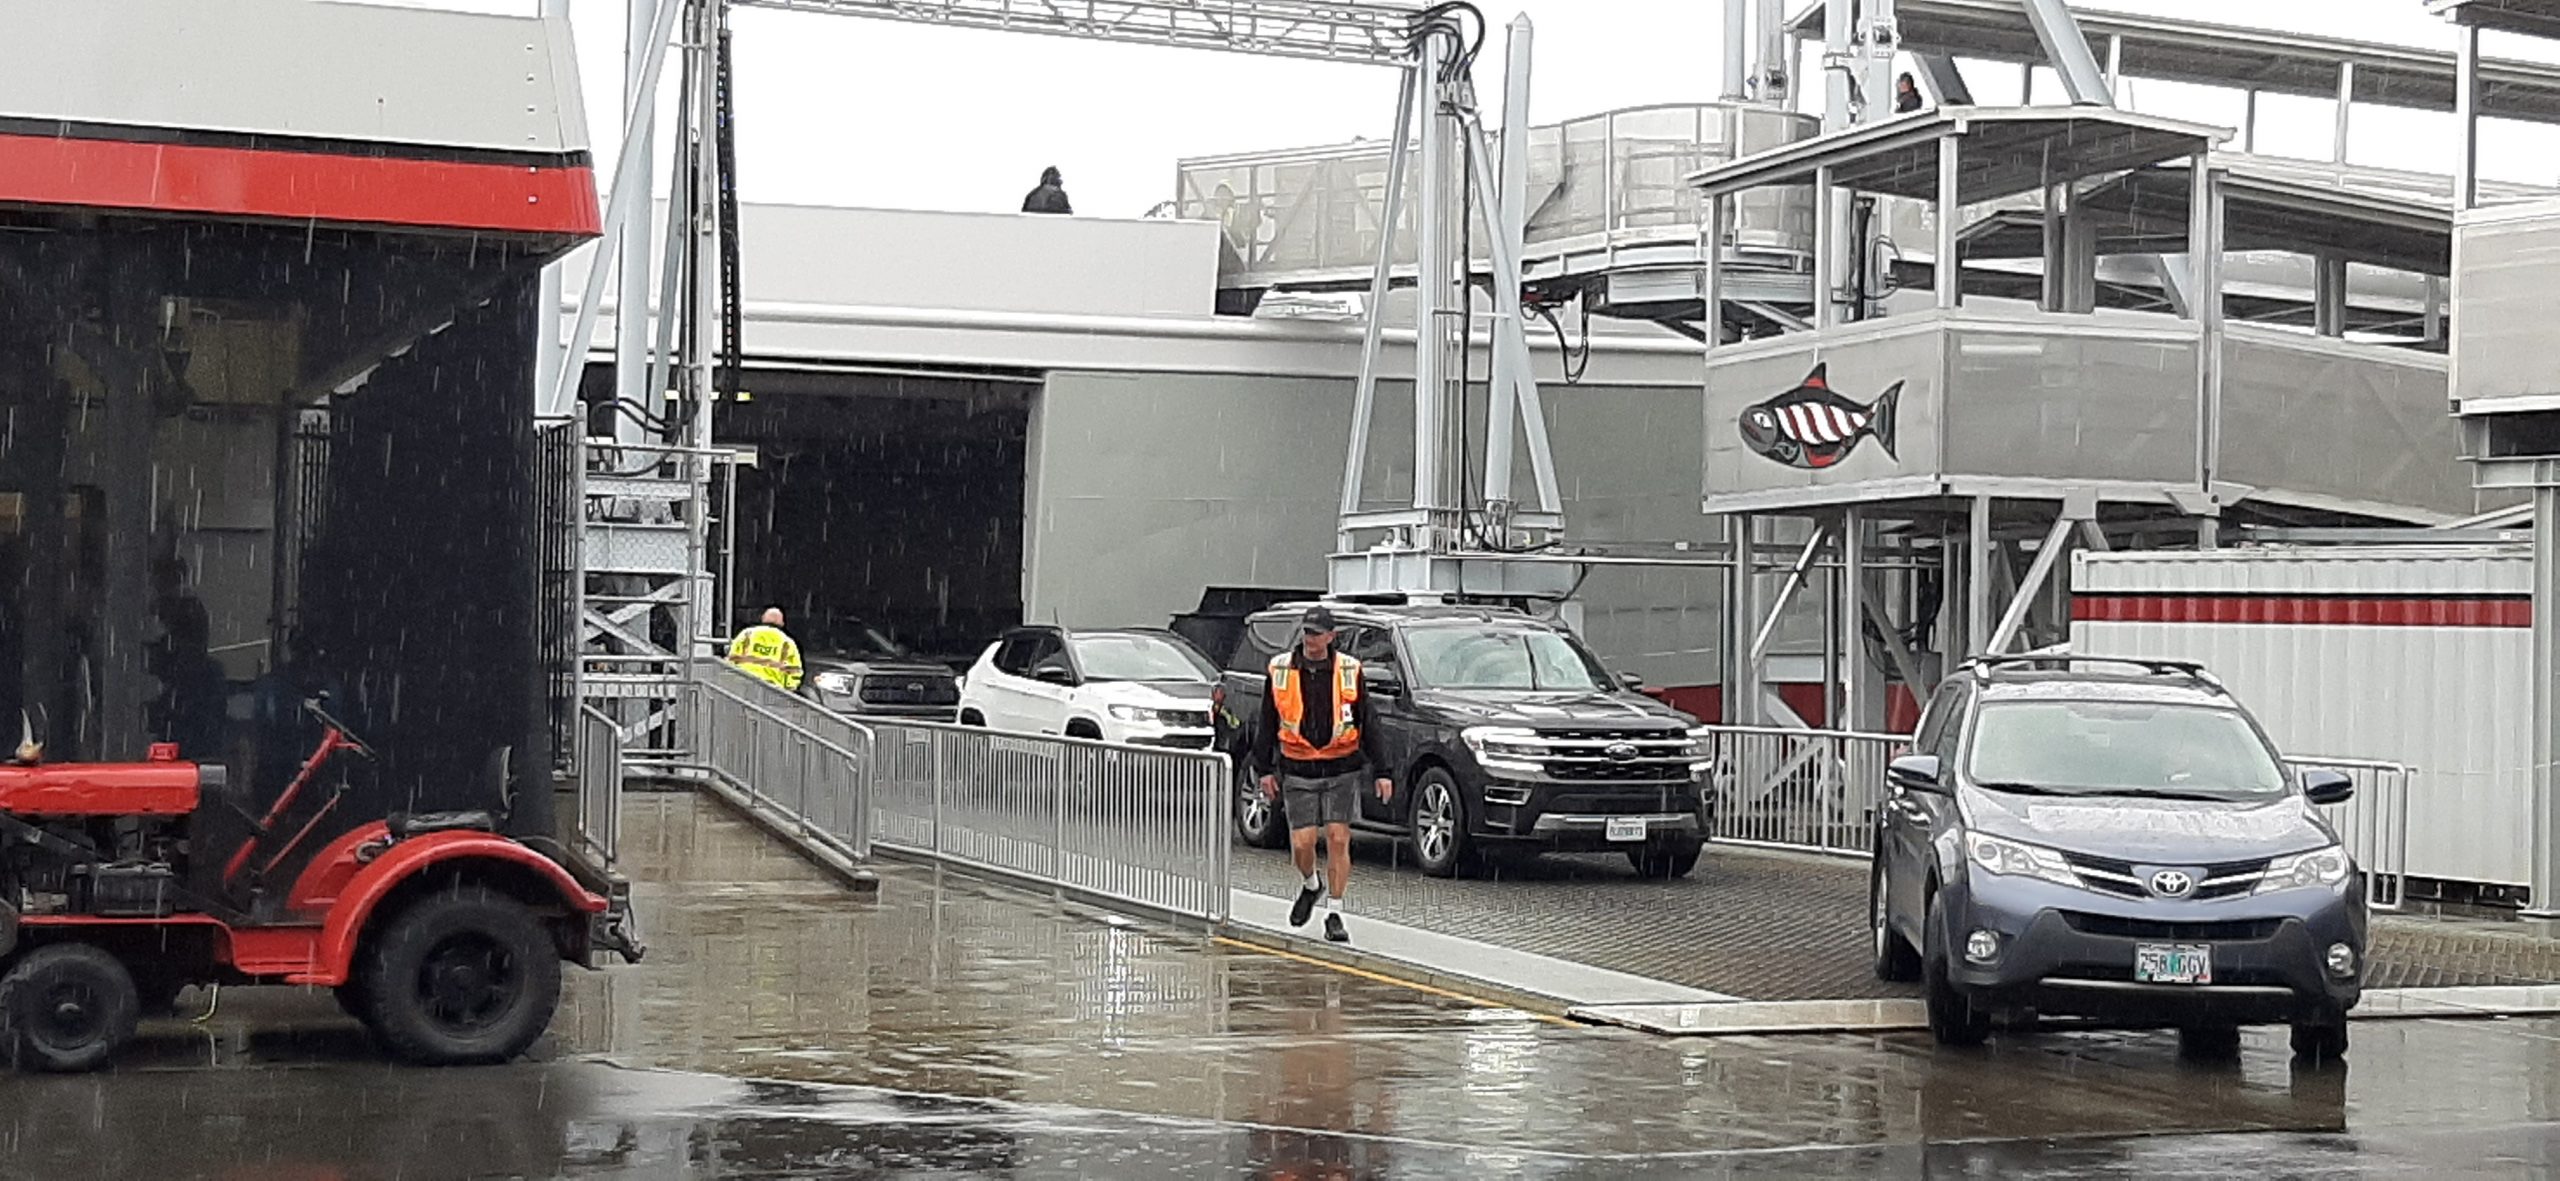
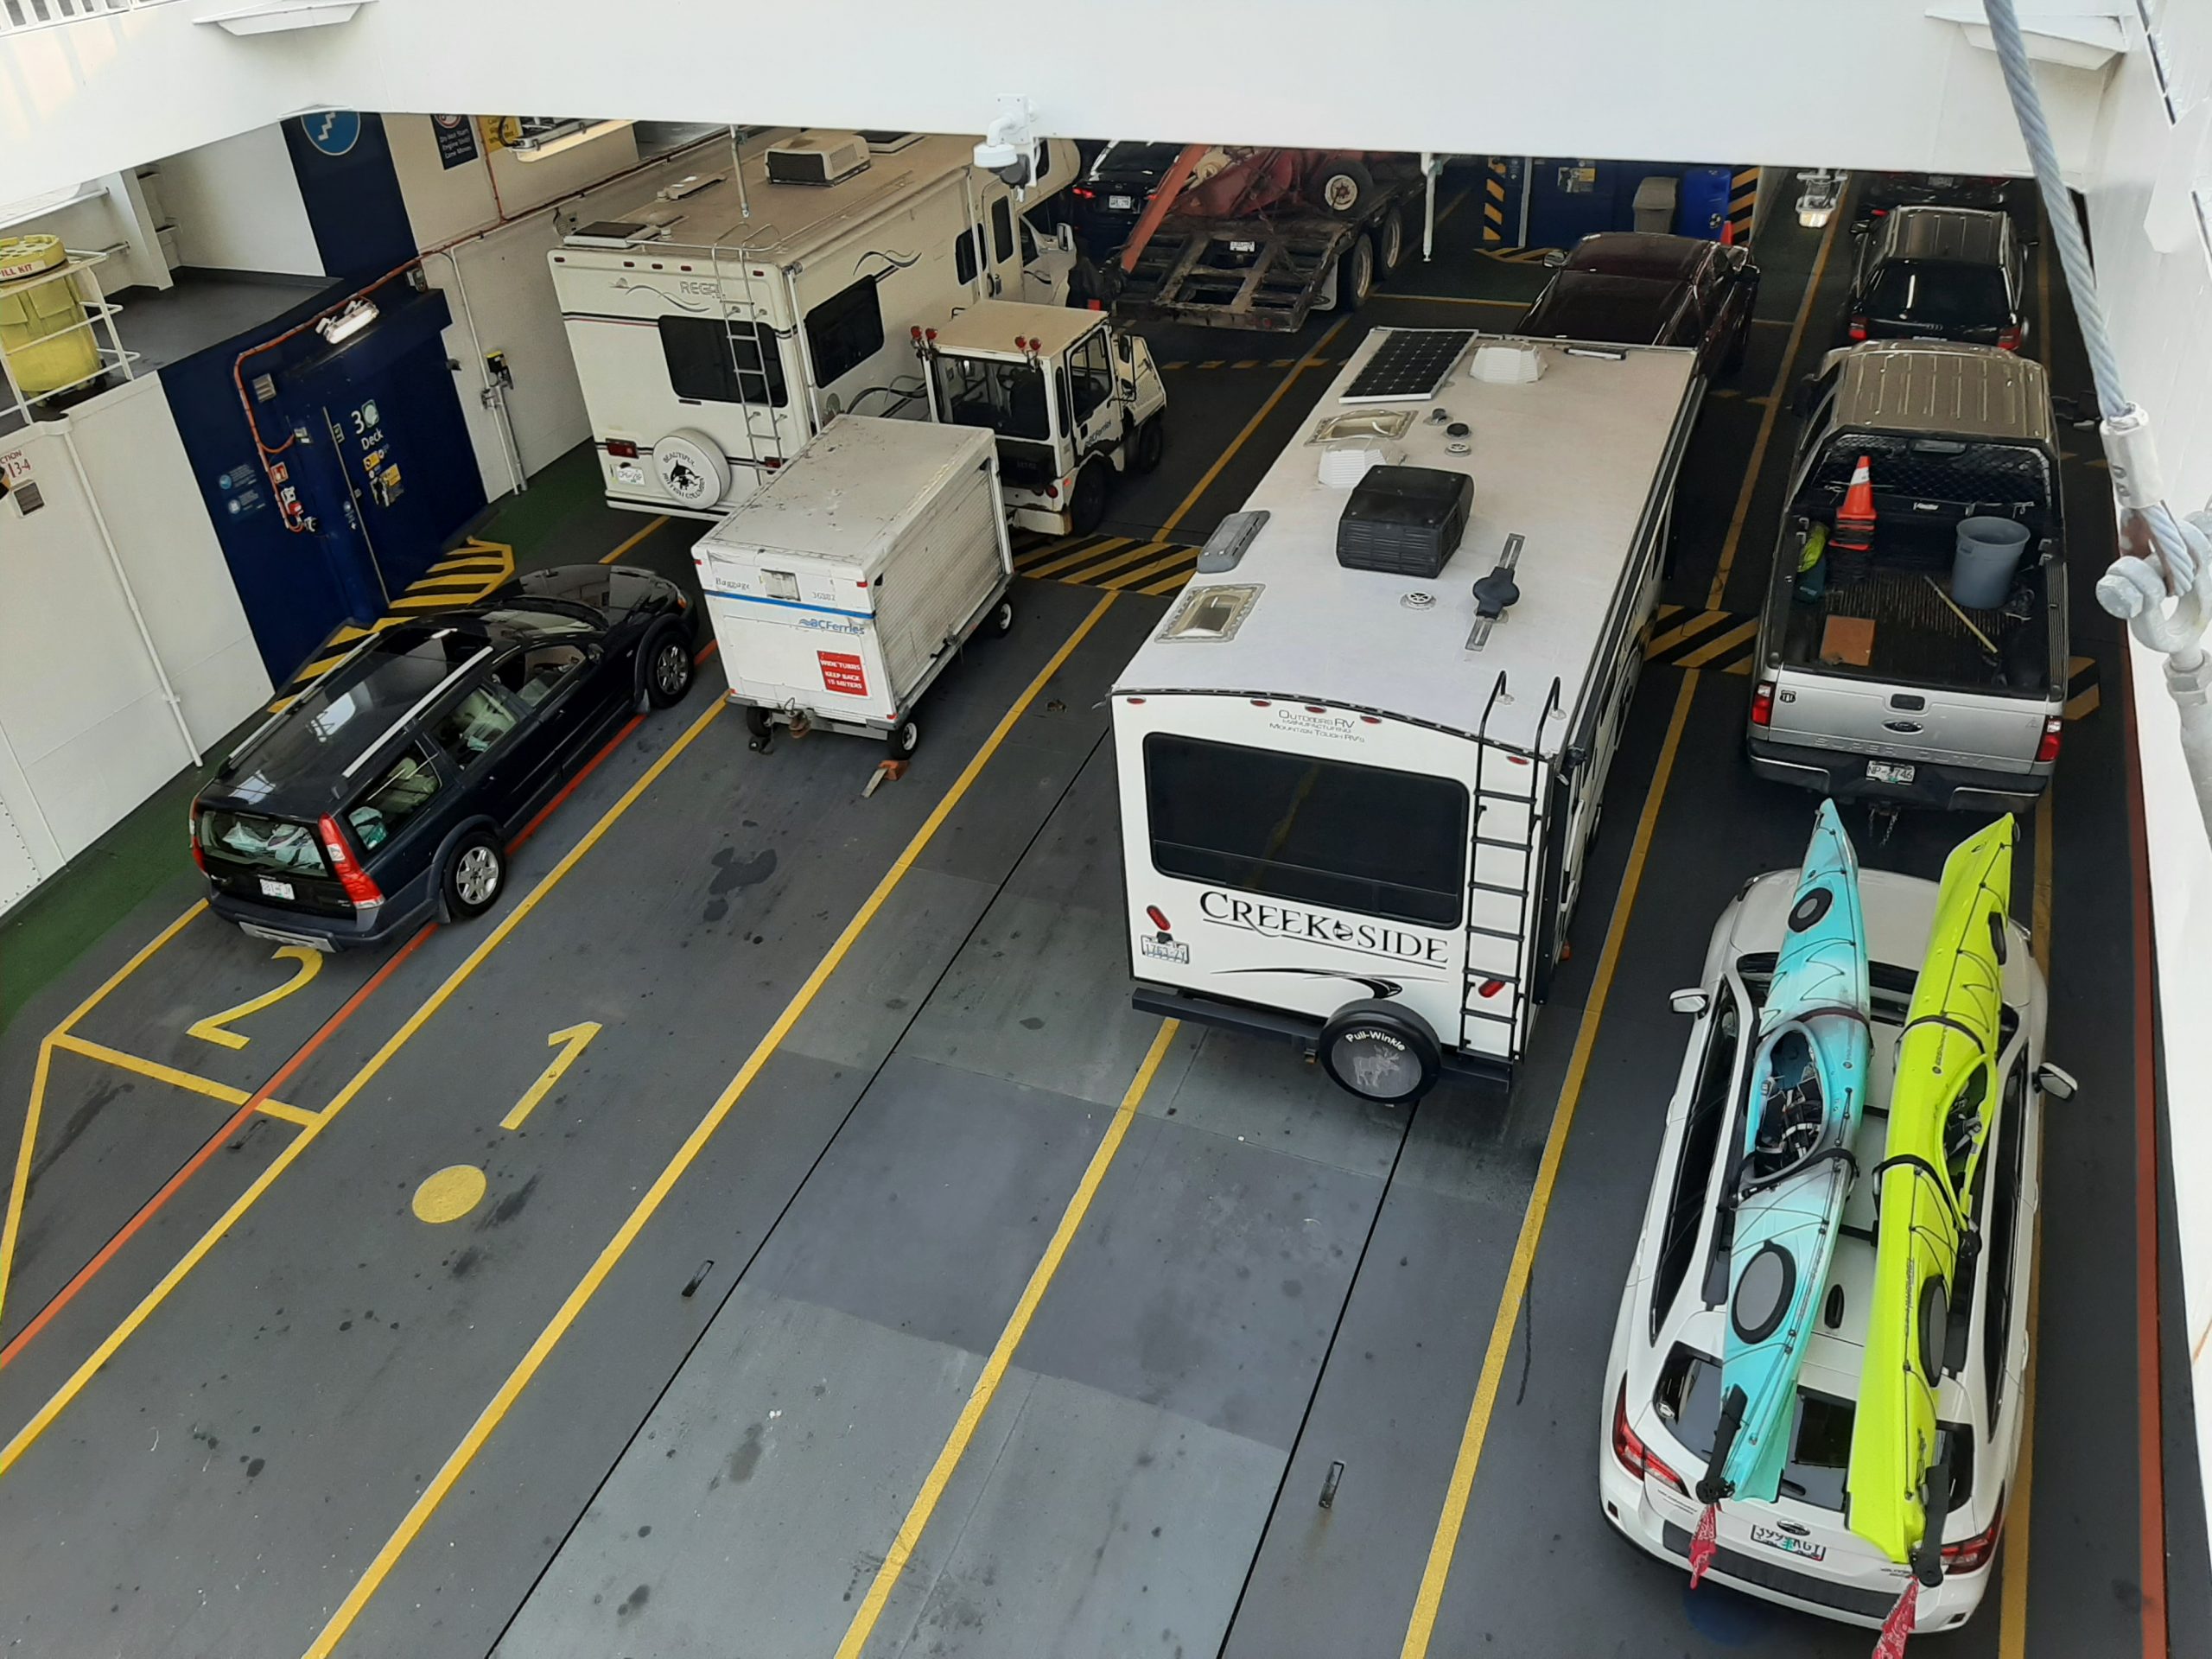
Cars disembarking from the Black Ball ferry. Notice that they are coming out of the side of the vessel, not the end. This should be fun boarding with a truck and trailer. Not!
Then another hour before we drove onto the ferry.
Then upstairs to sit in comfort while our ship crossed the Straights of Juan de Fuca. Luckily it was calm sailing. But even then, the boat was rocking side to side more than some of the passengers appreciated. Had it not been raining I would have been out on the bow of the ship doing my Kate Winslet impersonation because I love the ups and downs of riding the waves. But I restrained myself and sat inside reading my current book, A Tree Grows in Brooklyn by Betty Smith. Which BTW, I am enjoying immensely.
Not an easy read because it deals with poverty. And how rough it was for immigrants in the early 1900’s. But the writing is beautiful, and the story portrays how resilient folks had to be to survive at the very lowest level of educational or work opportunities, or class and nationality distinctions. The book is truly a classic in every regard. I highly recommend you add it to your list of “must read” books.
After leaving the boat we had to go through US Customs. We were prepared with a detailed list of how much liquor we were bringing into the country, how many semi-automatic weapons we were smuggling into Washington, and of course, how many citrus fruits we were bringing into the US from the rich and plentiful tropical citrus groves all over Canada. And the only questions our nice border guard asked us was if we purchased anything in Canada (yes, a wooden sculpture) and did we have any fruit or veggies, (yes, part of an onion, some carrots, and pea pods). (What we forgot to report was the garlic we had purchased on Salt Spring Island. Had it been found; I may have had to write this report while awaiting deportation. Sometimes luck favors the well prepared. And in this case, it proved true.)
No mention whatsoever about drugs, guns, or live animals. Of course, we didn’t have any illegal drugs, guns of any sort, or live animals (except for a possible spider, mosquito, or common house fly trying to immigrate to a warmer climate). But all that effort on our part gone to waste.
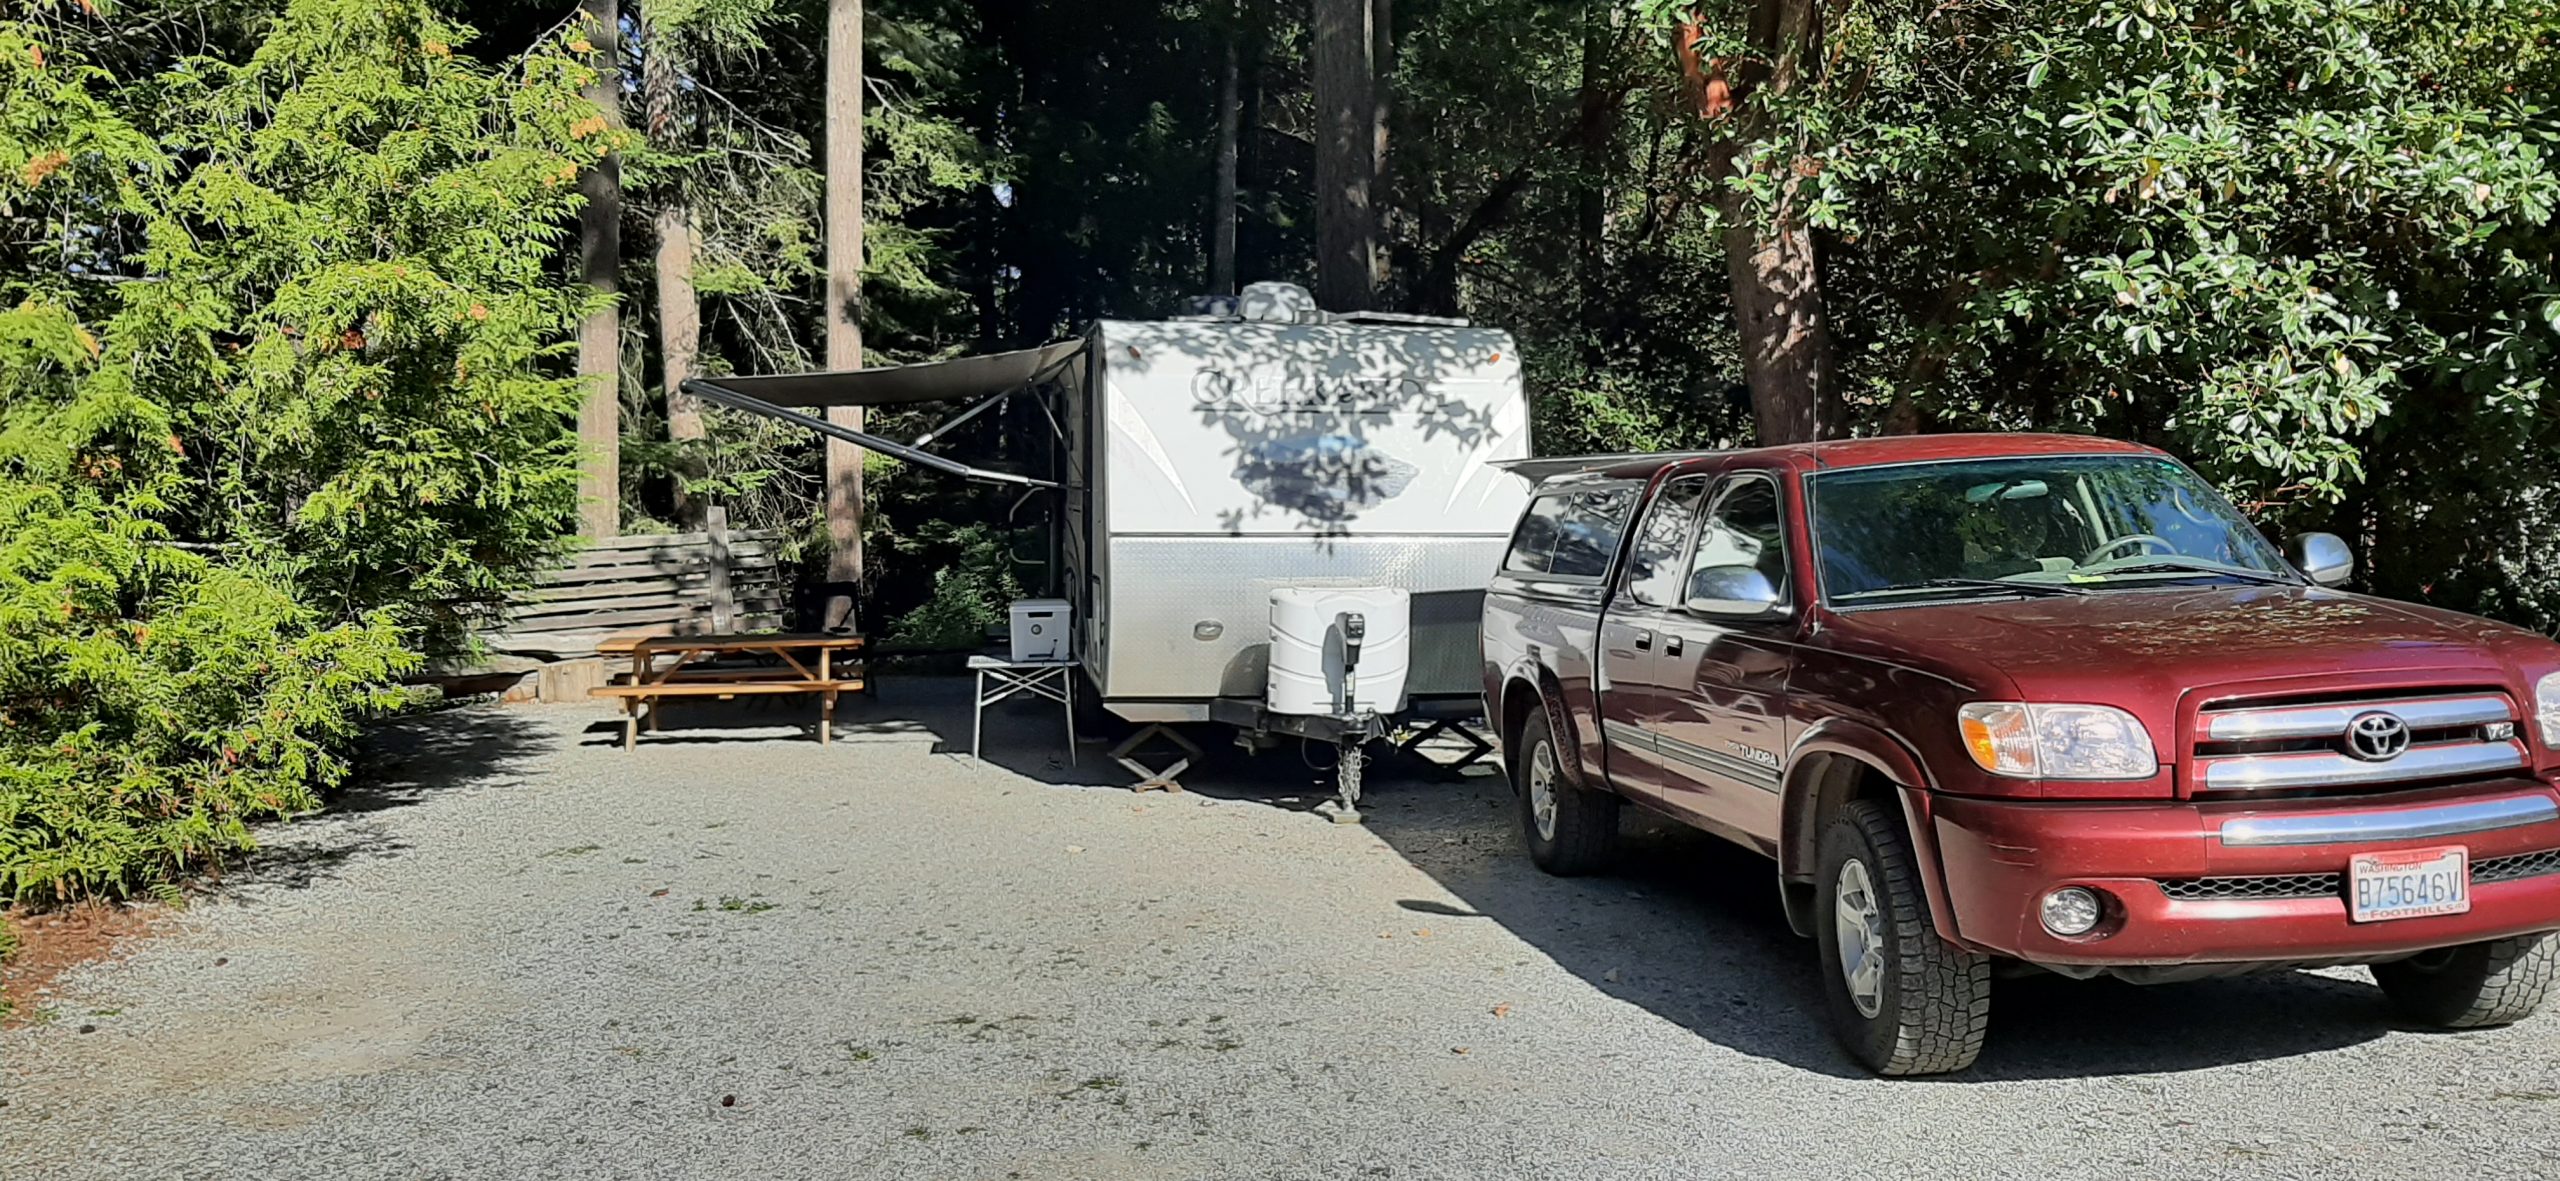
Anyway, out of Port Angeles and on west to the Salt Creek Recreation area and our new home for 3 nights.
After unhitching and getting set up, it was way past happy hour. So, after safe arrival libations, we had dinner and a fine evening of reading and an early to bed. Nice to be home in the beautiful state of Washington. We are livin’ the good life, that’s all I have to say!
Thursday, September 26, 2024 – Salt Creek Recreation Area
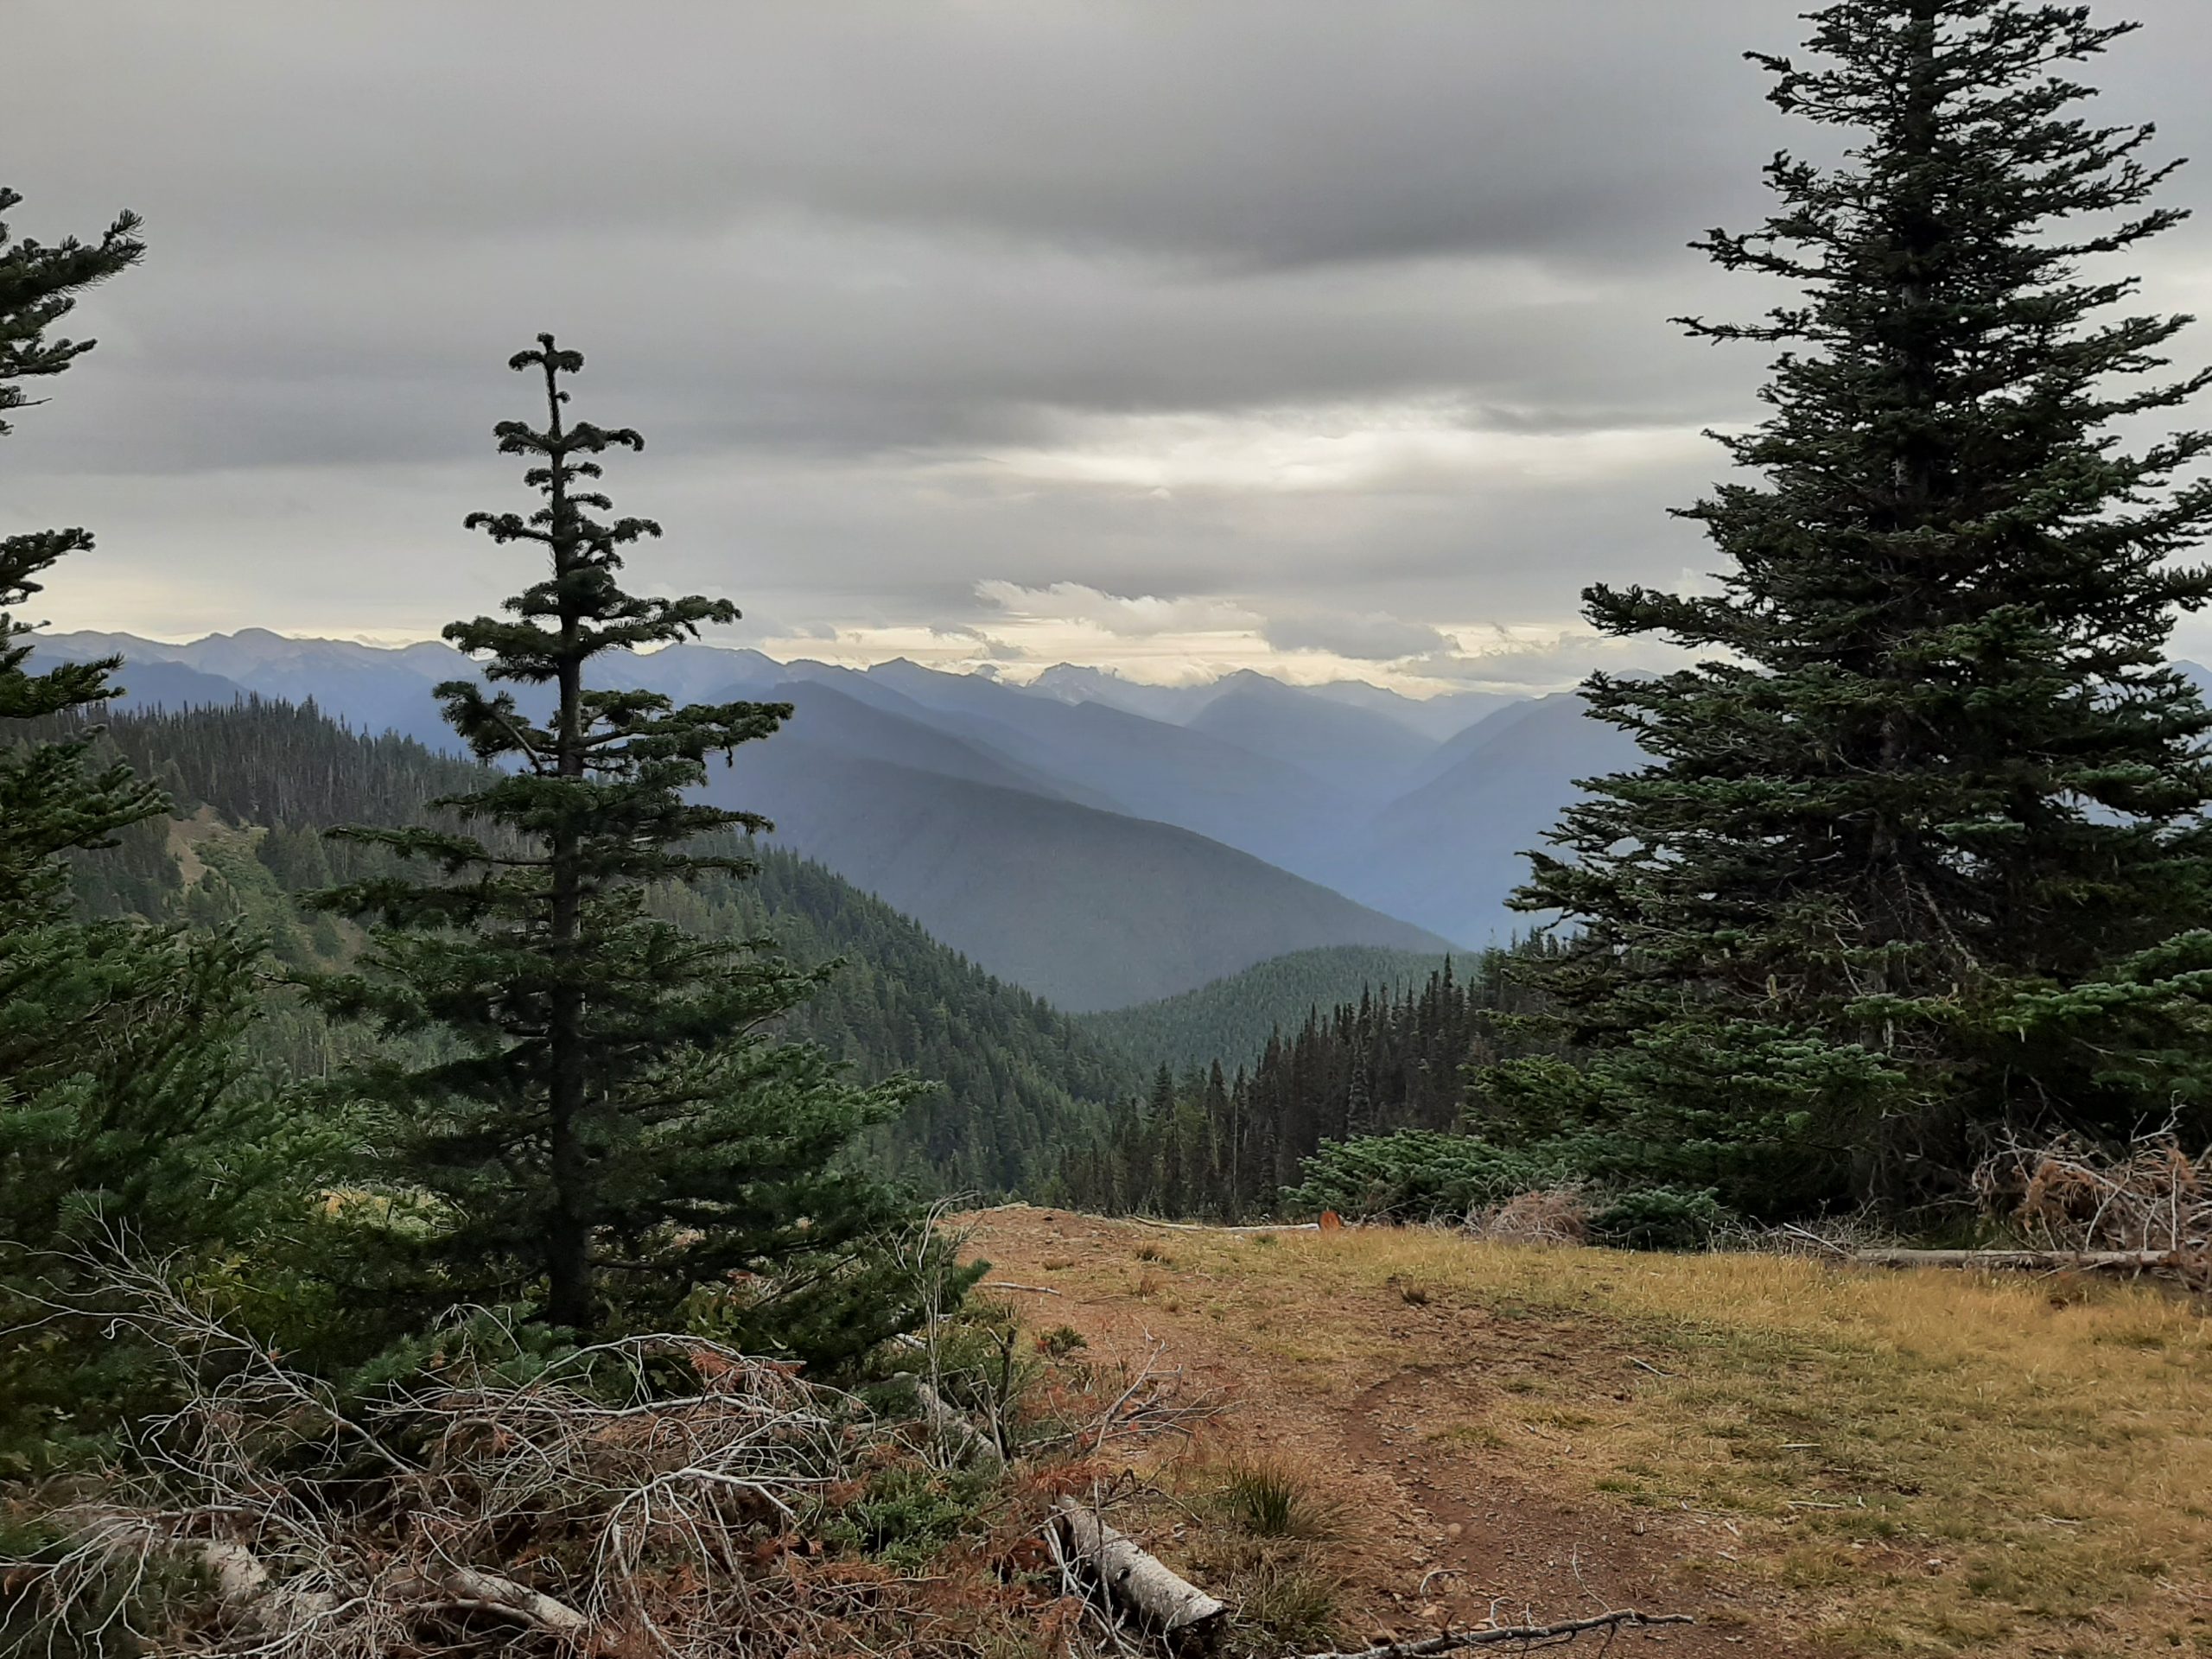
Well, what to do when it’s mighty cloudy and there is rain in the forecast? Hey, why not drive up to Hurricane Ridge? Actually, that was not our first thought. Before starting out, we had decided to head into Port Angeles (PA) and visit the Fine Arts Center. But as we were driving towards PA, we could see the tops of the nearby Olympic Mountains. So, being the grand adventurers that we are, we took a chance and headed up into the Olympic Nation Park. After all, Hurricane Ridge was only 17 miles from the outskirts of Port Angeles. So, we weren’t investing too much time if all that happened was a nasty old cloud bank completely obliterating Mount Olympus.
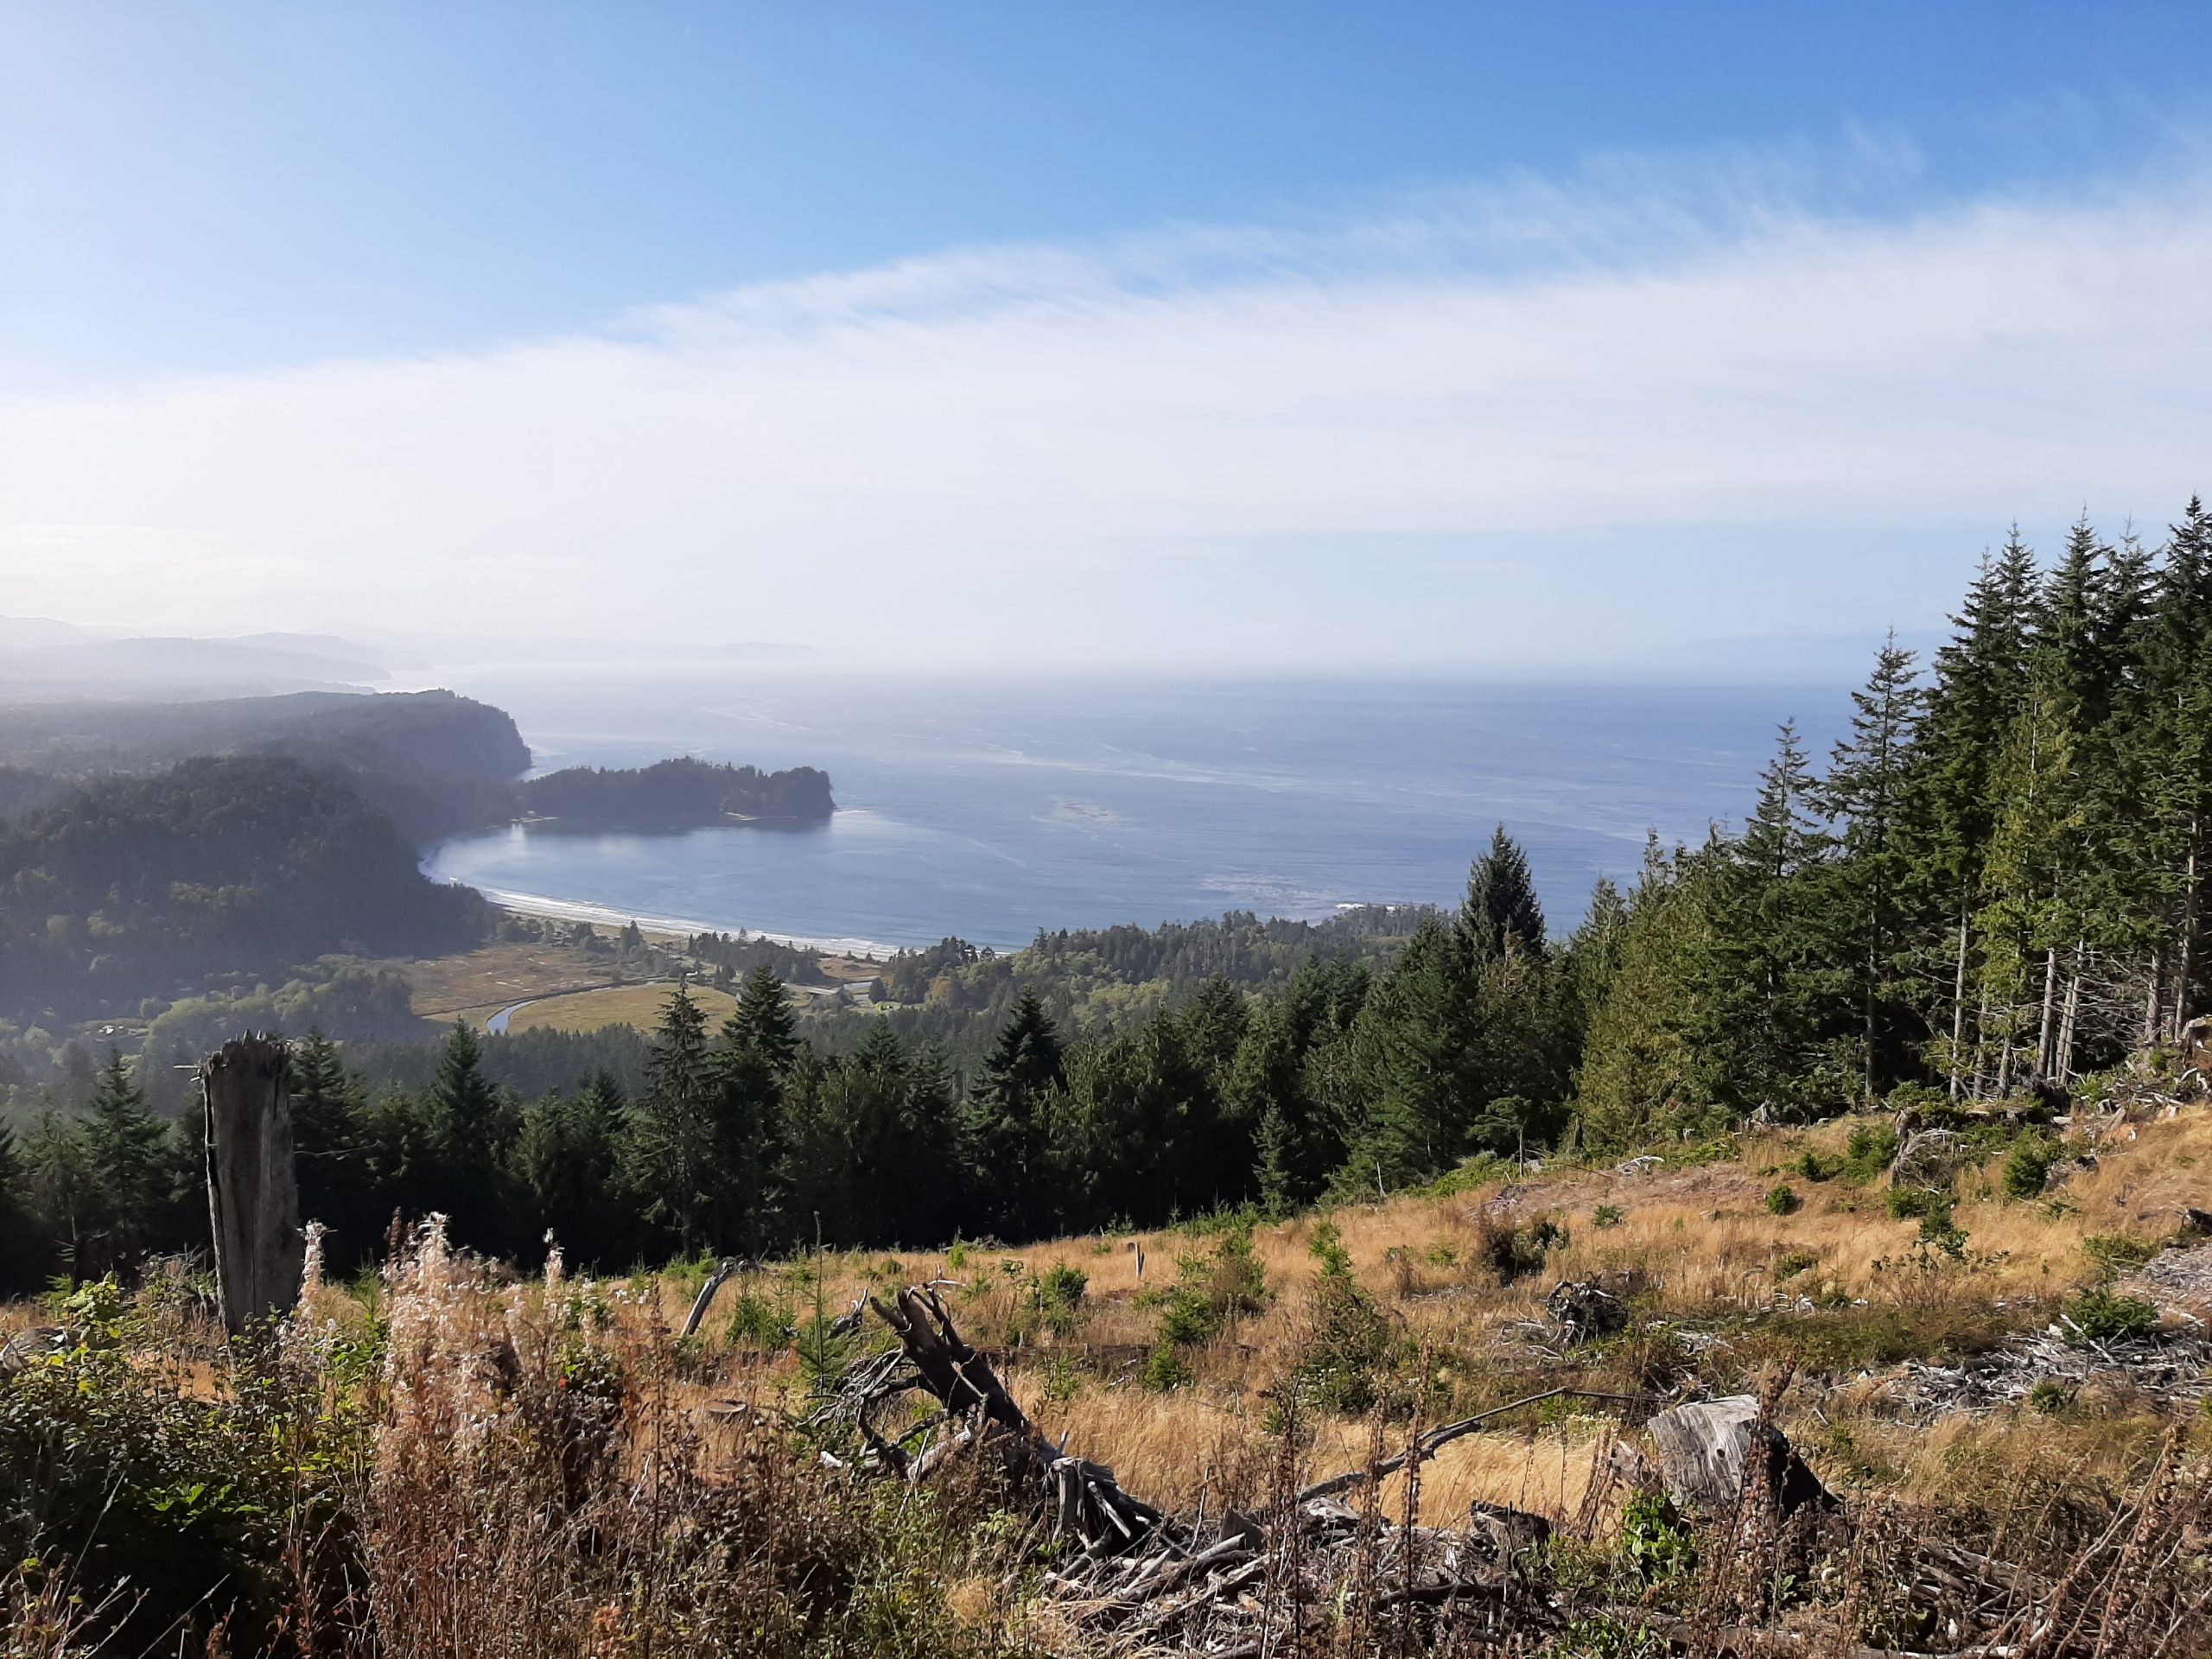
But as luck would have it, we had lovely vistas all the way to the viewpoint that looked out at Mt. Olympus and it’s few remaining glaciers.
Eastward view from the ridge.
Gone was the day lodge (visitor’s center) that burned down on May 7, 2023. In its place was a nice his and hers portable washroom. Which for some of us in our golden years, is like finding a pot of gold at the end of a rainbow!
But what fun to actually see the namesake of the “real” Mount Olympus that we had visited on last year’s adventure to Greece.
So, a few facts about Mount Olympus – Washington State and Mount Olympus – Greece:
Washington State: Mount Olympus is the tallest mountain on the peninsula, stretching 7,980 feet into the sky. It is also the most glaciated peak in the Olympics. The mountain is not directly accessible by car but can be seen from afar on a clear day from sites such as Hurricane Ridge.
Greece: Mount Olympus is part of an extensive massif (a compact group of mountains, especially one that is separate from other groups) which consists of 52 peaks and deep gorges. The highest peak being 9,570 feet above sea level. And even at that altitude, it only receives a slight dusting of snow in the winter. And unlike Washington’s Mount Olympus, you can drive or walk along the very base of this incredible massif which appears to just rise directly out of the sea.
So, after taking pictures of our Mt. Olympus and availing ourselves of the facilities, we headed back to PA to find some lunch. Having no idea where to eat, we ended up at a nice pub/café calling itself Moby Duck. The fish was fresh and plentiful, and the beer was great.
After lunch we decided to take, as much as possible, local coastal roads back to camp. We hit a few dead ends, but then that was just part of the fun. Finally, we found our way back to camp at about 3:30 pm just in time for the heavens to open.
But safely tucked away in our cozy, warm trailer, we read, wrote, and generally stayed dry.
After a nice dinner of chili (made at home before we left) which was absolutely perfect for a rainy, cold evening, we read for a while until it was time for bed. I feel like this whole trip has been about catching up on sleep. We stay very busy at home. But on our trailer trips, we become lazy. And that is exactly what we need to recharge our batteries.
Friday, September 27, 2024 – Salt Creek Recreation Area
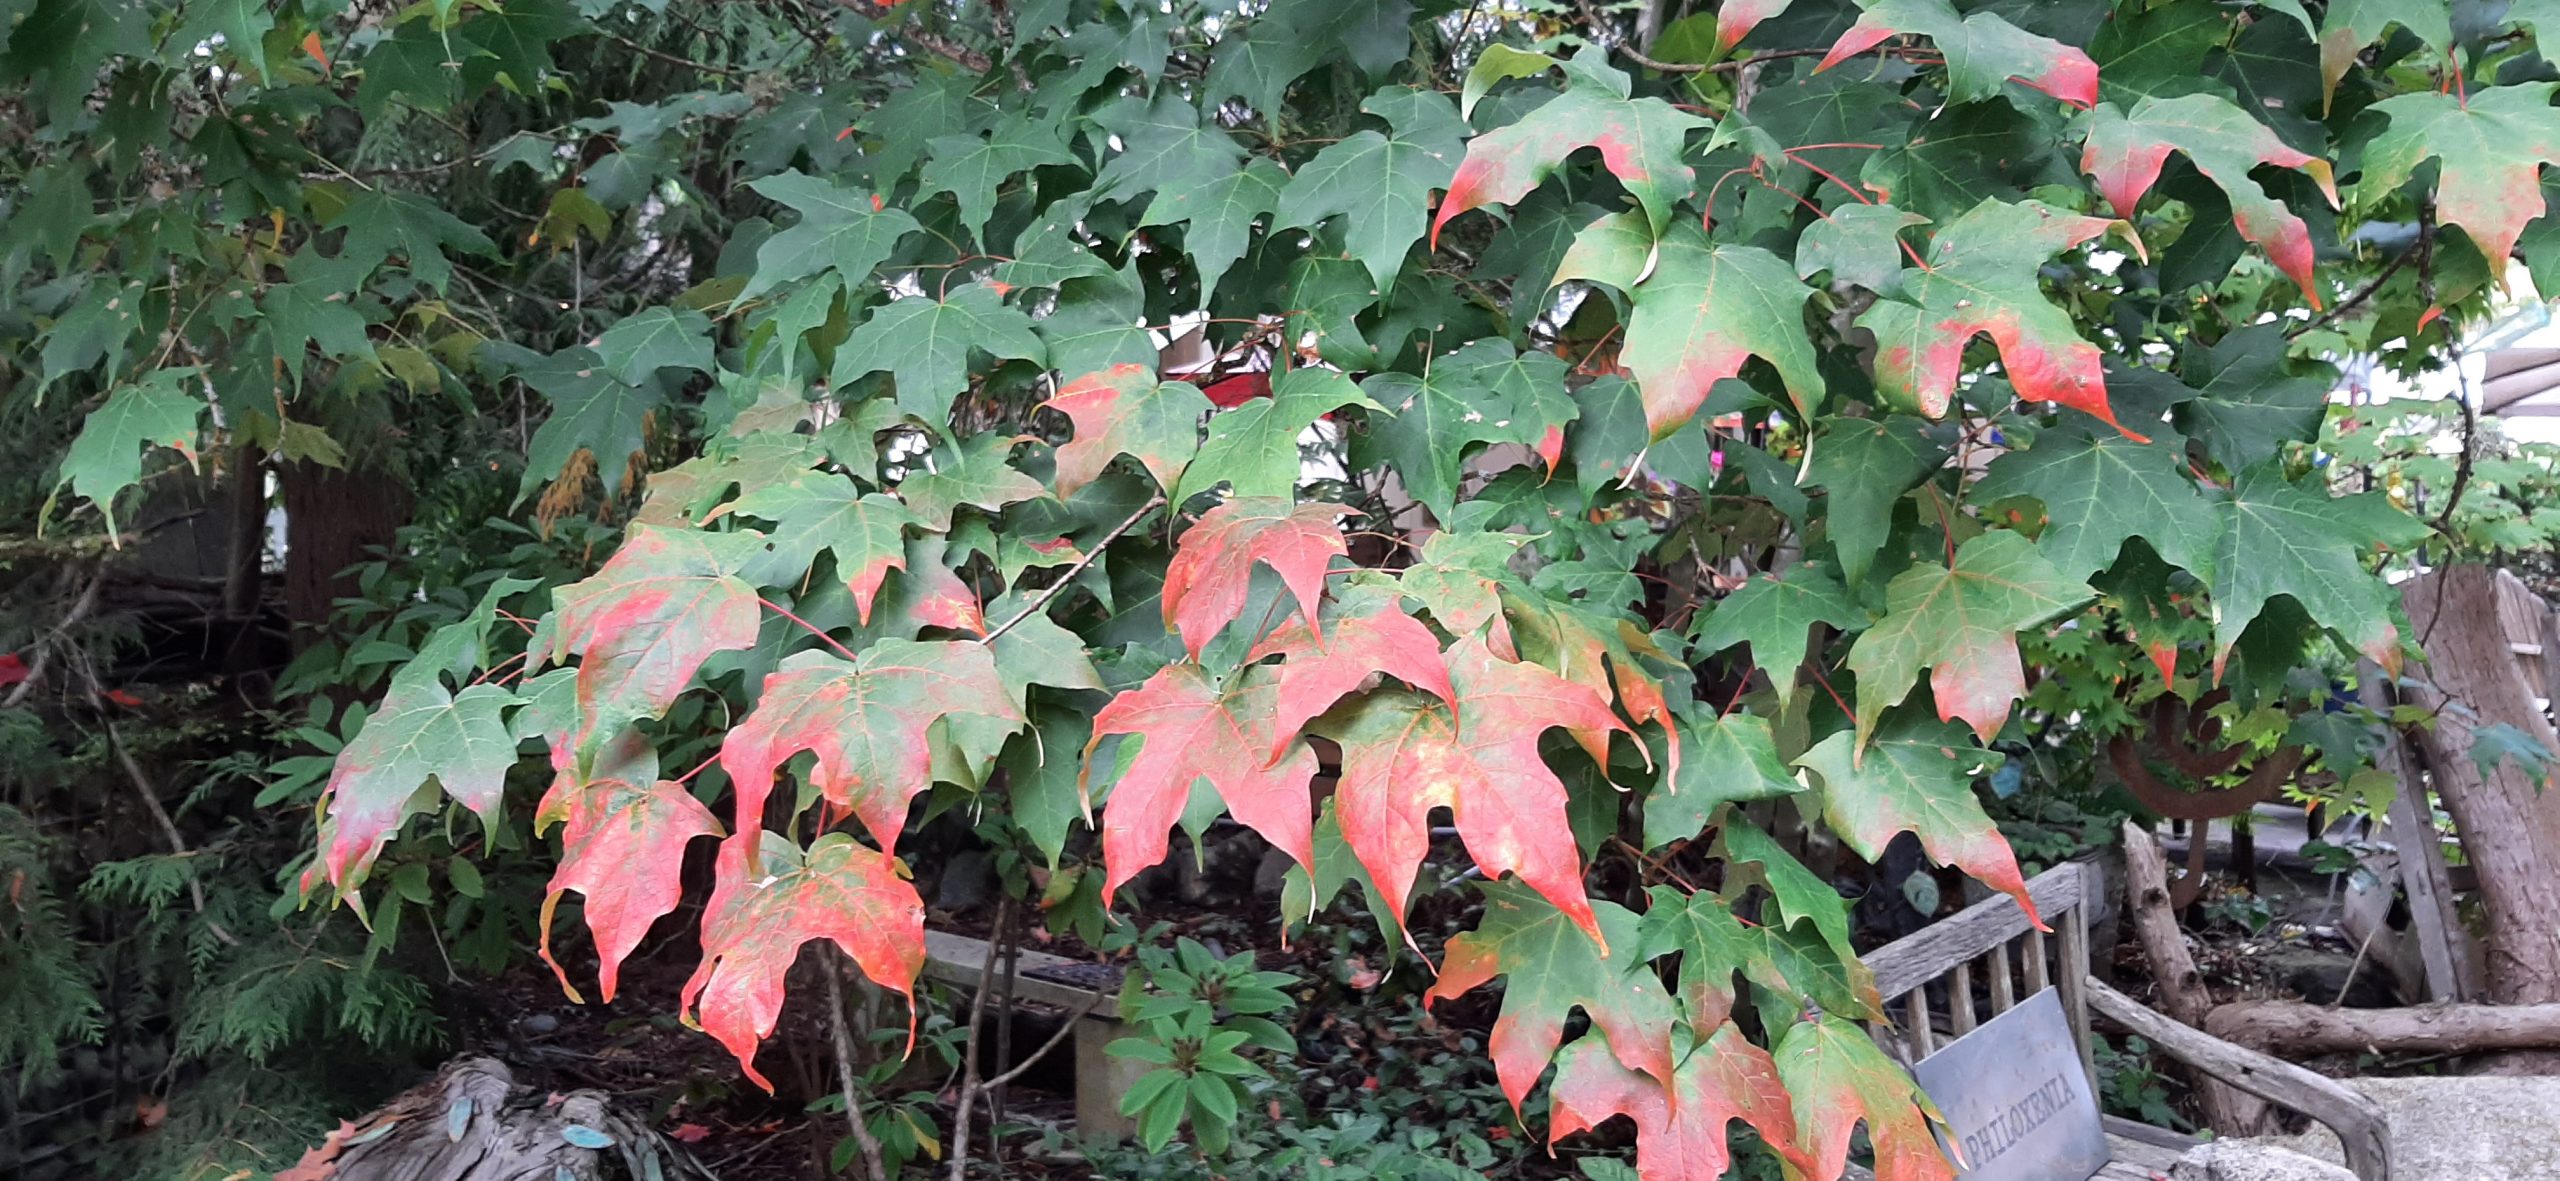
Woke to sun gallantly trying to find its way through the clouds. And by golly, it finally won. And because it definitely is Fall, the leaves are turning color. I just loved this tree with its leaf tips giving way to the inevitable.
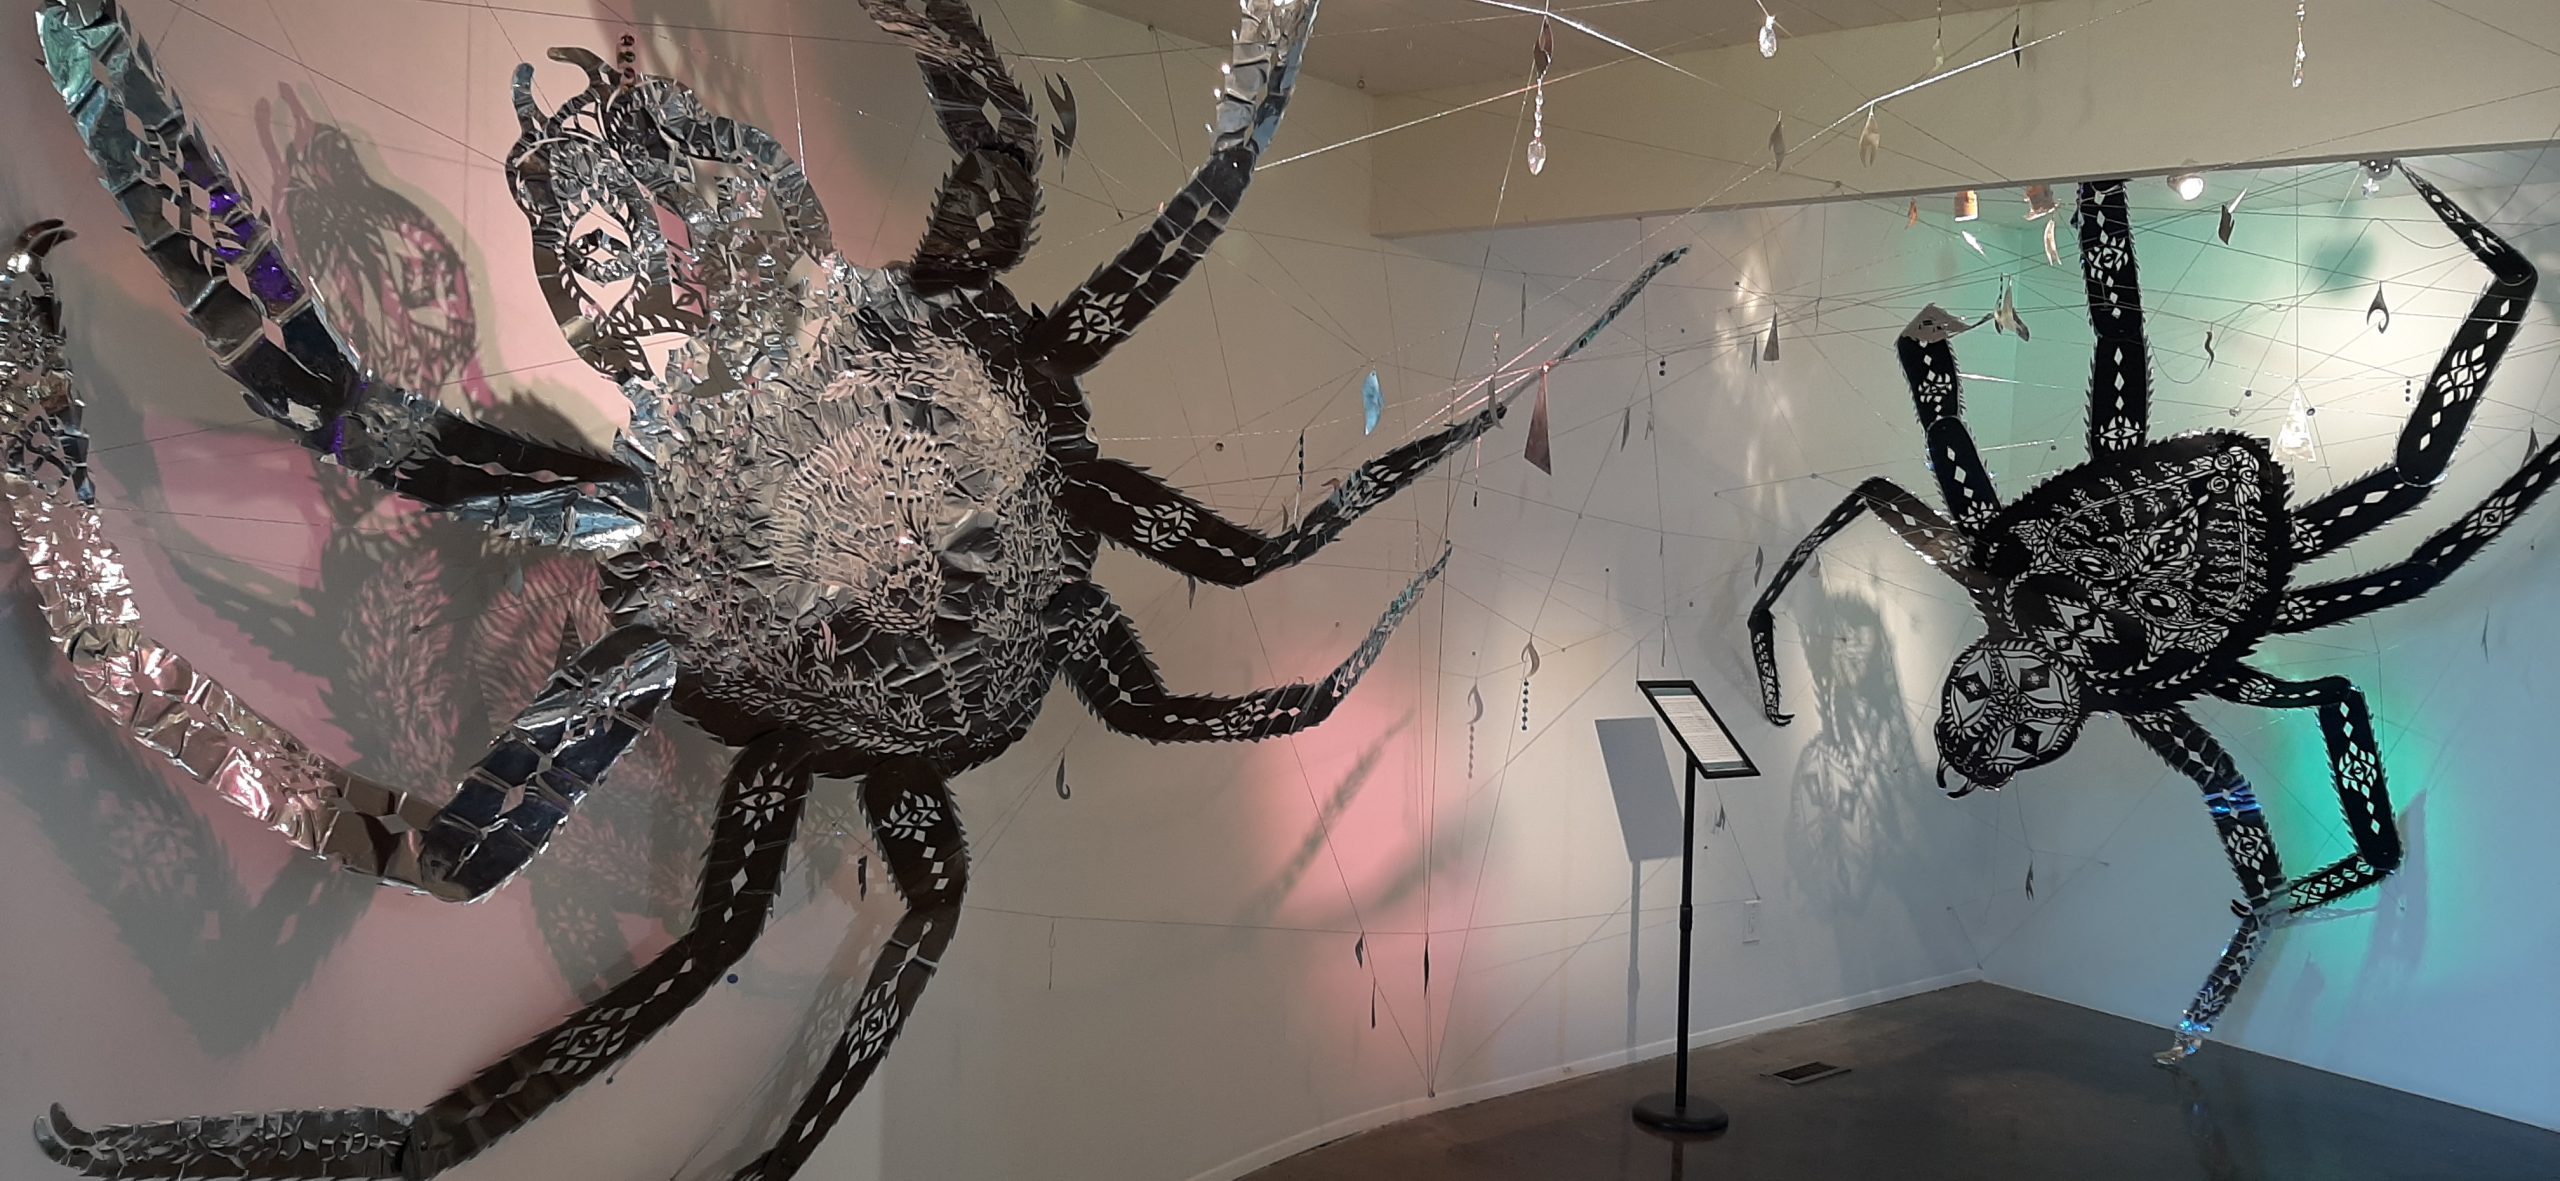
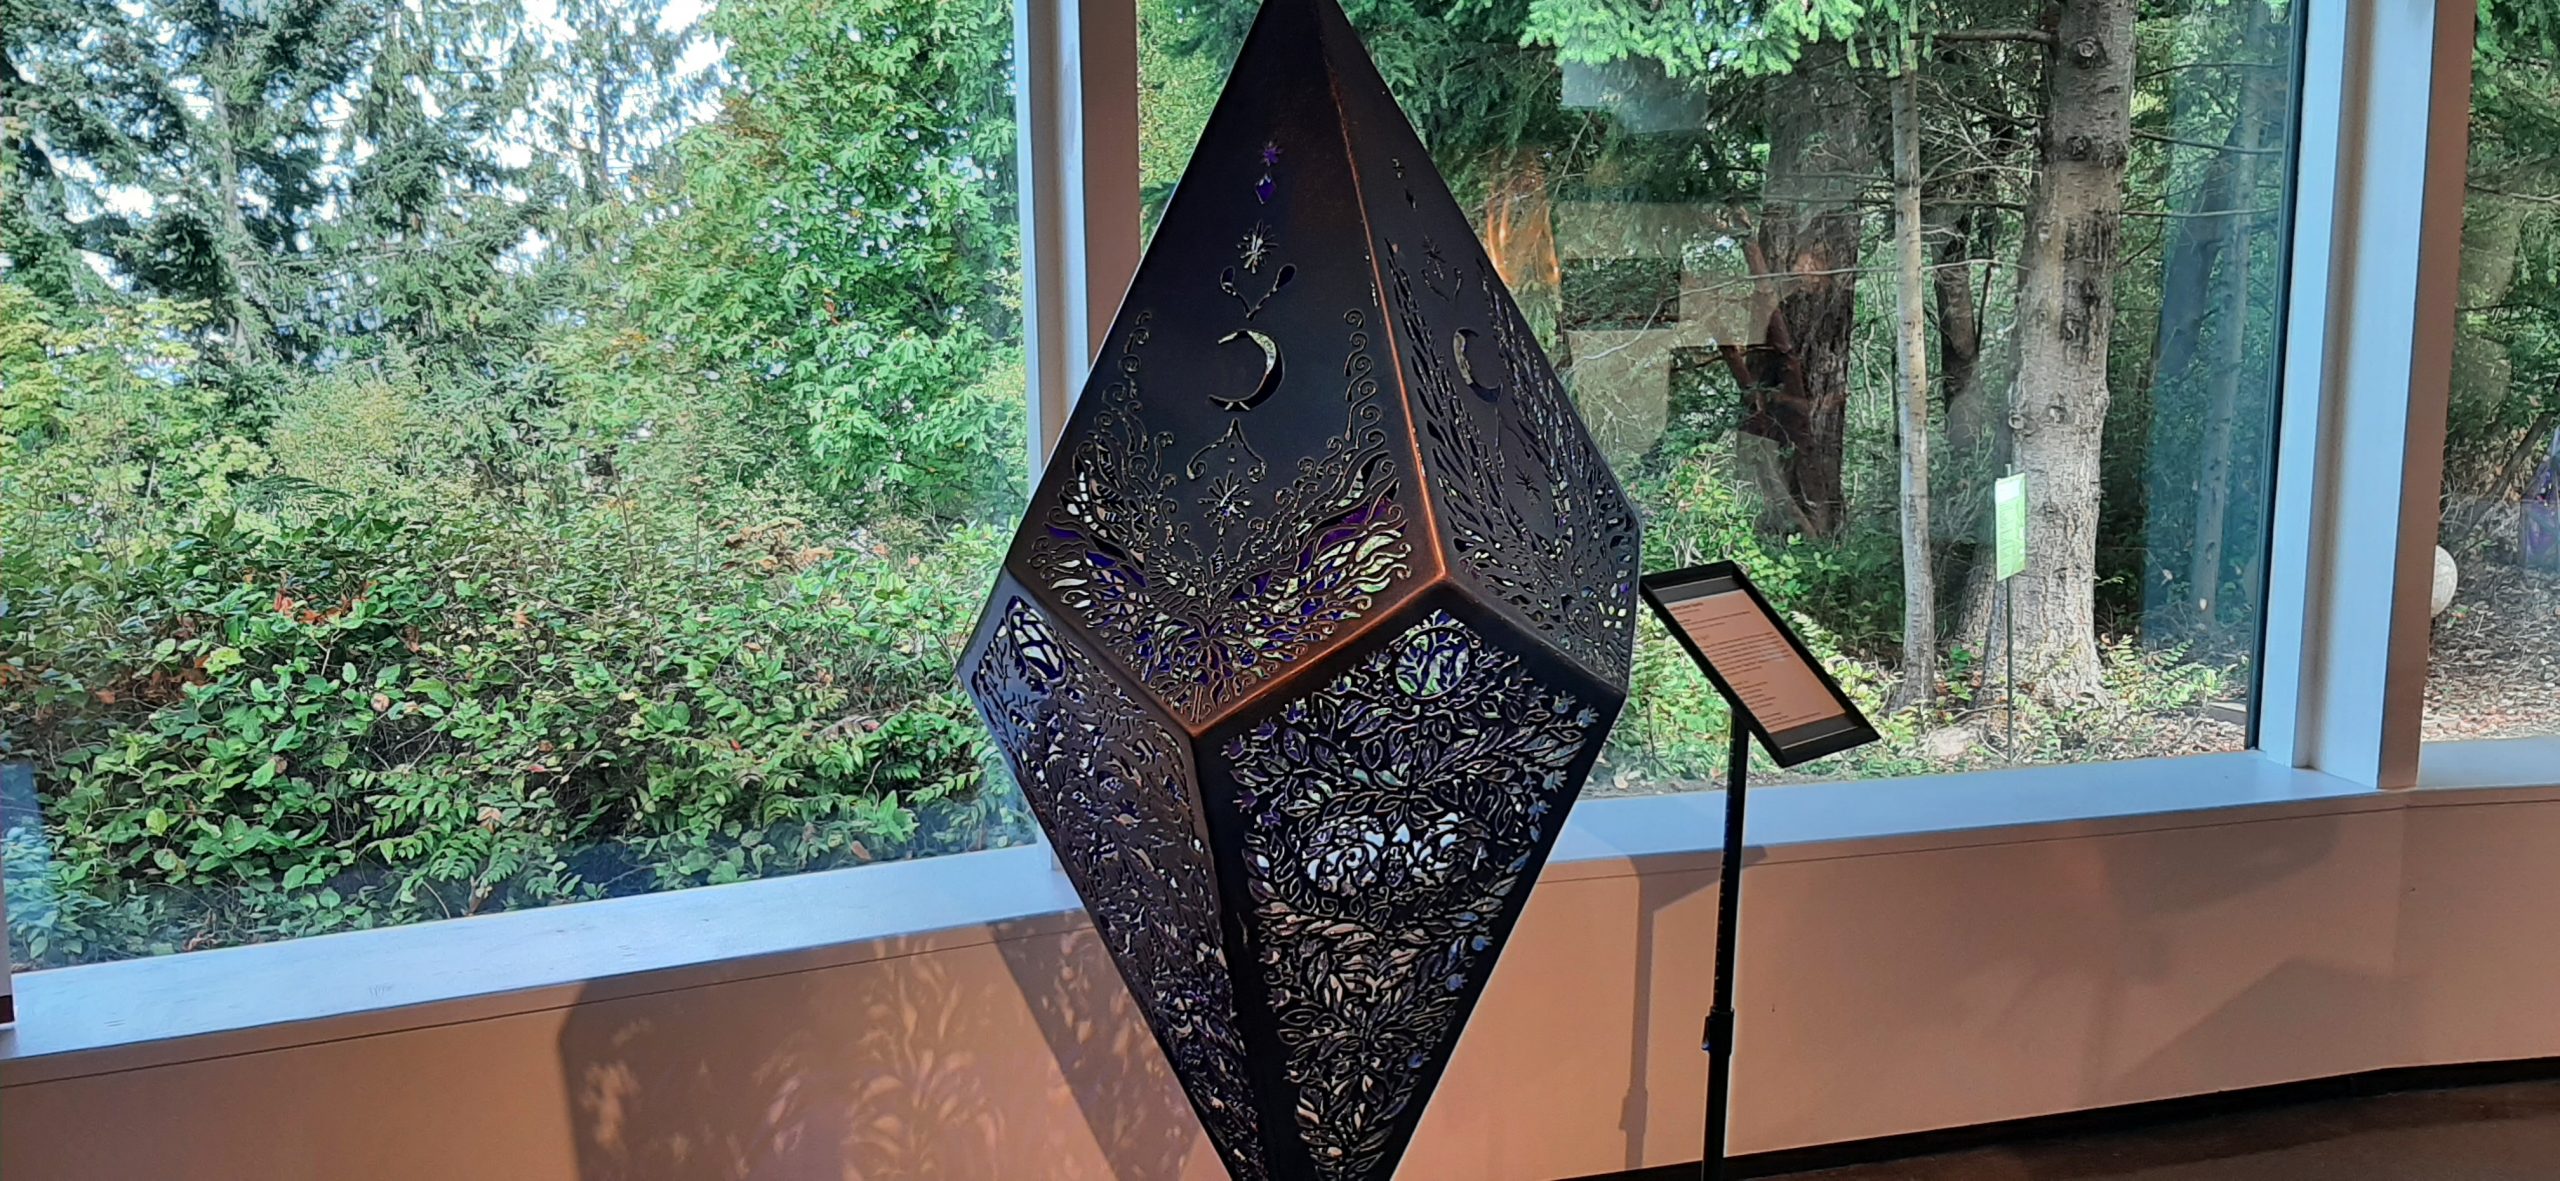
After a late breakfast, we decided to go into town (the town being Port Angeles) and visit the Port Angeles Fine Arts Center. Their current exhibit being – Sparks of Connection- In Celebration of Fem Fabrication. According to the center’s website “The featured artist, Heather Dawn Sparks, uses her metal fabrication expertise to create intentional space for other fem fabricators to learn the craft. As an artist she uses metal as a primary foundation for her art and she interweaves paper cutout design, creating a beautiful balance between soft and hard form as she explores the interplay between light and shadow. Exhibiting alongside her to delve into the sparks of connection made through creative collaboration will be emerging and seasoned regional metal artists.”
These were huge spiders. Floor to ceiling.
What nice legs you have my dear!
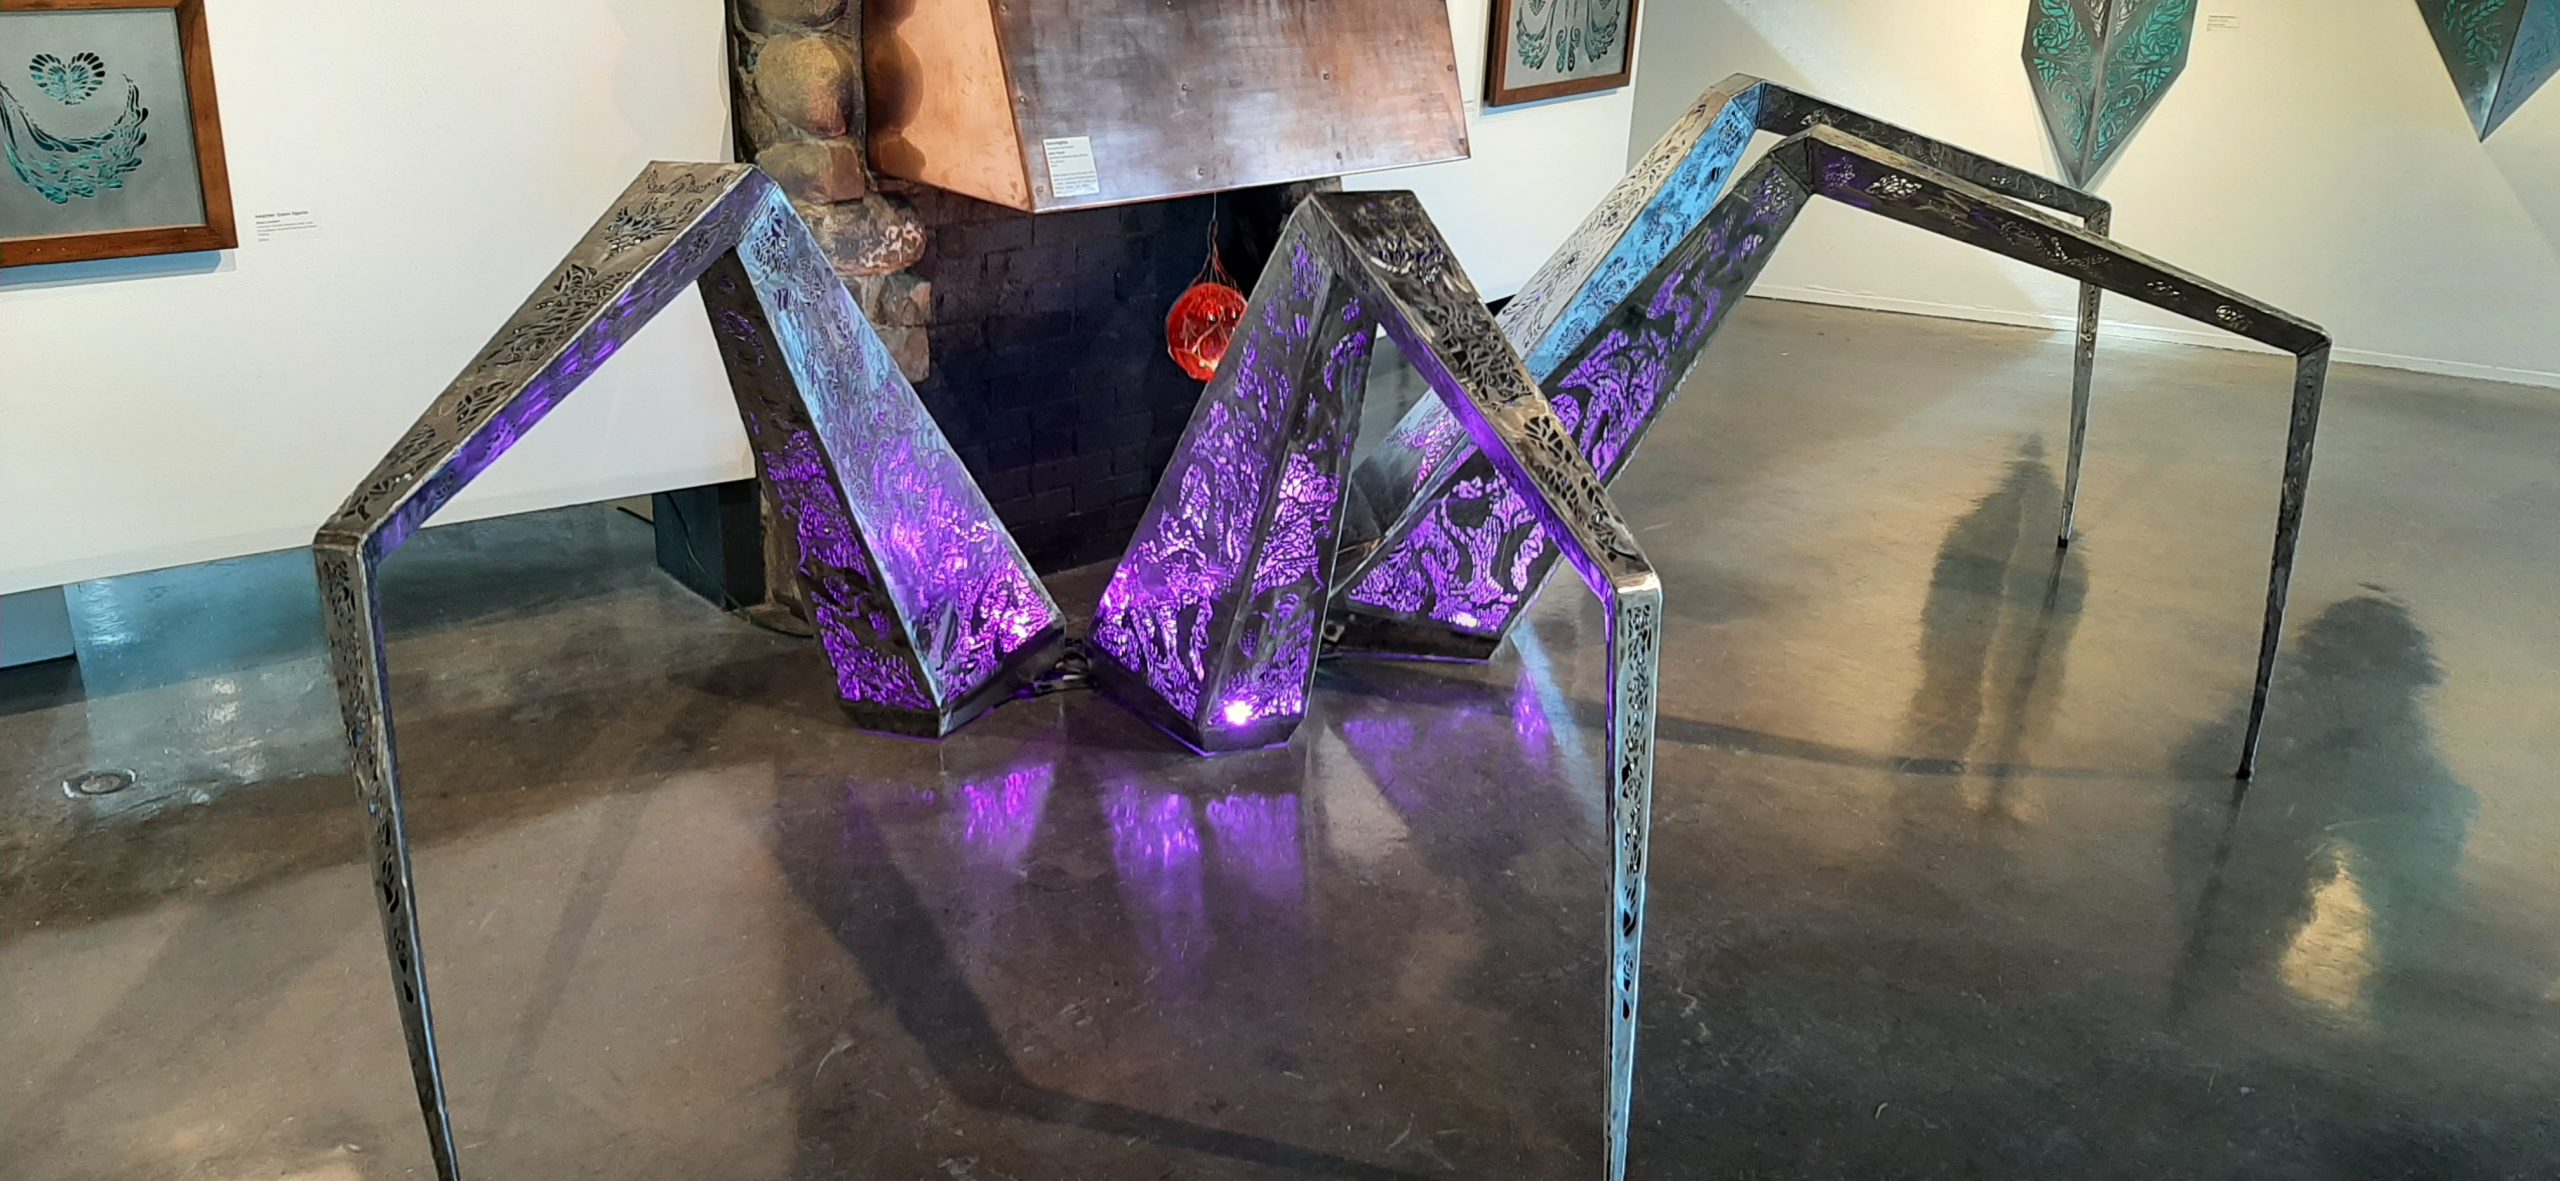
Not a great picture of the metal piece, but it gives you an idea of the layout of the building.
Another beautiful piece of metal art.
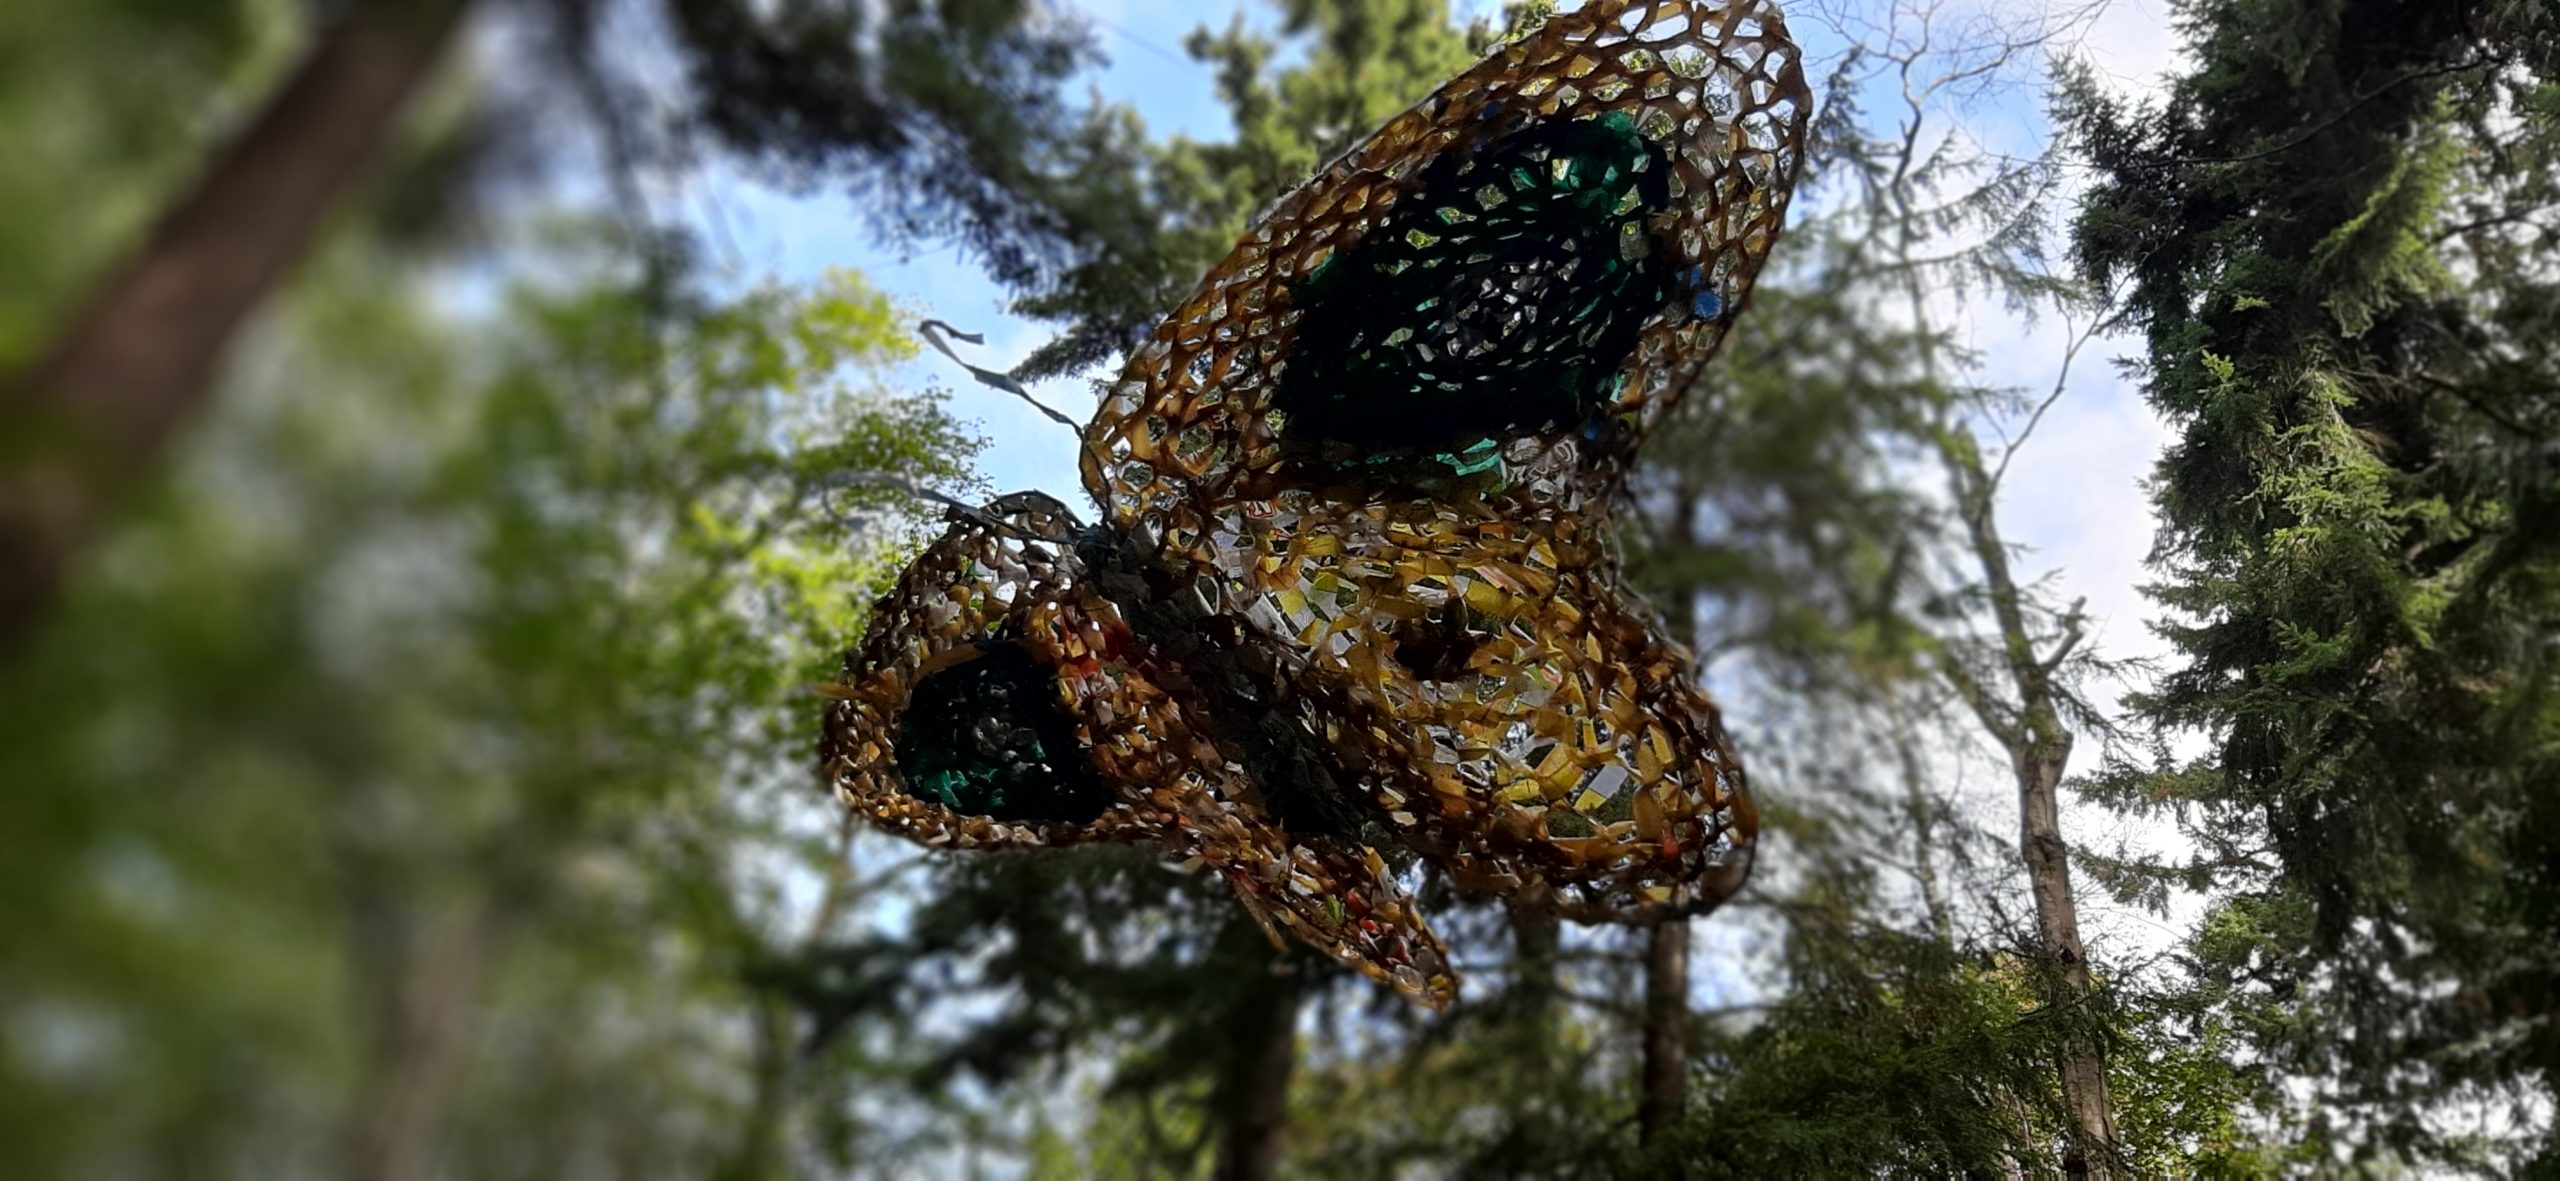
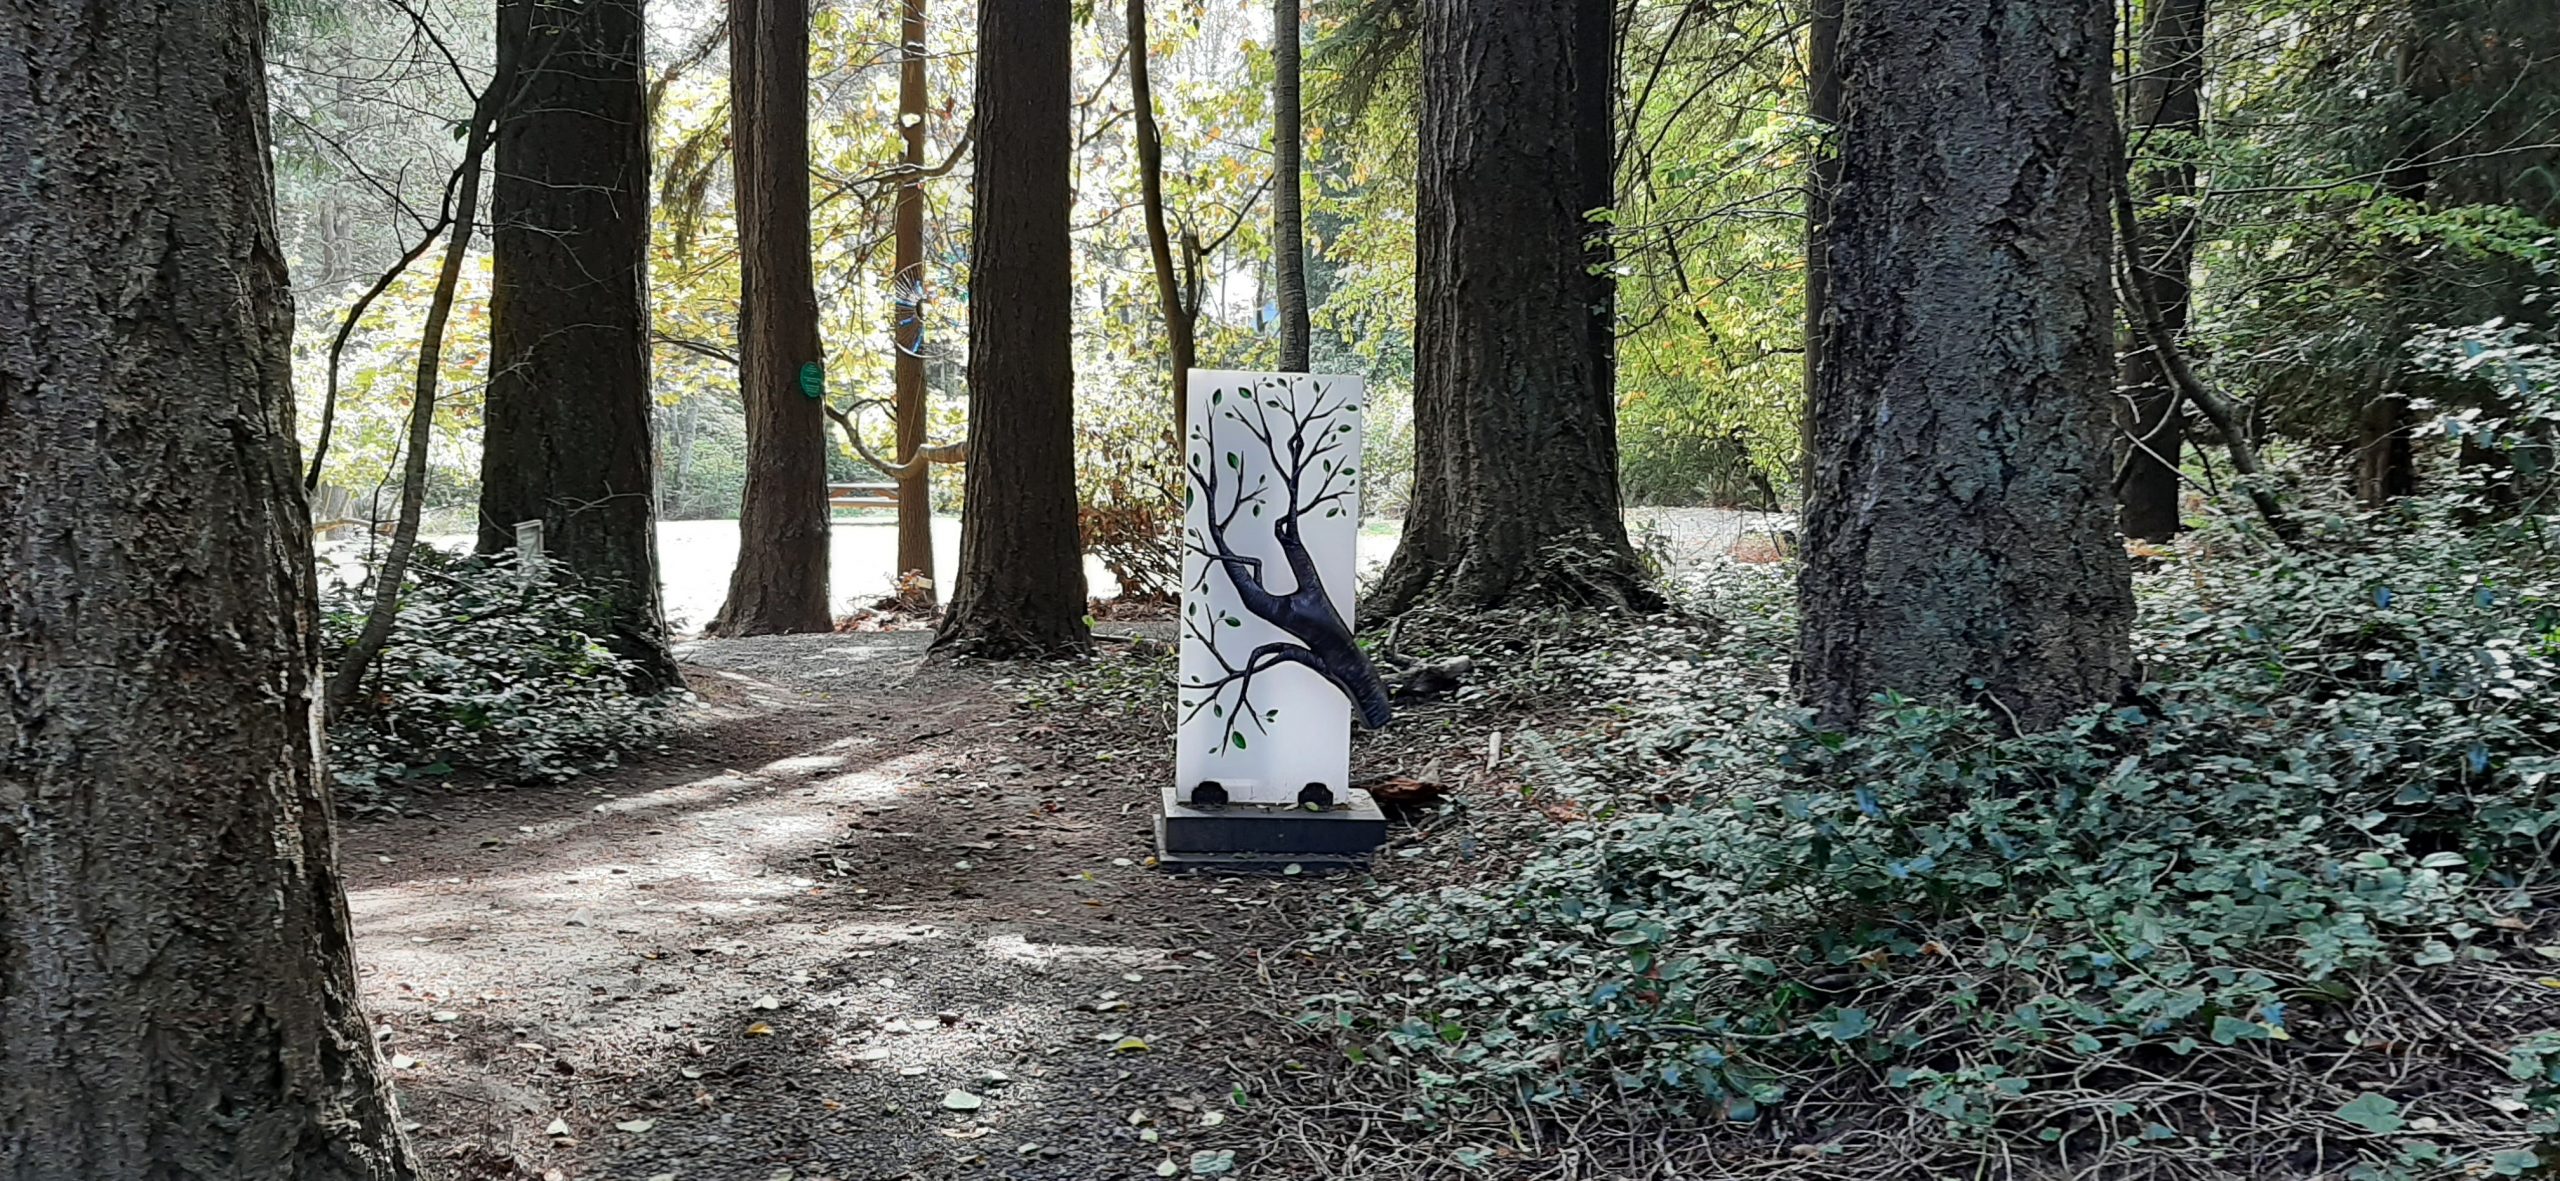
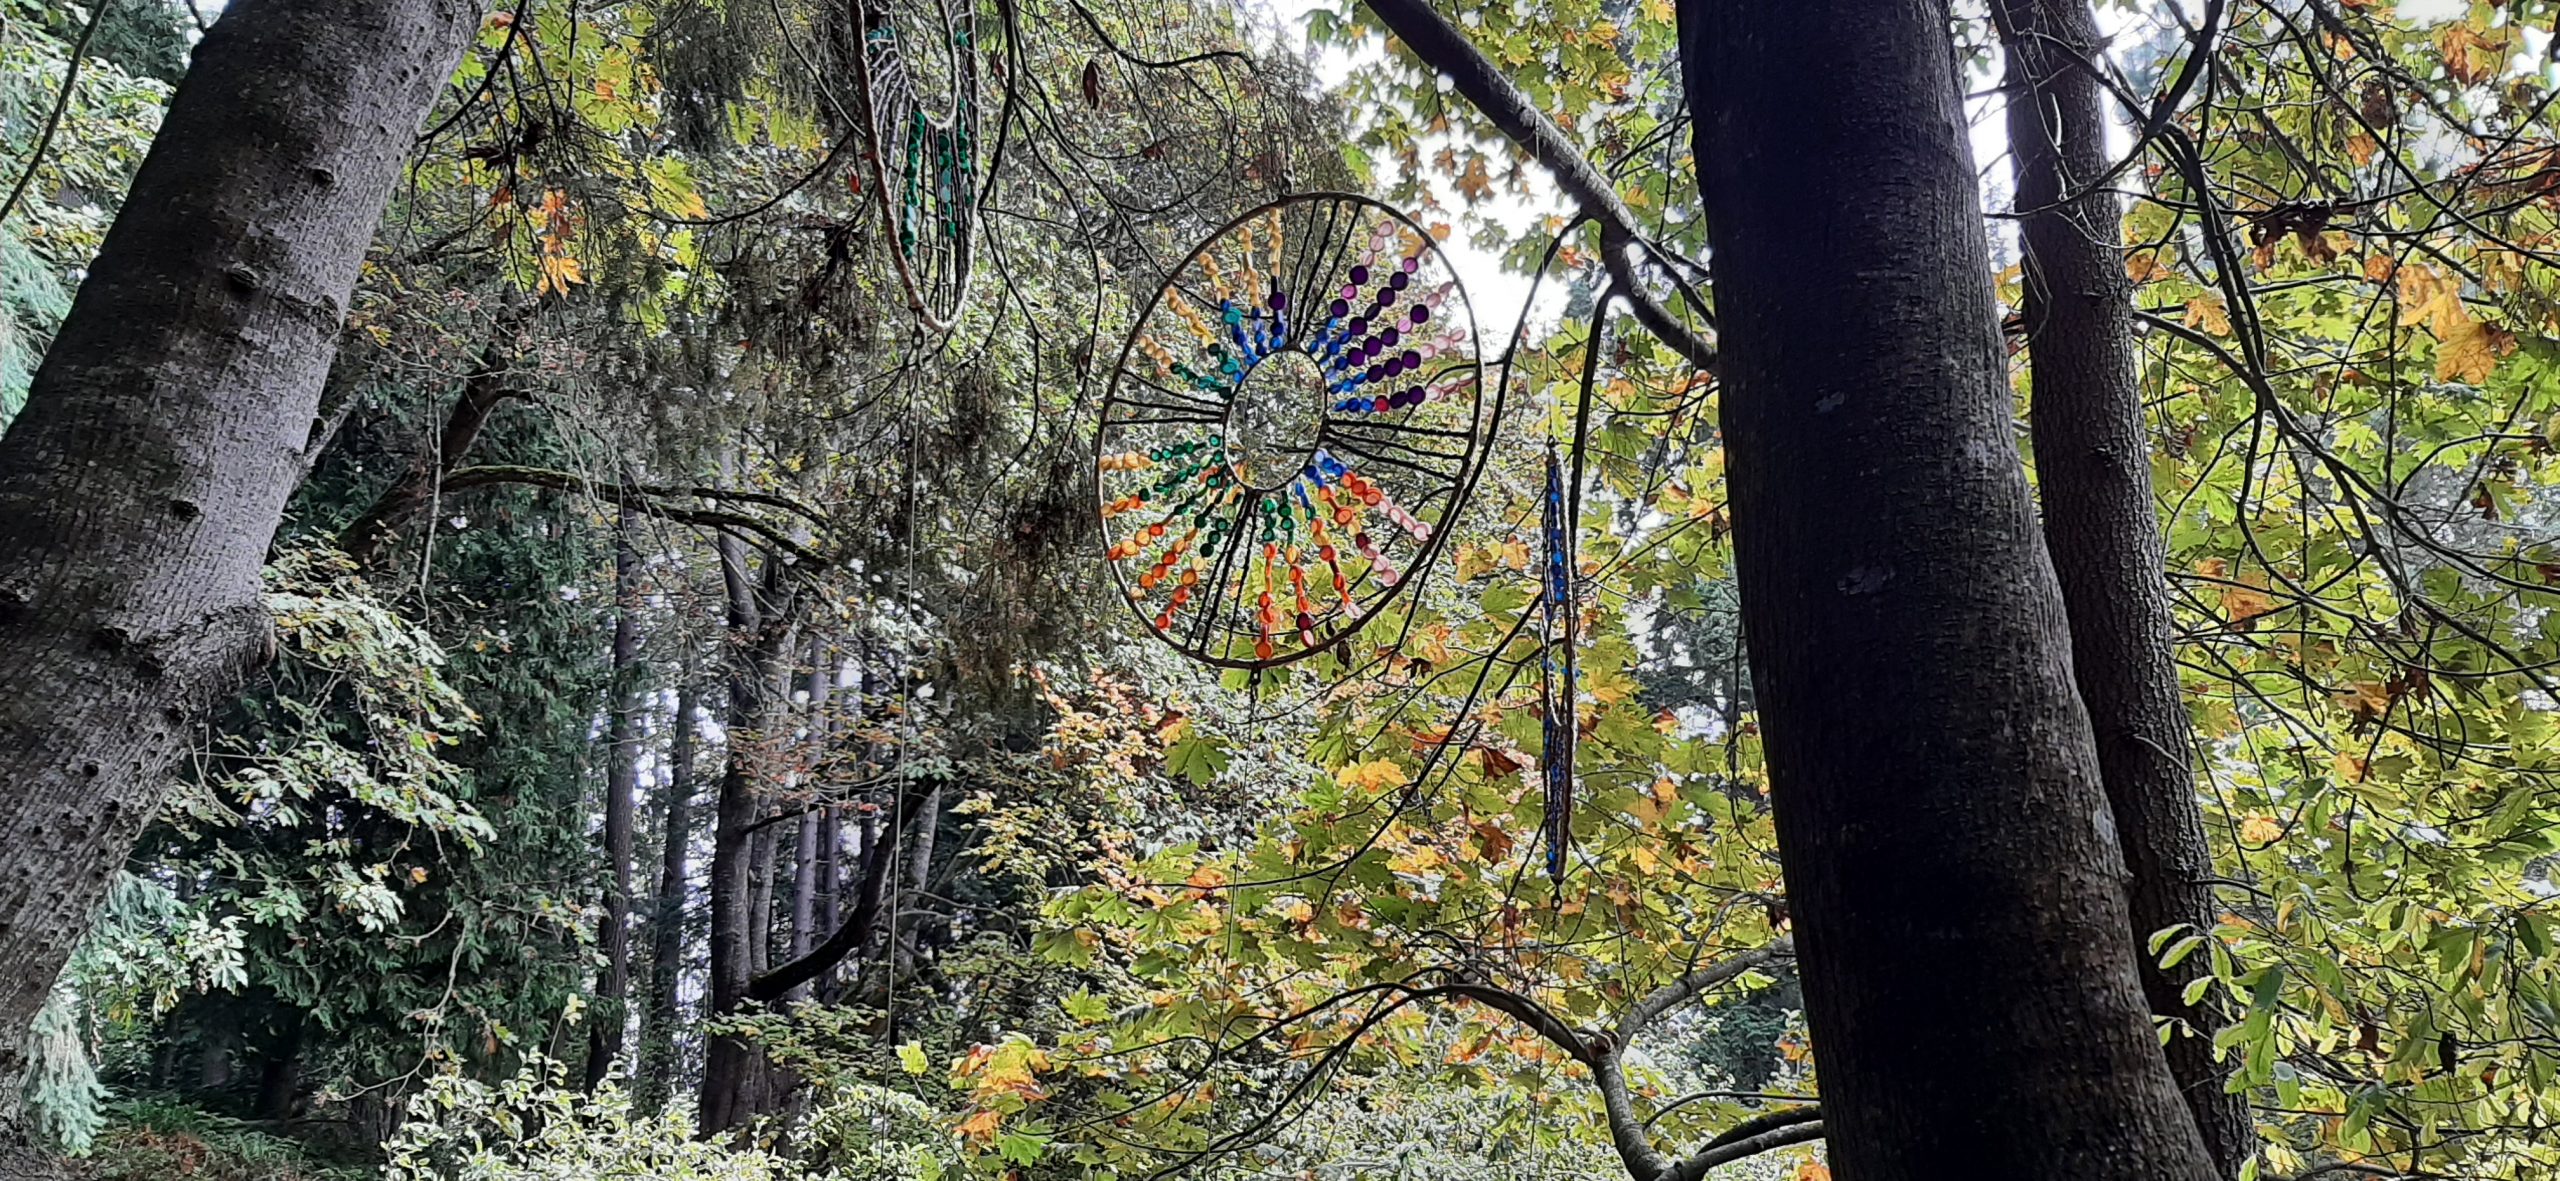
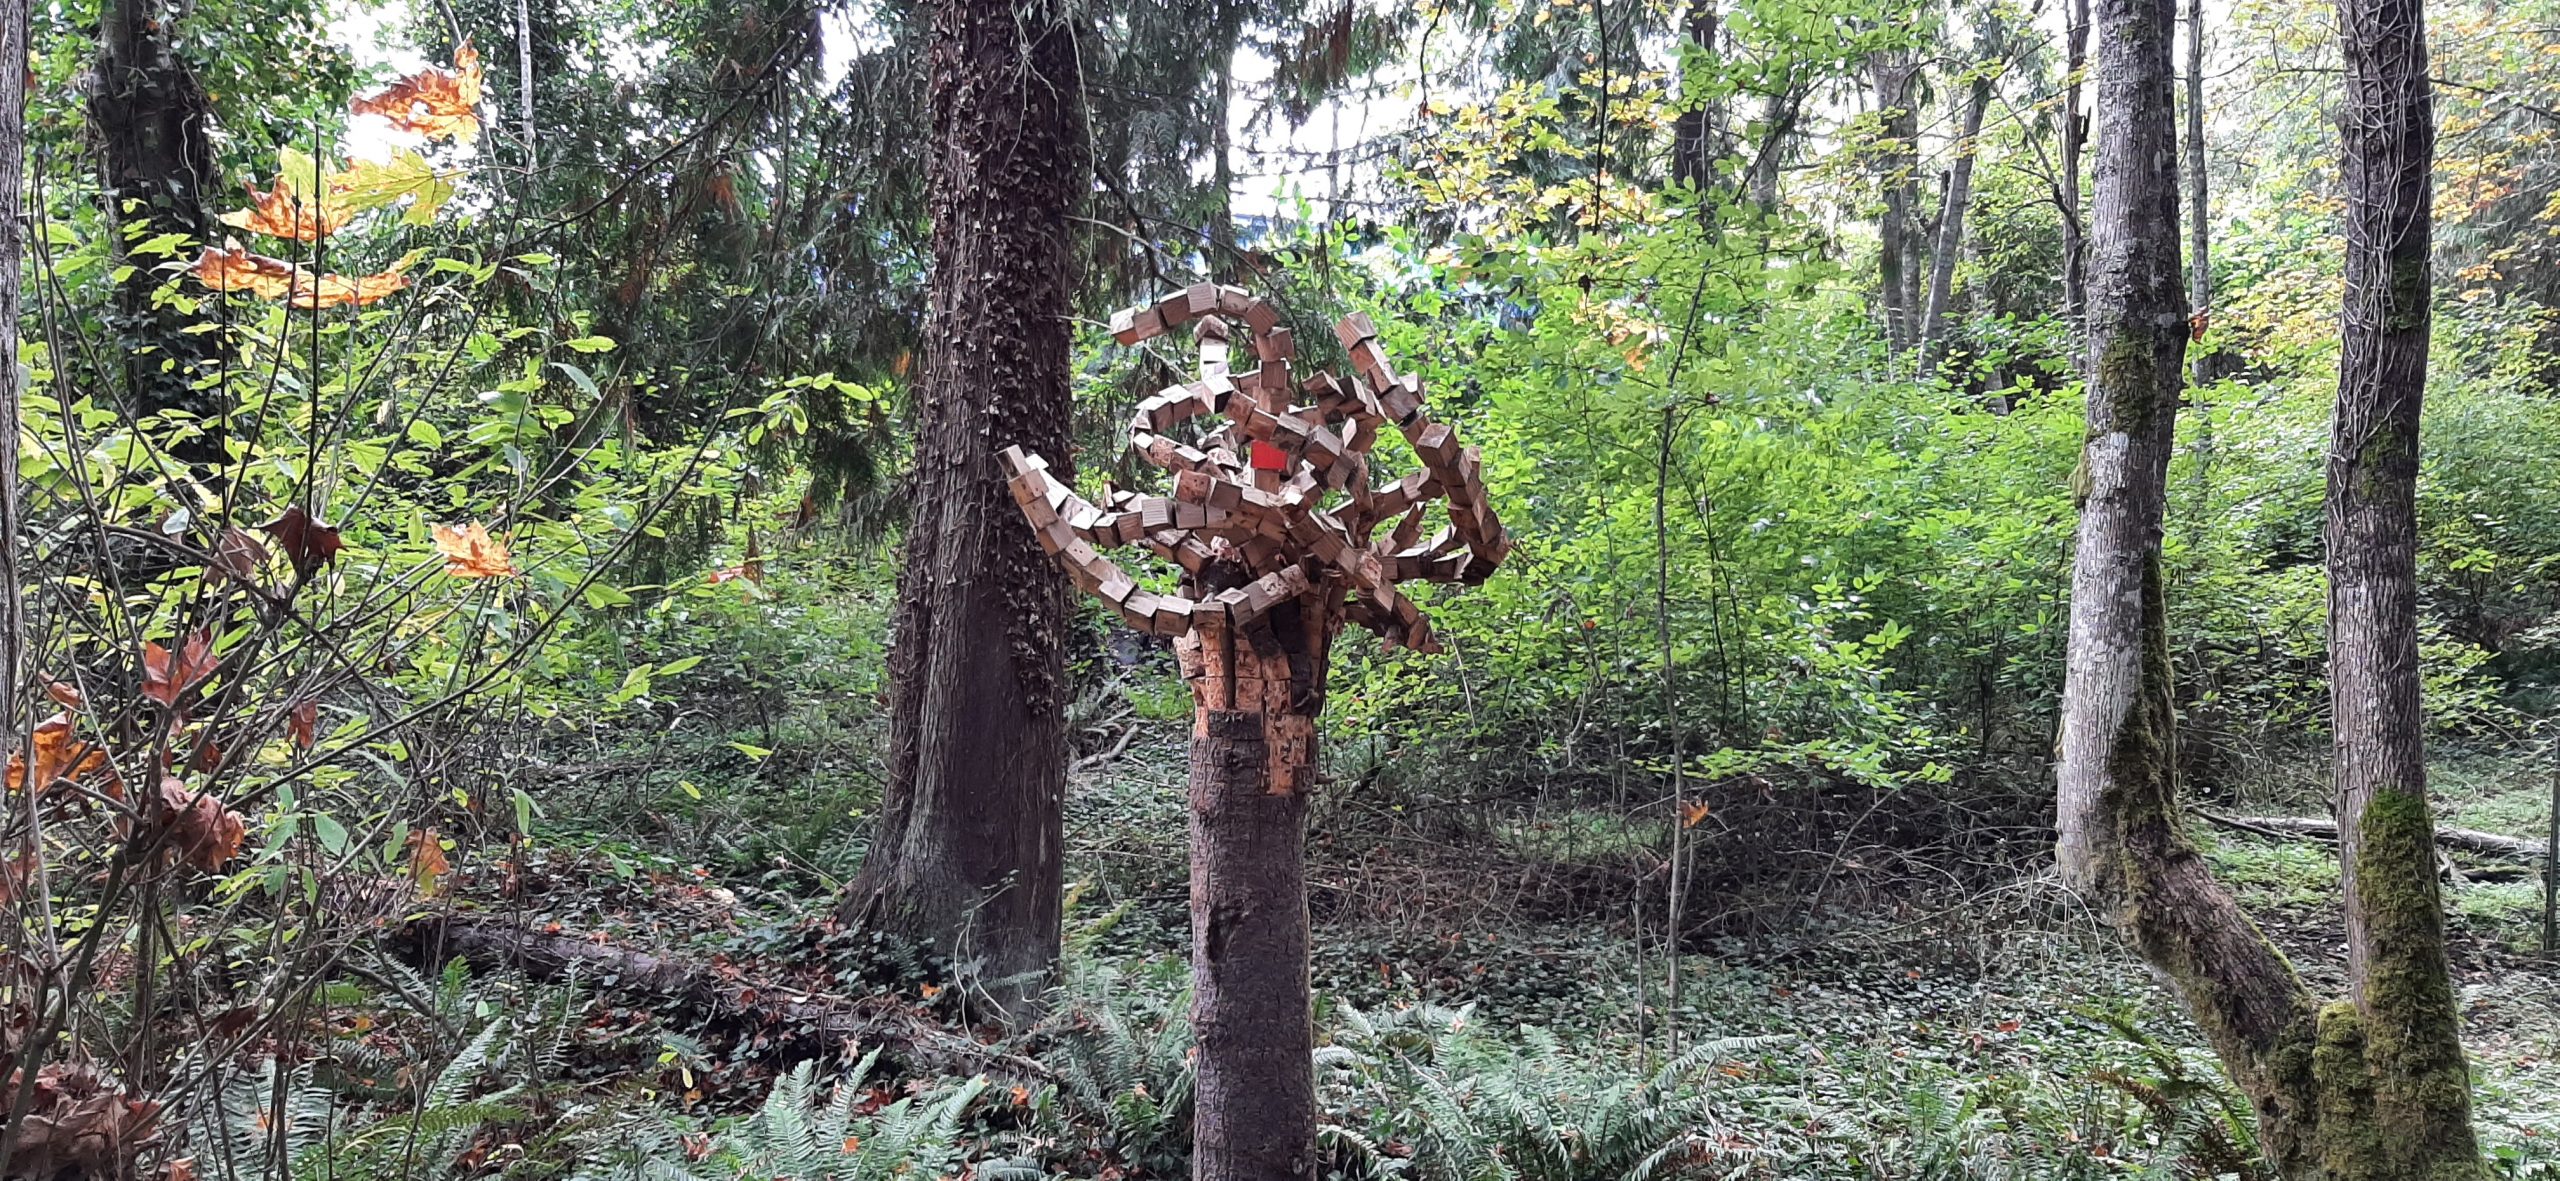
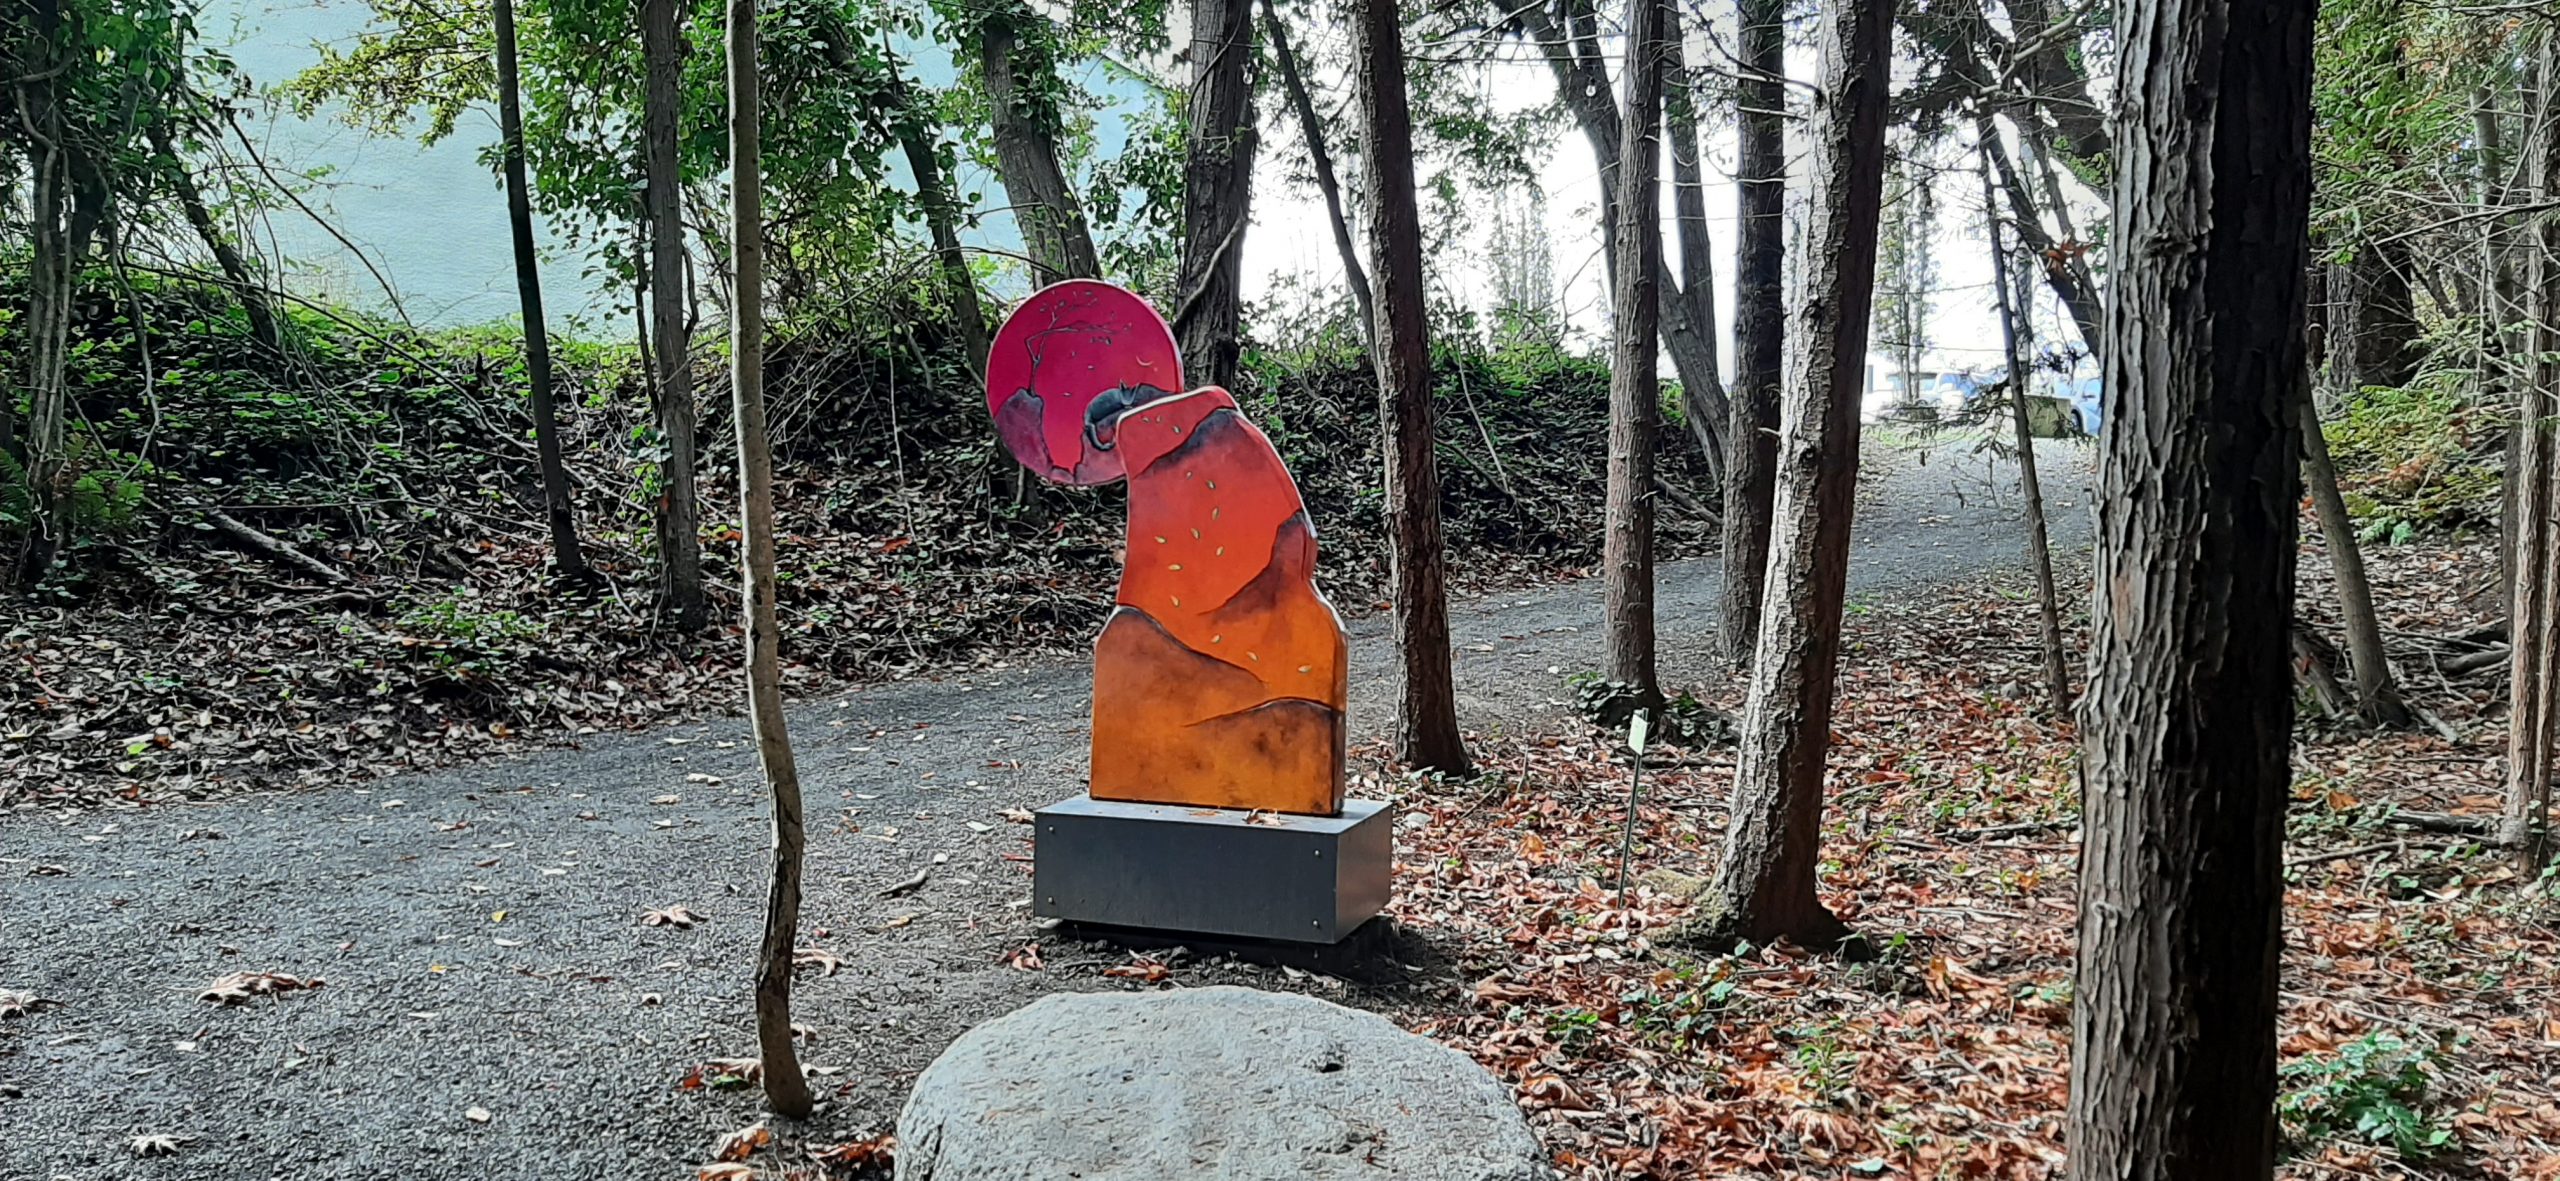
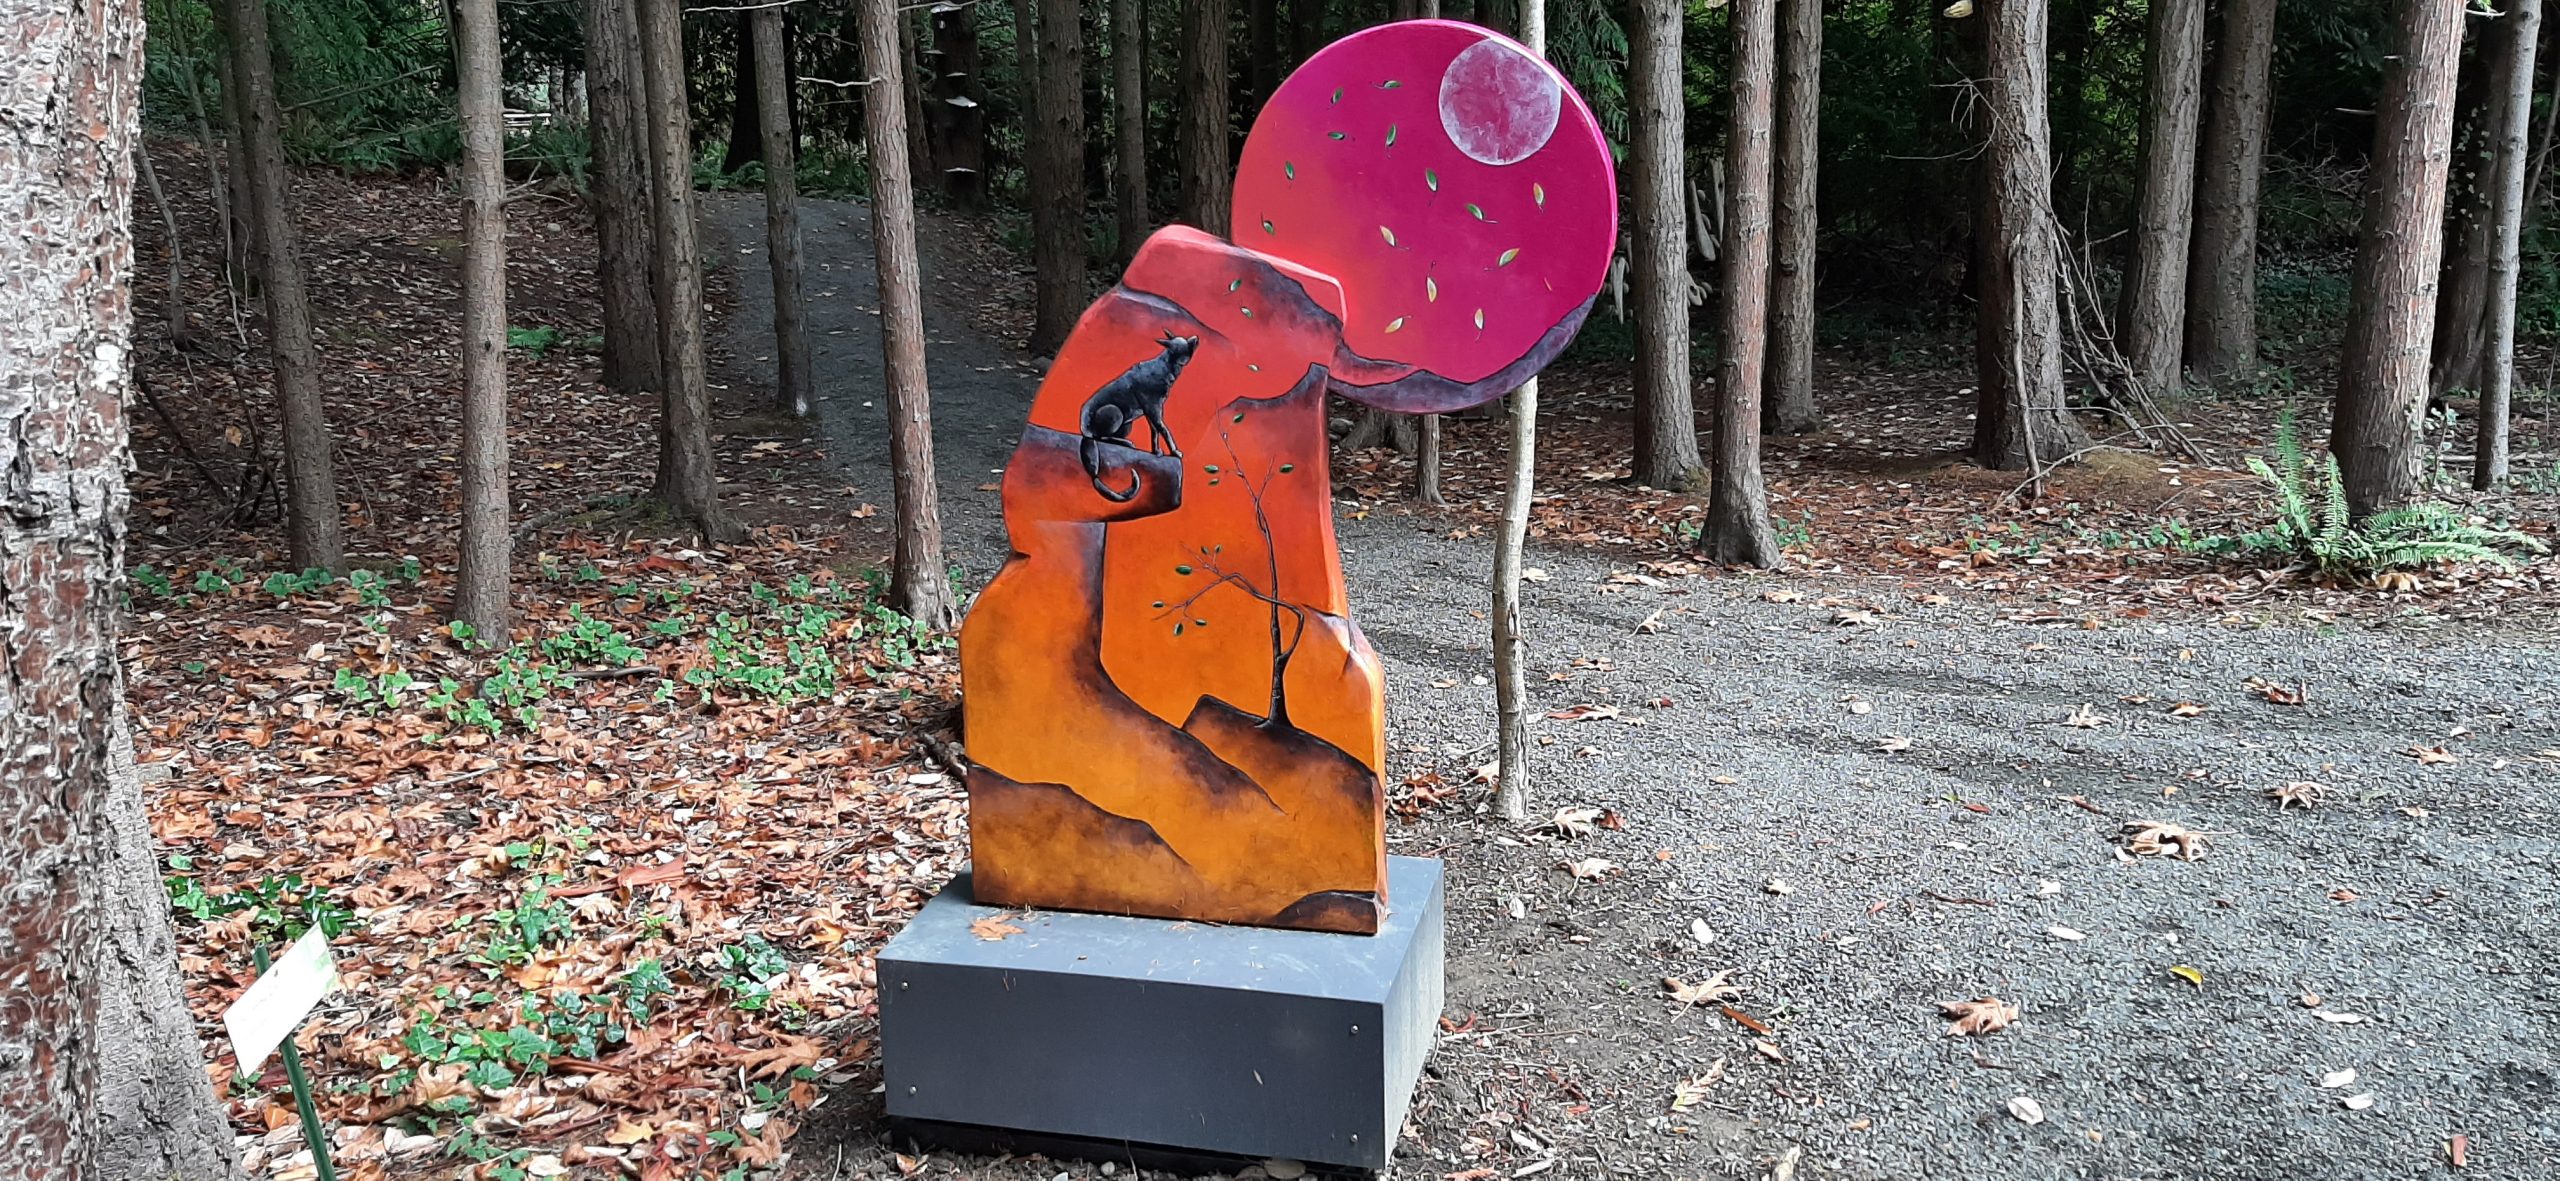
Along with the fine arts center there was a fun outside sculpture park.
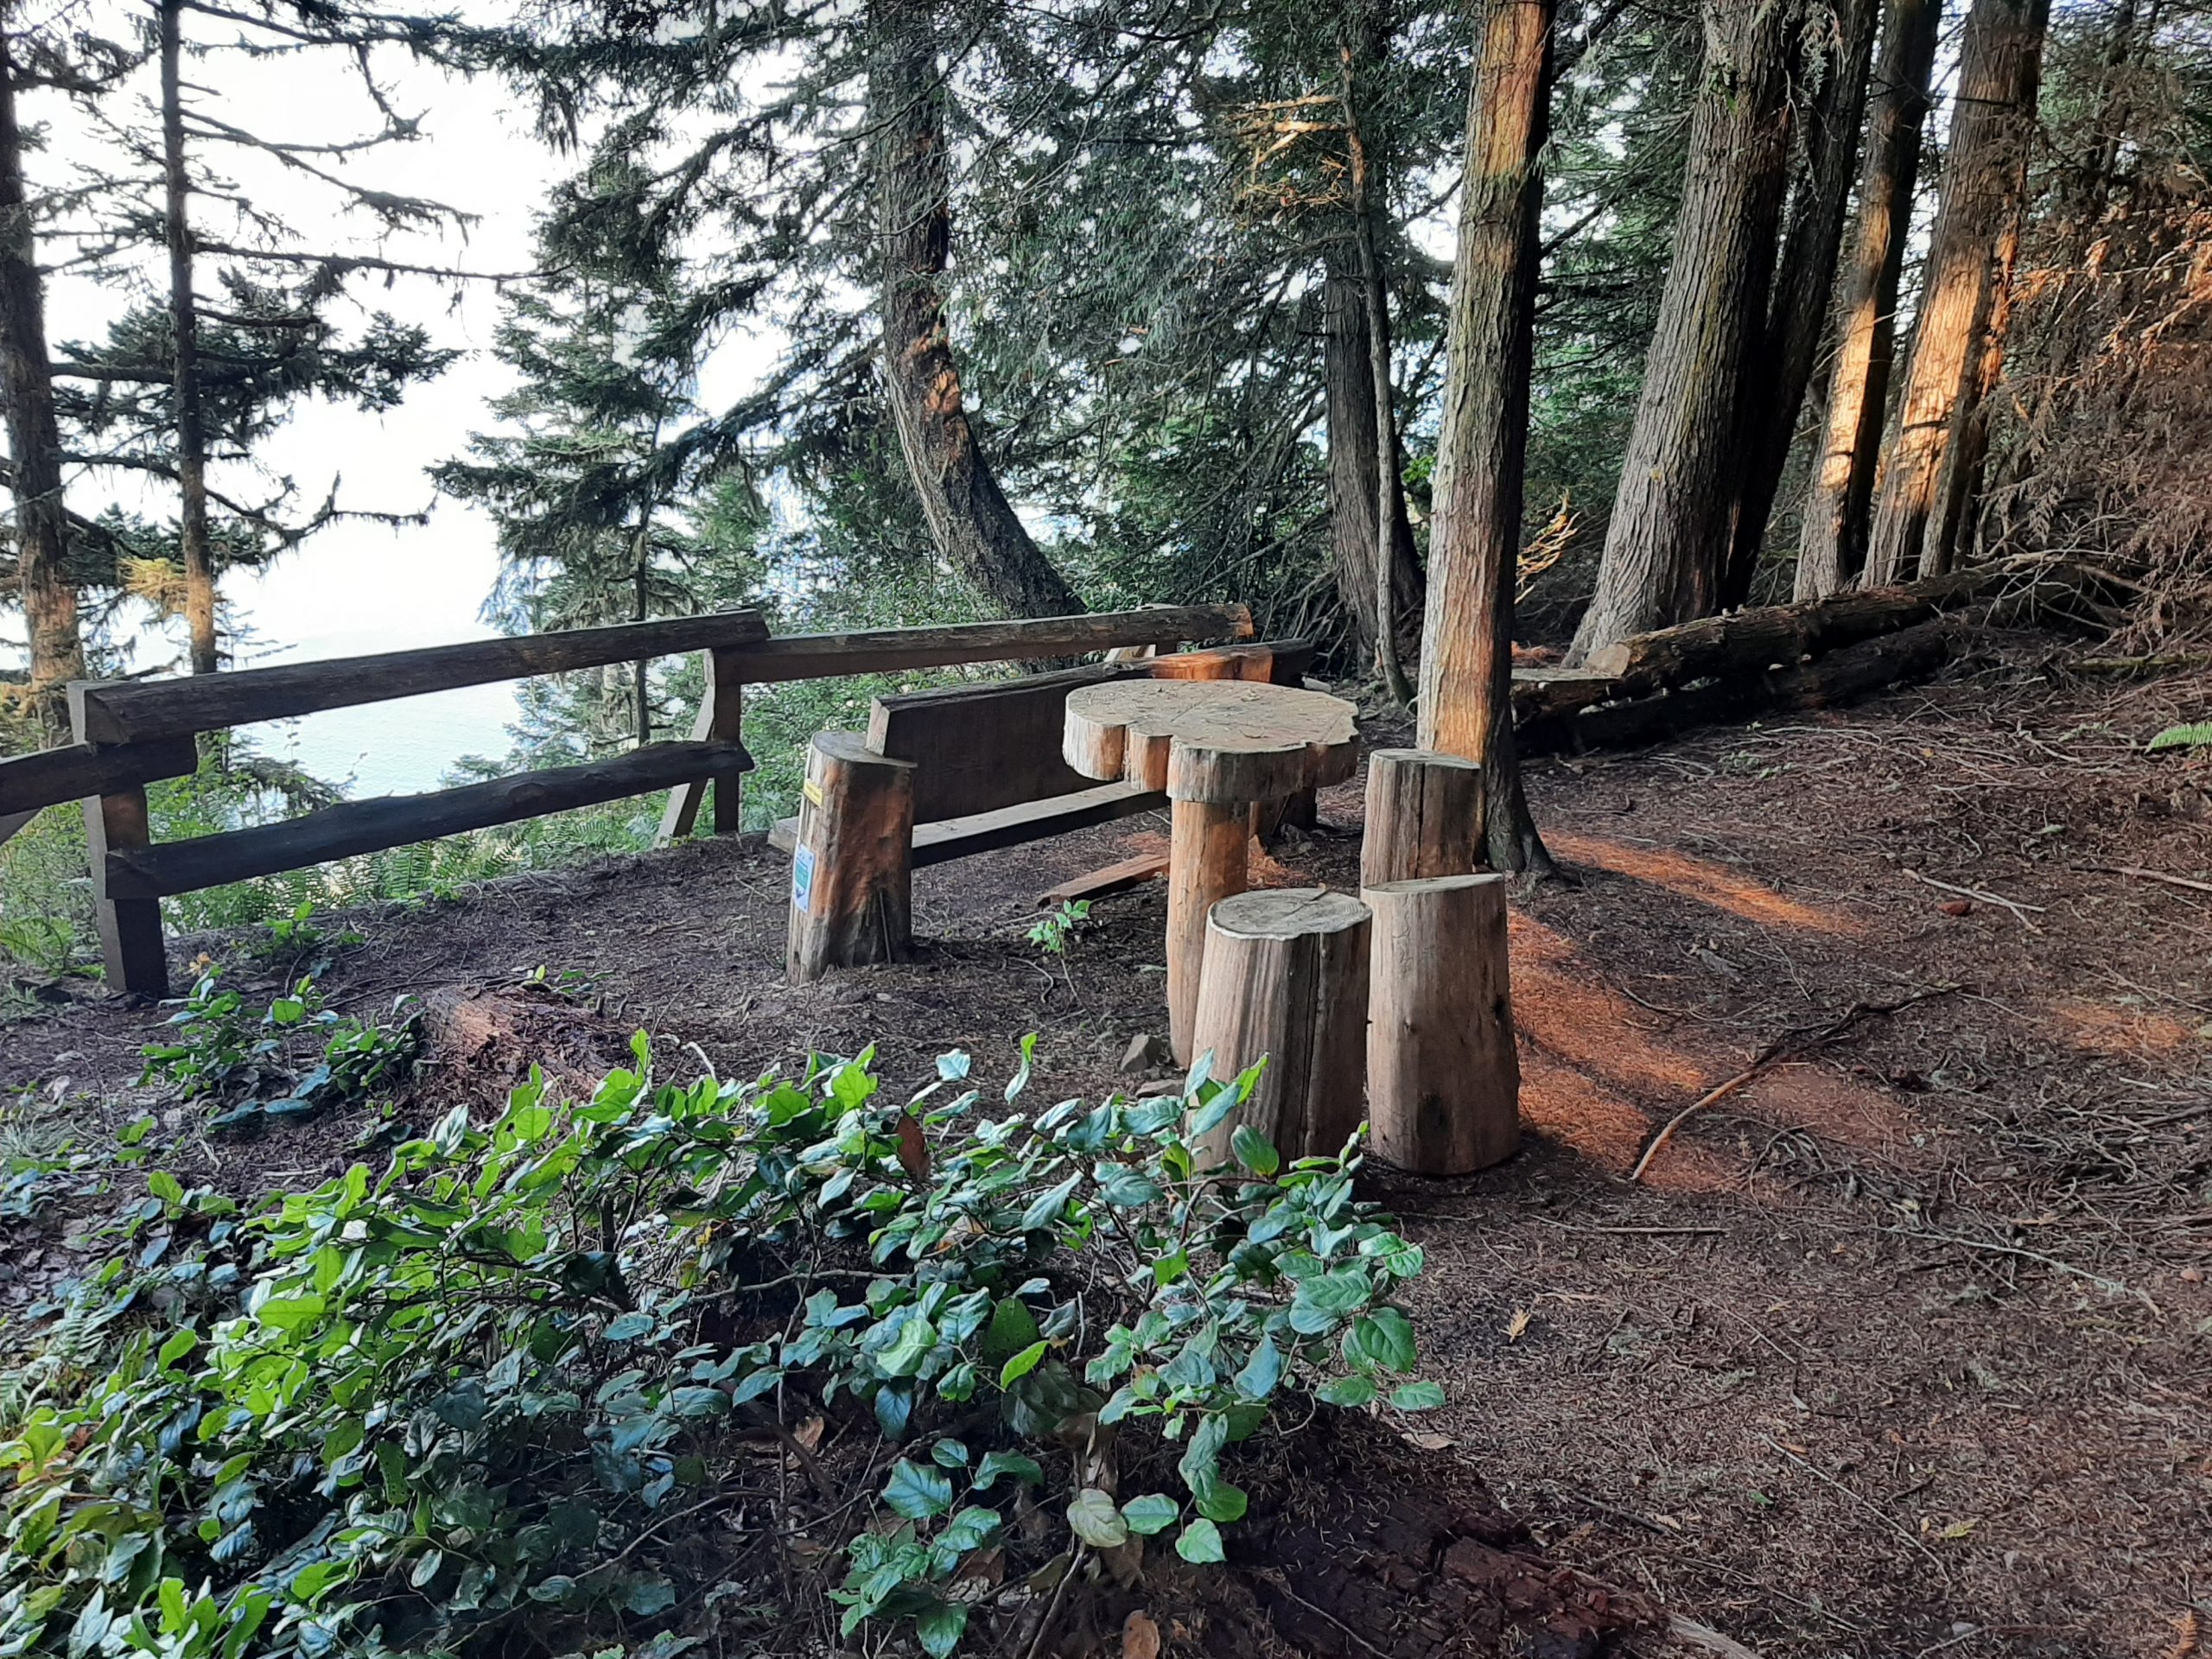
Now, that’s my kind of fence!
We walked the whole 5 acres and didn’t get lost. (That would have been impossible because the path was very well laid out.) But still, we made it through without having to ask for directions. Some of what we saw.
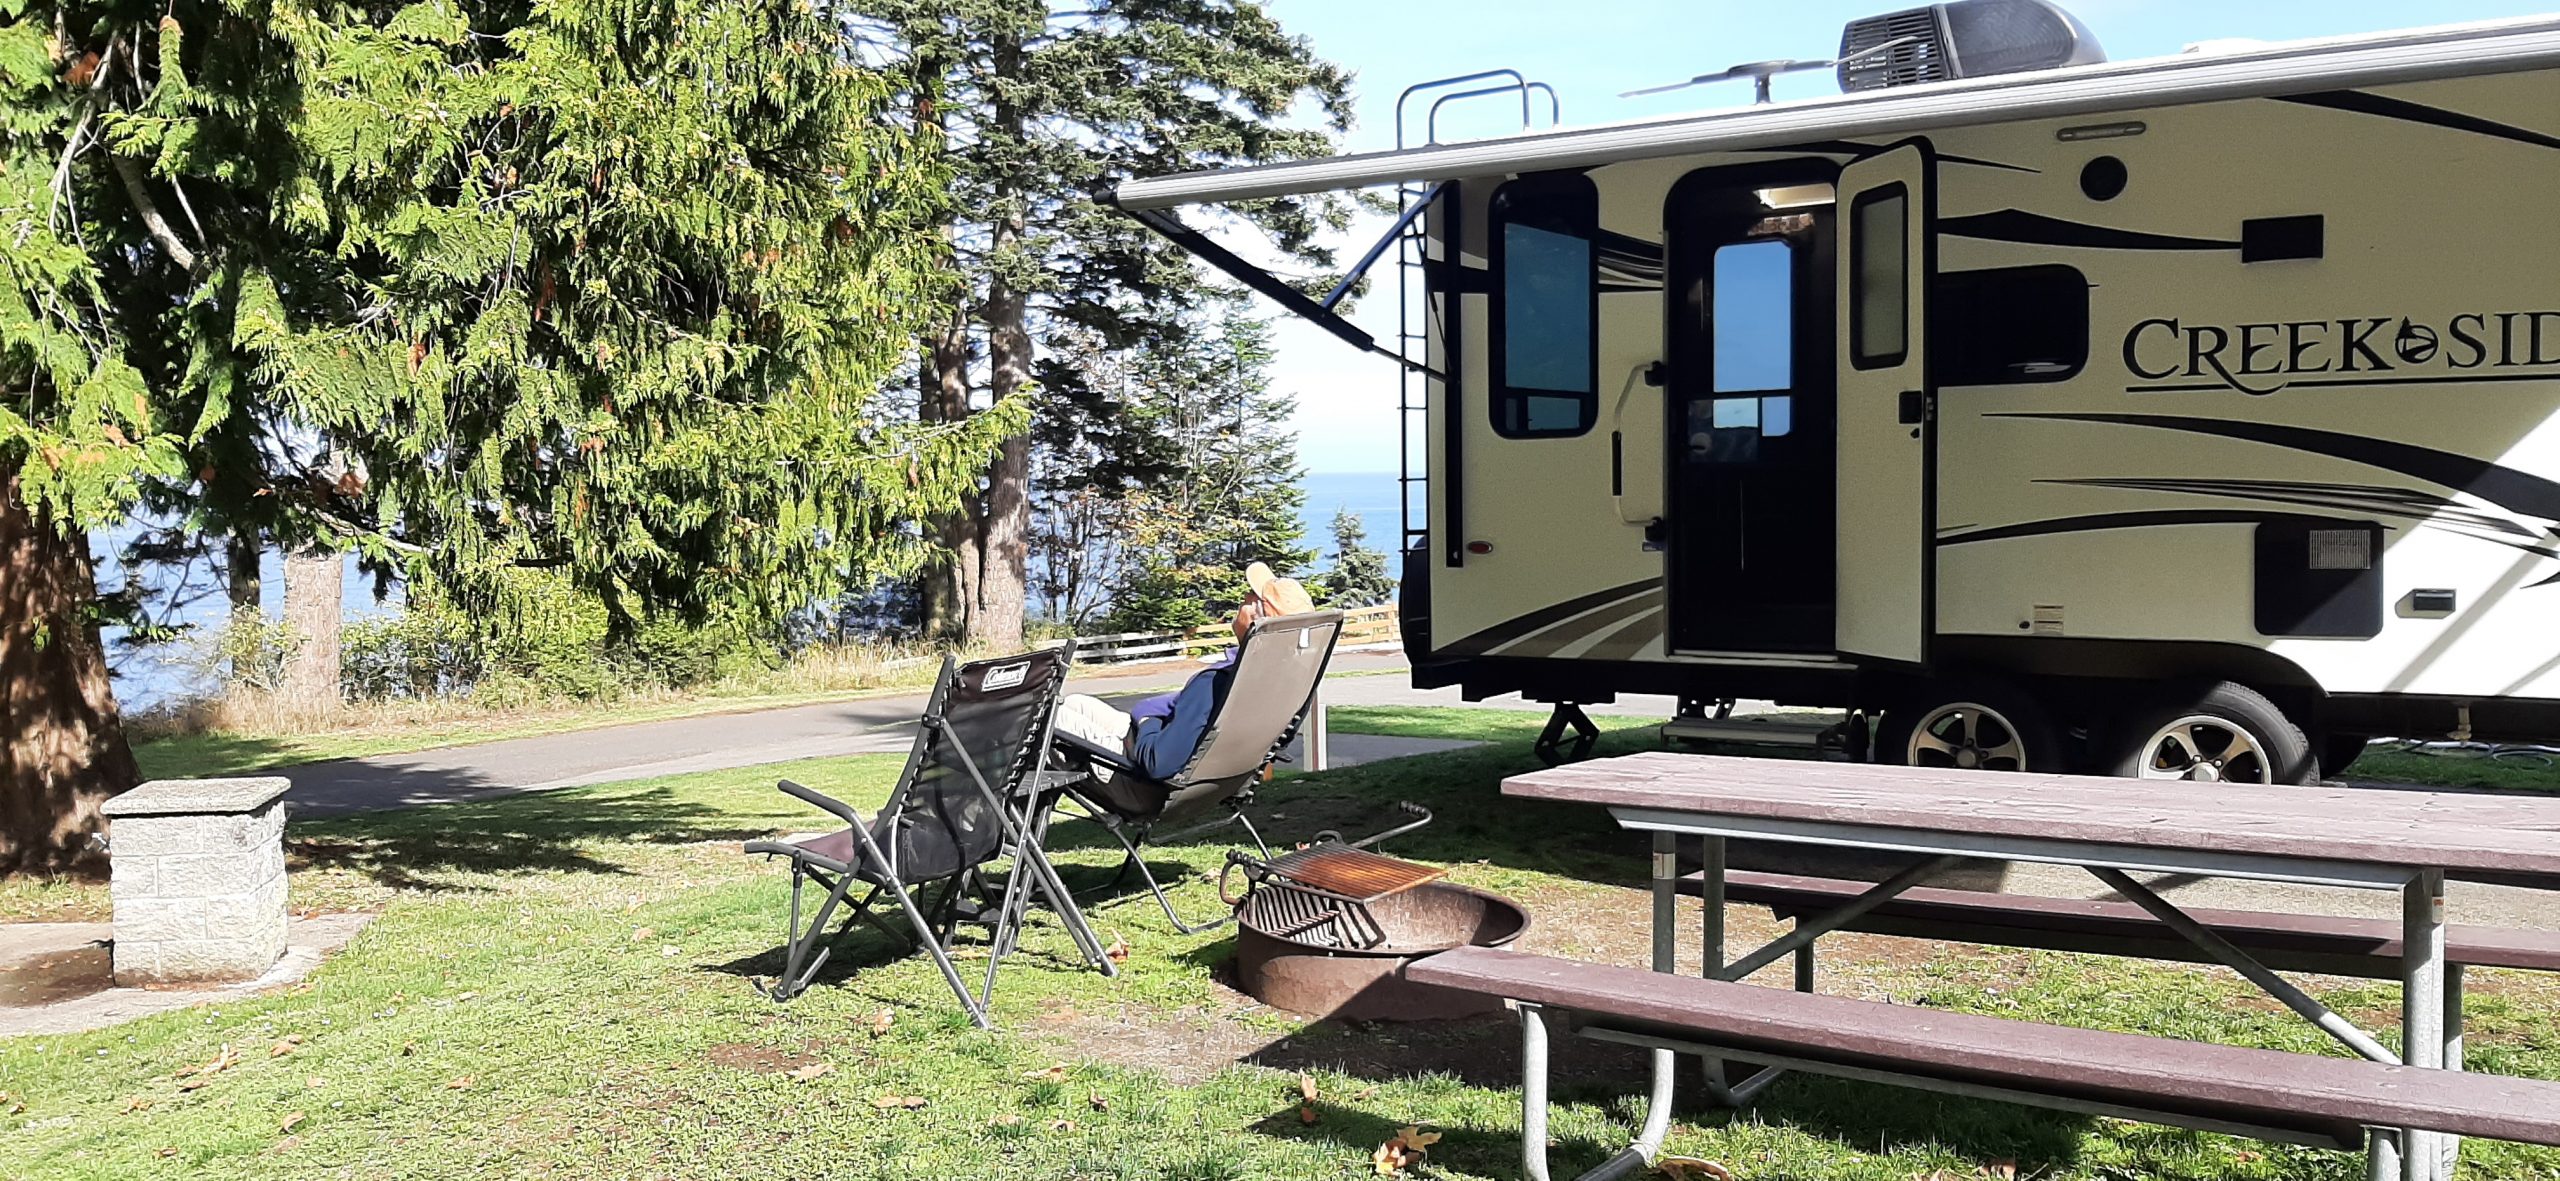
Then we headed back to camp for lunch and for Andy to go for a walk up Striped Peak.
And after that, for both of us to read (or nap) outside in the afternoon sun.
After sitting in the sun until I nearly froze to death, I climbed back in the trailer to read until once again it was time to drive into Port Angeles. This time to have dinner at the 929 Woodfire Grill.
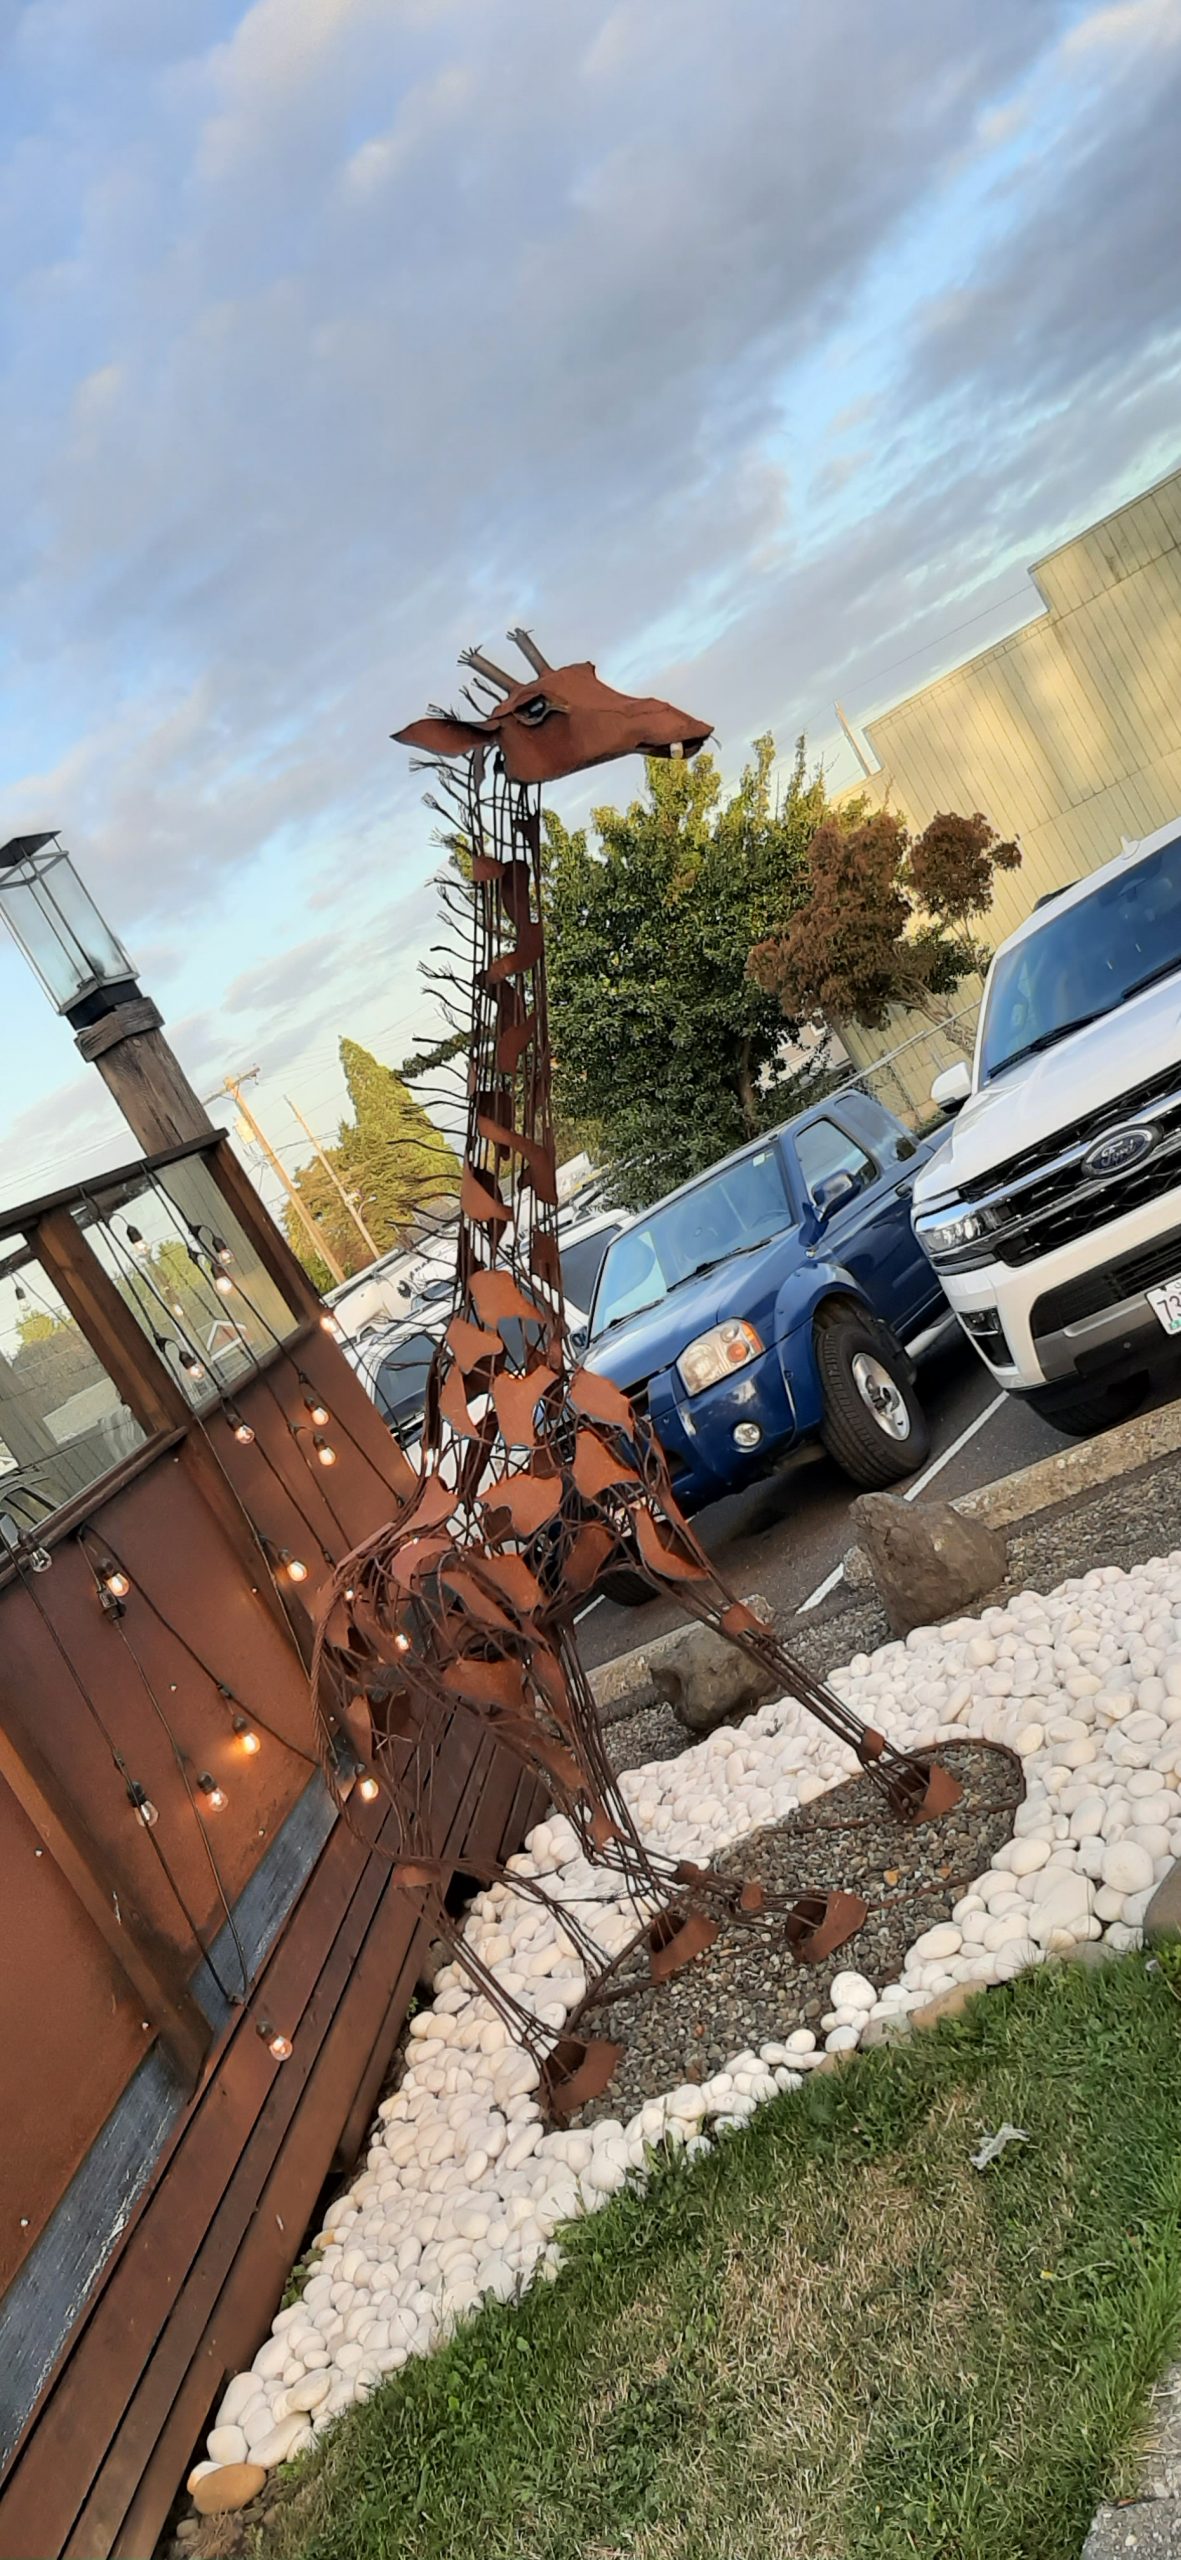
We loved the metal sculpture outside the restaurant. This picture is for our dear friend Cindy who absolutely adores giraffes. But then again, who doesn’t?
The restaurant served good food, but no cocktails. And they were out of the beer I like. Oh well, that was OK because we were seated outside under umbrellas. At least there was a propane fire nearby. But still, it was chilly. Enough so that we didn’t even look at the dessert menu. And usually, I like to at least look at the dessert menu because you never know if something new and exciting might be listed. Doesn’t happen often, but it could!
Then back to camp for our last night on the road.
This has been a very pleasant three weeks. Only 5 different campsites, so we really got to know each of the areas we were visiting.
But I’m looking forward to being home. We both miss our kitties and all the conveniences only a real home can provide. But we also know that our hectic pace is waiting not so patiently for our return. Gigs, and doctor’s appointments, and home concerts, and the holidays just around the corner. But fall is also an exciting time of year. Leaves drop, flowers fade, and there is never enough daylight to suit either one of us. But it’s also the time of year for soup and homemade bread, pot roasts, meat pies, and all the other comfort foods that entice us to stay home and stay warm. And just hunker in. We are so lucky. So, yes, I am ready to go home.
Saturday, September 28, 2024 – Camano Island
It’s always sad when a trip comes to an end, even though I am more than excited to be going home. But for me, going home has always meant warmth, family, and a safe and comfortable place to get away from the world. Oh, that everyone was as lucky.
And it really came to mind the difference in how people are looking at the upcoming election from totally different perspectives.
On our way out of Port Angeles, I noticed that more cars were coming into town as opposed to heading east out of town. Then I noticed that some of the vehicles, especially the trucks, were flying American flags and Trump banners. What we were seeing was a rolling, albeit seemingly peaceful, rally of Trump supporters. And it made me very sad.
Note: You may want to skip the next few paragraphs because I feel driven to write about the upcoming election, and it may not be what you want to read.
I don’t care that Trump is a republican. If he were a democrat, I would still hold him in disdain. This election should not be about standing by your party. It should be about good versus evil. And for goodness’ sake, if anyone thinks that if a democrat gets elected, taxes will automatically go up, gun ownership will be eliminated, immigrants would be free to pour into our country and take all the good jobs, and the economy would only get worse. If you truly believe that, because you have been spoon-fed information from a biased, unreliable news source, then you need to set aside some time to search out unbiased information for yourself. Because, in fact, the economy is doing very well. And besides, nothing of real value is getting done because the house and senate can’t even agree that Tuesday comes after Monday. And that wouldn’t change overnight no matter if a democrat got into office. We as a country are at a stale mate regardless of who wins!
But if Harris were elected, as a nation we would have a person who actually cares what happens to America and the rest of the world from an intelligent, educated, concerned perspective. And she would have a great staff to support her and help her lead our government so that every citizen benefited.
And the bully who once gave high governmental offices to his unqualified buddies and then got rid of them when they dared to have a different opinion, would no longer have the opportunity to hurt our nation. And maybe institutions like FEMA, federal aid for disasters, Obamacare, social security, and other benefits badly needed by many American citizens might stay in place. Or even get better!
So, please don’t think “I must go along with the party line”. Think, I need to vote for the person who will do the best job of running our democratic country so that it will stay a country of the people and for the people.
Note: OK, I’m done talking politics. Back to traveling.
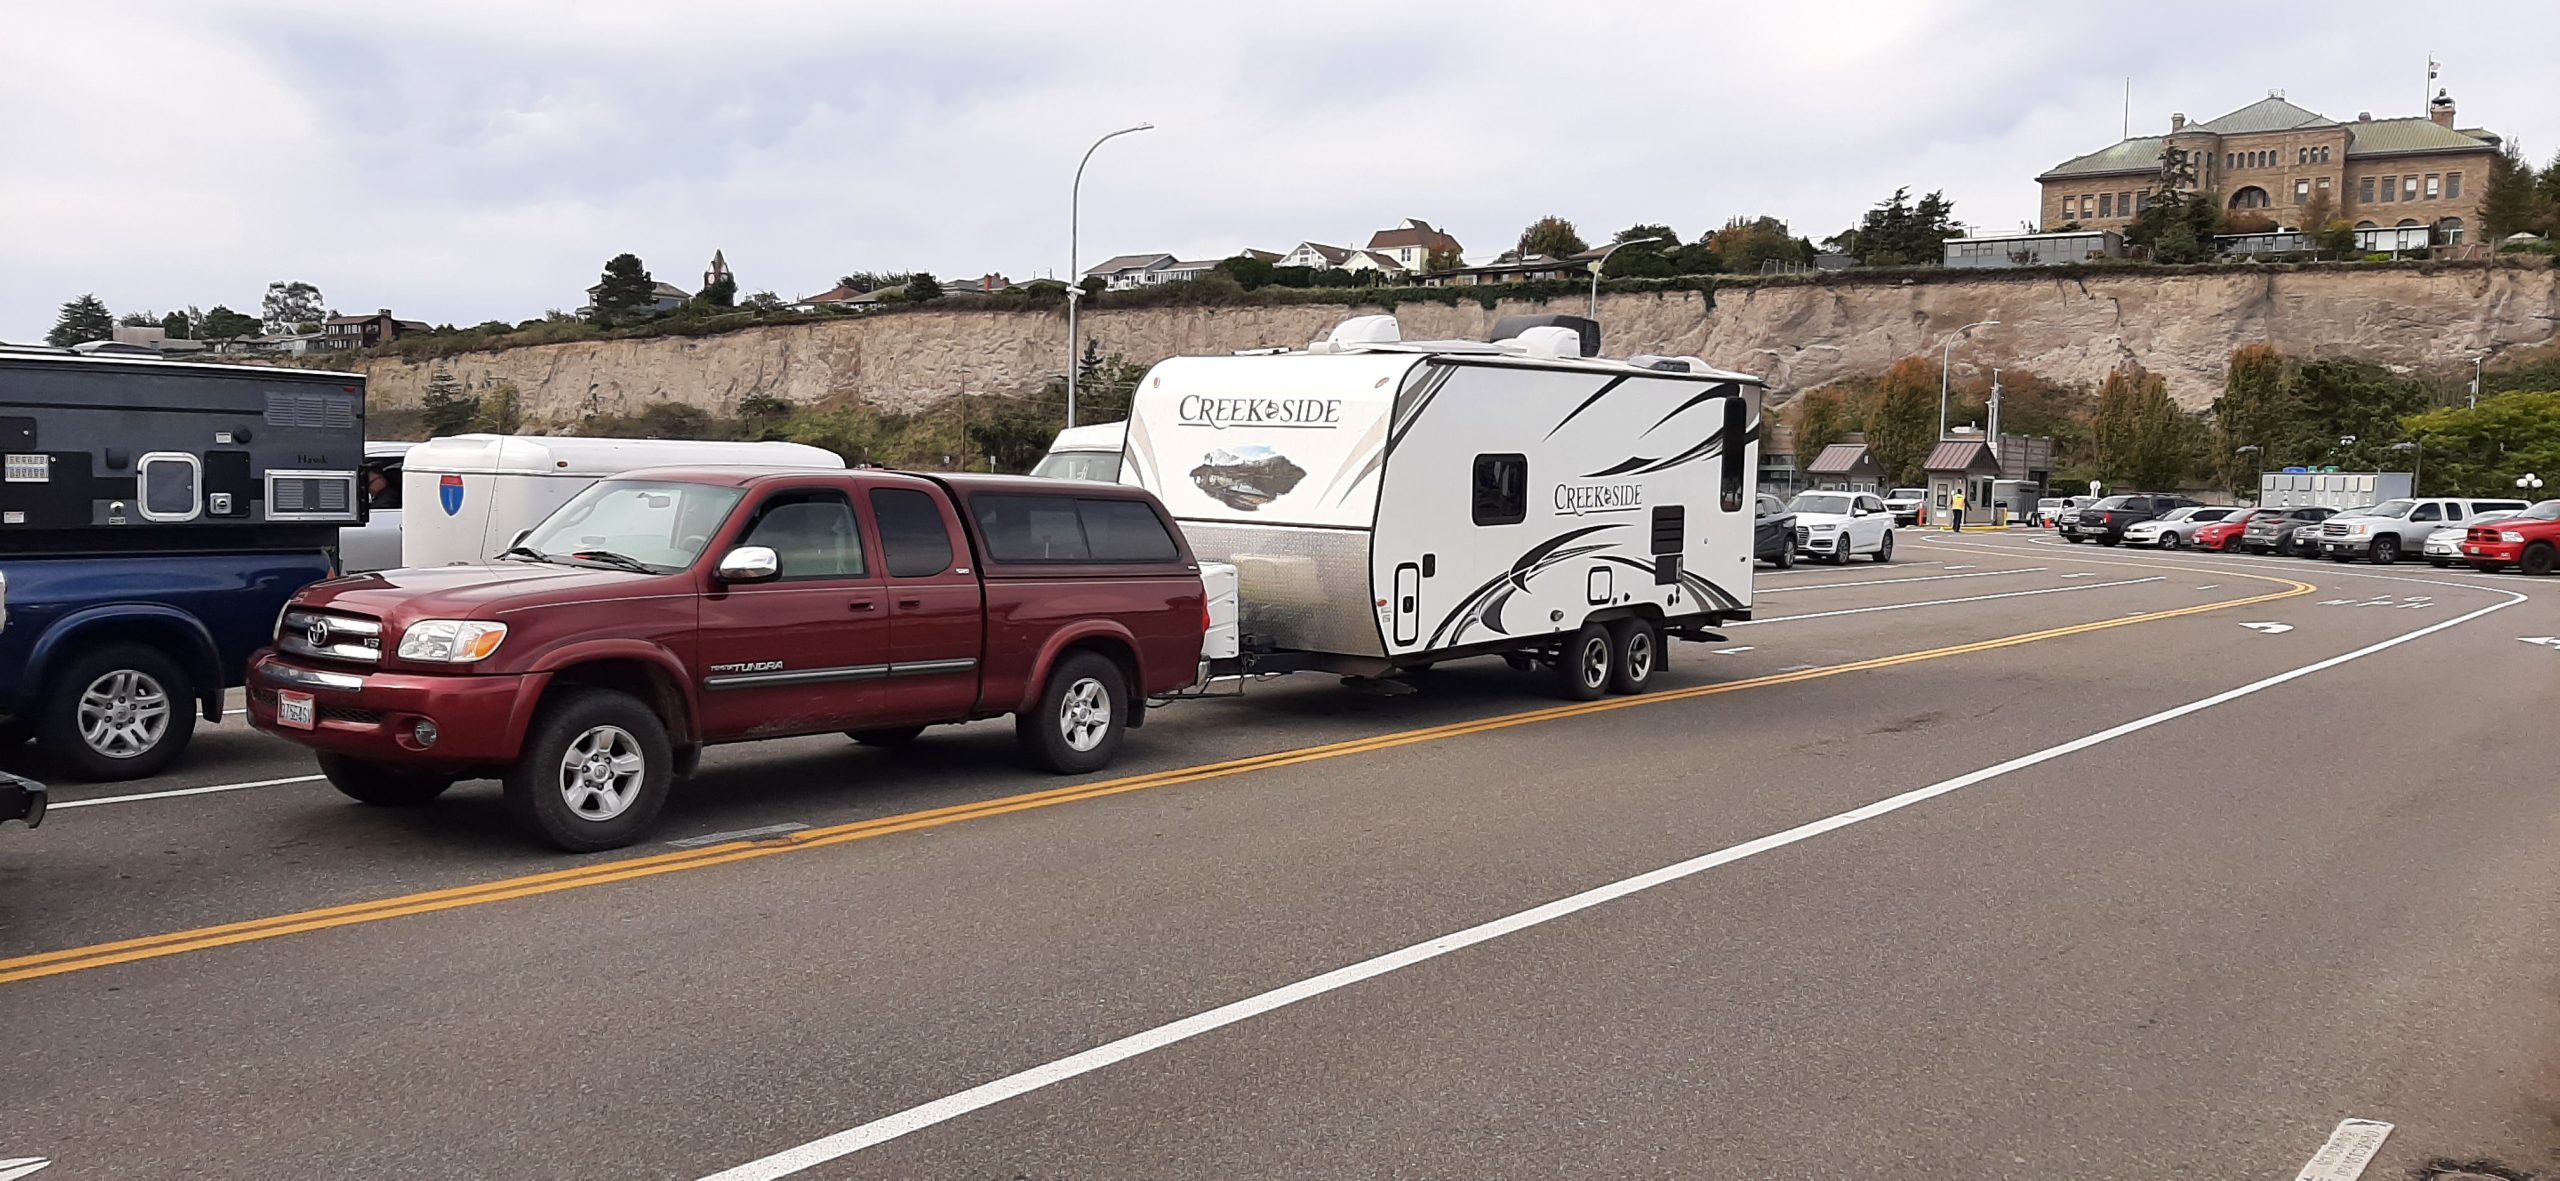
We had left plenty of time to reach Port Townsend for our 2:00 pm sailing to Coupeville so we had lunch at a small Mexican restaurant before getting in line. With full tummies we got in line, and after boarding had an uneventful crossing.
In line to board the ferry.
After dispensing with ferry travel for the foreseeable future, we disembarked the vessel and enjoyed an easy and well-known drive to our trailer storage facility.
We cleared the trailer of essentials – perishables, our pillows, toiletries and pills, computers, books, and a clean pair of underwear each. The rest we left for the next couple of days because basically we were pooped. Plus, we just wanted to honker down with our kitties Max and Miles. And of course, an early to bed since Andy had a gig the next day.
All in all, a peaceful, lazy, delightful fall trip.
Thank you for coming along with us on our latest adventure.
Part 4 – Weirs Beach RV Resort, Victoria (Vancouver Island) British Columbia
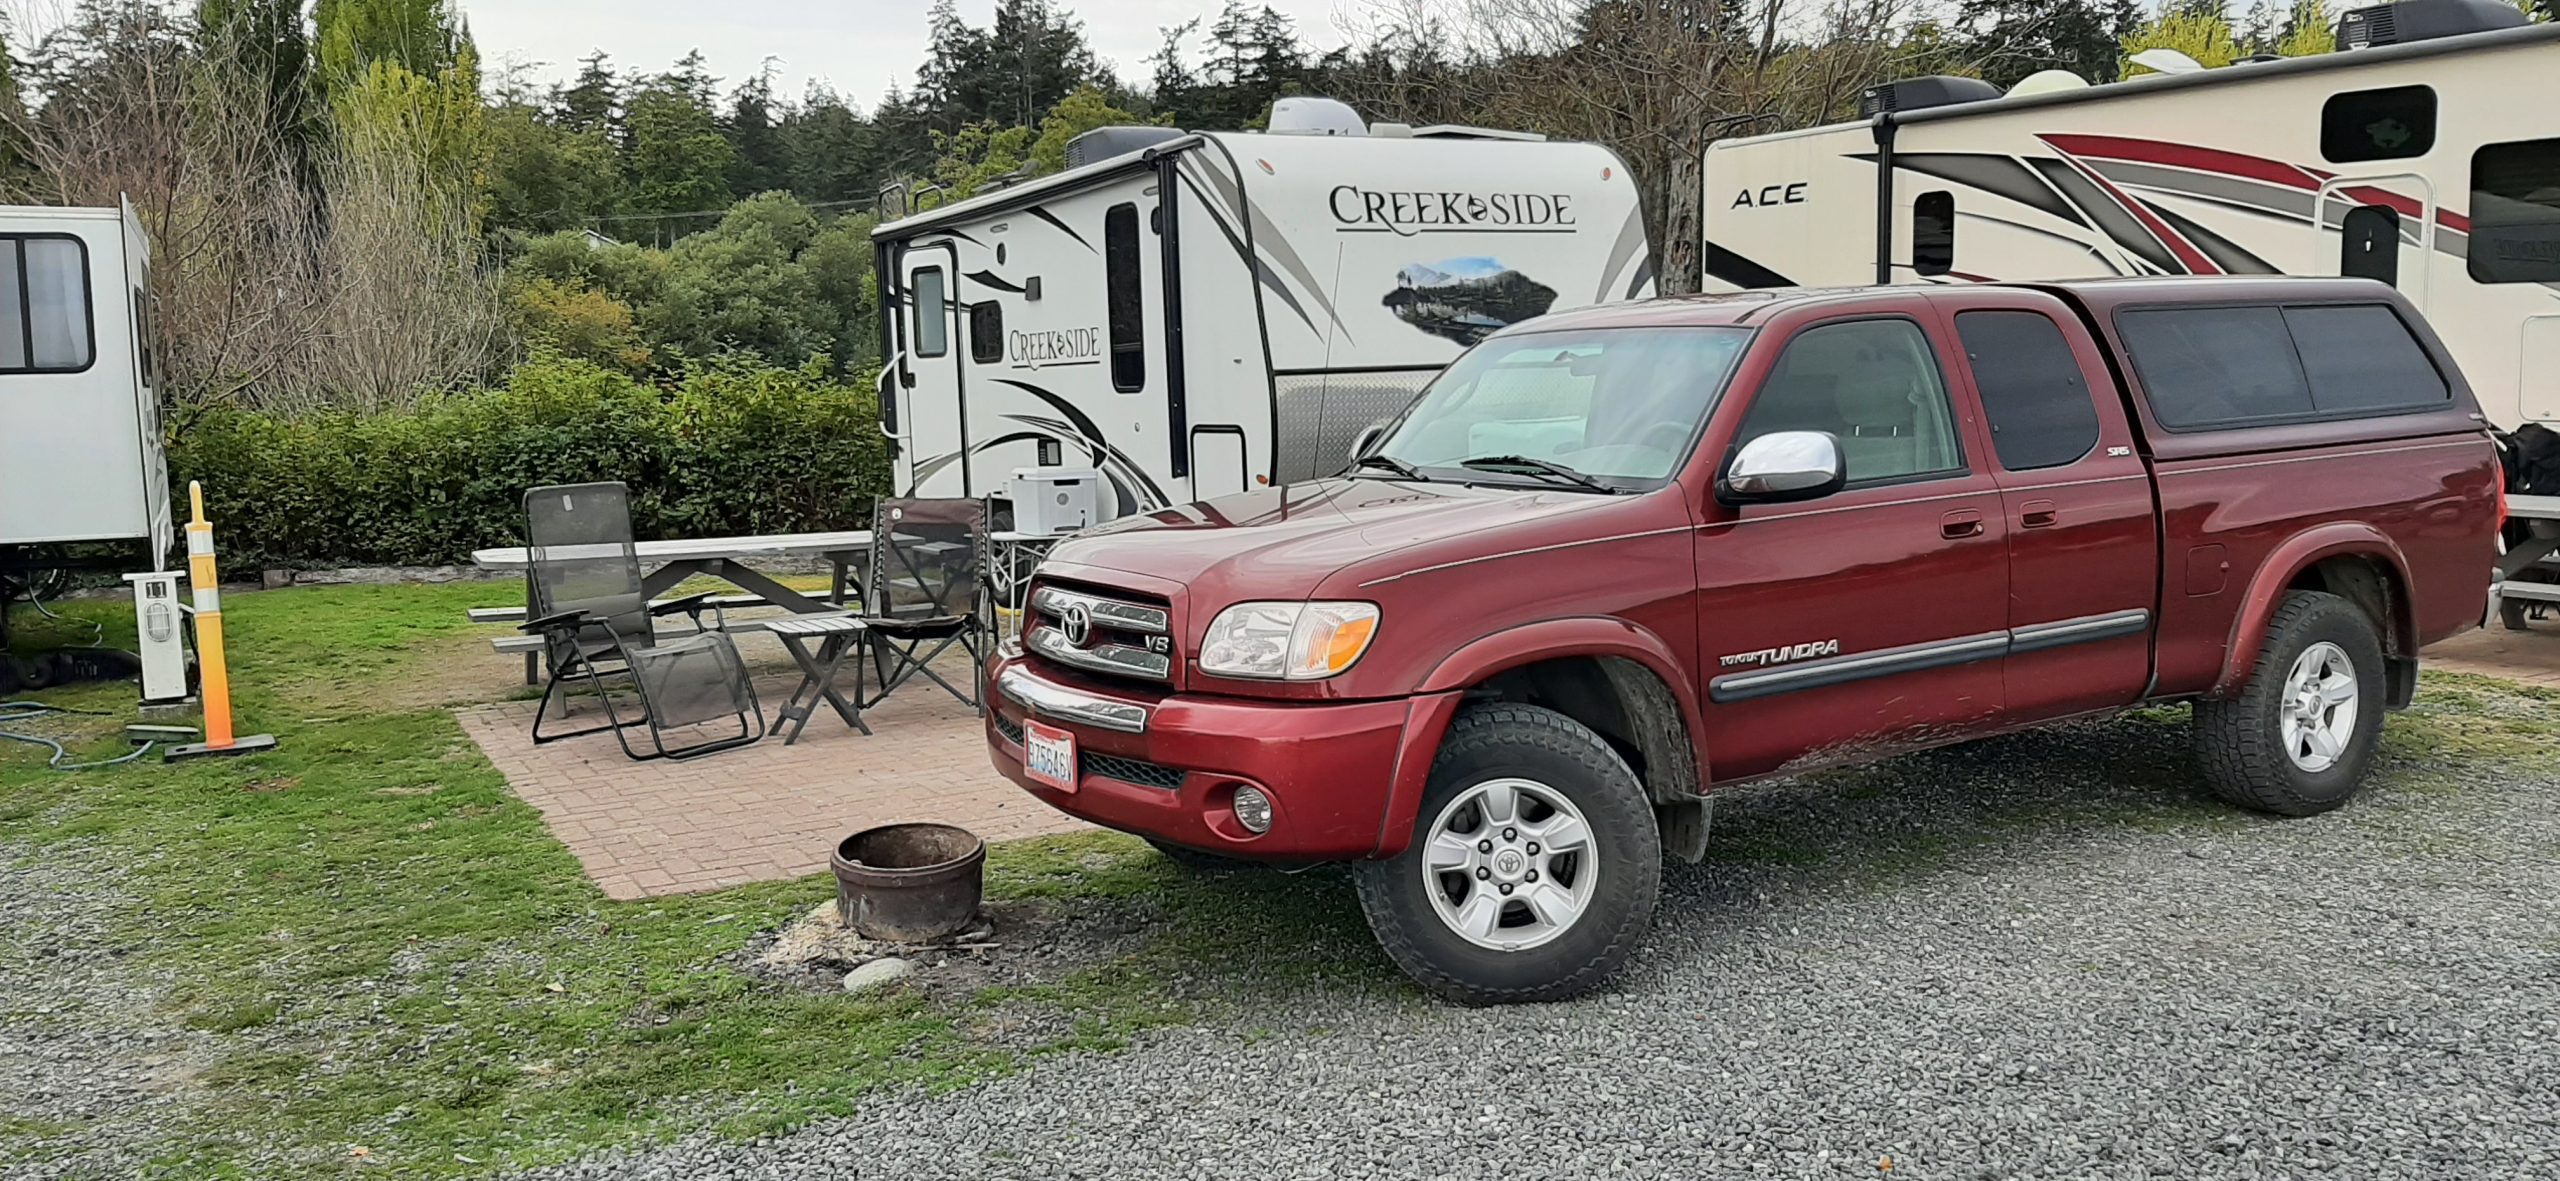
Saturday, September 21, 2024 – Weirs Beach RV Resort, Victoria (Vancouver Island) BC – site 10
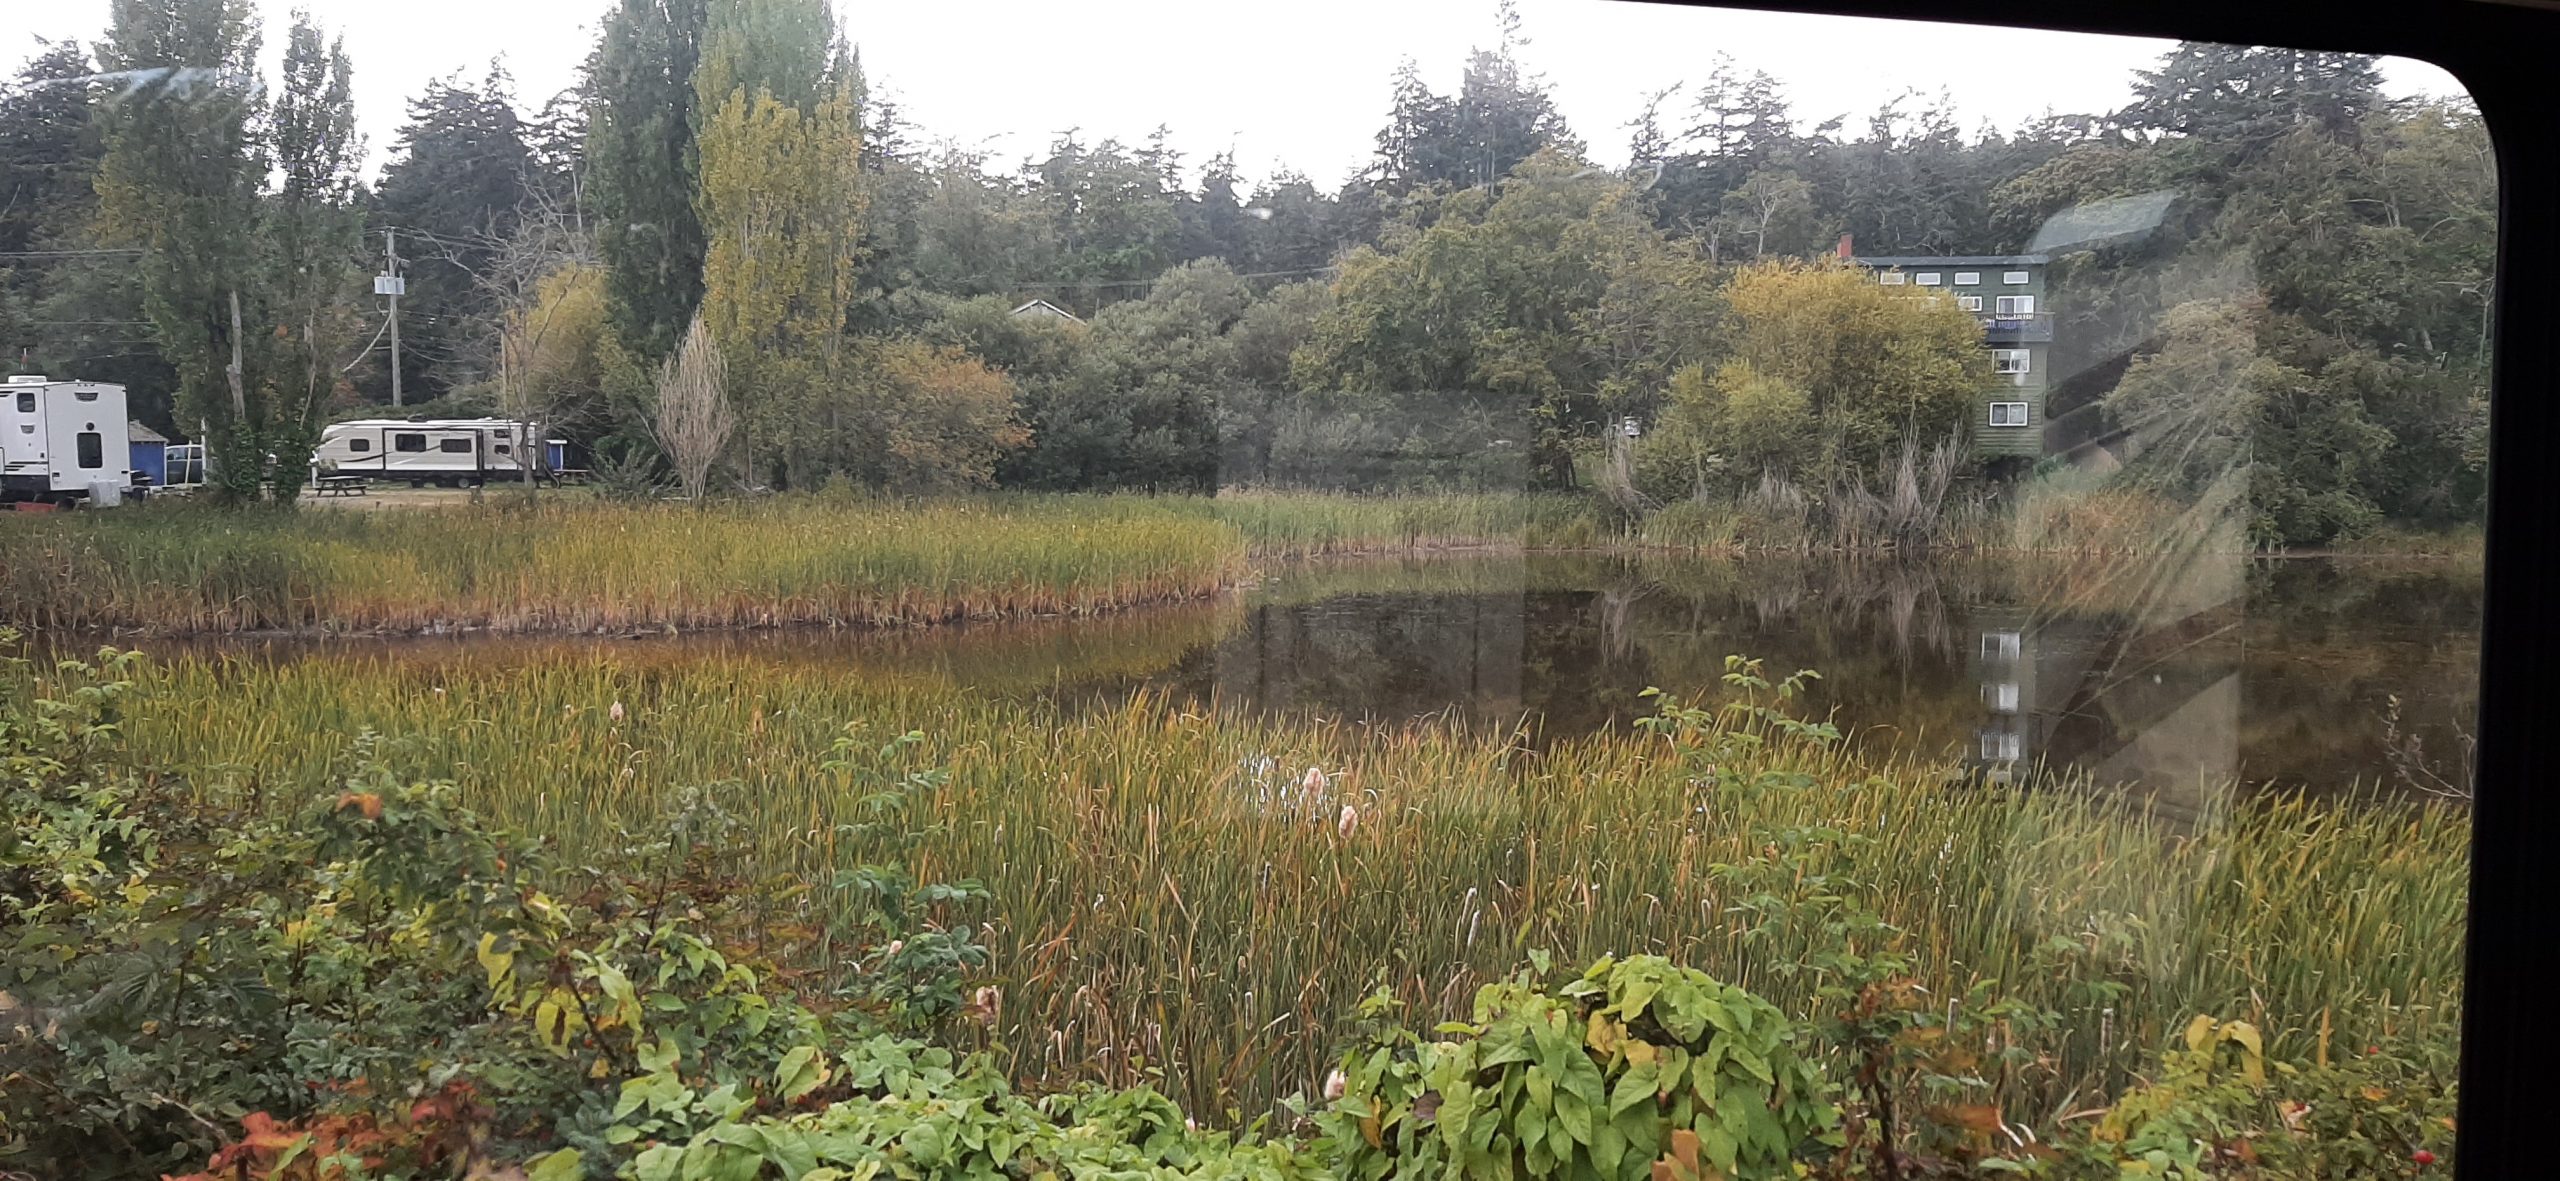
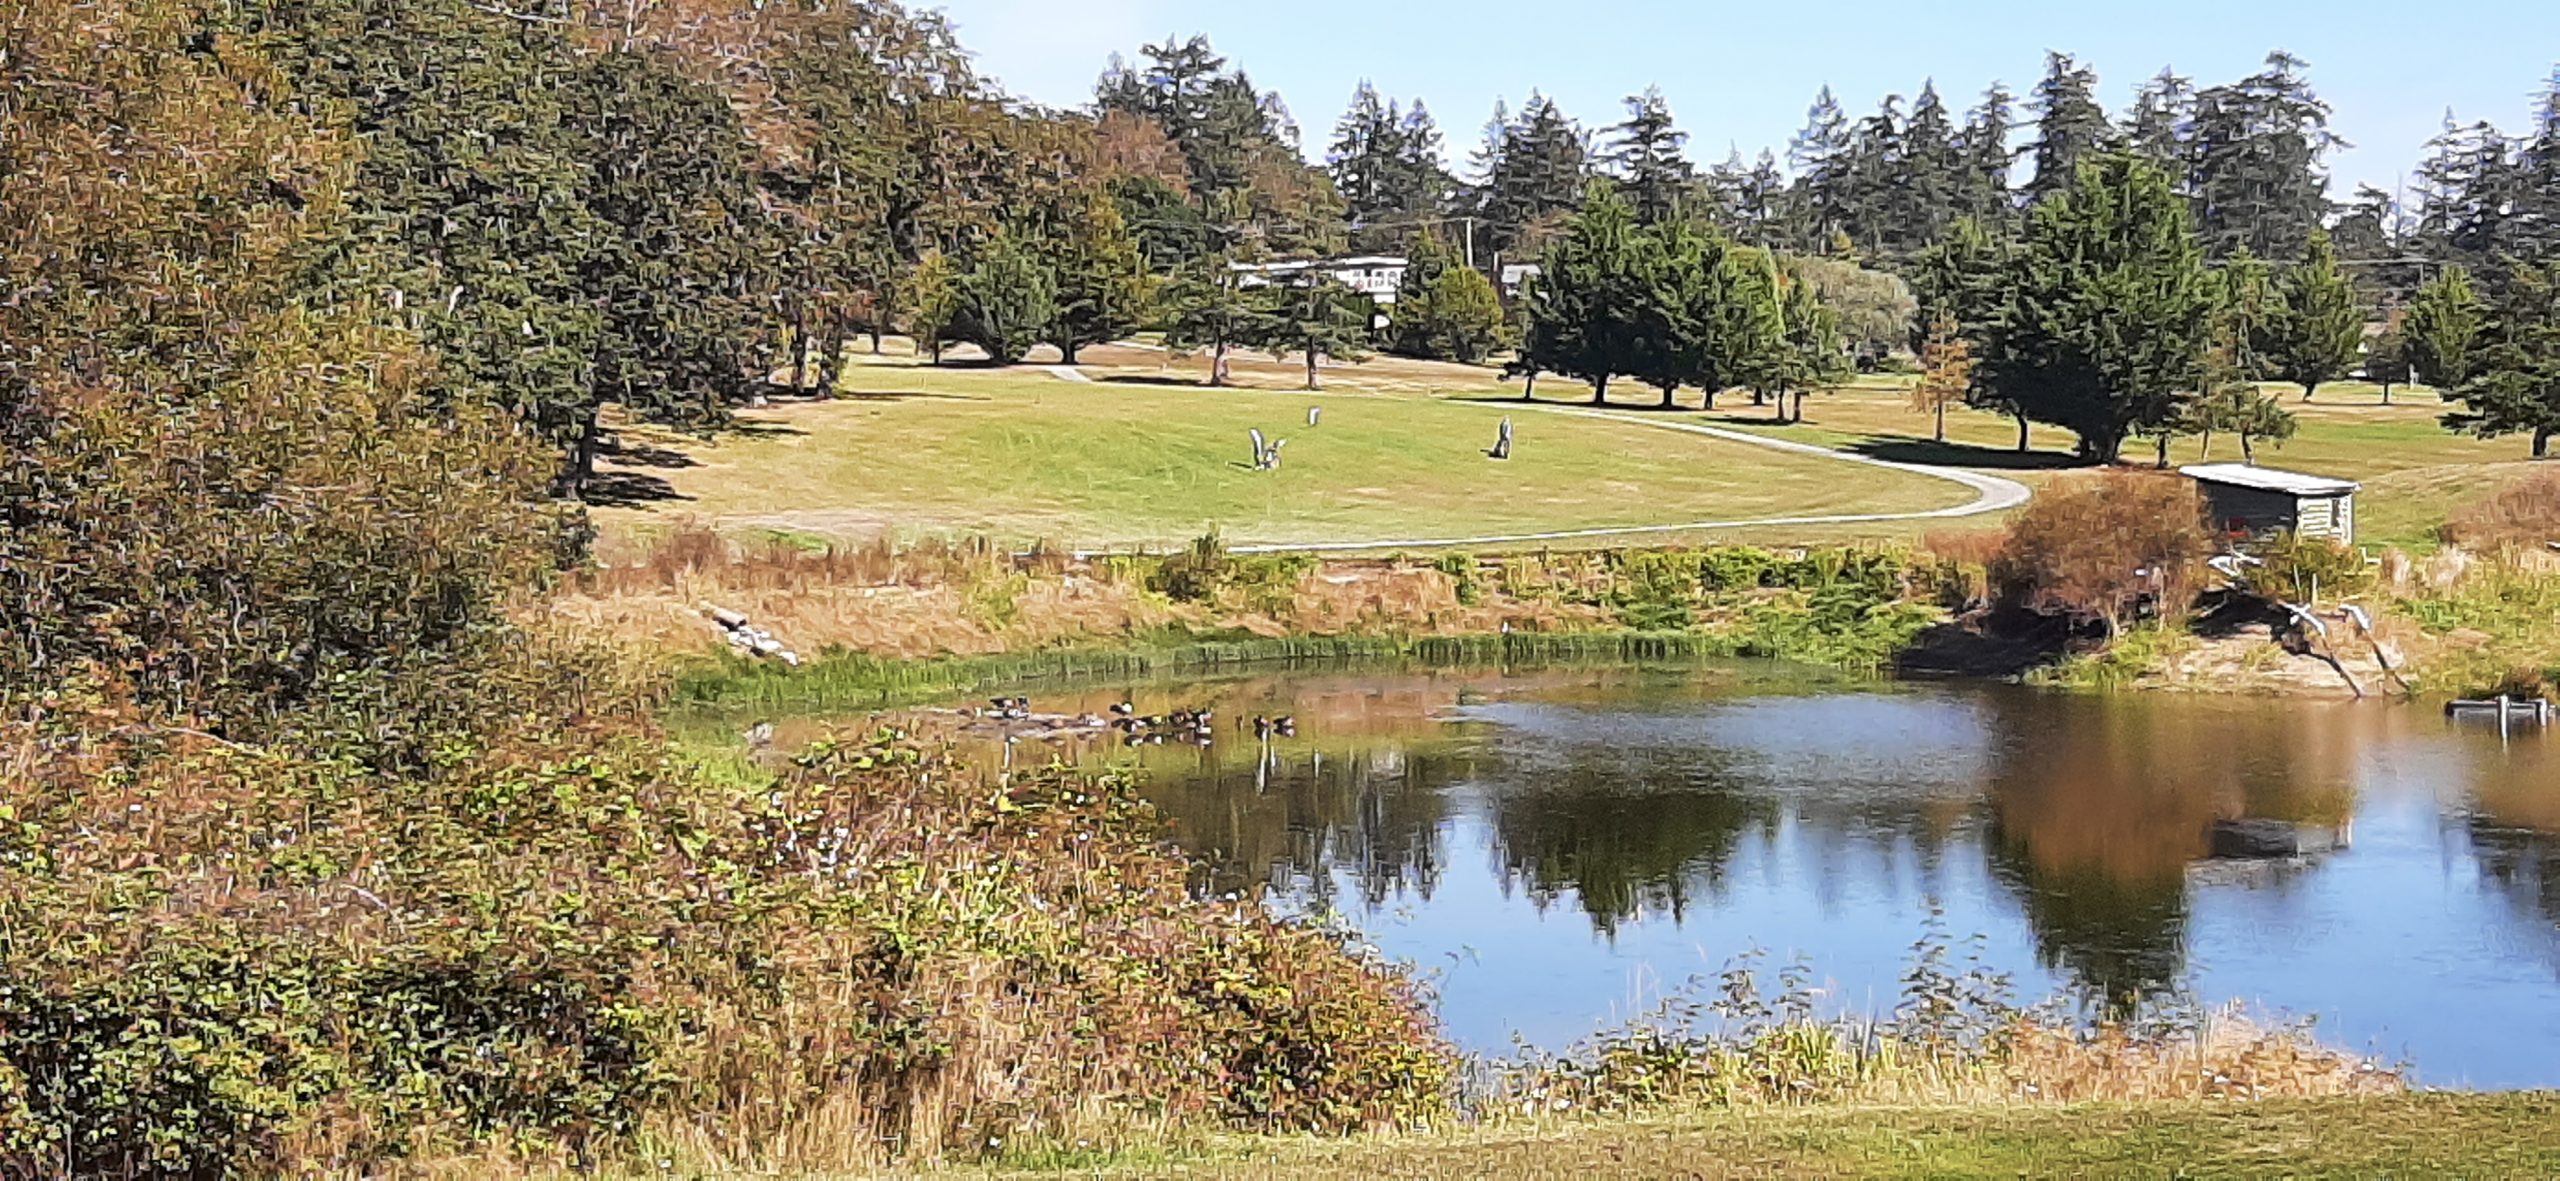
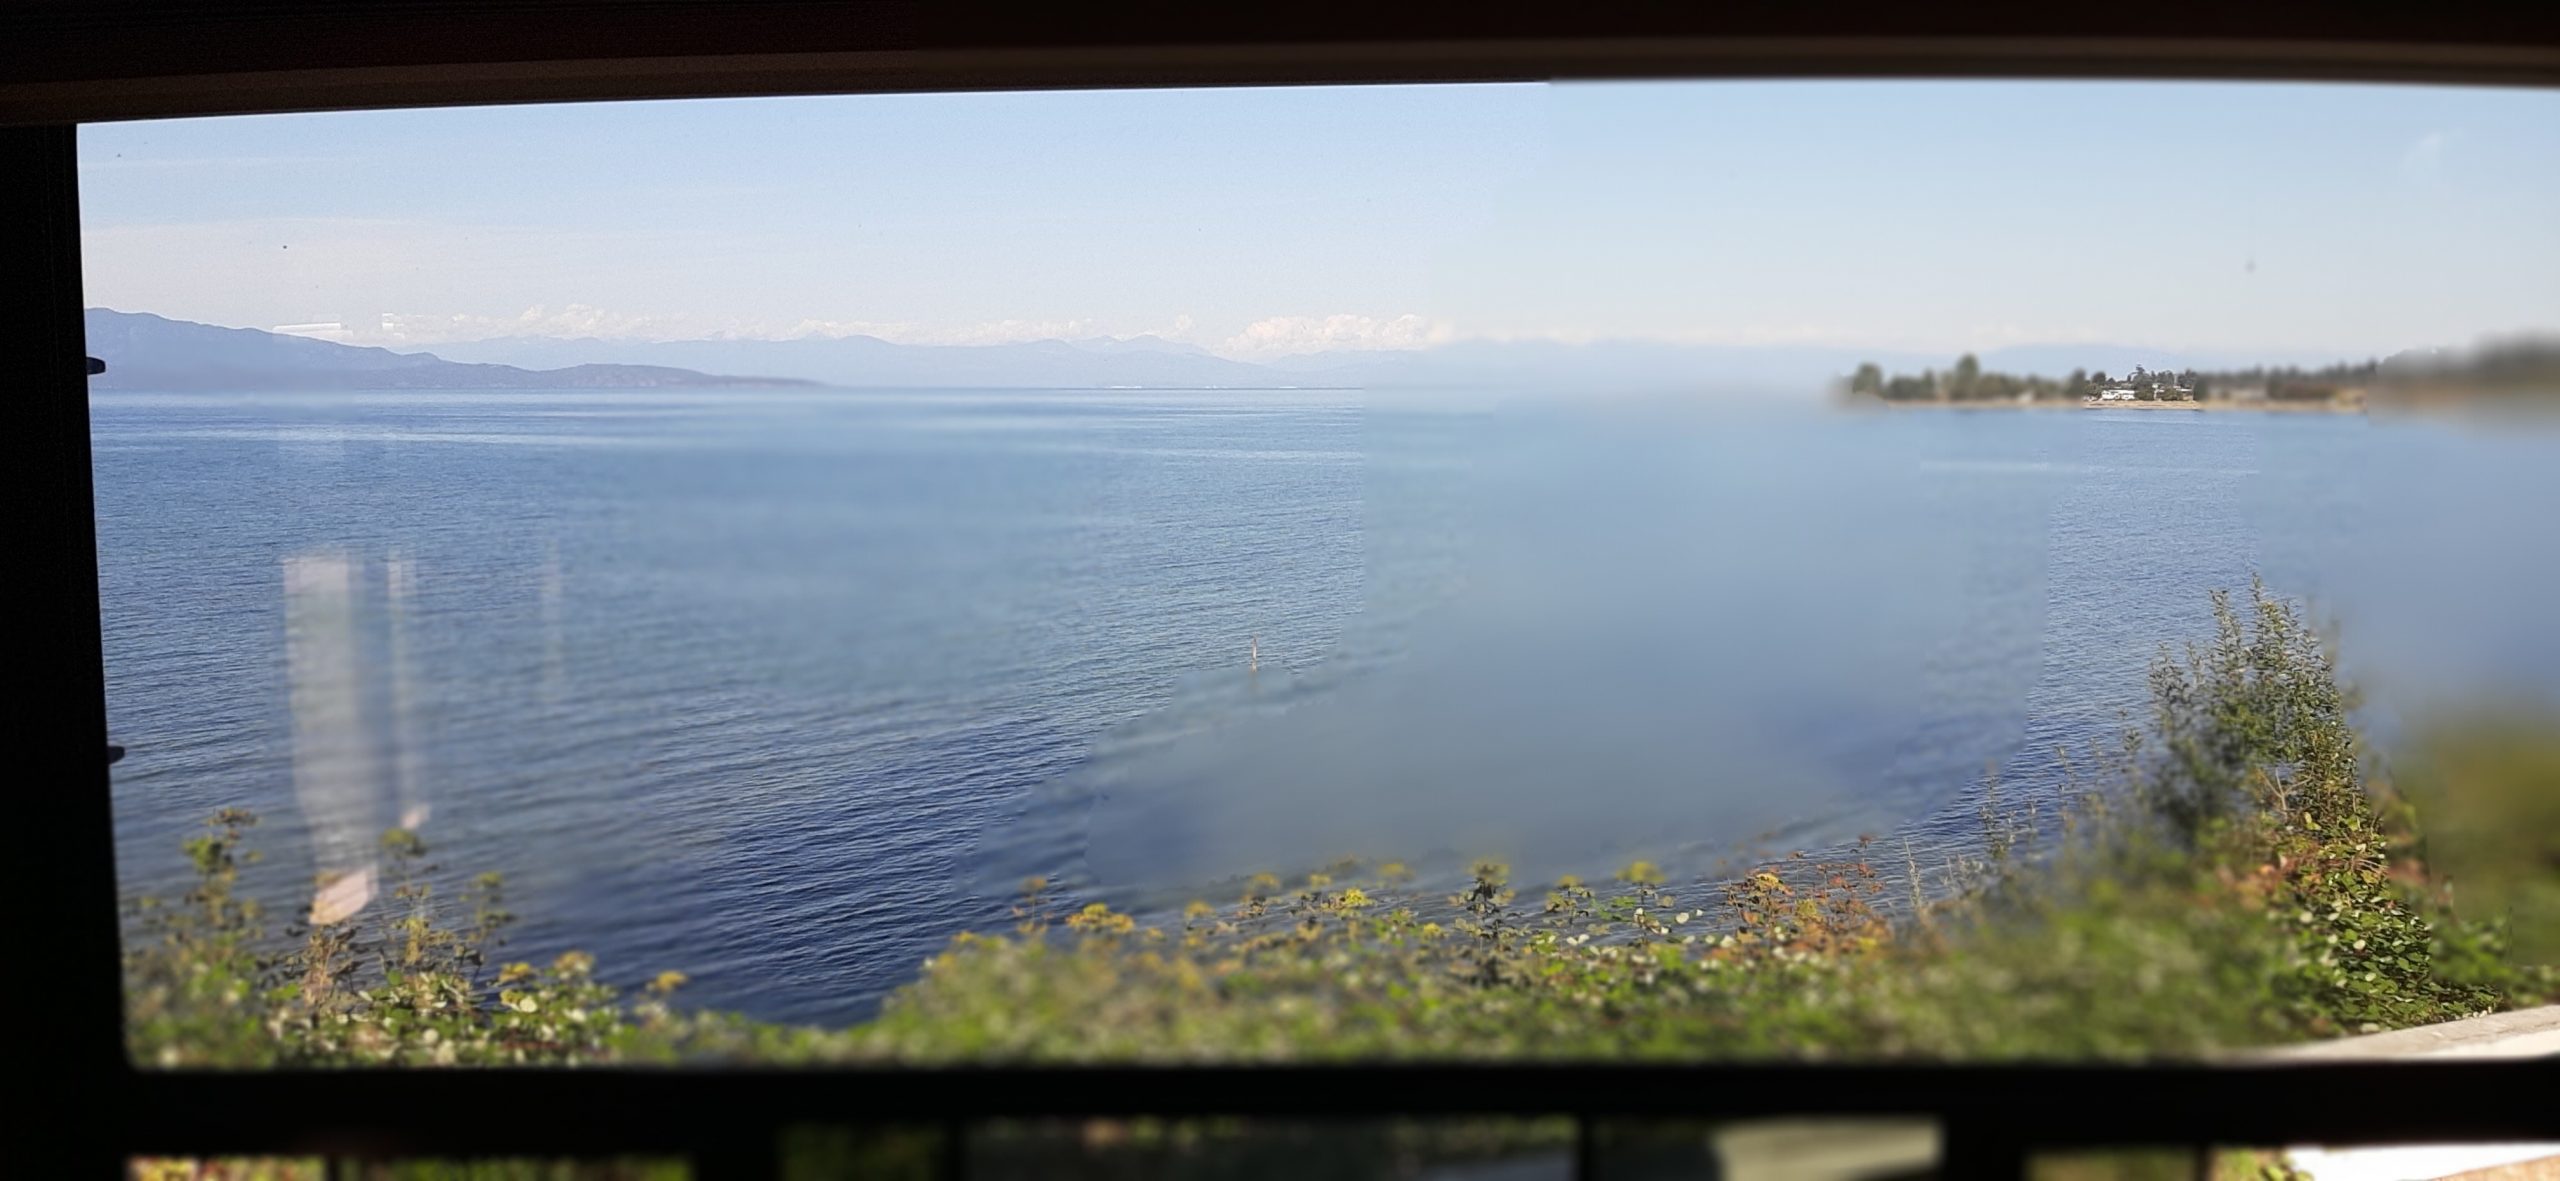
Our site backed up to a beautiful pond complete with ducks, geese, and a stately blue heron.
The pond through our back window.
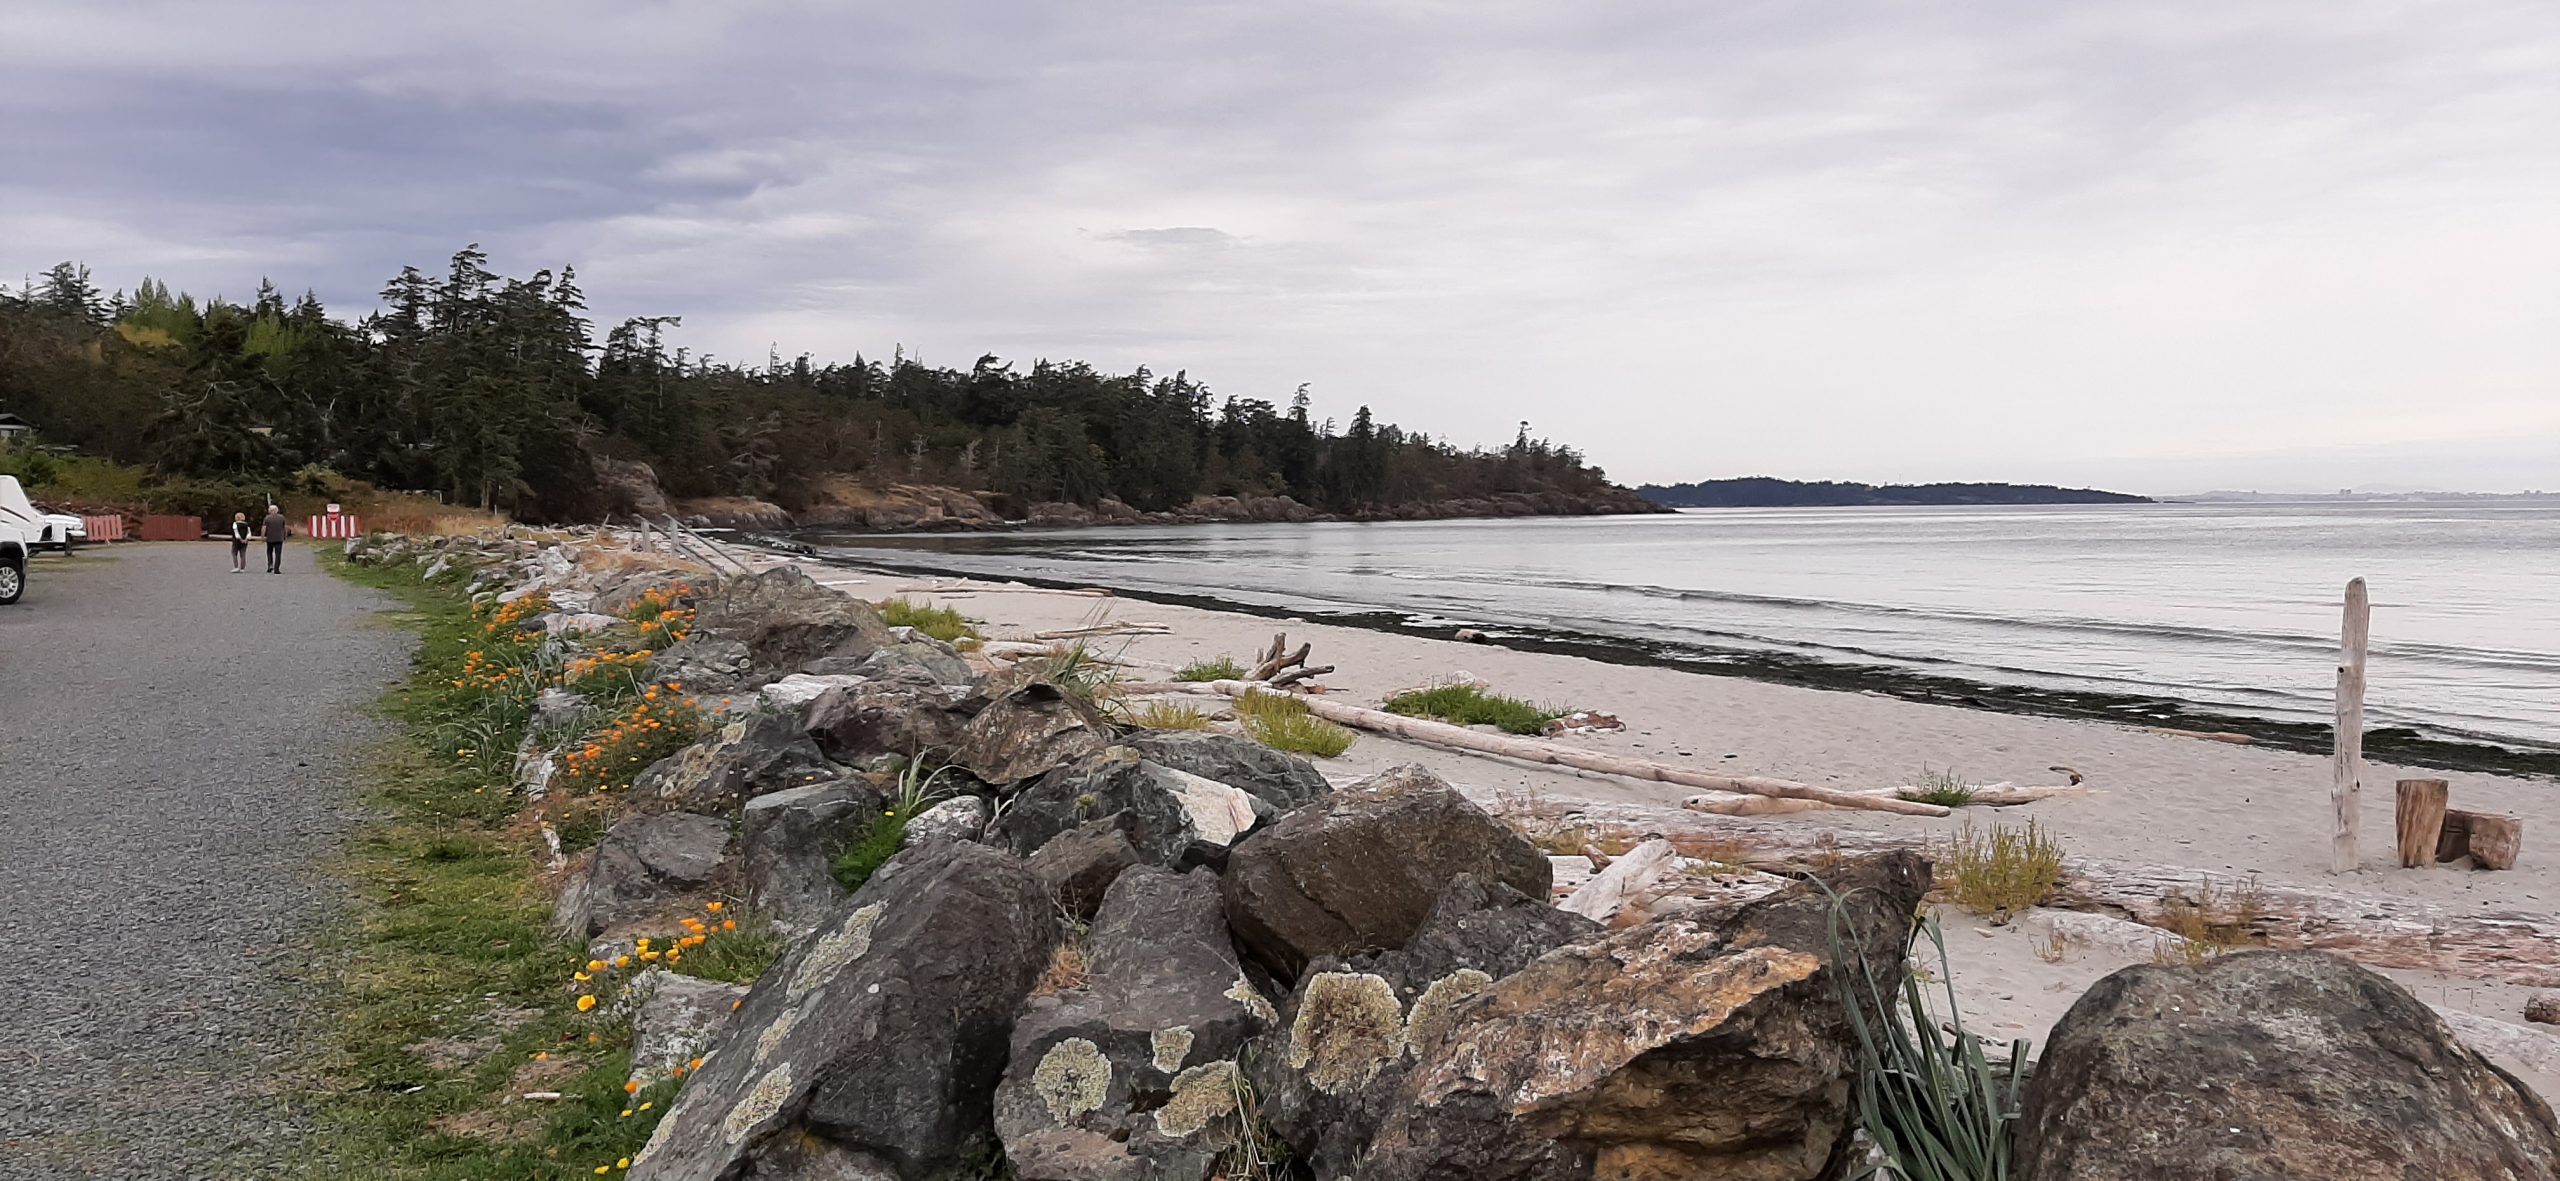
The beach just across from our trailer.
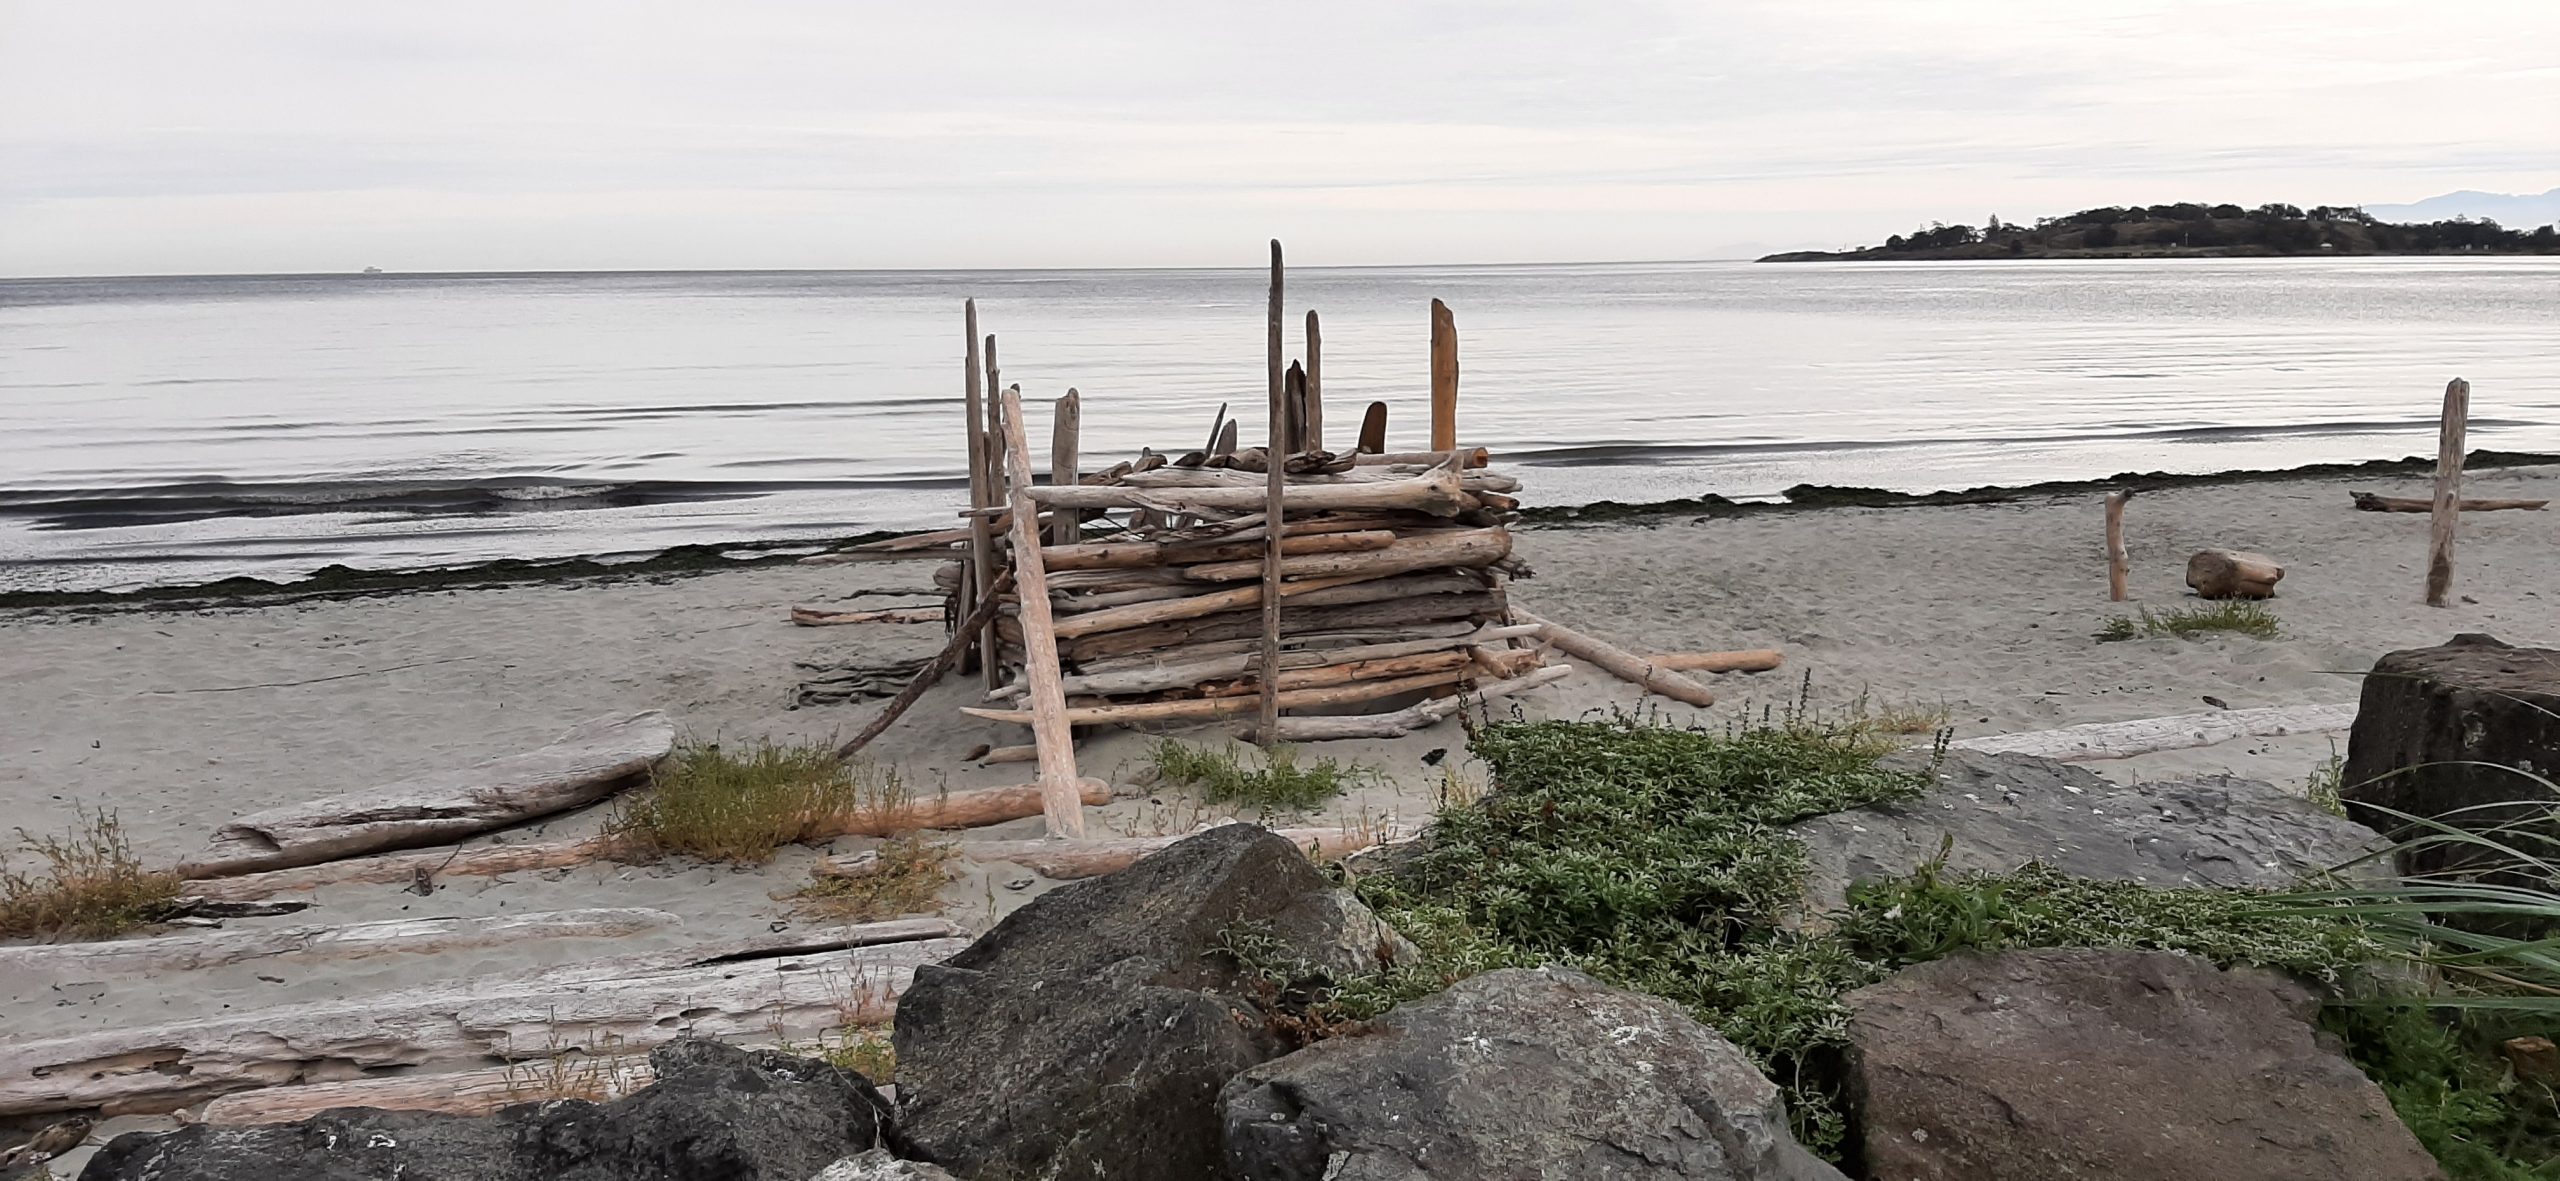
Our own driftwood fortress.
Got on the road by 10:00 am. Thought we would arrive at Weirs Beach by about 3:00 pm but instead didn’t arrive until 4:45 pm. And why the delay? Well of course we had to stop for a potty break. Then gas, then lunch. But the main reason we got into camp later than expected was because the main coast highway between Parksville and the turn off to the southern shore of Vancouver Island, has traffic lights every 10 yards. OK, not that frequent, but when you are trying to get from point A to point B, it sure seemed like it!
And then, after passing the small burg of Crofton where we had landed by ferry from Salt Spring Island, we were completely dumbfounded at what we found. Neither of us had ever traveled from this point south to Victoria. (Or north for that matter!) So, instead of a 4-lane highway, it was a windy, slow, at sometimes 2 lane mountain road with of course the obligatory road construction. What? Weren’t we just a few klicks from a major city? How could the road be so rural appearing and like we were in the middle of freaking nowhere? Like I said – we were flabbergasted.
But finally, we were able to head southwest towards our destination. And even then, it felt like we were a thousand miles from civilization. Two lane roads with very poor signage. But Mr. C. couldn’t get lost if his life depended on it. He just instinctively knows how to find where he needs to go. Amazing.
And once again, I didn’t get behind the wheel. Too many places where the good drivers pulling a trailer that we are, pulled over to let other cars pass us. But the pull-outs were narrow and seemed totally too short and scary to me. So, poor Mr. C. did all the driving. And I must say, he was a very good sport about it. (But I still feel guilty.)
And then we got to camp. Right on the water with a beautiful sandy beach with our big back window facing away from the water. But it’s OK. We can sit on the beach that is barely a cars width from our trailer. And it’s quiet here. So, sleeping and relaxing will be the order of the days to come. Well, along with going into Victoria to visit the Royal BC Museum and Butchart Gardens, I may even try to twist Andy’s arm to take me to high tea at the Empress Hotel. The options are endless. I love Victoria.
Sunday, September 22, 2024 – Weirs Beach RV Resort
After a late breakfast, we decided today was perfect for a ride. Since neither of us had been on the southern shore of Vancouver Island (VI), except for Victoria itself, we felt duty bound to go west Mr. and Mrs. Carr, go west.
So, at about 11:30 am we hopped in our truck and headed for Sooke. Of course, along the way we took various offshoot roads because, after all, we were exploring. First stop – Rocky Point. And if ever a place was properly named, Rocky Point is it! But then, every place name on the entire southern coast of VI should start with Rocky. Rocky Metchosin, Rocky East Sooke, Rocky Sooke, and even Rocky Jordan River. Because I have never seen such hilly, rocky landscape in my life. The fact that any animal can actually live off this land is amazing to me. Yet there are signs to watch out for deer, bear, and wolves all along the road, and I do mean road (singular), because there is only one paved road in this area. What could these poor critters possibly be finding to eat? Boggles the mind! And as far as 2 legged critters, there’s not much for us to eat along the way either. Very few dining establishments. Our next main diversion was to leave Rocky Point Road and turn left onto Sooke Road and head to East Sooke. Nothing really there, except a magnificent view of the waterway into Sooke.
So, finding ourselves at a dead end, we turned around and headed north on Gillespie Road until we turned west on highway 14 and on into the tiny burg of Sooke. But before actually going through Sooke, we turned right (north) to follow the Sooke River Road to check out Sooke Potholes Regional Park. Due to a wildfire located north of Sooke Potholes Park in July of this year, the park was closed until further notice. But it was still a lovely ride as far as we could go. Then back to Sooke and on west to Jordan River. Which of course we just had to cross. Because the Jordan River has since biblical times been imbued with powerful symbolic meanings: it is a boundary and a crossing point, a metaphor for spiritual rebirth and salvation, and a source of holy water.
Now I’m pretty sure the “Jordan River” referenced in the bible is not now nor has it ever been in British Columbia. But it’s never smart to ignore every opportunity to hedge your bets! So, after crossing the river we immediately turned around and crossed it again. It’s called double indemnity.
But the real reason we turned around was because we were starving. And a few klicks back we had seen a sign for Stoked Wood Fired Pizza. Well, by golly, we ate every bit of our Spicy Pepperoni pizza. In fact, the box it came in was almost in jeopardy.
After filling our tummies, it was back to the trailer for a bit of a read outside. For me that lasted about 5 minutes because it was a little bit too cold for my taste. So, inside and onto writing today’s trip report. About 6:00 pm Andy decided he’d had enough nature for the day and came inside to prepare our evening libation. And that’s where I will close for now. Happily sipping a martini while Andy enjoys his Manhattan. M & M’s a pair.
After dinner, more of the same. Read, write, sleep. Not a bad trio.
Monday, September 23, 2024 – Weirs Beach RV Resort
OK, I was awake several hours last night. FOR NO GOOD REASON. If I was anxious about something or didn’t feel well, then I would understand my new tendency towards periodic insomnia. But nothing was bothering me, and I felt just fine. I had heard that sometimes older folks can’t sleep as well as they did when they were younger, but I never thought it would happen to me. (I never counted on wrinkles either, but I’m starting to look like a dried-up prune!) (But that’s neither here nor there.) (Shit just happens!)
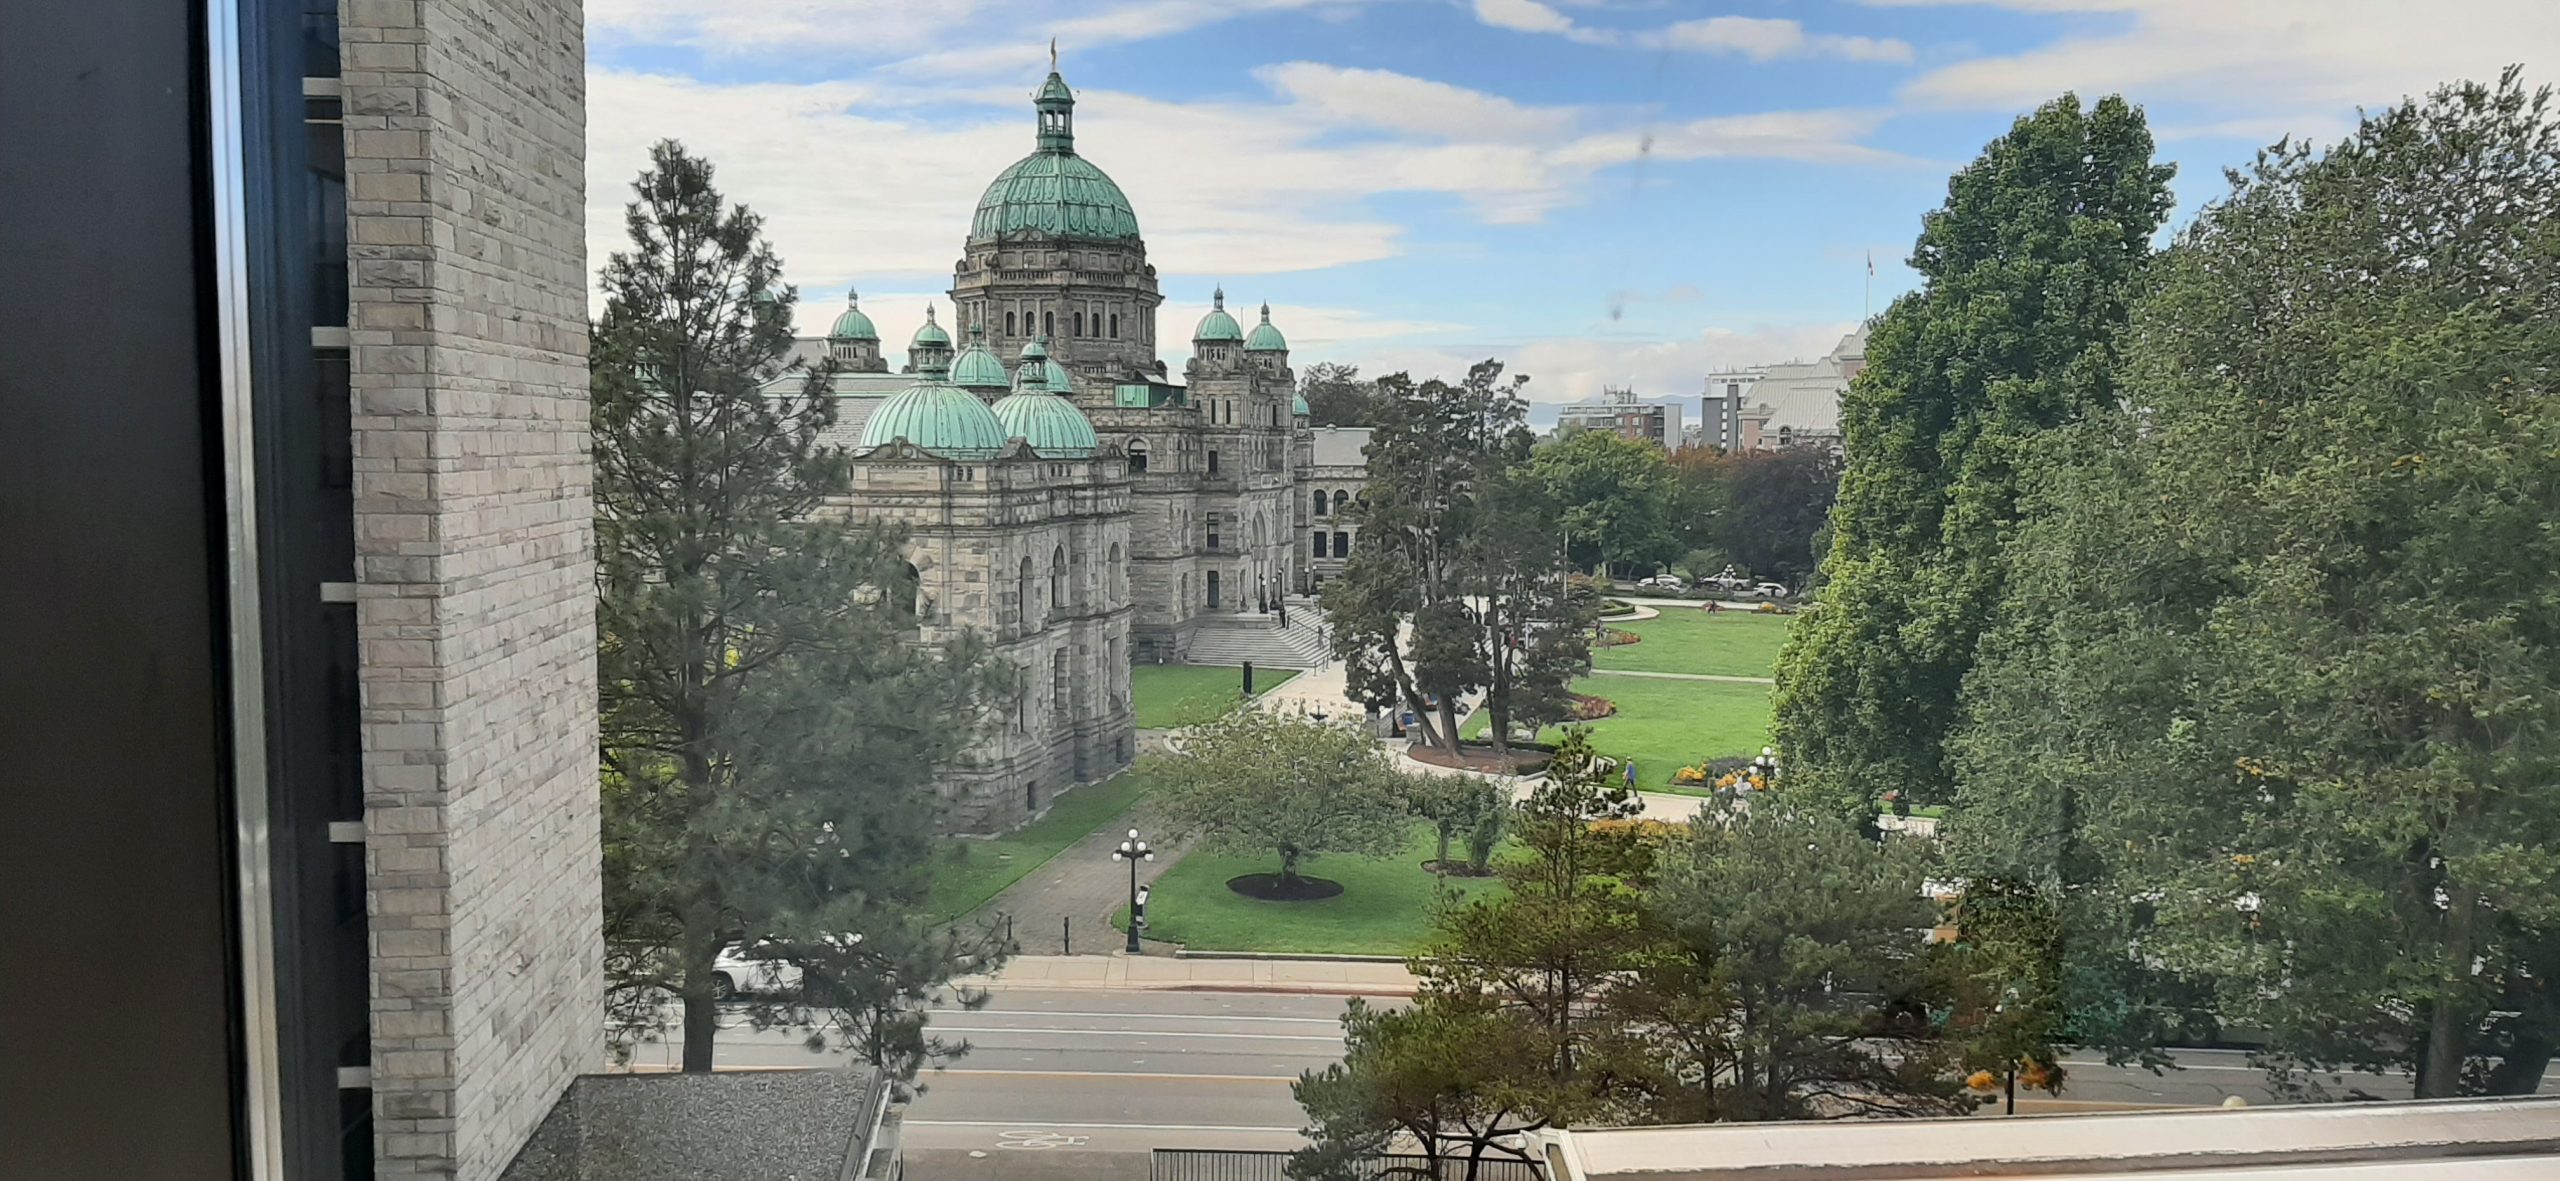
Anyway, I slept in a bit longer than I had planned, so we didn’t leave for Victoria until about 11:30 am. Today’s agenda consisted of the Royal BC Museum. So, after parking about 4 blocks from the museum, my legs were so tired by the time we got to the museum, that I was ready to turn around and come back to the trailer. But once I got into the museum, I was raring to go.
Because I love this museum, and it had been too many years since my last visit. But just as Andy was getting in line to buy our tickets, we read that the IMAX theater was about to screen a documentary on Blue Whales. So, we decided to watch that first before going through the museum. (Plus, I could rest my weary legs before strolling through the museum.) And boy oh boy was Blue Whales an interesting and educational production. We both loved it. Next, we toured the museum. But first, 3 views of Victoria from the top floor of the museum.
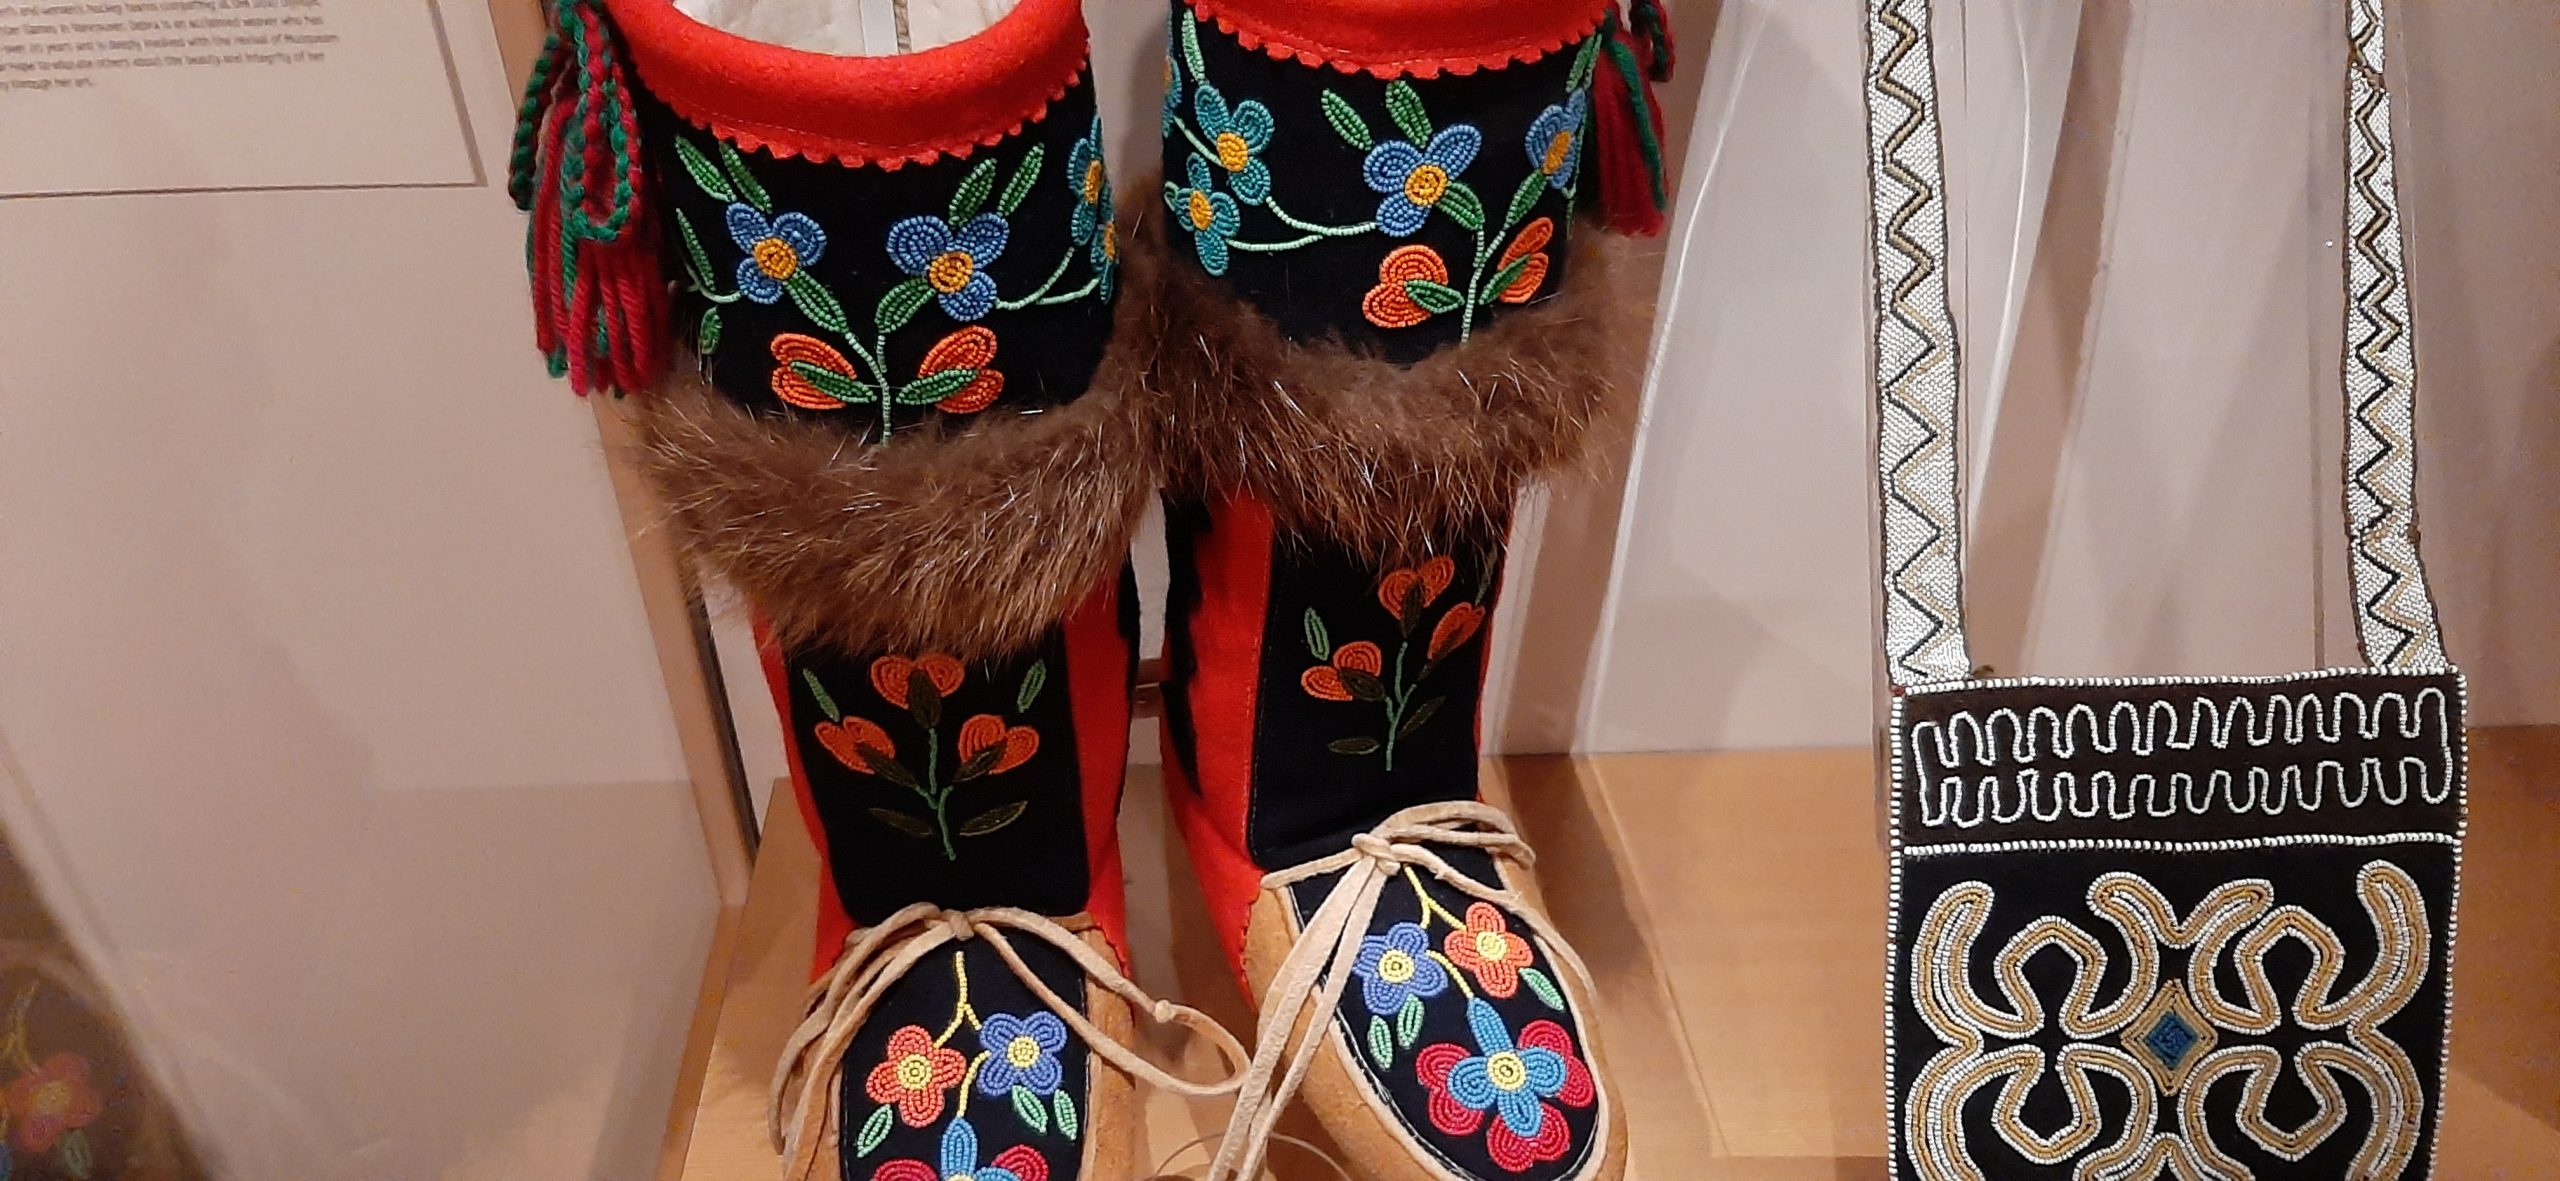
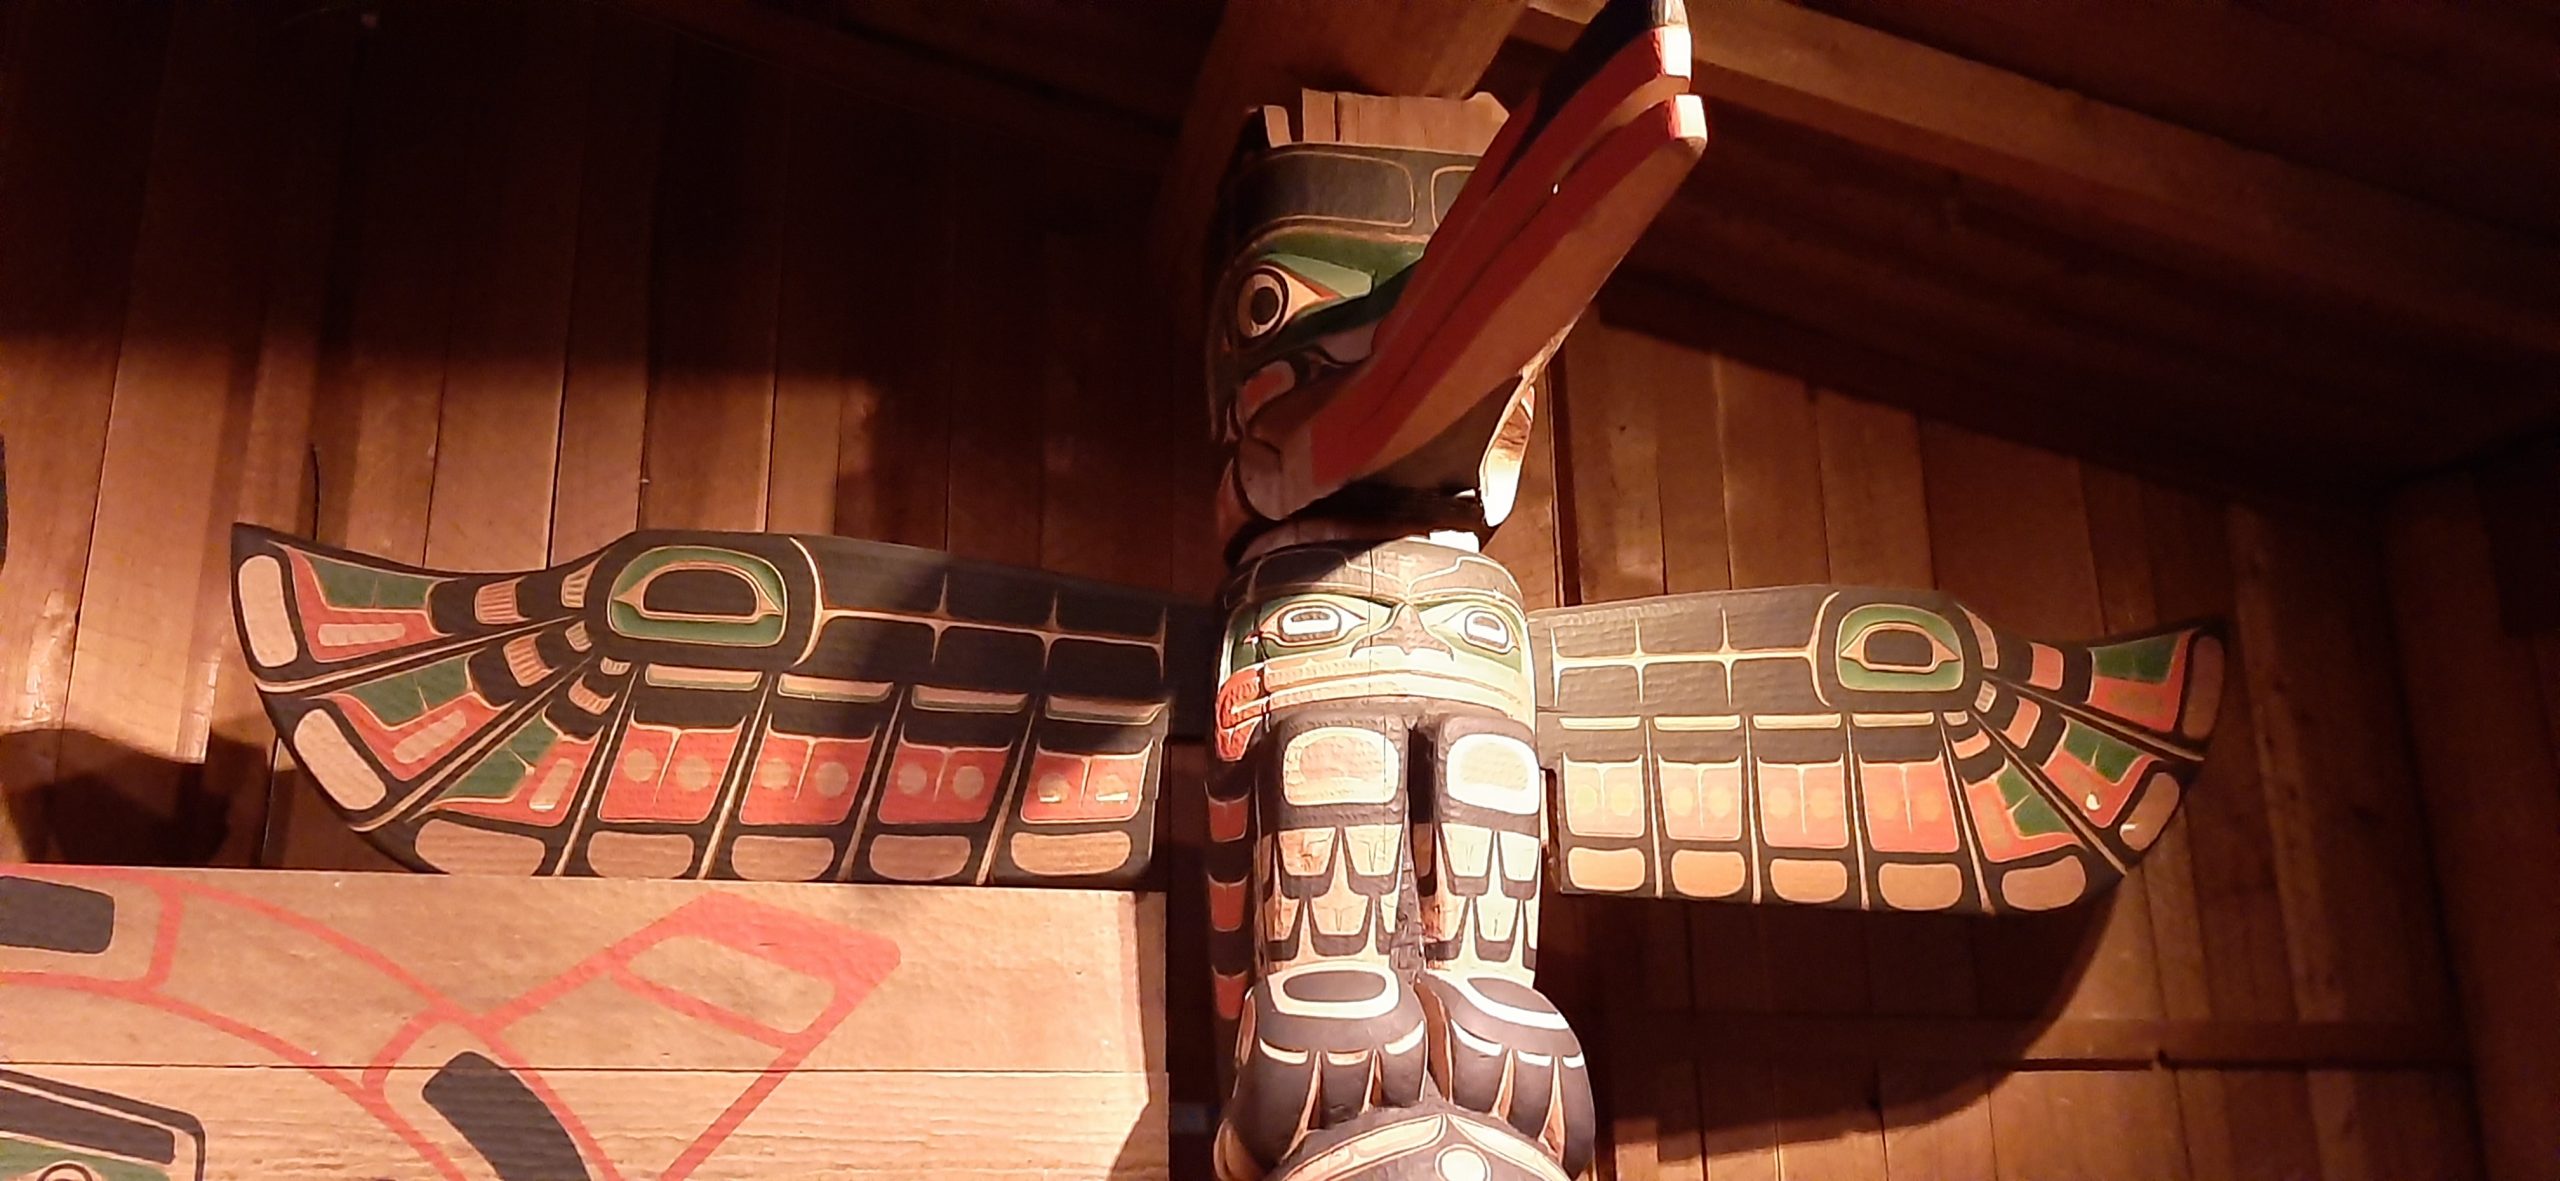
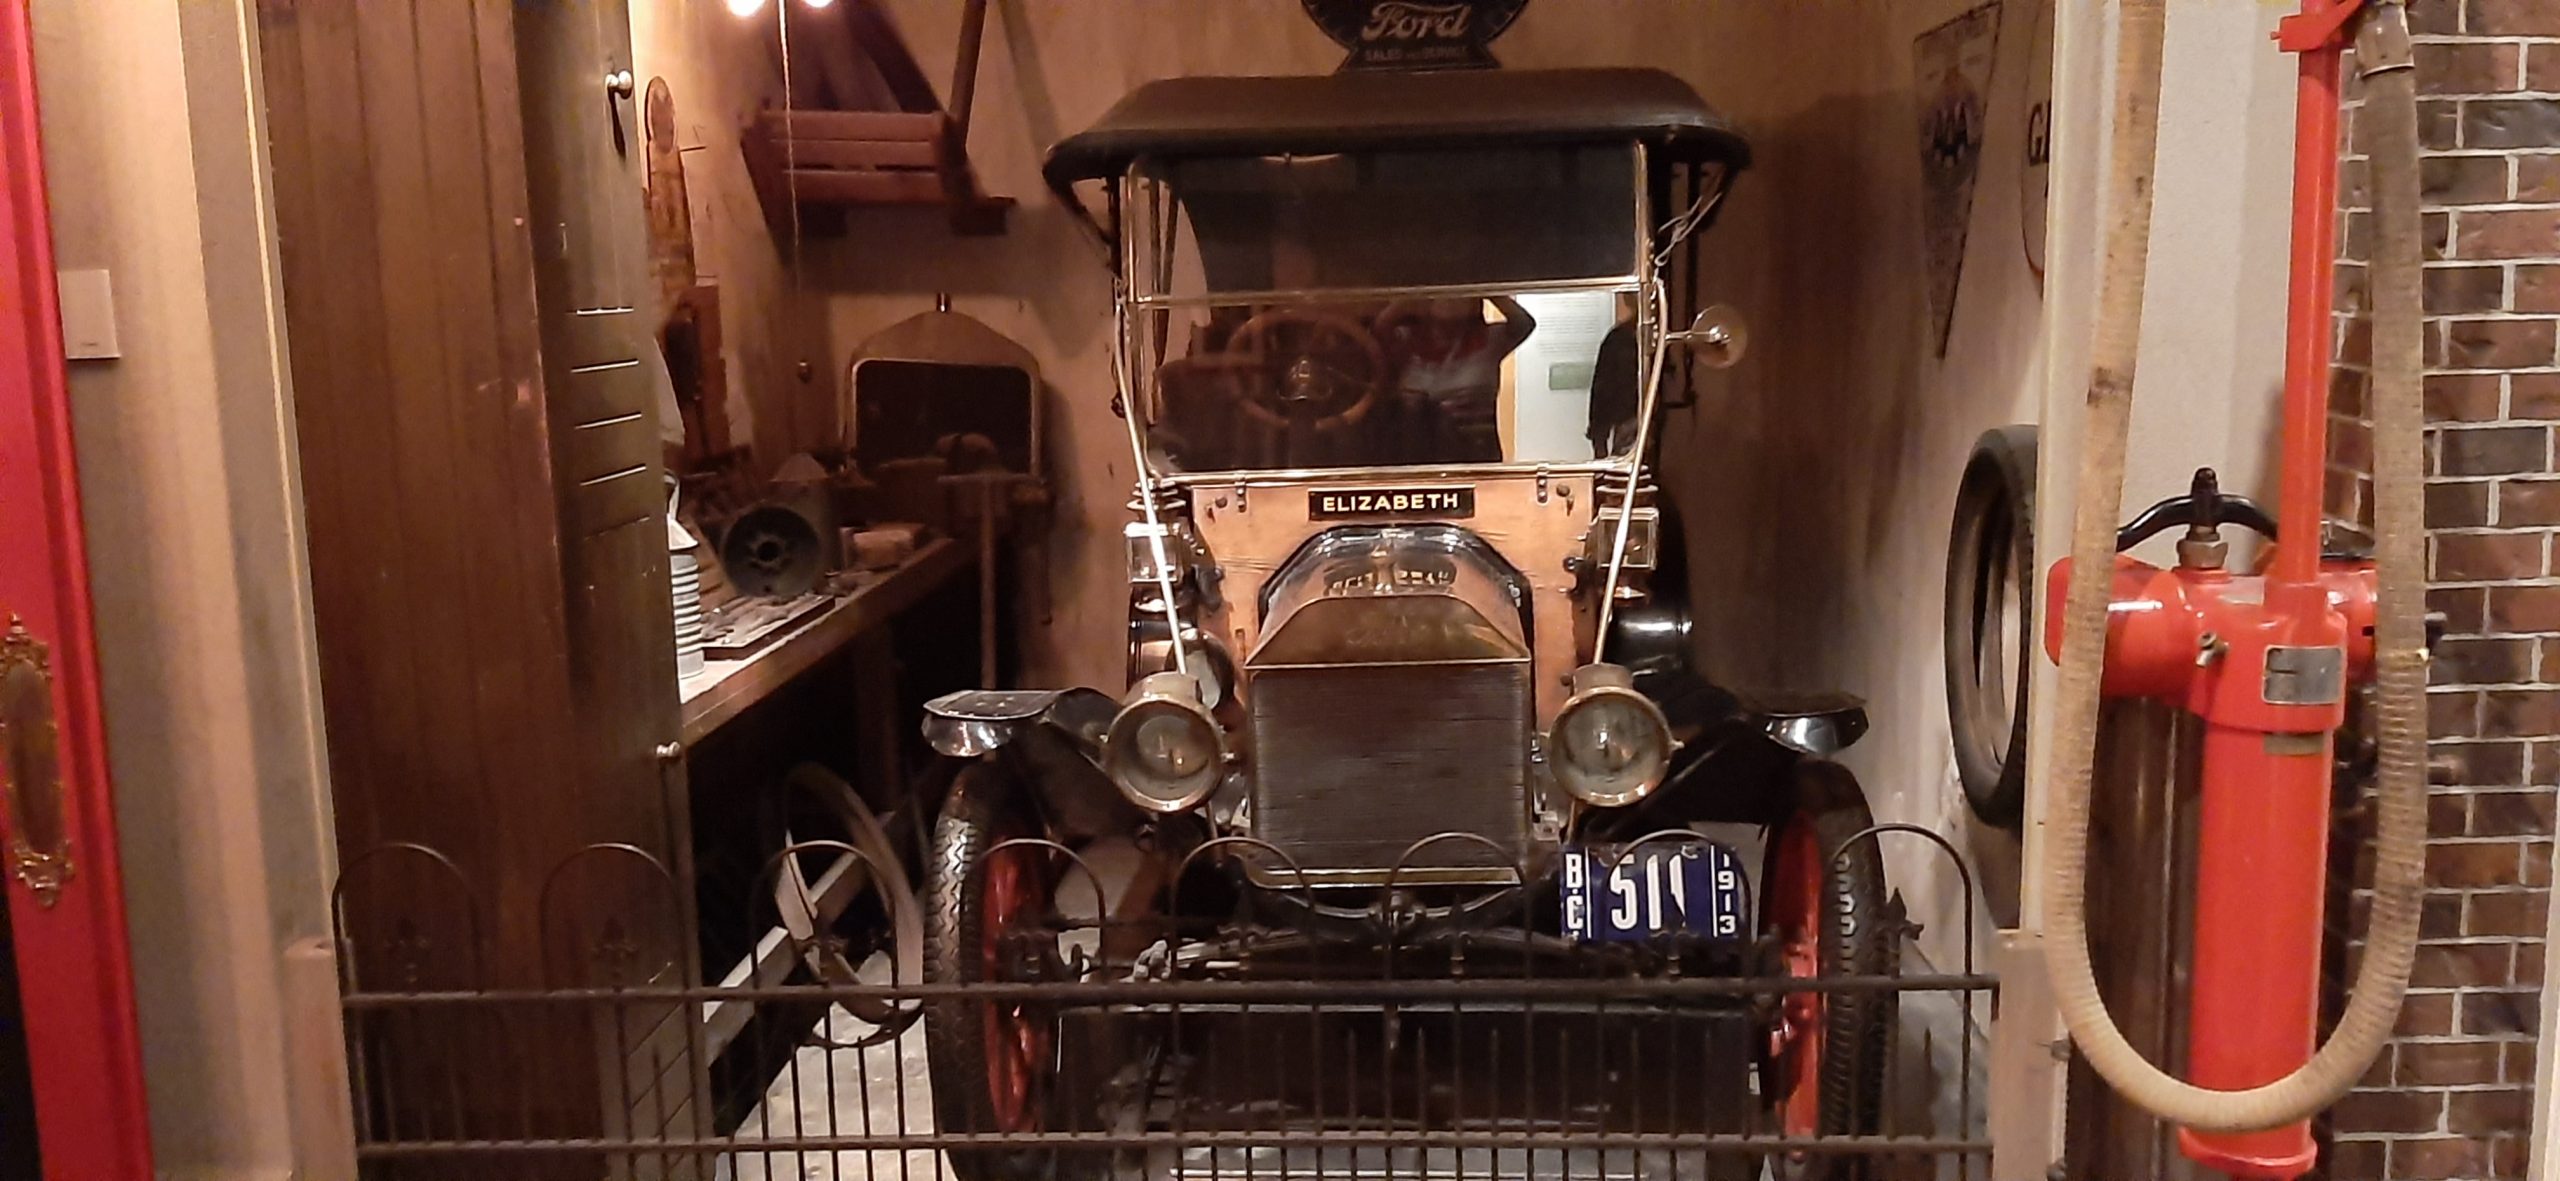
Then the museum itself.
One of the current exhibitions is about Stonehenge. Very interesting and informative. And it recalled the time my former husband and I had taken our three younger children to Europe for 5 weeks. And one day just minding our own business, we happened to drive by a field that looked empty except for some large stones seemingly enjoying themselves in the afternoon sun. We looked at each other, and even though there was no sign indicating what we were seeing, we were savvy enough to immediately recognize that what we were looking at was Stonehenge. So, all by ourselves, the 5 of us in 1978 walked through these ancient ruins. It was freaking amazing. And we were the only people there.
Now you practically have to offer up your first born, to even stand behind a fence to view this ancient marvel of engineering.
After touring the museum, it was after 3:00 pm and we decided a bit of sustenance was in order. And right in front of us was The Spaghetti Factory which we had eaten at maybe 30 years ago. So, why not? We had two appetizers. Steamed mussels in an amazing wine broth, and fried calamari. Both were delicious.
Then it was back in the truck to head towards our campground. But first, a bit of provisioning. Then back in camp it was cocktail hour and time for me to write up todays’ experiences.
Then cook dinner and do a bit of hand laundering. Andy was out of socks and clean underwear would be in short supply for both of us after tomorrow. So, with no options available, Patti the laundress was put to work!
Then read for a while and an early to bed for me. My body was a bit tired from walking in Victoria and going through the museum. So, knowing we would be doing some more walking tomorrow, I decided to give in to gravity and lay my tired bones down and give them a long rest. When Andy made it to bed, heaven only know?
Tuesday, September 24, 2024 – Weirs Beach RV Resort
Well, I must have been harder on my body than I thought, because this morning I could hardly get out of bed. So, after fixing breakfast and discussing our options for today, we decided Butchart Gardens was out of the question. My arthritic knees just were not up to the task of walking any distance. That left – golf.
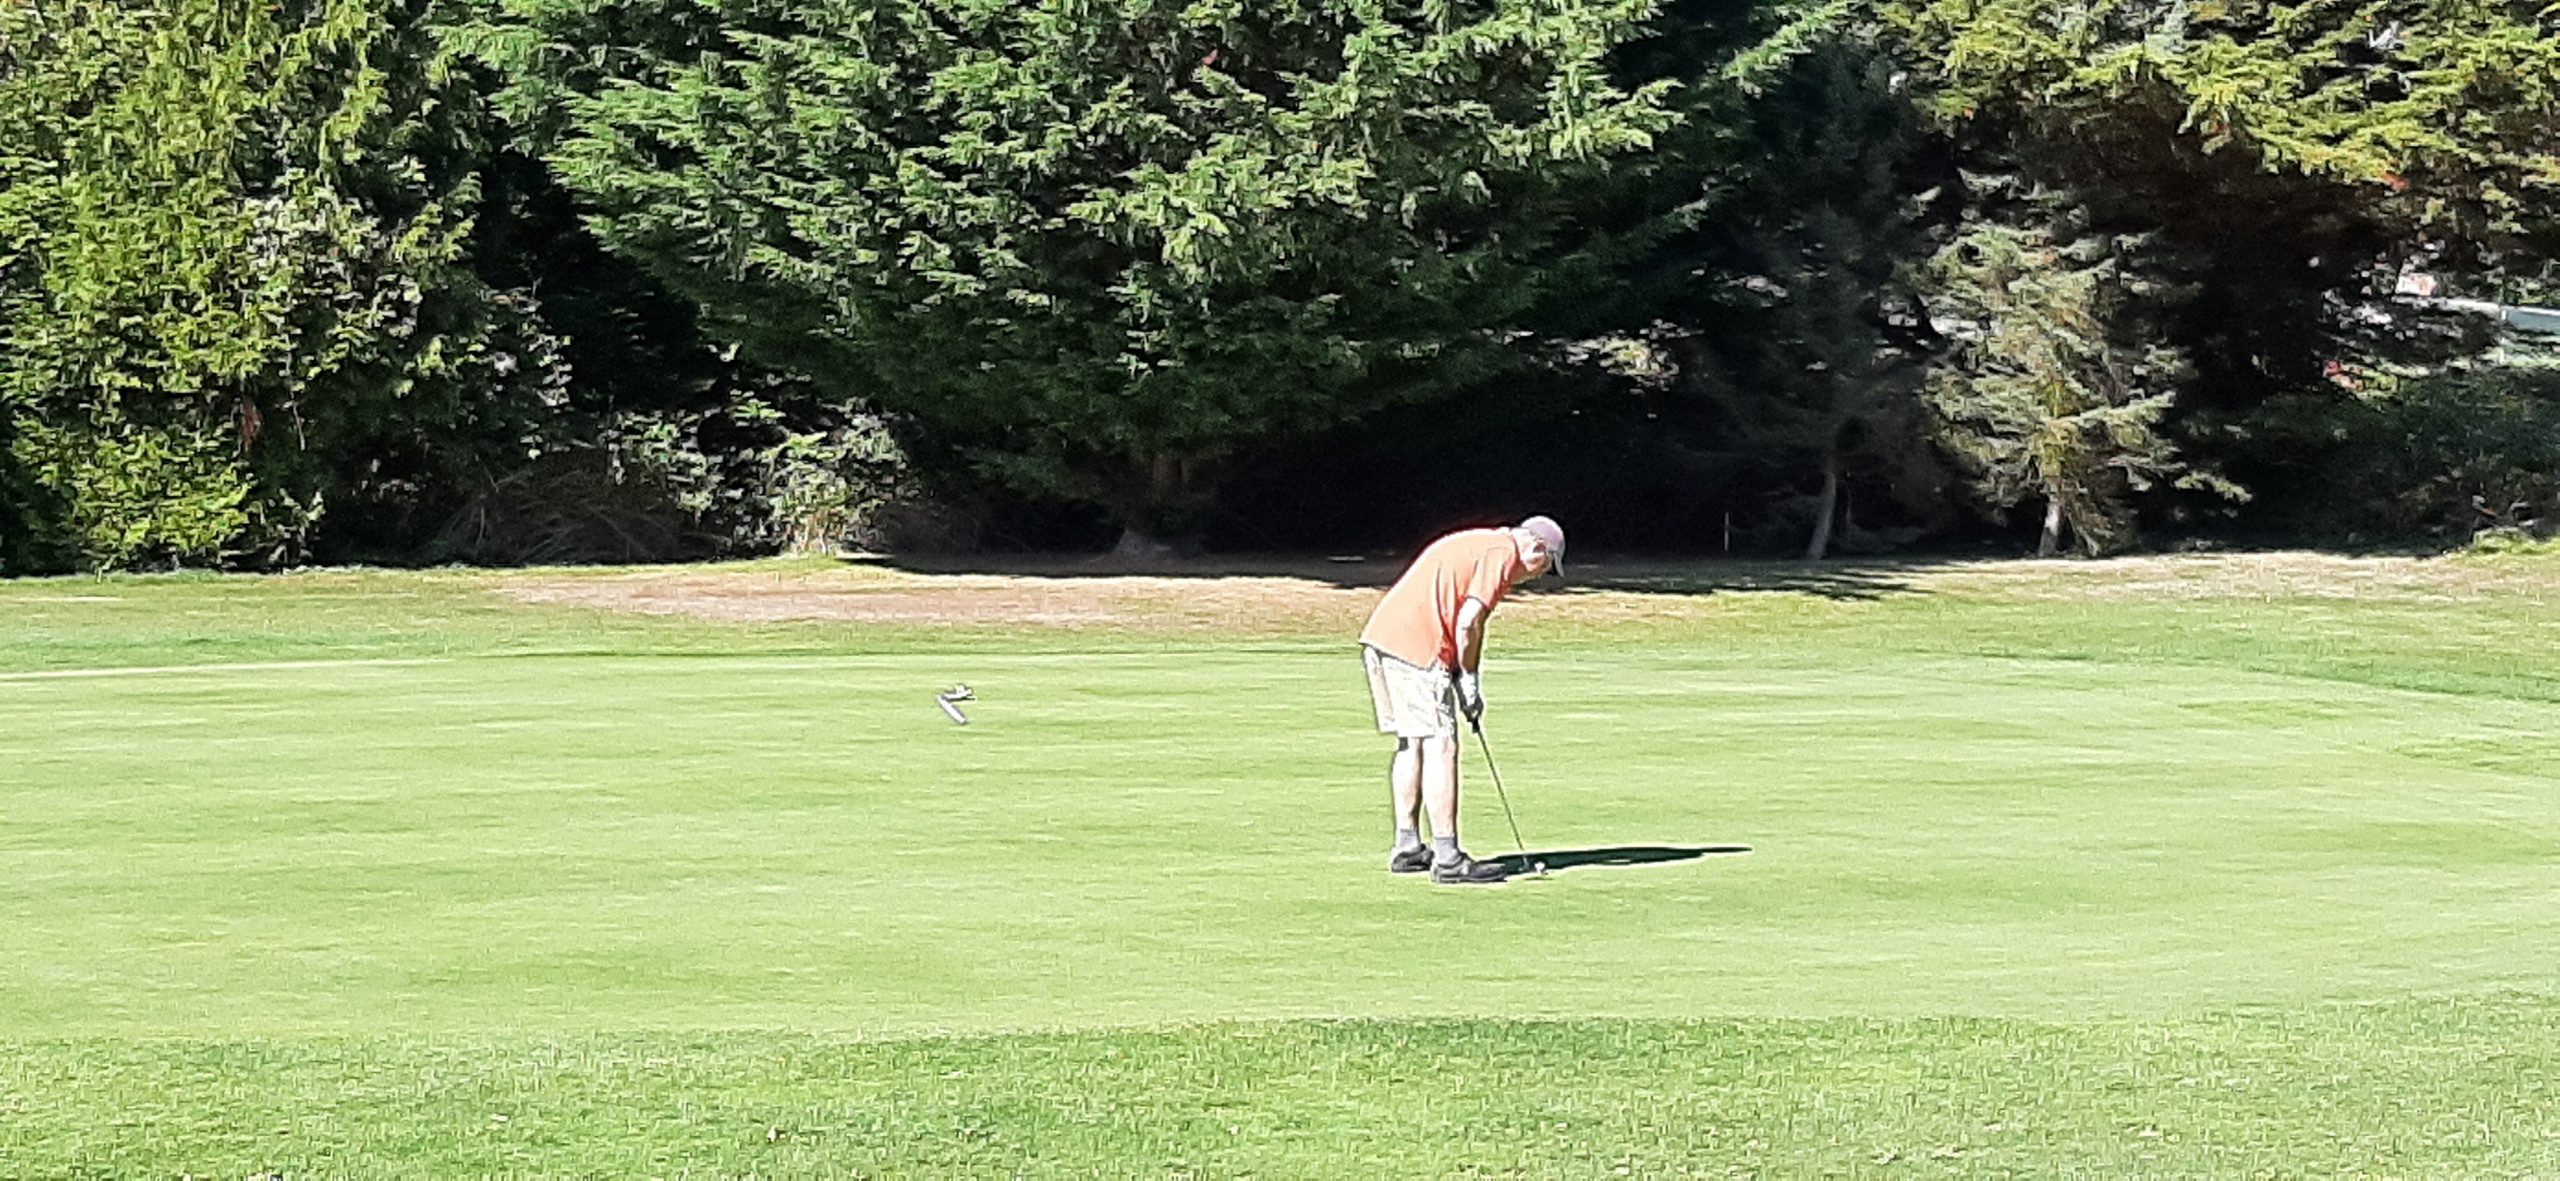
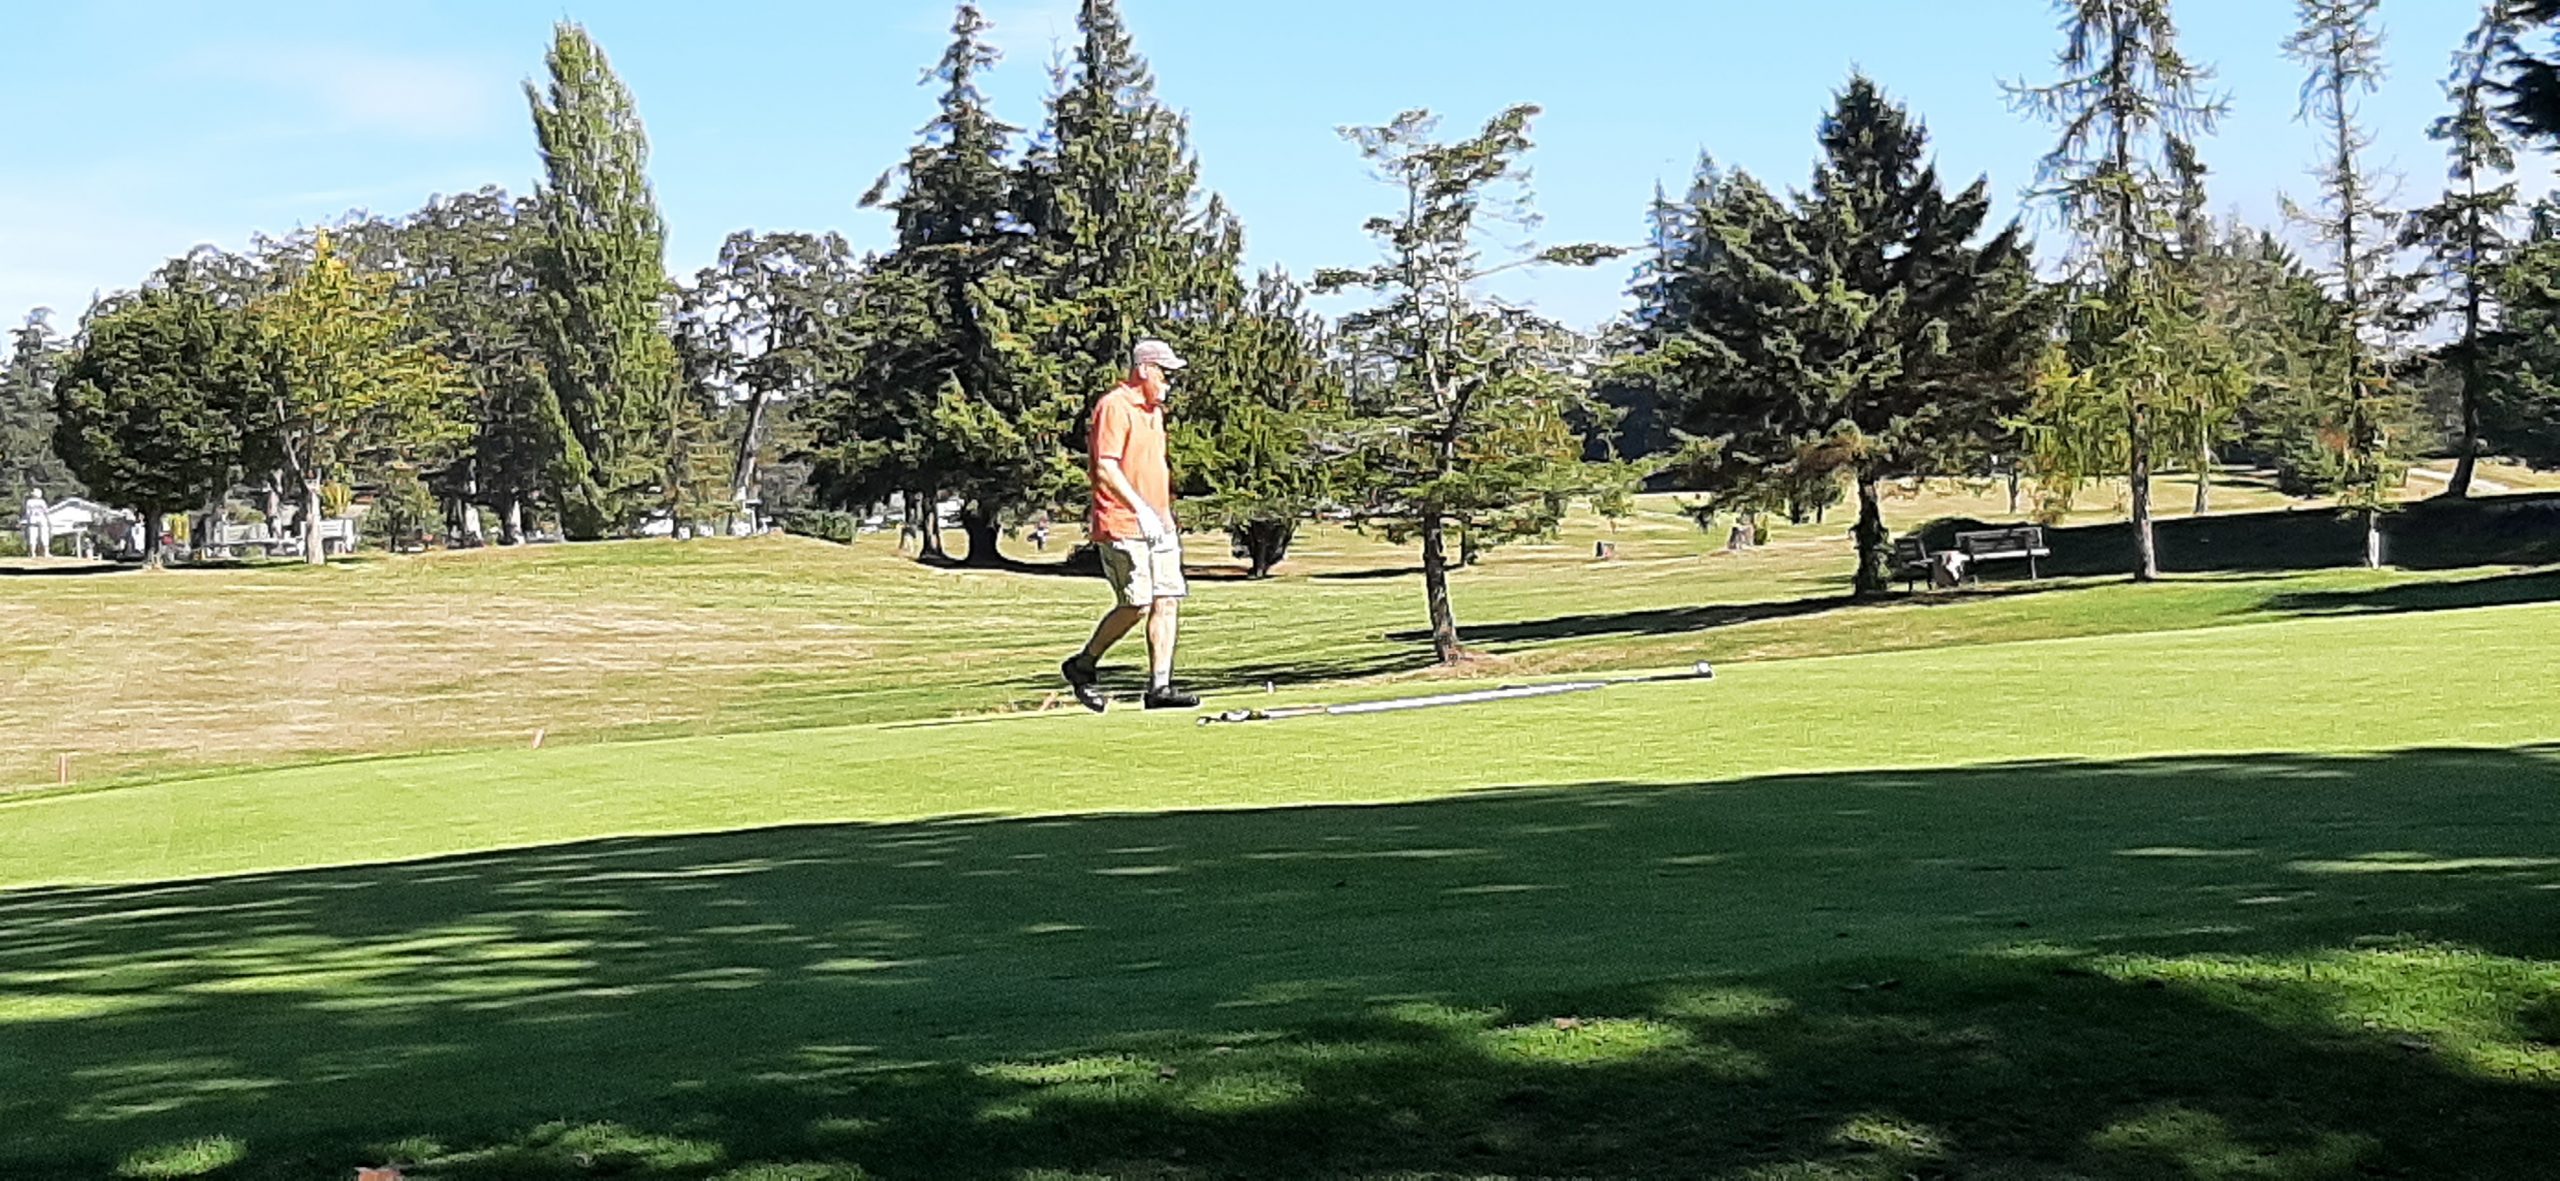
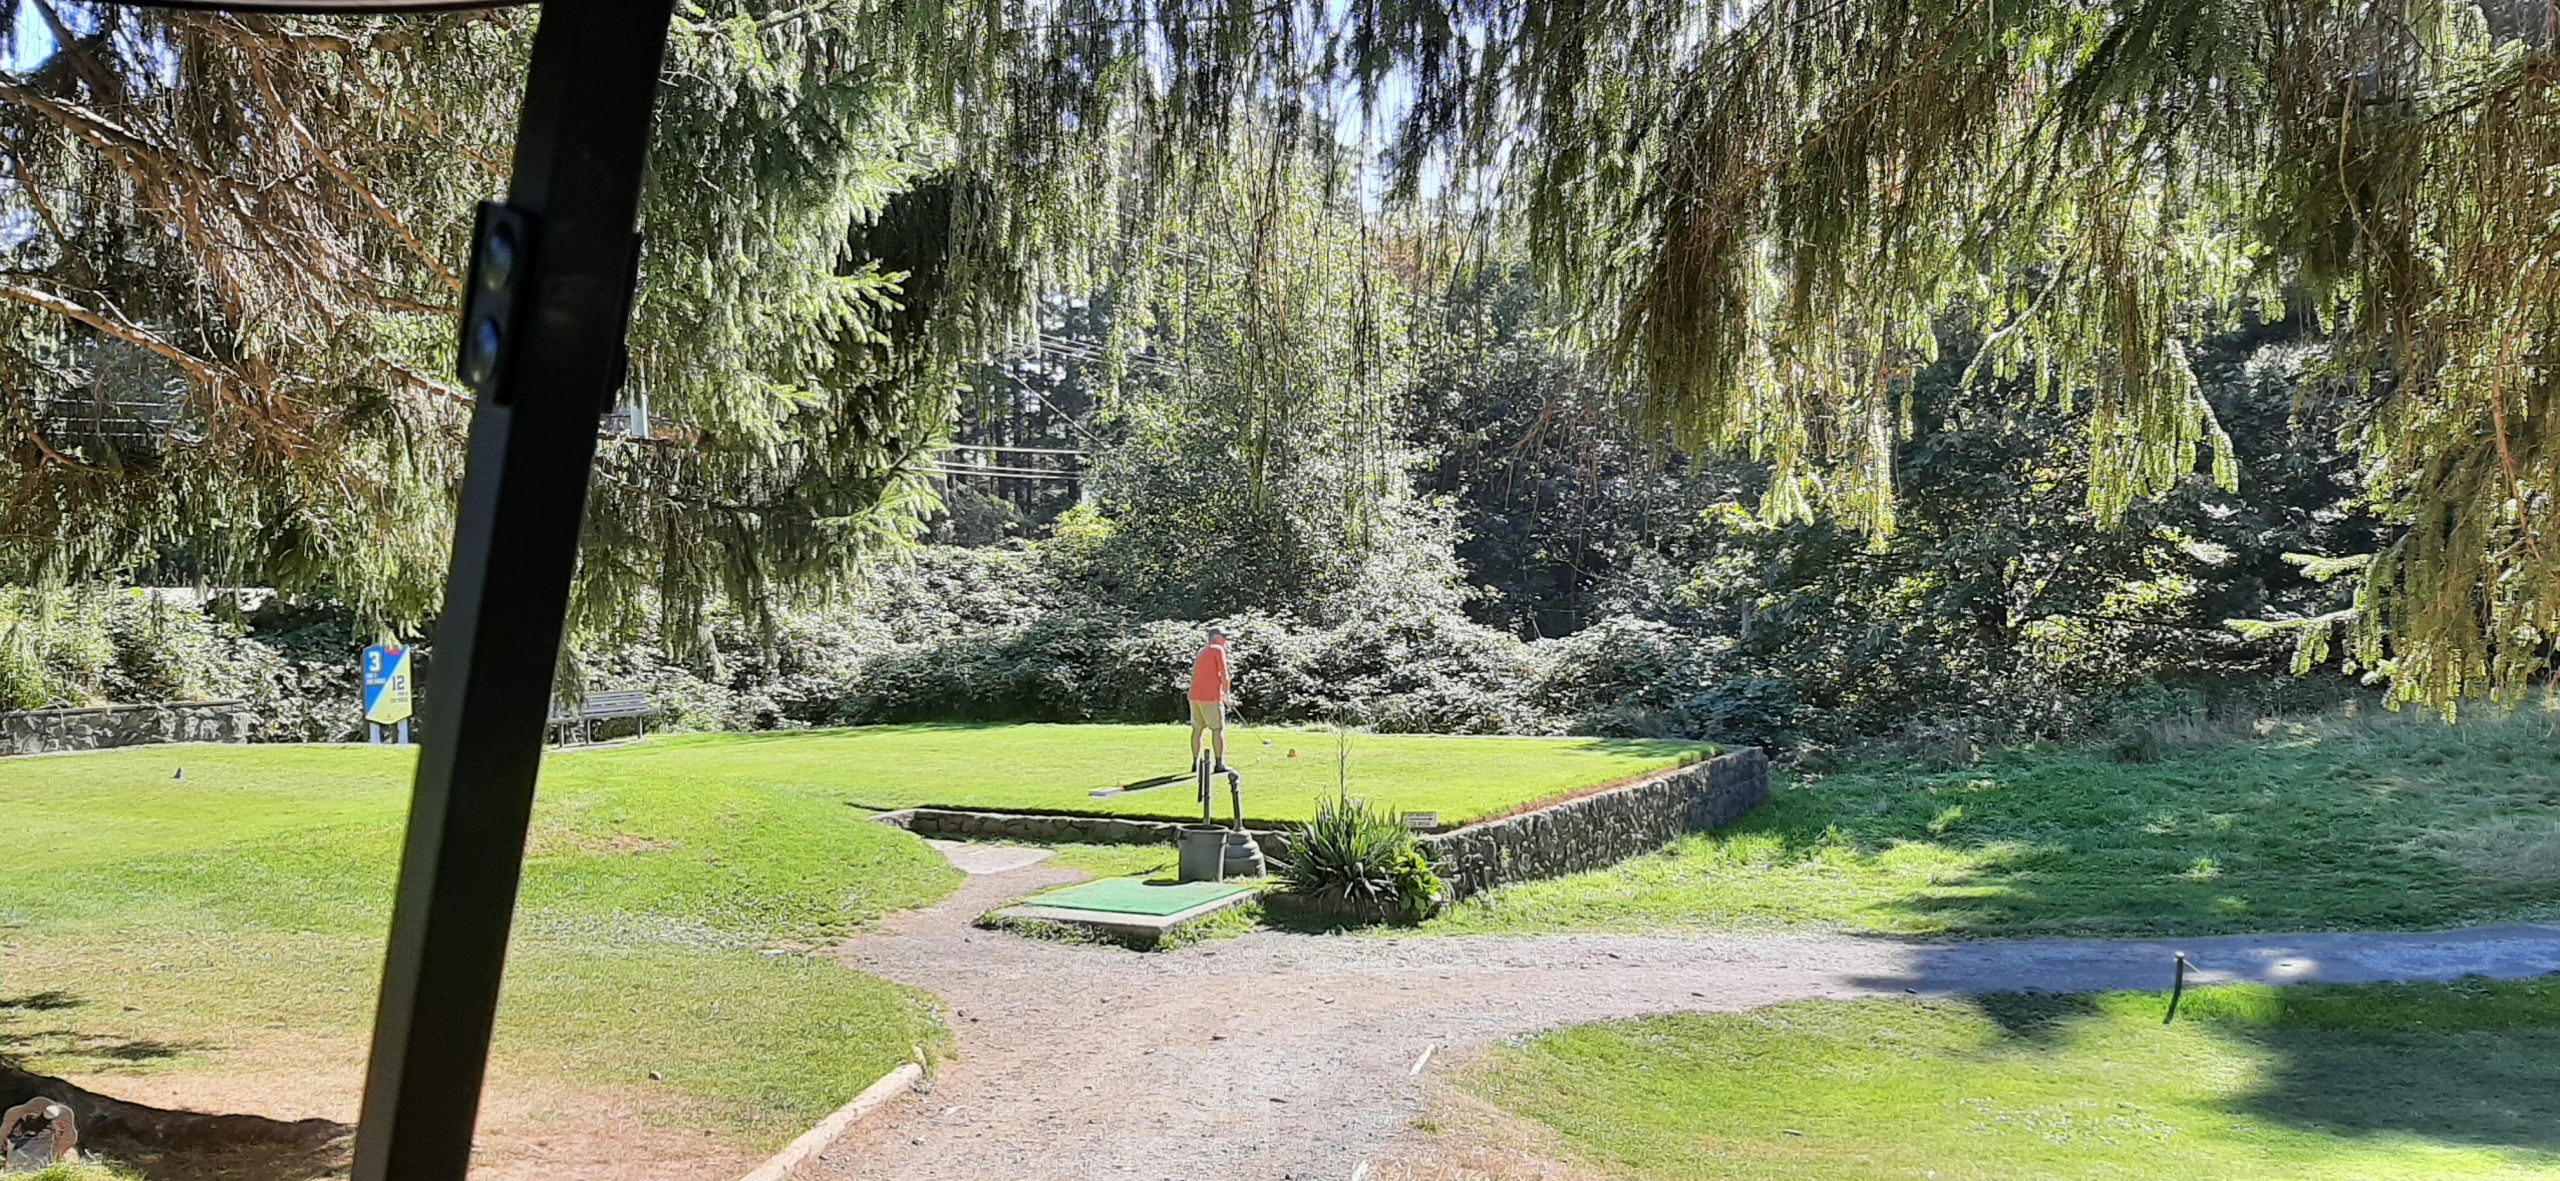
We had seen a nearby golf course (Metchosin Golf and Country Club) on our way back from Victoria on Monday. So, armed with golf clubs for Mr. C. and my burning desire to drive a golf cart, off we went for 18 holes of frustration, excitement, zeal, exhilaration, euphoria, discouragement, and every emotion in between. (And that was just my emotional take on the game from a spectator’s perspective. Andy was calm as a cucumber!)
Nice and easy does it every time.
Hazard! What hazard?(And people wonder why I don’t golf!)
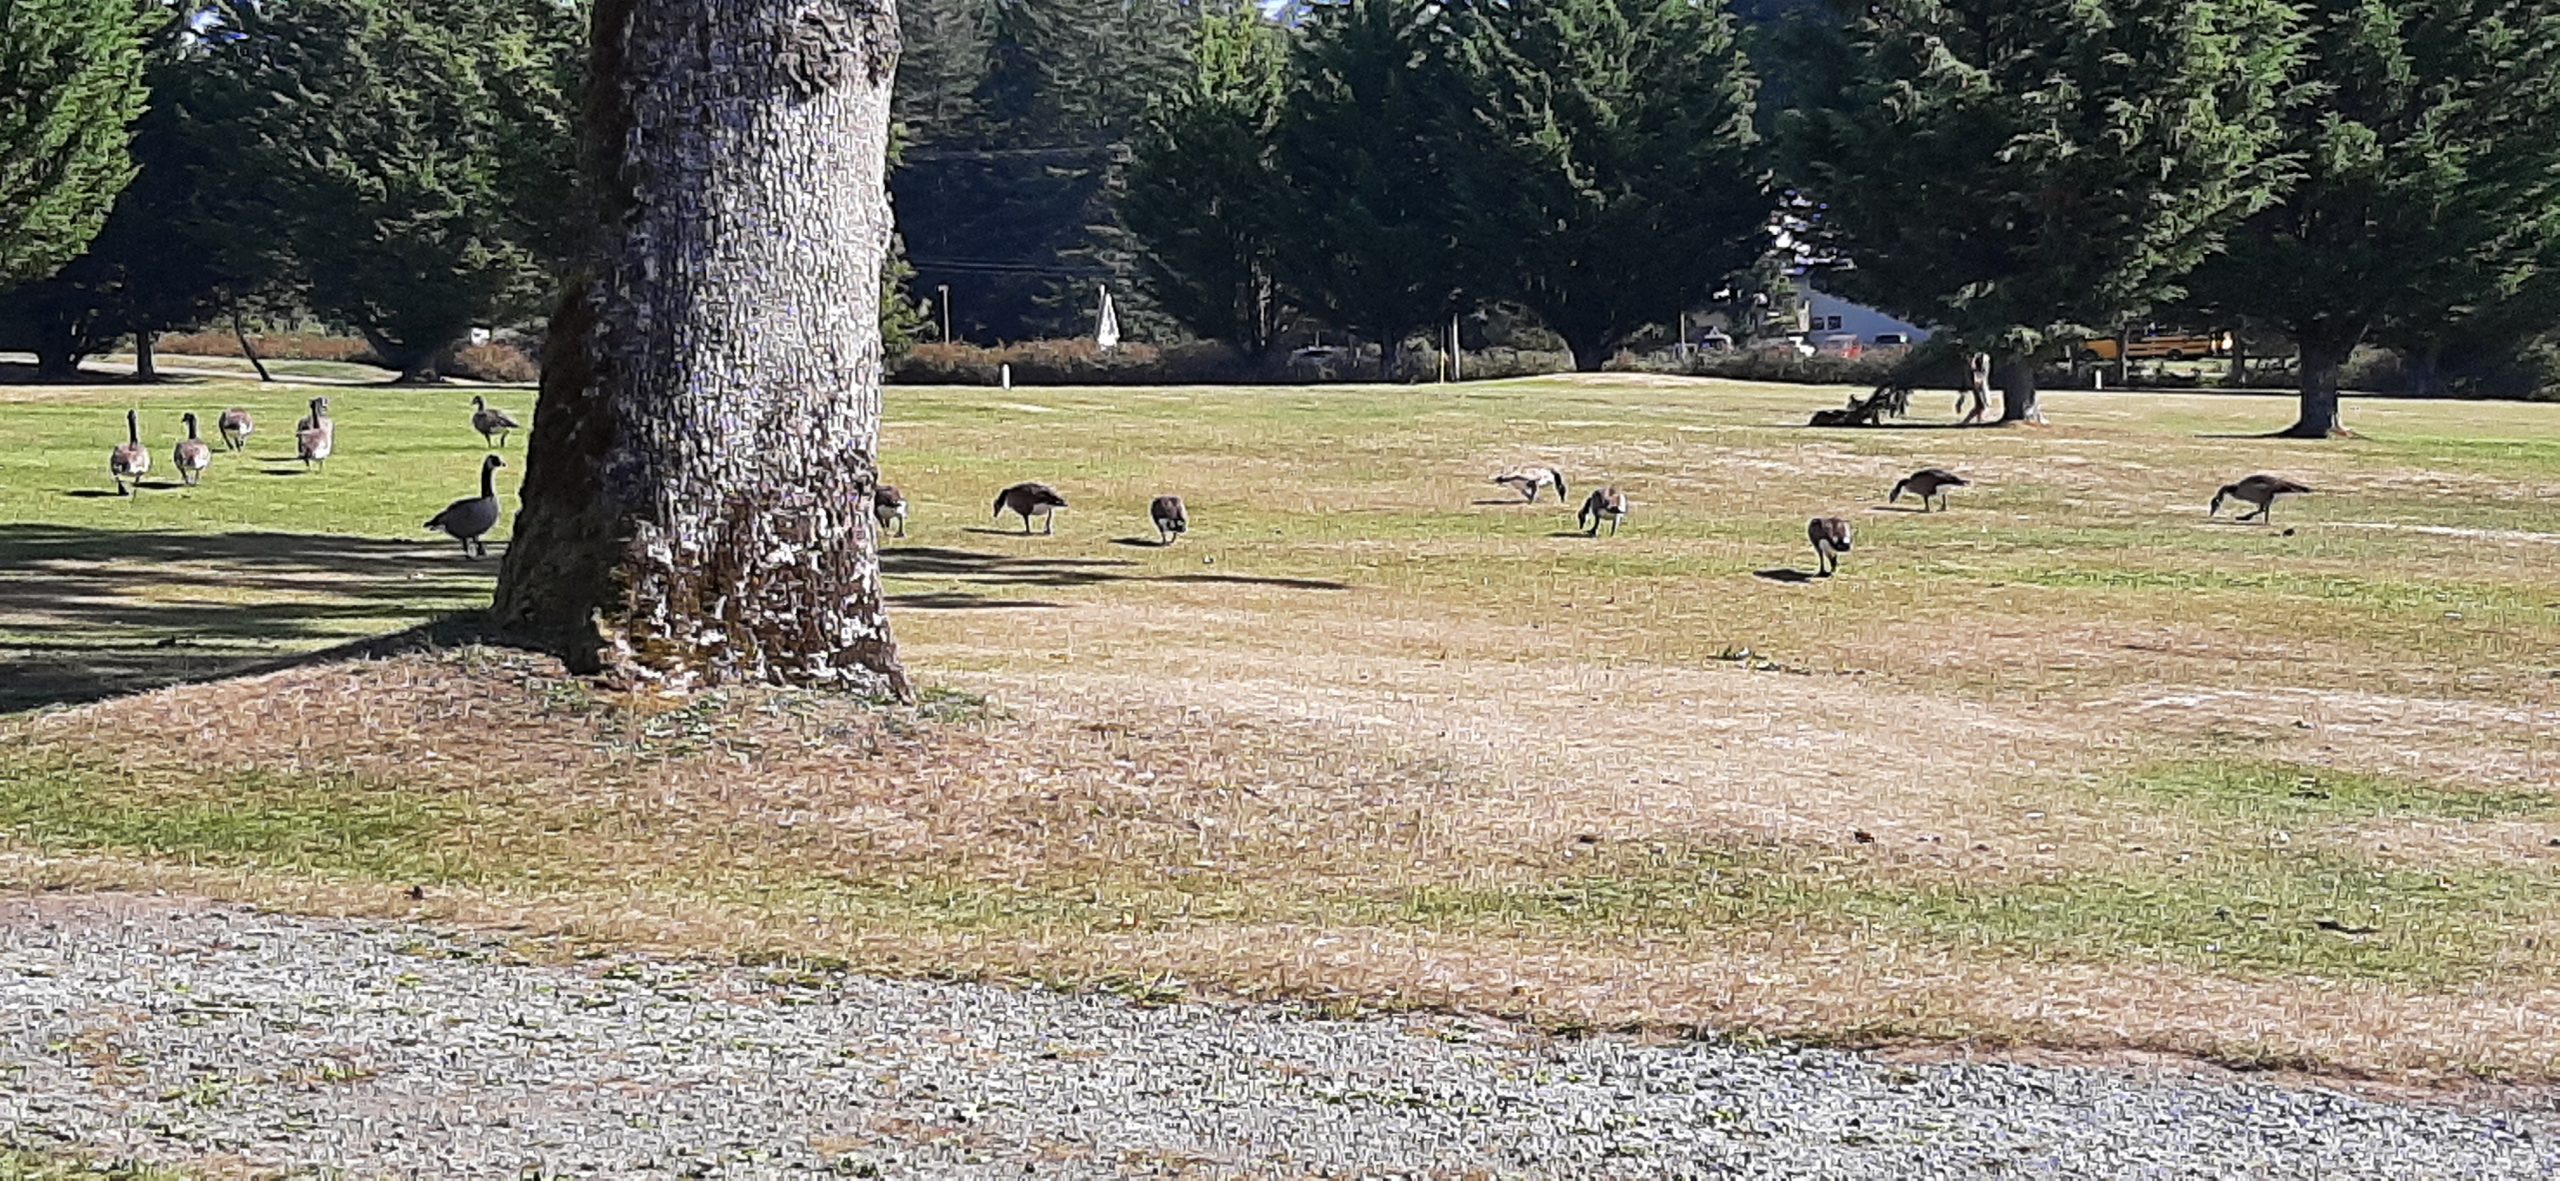
And then of course, there are the moving objects to avoid……
But what a grand time we had. Andy played well, and I actually drove the golf cart with as much assurance as if I’d been trained by Mario Andretti. And no Canadian Geese were hurt in the process. Which is amazing since they were happily wandering the fairways as if they owned the place. And the day was perfect for being outside. Sunny and warm with only a slight breeze to remind us that it is indeed fall.
After skipping lunch, we decided to have an early dinner at My-Chosen Café. Wonderful food and charming ambiance. I had liver and onions, with bacon and gravy which came with garlic bread and a lovely fresh veggie salad. (Even the blue cheese dressing was wonderful.) OMG. If I lived here, I would eat at this rustic eatery at least once a week. My entrée was just that good. Andy had pesto linguini with chicken and garlic bread. He also loved his meal.
Then back to the trailer to get some work done in preparation for tomorrow morning’s departure. (Dump black and grey water, put camp chairs away along with our outdoor tables, that sort of thing.)
We usually wait until the morning when we leave to do all these chores, but the weather report was for rain starting about midnight and continuing during the day tomorrow. And neither of us enjoy doing chores and hooking up the trailer in the rain. So, whenever possible, we do as much as possible ahead of time.
Tomorrow will take us back into Washinton state for three more days of trailering. And our last trip of the year.
It is always sad to say goodbye to our trailer for the winter because after all, it is our second home. And we always have so much fun pulling it along with us as we explore new and exciting areas or visiting places that beckon us back year after year. But our dear Pullwinkle needs time off too.
But we’re not done yet. Port Angeles here we come!
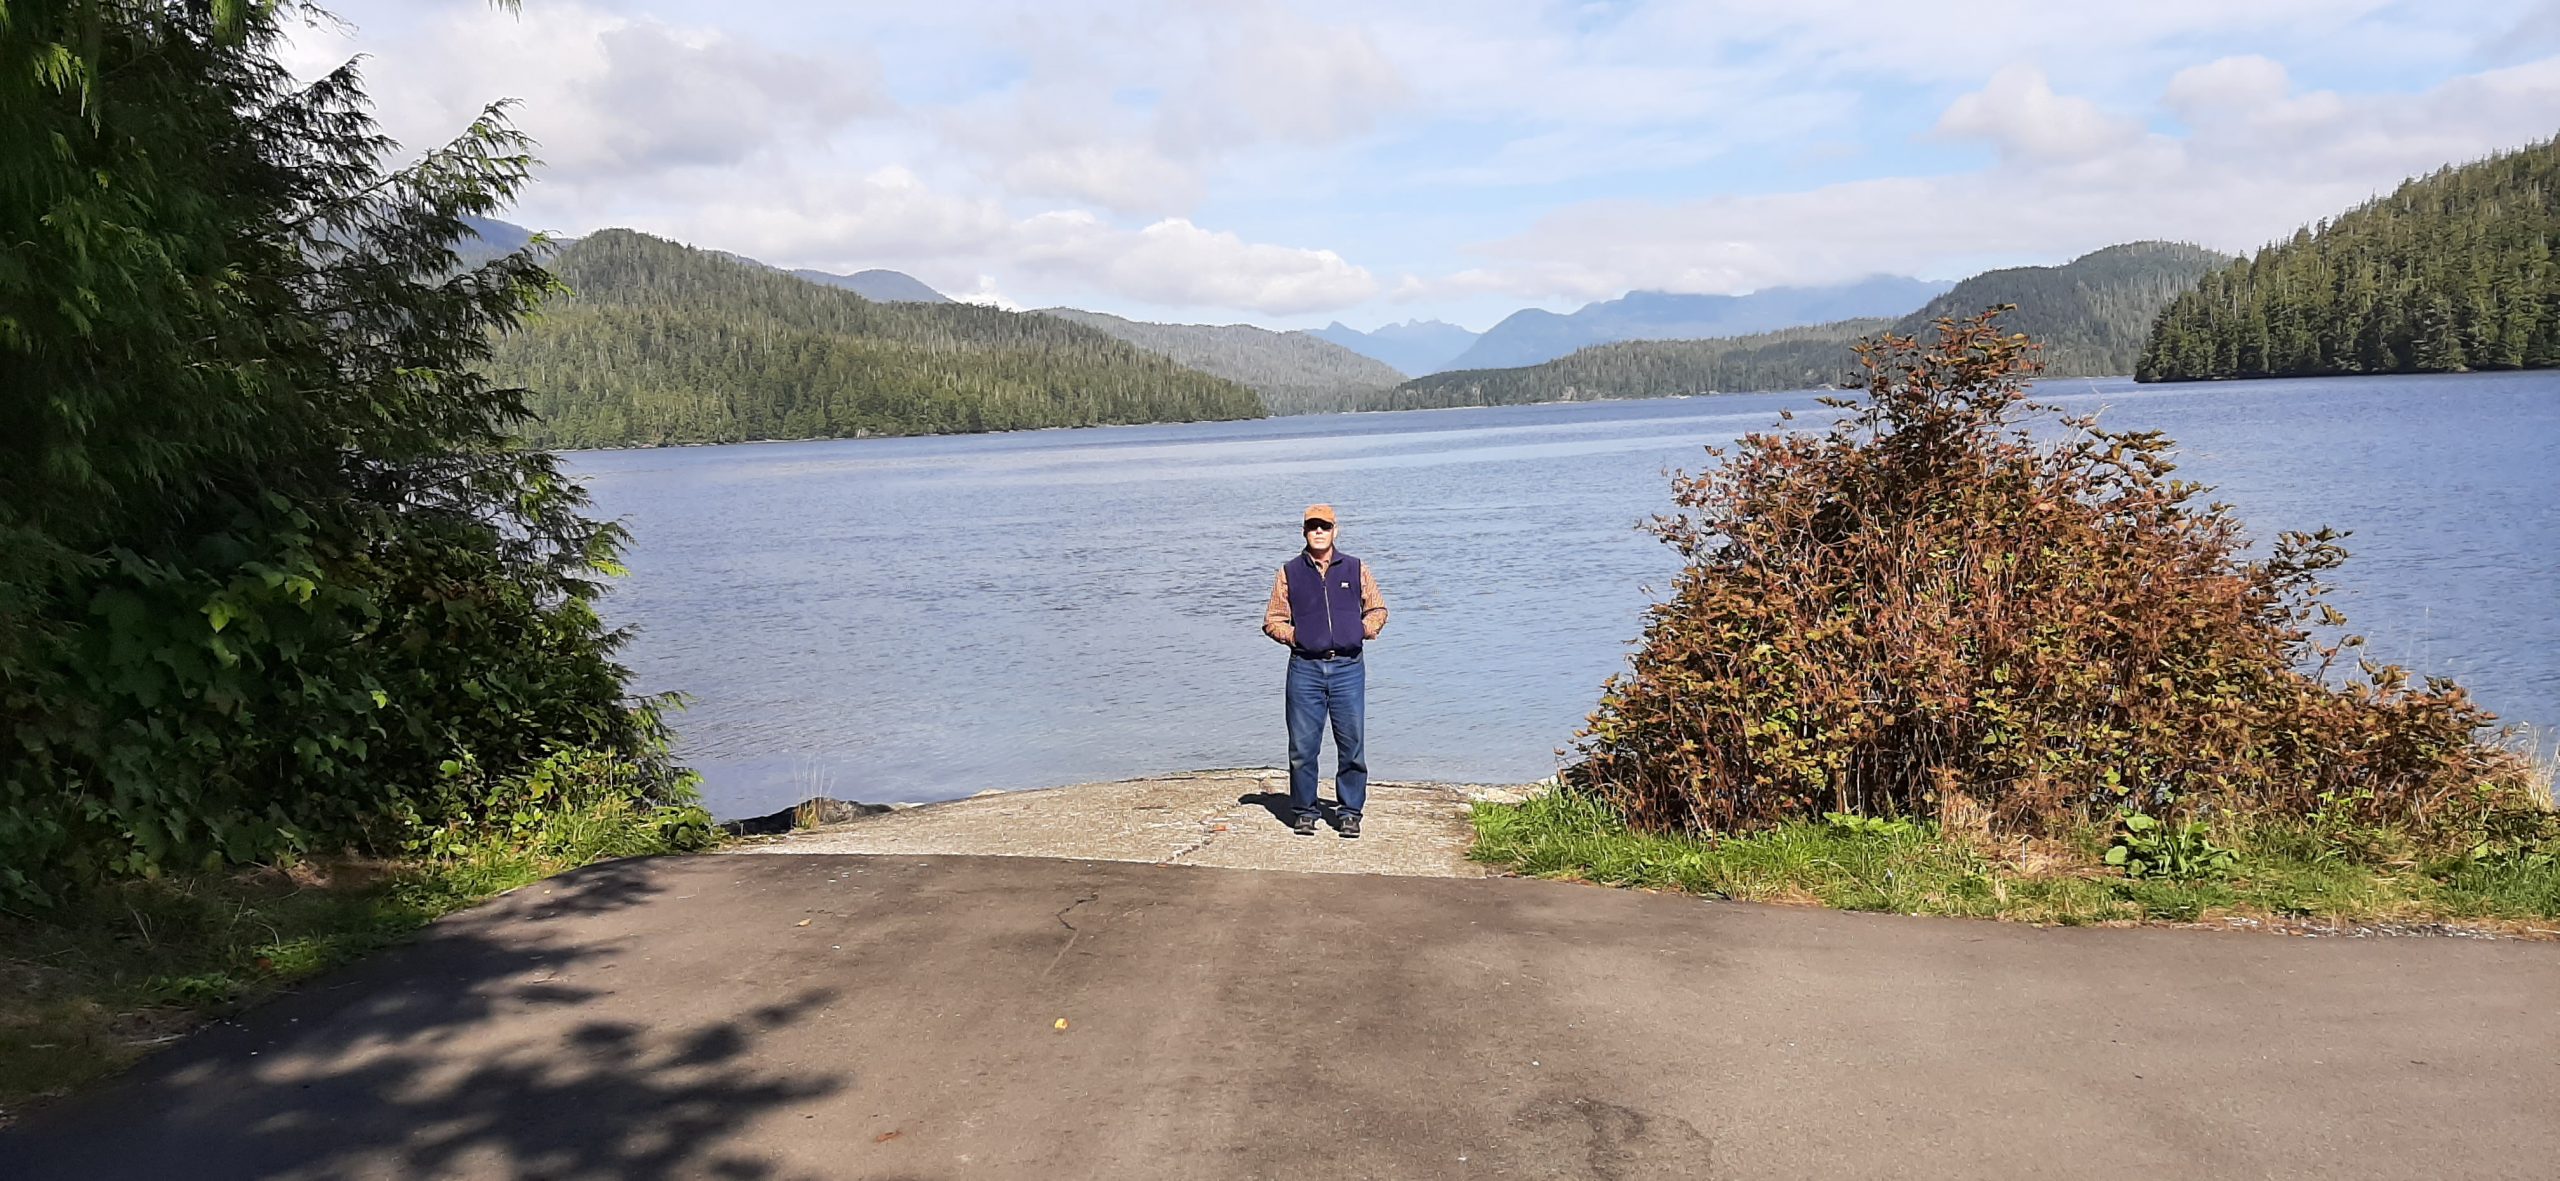
Part 3 – Bella Pacifica Campground, Tofino, Vancouver Island
Monday, September 16, 2024 – Bella Pacifica Campground, Tofino, Vancouver Island – site 26
Because we were informed that we must be out of our campsite by 10:00 am, we got an early start. We actually left at 9:56, which believe me, is not easy for us.
We like a leisurely beginning to our day. We read the paper online while slowly sipping our coffee, followed by a good-sized breakfast to tide us through to lunch. But with an early departure deadline, I skipped reading the paper and went full speed ahead into breakfast preparation. Quickly followed by getting the inside of the trailer ready to move on down the road. While Andy secures the outside. (Unhook water and electricity etc. etc. etc.) After 32 years of trailering, we pretty much have our individual duties down to a science. Which is good, because I am not a morning person. By 4:00 pm I can accomplish great feats of daring. But at 9:00 am, I am basically worthless.
Once out of camp, we turned west on highway 4 towards Port Alberni and on till we reached the shores of the mighty Pacific Ocean. And I must say, the road all the way was not the best road we have ever encountered. Not the worst either. (And yes, we had been warned by our dear friend Tim that the road was rough.) Lots of up and down, a couple 18% grades, around more curves than I ever would have dreamed possible, past two big lakes, large growth forests, and mountains with bare, vertical pinnacles. But an absolutely lovely, unparalleled ride in terms of natural beauty. In terms of smooth and easy to drive, not so much!
Arrived at the “T” in the road. (Going straight would have landed us in the ocean.) Turning left would have taken us to Ucluelet – pronounced you-clue-let (just like it’s spelled) (how often does that happen with “first nation” names). But even with its pronounceable name, we turned right. Our campground was just a few klicks south of the teeming metropolis of Tofino which just happens to be at the very north end of highway 4.
Point of interest: Tofino has grown 58% in the last 20 years. It is no longer a sleepy little village. Several huge resorts are now occupying vast stretches of prime coastal land. Beautiful facilities, but it’s very costly to stay on their hallowed property. But a great place to get away from it all.
Andy had received a text on his phone while we were driving towards Tofino that provided us with our campsite number and informed us that we were now officially “checked in” and didn’t have to stop and register at the camp office. Great! So, to our site we proceeded. Well, the sites are so close together with very little place to park your pulling vehicle, that we had to ask the kind gentleman across the road from us to move his truck so that Andy could back into our site. He was most accommodating and even helped me guide Andy as he backed our trailer into a site designed for a Volkswagen Beetle. But we made it work.
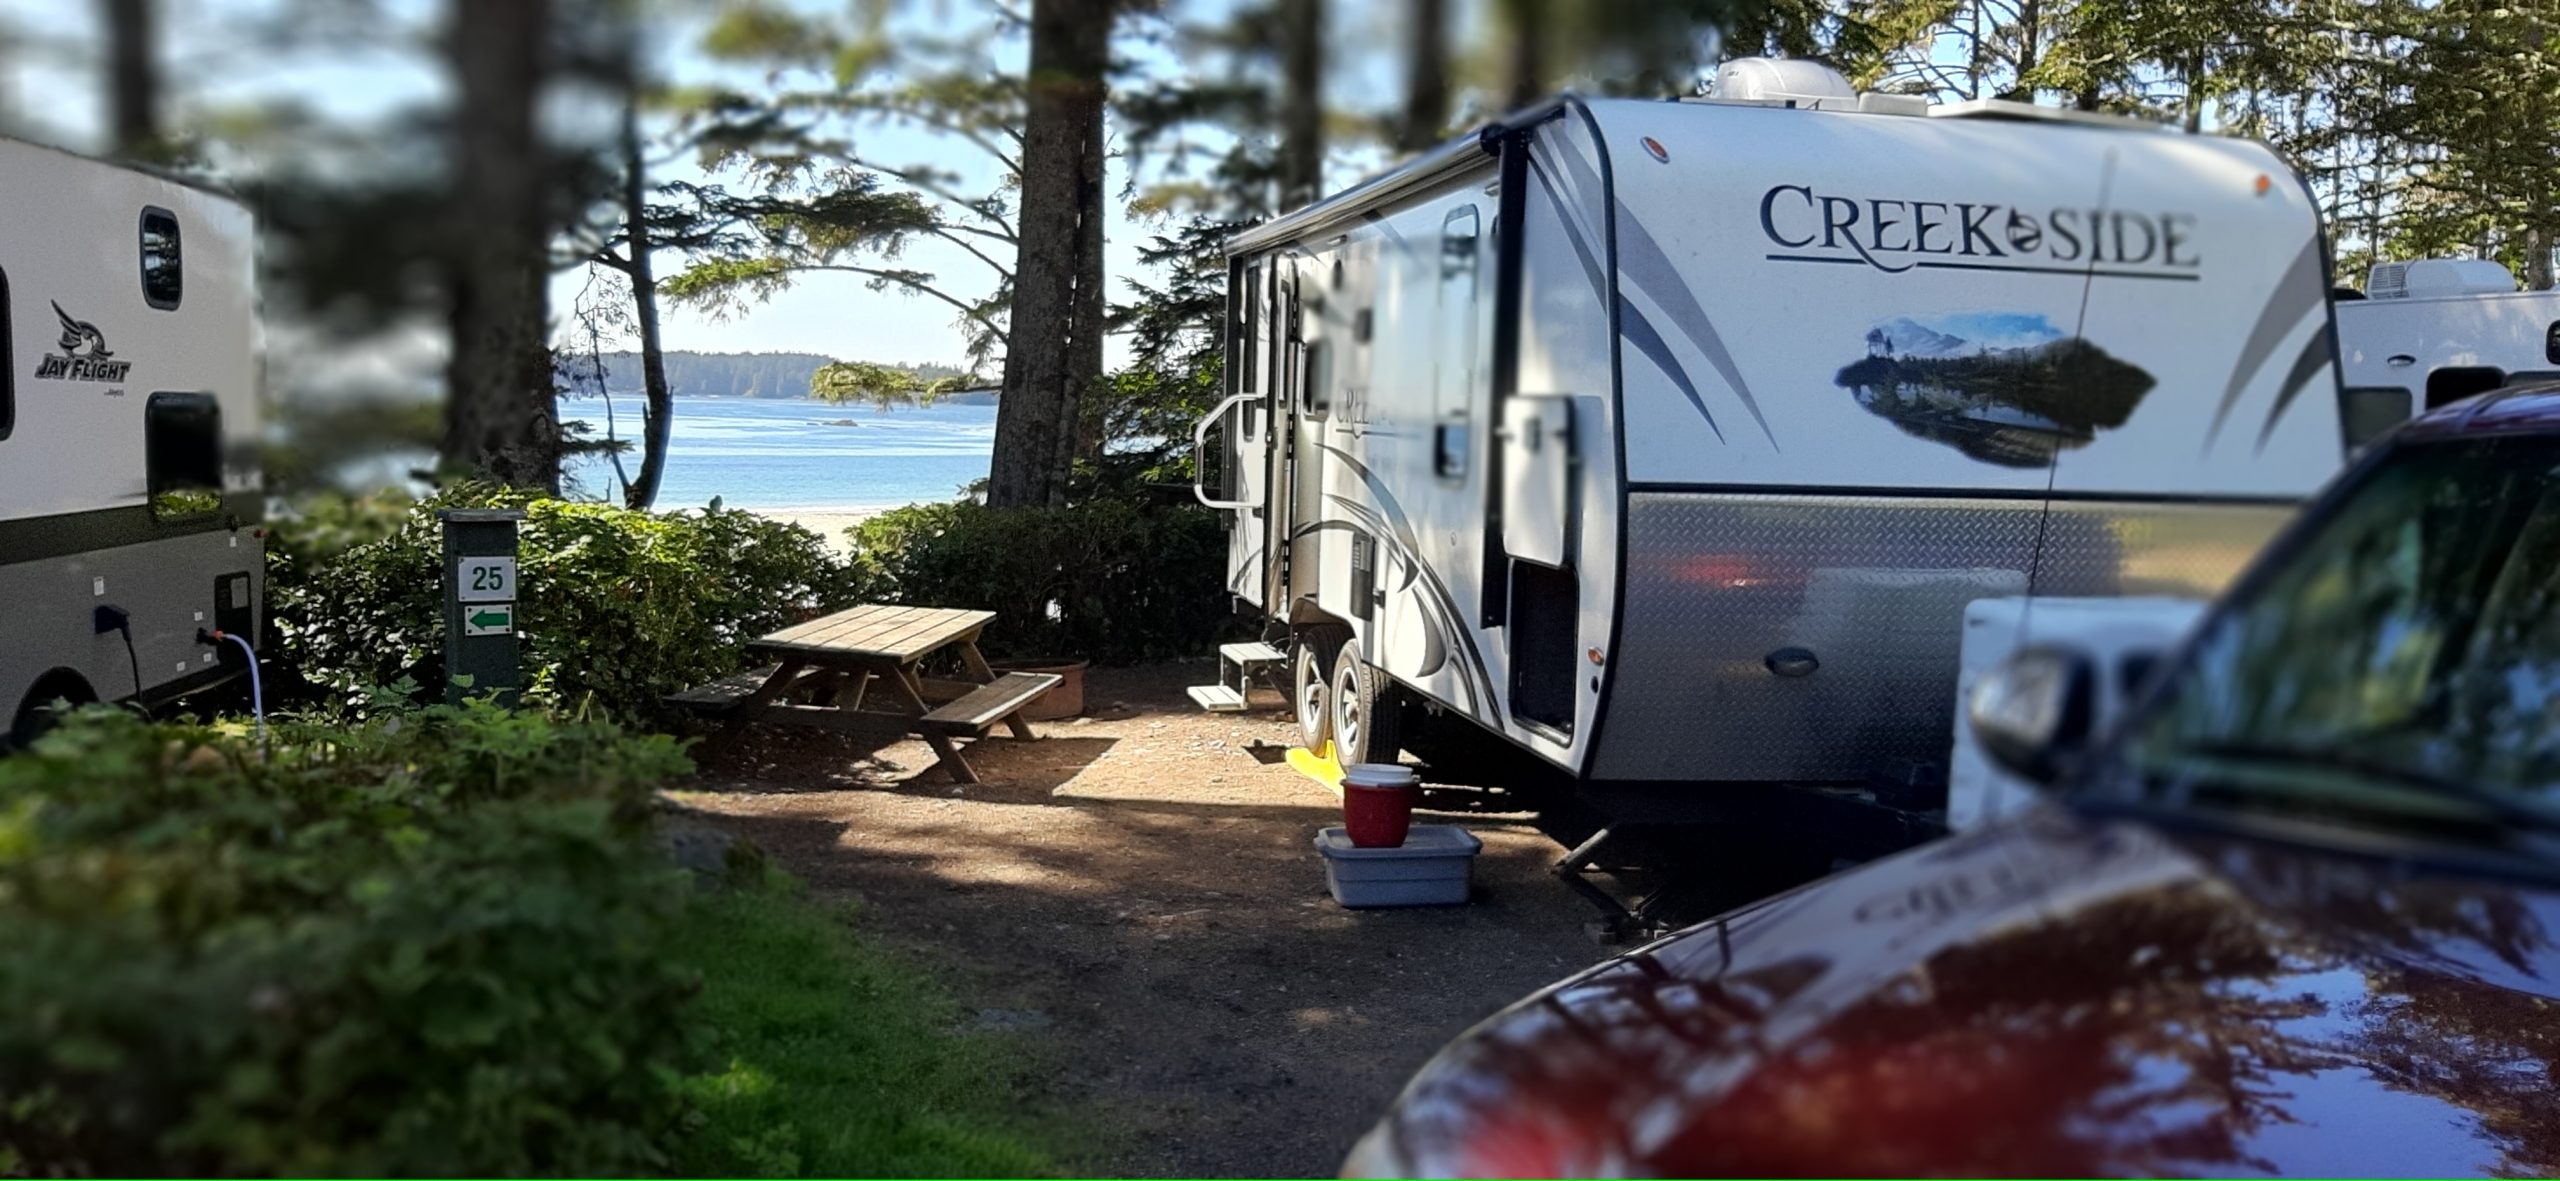
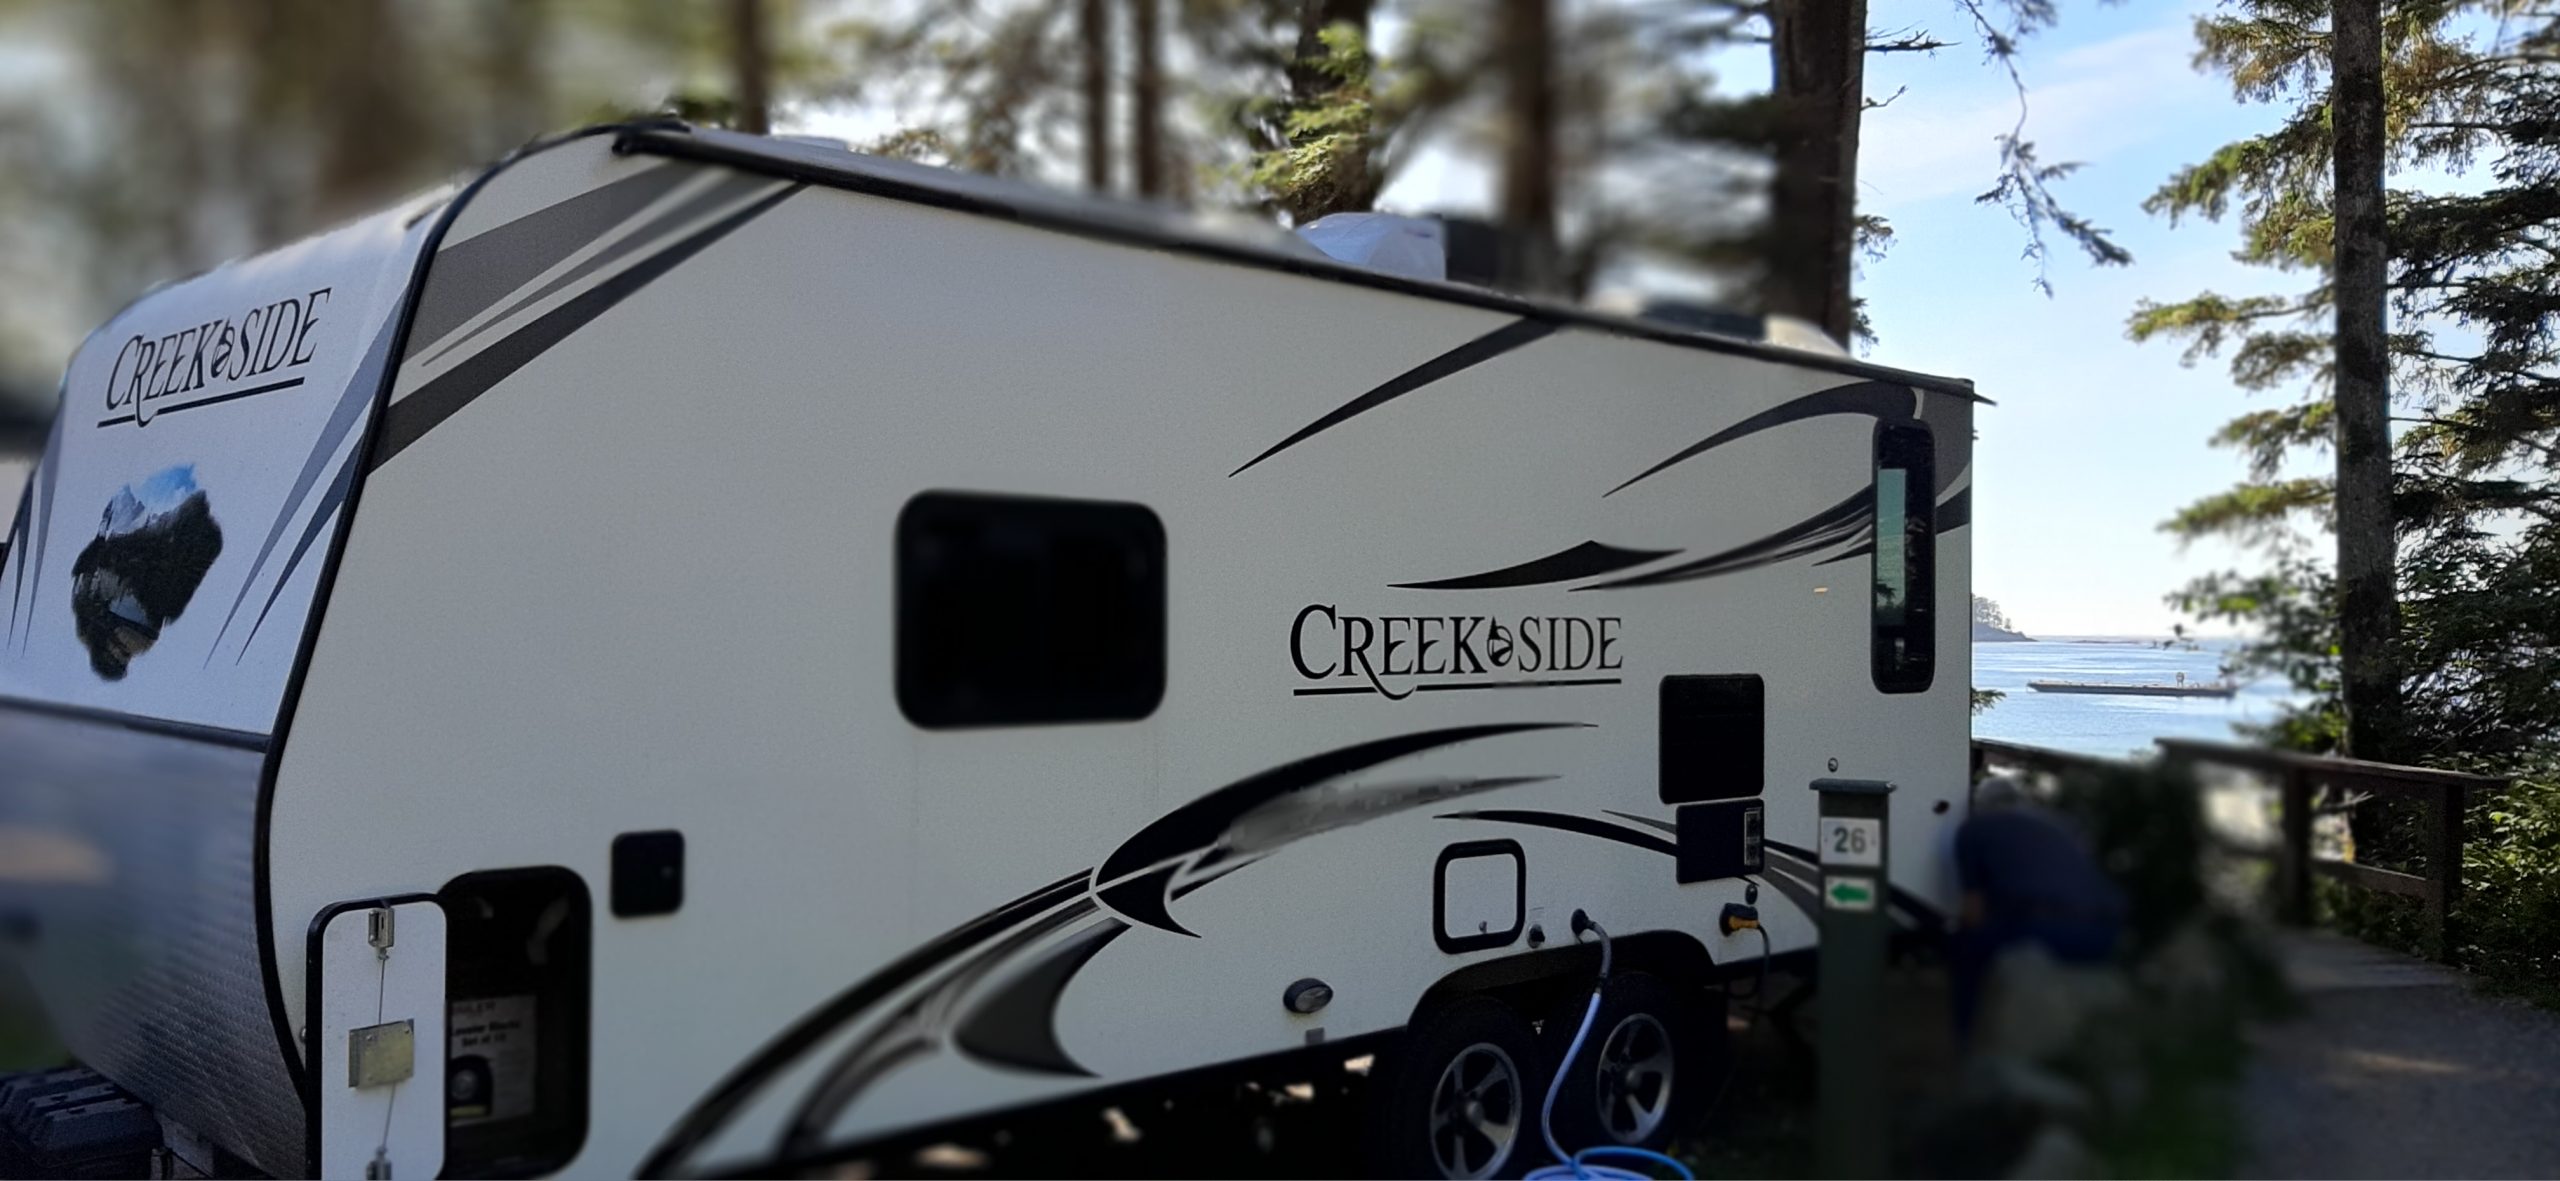
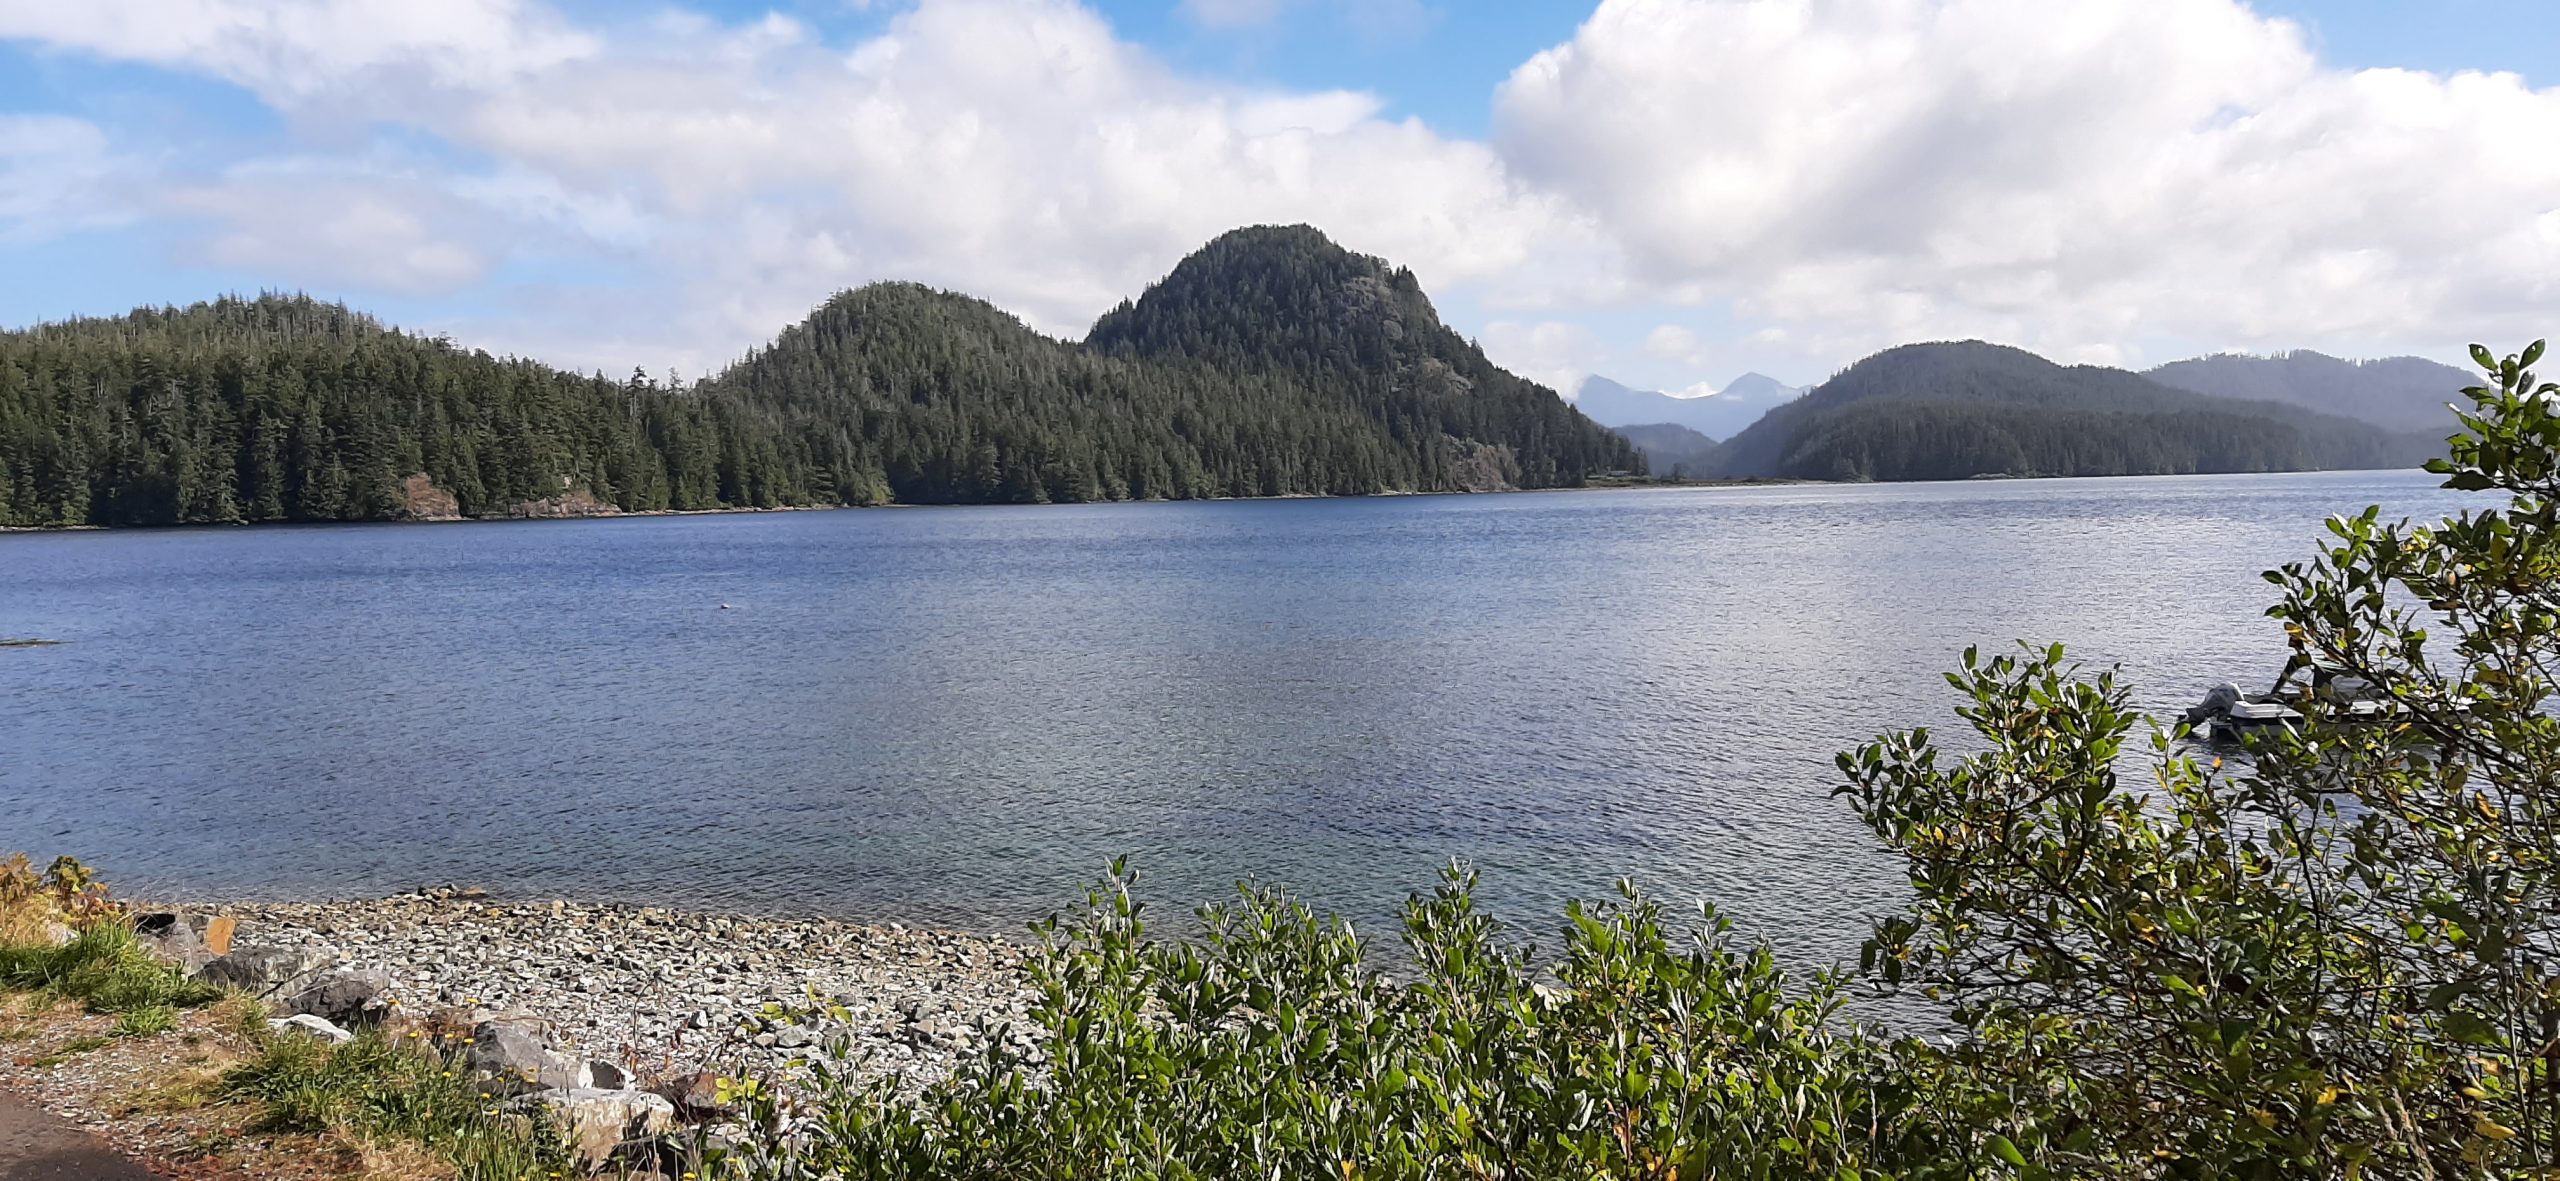
But what a site. Probably one of the best in the camp which had 265 sites from which to choose. Of course, we wouldn’t fit in 98% of the sites, but here we were for 5 nights with our back window looking out at the ocean, small offshore islands, and a lot of beautiful sandy beach. Lovely.
After getting set up and a enjoying a bit of lunch, Andy decided to take his camp chair and go sit on the beach and read while I typed up the first part of today’s trip report.
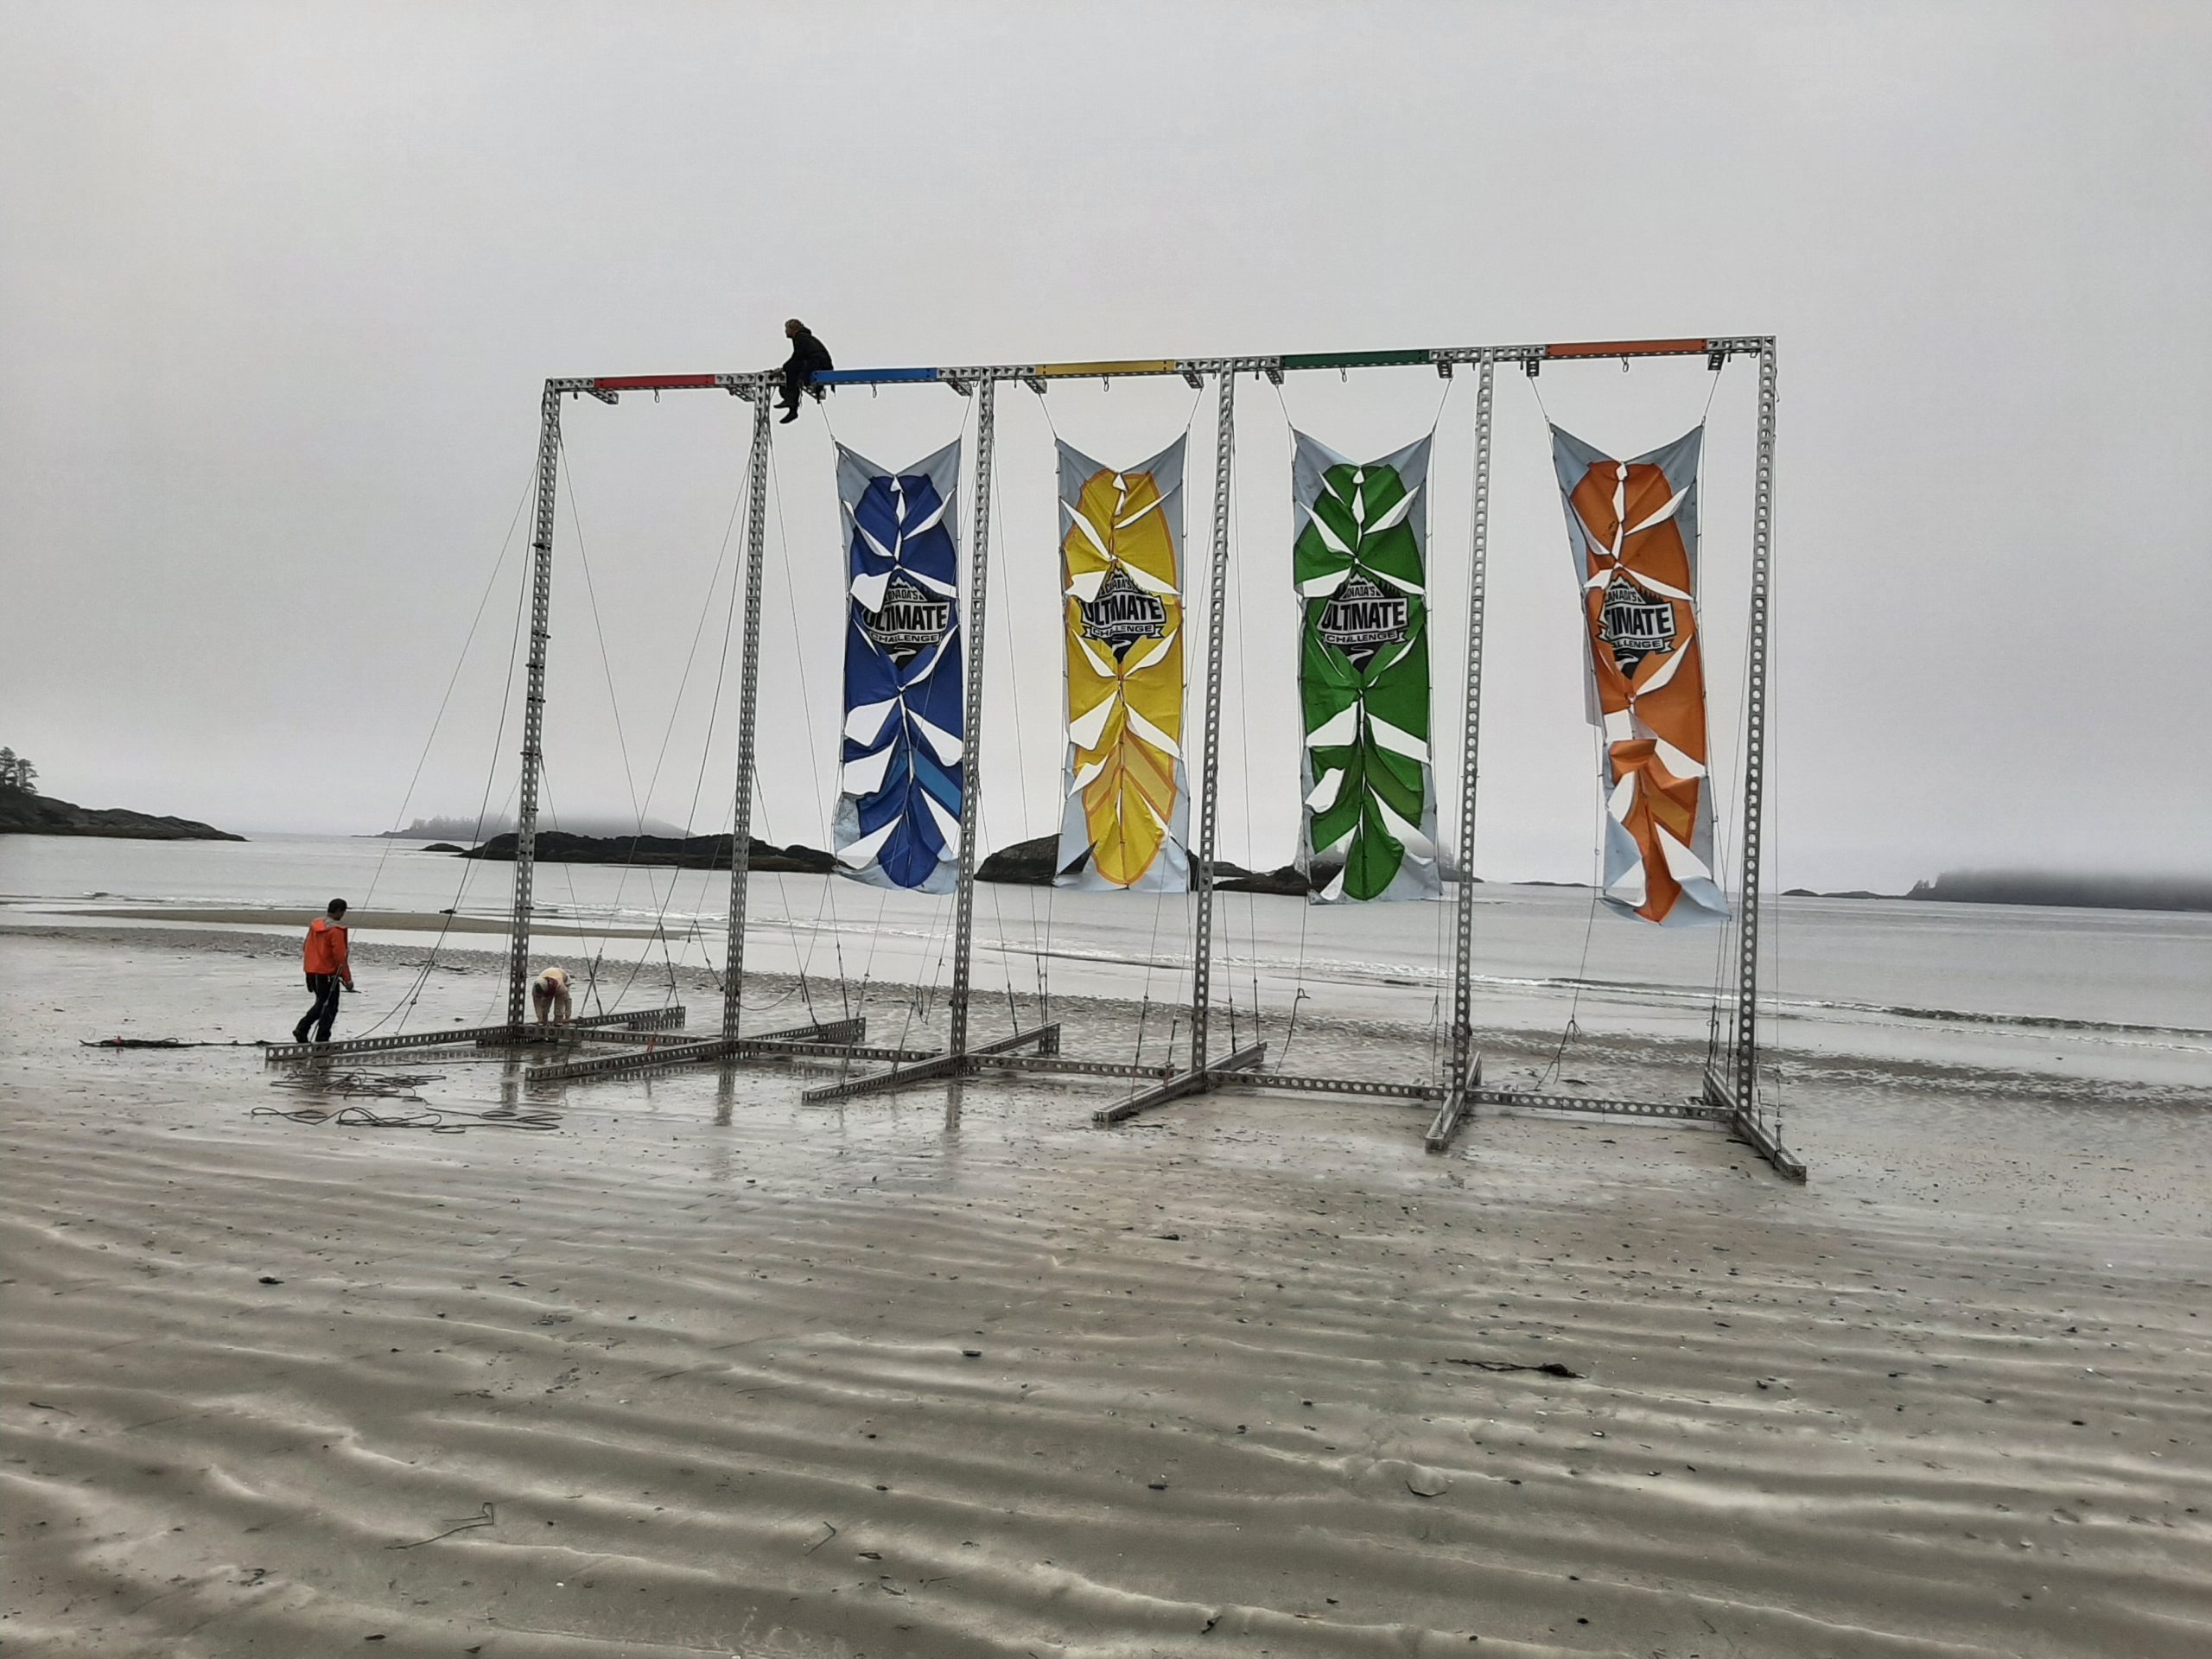
While he was down on the beach, he witnessed an episode (presumably) of Canada’s Ultimate Reality Challenge (who knows what that is) being filmed.
For this challenge, each team had to fit 10 pieces of material together to make the rectangular banners and then get them into place on the frame. As you can see from the size of the man standing to the left of the frame, these banners were big and probably quite heavy. It took a great deal of teamwork to accomplish this task and about an average of an hour to complete.
20 people (5 teams of 4) swam to our beach from a barge that was anchored right offshore, then worked in teams to complete different tasks. The above being just one of the assignments.
Some required a bit of strength, but none where anyone was in real physical danger or being asked to eat raw rutabagas or anything that disgusting! The tension was high and screams between teams could be heard. So, it was definitely a serious (at least to participants) competition!
Andy thought it was kind of fun to watch and stayed down on the beach until he got too cold. Then it was back to the trailer for a shot of heat and a couple shots of bourbon in his cocktail of choice this evening – a Maker’s Mark Manhattan.
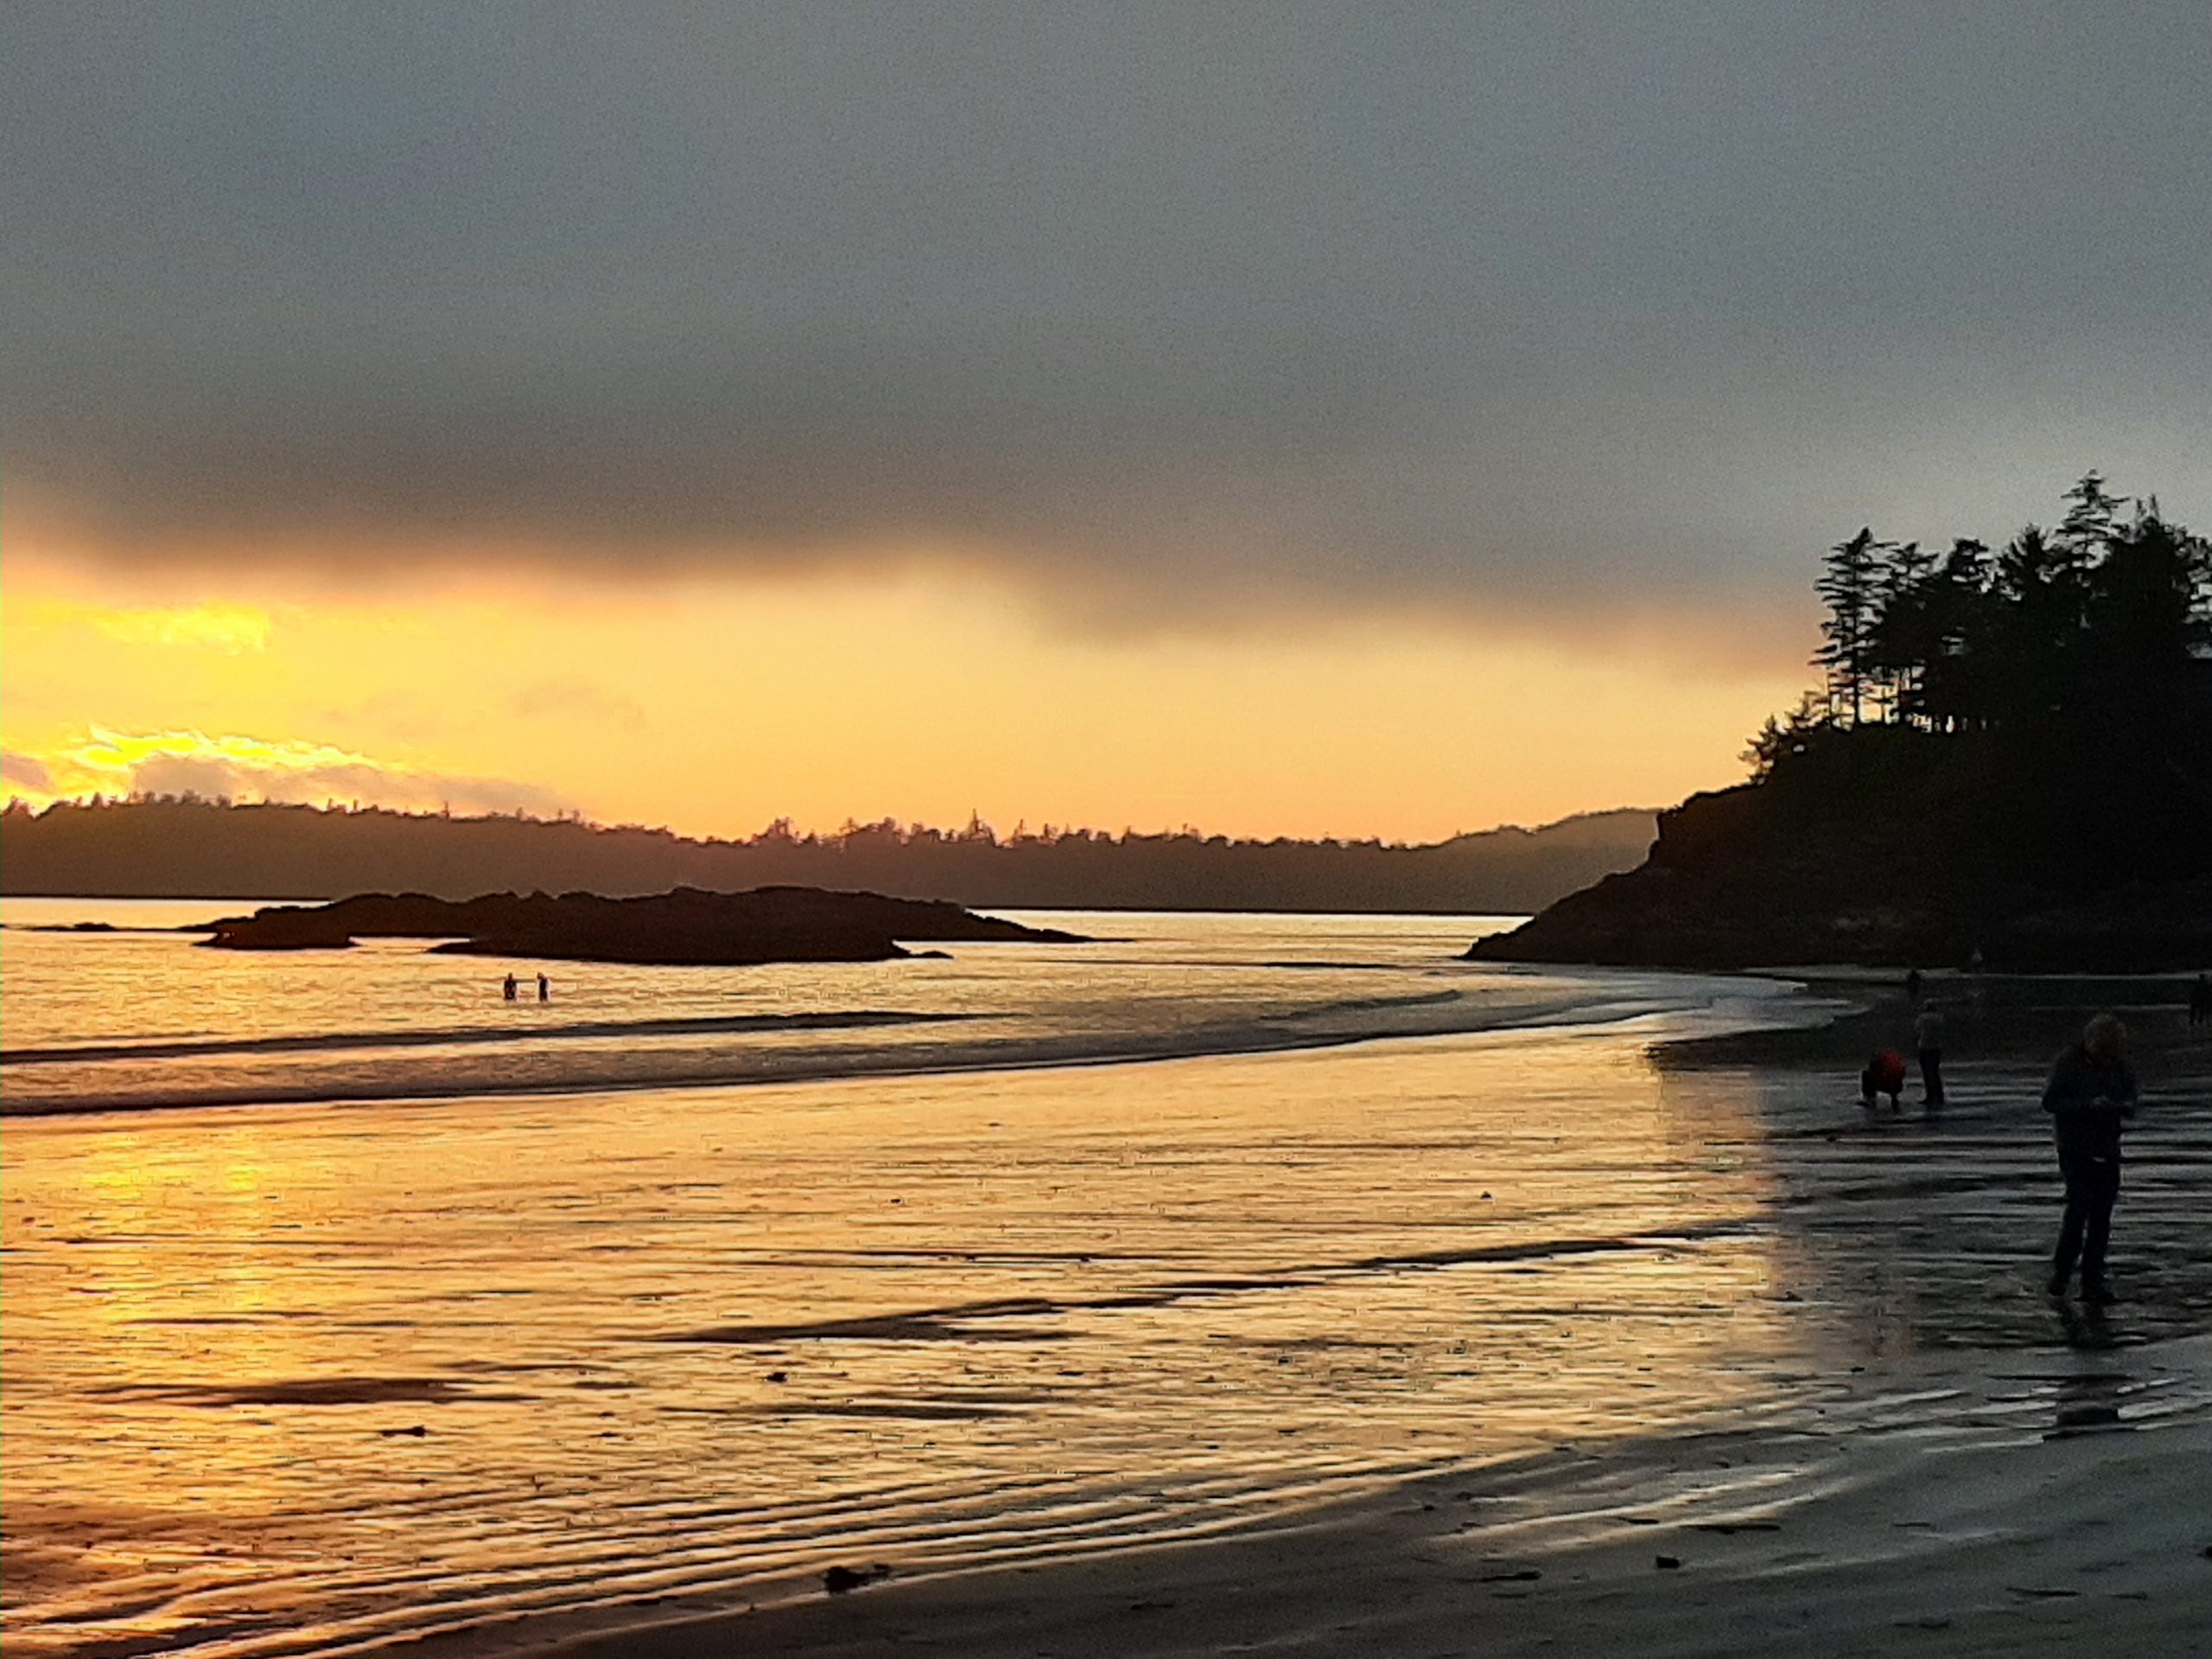
And oh, the sunset this evening. Magnificent!
After dinner it was the usual. We each read our respective books for a little while before taking those few short steps that afforded us blessed horizontality and a chance to get a good 10 hours of sleep. Another delightful day in Canada.
Tuesday, September 17, 2024 – Bella Pacifica Campground
Well, the guys predicting rain were not wrong. We woke to a wet world with big old drops of rain. Not a gently little mist or a charming little sprinkle. The ground may have been sodden, but nothing could dampen our spirits. Until Andy tried to light our oven. No way was that sucker going to be lit. So fine! I decided if I couldn’t bake the biscuits for our breakfast of biscuits and sausage gravy with an over easy egg on the side, I would just have to improvise.
The sausage gravy I had made at home and was currently residing in our trailer freezer. The biscuits, in the form of a package mix, were just waiting to be mixed up and baked. But with no oven I had to get inventive. So, I “baked” them on my griddle. I used low heat, flipped them several times, and the result was nicely done biscuits with a crust that was even crispier than if they had been baked. Hurray for me. And since I had made enough gravy for 2 breakfasts, I now had the biscuits in our freezer for the next round of biscuits and gravy. Score 2 for Patti, score 0 for oven!
After finishing breakfast (about 10:30 am) and doing the dishes we decided to take a ride and see what this area had to offer. So, into Tofino we drove. And boy oh boy has Tofino changed since the first and last time I visited this part of the world.
About 25 years ago, my dear friend Linda invited me to come along with her to stay a couple of nights in Tofino and attend some kind of local sculpture garden event. And Linda suggested staying in a hostel. (I had never stayed in a hostel before.) (Or haven’t since and never will again!) Anyway, we got to our hostel and found out that the 4-person, 2 bunk-bed rooms were co-ed. What? Wait! I am not sharing a room with a man. Period!
I was ready to spend any amount of money to get us a room in a hotel/motel or any reasonable accommodation that did not include a strange man listening to me snore! But we had brought all our own food to prepare in the hostel kitchen, so I put on my big girl panties, plus every other article of clothing I had brought along and decided to just go with the flow. But the bottom bunks had already been claimed when we got there. And with my arthritic body I wasn’t going to climb up to the top bunk. So, the delightful young man, as it turned out, who was one of our roommates, offered me his bottom bunk but I declined. So, he helped me move the top bunk mattress to the floor where I slept for the couple of nights we spent in hostel hell. (And no there was nothing we read or were told about the hostel that referenced co-ed in the reservation process. So, be advised, if you plan to stay in a hostel, you might want to call before booking and ask a few pertinent questions. Better to be informed than gob smacked like we were!)
The only good part of staying in the hostel was cooking in the community kitchen and feeding anyone who needed an extra little bit of sustenance. (I do so love to feed people.) But stay in a hostel ever again? Not even if Mark Harmon was one of my bunkmates! Or, I should say, especially if MH was one of my room mates. Yikes! How horrible would that be to have to confess to him that I would be getting up at least 3 times every night to go to the bathroom! These are the things of which nightmares are made! But enough about hostile hostels and back to our exploratory drive.
In order to not bore you more than I already have, I’m going to make this next part short and sweet. We drove through Tofino, bought fresh fish (halibut and scallops for dinner), drove down to Ucluelet, then back to camp.
Back in camp I wrote up this trip report until it was time to cook dinner. (And yes, it was still raining.) But who cares. We were dry, warm, and had plenty of provisions to ward off hunger or alcohol deprivation. For dinner I made a big salad and fried up the halibut and scallops we had bought in Tofino. I’ve never had better halibut. I simply sprinkled seasoned salt and pepper on one side and fried the fish in half olive oil, half butter and served it with a simple fresh lemon and mayonnaise aioli. Absolutely yum!
Then I read some of my book, wrote up this day’s report, and luxuriated in another early trundle off to bed. Another wonderful day in Canada.
Wednesday, September 18, 2024 – Bella Pacifica Campground
Well, we decided today was going to be another quiet day in camp. It wasn’t raining, and the sun was trying its darndest to break through the clouds, but to no avail. So, after a late breakfast we decided to try and find the hostel where I stayed all those years ago. But nothing we found looked or felt familiar at all. (I have a suspicion that some other unsuspecting guest might have burned the building down years ago. Of course, I’m sure that didn’t happen. And no, it wasn’t me! I didn’t do it!)
Next, we searched out where we were going for dinner that evening. That we found. Then into the sculpture garden parking lot that I immediately remembered from all those years ago. Yes, we found the place, but it was closed for the season. Then we decided to check out where the other half find lodging when they visit this area. In other words, the posh resorts. And oh my, there are some pretty fancy digs in this area now. Big money has found its way to this remote spot.
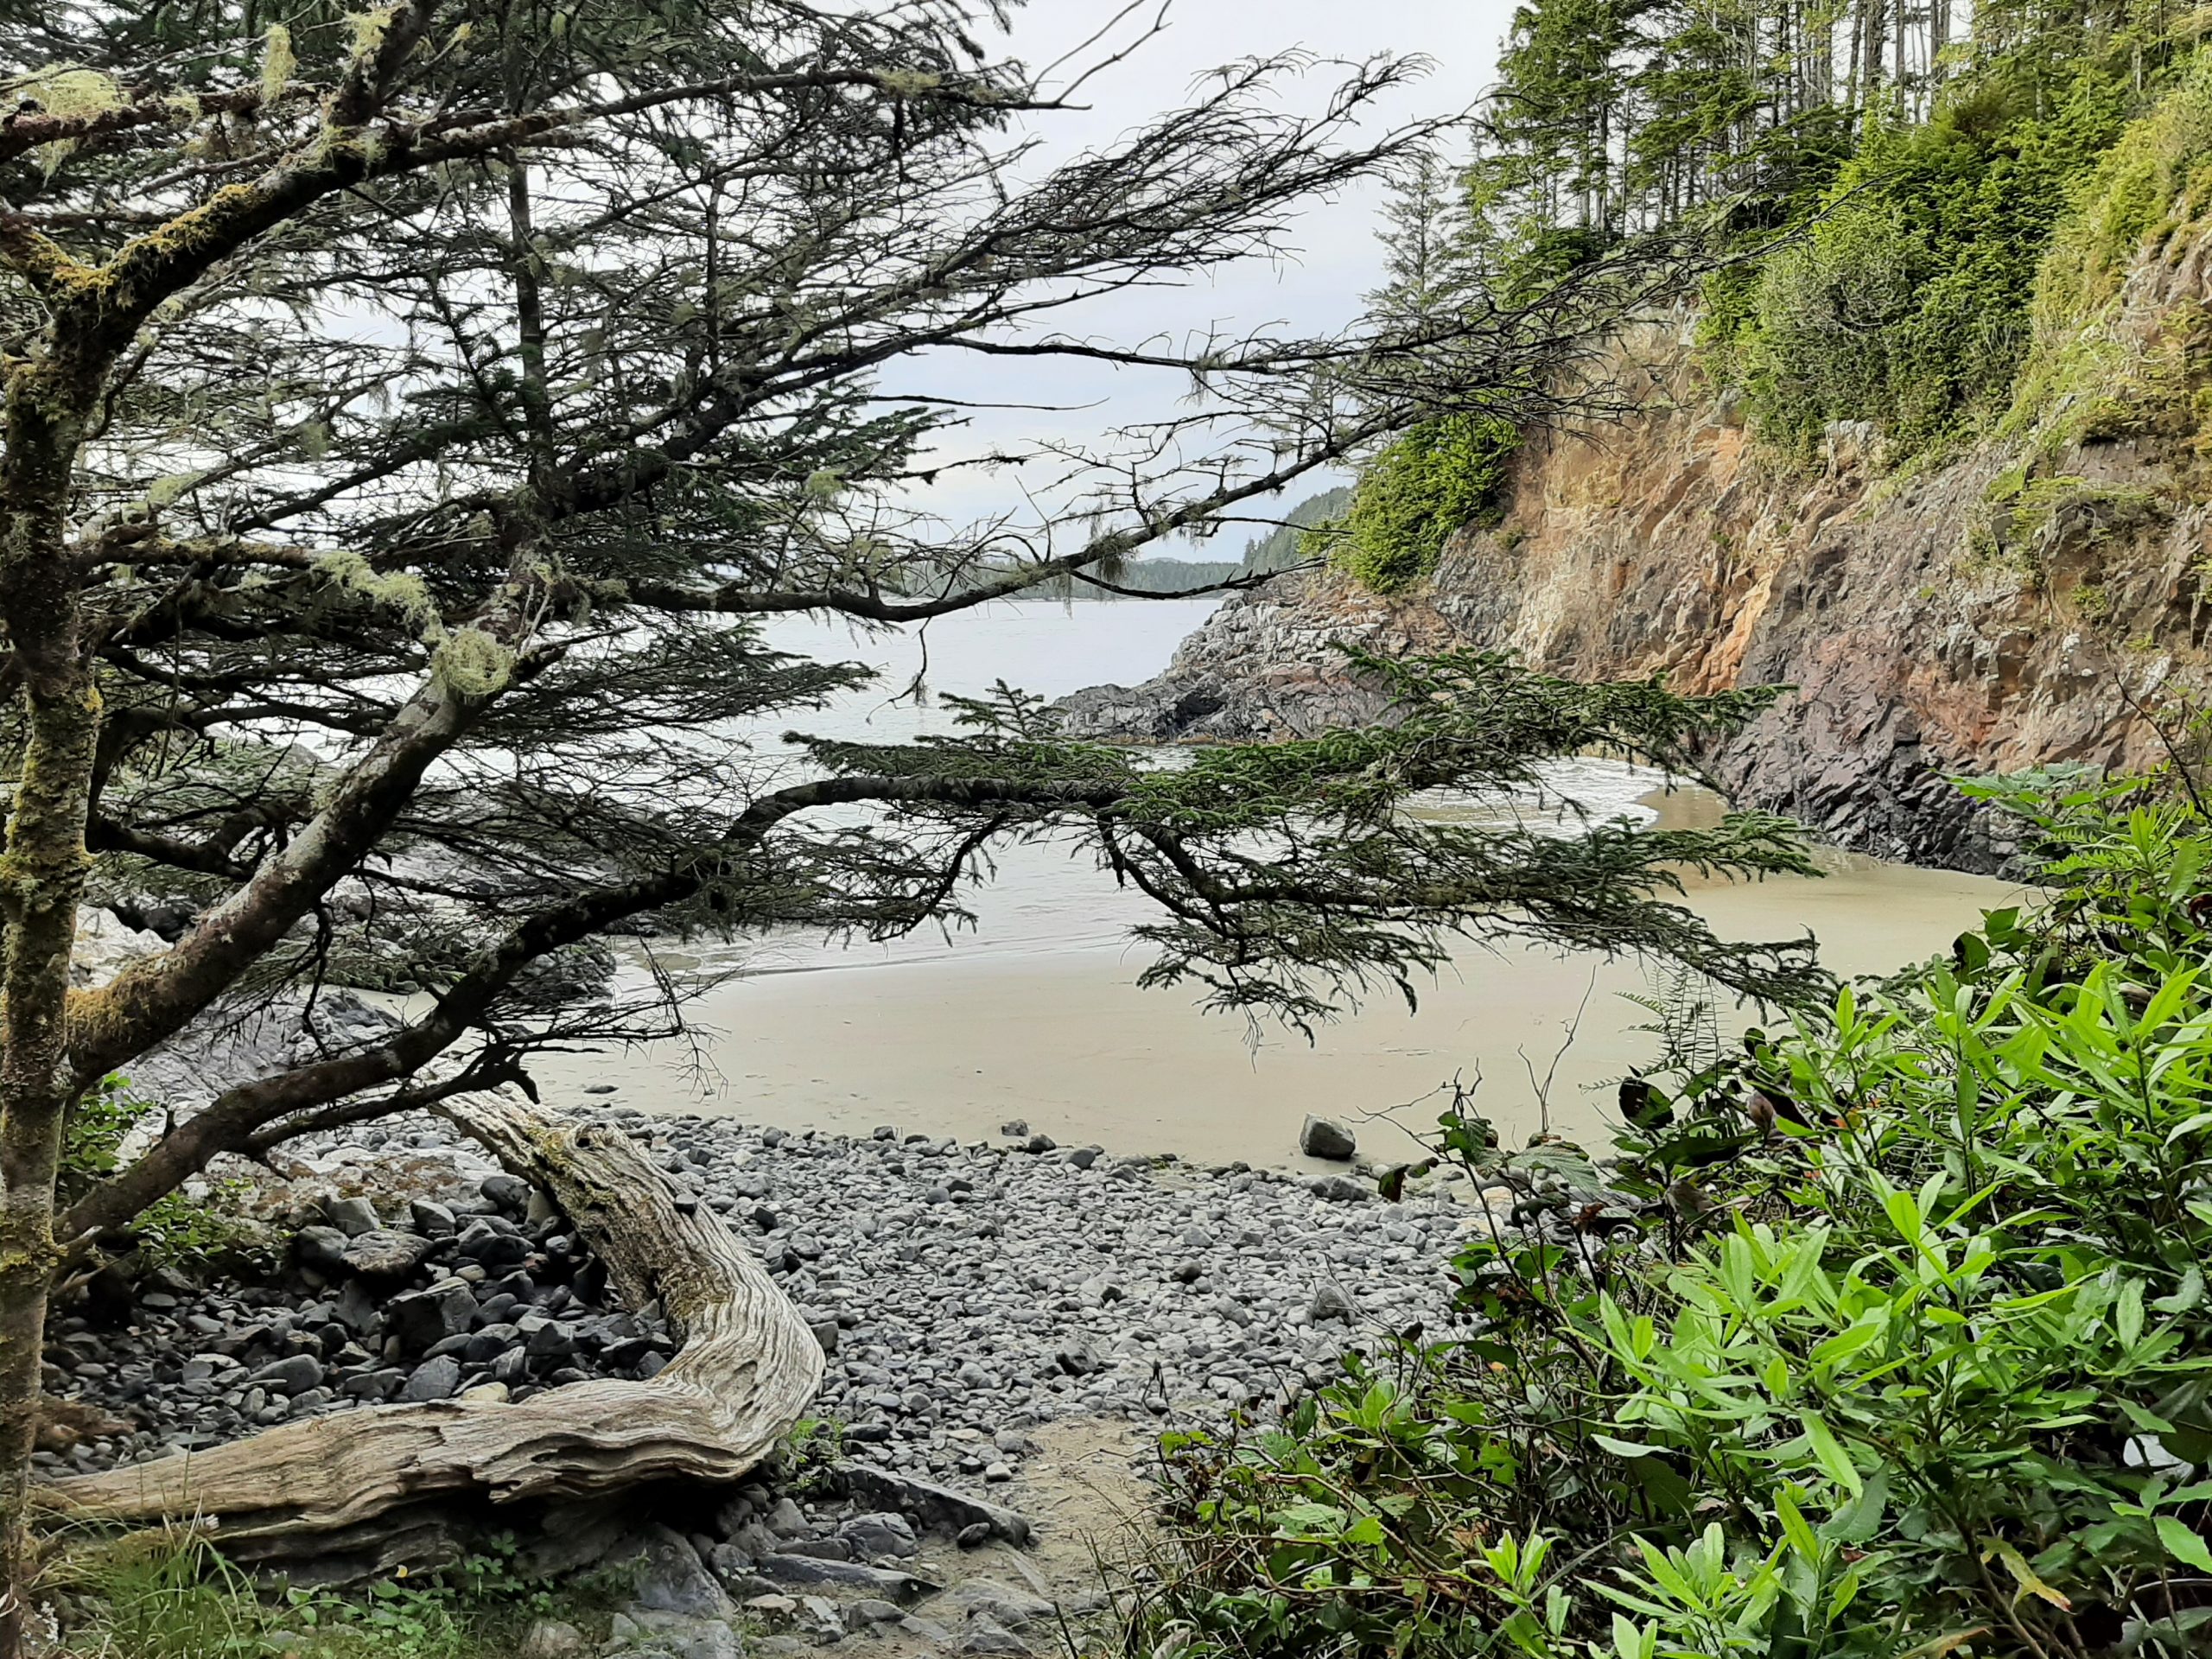
And I sure as heck can understand the appeal. This unbelievably beautiful area with its rugged coastline, numerous offshore islands, abundance of wildlife, surfing opportunities, and lush forests is just such a restful place to leave the hustle and bustle of life behind. It is simply, a nature lovers paradise. And for all you biking enthusiasts, there are biking trails everywhere you look.
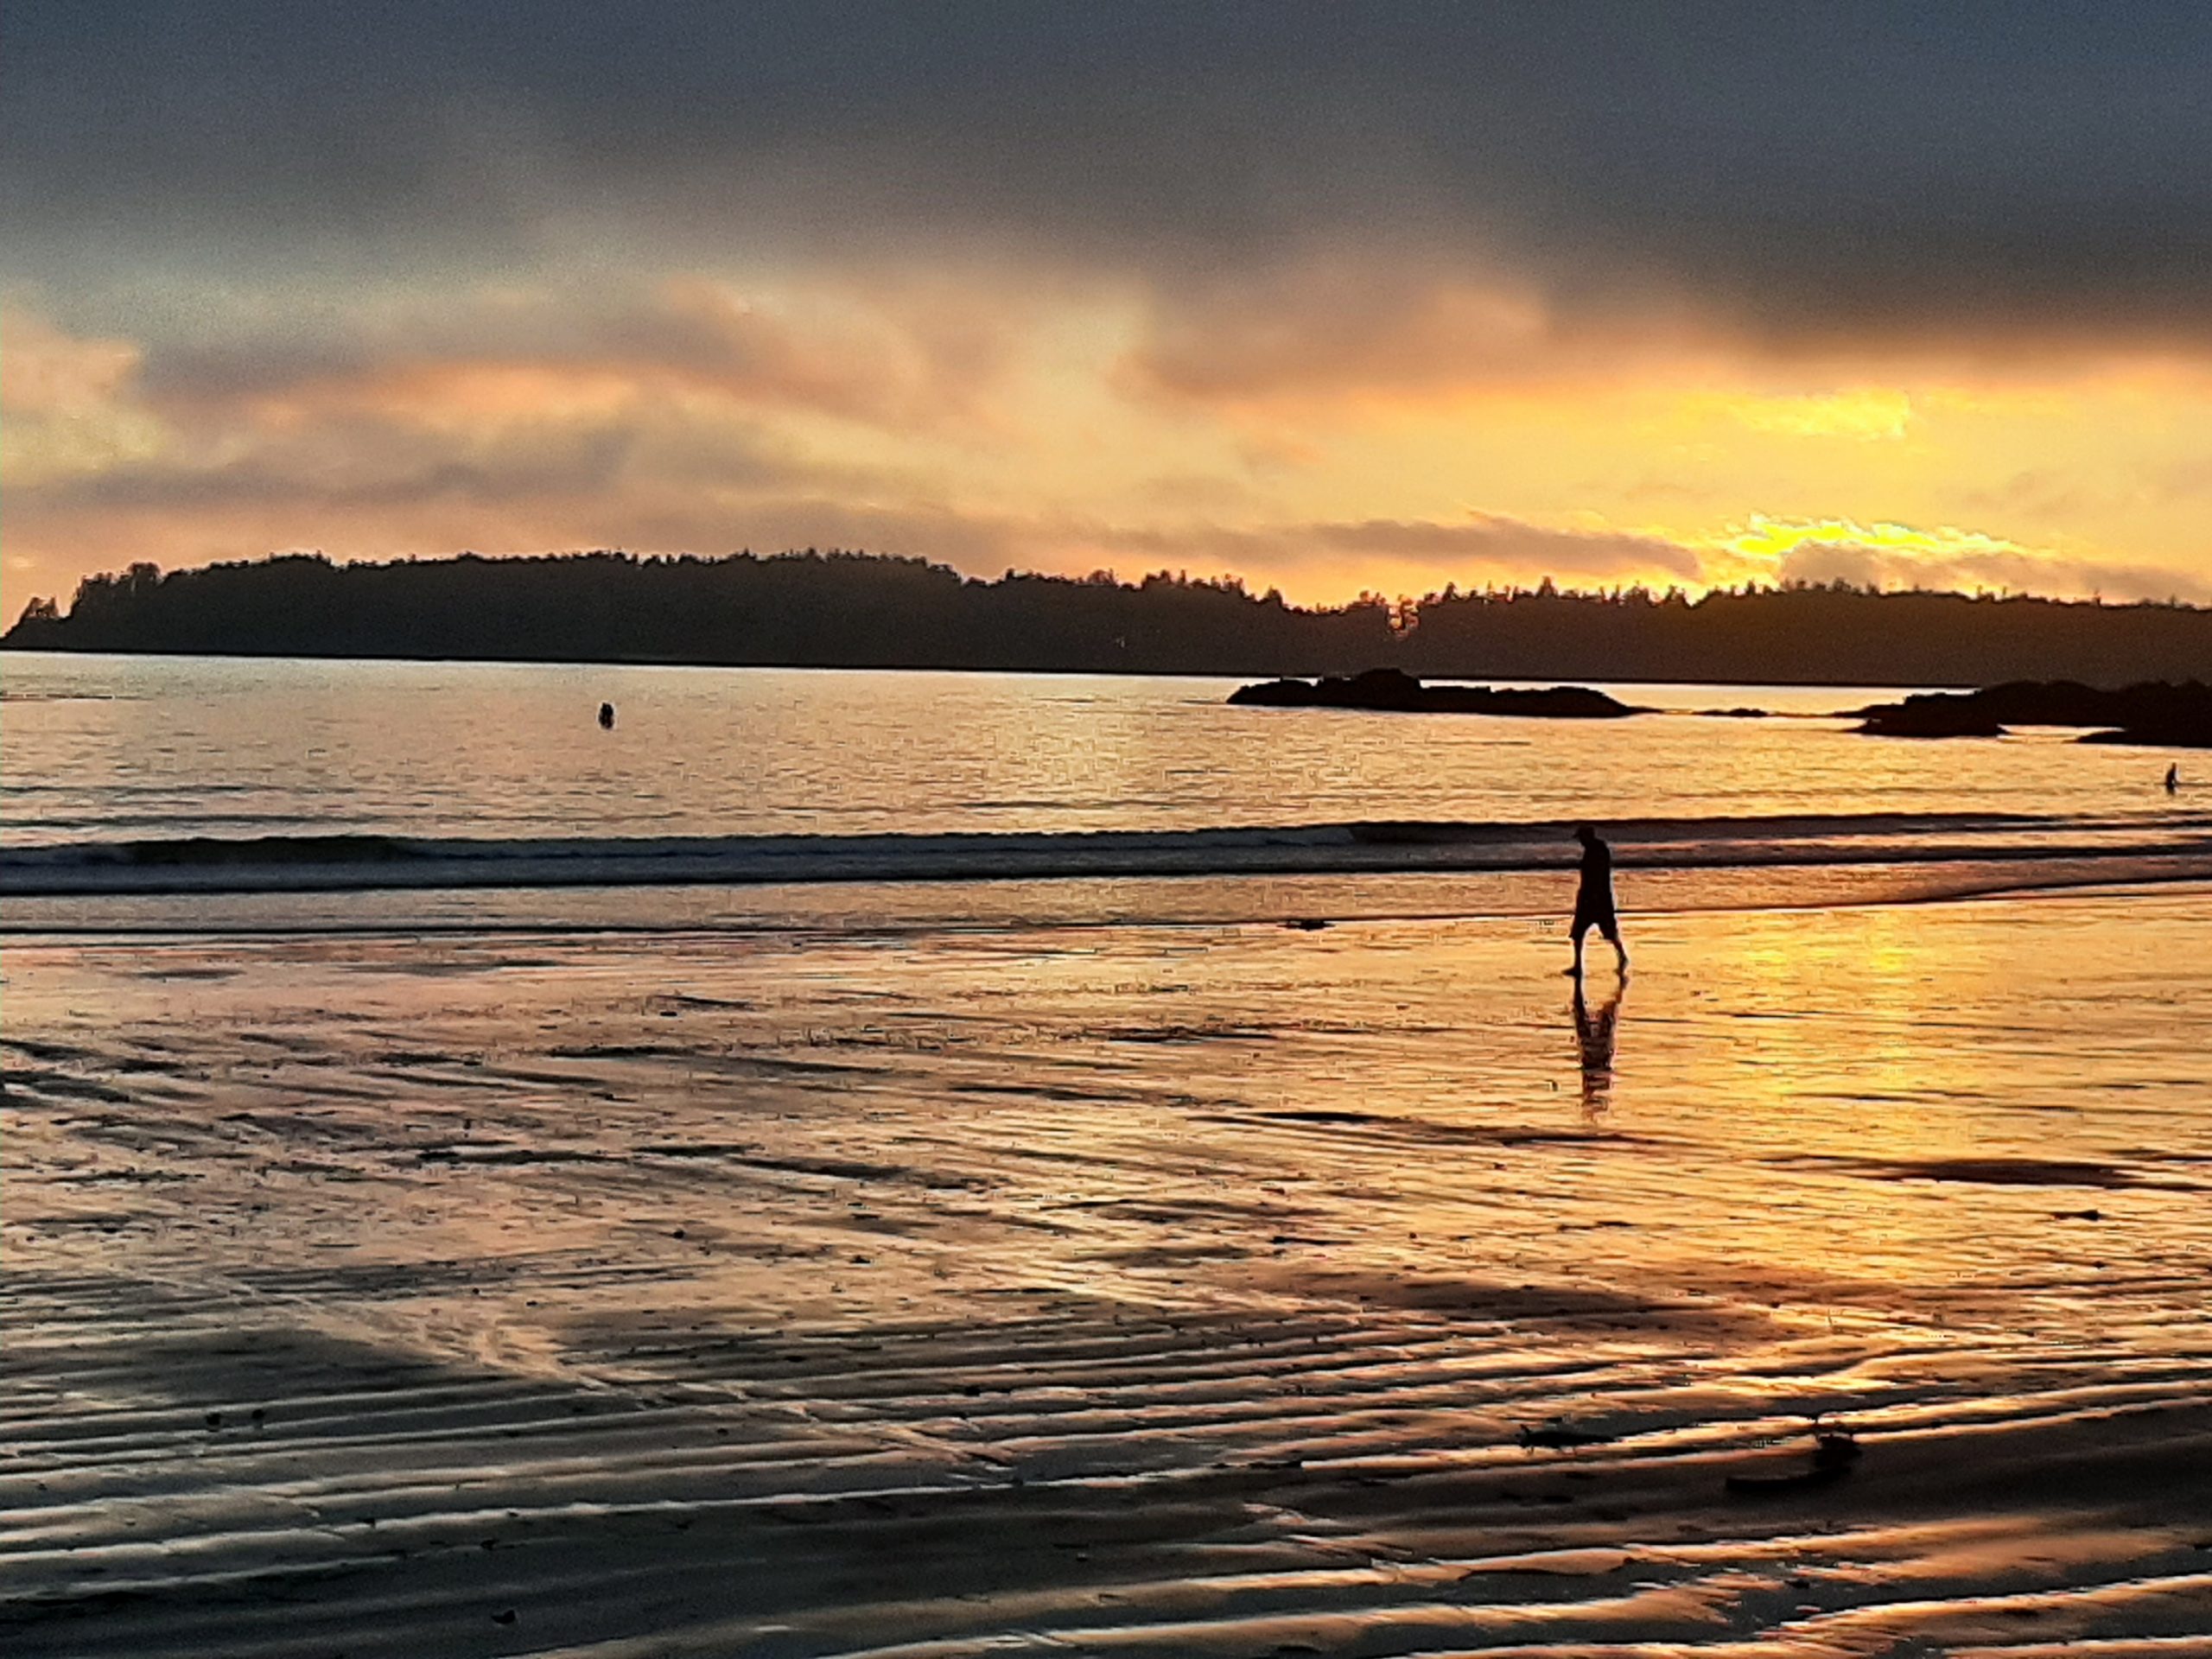
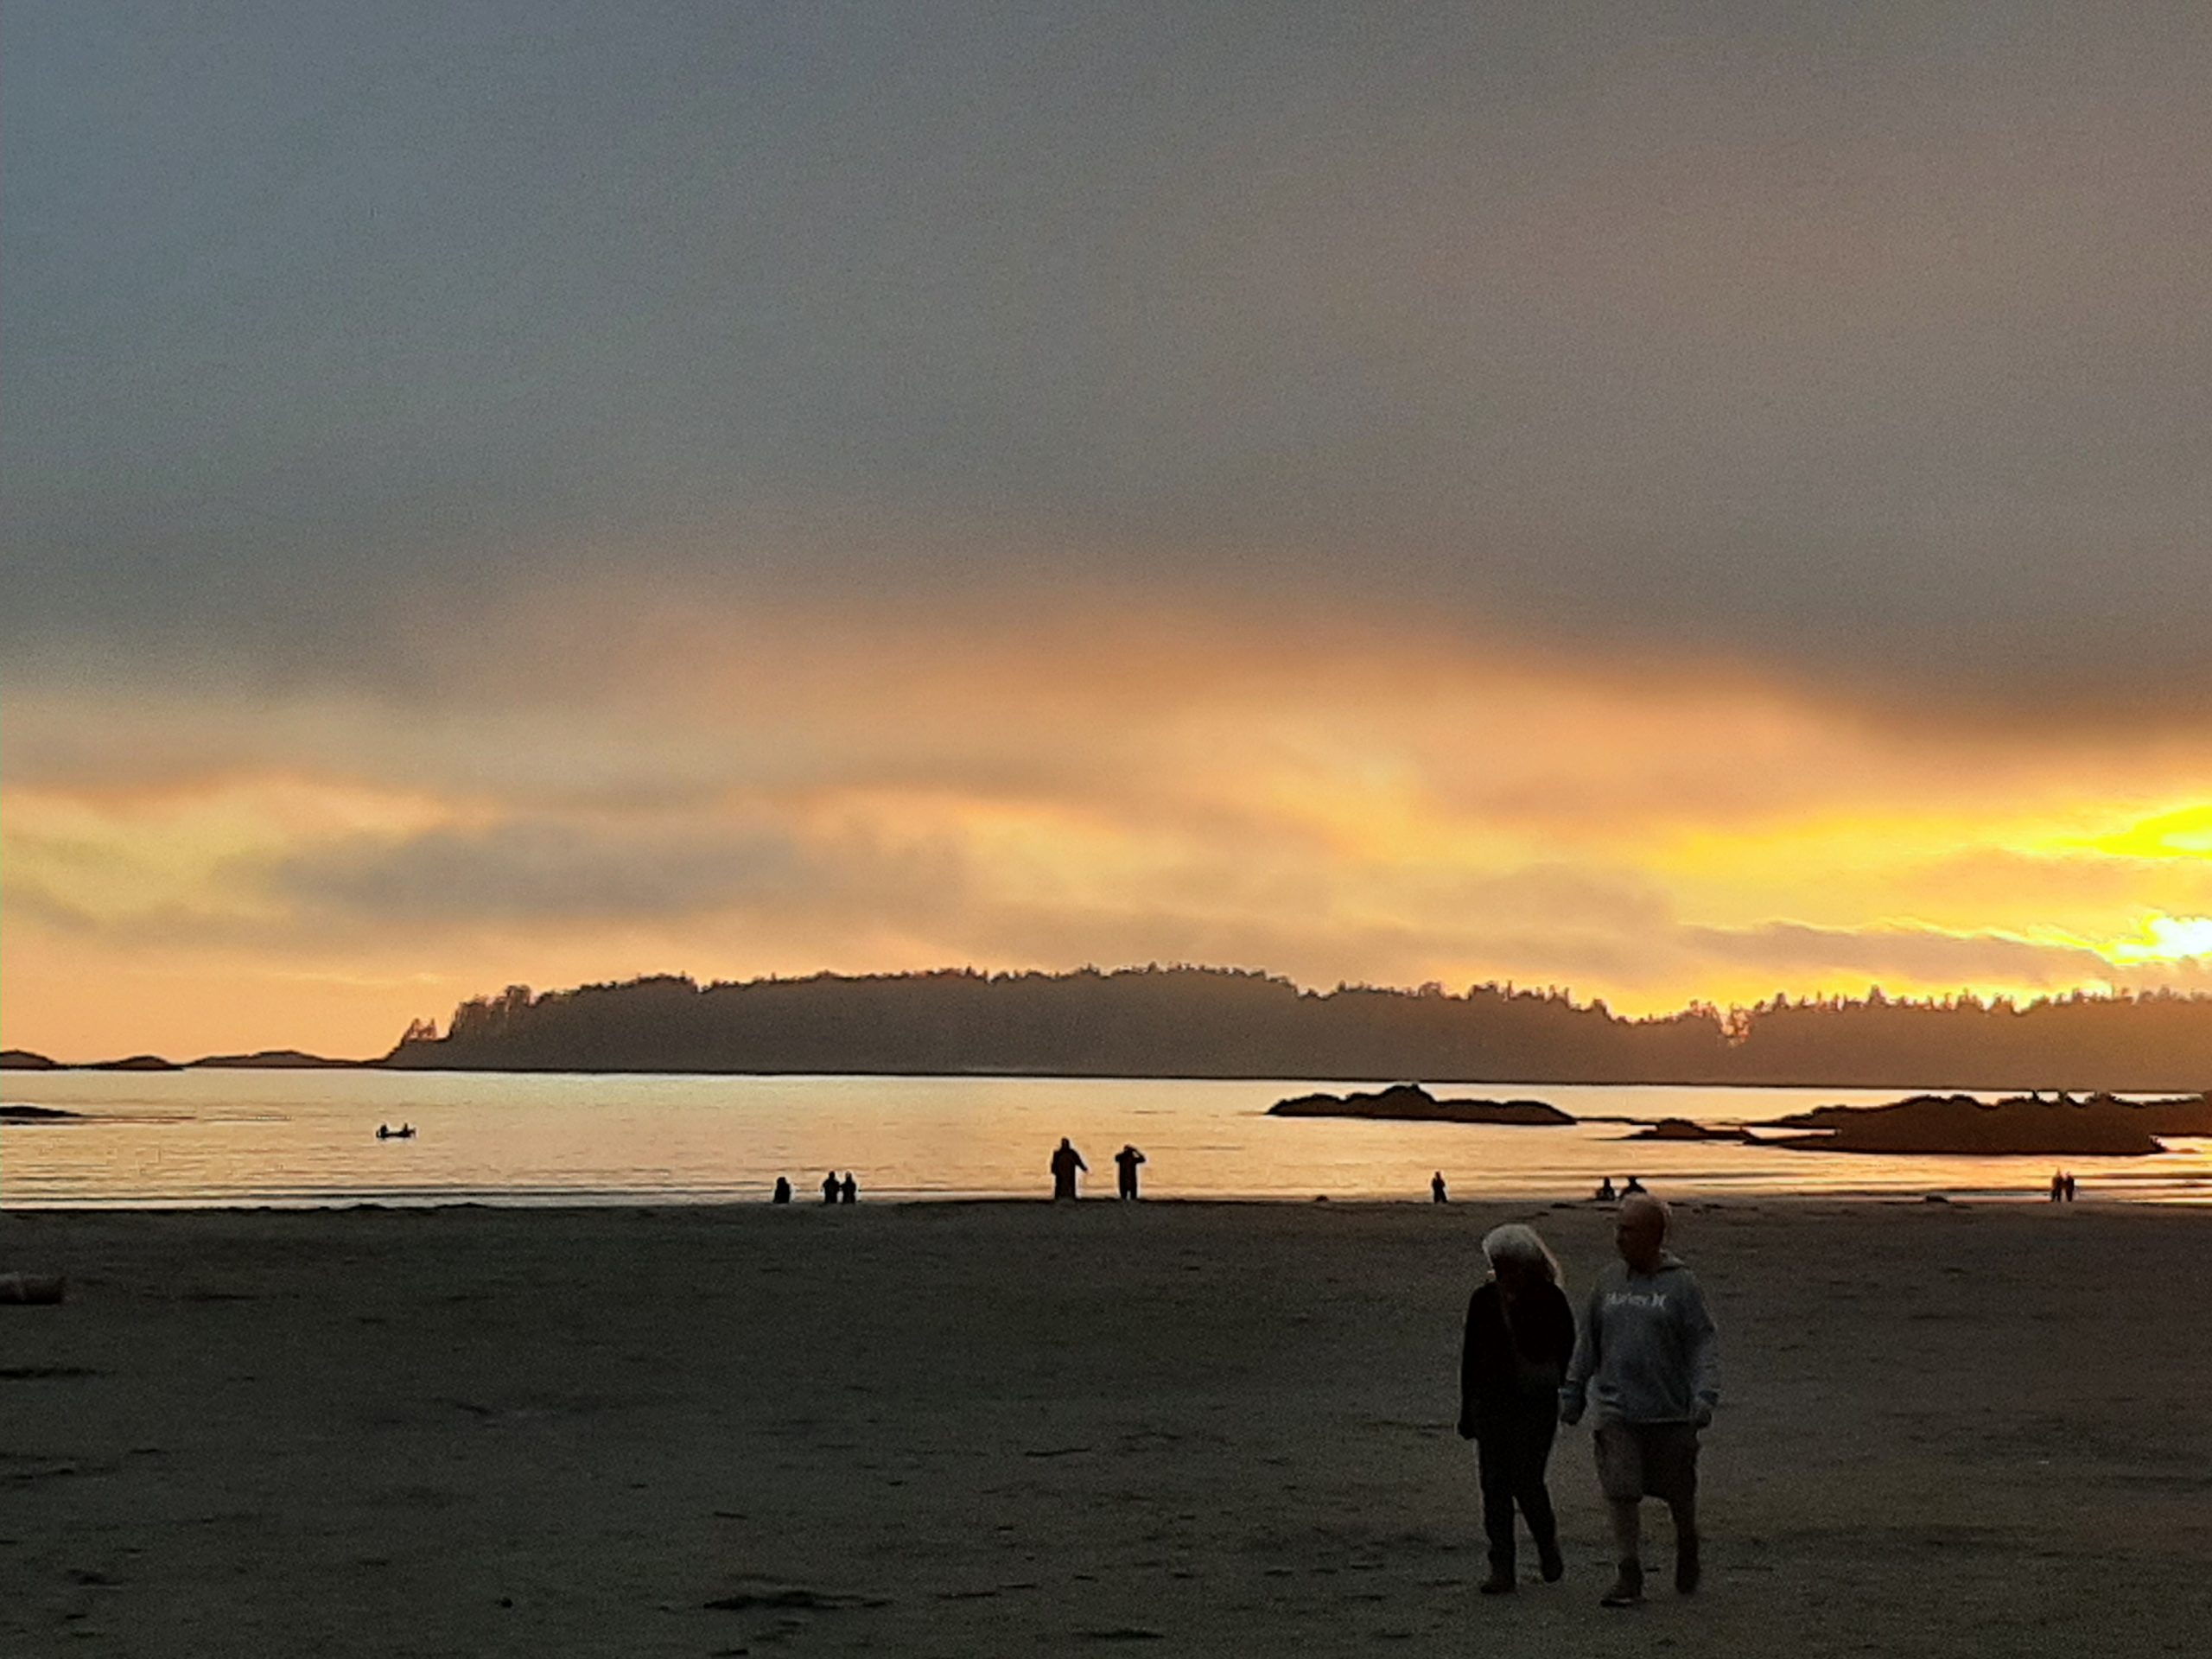
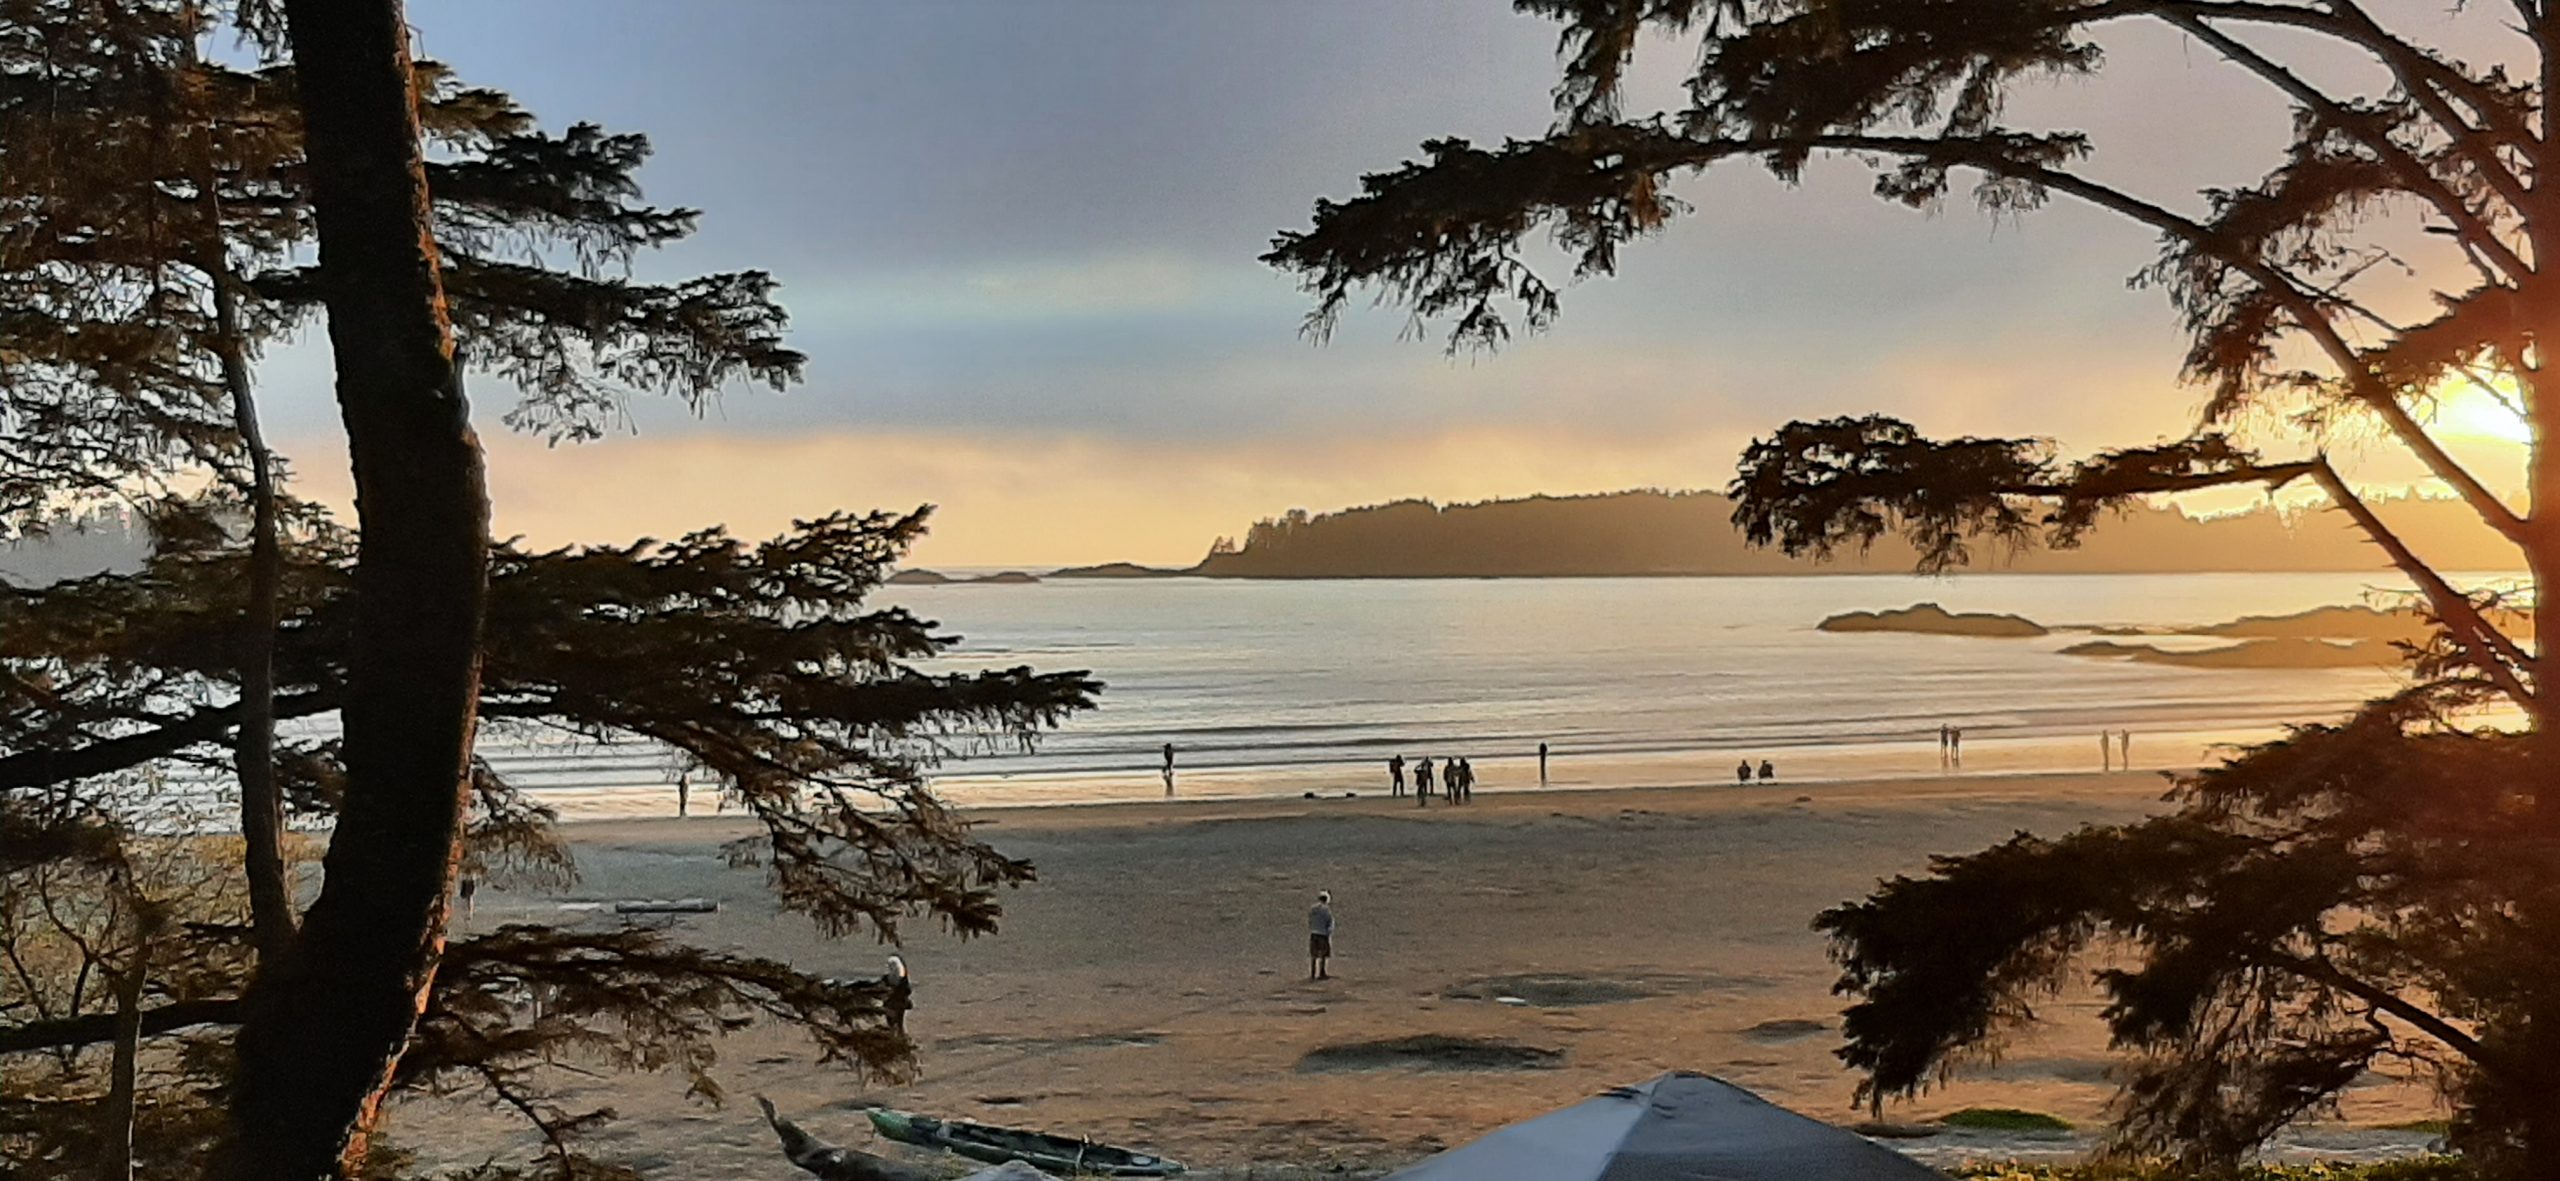
After our drive we came back to camp for Andy to take a beach walk and me to do some writing. Some views from the back of our trailer.
After Andy returned it was time for us to go back into Tofino for dinner. But first a bit of a walk around the many shops and galleries.
For dinner we chose The Schooner Restaurant and had a first-class meal. Had a chance to talk with a charming couple from Alberta that were sitting next to us. Every time we begin a conversation with any unknown person or persons, usually a couple, especially when we are traveling outside the US, I want to start by apologizing for what is happening politically in our country. And inevitably, they just smile and wait for us to bring the name of a certain former president into the conversation. Then they just shake their heads and empathize with us. Because what is happening in America is adversely affecting their nation as well as making America look like a country of unintelligent jerks. So, we do our best to let them know that we aren’t all idiots. And that those of us with half a brain, absolutely hate what is happening to women’s rights, immigrant status, civility, humanity, empathy, and all the other bedrock tenets of democracy. And that hopefully in our upcoming election, good will win over evil.
And then they tell us that their country is also having problems. And I don’t care what country you care to mention. There are seemingly problems everywhere.
After our lovely dinner, it was back to the trailer for another few chapters in our respective books. Which reminds me, I am currently reading Harlan Coben’s second published novel, Miracle Cure. And I especially loved reading the note Mr. Coban wrote about this book many years after it was first published, which BTW was in 1991 when he was in his early twenties.
He wrote, “Okay, if this is the first book of mine you’re going to try, stop now. Return it. Grab another. It’s okay. I’ll wait.” (BTW, I’m loving the book.) But then, I love Mr. Coben’s writing.
Then it was off to bed to be rocked to sleep by the sound of gentle waves washing up on shore.
Thursday, September 19, 2024 – Bella Pacifica Campground
Took our time waking up and getting started on our day. But soon we had happy tummies and were ready to set off for another day of adventure.
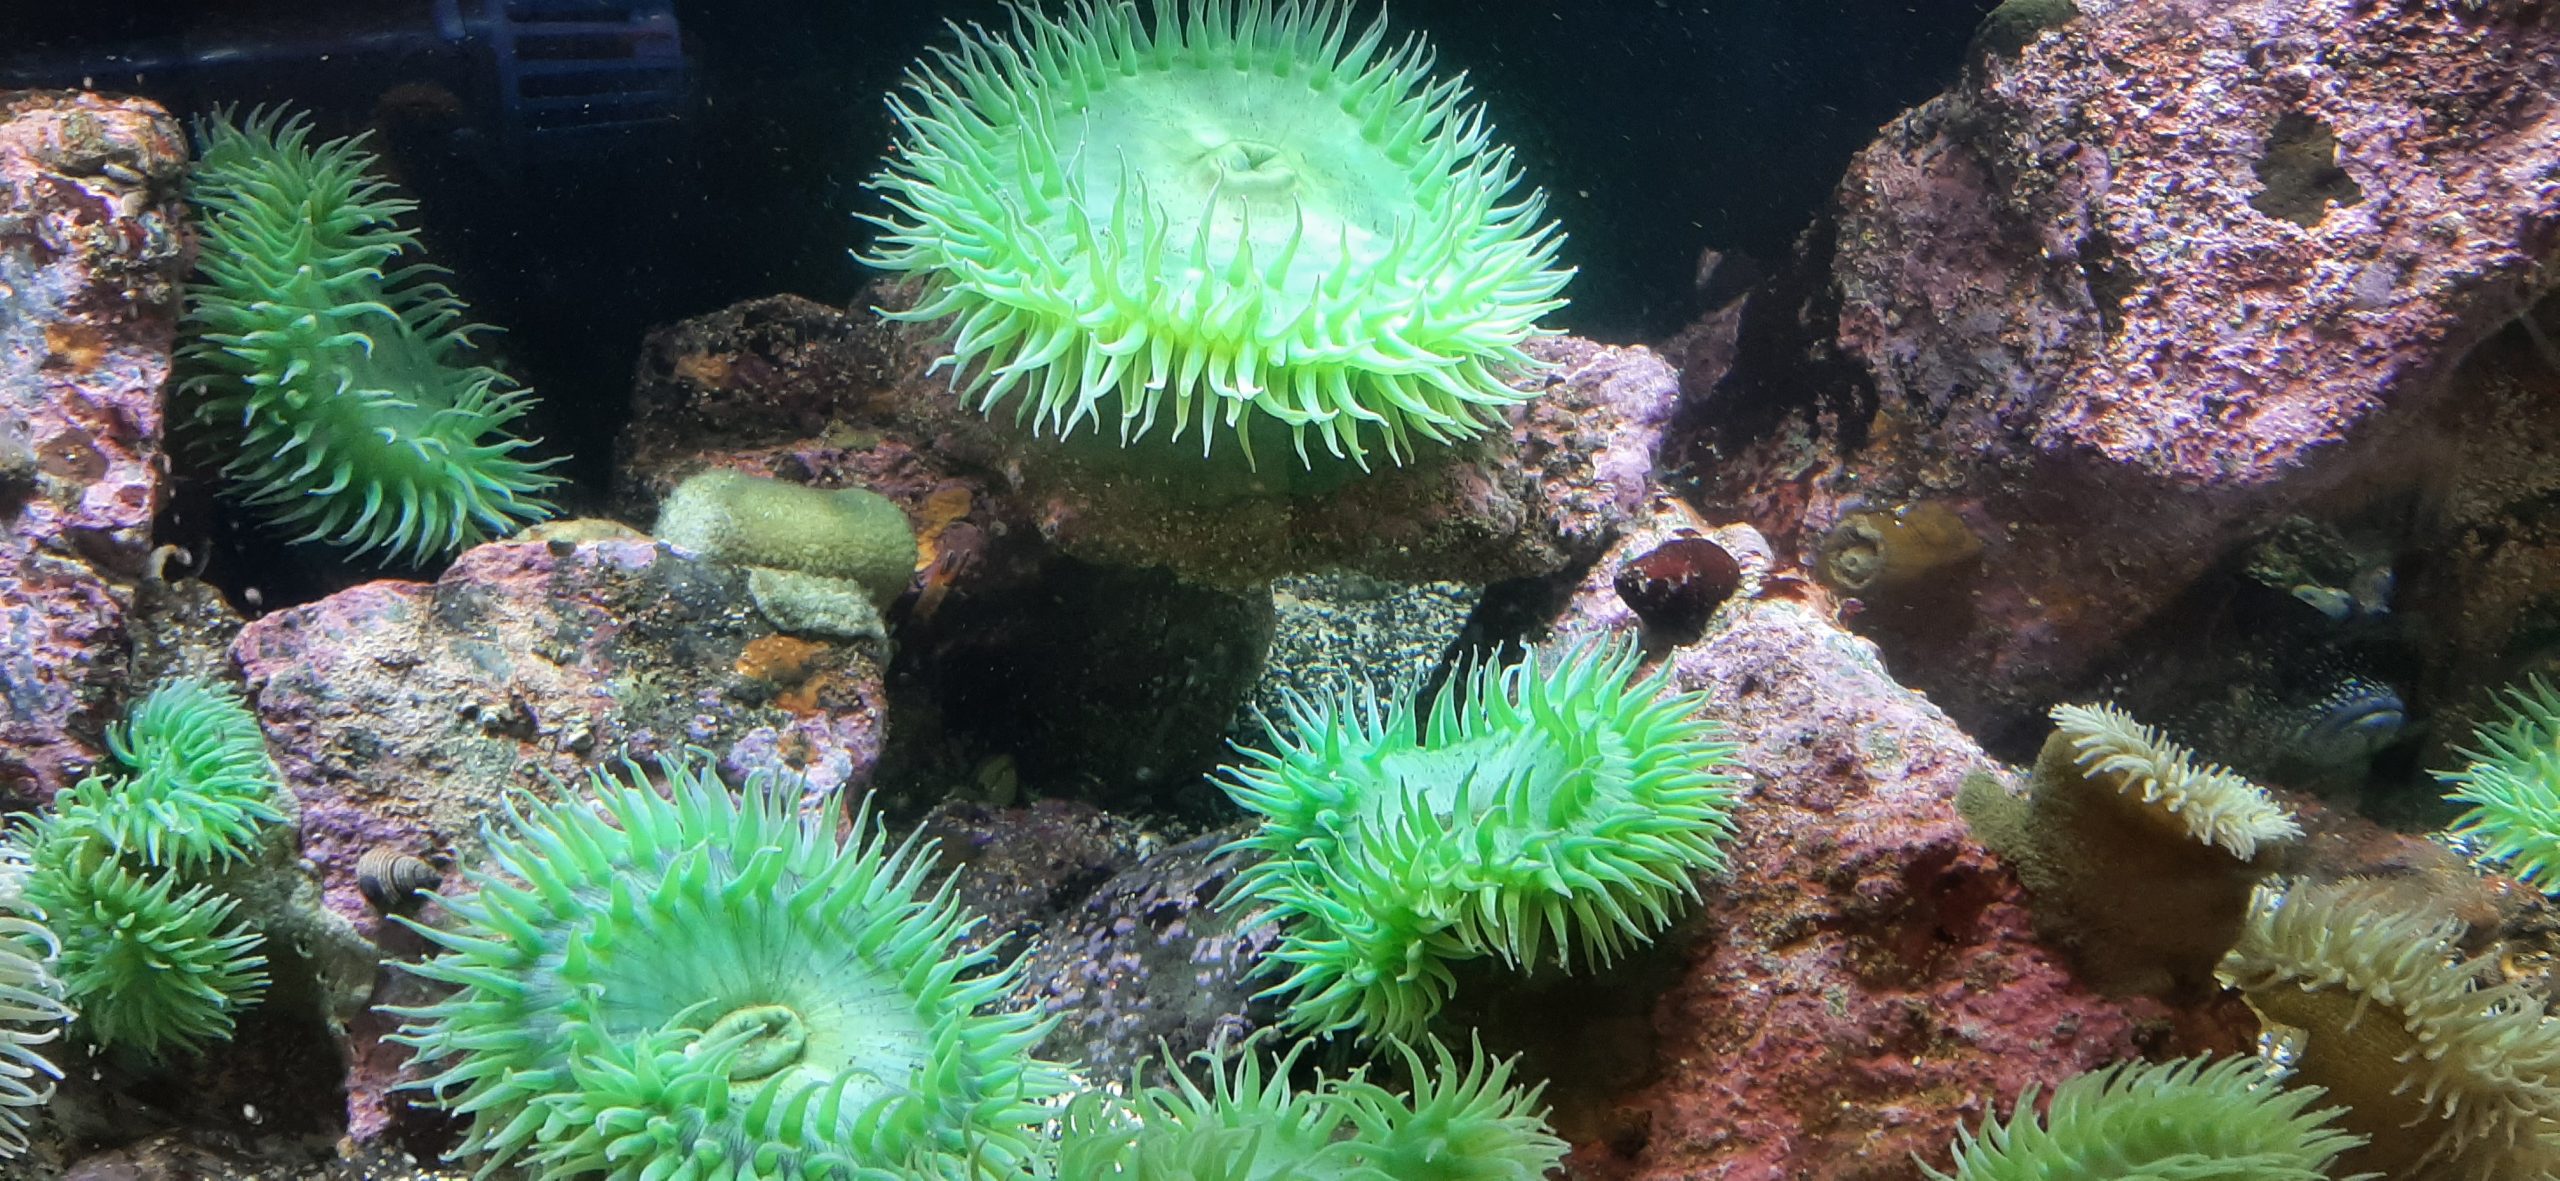
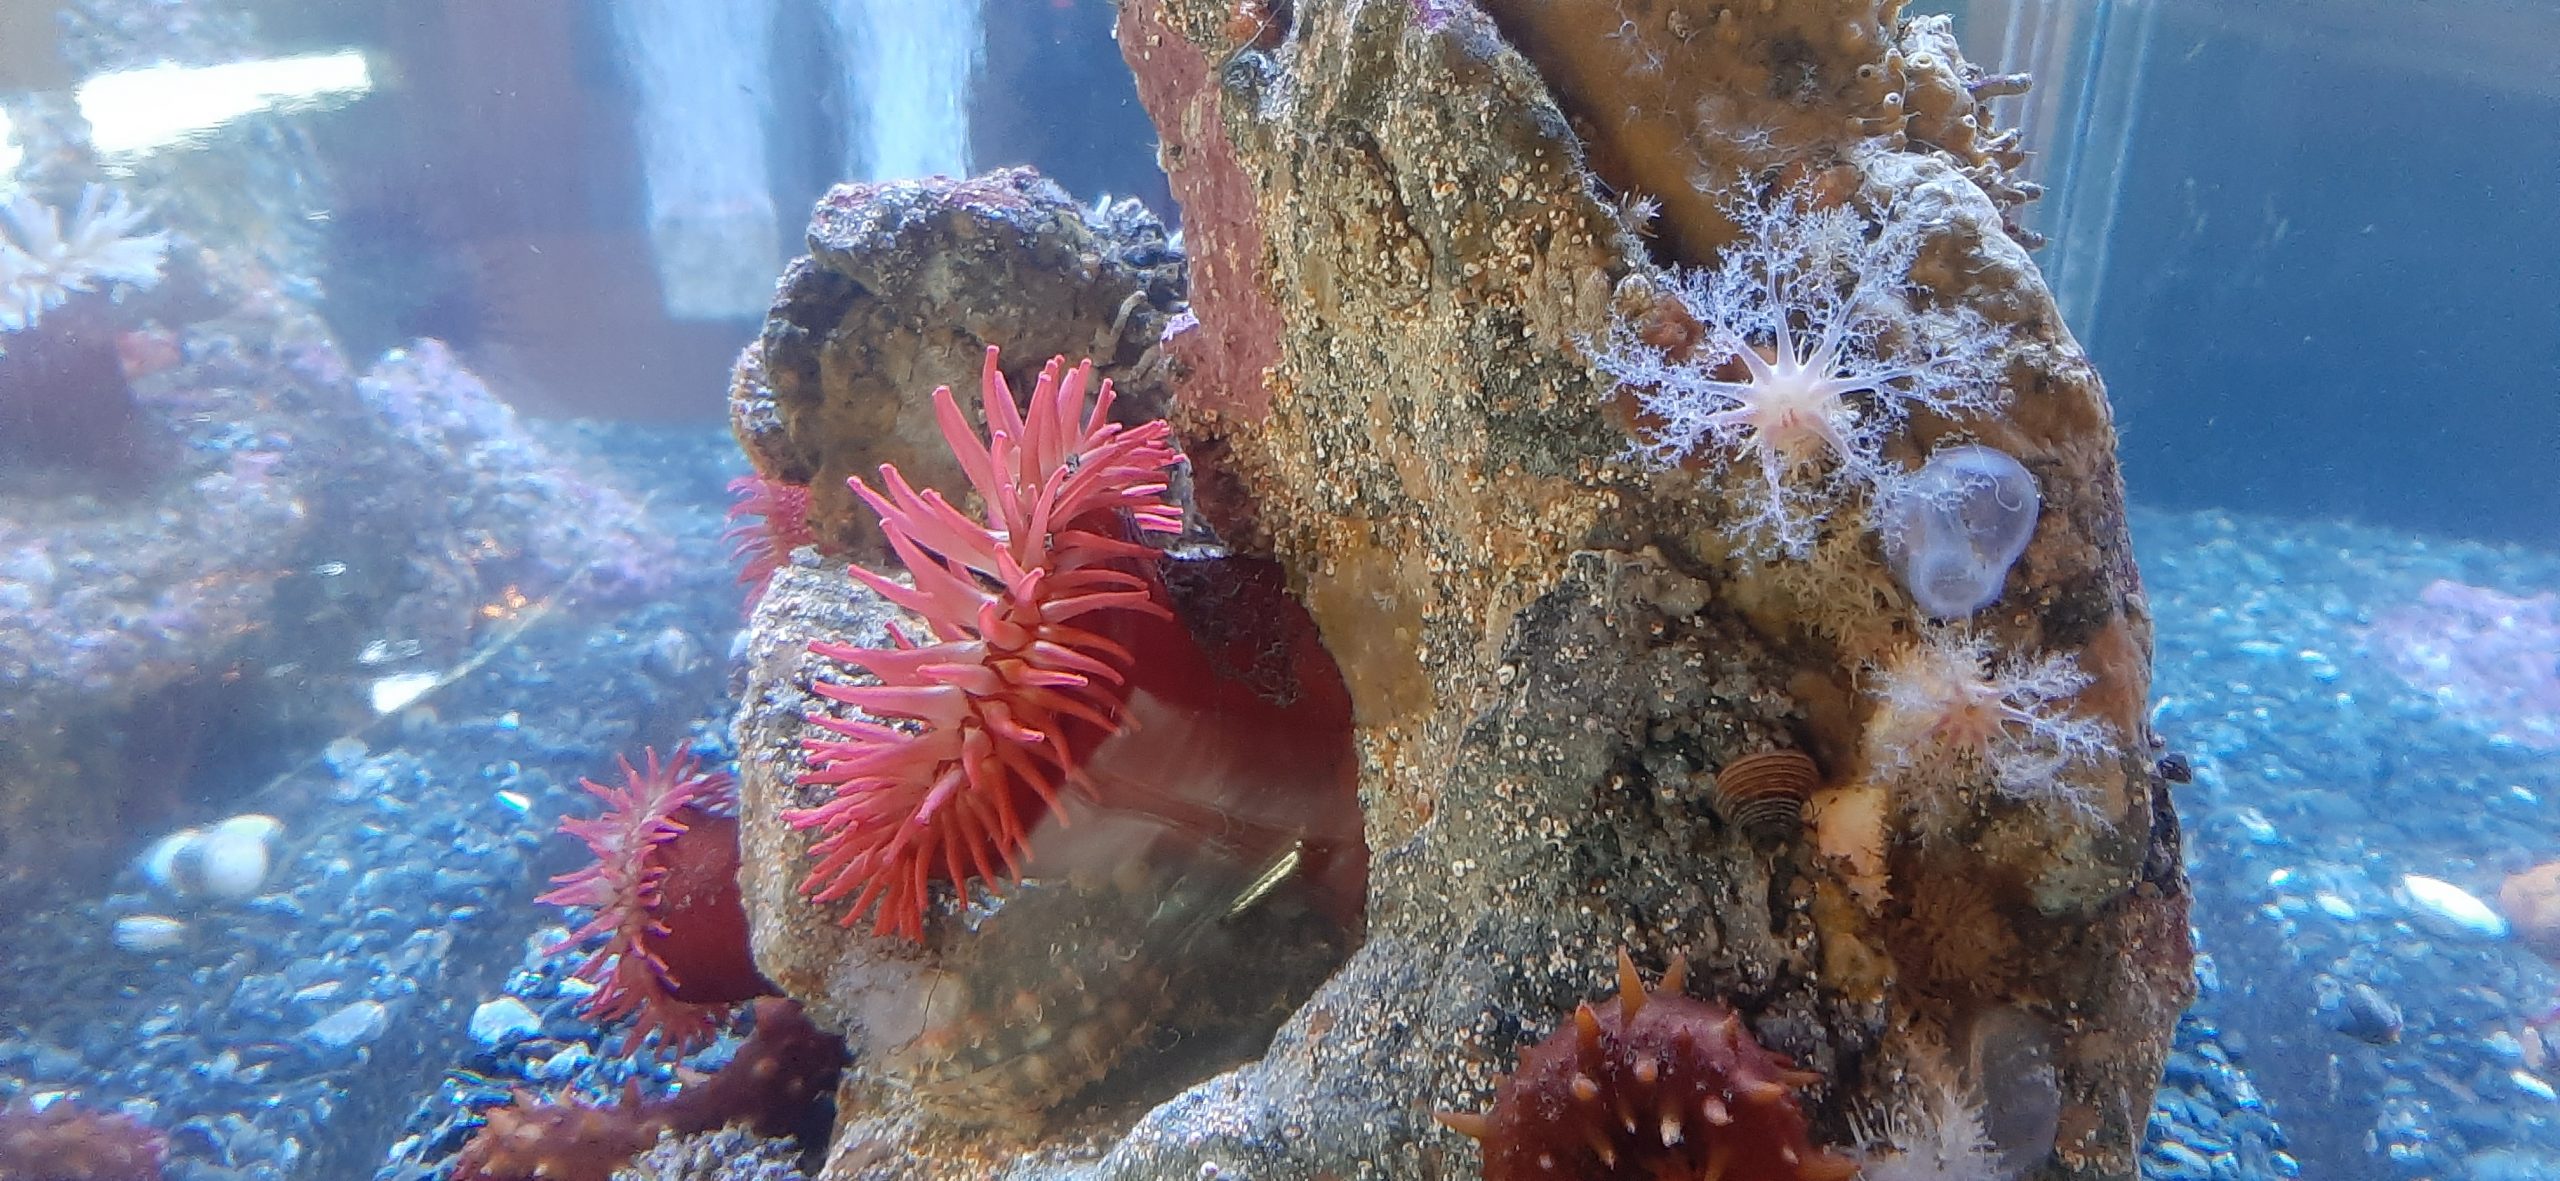
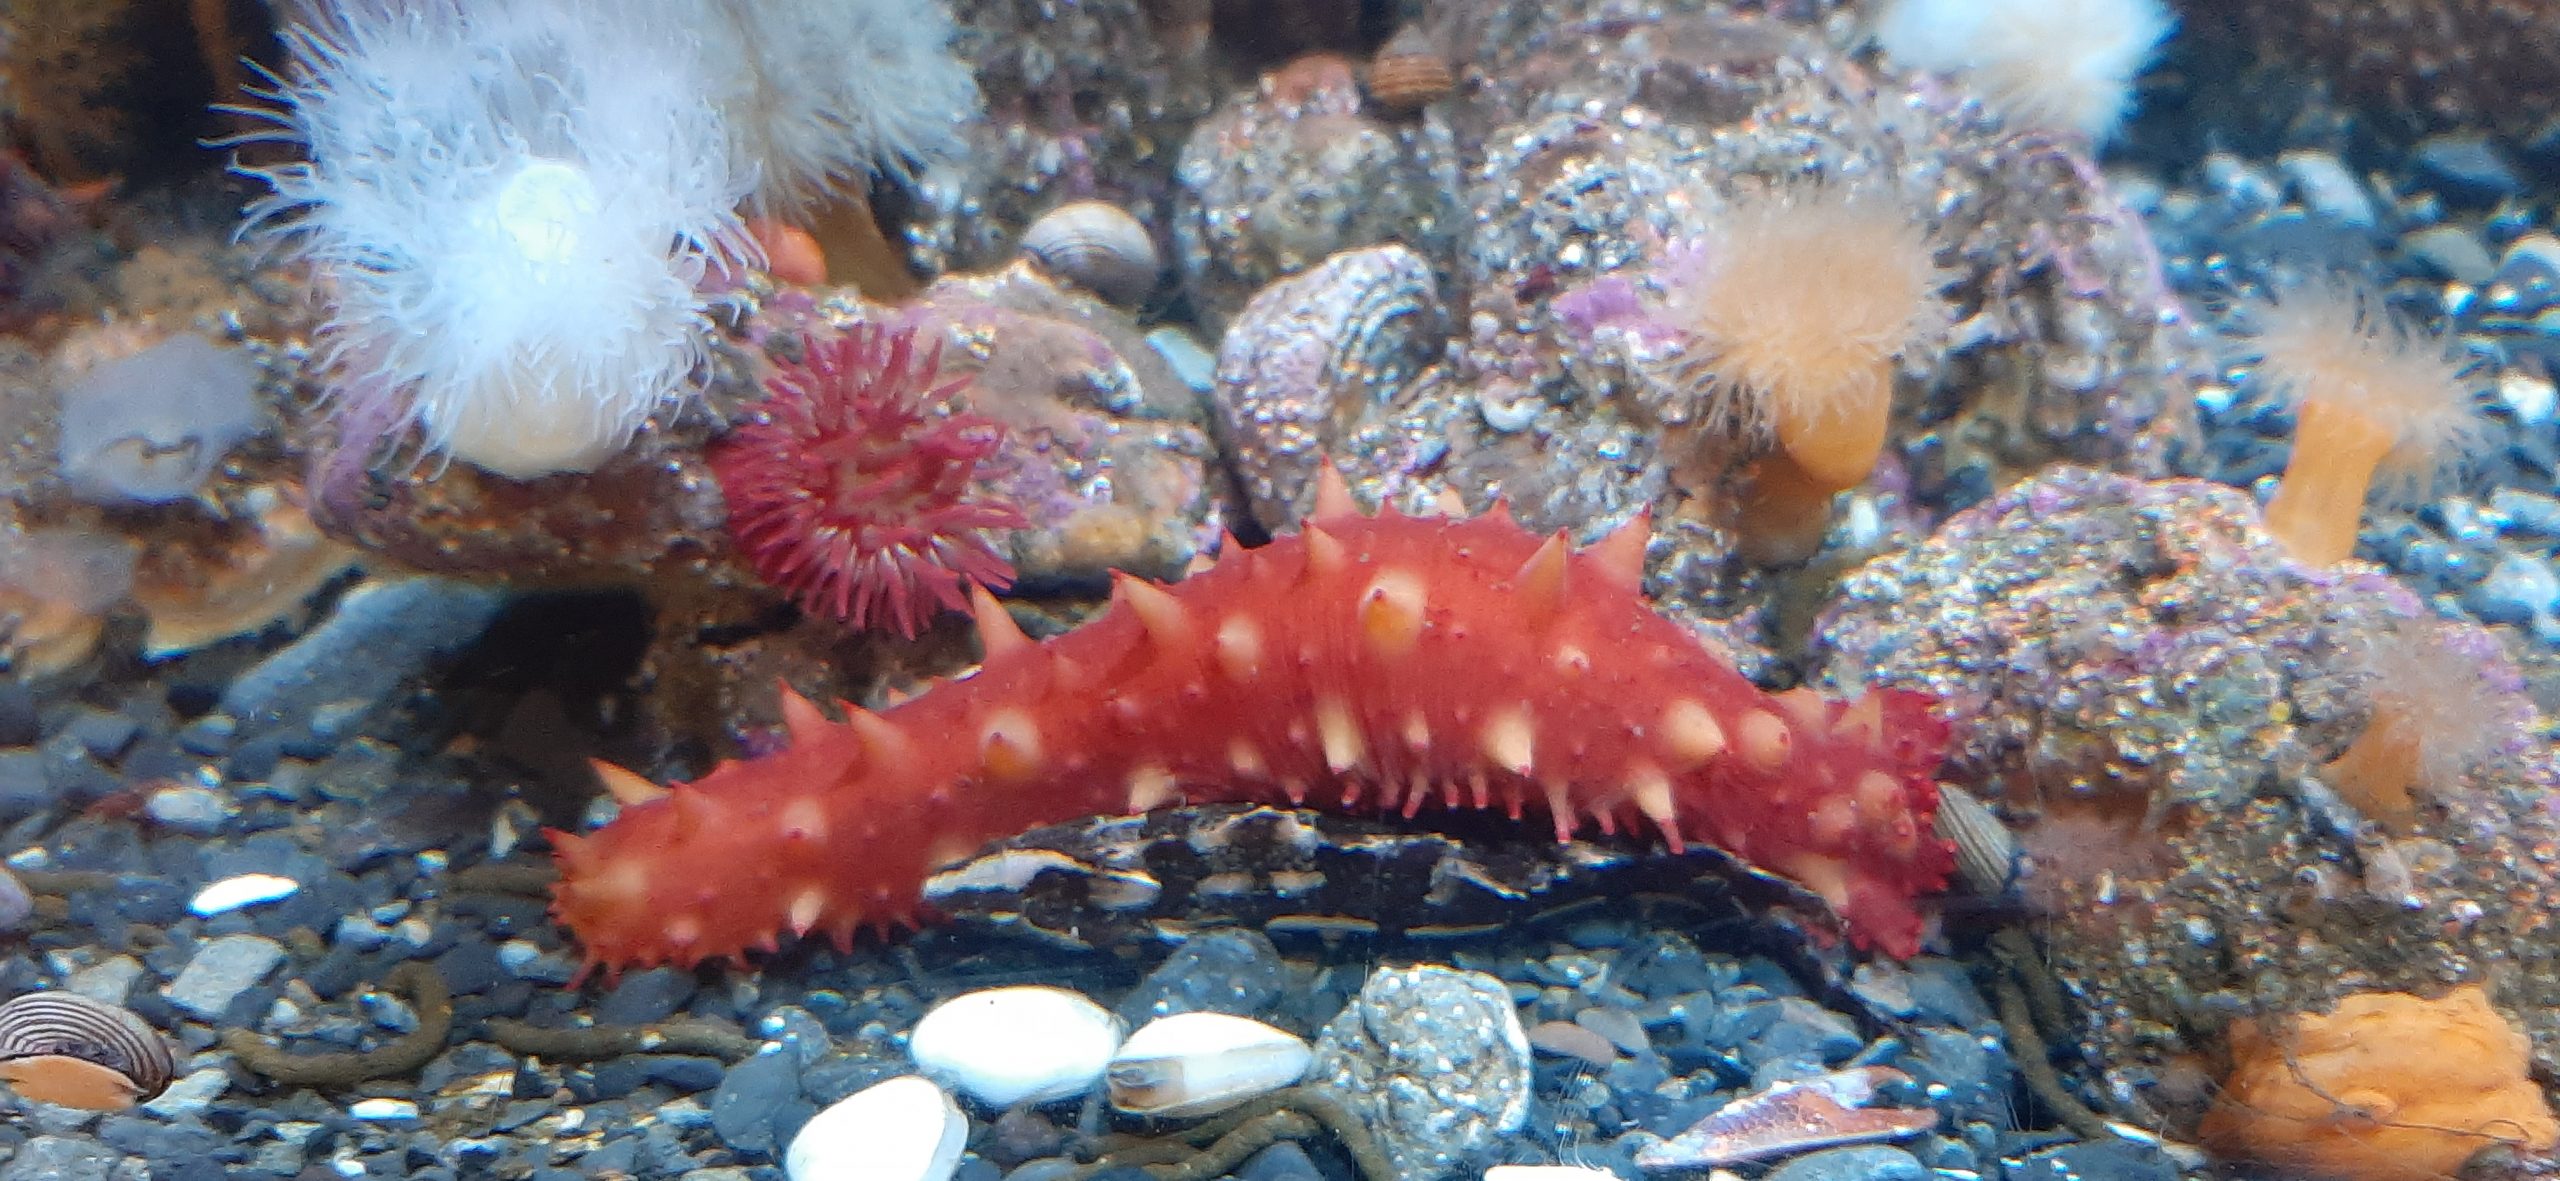
First stop – the Ucluelet Aquarium in (you guessed it) Ucluelet (or as the natives refer to their town – U-kee). And what a nice aquarium this turned out to be.
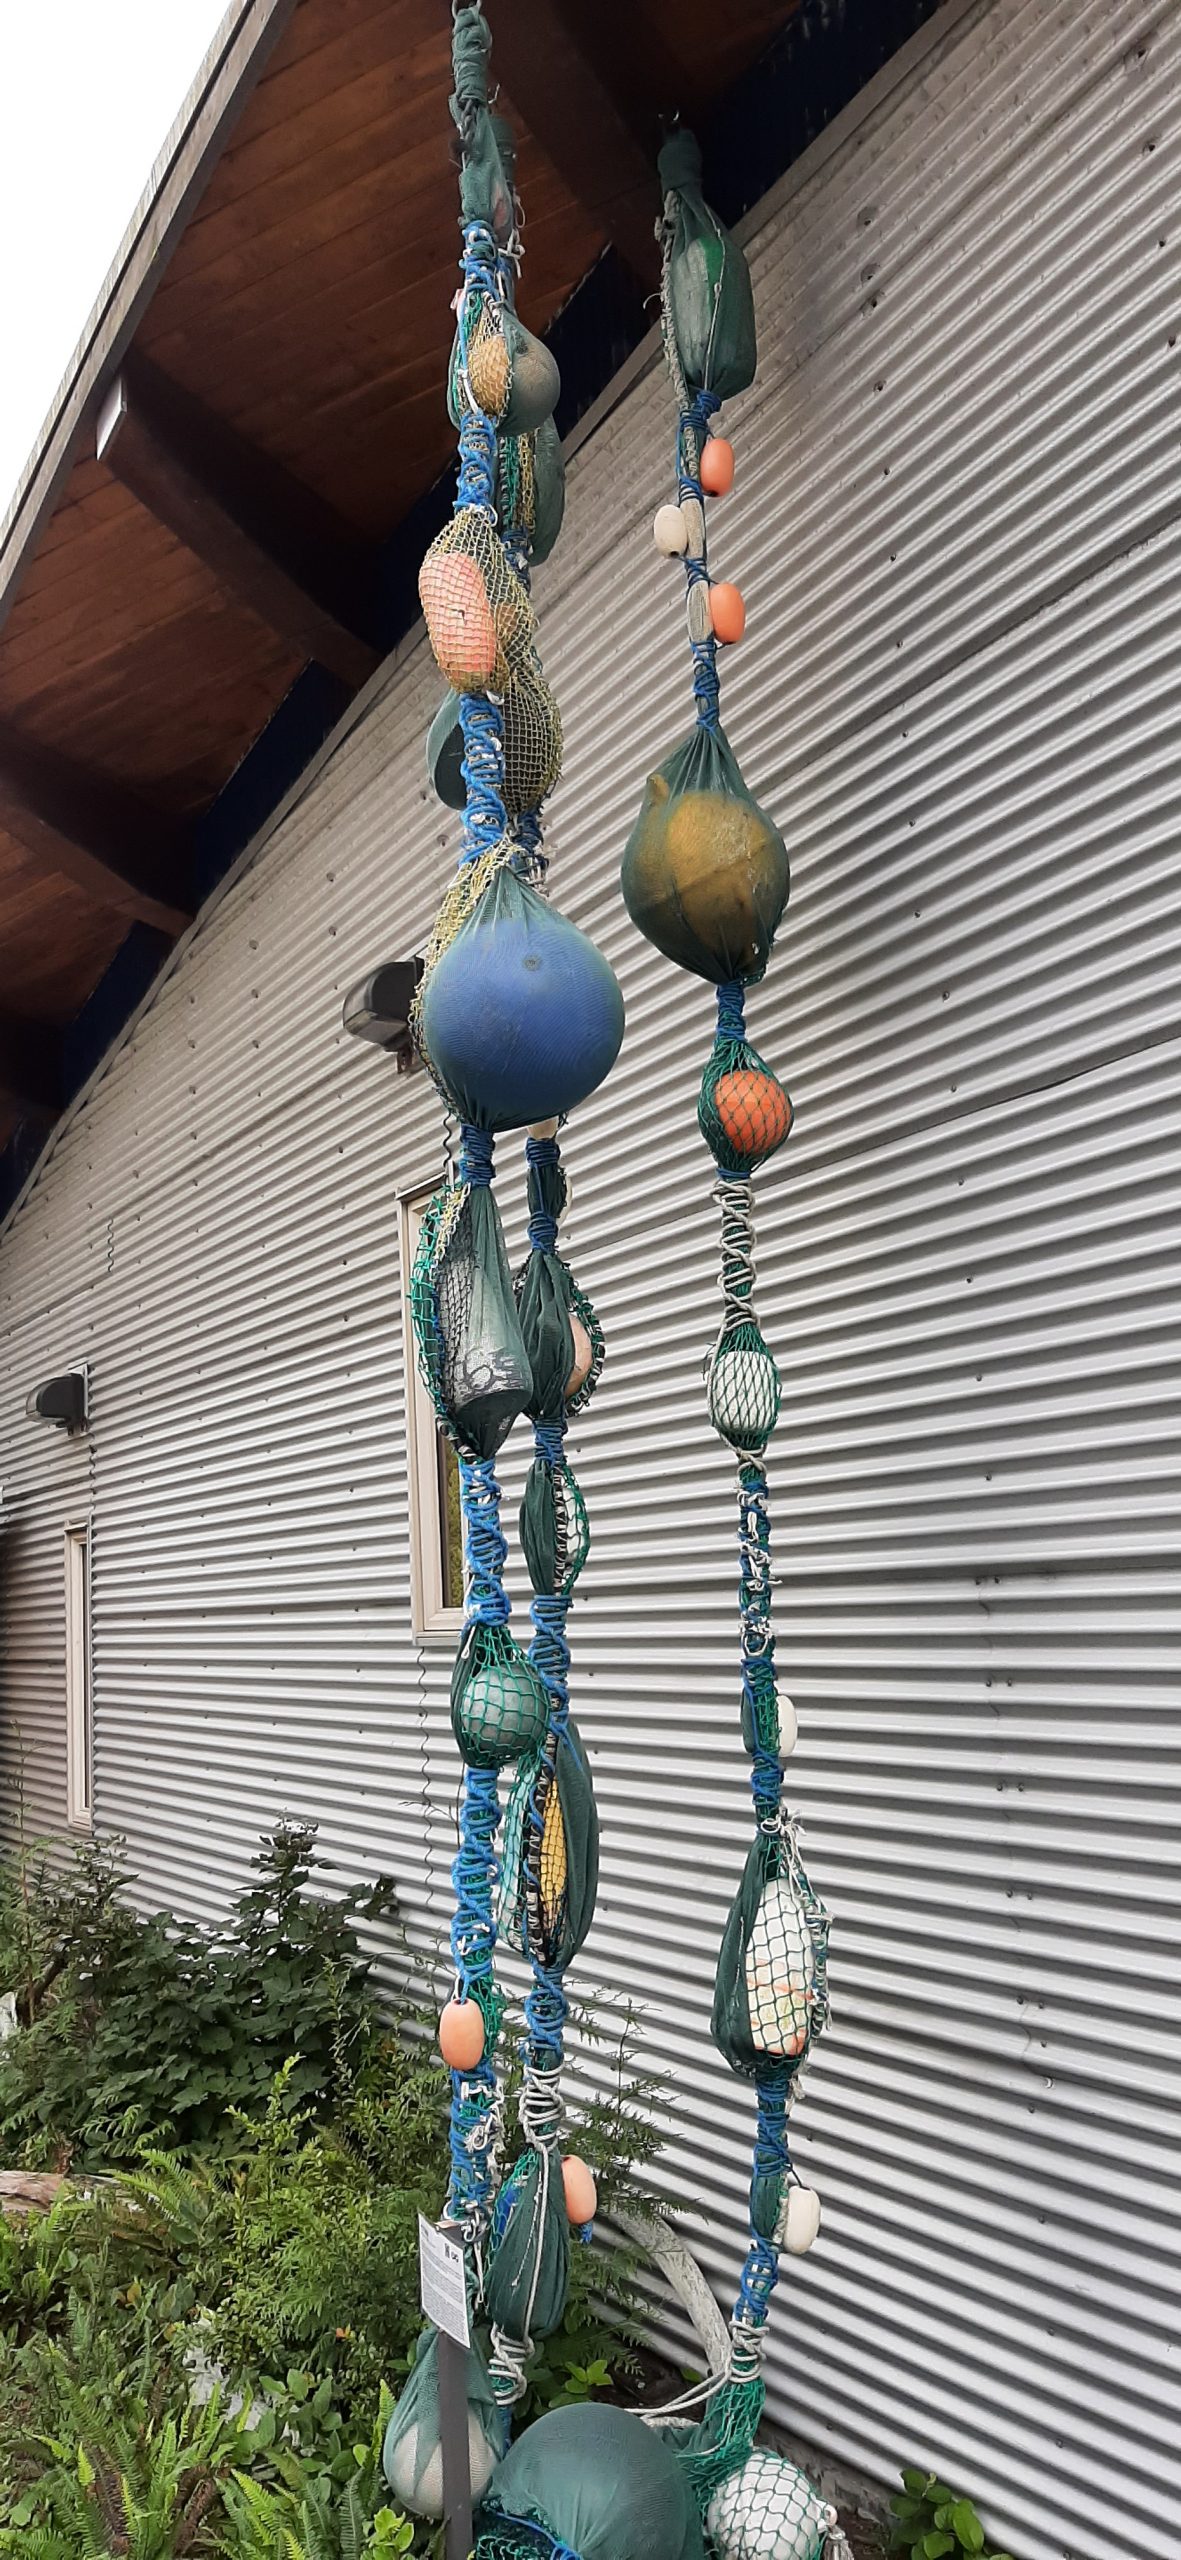
Hanging on the outside of the aquarium
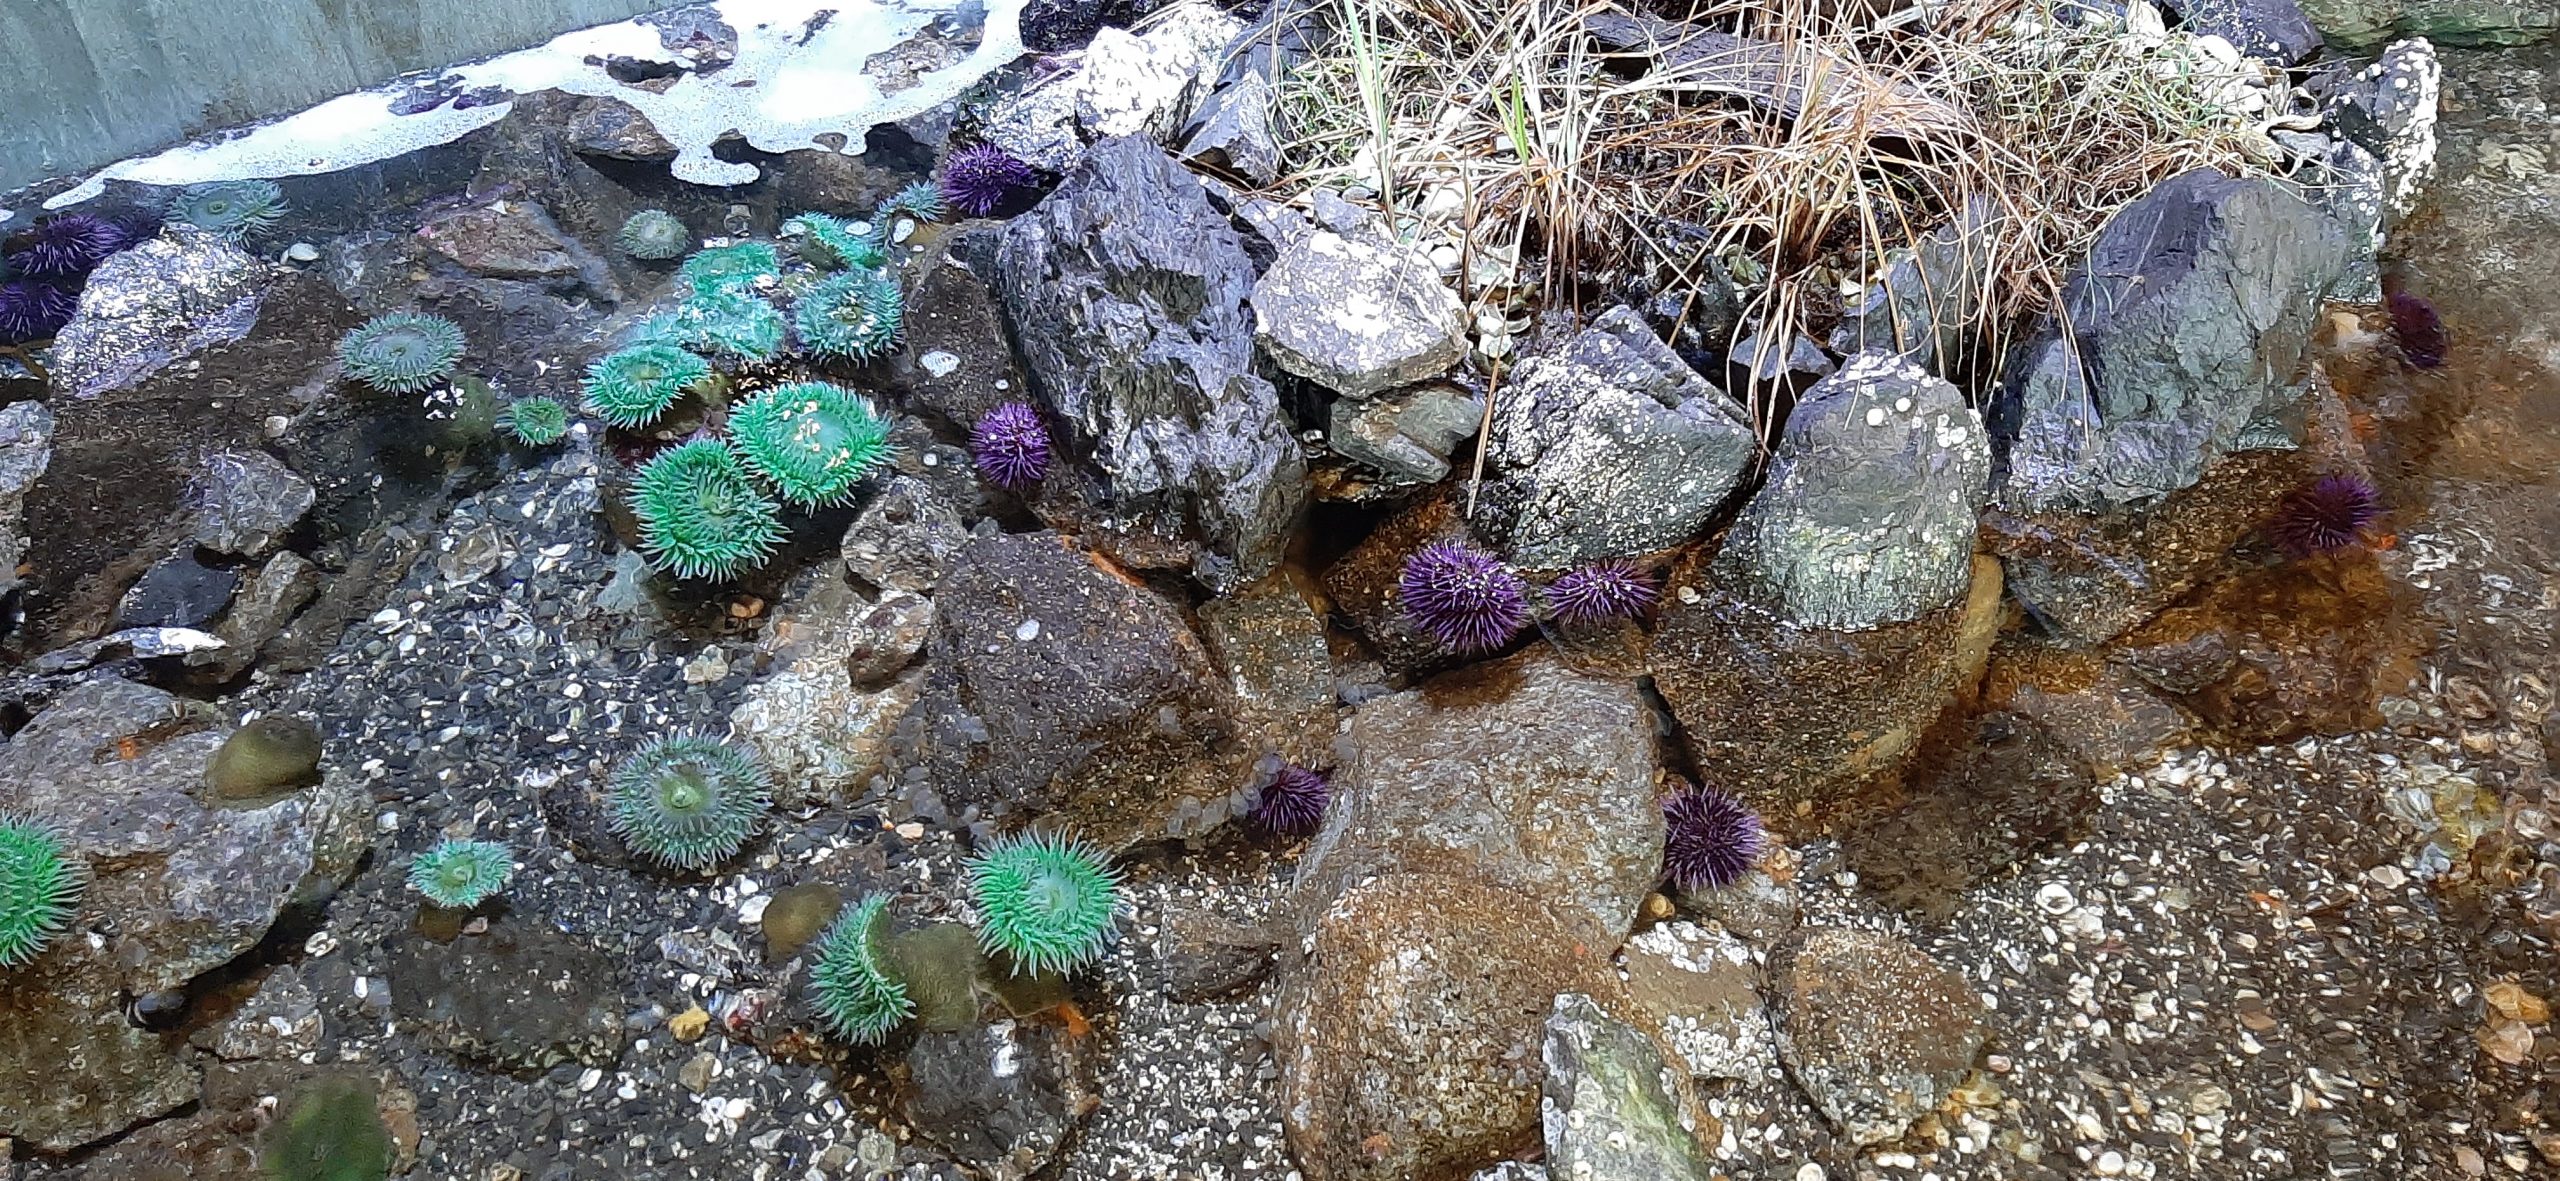
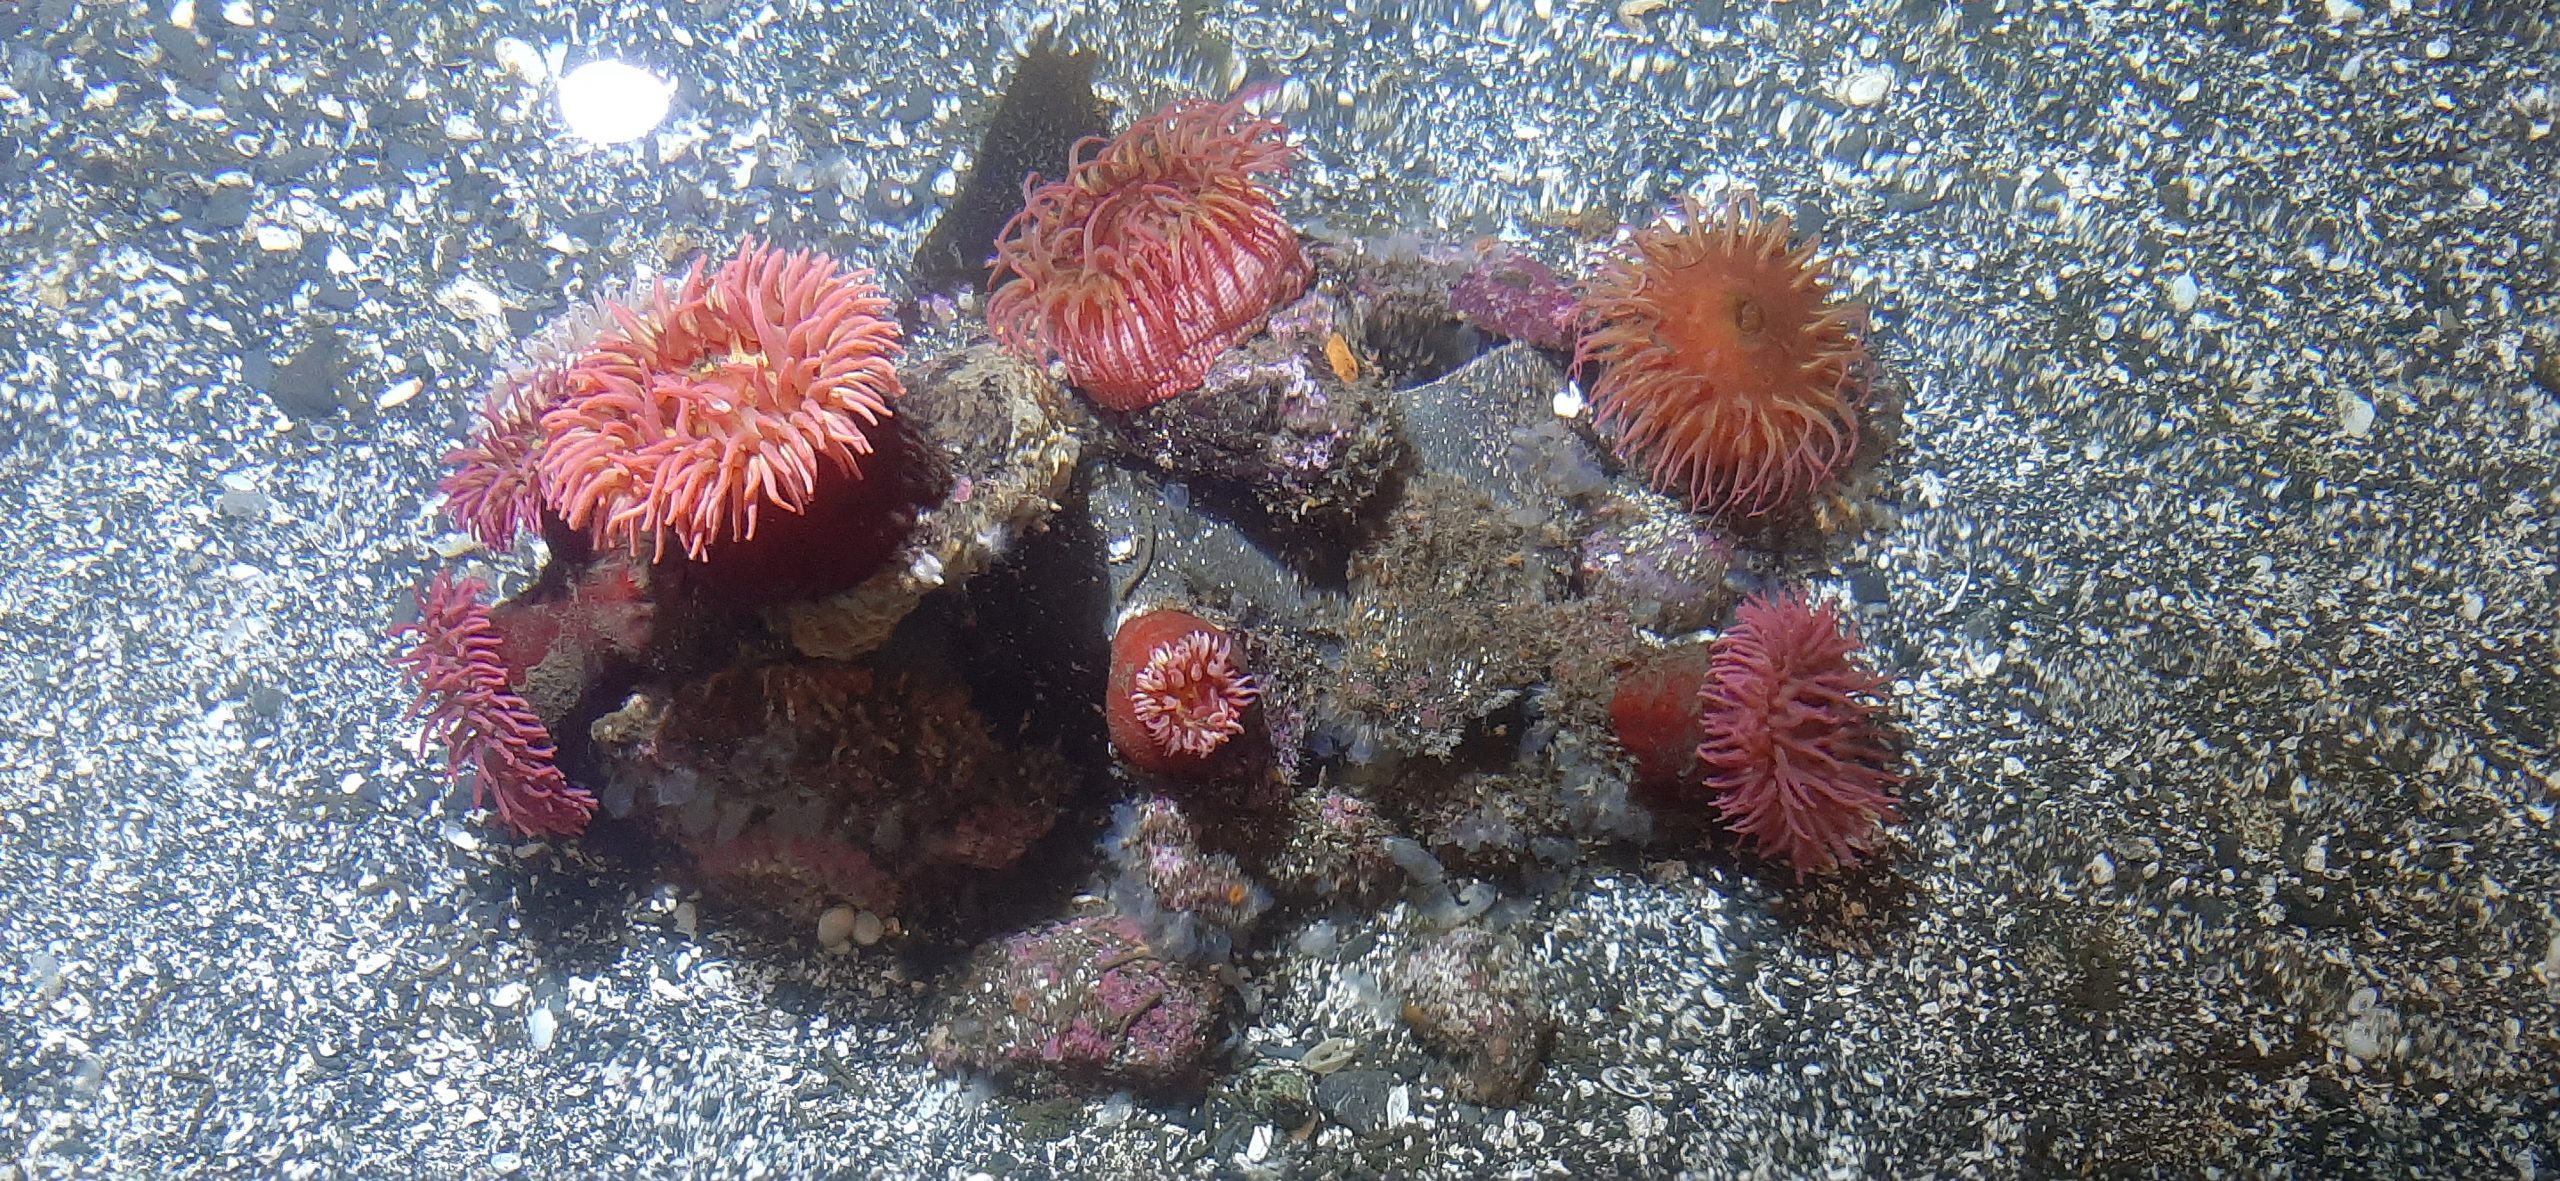
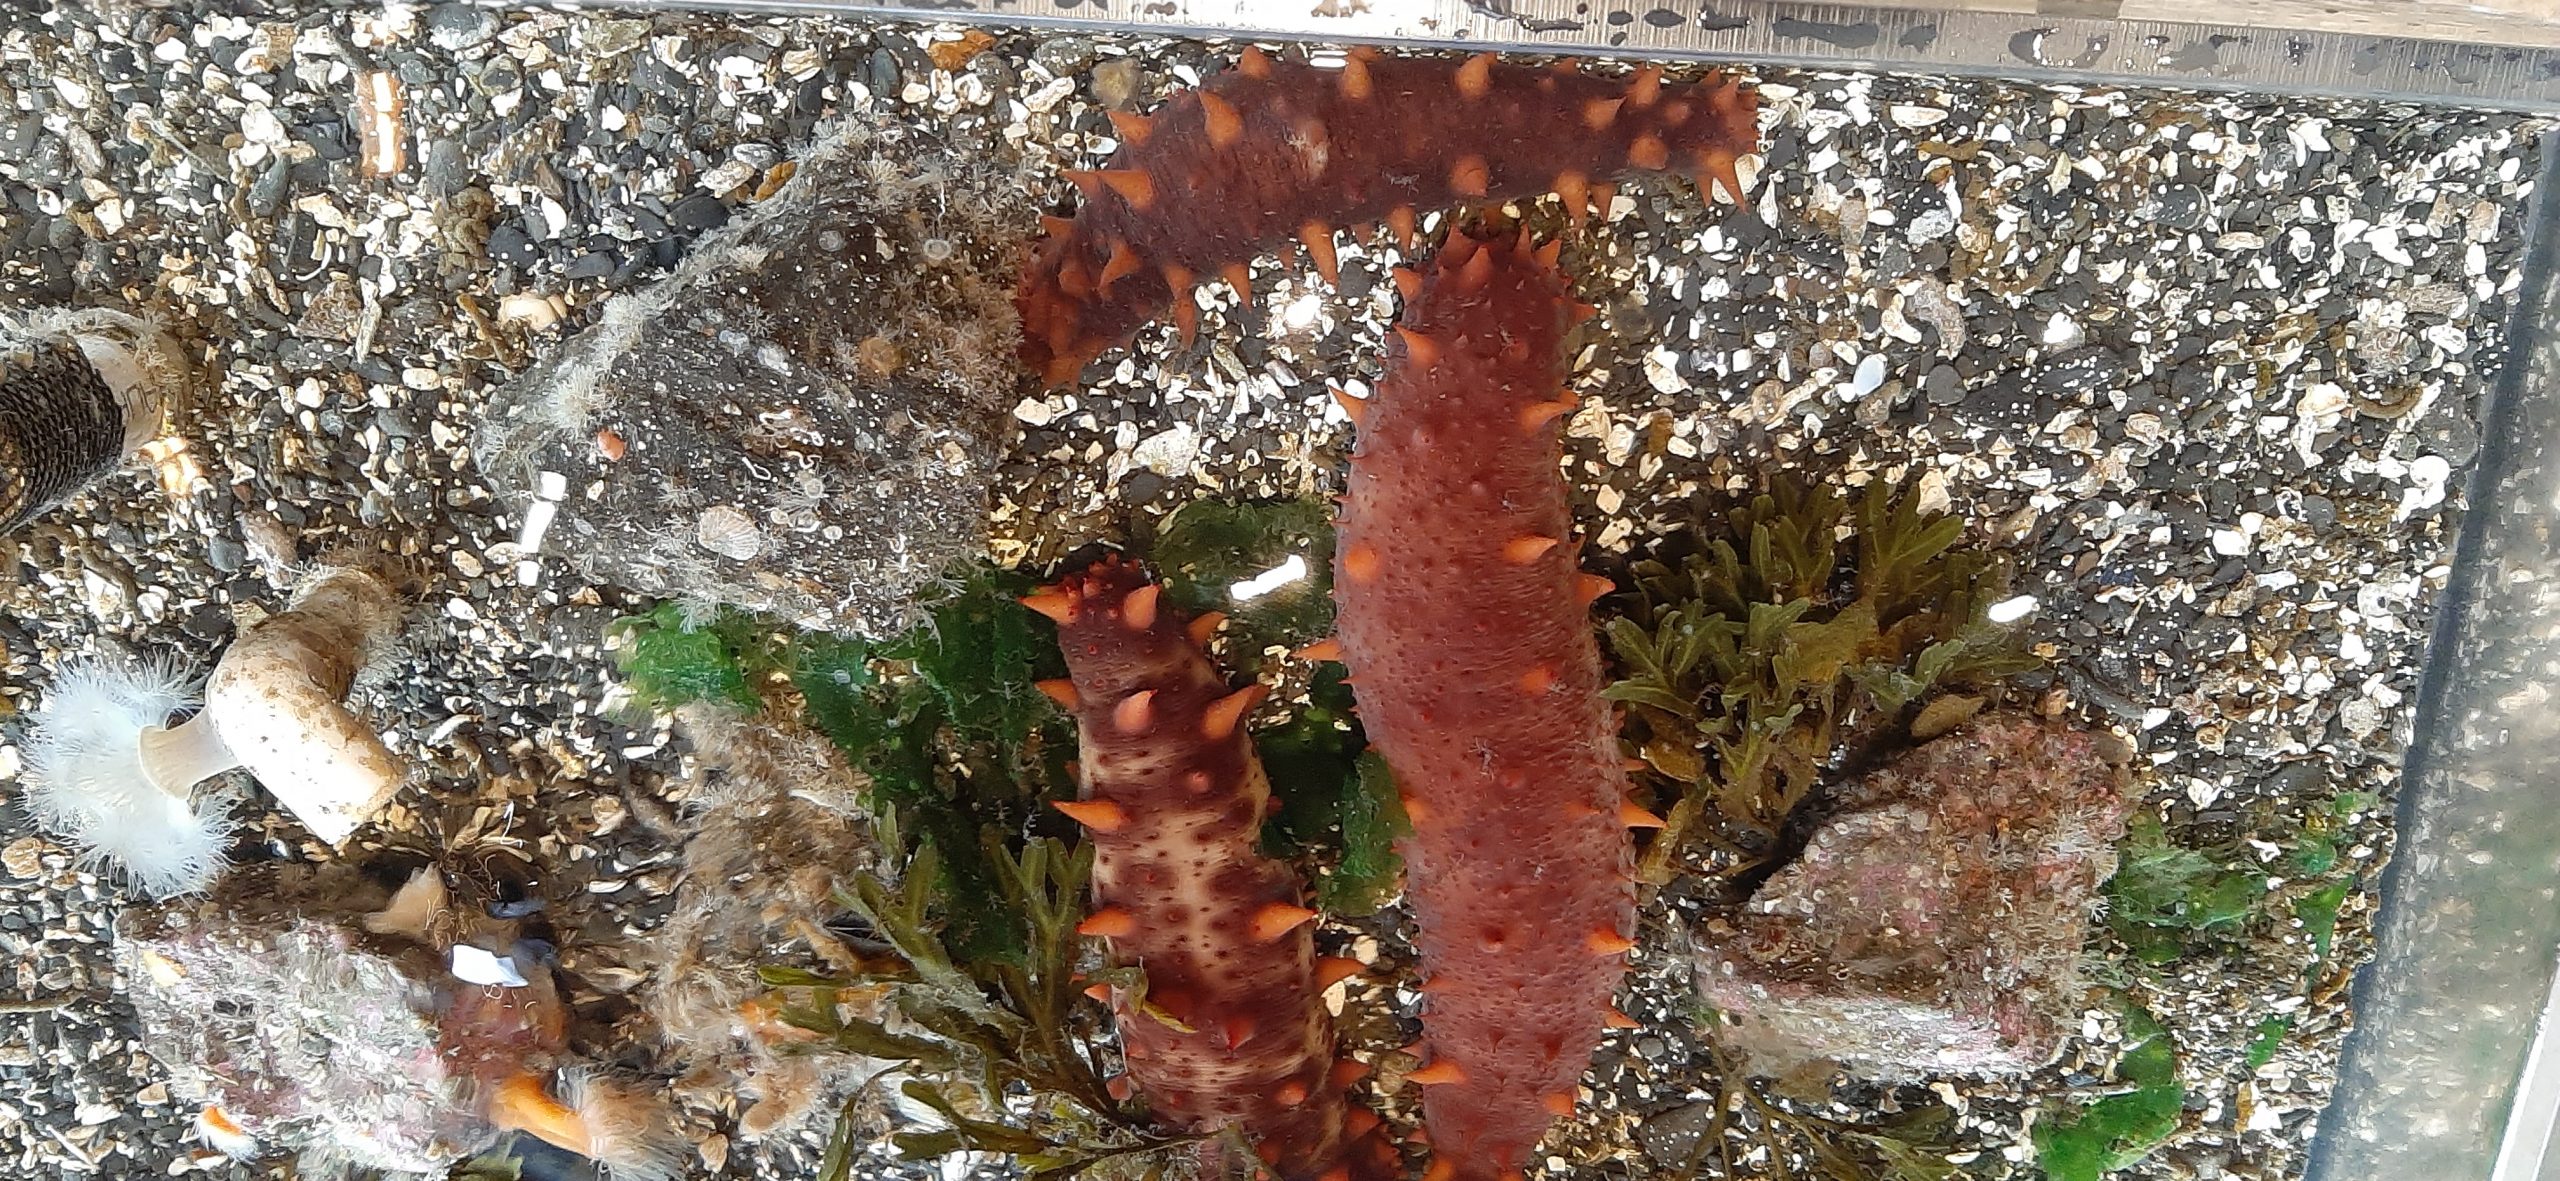
This is a non-profit aquarium. It opened on June 1, 2012. The aquarium exhibits marine plant and animal life (invertebrates and fishes) native to the west coast of Vancouver Island. The aquarium fosters an “up close and personal” visitor experience through their educational approach, which encourages active participation with staff and volunteers in learning about the marine life on display.
All the specimens in the exhibits, with the exception of freshwater juvenile salmon, are collected from the nearby Pacific Ocean, specifically from Barkley Sound and Clayoquot Sound, and are seasonally released back into the ocean.
After our visit to the aquarium, we stopped for some fried calamari and cod and chips. Then a few provisions at the local Co-op (grocery store) and back to camp to bask in the lovely afternoon sunshine. Well, bask might be a bit of an exaggeration. I stayed in the trailer to write up this report. Andy went for a short beach walk and came back and got his down jacket so he could stay outside to read.
Then it was time for me to start dinner.
After a late dinner we did the same thing we do most evenings whether we are at home or on the road. We read until we can’t keep our eyes open.
And I know, for some of you, reading every evening puts us in the “boy are these two boring individuals” category. We will gladly accept that assessment. Because we also go to a lot of plays, concerts, opera presentations, dinners at friends’ homes, etc. And don’t forget the 3 or 4 trips we take every year. Or all of Andy’s gigs. But for us, being in our golden years, there are still hundreds of books we want to read before we pass on to never-never land. And I don’t have any idea where or if there is a never-never land. But if there is, mine will be filled with wonderful books and an eternity to read every single one of them! And to never-never again have to go to bed before finishing my current book. And I’m pretty sure Andy feels the same way. Except in Andy’s case, our Bösendorfer piano would have to go along with him. (That would make me happy too.) But enough about the afterlife. We are content to stay a while longer on planet Earth just for all the natural beauty that surrounds us. And it doesn’t get much lovelier than where we are right now.
Friday, September 20, 2024 – Bella Pacifica Campground
Woke to sunny skies. Delightful.
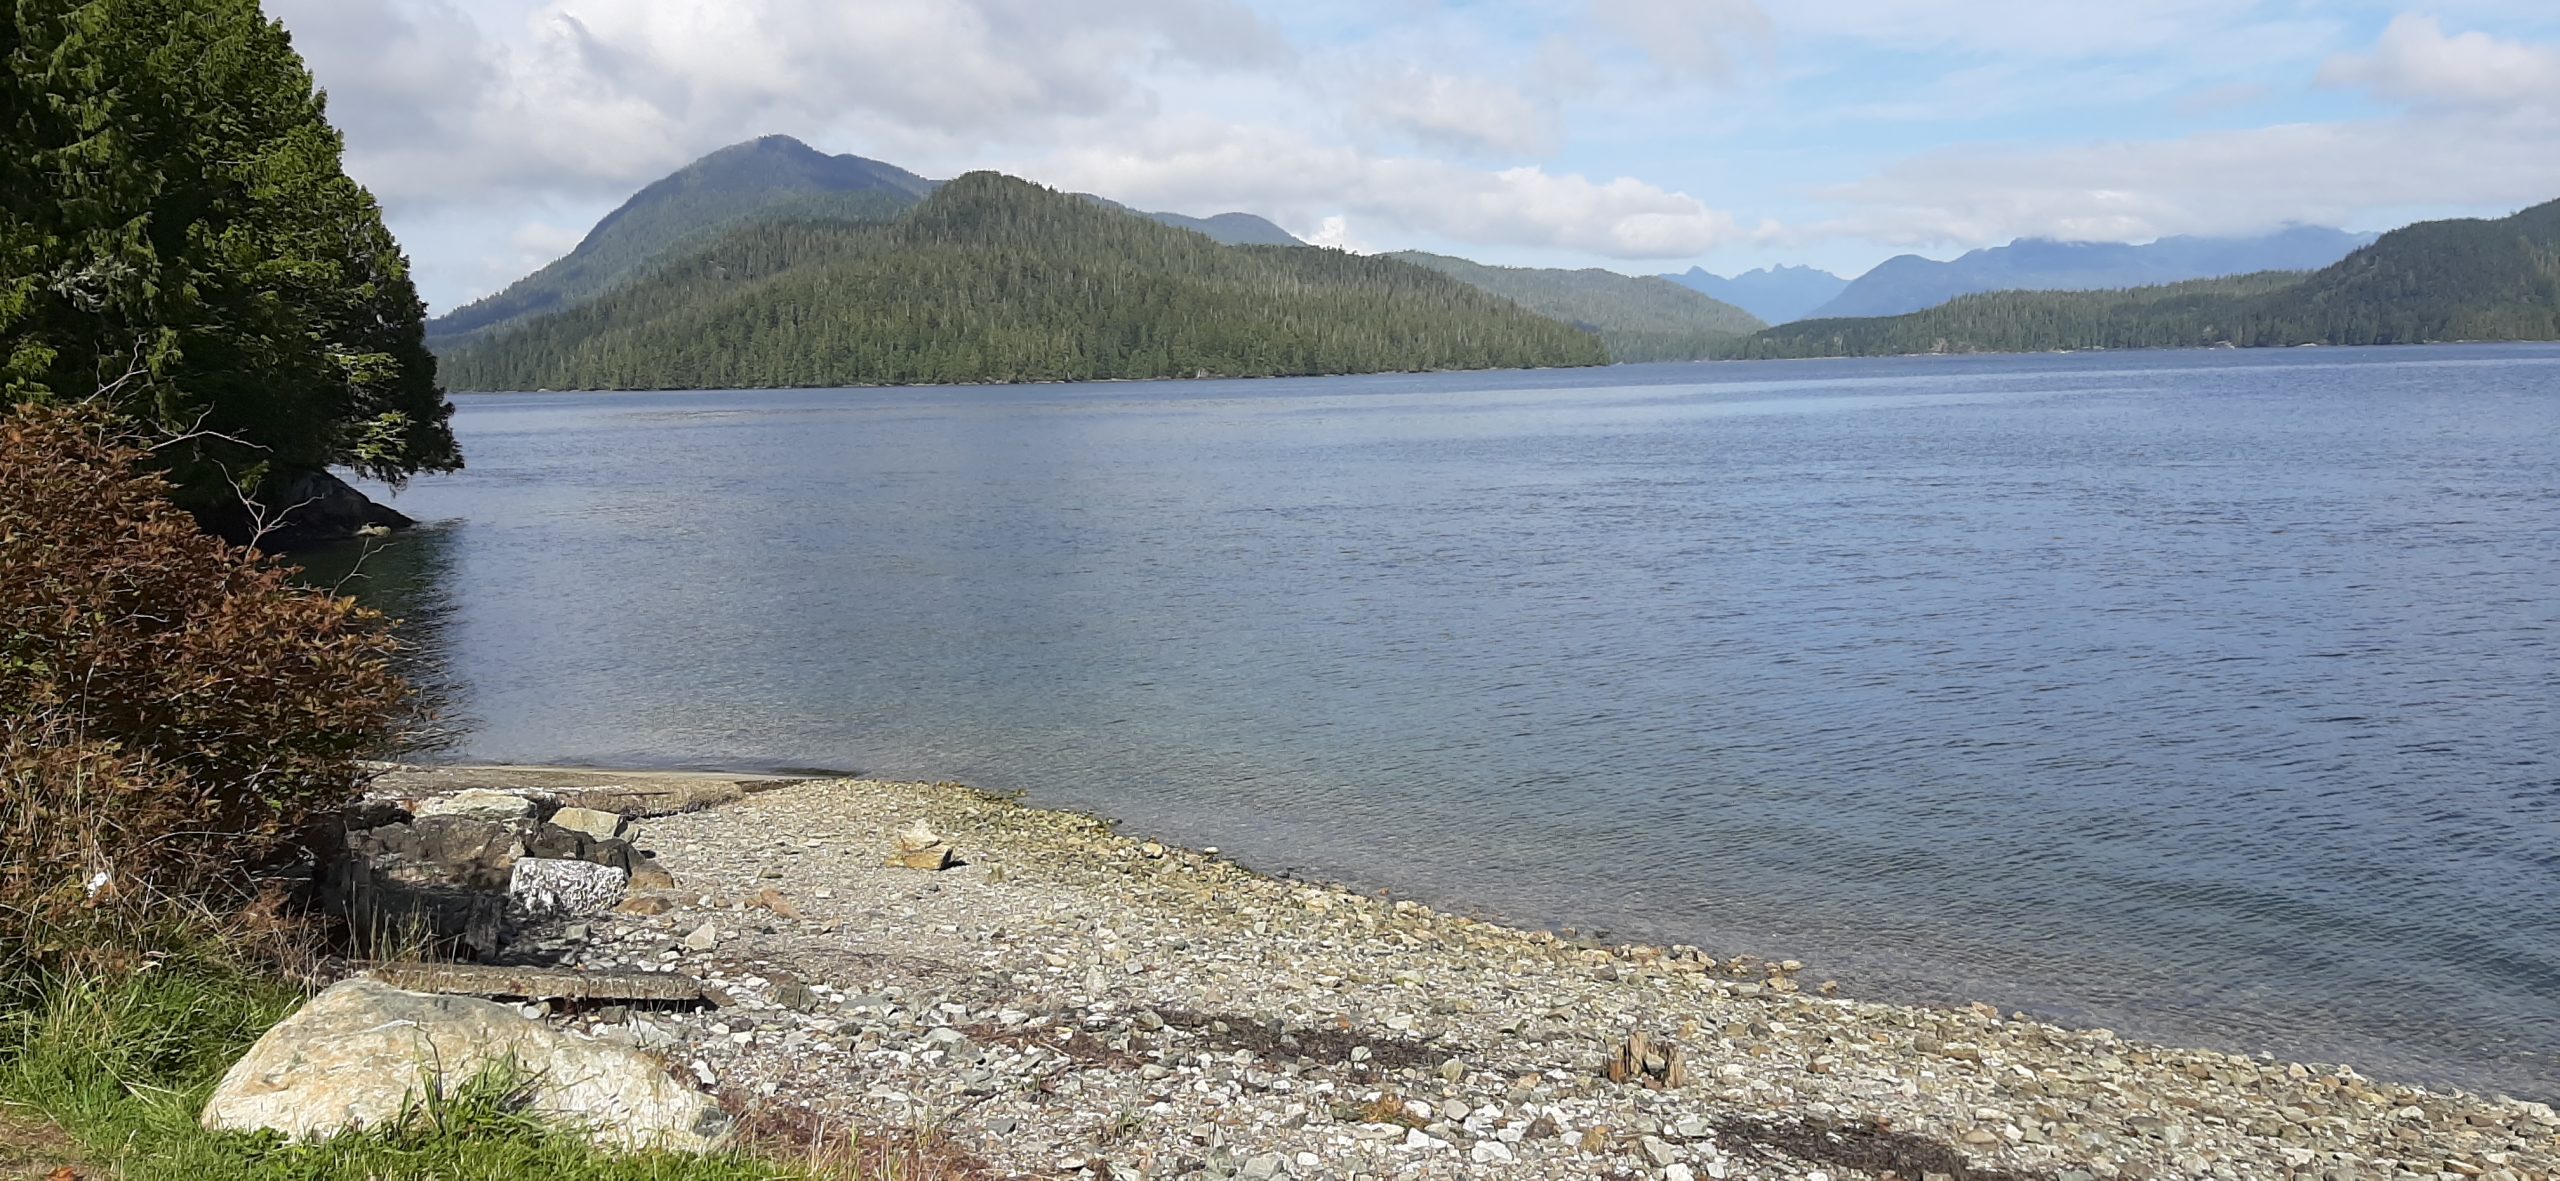
After breakfast we decided to take another drive to see what we could find. First stop – Grice Bay. And wow, was that a beautiful place.
Then we tried to go to the visitor’s center for the Pacific Rim National Park. But it was closed for a cultural event. So, we went in and out a few other offshoots of the main highway, until we decided we had seen everything we wanted to see.
Before returning to the trailer, we went to the same fish market where we had purchased the wonderful halibut and scallops, we had dined on three evenings before and bought the same combination again. And I’m going to cook them exactly the way I did that evening. (Can hardly wait for dinner.)
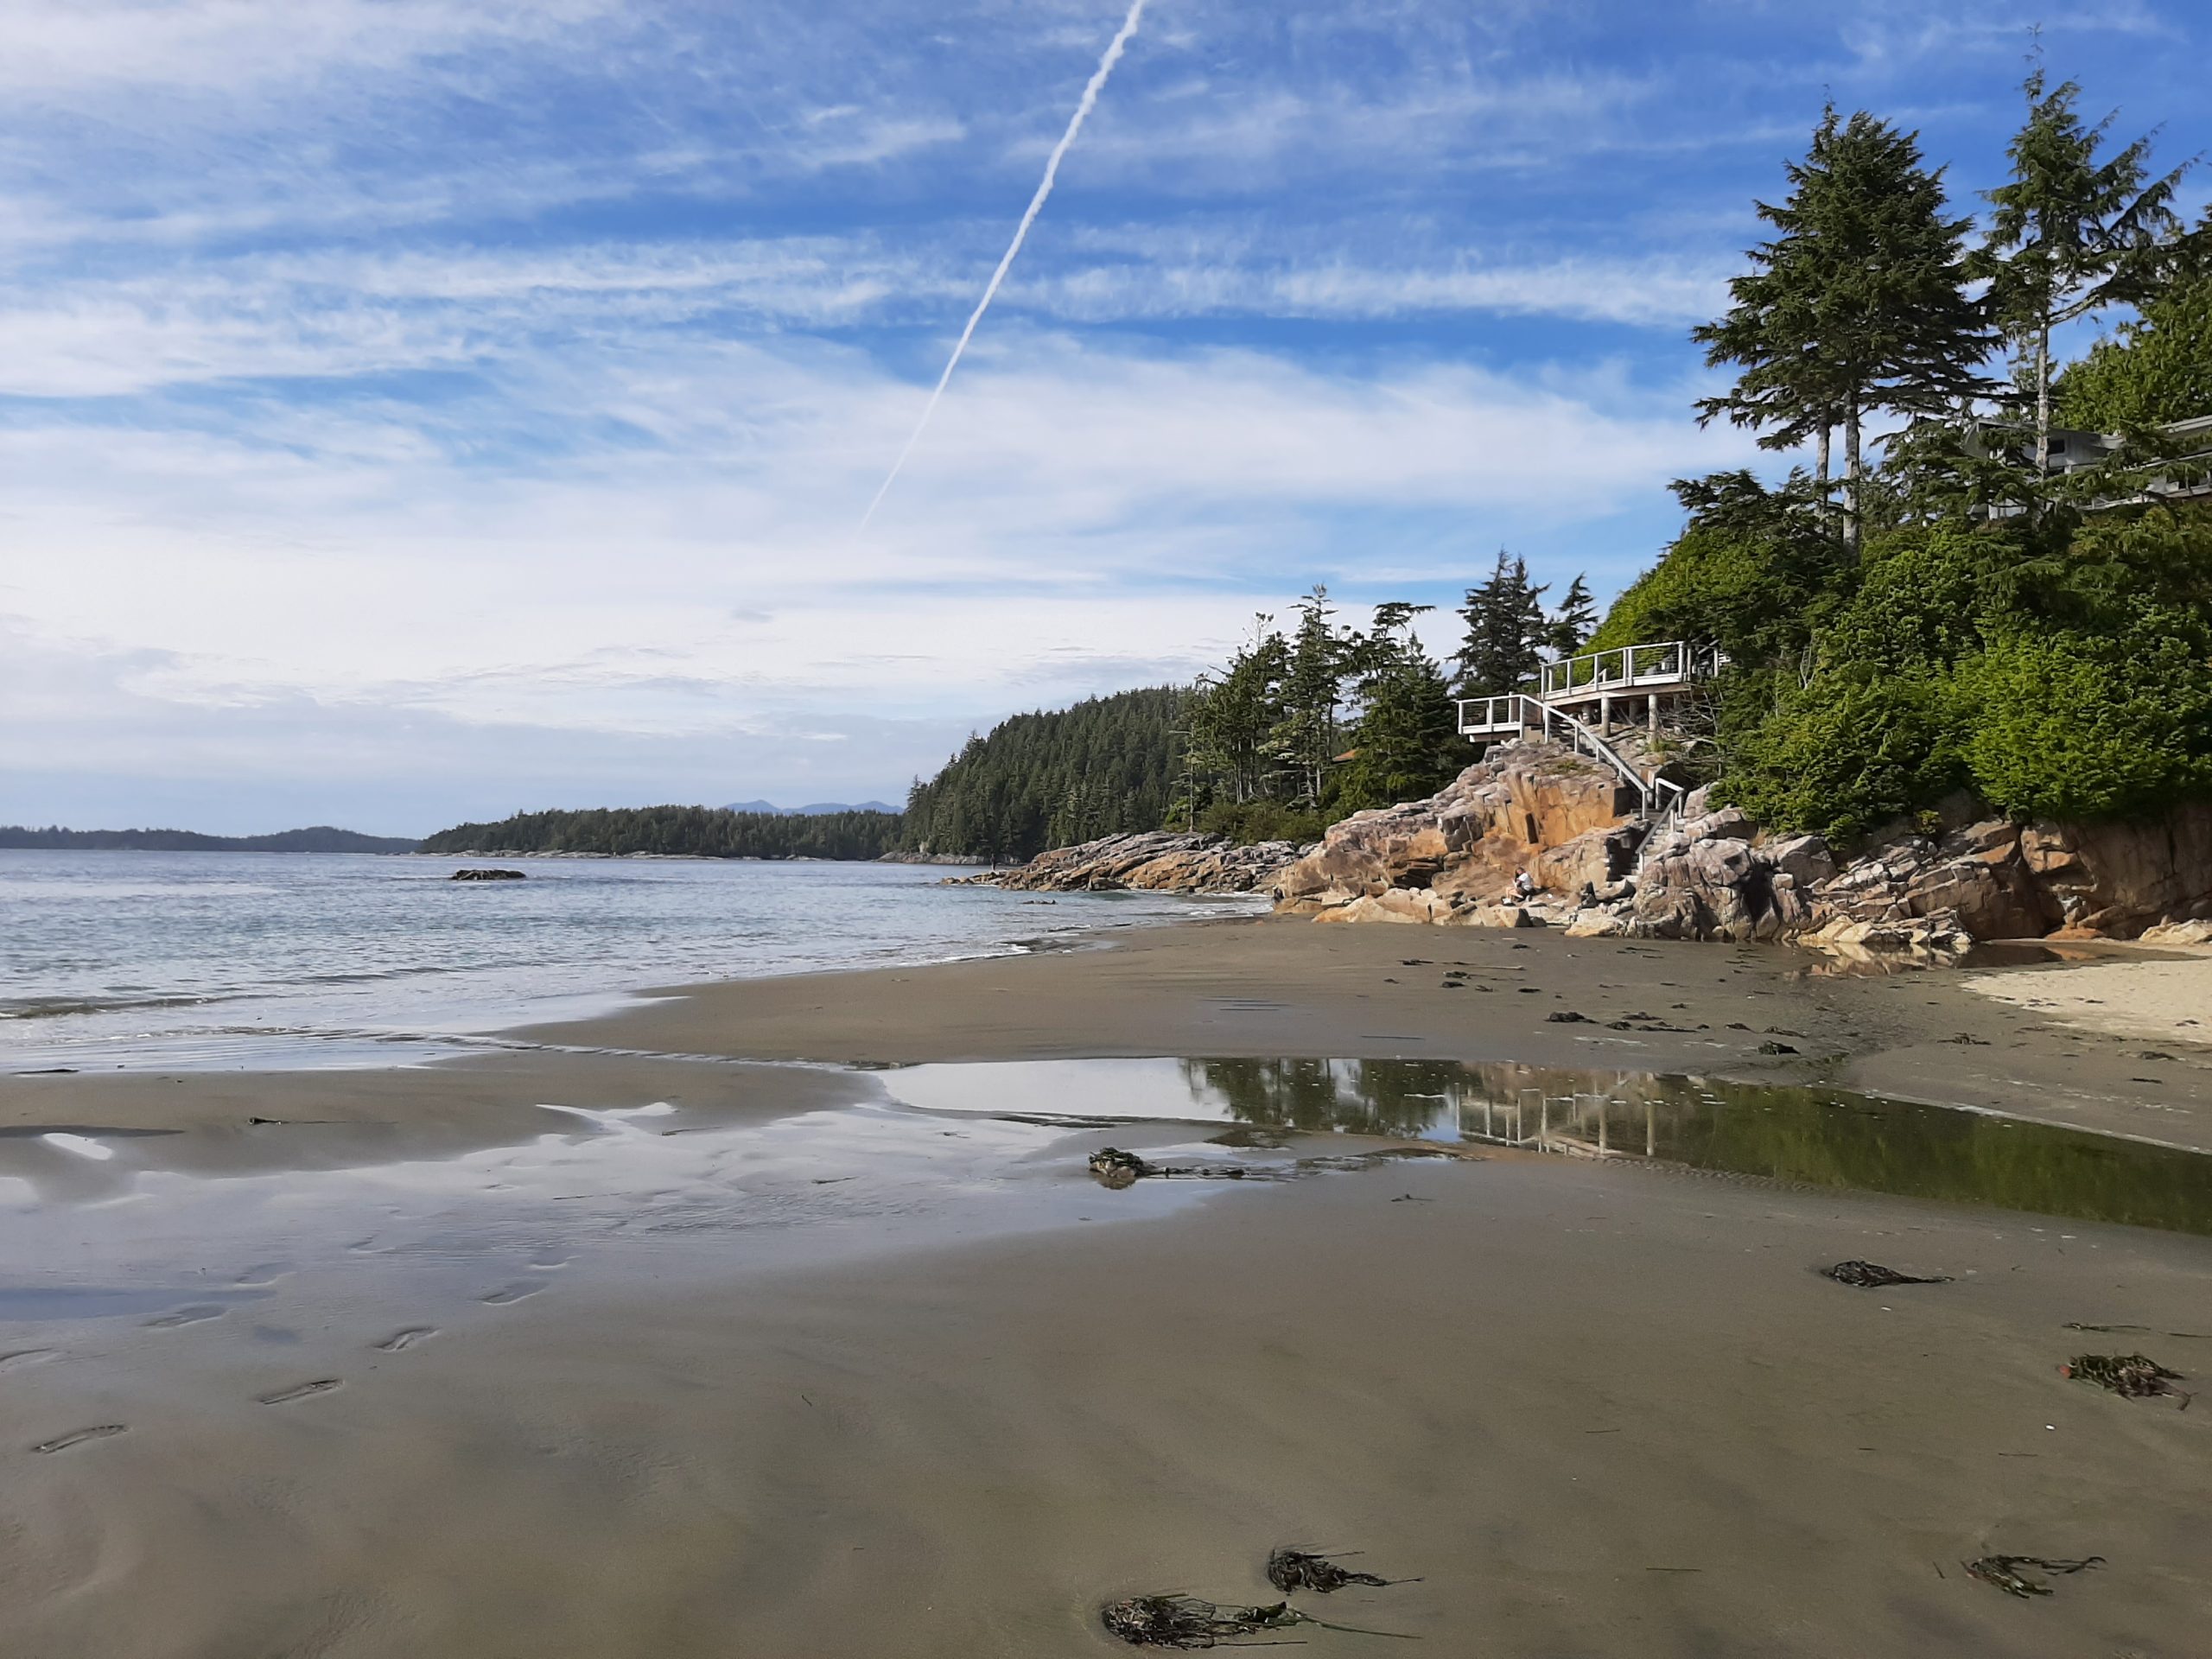
Then back to the trailer for a small lunch and Andy to take a walk to Tonquin Beach.
While Andy went for his walk, I took my book outside to catch a few rays and hopefully not freeze in place.
Well, as it turned out it was too bloody cold to sit outside, so I stayed inside and wrote a bit and read a whole heck of a lot.
When Andy returned, I cooked dinner, we played 4 or 5 rounds of Bend Dominoes, then it was off to the land of nod for both of us. Our last night at this perfect location.
Part 2 – Paradise RV Park, Parksville, Vancouver Island
Thursday, September 12, 2024 – Paradise RV Park, Parksville, Vancouver Island – site 9
After an easy hitch-up, we were on our way to our next destination at 10 minutes after 11:00 am. After being stopped for road construction, we still arrived at the Vesuvius ferry terminal at about 11:30 am. We were directed to the center line and told we would definitely make the next crossing. (Always good news.)
Andy went for coffee while I rolled down my window and dove into my current book – Eight Perfect Murders by Peter Swanson. And wow, what a story. I’ve decided that from now on, I am going to include in my recipe prefaces and on my travel logs, what book I am currently reading. I love “who done it” books, but I also like to read a smattering of classics. So, I figured everyone needs book recommendations periodically, especially ones that someone else has found entertaining. But back to sitting in line at the ferry dock. There are actually six ways to get off Salt Spring Island. By air, by private boat, swimming (not recommended), and one of three ferry options. We chose the Vesuvius to Crofton option because it got us closer to our destination – Parksville.
Look at that sky as we crossed from Salt Spring Island to Vancouver Island.
The other options that we could have taken – Ganges (Long Harbor) to Swartz Bay on Vancouver Island or Fulford Bay to Swartz Bay. So, after a delightful 20-minute ride, we were driving north on Vancouver Island to Parksville.
Upon arrival we went to check in and found that the reservation I had made months before had not been described to me accurately. Our original reserved site, number 3, was a site that backed into woods, even though it was described as an ocean view site. Although in all fairness, if the trees hadn’t been there, we could have seen the ocean. But being the pain in the ass that I am, I told the nice young man that I wanted a site that bloody well had an OCEAN VIEW! Because that was what I had reserved and what was plainly stated on my confirmation sheet. As it turned out, site number 9 for motor homes was available. We took it!
I tried to explain to the young man at the reservation desk that we would be going into site number 3 for just a few minutes before heading to number 9 because we needed to dump both our grey water and black water holding tanks. But the poor guy had no idea what I was talking about when I mentioned grey and black water. He just kept insisting that we go straight to site number 9. Of course, he was extremely busy the whole time we were talking because this RV park also offers bumper boats and miniature golf to not only the campers but everyone up and down the Discovery Coast. And the place was packed with people needing his attention. He never understood my reasoning. I tried several times to explain that the hook up for motor homes was on the opposite side from trailers. Motor homes just pull straight into a site, so the power etc. in on the left side as seen from the road. But with trailers, we back them into a site so the power etc. is on the right when you look at the site from the road. He is probably still trying to figure it out! For all I know, he may still be wondering what a hook-up is! So, to spell it out for those of you who are unfamiliar with what I am talking about, allow me to explain what we did.
We first pulled into our new site truck first. We then dumped our black and grey water, then Andy backed out of the site. Then he drove out of the RV area, went into a large parking lot and turned around, and came back to the site from the opposite direction. He then backed our trailer with its lovely big back window up against the sea. We knew there would not be any problem hooking up the water and electricity because we have plenty of length on both our water hose and electric line. And that there was no problem not being hooked up for 4 nights to the septic system. We would simply dump when we got to our next campground.
Our view from the trailer’s back window.
Once we were parked and I had stripped myself off the ceiling, it was time for me to make us a late lunch. Then it was plunk down in our comfy camp chairs outside and read until it was time to make dinner. Then read some more until it was time for an early-to-bed, at least for me. First day in “Paradise”. And just so you know, 2 other trailers did just the same thing we did. They decided that for at least this trip, they too were driving motor homes.
Friday, September 13, 2024 – Paradise RV Park
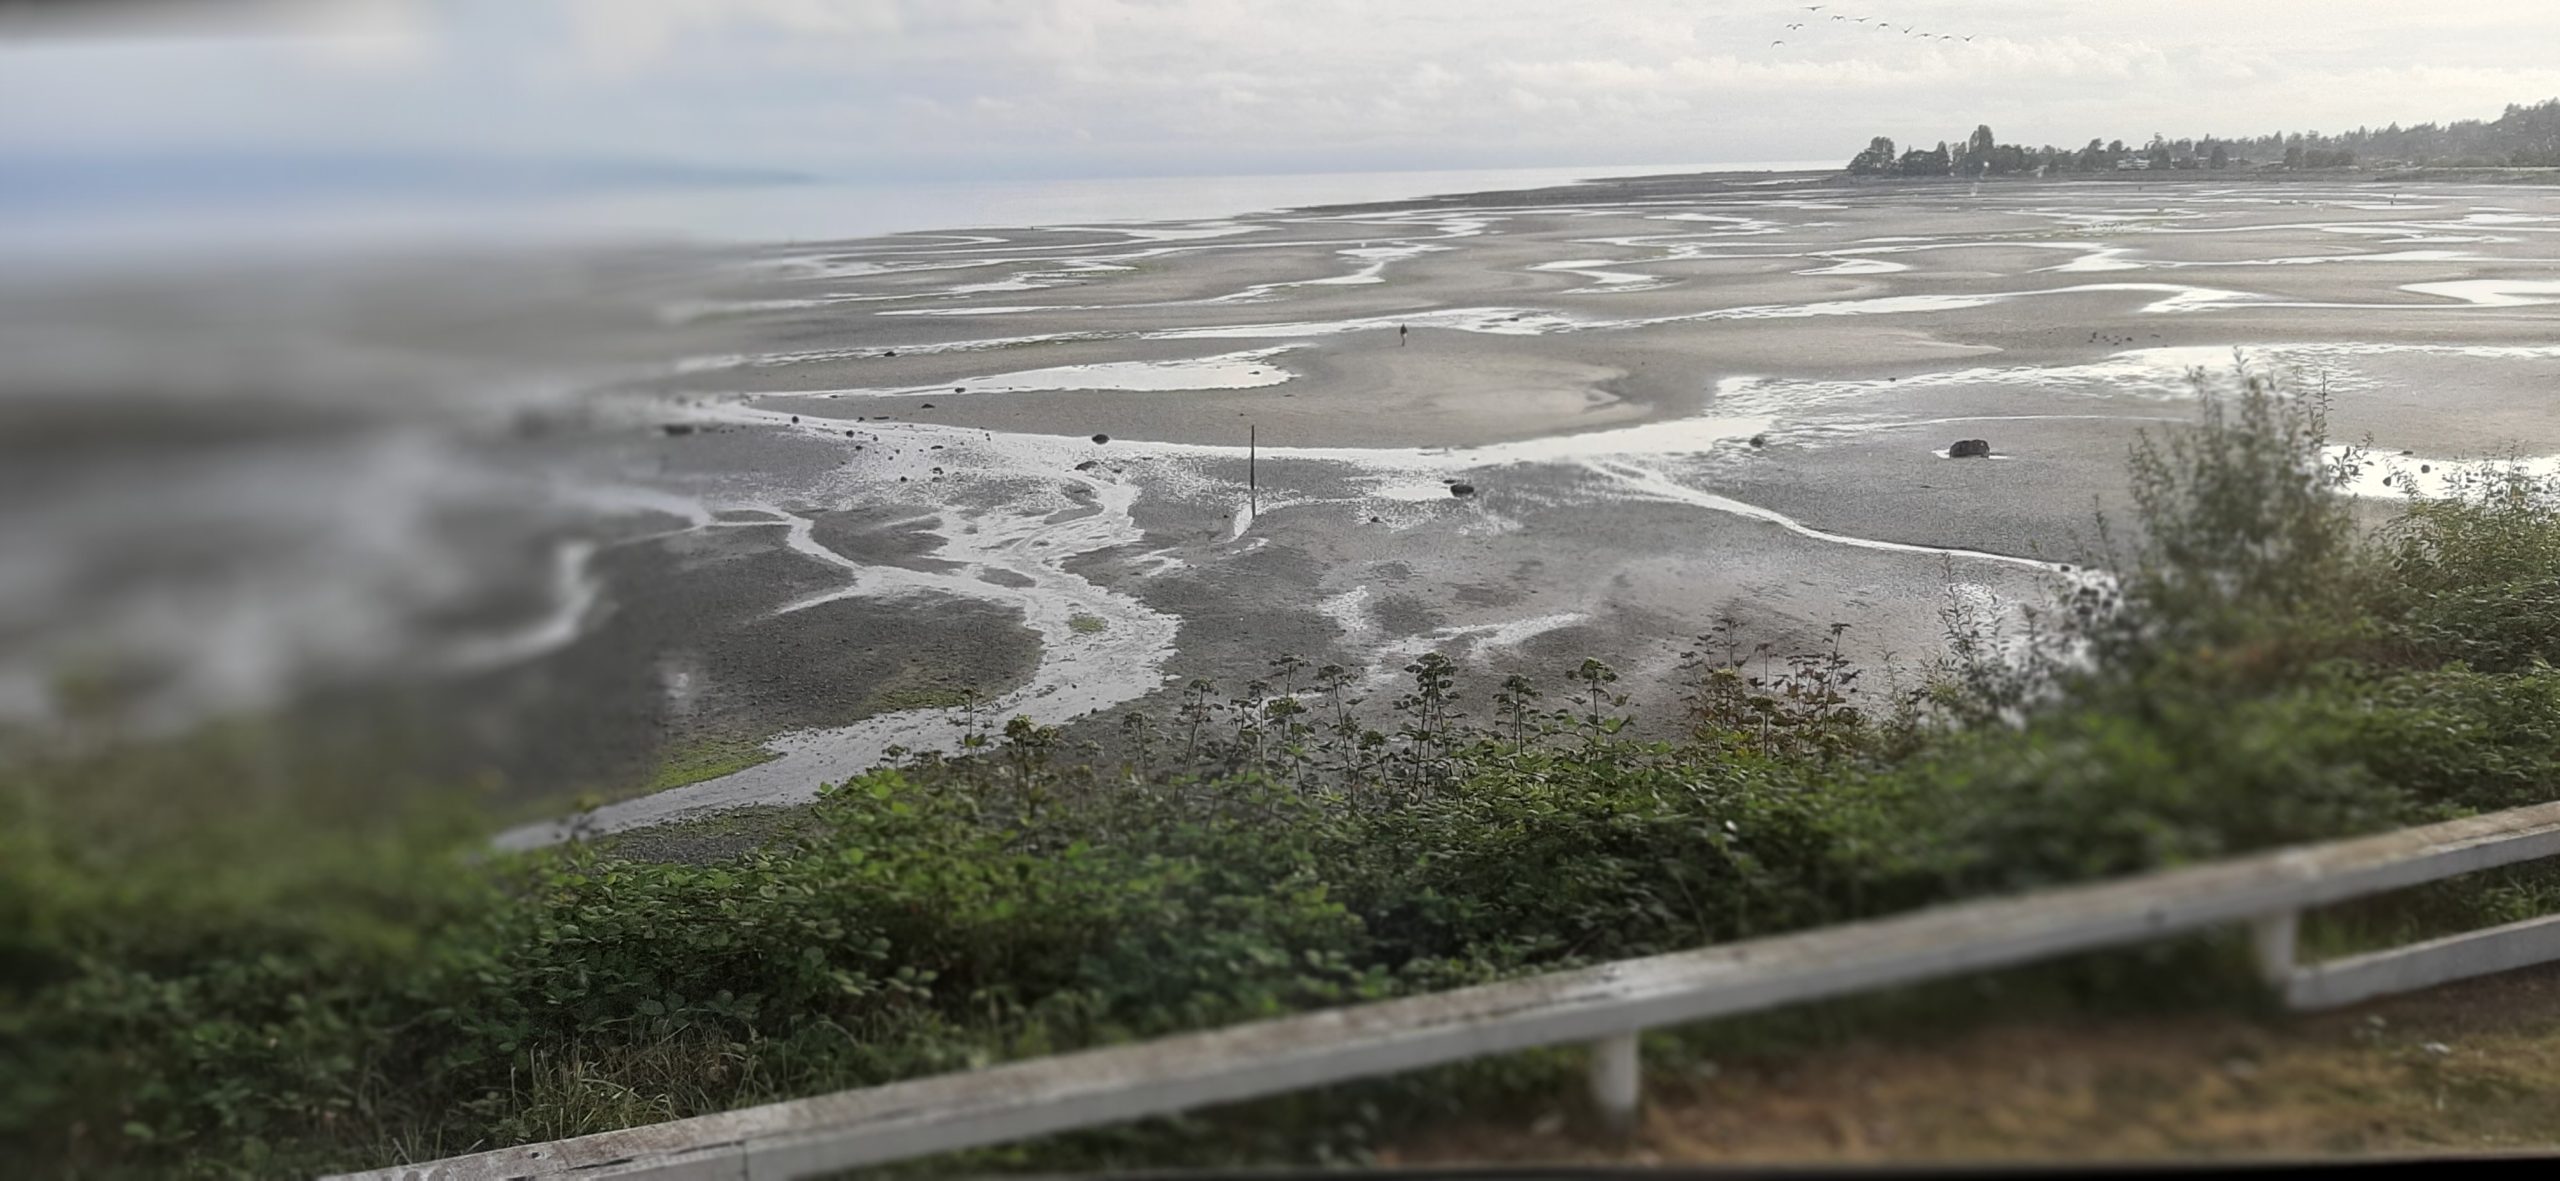
Slept long and hard. Woke to clouds and the promise of rain. And through our back window, I quickly perceived that the bay water was gone.
OK, the water wasn’t all gone. But there was enough gone for me to wonder if someone had inadvertently pulled the plug! I also quickly realized that Andy was also missing. But even without my glasses, I could see someone that walked just like him way out on the sandy flats.
Out on the mud flats looking back at the shore and our parked trailer.
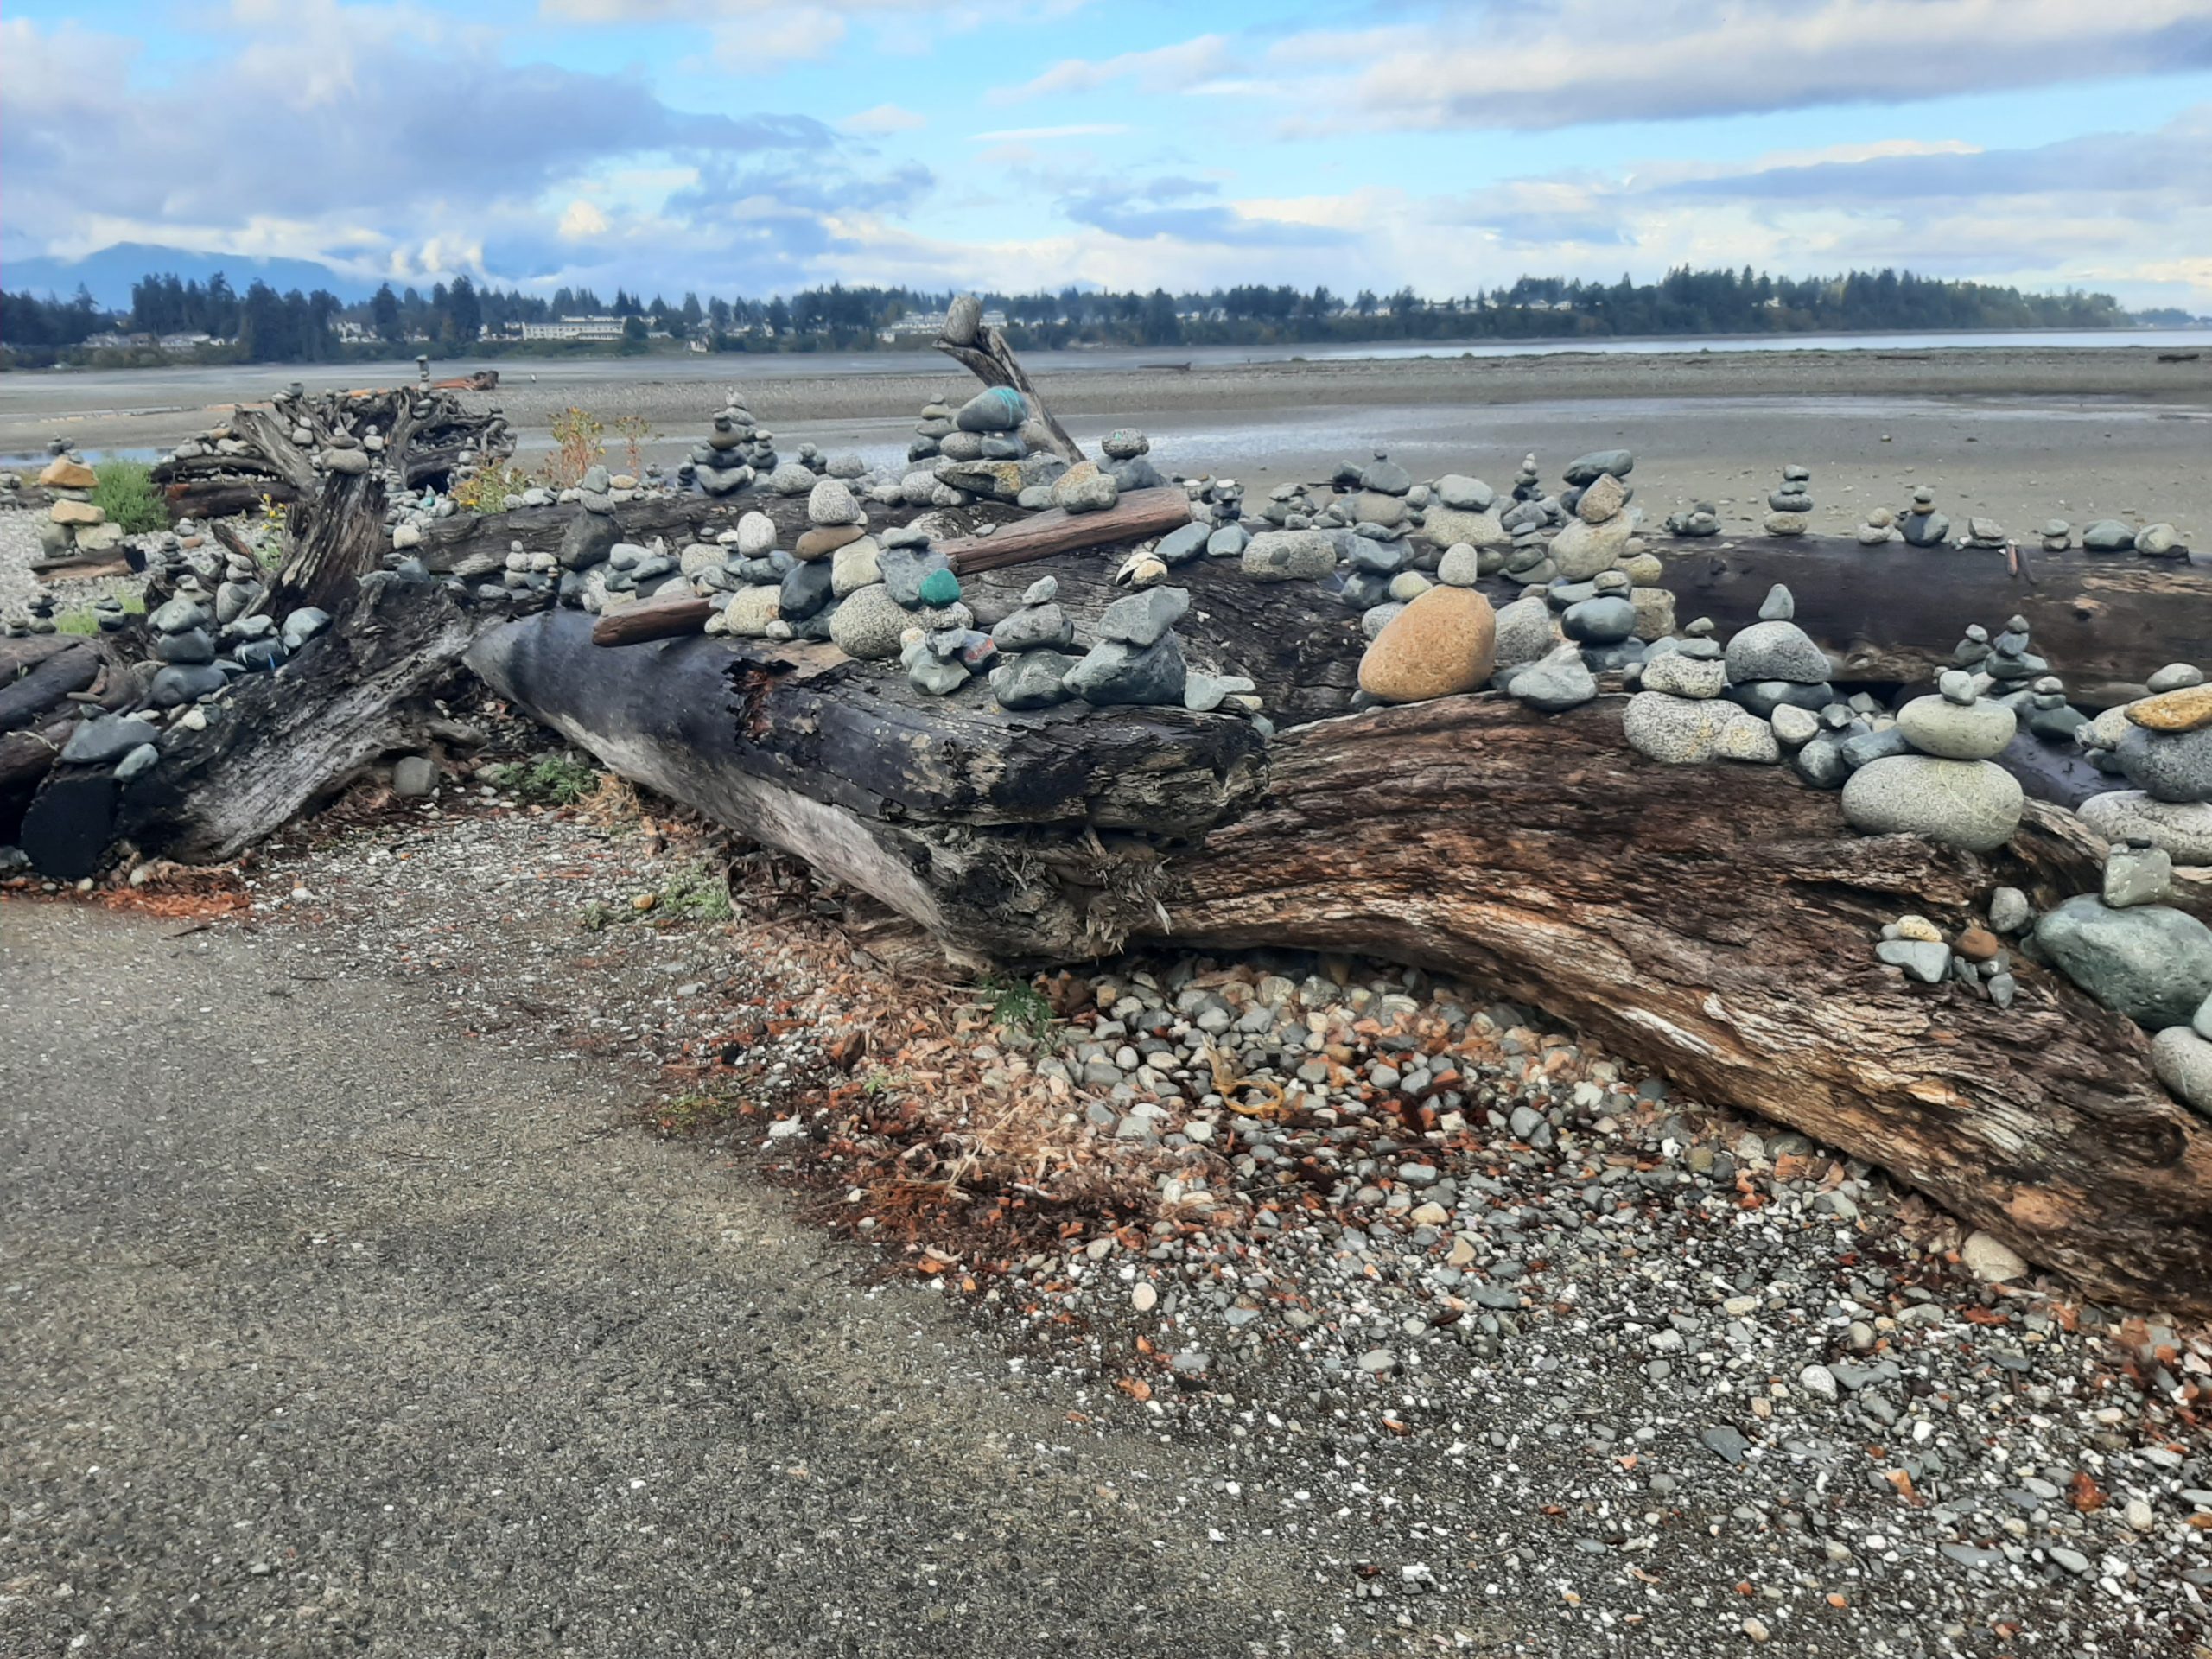
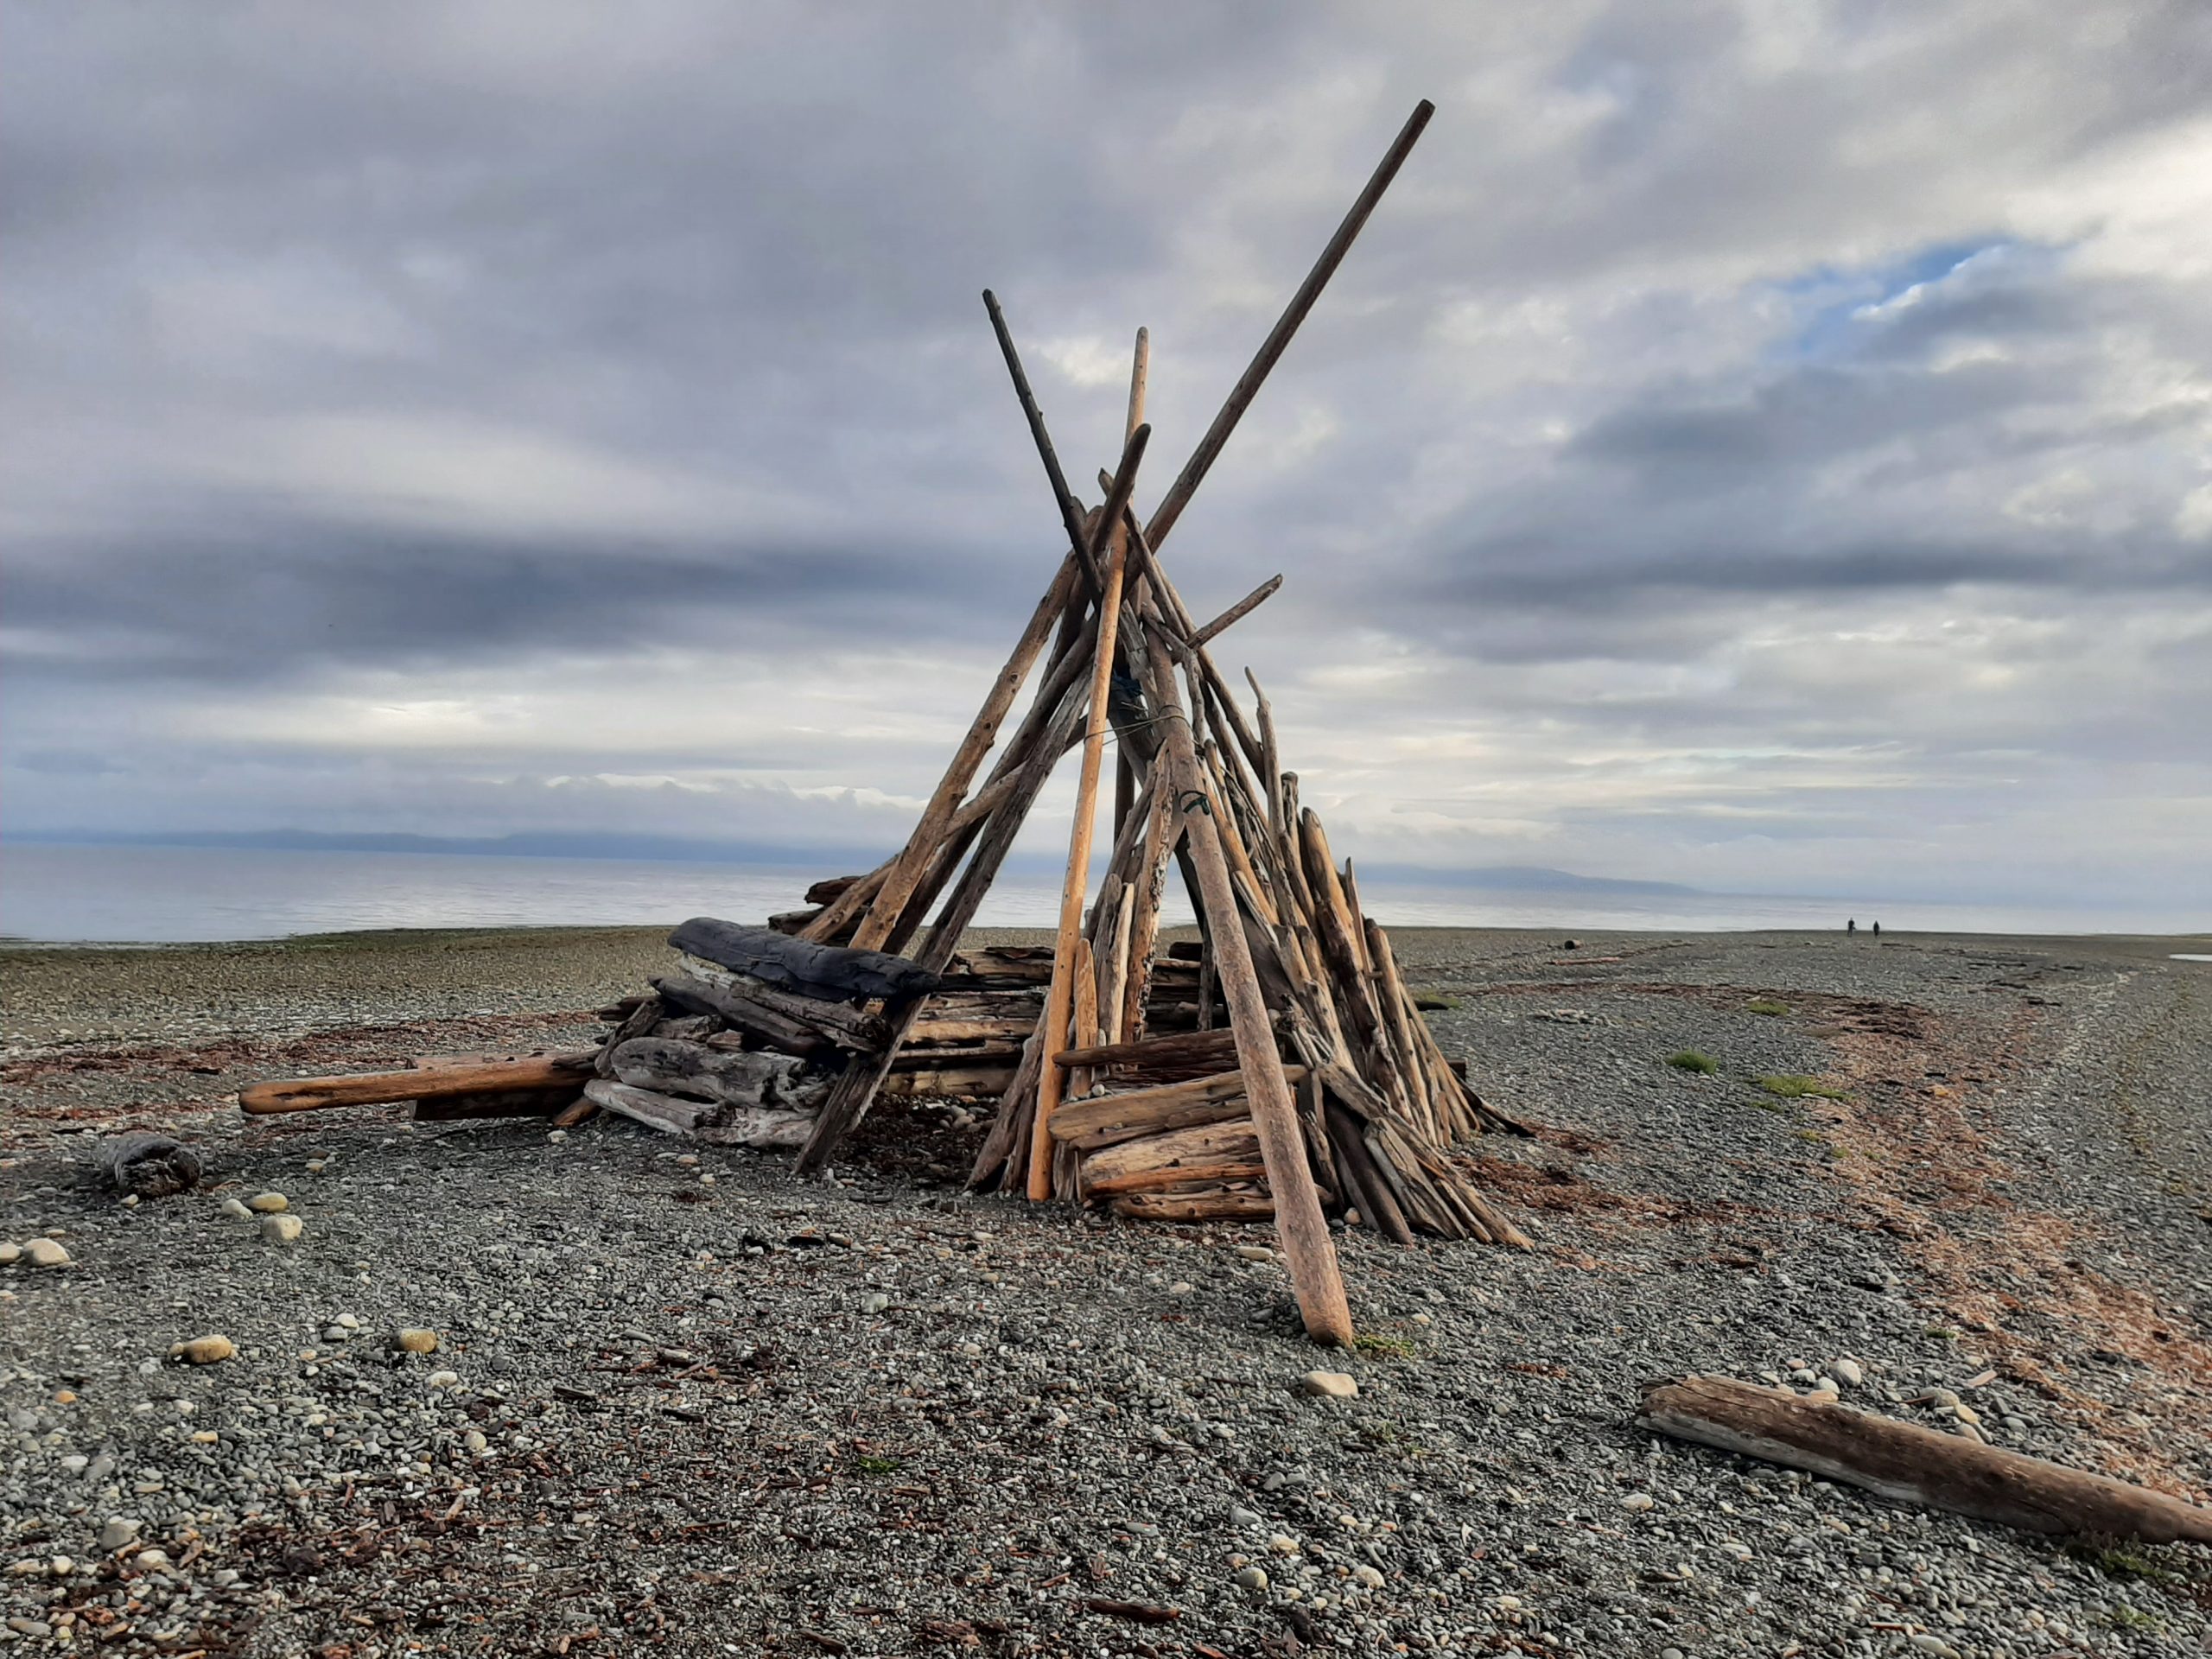
Bonfire out on the flats just waiting to be lit.
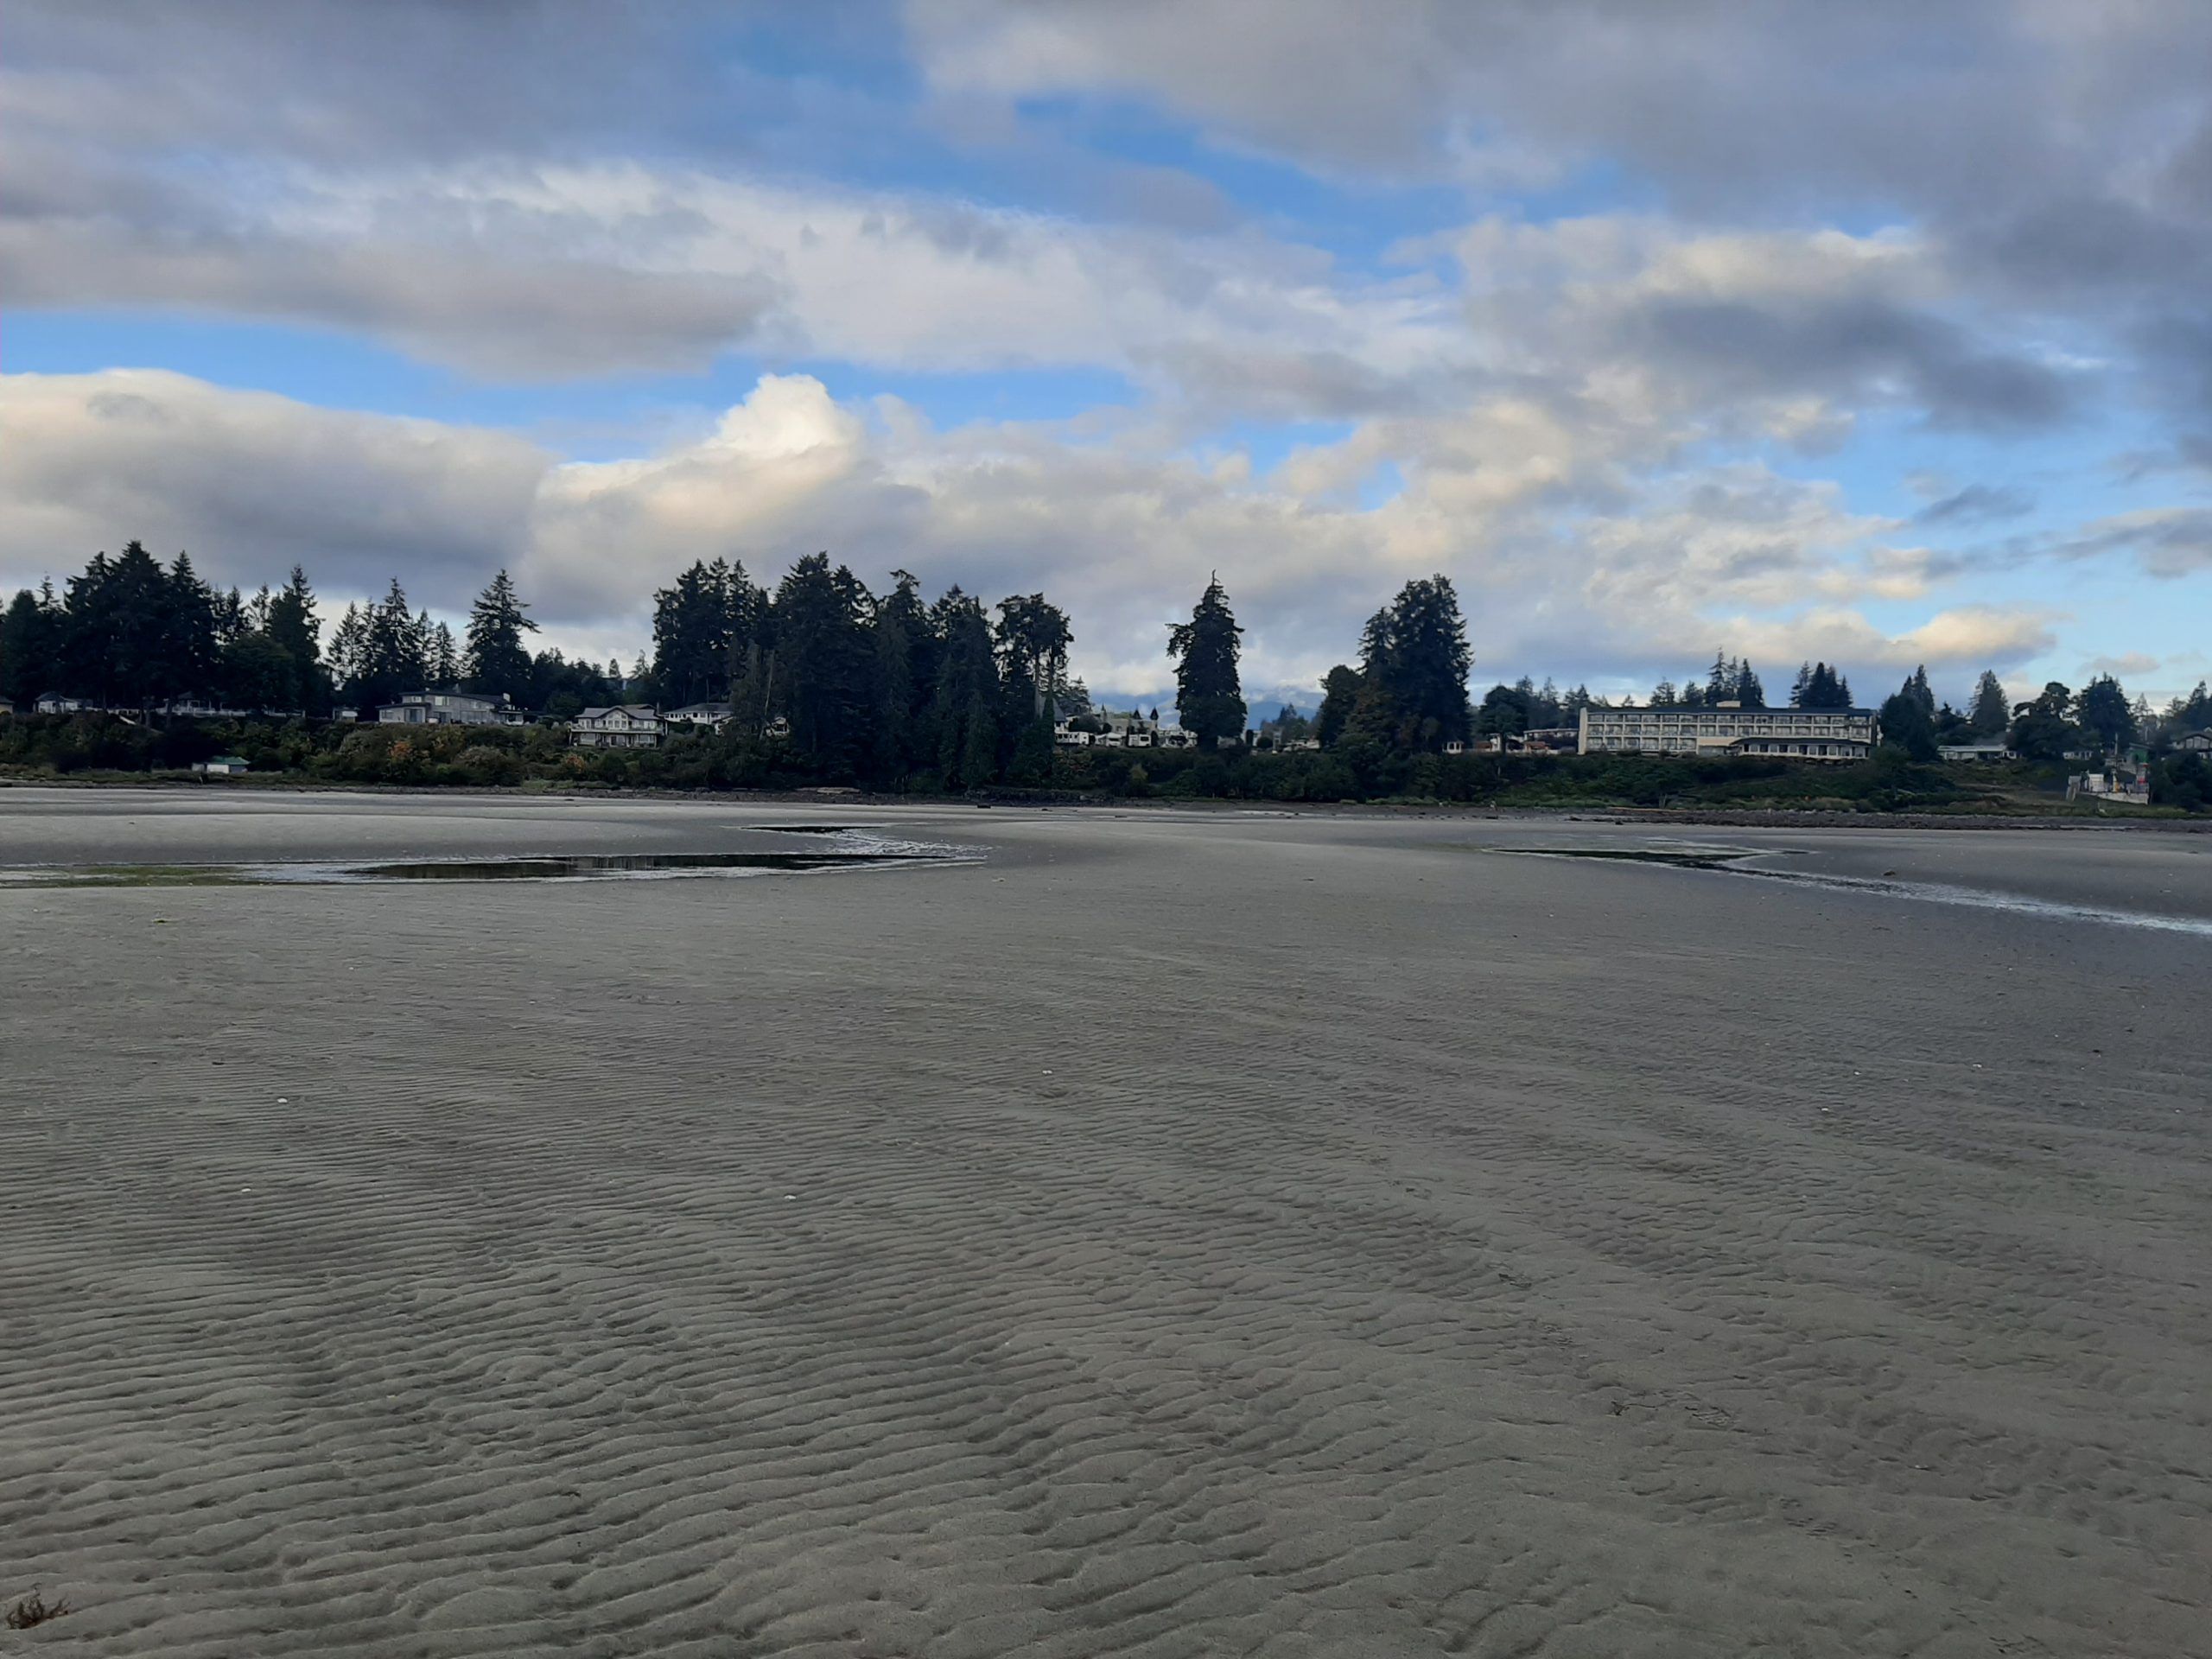
Closer in view of the shore with the back of our trailer smack dab in the middle again.
Andy got back to the trailer after a few minutes and eventually the water must have missed the shore, because it eventually came back too.
During breakfast, the heavens opened, and it began to rain in earnest. But never to be denied a bit of fun each day, we decided rain be damned, we needed an adventure.
While we were driving from Crofton (the ferry landing on Vancouver Island) north to Parksville, we quickly realized that we were in vacation country. RV parks, motels, hotels, restaurants, galleries, cute little boutique shops, museums, and every possible type of tourist trap you could imagine, were still in full tourist mode. So, our first few visits today were to the RV parks in the vicinity. We decided they each had some interesting qualities, but we would be content with where we were currently parked.
Then up the coast as far as Qualicum Beach before we headed back to camp for lunch and for me to write and Andy to read. And yes, it rained the entire time we were driving.
We had decided that we would go out for dinner that night. So, when we returned to camp after our ride, I did some research. What I learned was that the Bayshore Restaurant and Lounge in The Bayside Oceanfront Resort, which just happened to be right next door to our RV park, had a first-class menu and very good reviews. So, I made a reservation, and we were seated within 5 minutes of locking our trailer door.
The food was marvelous, and our table was right next to the window looking out on the water. So, we had a lovely evening.
Then back to our home away from home for me to finish my book and start a new one. More to come about my new read. But that can wait until what seemed like a long overdue assignation with my pillow.
Saturday, September 14, 2024 – Paradise RV Park
After a good night’s sleep, I awoke to clouds with a bit of sunshine peeking through. The sun really wanted to present itself more, but the clouds would have nothing to do with sharing the sky. But eventually around 11:00 am, the sun took over for a few hours. There were still clouds here and there, but it was warm enough to shed some layers and go for a ride.
Andy thought he remembered going to a Provincial Park in this area when he was a boy. So, we decided to take a ride and see if going through the camping area of the park he had in mind brought back any memories. The park, Englishman River Falls, is right next to the Englishman River (duh), and he thought those sites looked familiar. So, that was fun.
Then we just followed a few roads that looked interesting until we decided to stop at a BC Liquor store for a bit of provisioning and then up to Qualicum Beach for fish and chips.
Earlier in our trailer trips, the only time we would eat out was for lunch if we were on our way to a new destination. But since I’ve gotten older, I appreciate not cooking three meals a day. So, every two days or so, we have one of our daily meals out. And that suits me just fine. Sometimes it’s not possible to dine out because we are so far from civilization with decent cafés or restaurants, that it seems silly to eat mediocre food when I can jolly well cook something tastier in the trailer. And of course, that’s just what I do. But, when the opportunity presents itself, I enjoy the heck out of someone cooking for me.
After our mid-afternoon lunch, we came back to camp to sit in the sun and read. Well, that didn’t last long. There was a cold breeze coming off the water and we soon sequestered ourselves in our cozy trailer.
But sure enough, the wind died down and the sun came out, so off to the 36-hole mini golf course we proceeded. I came in two strokes ahead on the first 18. On the second 18, I completely lost it, and Andy stopped taking score. (He knows where his bread is buttered!) Anyway, we had a great time and made it back to our trailer just in time for the rain to start. You would think we were still in the Pacific Northwest. But I suppose the Canadians refer to this as the Pacific Southwest. But basically, it’s all the same regardless of what it might call itself! Note to self: Ask a local if we are currently in the Pacific Southwest. That only makes sense. But then, when does anything that makes sense happen?
Since it was almost 6:00 pm, and I had no idea where I was, cocktails were in order.
With martini in hand, I wrote up todays adventures and now must stop writing and cook dinner. Meatloaf (made at home before we left) and corn on the cob we purchased on Salt Spring Island.
After dinner it was a rousing few games of Bend Dominoes. Then we read our books until all the letters started to blur. And finally, we took those 8 arduous steps to find ourselves nestled in our snug queen-sized bed, while visions of adventures danced in our heads.
Sunday, September 15, 2024 – Paradise RV Park
Just another day in Paradise. After a late breakfast, we decided to head back to Nanaimo and take a short ferry ride to Gabriola Island. (“Gabe” to the residents and locals.)
Our mighty Toyota Tundra out for another ferry ride.
BTW, Gabriola Island is the furthest northern island in the Gulf Islands which is part of the Gulf Islands/San Juan Islands archipelago. (Called the Gulf Archipelago.)
The tip of Lopez Island being at the southernmost point. But back to Gabriola Island.
Had a bit of difficulty finding the ferry dock in Nanaimo, but once there and ticket purchased, we were soon on our way on yet another BC ferry. And I must say, (sorry Suzie), that BC ferries have got the whole “ferry thing” down pat. From the ticket booth person to the crew that gets us on the boat, to the people that direct us off the boat, we were in very respectful, capable hands. The signage however, to direct us to the boat and what to do when we actually found the terminal, sucked! Big time! You practically had to have been born in the area to understand just exactly what they wanted you to do, and when they wanted you to do it! (And yes, BC folks, riding a ferry is not our first rodeo (so to speak). But a little signage would have been ever so helpful. So, ferry folks – thanks for being so wonderful. Ferry officials who sit in glass towers and feel no directions are necessary because “everyone” already knows how to find these hidden terminals, may the bird of paradise fly up your corporate noses!) (OK, I feel better now. Thanks for listening.)
But once on the island, we were enchanted. Very rural feel, with lots of beautiful homes and wooded areas. Just a few cleared fields. But on those cleared areas cows, horses, sheep, and at least one lama.
Then to the only shopping area we found on the island for a quick sandwich purchase, and back to line up for the next ferry back to Vancouver Island.
BTW – This ferry did not run on a schedule. When the boat gets full (or almost full), they head for the opposite shore. There are two boats which can each accommodate approximately 47 cars. The crossing takes about 20 minutes. So, at either end we didn’t have to wait at all.
Then a bit of grocery shopping in Parksville before returning to camp. The sun was shining, so before dinner we sat in our comfy camping chairs and read until it was time for me to start dinner. A beautiful way to spend a lazy late summer day.
I love it here. The people are friendly and between the water and the mountains it feels just like home. And what can be finer than that!
Part 1 – Mowhinna Creek Campground – Salt Spring Island, British Columbia
Sunday, September 8, 2024 – Mowhinna Creek Campground – Salt Spring Island, BC – site 47
Left our trailer storage area at 10:30 am, which is amazing considering that I am not a morning person. So, getting up early is not something I look forward to regardless of what the day happens to portend.
But off we went without a hitch. Actually, we did have a hitch. Which of course is something you really need when pulling a trailer!
First stop – the Canadian border at Peace Arch in Blaine, Washington.
The Peace Arch is valued as a symbol of the peaceful co-existence of two nations and marks the western edge of the longest undefended border in the world. And just because we had absolutely adhered to every regulation we could read about regarding bringing food and alcohol from Washington State into Canada, the only questions we were asked by the nice man who held our life in his hands were 1) where we were going in Canada, 2) how long we would be in Canada, 3) did we have any firearms in either the truck or trailer, or 4) were we carrying any live animals on board? I wanted to answer that Mr. C. was a live animal, but I thought better of messing with the guy. Over the years it has been my experience that border crossing folks have absolutely no sense of humor. So, I showed remarkable restraint, and we were allowed to proceed onto the hallowed grounds of Canada after about a minute of intense questioning. So, now what to do with our time between noon and our 5:15 pm ferry reservation? Have lunch, of course!
So, we went into the thriving metropolis of Tsawwassen to look for any café or restaurant where we could find a place to park. Believe me, you haven’t lived until you have been in a town and your truck and trailer together are 45 feet long. (And we have a small 25-foot trailer. Imagine towing a 36-foot trailer! No, don’t even go there. It’s too horrifying to even imagine.)
Anyway, we found a place to eat (White Spot Restaurant) right next to a large parking lot and enjoyed a very nice meal.
After lunch we headed for the ferry terminal. When we got to the ticket booth, we were so early that the ticket lady had to call and see if we could get in line or if not, we would have to leave the area and come back later. Luckily, we were allowed to get in line. And yes, we were the first in line. So, 4 hours later, we were the second to the last vehicle escorted onto the ferry. (See how that works!)
But even though we were worried about getting totally bored for those 4 hours, they went by in a flash. There was so much activity going on at the terminal, we were absolutely captivated watching ferries come and go and all the employees doing this and that. We even heard an announcement for the driver of a black EVO to return to the ticket booth. We then saw the EVO sneaking in and out through the lanes trying to escape the police car that was right on its tail. Apparently, the driver had gone through a booth without paying. But just like at an airport, there is a tall structure that looks like an air traffic control tower where the entire terminal can be closely monitored. So, this poor EVO driver really didn’t have a chance. And since you too may have no idea what an “EVO” is, allow me to explain. The Mitsubishi Lancer Evolution, popularly referred to as the ‘Evo’, is a sports sedan and rally car based on the Lancer that was manufactured by Japanese manufacturer Mitsubishi Motors from 1992 until 2016.
So, now we are on the ferry for a very calm crossing.
Looking down on our trailer from the sun deck
Then on to Ganges and our camp site for the next 4 nights.
After supper it was an early to bed. Suffice it to say we were so tired neither of us opened our books. That my friends, is a rare occurrence.
Monday, September 9, 2024 –Mowhinna Creek Campground
Slept in until 9:00 am. (We really needed the rest.) Then after a big breakfast, we decided to take a ride up the northern part of the island. We had been on Salt Spring Island 20 years ago for a wedding (nephew Rolfe and Rebecca) but had not been on this Gulf Island since. And since Rebecca calls Salt Spring Island her “favorite place on Earth”, we decided to pick her brain about what to see and do while we were here. So, with a list in hand, we hopped in the truck and away we went.
Our only stop on this first day was for seafood in Vesuvius at the Seaside Restaurant. Nice outdoor seating right next to the ferry terminal where we watched a ferry come in and leave. And we realized we could take that ferry when we left on Thursday for Vancouver Island. It would save us several miles (excuse me) “klicks” of driving. Plus, the boat was fairly small, and it looked like it would be fun to ride.
Picture of the ferry from our restaurant table
Then we decided to go to the Mount Maxwell lookout. Right! We made it quite away up the very poor road. But when it not only got rougher, narrower, and steeper, we turned around. Four-wheel drive truck and all, but it was just a bit too much for me. When Andy asked me if we should maybe turn around, I instantly answered yes. And there is still no question in my mind that we made the correct decision.
Then back to camp for me to sit outside our trailer and read while Andy took a quick hike around Ruckle Park where Rolfe and Rebecca had been married.
Upon his return to camp, it was time for happy hour. Then dinner and Andy back to his book and me to write up this post.
Then lights out thinking about what mischief we could get into the next day.
Tuesday – September 10, 2024 – Mowhinna Creek Campground
I actually slept until 9:00 am this morning. And it was delightful. I think I mainly sleep better in our trailer because I don’t have a cat cuddled up to me all night. Plus, fewer commitments at home that I sometimes worry to death when I should be sleeping peacefully. But the fact of the matter is that I love being able to sleep until I jolly well feel like dragging my old bones upright from delectable horizontality. And I know. It sounds like we take these mini vacations just to rest and relax. And you would be spot on! We appreciate our getaways so that Andy can take a break from our homeowners’ association on which he serves as treasurer and from his busy gigging schedule. But don’t get me wrong. We love our busy lives, but the 3 or 4 times a year when we can take a respite from reality, we kick back and relax like we can’t at home.
So, for today, it was more adventures on the beautiful Salt Spring Island.
And during our drive we saw some beautiful countryside. We climbed up and down over hill and dale, passed freshwater lakes, feathered friends,
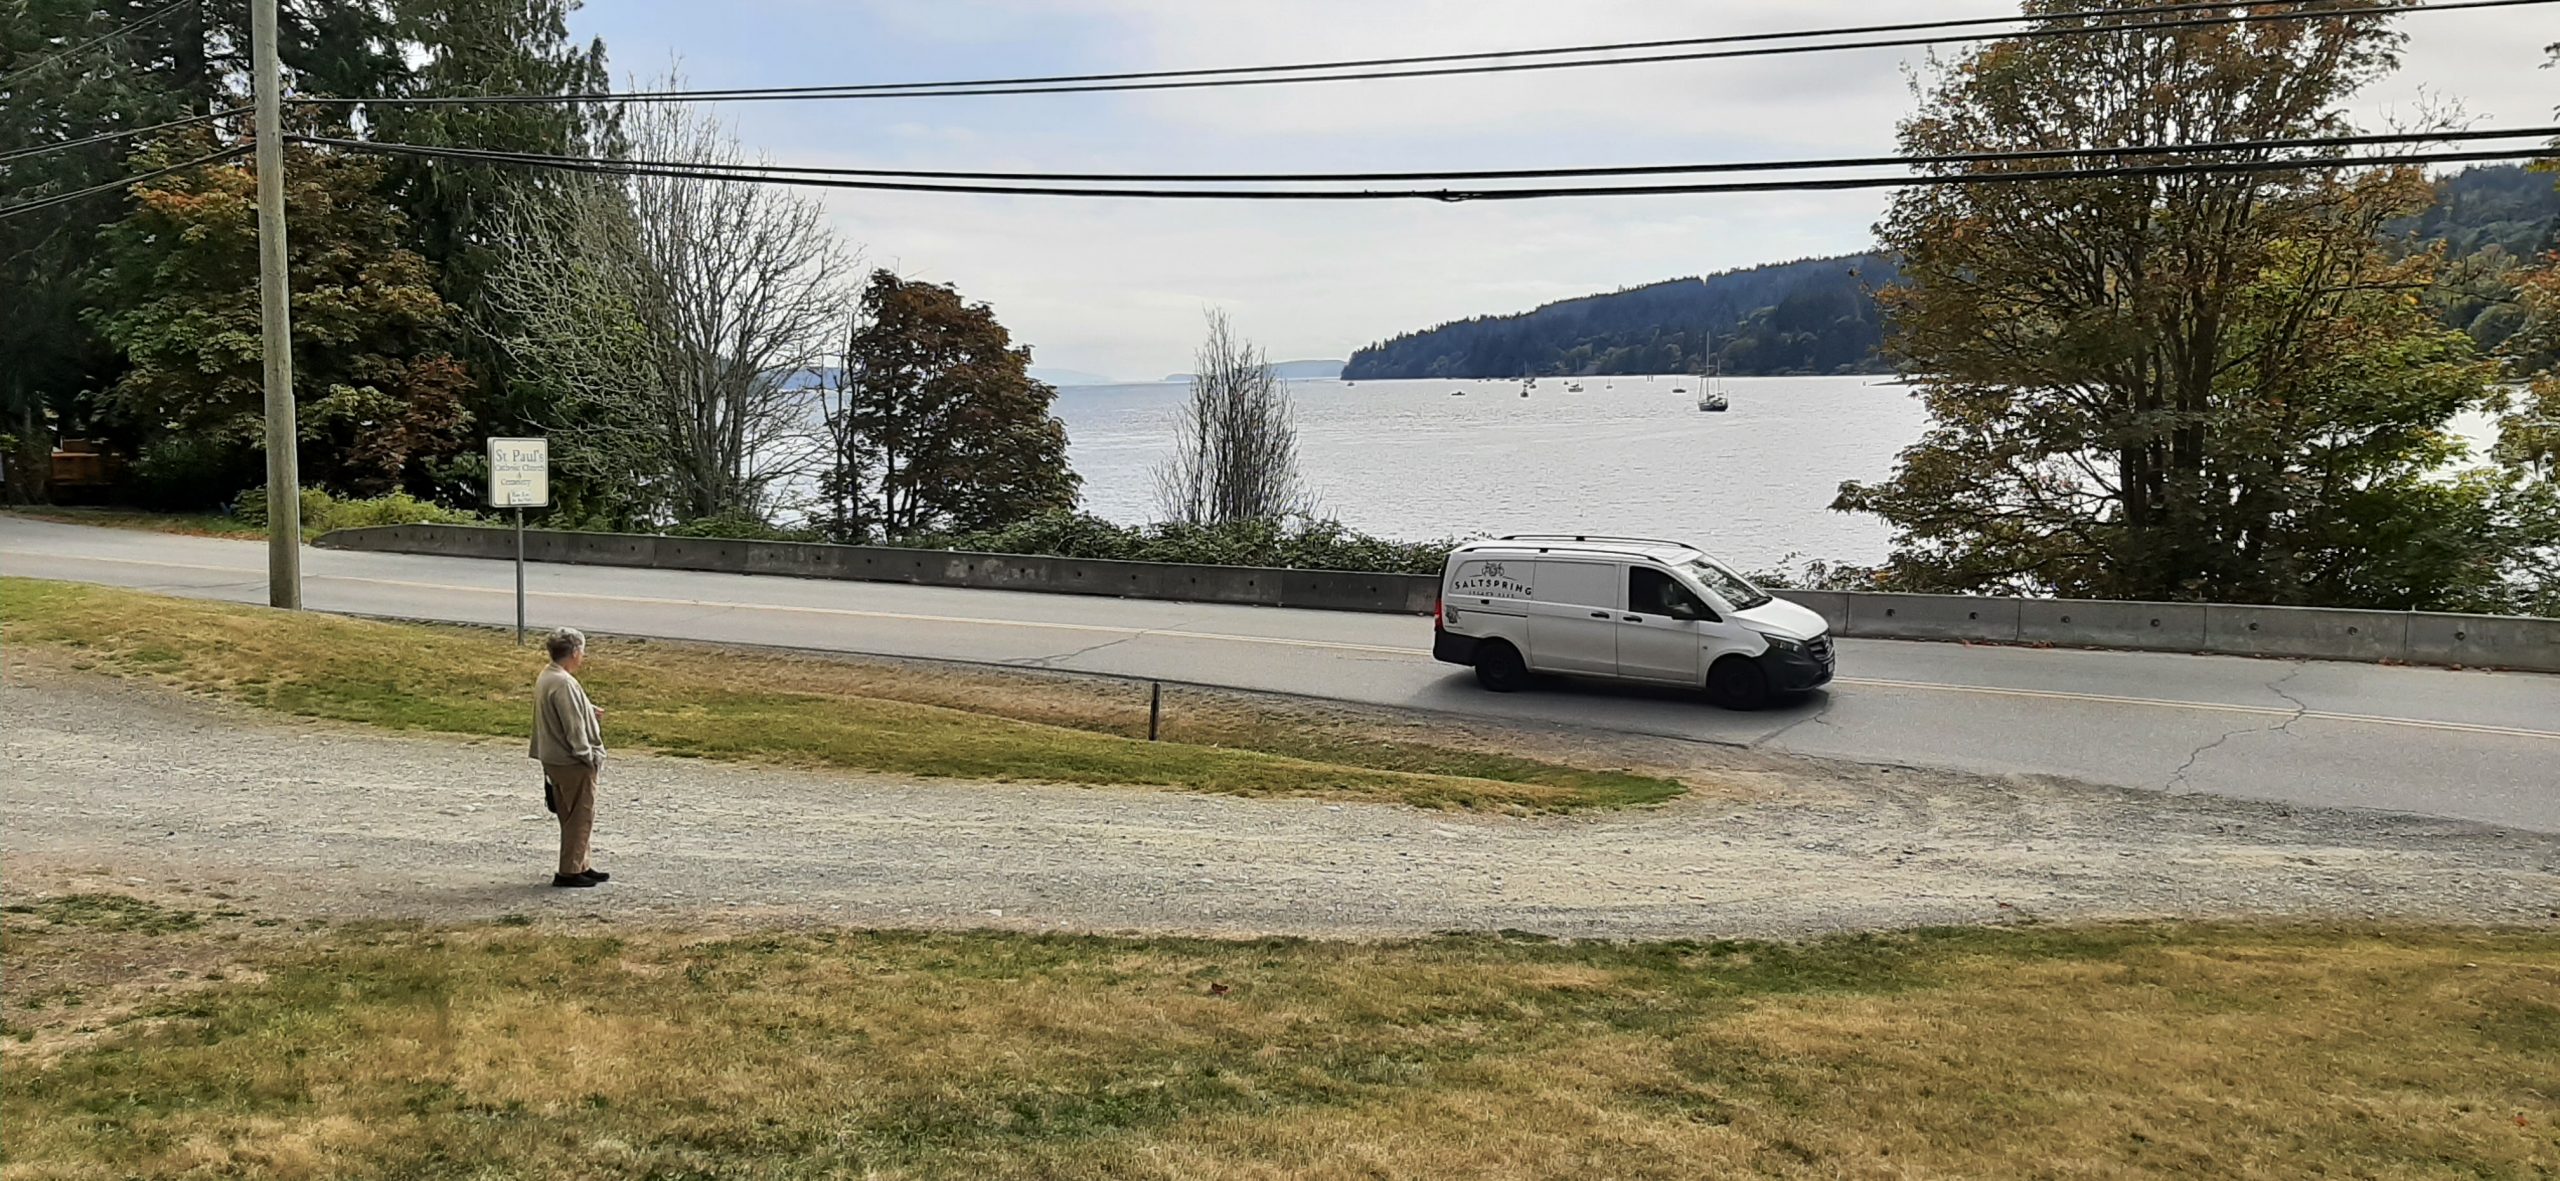
encountered a myriad of saltwater inlets,
St. Paul’s Catholic Church, which is Salt Spring Island’s oldest church built between 1880 and 1885. Founded in 1878 by Father Doncklele who was the first Roman Catholic missionary on the Gulf Islands,
Fulford Harbour
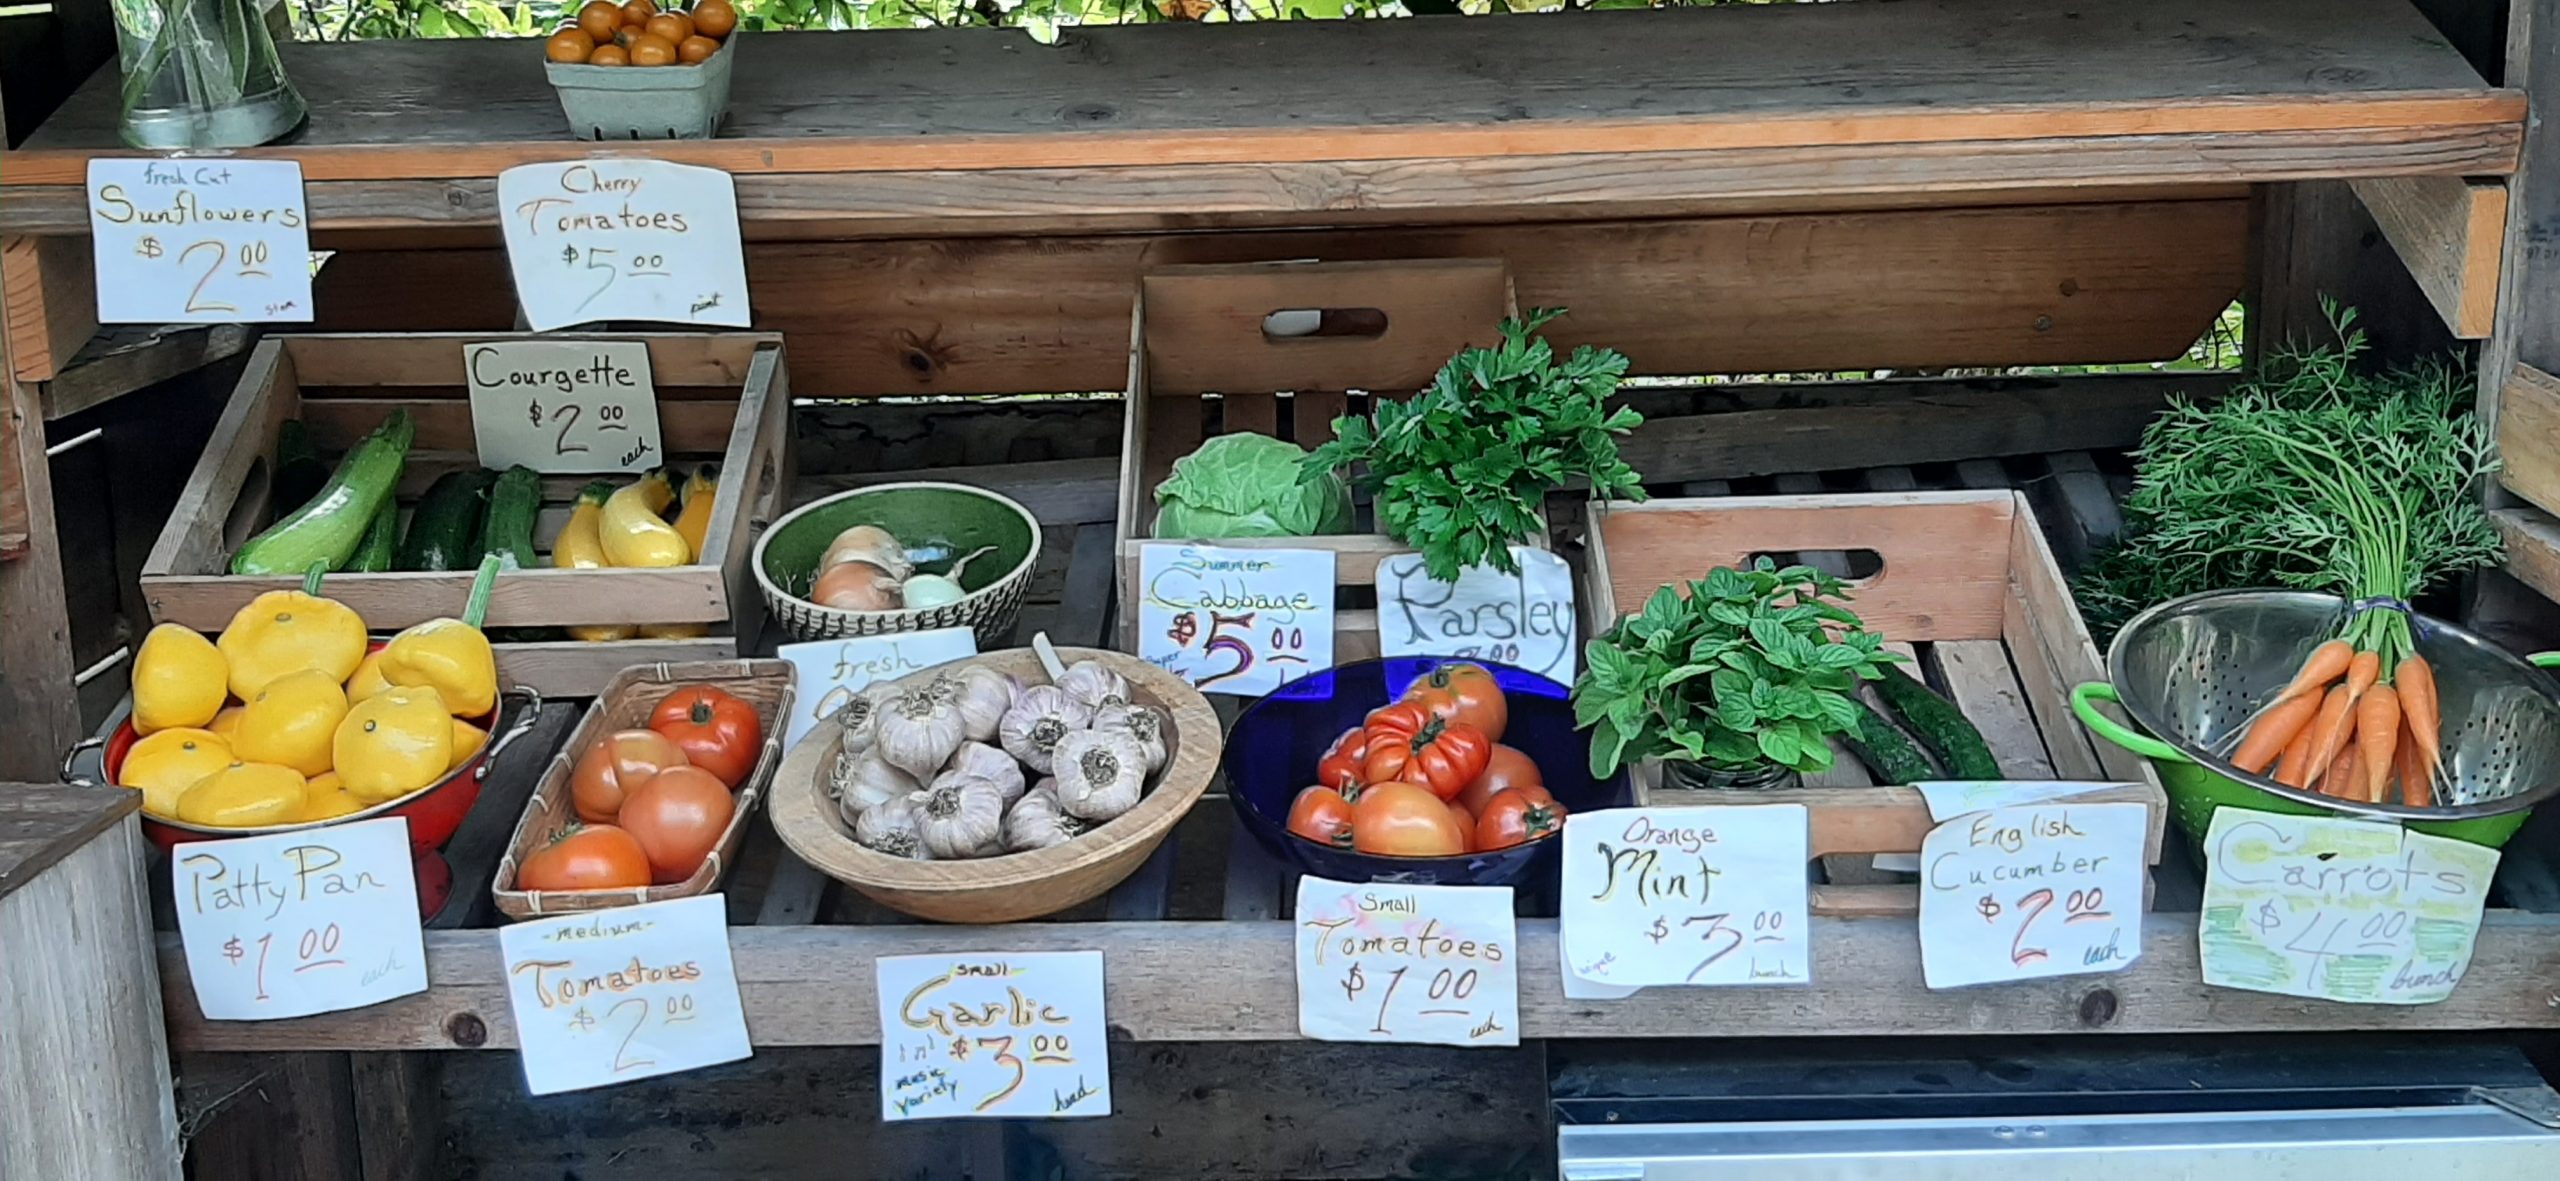
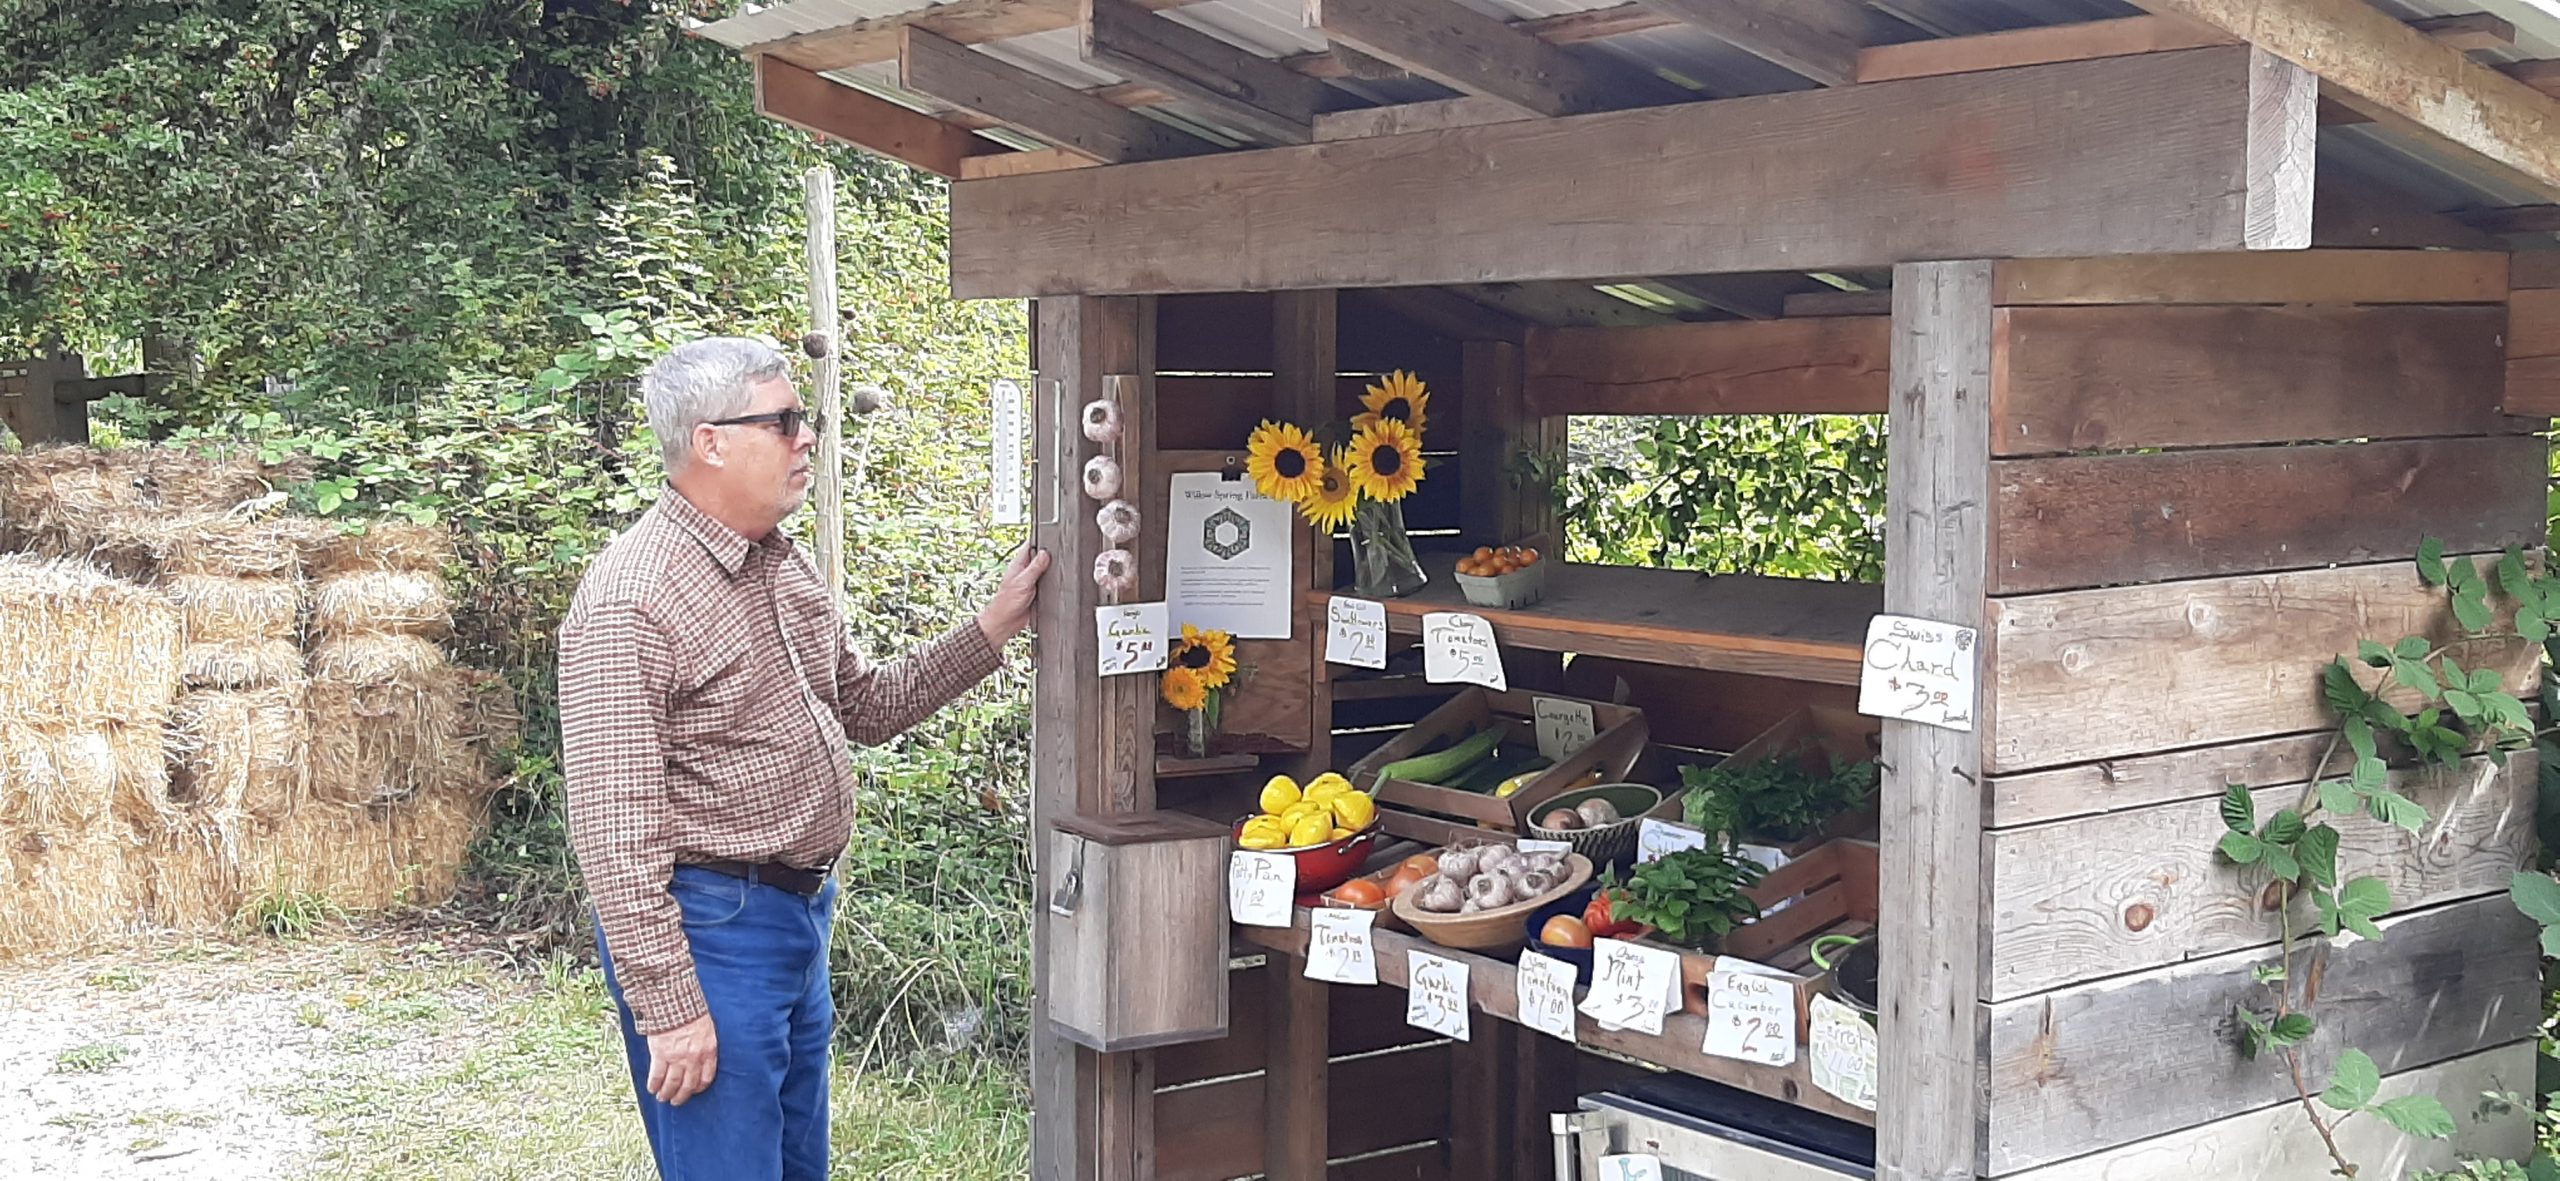
and more farm stands than we could count. At one farm stand we bought tomatoes, pattypan squash, and beautiful green beans.
(Apparently there are about 200 farm stands on the island.) Then we stopped at the Salt Spring Island Cheese shop and purchased some delicious goat cheese. At the Tuesday Farmers Market in Ganges, we bought corn on the cob and a wool dryer ball.
And should you be as ignorant of dryer balls as I was until recently, allow me to explain. Dryer balls are commonly made of tightly compressed wool. They help prevent laundry from clumping together in the dryer by tumbling between layers and separating fabric. This action allows warm air to circulate better which can help reduce drying time. The movement of the dryer balls against fabrics can also help fight wrinkles, prevent static, and soften clothes. So, of course I had to have one.
Then we stopped at Buzzy’s Luncheonette, a small Jewish establishment where they proudly make their sandwiches with their own Montreal smoked meat.
Our final stop for the day was the Embe Bakery in Ganges. We had been advised to try one of their Eccles Cakes, but they were sold out. So, Andy enjoyed an Affogato, and I had a marvelous strawberry ice cream cone.
Then back to camp for a late afternoon read in the sun for me while Andy decided to take a nice beach walk.
So, off he went while I finished Love in the Time of Cholera by Gabriel Garcia Marquez, winner of the Nobel Prize.
When Andy returned it was cocktail time and time to watch the Presidential debate. While we rarely watch debates, I really wanted to hear and see what each of the presidential candidates had to say. And once again I was reminded that there are responsible, caring people in this world, and others who are only in it for themselves. And I couldn’t help but wonder once again, why every American citizen over the age of 18 wasn’t seeing, hearing, and comprehending the same thing I was witnessing. One of the candidates was speaking like a wise and informed adult. The other candidate sounded like a spoiled 4-year-old with boundaries yet to be learned. And why anyone could believe that someone with a proven record of detestable behavior would care in the least what happened to them or to future generations is way beyond my comprehension. The thought that some of the listeners couldn’t see through all the elephant excrement left me absolutely repulsed! And very sad for what might happen to our country. Because the same people who depend most on social security, Medicare, Medicaid, low-cost medical insurance, and the rights of women to take responsibility for their own bodies, are the very ones who have the most to lose if an elephant is elected in November. An elephant, the symbol of the Republican party, supposedly represents intelligence, dignity, and strength. But that is not what I see represented any longer. I see just the opposite. So, for the immediate future the only thing I can do is forget about the whole mess and cook dinner. So, that’s just what I did.
After dinner it was read and write and lights out. Another wonderful day on Salt Spring Island.
Wednesday – September 11, 2024 – Mowhinna Creek Campground
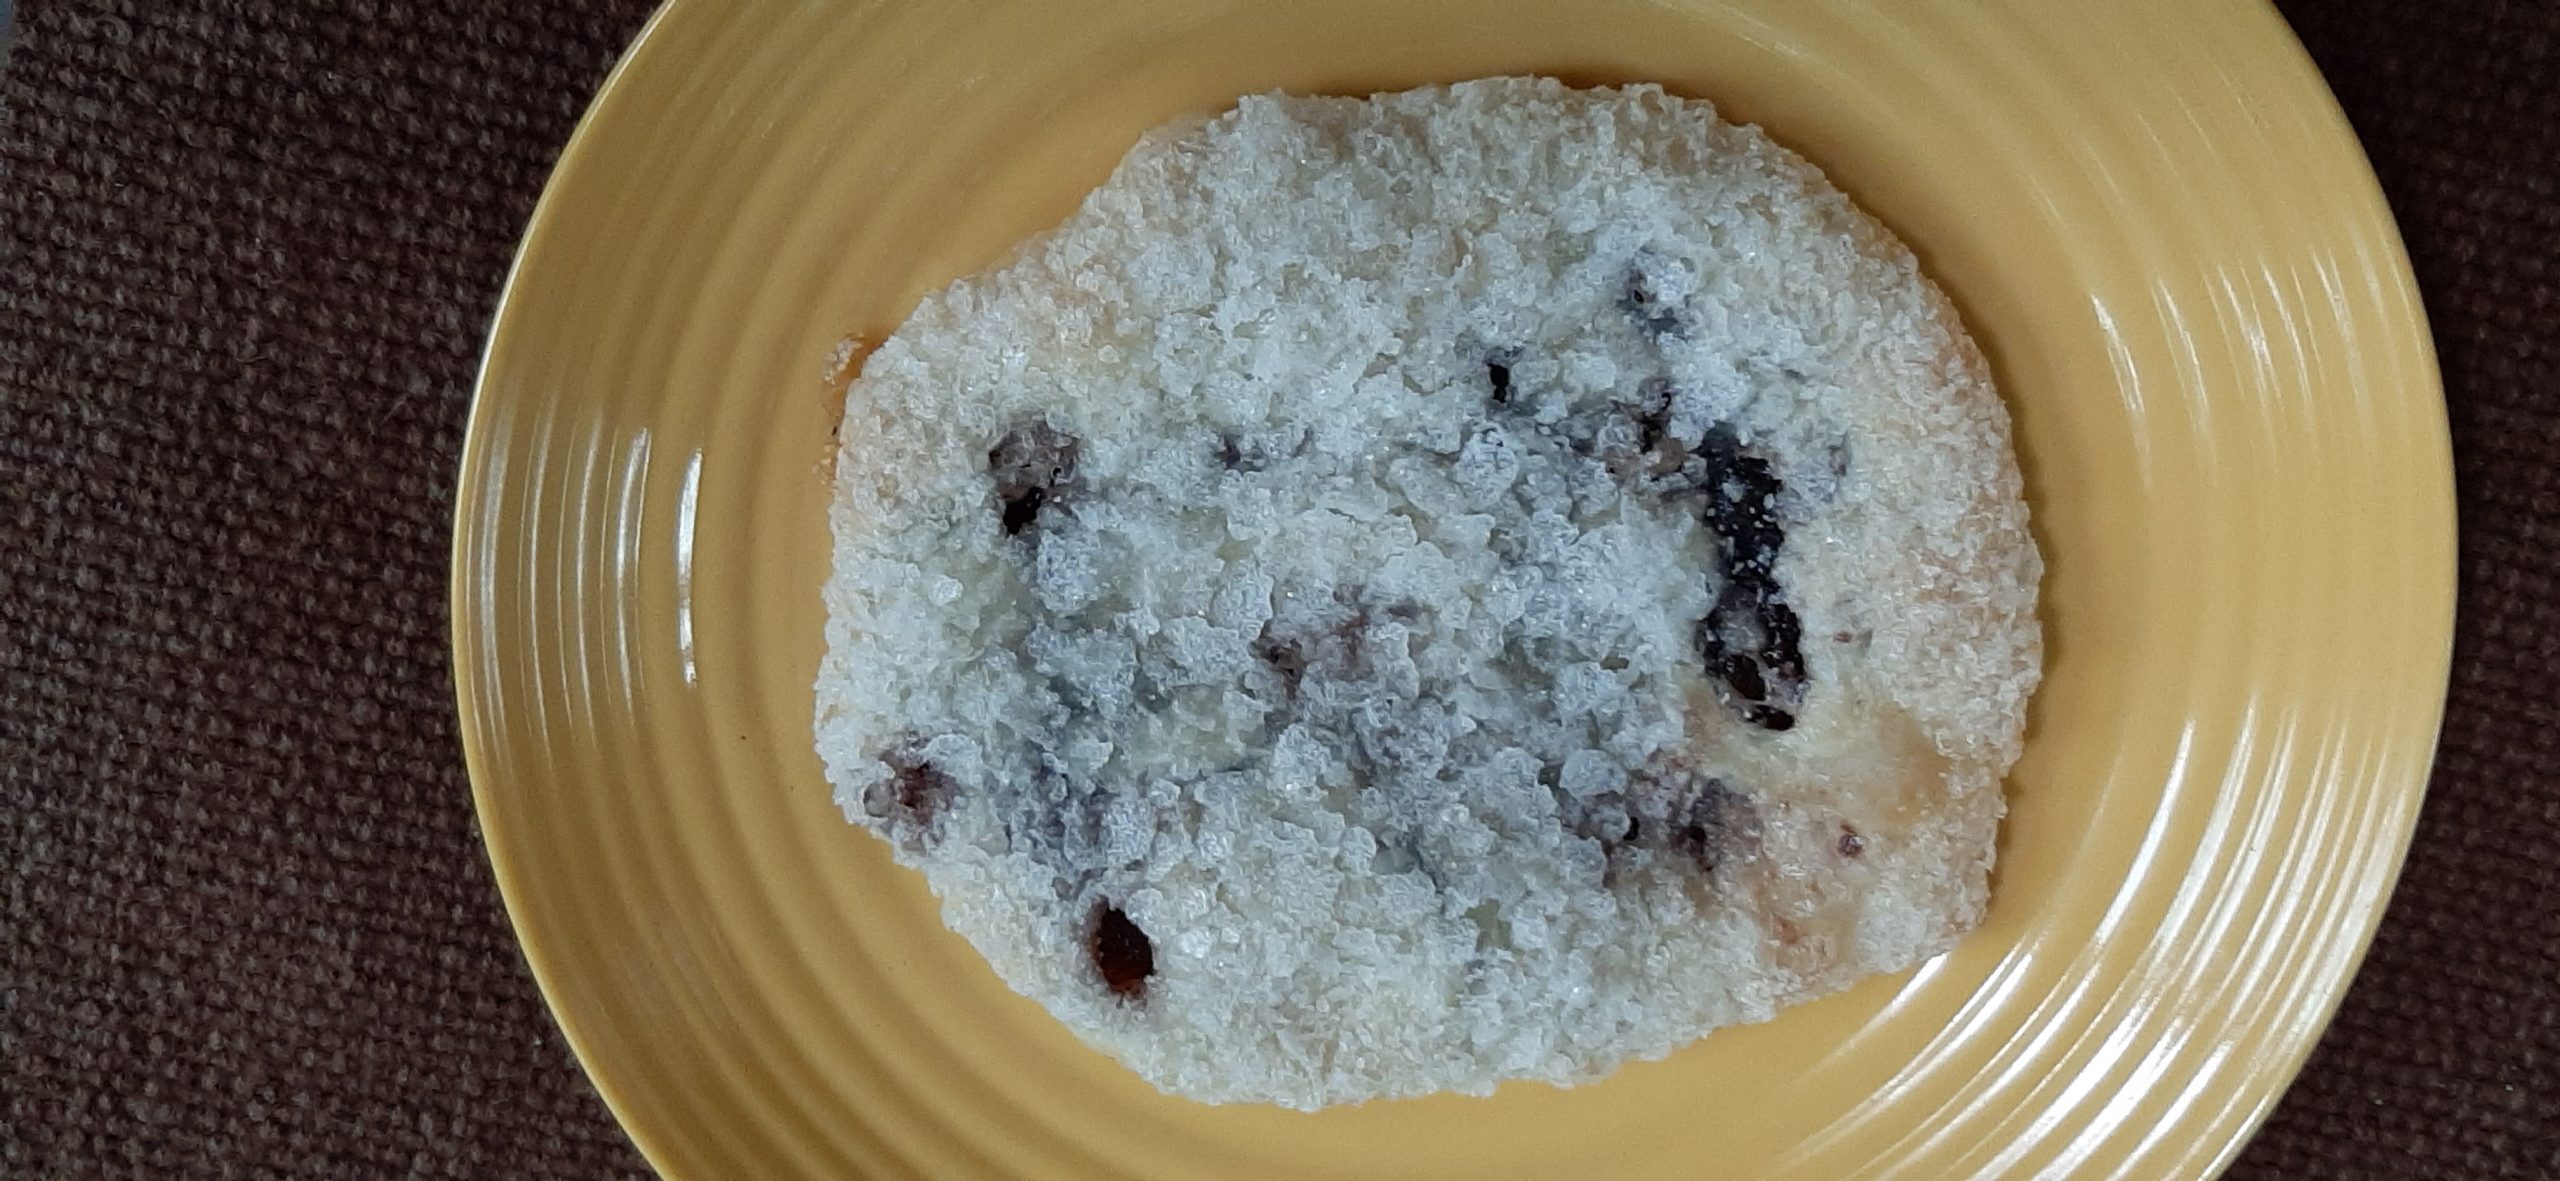
Woke up several times during the night to the pitter-pat of rain on our trailer roof. Not a bad sound, but not a good omen for what kind of day we might expect upon awakening. But when dawn arrived there was a reduction of sprinkles, and patches of sun appeared periodically. So, although it wasn’t warm, it wasn’t cold either. We decided the first part of today’s road adventure would be a visit to the Embe Bakery in Ganges to see if they had any Eccles cakes with our name on them. But before I go any further, I should give you the reasons I was so determined to try one of these pastries. First, our niece-in-law Rebecca had told us we simply must buy one while we were visiting Salt Spring Island. The second reason is because Maisie Dobbs, the female private investigator protagonist in Jacqueline Winspear’s fabulous series set in post–World War I London, is crazy about Eccles cakes and orders them everywhere she dines. So, having read as many of the books in the series as I could find, I decided I too must find out what all the fuss was about. And boy am I glad they were available this morning. Not cheap. Six Canadian dollars for one very small pastry. But they are truly delicious. They are basically a spiced currant and candied citrus peel filled pastry covered with flaky sugar.
A whole Eckles Cake – looks big but it’s only about 4 inches wide. (It’s on a small plate.)
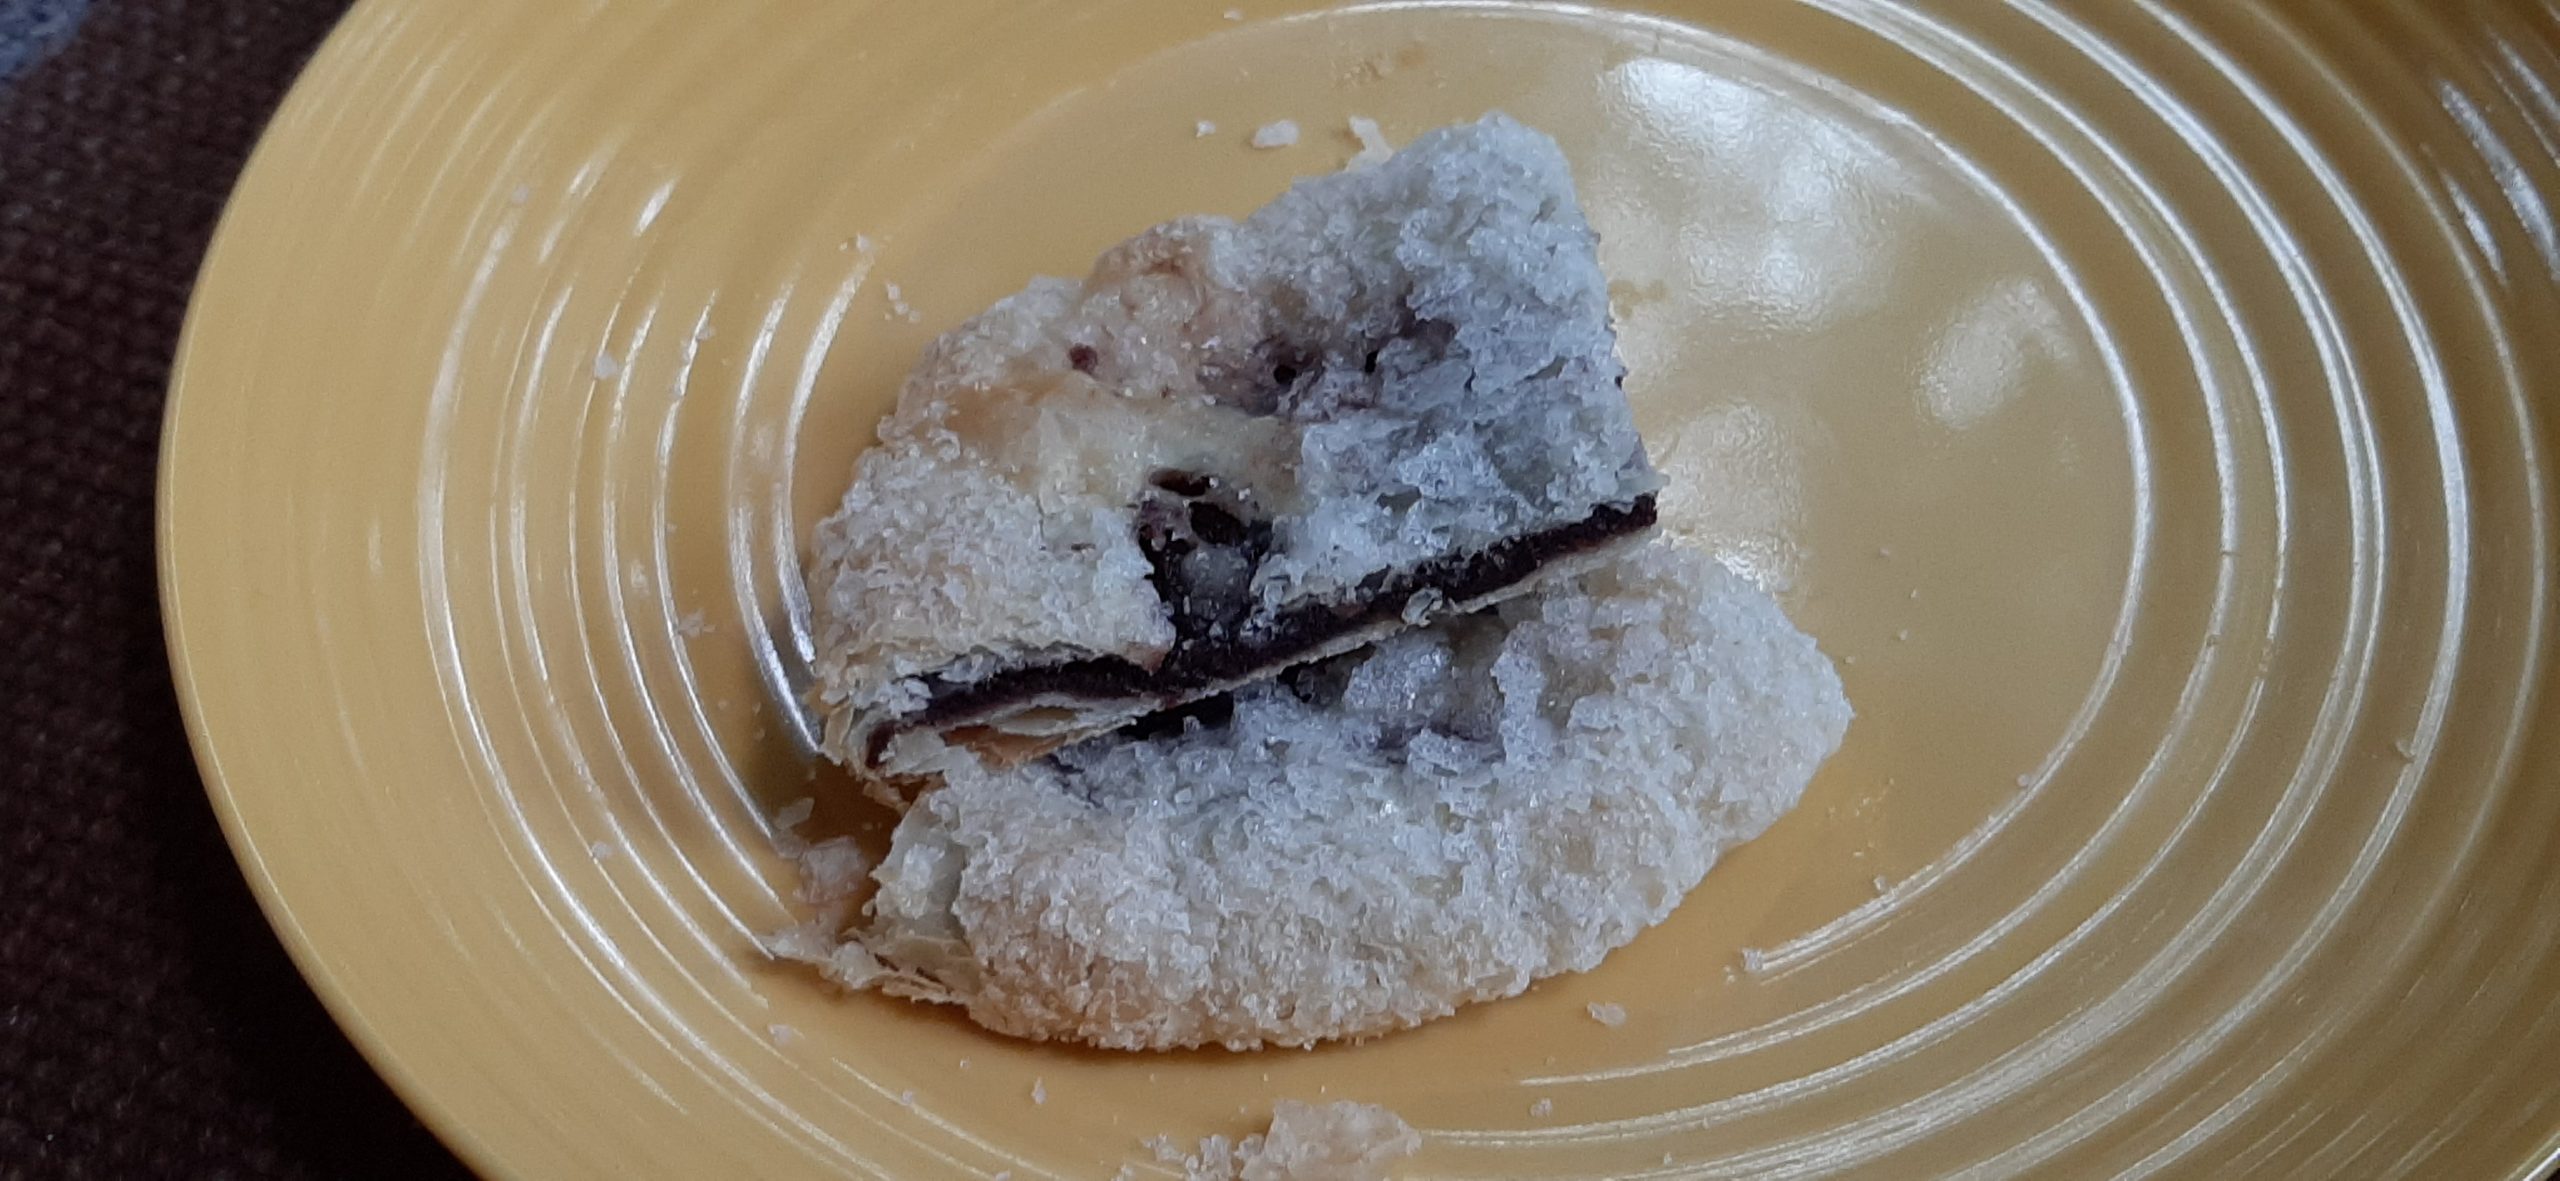
Cut so you can see the filling.
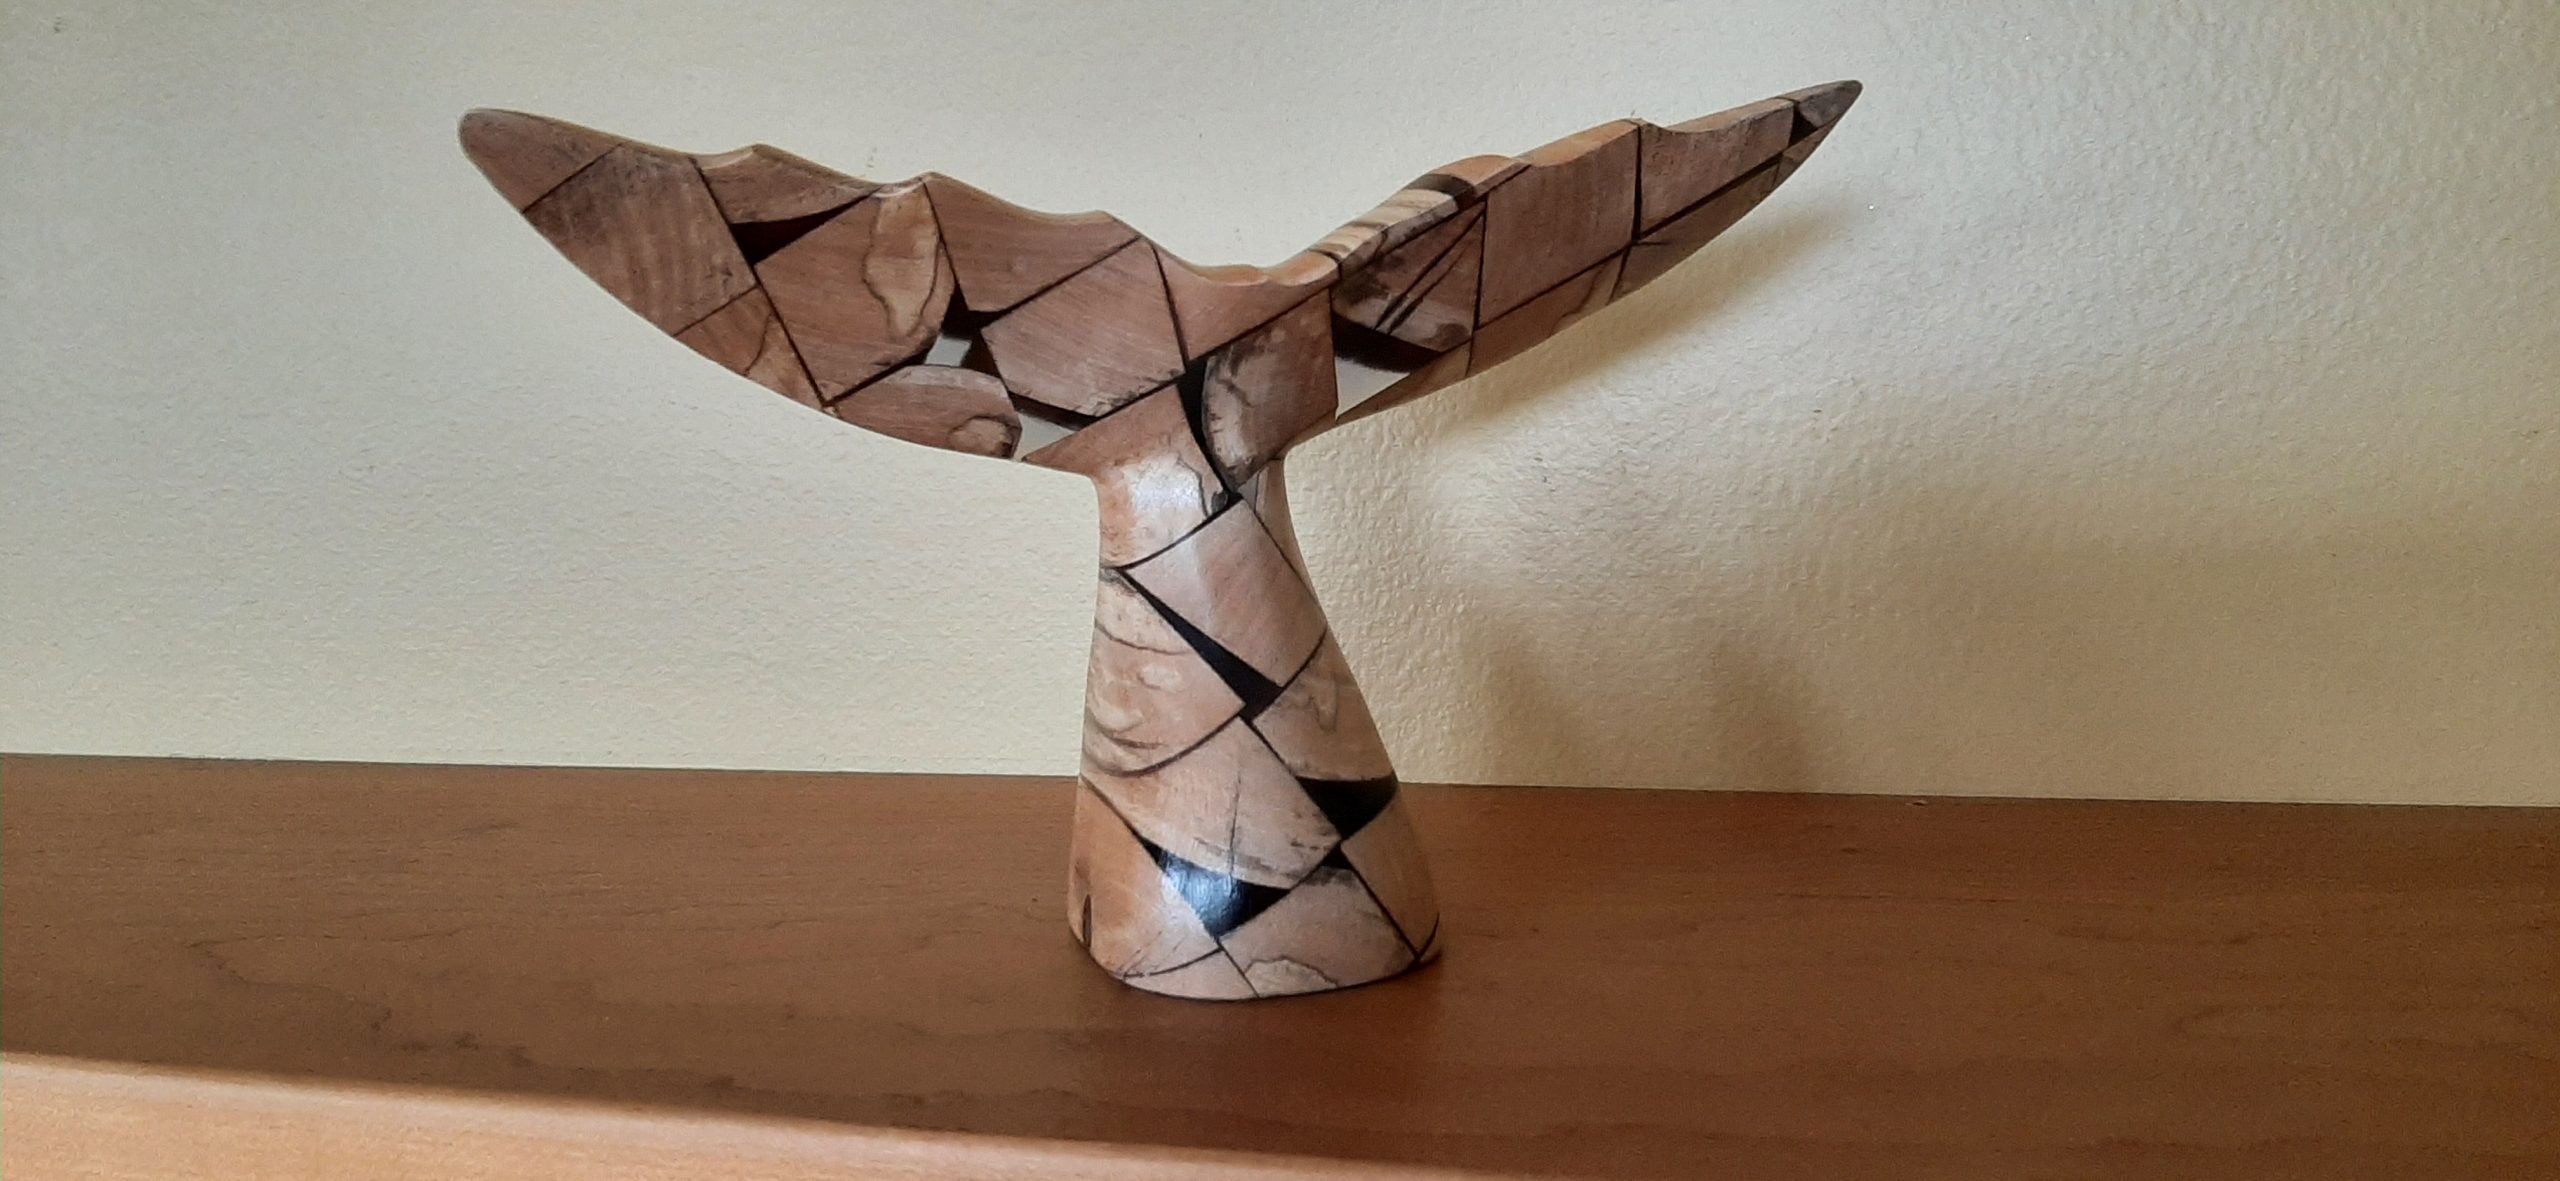
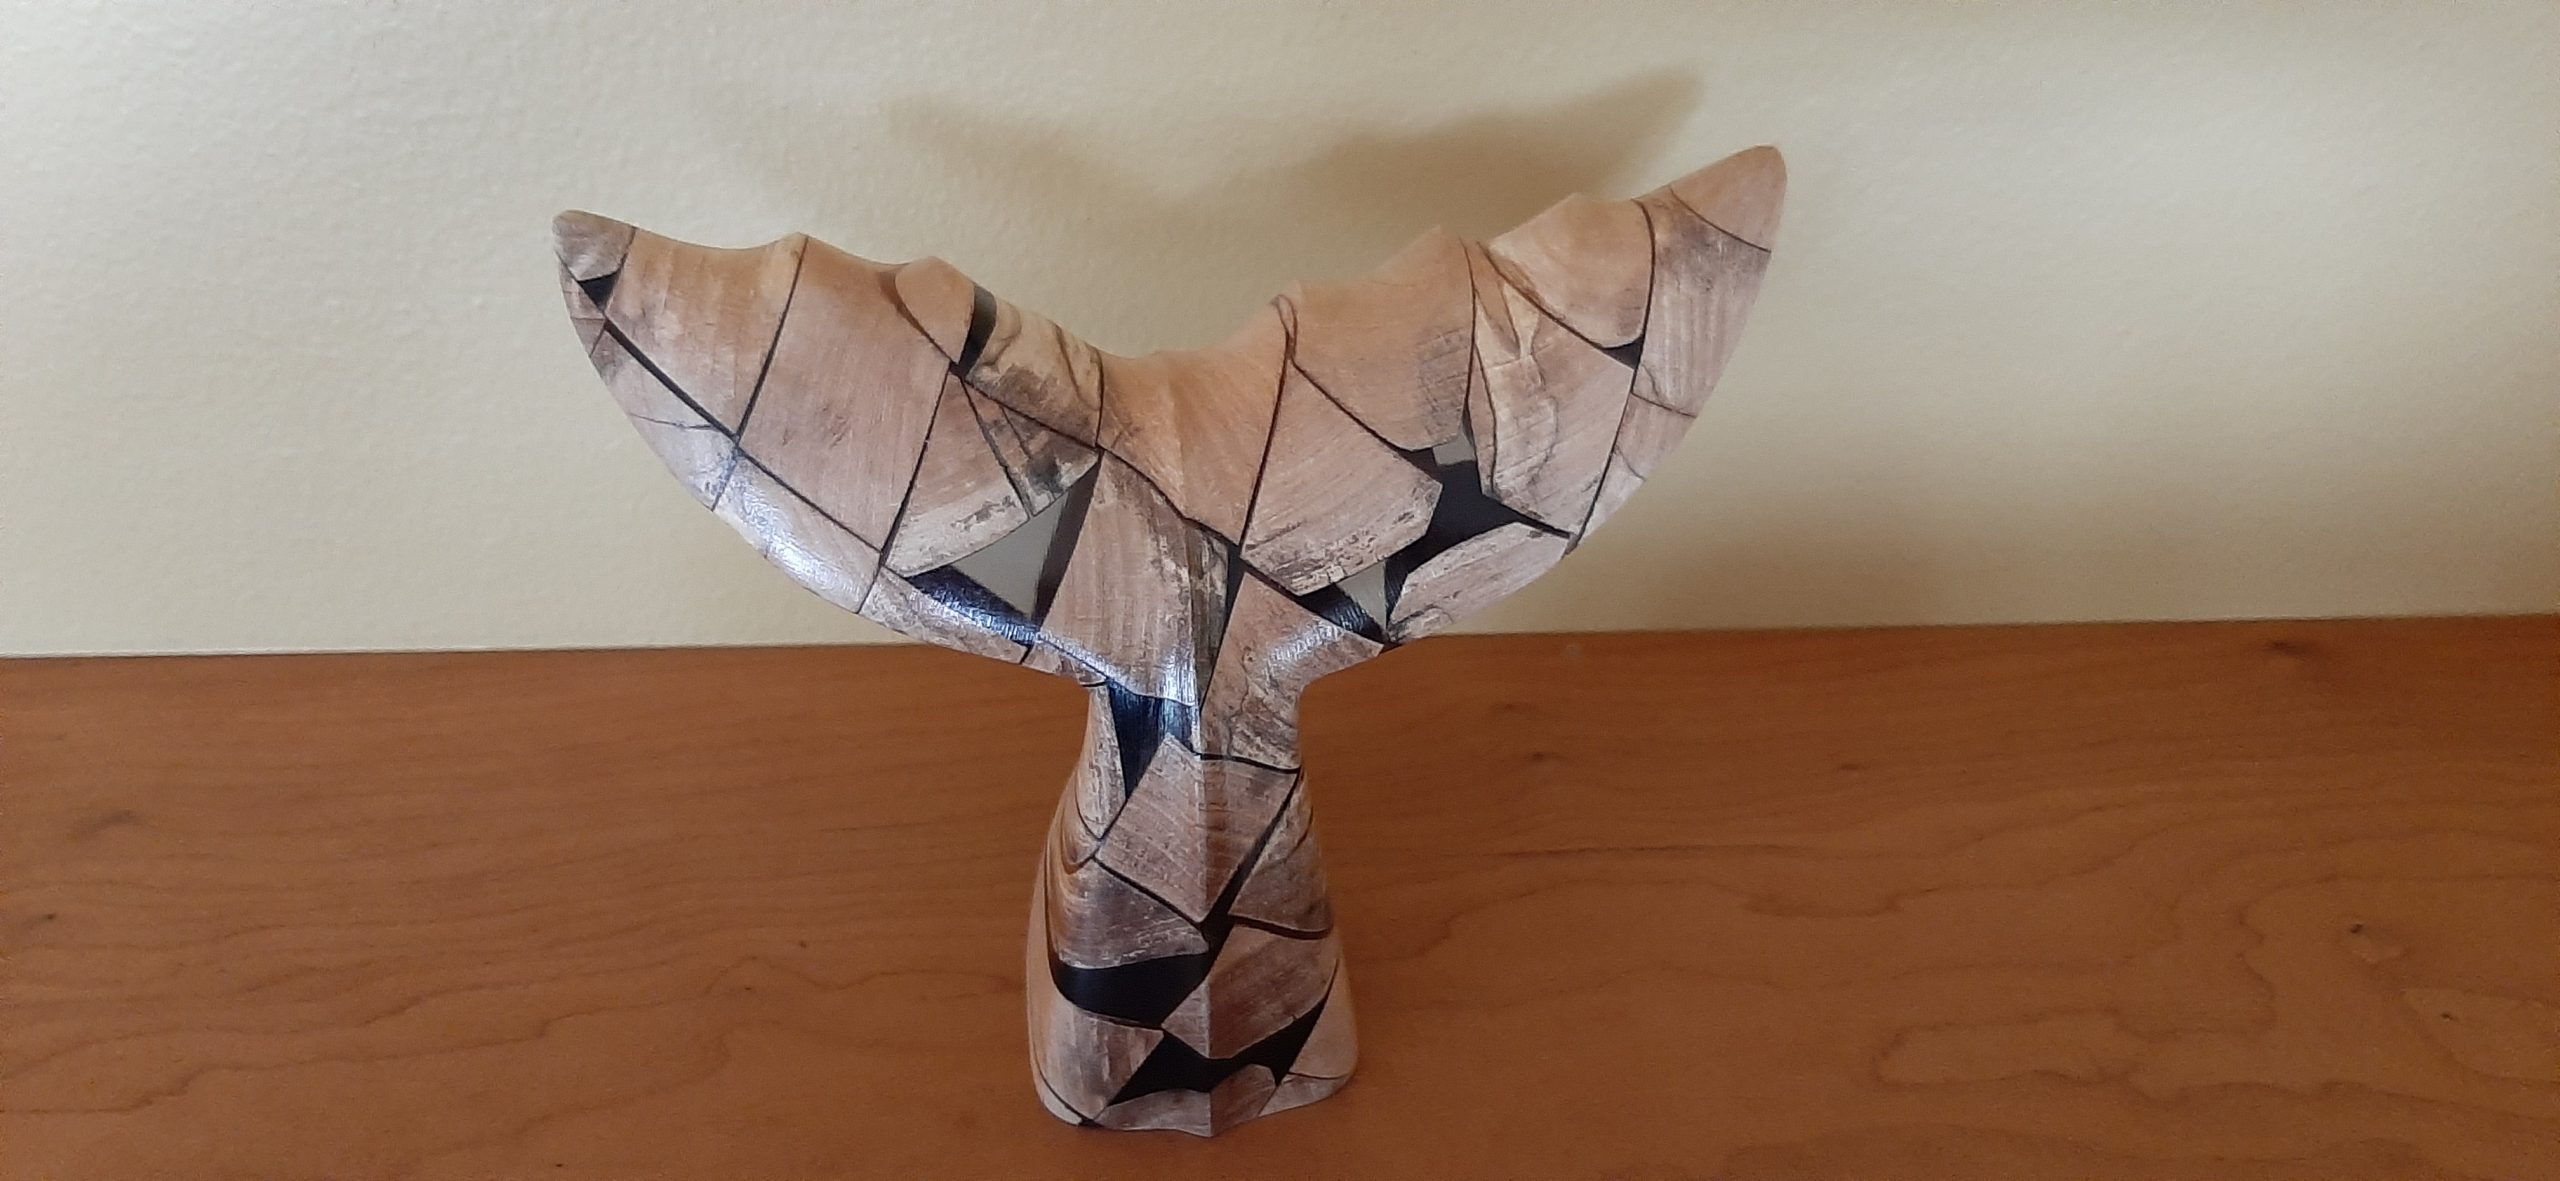
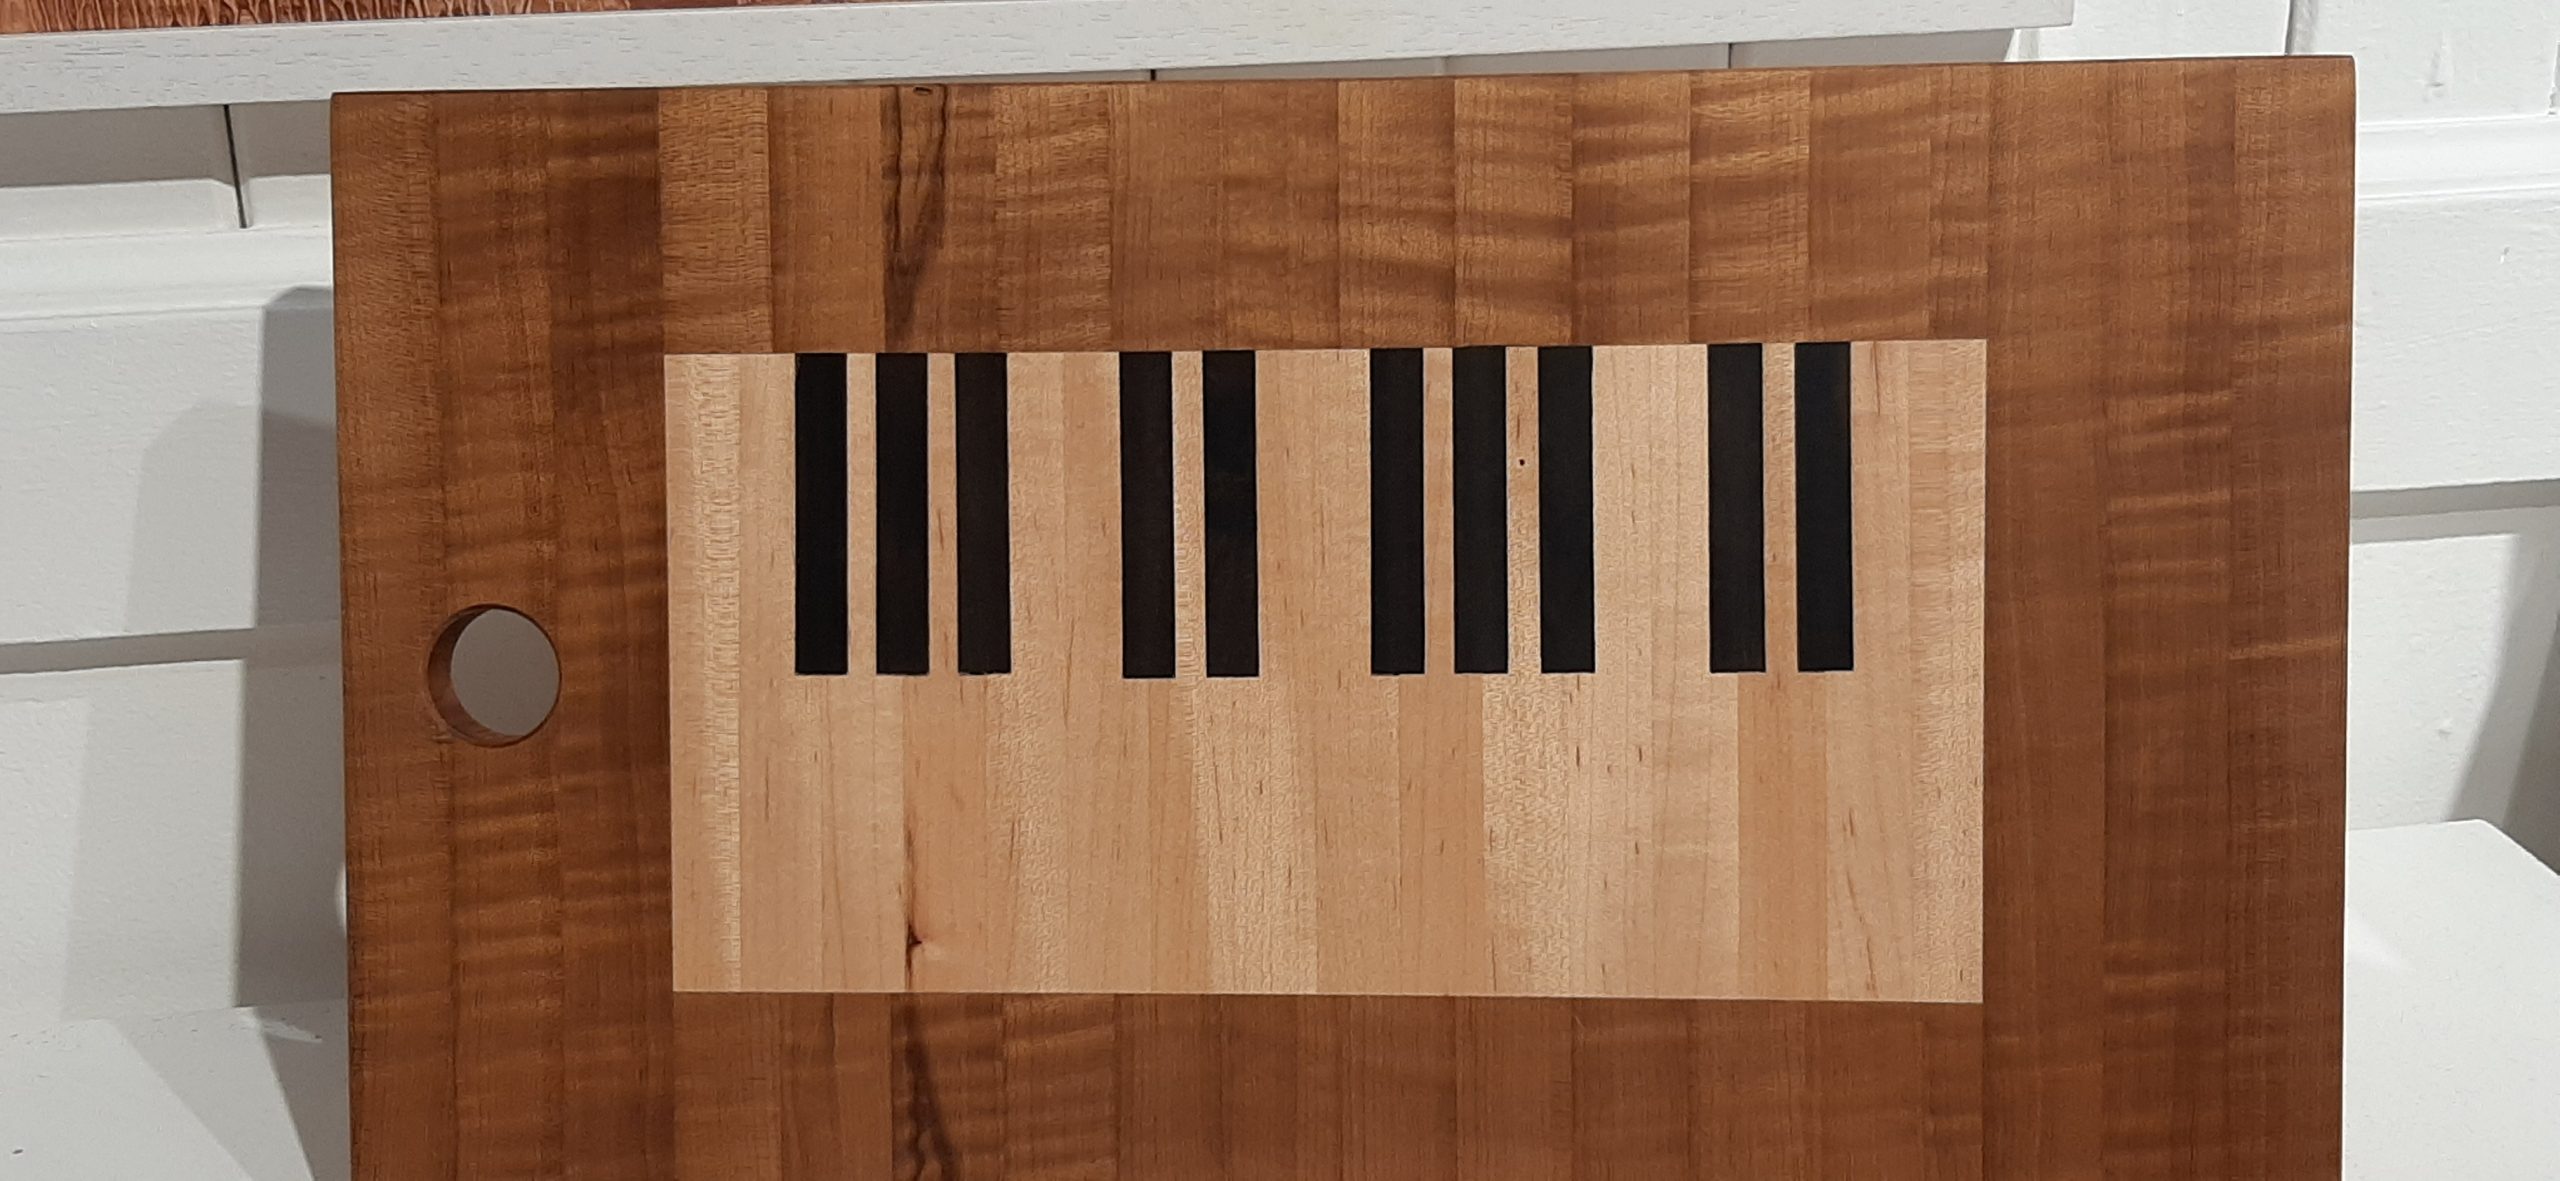
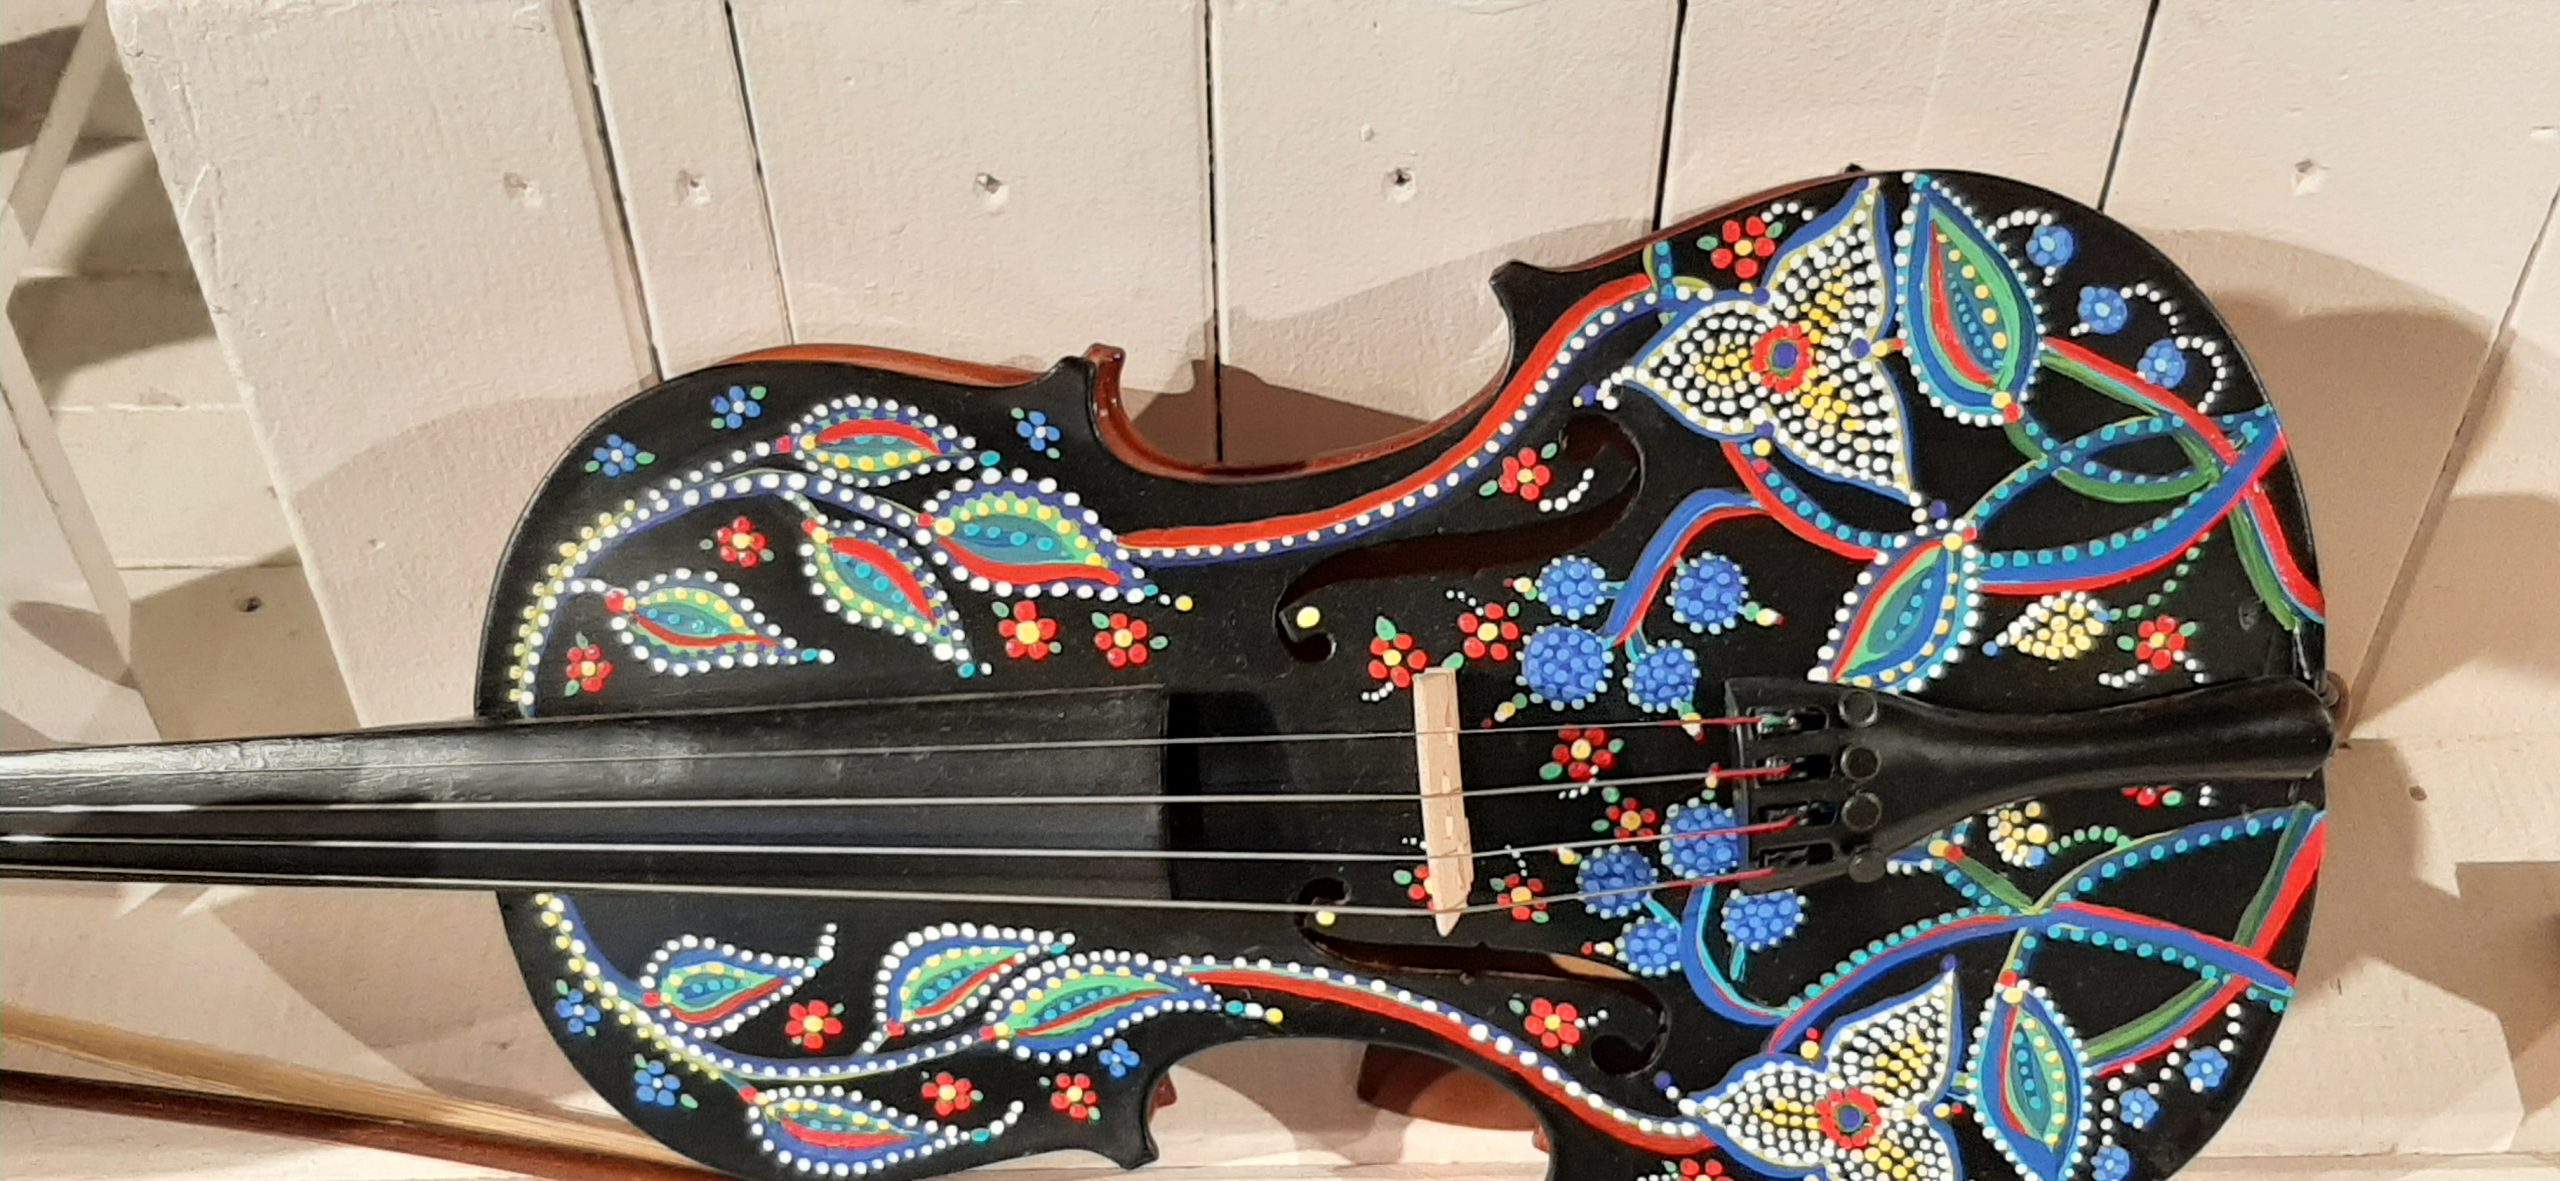
After leaving the bakery, we decided to visit the local arts and crafts store. Very nice works of art which included a wooden whale’s tail (fluke) that followed us out of the shop and now resides at Chez Carr.
A beautiful charcuterie board that didn’t follow us out of the store. (But I now wish it had.)
A lovely guitar that I also wish we had purchased, but figured Vicki could use this picture as a prototype.
Then we hit the local grocery store for a couple of provisions before starting another drive around the island.
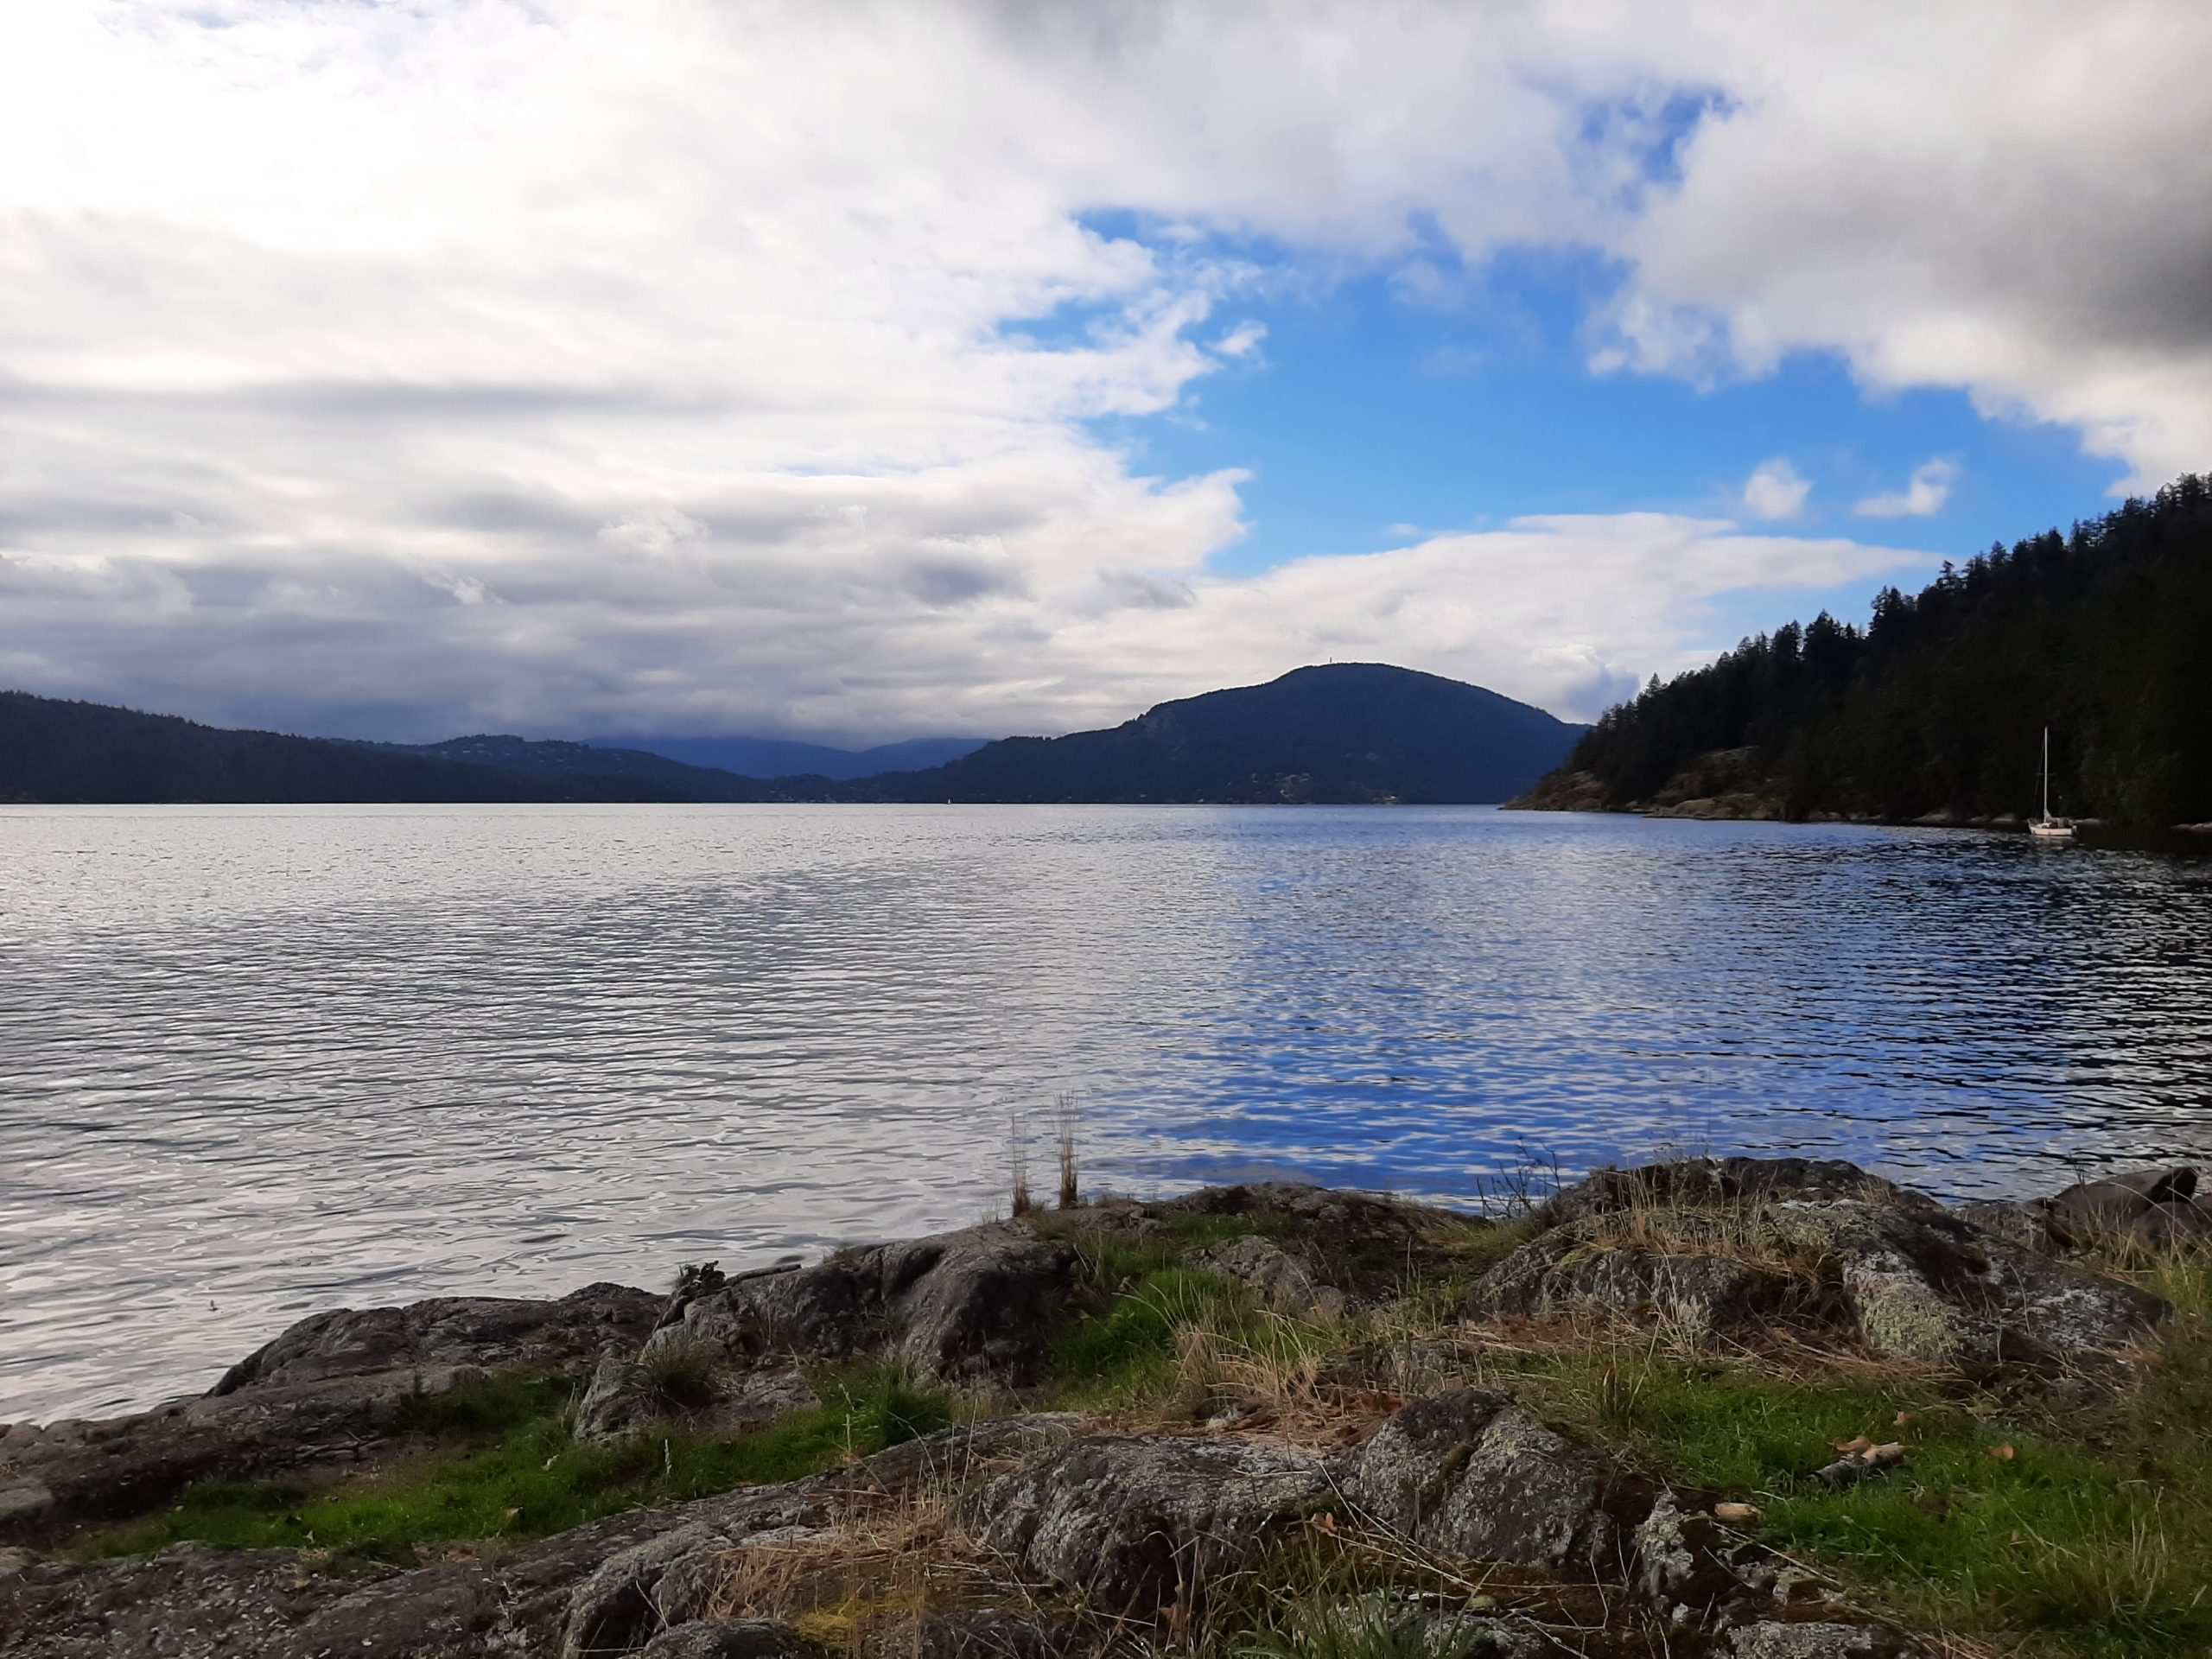
One of the places that we found the most beautiful was Burgoyne Bay. I could have stayed there for hours just looking at the calm water and beautiful landscape.
As we were driving, I told Andy that I could happily live on this island. However, I would miss all the musical opportunities available to him where we live. And that I would also miss live theater and all the other cultural events at the level of competency with which we have become accustomed. Not to mention our dear friends that we couldn’t see on a regular basis. Or easy access for our relatives to come and visit us. So, although we plan to return to Salt Spring Island as often as possible, we think we’ll stay on Camano for the foreseeable future.
Back at our trailer we had a late lunch and Andy decided to take another exploratory walk. But for me it was to write up today’s events, which incidentally gives me a great deal of pleasure.
Oh, and if you happen to be wondering if Eccles cakes are in my baking future, if you don’t know the answer by now, you simply have not been paying attention or have never met me! (Of course, I’m going to make these as soon as I get home.)
After dinner we read our respective books until we could no longer keep our eyes open.
Tomorrow it’s on to Vancouver Island for 3 different camping sites. A total of 13 nights. And I can hardly wait. But I will really miss Salt Spring Island. The people are friendly, and the scenery is amazing. And I love all the farm stands. You can find everything from art to apples, corn to cucumbers, flowers to milled flour. And each time you are putting a bit of money in a local farmer’s or craft person’s hands.
So, when I heard that it was our good friends Tim and Phyllis’s 20th wedding anniversary the day before they were coming here for dinner along with our other dear friends Jim and Margo, I decided a special dessert was in order. I mean really, an anniversary or celebration of any kind requires cake. And I know, some of you are not cake lovers. To that I say “hurray”, more for me!
Because in my estimation, a truly great cake is a taste treat that few actually experience. And yes, there are bakeries out there that turn out fabulous cakes. But you pay through your teeth for the privilege. That’s why I have always preached -BAKE CAKES AT HOME AND SPARE NO EXPENSE. Use quality ingredients and the cake will still cost you a fourth the price of one that comes from a bakery! And it will make your whole kitchen smell wonderful as it bakes. (OK, I am now stepping down from my high horse!)
Among the purchased cakes that are ridiculously expensive, ice cream cakes come in right at the top. And why I previously never thought to make an ice cream cake is right up there with why I wore a girdle in college when I weighed 128 pounds? (What was that all about?) Apparently, some things take longer than others to garner attention in the critical thinking area of my brain. Or at least that’s how I interpret my “aha moments”. But once a good idea resonates, it’s usually full steam ahead for me. (I did figure out a former politician the first time he appeared in my consciousness. So, I must give myself a pat on the back for intuiting that odious person correctly!) But, back to this recipe.
In all honesty, the ice cream cake I made the other evening was really tasty, but the brownie part was hard as a rock. I had tried a new brownie recipe (that sounded marvelous), but the reality was somewhere between tasty shoe leather and chocolate flavored drywall. (Not that I know anything about how shoe leather or drywall taste. But I have an excellent imagination.) So, I repurposed one of my cake-like brownie recipes to make this ice cream cake 100% fabulous.
So, the next time you need a special dessert, may I recommend this recipe. It does require a few steps, but the result is well worth the effort. And it must be prepared ahead, which is always great, especially when you are entertaining guests.
And you know what – even if you start with a brownie mix and store-bought caramel sauce, the ice cream cake will still be tastier and less expensive than if you bought one from an ice cream shop. Just please consider not using a ready-made whipped topping. One of the most widely used whipped topping is made of water, hydrogenated vegetable oil (including coconut and palm kernel oils), high fructose corn syrup, corn syrup, skimmed milk, light cream (less than 2%), sodium caseinate, natural and artificial flavor, xanthan and guar gums, polysorbate 60, sorbitan monostearate, sodium polyphosphate, and beta carotene (as a coloring). (Yikes. Now, if that doesn’t scare you, I don’t know what would?)
So, I’ll leave you now to think about the difference between fresh from a cow heavy cream and a product that only resembles real whipped cream in that it is almost the same color.
On that sobering note, peace and love to all. (And I hope you enjoy this recipe.)
BOURBON CHOCOLATE BROWNIES
1¼ c. granulated sugar
¾ c. (1½ sticks) unsalted butter
½ c. cocoa powder
¼ c. bourbon
2 lg. eggs
1 tsp. vanilla extract
1½ c. unbleached all-purpose flour
1 tsp. baking powder
½ tsp. baking soda
½ tsp. fine sea salt
1/8 tsp. espresso powder, opt.
¾ c. whole milk
Grease and line a 9×13-inch baking pan with cooking spray and enough parchment paper left on both ends of the pan to lift the baked brownie out of the pan.
In a large glass mixing bowl, heat the sugar, butter, and cocoa powder in your microwave just until the butter melts.
Remove from microwave and whisk in the bourbon, eggs, and vanilla extract.
Whisk the flour, baking powder, baking soda, salt, and espresso powder together. Add a small amount of the flour mixture to the butter mixture, stir to combine, then add a small amount of the milk. Repeat until all the ingredients are well incorporated. Pour the batter into the prepared baking pan.
Bake in a pre-heated 350-degree oven for 25-35 minutes or just until a wooden pick comes out clean in the center. Do not overbake.
Remove from the oven and cool for 20 minutes before lifting the brownie out of the pan to a wire rack. (don’t wash the pan.) Let the one big brownie cool completely before slicing it in half lengthwise. (Not easy but if it comes apart, no problem. You can “glue” it back together with ice cream.)
BOURBON CARAMEL SAUCE
1 c. packed brown sugar
½ c. (1 stick) unsalted butter
pinch sea salt
½ c. heavy cream
¼ c. bourbon
Whisk butter, brown sugar, and salt together over medium heat in a small heavy saucepan until brown sugar has dissolved completely. (This happens after the mixture comes to a boil and is allowed to burble for a couple of minutes or until it turns kind of shiny. Continue whisking the whole time the mixture is on the heat.) Remove from heat and gently whisk in the heavy cream and bourbon. Allow it to cool completely and store covered in your fridge.
Can be made ahead and refrigerated.
BOURBAN WHIPPED CREAM
1 c. heavy cream
1/3rd of the Bourbon Caramel Sauce
Beat cream until stiff peaks form. Add the BCS and whip until well blended. Cover. Refrigerate until ready to serve.
PUT THE ICE CREAM CAKE TOGETHER
2-3 pints ice cream (I used Häagen-Dazs Bourbon Vanilla Bean Truffle ice cream)
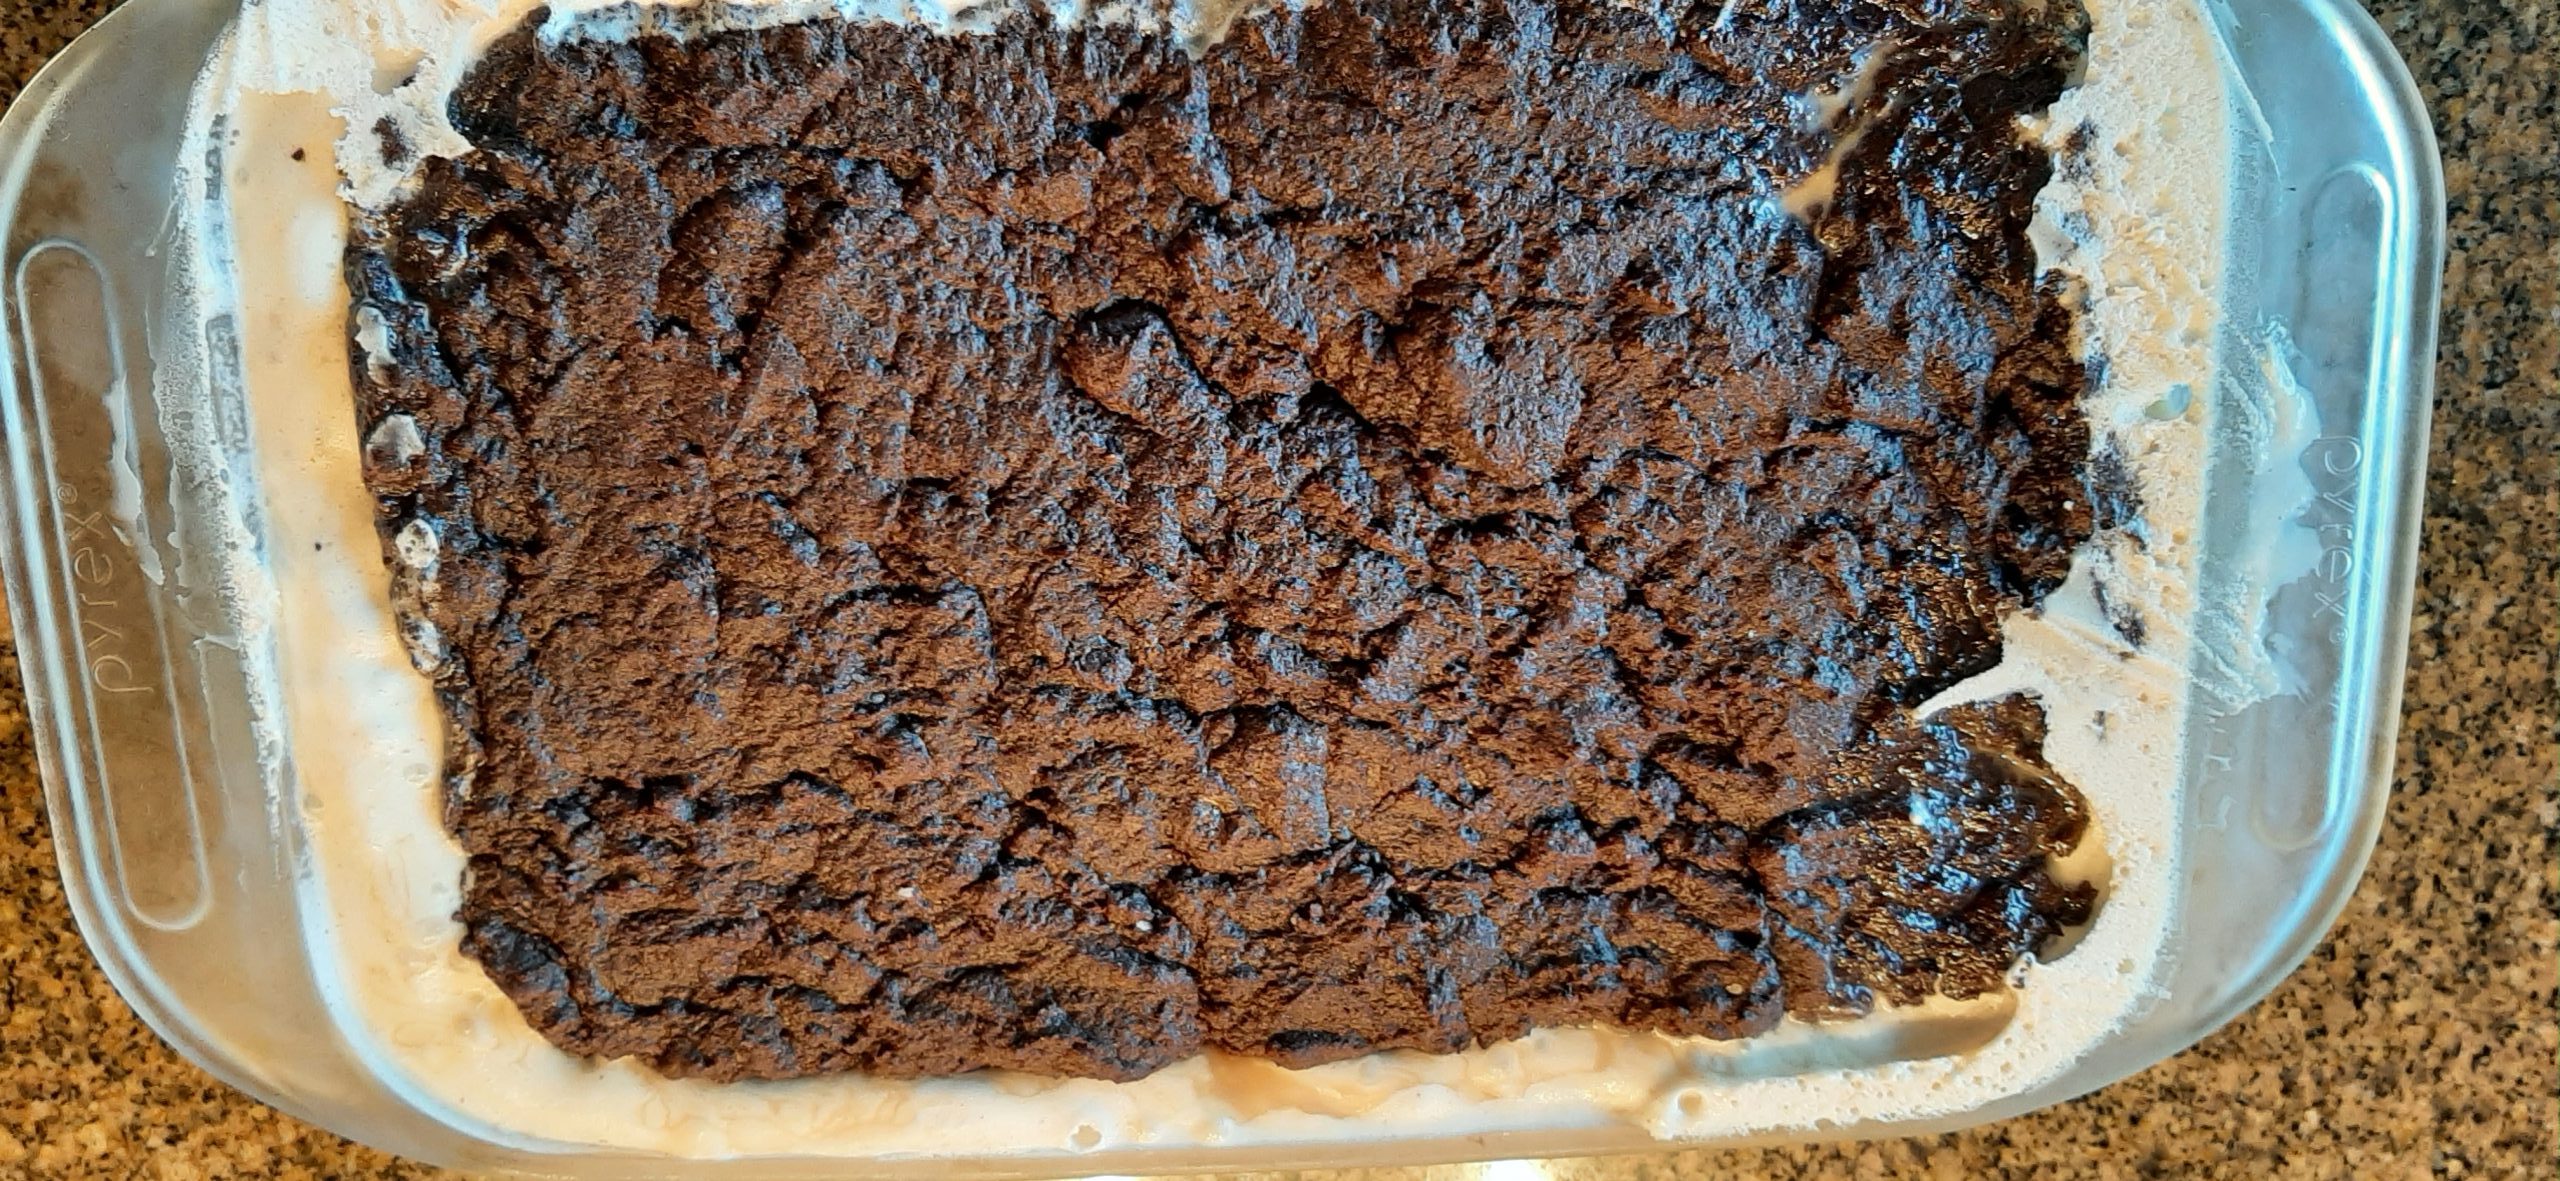
Place one of the brownie halves back in the pan.
Remove the ice cream from the freezer and let sit for a few minutes to soften a bit. Then spread as much or as little of the ice cream over the brownie in the pan as desired. Then spread evenly with 2/3rds of the cold Bourbon Caramel Sauce. Then top with the other brownie. Push down gently to “seat” the brownie.
Cover the pan and place in your freezer.
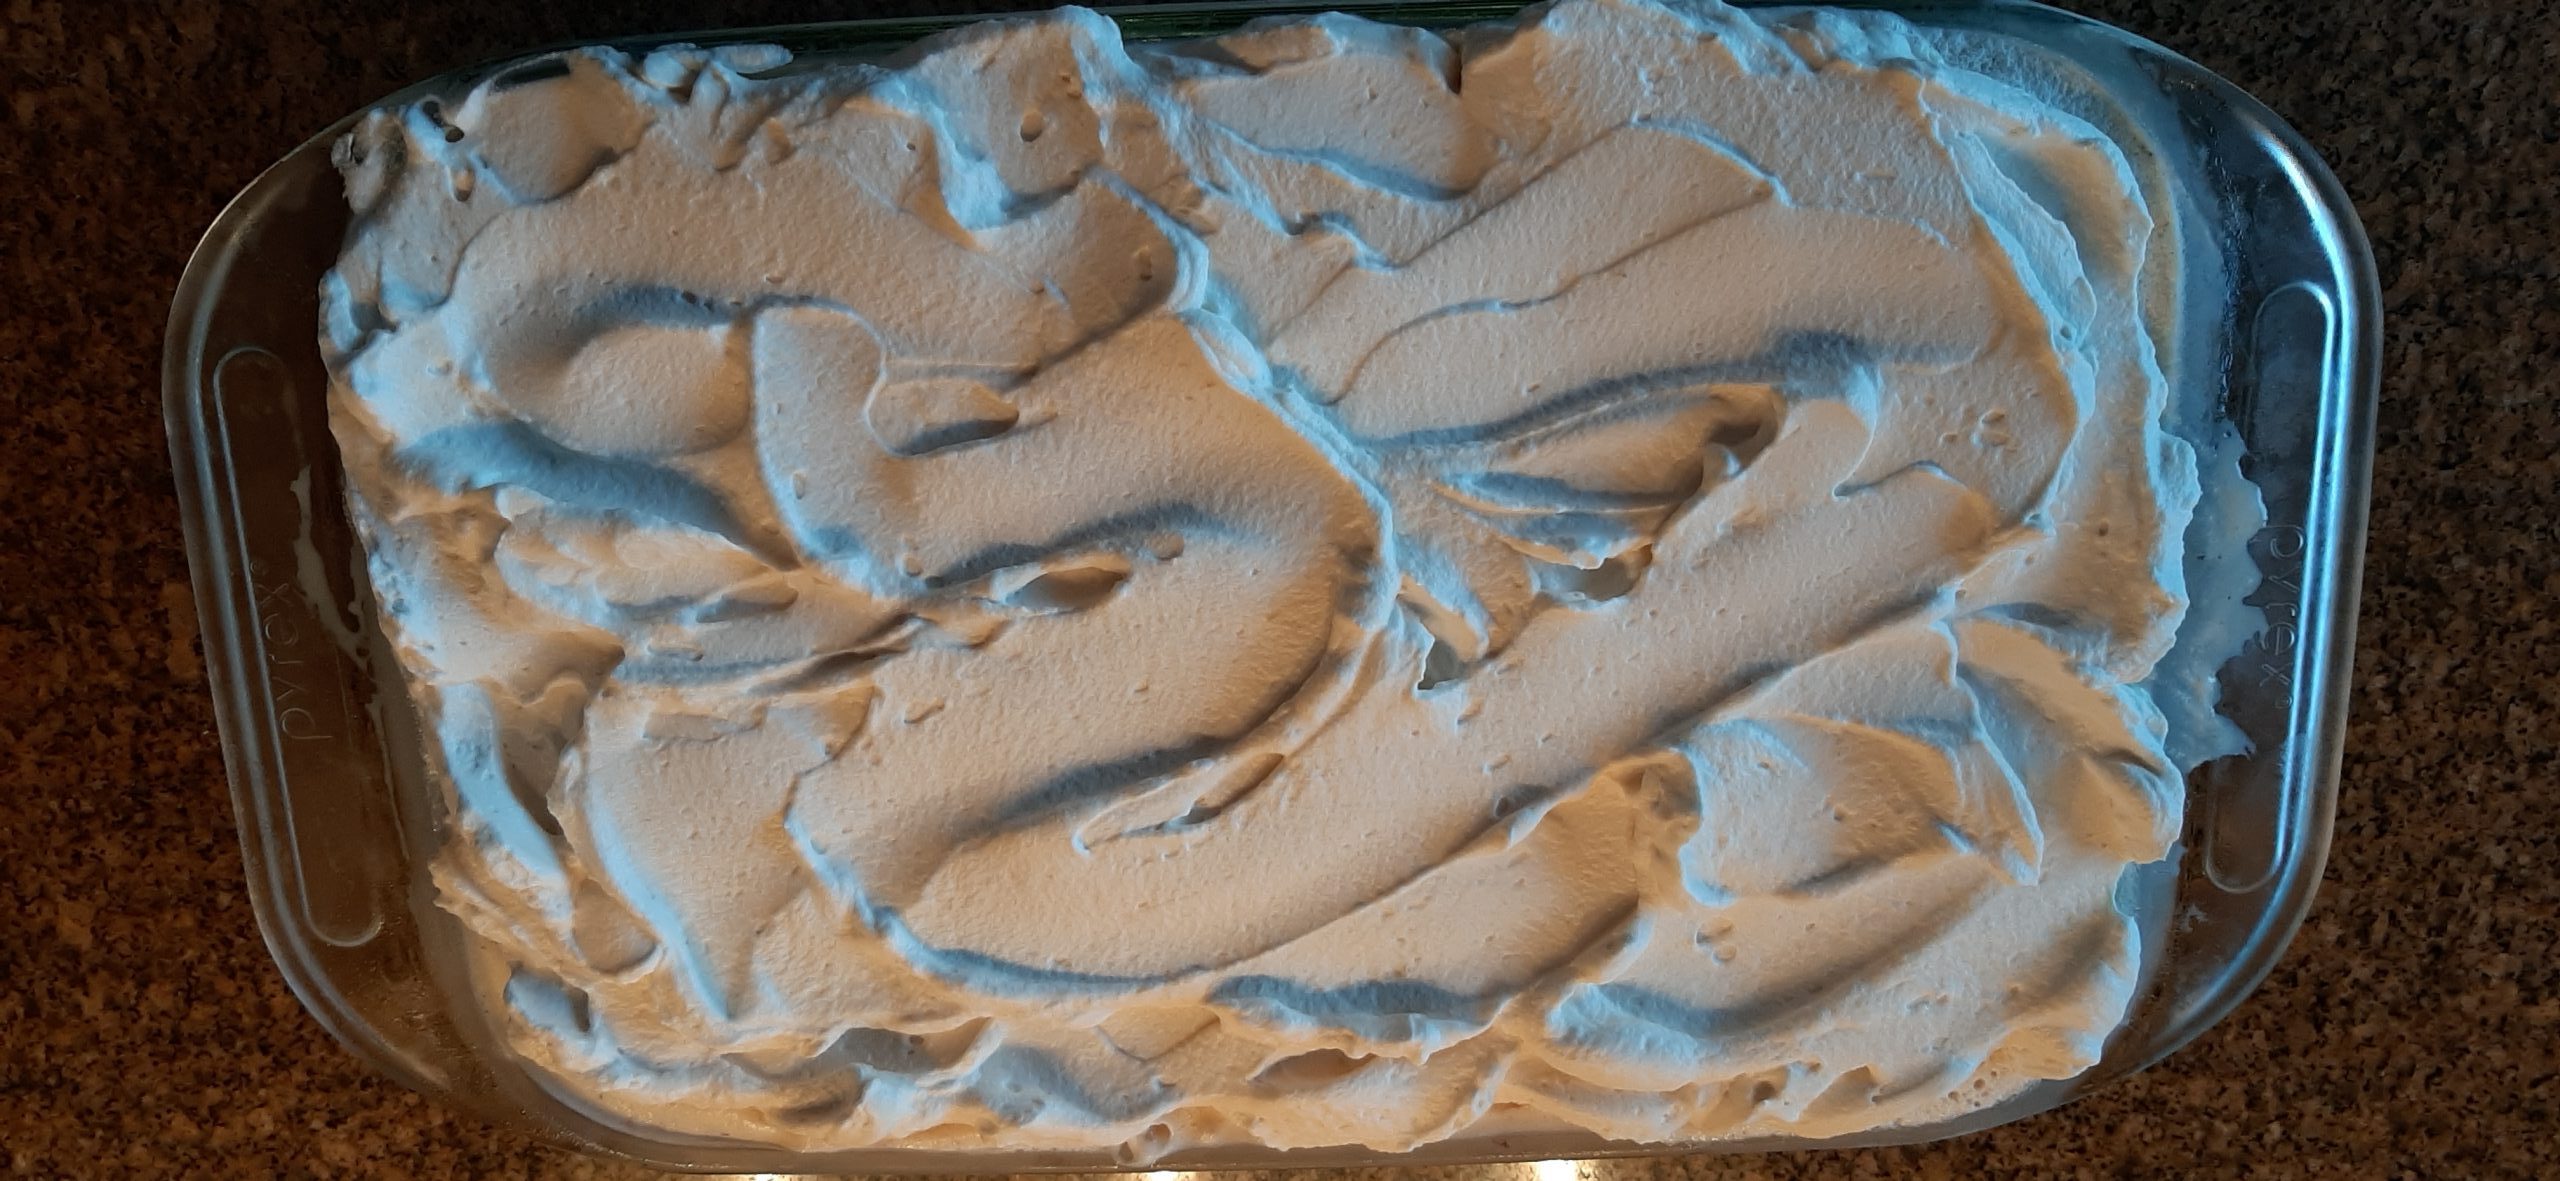
TO SERVE THE ICE CREAM CAKE
Remove the ice cream cake from the freezer. Slather on the Bourbon Whipped Cream and cut into reasonable sized pieces. (This ice cream cake is very rich. Cut accordingly.)
Well, while I still had a few of the fresh peaches Mr. C. brought home the other day, I decided to make a peach quick bread for our upcoming trailer trip. (I like to have tasty baked breakfast treats tucked away in our trailer freezer so that I can make each breakfast a bit different than the one I served the day before.) And no, I had never thought to make a peach quick bread before I came up with this recipe. But after going online and reading several recipes for peach bread and cake, I came up with the recipe you find below.
And oh my, it was such a lovely surprise when it actually worked. But then, how can you go wrong with fresh peaches, pecans, and a bit of bourbon to bring the whole taste sensation together?
So, if you too love peaches, bourbon, and a quick bread that is sweet, but not too sweet, then give this recipe a try. The bread is moist and very flavorful and easy to pull together. Who could ask for anything more?
Well, Labor Day is over and it’s back to school for all the kids in our neighborhood. And I’m sure I heard a big sigh of relief this morning from all the parents for whom the summer had been plenty long enough, thank you very much! I know if it had been my kids going back to school, I probably would have gone outside and joined the celebration. Not that I didn’t love my little darlings, but I would have taken it for granted that they would be safe and cared for at school. If only that were the case today. Today I would wonder if my kids really were safe at school. Cared for by their teachers – yes. Safe – not so much.
I can only hope that in my lifetime there will be action taken to help everyone in our society be safe. That mere condolences and prayers after a mass shooting, for example, become a thing of the past. That action replaces complacency (forget which political party you represent), compassion replaces greed (does any one person actually need billions of dollars), and that people start to work together for the common good. (I know this will never happen, but an old gal can dream.)
So, while I’m dreaming, I wish nothing for you but love and peace. (And a delicious quick bread in your future.)
For the crumb topping:
2 T. packed brown sugar
3 T. unbleached all-purpose flour
¼ tsp. ground cinnamon
2 T. unsalted butter, cold and cubed
Mix the brown sugar, flour, and cinnamon together. Add the cold butter and using a pastry cutter or fork, cut butter into the brown sugar mixture until pea-size crumbles form. Or dump the whole mess in a small food processor and whirl until chunks form.
Refrigerate until ready to use. (The colder the topping, the less likely it will sink into the bread while it is baking.)
For the bread:
⅓ c. granulated sugar
⅓ c. brown sugar
3 T. whole milk
1 T. bourbon (or more whole milk)
¼ c. canola oil
2 lg. eggs
2 c. unbleached all-purpose flour, fluffed
1 tsp. kosher salt
2 tsp. baking powder
½ tsp. ground cinnamon
1 c. pecans, coarsely chopped
2 lg. peaches, peeled, pitted, and cut into small chunks
In a large bowl, stir the sugars, milk, bourbon, oil, and eggs together. Whisk the flour, baking powder, and cinnamon together and add to the sugar mixture. (The batter will be quite thick.)
Carefully fold in the pecans and peaches until thoroughly blended.
Spoon the batter into 1 standard 9×5-inch loaf pan or 2 7-inch loaf pans that have been lightly greased and the bottom of the pan or pans lined with parchment paper.
Evenly top the dough with the cold crumb topping.
Bake in a pre-heated 350-degree oven for 50-60 minutes for a large pan or around 35 minutes for the smaller pans. Or until a pick inserted into the loaf or loaves comes out clean.
Remove from oven and allow to cool completely before slicing. (Don’t eat the parchment paper.)
Yesterday I posted my recipe for Muffaletta Sandwiches. I included this salad recipe at the bottom of the post because I feel macaroni salad is the perfect side dish to serve with this classic New Orleans sandwich. But then I got to thinking; I really should post this recipe separately because a really tasty pasta salad is a hard thing to find.
It has been my experience that pasta salads, in general, are boring. They tend to lack flavor, crunch, and eye appeal. And I must admit, the salad I served the other evening fit the category of “lacking eye appeal” because I didn’t have a red onion on hand. But sometimes, you simply must go with what’s in your veggie larder. So, I used green onions instead of red onion because green onions were happily residing in my veggie crisper, and the closest red onion was marking time at our neighborhood IGA. (See how that works!)
So, the eye appeal could have been better. But the flavor and crunch were there in spades. And I could have added some fresh tomato for color, but I didn’t. Or some chopped pimento, but I didn’t have any. So, I went with what I had.
That’s the beauty of playing mad scientist in the kitchen. You can mix and match and sometimes come up with a new and better “whatever”. Of course, you can also blow the whole dish to hell. But as in this case, the appealing color factor was the only thing missing.
So, if you too love a good pasta salad, let me recommend this recipe. Also, my recipes entitled Pasta Salad, Veggie Macaroni Salad, Shrimp and Macaroni Salad, and Tuna Macaroni Salad are easy to make and delicious.
And because I so appreciate all the wonderful cooks who post their fantastic recipes that benefit all of us, many thanks to the southernbite.com site for this recipe. Slightly modified by me, of course.
Well, that’s it for today. Mr. C. is rehearsing for a gig this afternoon and playing at a gig this evening. I usually go along, but there are just those times when I need to stay home and play in the kitchen. Mr. C. brought home some lovely ripe peaches a couple of days ago. And if I don’t use them in the next couple of days, they will turn themselves into peach puree. So, why not tempt the fates by creating a recipe for a “crumble topped peachy bourbon-pecan quick bread”? So, that’s exactly what I am going to do after I post this recipe. Wish me luck!
Peace and love to all.
1 c. mayonnaise
1 T. yellow mustard
3 T. white vinegar (the old-fashioned kind)
1 tsp. granulated sugar
1 tsp. seasoned salt
freshly ground black pepper
½ tsp. granulated garlic
¼ tsp. granulated onion
½ c. finely chopped dill pickle
1 T. dill pickle juice
½ c. finely diced red onion* or green onion
½ c. finely diced celery (plus leaves)
3 c. uncooked small elbow macaroni, cooked al dente, drained and cooled by tap water
kosher salt, if needed
In a covered bowl, whisk the mayo, mustard, vinegar, sugar, seasoned salt, black pepper, granulated garlic, and granulated onion together. Then stir in the chopped dill pickle and pickle juice. Set aside.
Place the onion, celery, and cooked macaroni in a covered bowl. Add about 2/3rds of the dressing and toss to coat. Cover and refrigerate the pasta for at least 2 hours. (Refrigerate the remaining dressing too.)
When ready to serve, add remaining dressing and toss to coat. Taste and add kosher salt if needed.
*If you use diced red onion, before adding it to the rest of the ingredients, give it a bath for about 15 minutes in ice water. This will reduce the “bite” that is often associated with red onion. Be sure to drain and pat the diced onion dry with a paper towel before adding it to the salad.
The olive and veggie “salad” and assorted meats and provolone cheese.
The top with a bit of olive oil and the bottom filled with “salad”.
Add the meat, cheese, and tomato and the sandwich is ready to be put together.
All together now, all together now…… (FEEL FREE TO SING ALONG)
Two halves of a whole.
Sorry about all the pictures. But in the case of this sandwich, I thought pictures would be better than a thousand words.
Several years ago, we joined our dear friends Dick and Eloise for a mini vacation to the great city of New Orleans for Mardi gras. We spent 10 days in this amazing city attending parades, eating as much great food as our tummies could accommodate, and of course listened to terrific jazz in small hole-in-the-wall cafes, famous eating establishments, and funky bars so dark you wondered if you had stumbled into a jazz infused spelunking adventure filled with really interesting (think kinda scary) critters.
And frankly, had we not been staying with Dick and Eloise’s son John, DIL Carol, and kidlets in their big, beautiful home, the entire trip would probably not have been such a wonderful experience. Because there’s only so much fun I can handle before I just want to bury my head under a pillow. So, staying in a hotel near the center of all the noise and 24-hour partying might have been more than I could handle. But since we had the great opportunity to stay in a private home, we enjoyed the heck out of our visit to “The Big Easy”.
And as I mentioned above, part of the reason we enjoyed New Orleans so much was the food. On one memorable occasion, Mr. C. and I took a walk around the neighborhood where we were staying and found a small corner market/deli that advertised “great muffaletta sandwiches made to order” or some such phraseology. Never ones to shirk our responsibility to embrace local cuisine, we wholehearted bought into the whole Creole/Cajun/Southern/Italian food scene. And OMG, we were immediately hooked on this famous Italian sandwich invented in New Orleans featuring cured meats, provolone cheese, olive and veggie salad, and great bread.
So, if you too would like to have a taste of what New Orleans has to offer in the way of fantastic food, then give this sandwich a try.
And if you ever get the opportunity to visit New Orleans, try as much of the local cuisine and listen to as much jazz as your body and soul can handle. Because N’awlins is the birthplace of jazz. And the jazz performers in New Orleans are top drawer. And while you are listening to these fabulous musicians, eat everything in sight.
For additional recipes that might take you back to or introduce you to some of the types of dishes you might experience in New Orleans and environs, go to the “Categories” area on this site and search under “Creole/Cajun Recipes”.
Well, that’s all I have to say today. Except of course, peace and love to all.
For the olive and veggie salad:
2/3 c. extra virgin olive oil, or more if needed
¼ c. red wine vinegar
1 c. pitted kalamata olives, chopped
¾ c. pimento-stuffed green olives, chopped
¼ c. chopped pepperoncini
2 garlic cloves, finely minced
2 T. drained capers, roughly chopped
2 T. finely chopped fresh parsley
½ c. finely chopped celery
¾ c. finely chopped carrot
1 tsp. dried oregano
freshly ground black pepper
Combine all ingredients in a glass container with a lid. If the olive oil doesn’t cover all the chopped ingredients, add a bit more until all is covered. Refrigerate until needed. Best made at least a day ahead.
For 8 homemade individual round flat dinner rolls:
2¼ c. warm water
1 T. instant yeast
1 tsp. granulated sugar
1½ tsp. fine sea salt
5¼ c. unbleached all-purpose flour (more or less)
olive oil
In the bowl or your stand mixer, combine the water, yeast, and sugar. Ignore for 5 minutes.
Add the salt and a bit less than 5 cups of the flour. Mix with your bread hook until a soft dough has formed. Add additional flour as needed. (There should be a bit of dough hanging out on the bottom of the bowl. That’s what you want.)
Pour a bit of olive oil in the mixing bowl and using your hands and a stiff spatula form a dough ball covered in oil.
Cover the bowl loosely with plastic wrap. Allow the dough to rise at room temperature for about 80 minutes or until doubled in size.
Place a bit of flour on a pastry cloth or clean kitchen counter. Transfer the bread dough onto the floured surface using a stiff spatula. Then flour your hands and form the dough into 2 large equal sized balls. Then divide each ball into 4 pieces. Form each piece into a fairly flat round roll. (Do not knead the dough or handle it more than necessary.)
Place the formed bread dough on top of a parchment paper lined baking sheet and using a serrated knife, gently carve 2-3 diagonal cuts on the top of each loaf.
Rest the formed dough while you fill an oven proof pan with 2-inches of water and place it on the ovens’ bottom rack. This will create steam that will help the crust become a bit hard as it bakes. Then set the oven to heat at 450-degrees.
Once the oven has come to temperature, transfer the bread to the middle rack of your oven.
Bake for about 13 minutes or until golden brown all over and the internal temperature reaches about 200-degrees.
Remove from oven and transfer the loaves to a cooling rack. Allow to cool completely before slicing the loaves in half crosswise.
To put the muffaletta sandwich together:
8 round flat dinner rolls*or a large Italian loaf of bread (unsliced)
¾ lb. deli sliced Genoa salami
¾ lb. deli sliced ham
¾ lb. deli sliced mortadella
¾ lb. deli sliced provolone cheese
thin tomato slices
For each roll, hollow out the bread halves by pulling out about half of the insides. If using a long loaf, cut crosswise and into about 2½-inch wide pieces and remove about half of the soft bread. (Hint: Do not throw this nice lovely soft bread away. Toast it in your oven for the next time you need plain breadcrumbs.)
Coat the inside of each roll or sliced loaf with the olive oil marinade from the veggie salad. (Place most of the marinade on the top half since the salad goes in the bottom half.)
Spoon salad into the bottom halves.
Layer the salami, ham, mortadella, and provolone evenly over the salad. Add the tomato slices and place the top half of bread firmly on the tomato slices.
Serve immediately, or cover sandwiches tightly with plastic wrap and place in your fridge for several hours. Muffaletta sandwiches can be served cold, at room temperature, or slightly warmed.
Great served with thick potato chips, Classic Southern Macaroni Salad (see recipe below), and a cold beer.
*I like to use round, flat dinner rolls because I can “capture” the filling better than if I use sections from a long loaf of bread. Just a personal preference.
CLASSIC SOUTHERN MACARONI SALAD – based on a recipe I found on the southernbite.com site
1 c. mayonnaise, or a bit more if needed
1 T. yellow mustard
3 T. white vinegar (the old-fashioned kind)
1 tsp. granulated sugar
1 tsp. seasoned salt
freshly ground black pepper
½ tsp. granulated garlic
¼ tsp. granulated onion
½ c. finely chopped dill pickle
1 T. dill pickle juice
½ c. finely diced red onion* or green onion
½ c. finely diced celery (plus leaves)
3 c. uncooked small elbow macaroni, cooked al dente, drained and cooled by tap water
kosher salt, if needed
In a covered bowl, whisk the mayo, mustard, vinegar, sugar, seasoned salt, black pepper, granulated garlic, and granulated onion together. Then stir in the chopped dill pickle and pickle juice. Set aside.
Place the onion, celery, and cooked macaroni in a covered bowl. Add about 2/3rds of the dressing and toss to coat. Cover and refrigerate the pasta for at least 2 hours. (Refrigerate the remaining dressing too.)
When ready to serve, add remaining dressing and toss to coat. Taste and add kosher salt if needed.
*If you use diced red onion, before adding it to the rest of the ingredients, give it a bath for about 15 minutes in ice water. This will reduce the “bite” that is often associated with red onion. Be sure to drain and pat the diced onion dry with a paper towel before adding it to the salad.