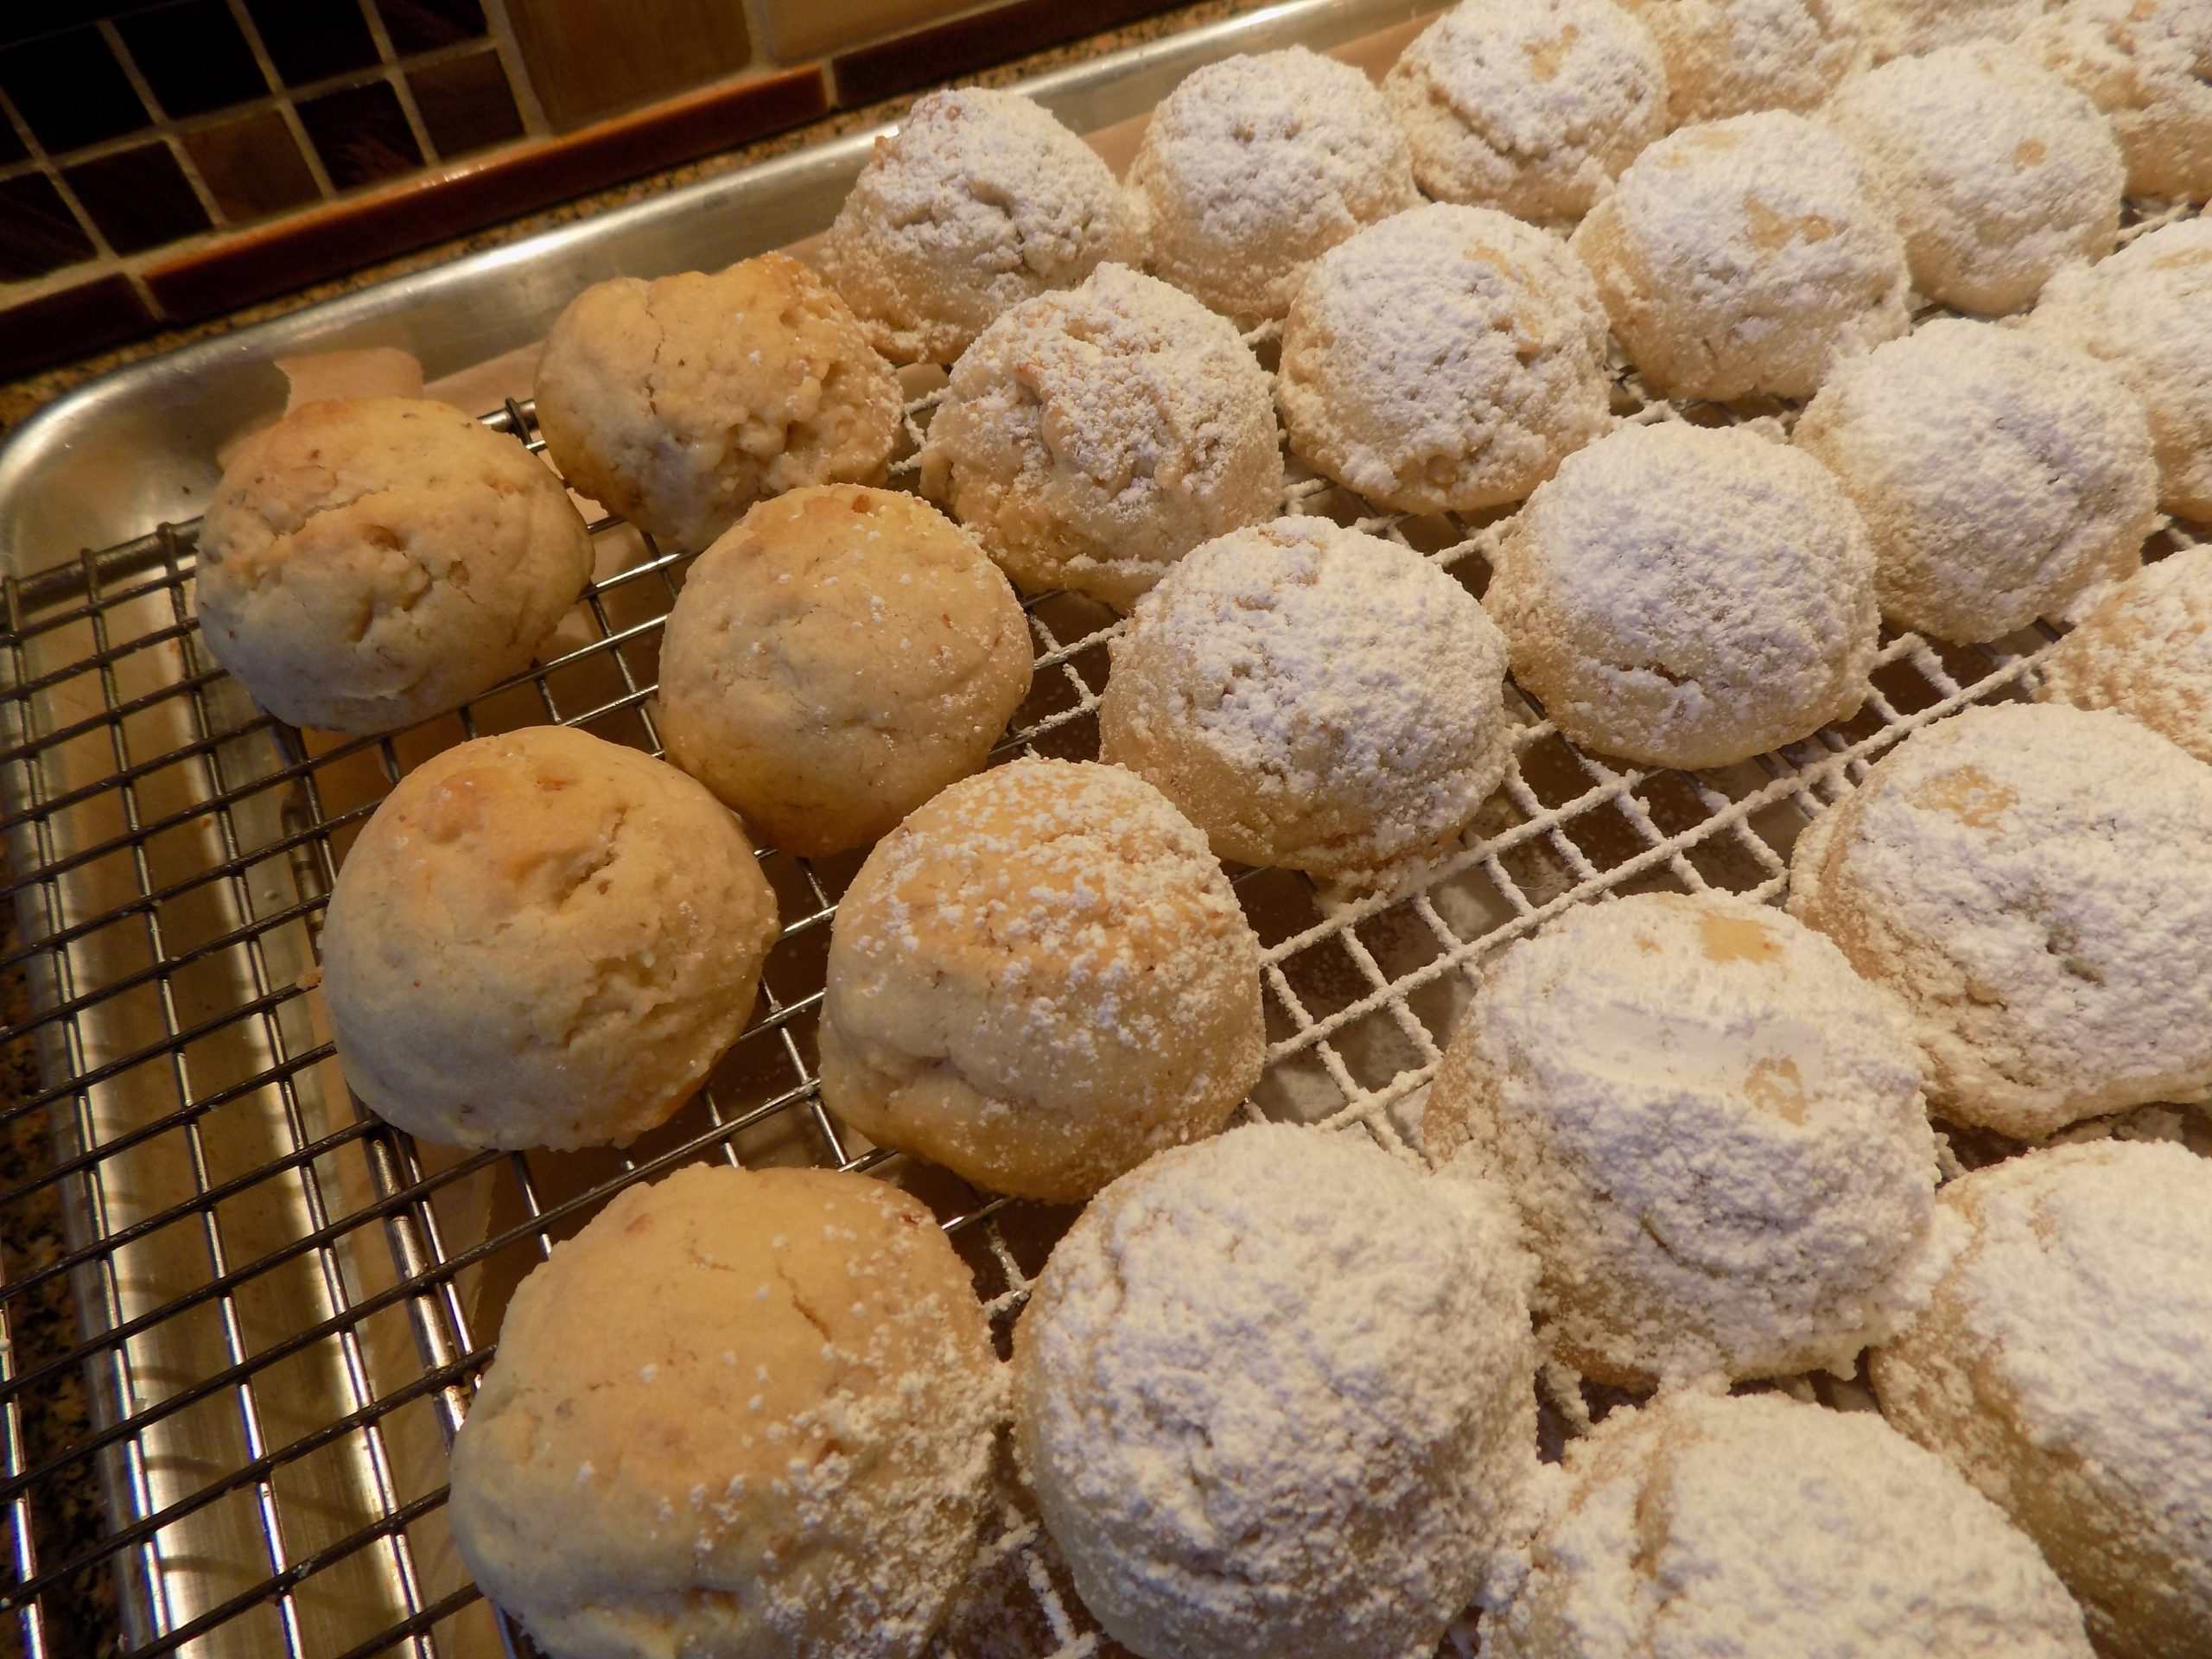
The tea cakes on the left have yet to receive their sprinkle of powdered sugar.
My daughter Paula called me before Christmas because a fellow worker wanted my recipe for Russian Tea Cakes. Paula was at work so didn’t have her recipe at hand, so she went to her momma’s site but couldn’t find the recipe. And no wonder! My favorite cookie recipe and the one that always appears at the top of my list for “goodies that simply must be made at Christmas” had never been published. What! Wait! How could this be right? But sure enough, this fabulous recipe had never left my fingertips and as if by magic, landed on this site. The only reason I can think of to justify this omission, is that I practically have this recipe memorized. (Or I used to have it memorized when I still had my full set of faculties. Now I have to read, re-read, and then check off ingredients as I place them in the mixer. (Getting older can be a bit trying at times. Hopefully none of you can relate. But if you can, I sympathize.)
Anyway, here is my recipe for Russian Tea Cakes. (And I know. Most of you already have a great recipe for these fabulous and easy to make cookies. But for those who don’t, I felt compelled to share the recipe with you.)
Well, that’s it for today. I’m totally burned out from making reservations for our upcoming trailer trips, so I think I’ll keep this short and treat myself to an afternoon helping the protagonist in the book I’m reading figure out who done it. (I’m very good at being an armchair detective.)
Have a great new year. Stay healthy. Stay positive, and don’t forget to laugh. Laughter is so good for us, and although laughter can be contagious, it’s not infectious. And isn’t that refreshing!
Peace and love to all.
1 c. (2 sticks) unsalted butter, room temperature
½ c. powdered sugar, plus more for sprinkling
1 tsp. vanilla
2¼ c. unbleached all-purpose flour, fluffed
¼ tsp. salt
¾ c. finely chopped walnuts
Cream the butter, ½ cup of powdered sugar, and vanilla together. Add the flour, salt, and finely chopped walnuts.
Use a small ice cream scoop or roll the dough by hand into 1-inch balls. Place on a parchment paper lined cookie sheet.
Bake in a pre-heated 400-degree oven for about 10-12 minutes. Cookies should be a very light golden brown when they are done. DO NOT OVERBAKE.
Remove from oven and allow to cool completely on a wire rack.
When cool, sprinkle* with powdered sugar. Store in an airtight container.
*The best (and least messy) way to coat the top of the cookies with powdered sugar is to place the cooled cookies back on your baking pan, then scoop a bit of powdered sugar into a small, fine sieve (strainer) and shake over the cookies. (You don’t have to coat the bottom of the cookies.) Let sit for about 30 minutes before storing.
These are the star ingredients I used for this mocha coffee mix. Unfortunately, I failed to take a picture of the mix itself. (Christmas is a crazy time at our house. That’s my only defense!)
Well, Christmas is past, the New Year is here and the only thing that remains unpleasant from 2022 for us personally are the lingering coughs from whatever possessed us the last couple of weeks of December. Flu, RSV, who knows! But whatever it was, I truly encourage you not to get it! It wasn’t the worse flu or cold we’ve ever experienced, but it just went on and on and on. And just when we thought we were getting rid of the darn thing, it sprang to life again. That is simply not fair! So, no Christmas eve with our dear friends Jim and Margo and no Christmas day with our extended family. What saved the whole Christmas holiday was getting to spend the 26th with daughter Paula. She braved our germy house and came to visit regardless of our lingering ailments. So far, she is still well. Thank goodness!
And, New Year’s Eve we were able to enjoy being wined and dined at Margo and Jim’s home. New Year’s Day, we spent a glorious few hours at Tim and Suzie’s home. While the guys (Whistle Lake Jazz Quartet) were practicing for an upcoming gig, we wives (plus our dear friend Diane) spent some quality time reflecting on our careers and how the role of women in business has changed through the decades. In many ways for the better. But in some cases, there is still a prejudice against “grey-haired middle-aged women”. Well, learning that this attitude was still alive and well, and in one case perpetuated by a younger woman executive, it was a good thing we were firmly ensconced in Suzie’s living room and this young lady who had made the comment wasn’t living and working in the vicinity. It could have gotten quite ugly for her. To say we were steamed, would be putting it mildly. But for me, it was almost cathartic to share our stories. To be reminded that I was not alone. Things in my years at the bank that had caused me pain, were also being experienced by other women in far different professions. And yet, we had or were still surviving, and mostly stronger for having been exposed to and confronted these difficult situations. And as we talked, I felt so blessed to not only know these amazing women, but to be able to call them friends. I have always had close woman friends. And I realized once again, how lucky that makes me feel. But enough about me and on to this mocha mix.
This Christmas was the year of the biscotti. For the Whistle Lake gang, I gave each couple a trio of my favorite Italian cookies, a couple of red mugs, and some of this mocha cocoa mix. It was so much fun to make different kinds of biscotti. (New recipes to be posted in the near future.) And even more fun to prepare this cocoa mix.
Now, if you have never made biscotti, you can’t possibly know how easy these delicious twice baked cookies are to build. And if you have never eaten a biscotti, well, you have no idea what you have been missing. Biscotti is just one of the yummiest things you will ever put in your mouth. In my estimation, biscotti should actually be its own food group!
Anyway, along with the biscotti, I wanted something that our friends could dunk their biscotti into, and I found this recipe on theyummylife.com site. I changed things up a bit, but then, that’s just what I do!
So, I hope you enjoy this recipe. But remember, this hot drink is always best served with a biscotti. And life is simply too short to continue depriving yourself of this wonderful combination. And it’s going to be winter for several more months. Need I say more? Except, Happy New Year.
And as always, peace and love to all.
1 c. instant coffee (I use Mount Hagen Organic Fairtrade Coffee (instant decaffeinated) (Amazon prime)
1 c. cocoa powder (I use Valrhona Cocoa Powder (Amazon prime)
3½ c. instant dry milk powder
2/3 c. powdered sugar
1 c. vanilla powder (see recipe below)
2 tsp. corn starch
¼ tsp. fine sea salt
Pulse all ingredients in food processor until well combined. Store in airtight container. Makes approximately 5 cups of mix.
To prepare mix: Add 3-4 tablespoons of mix to 8-oz. boiling water. Stir and top with whipped cream if desired. (Chocolate sprinkles are nice too.)
Homemade vanilla powder:
1 c. granulated sugar
2 T. vanilla paste or extract (I use Rodelle all natural Vanilla Paste*) (Amazon)
Combine the sugar and vanilla paste in a small bowl. Stir to form a thick, uniform, coarse paste. Line baking sheet with parchment paper. Transfer sugar/vanilla mixture to baking sheet and spread into thin, even layer. Allow to set out until completely dry, 6-8 hours. Stir once during drying time to promote faster drying. It’s normal for there to be small, dried clumps. Transfer dried mixture to food processor and pulse until all clumps are gone and texture is a fine powder. Store in an airtight container. *Vanilla paste has a thicker consistency than vanilla extract because it includes specks of vanilla bean seeds. Whereas vanilla extract contains no specks from vanilla beans. With the inclusion of ground vanilla bean powder, vanilla paste has a slightly more intense flavor than vanilla extract.
I thought covid and all its social restrictions was a bummer. And it was a bummer for a myriad of reasons. But at least we could still get together with dear friends and relatives at Christmas. Even if it was only for a short time in someone’s garage, responsibly spaced around a portable propane camping fire. (And yes, we actually did enjoy a bit of Christmas together exactly as described!)
But this Christmas was the pits. Both Andy and I were ill. We think we had RSV. But it could have been the flu. (And yes, we had this year’s flu vaccination!) But hey, we could have had both of these darling infirmities at the same time! Now wouldn’t that be special! Because we had symptoms from both at various times during our illnesses. And we still aren’t 100%! Almost 3 weeks for Andy and about 10 days for me. Humbug! (That’s what we’ve chosen to call what we had/have. The 2022 HUMBUG!)
So, we missed Christmas Eve with our dear friends Jim and Margo and Christmas day with relatives and close friends because of what’s “going around”.
But you know, while I was sitting in my favorite reading chair on Christmas day feeling ever so sorry for myself, I realized how exceedingly lucky I was to have Andy to spend the day with. And how blessed we both were to have close friends and family that were able to be together. Even if this Christmas we couldn’t be there with them. I realized all of us were the lucky ones. We had a home. We weren’t being bombed by some power-hungry Russian maniac. We weren’t out in the cold with no way to get warm, stay warm, or feed either our loved ones or ourselves. We were lucky. Just plain lucky!
So what if Mr. C. and I couldn’t spend Christmas as planned. We had fresh running water. A nice cozy bed to climb into when we felt chilled. Food to eat when we got hungry. We had everything we needed to get healthy. We were safe. Whereas so many of the world’s population could not say those three little words. I am safe. And I realized how horrible that must feel to not be safe. I couldn’t even begin to imagine what that would mean.
So, did I have a great Christmas? Yes, I did. I was given the opportunity to realize how truly blessed I am. Sometimes it takes something like a brief illness to remind us of our blessings and to put our wonderful lives in perspective. Thankfully I was able to learn a valuable lesson as I was recovering. And thankfully, I had been able to finish most of my baking before my body was invaded by germs. (I’ll take my luck wherever I can find it!)
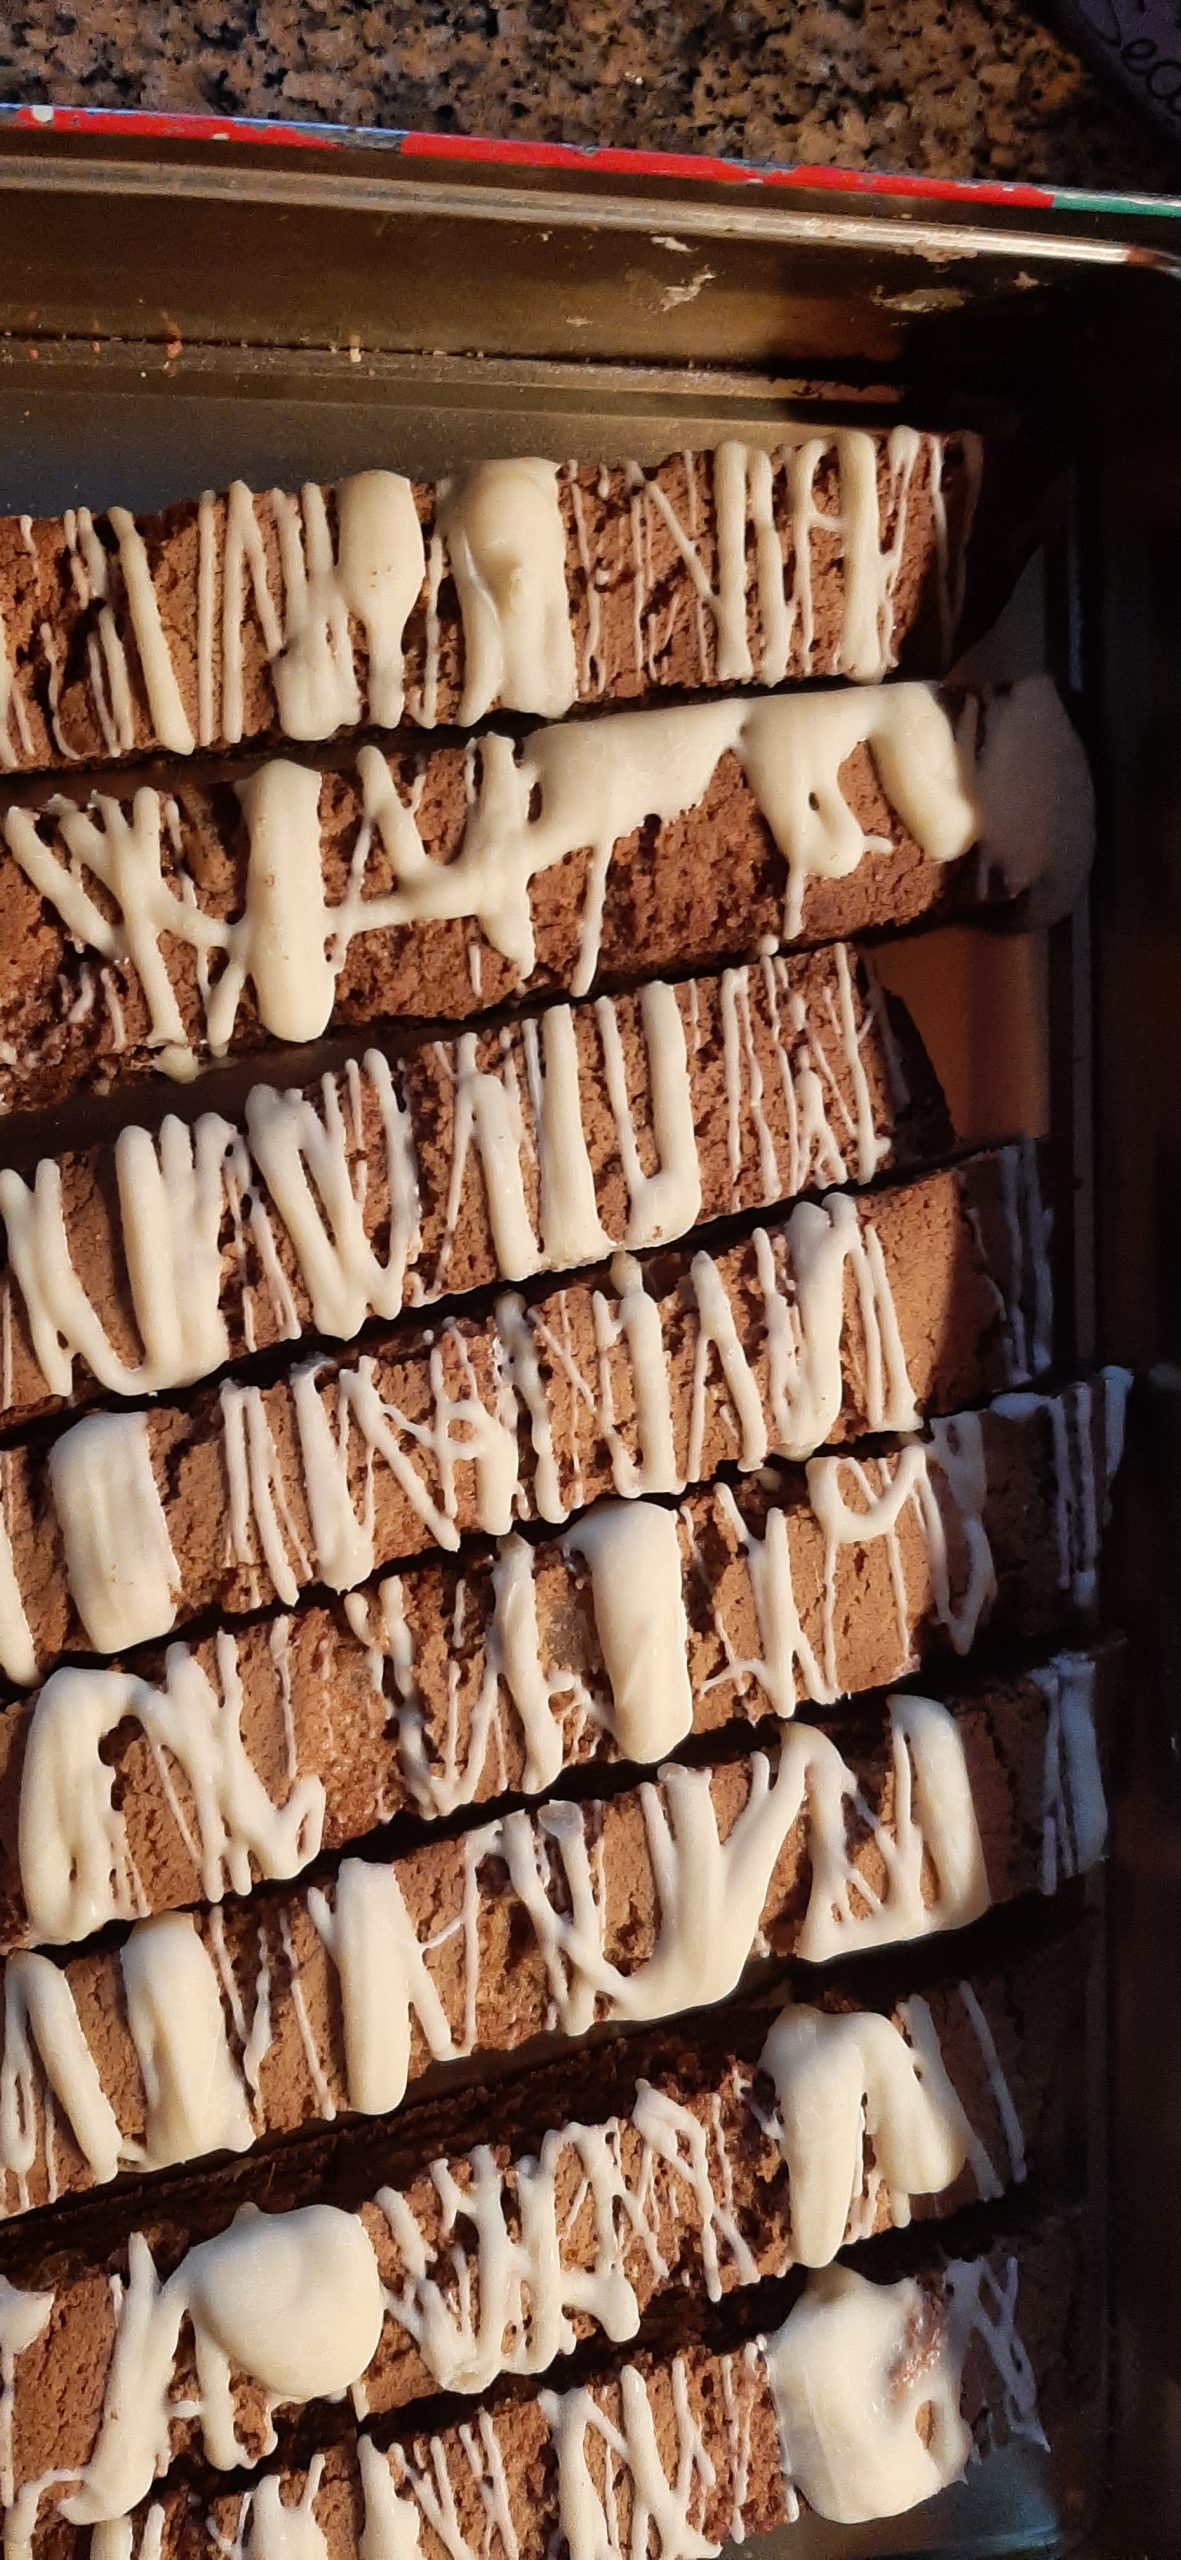
And one of the best cookies I made this year was this recipe for gingerbread biscotti. I found the recipe on theoliveblogger.com site. Delicious. I made a small change, of course I did, but the main recipe is all Melissa. So, if you too love gingerbread and biscotti, then this is the recipe for you.
As we all approach the new year, I hope we can keep the spirit of Christmas alive throughout 2023. Wouldn’t it be refreshing to find ourselves wishing each other a merry “whatever” every time we met. I’ll start. Merry 2023.
And as always, peace and love to all.
⅓ c. unsalted butter, room temp.
1¼ c. brown sugar, lightly packed
2 lg. eggs
2 T. molasses
1 tsp. vanilla
2¼ c. unbleached all-purpose flour, fluffed
2 tsp. ground ginger
1 tsp. ground cinnamon
½ tsp. ground cloves
¼ tsp. ground allspice
¼ tsp. ground nutmeg
2 tsp. baking powder
½ tsp. baking soda
scant ½ tsp. fine sea salt
½ c. finely chopped candied ginger
white chocolate, for drizzle
Line a large baking sheet with parchment paper.
In the bowl of your stand mixer, mix the butter and brown sugar together until creamy. Add the egg, molasses, and vanilla and mix until well combined.
In a medium bowl, whisk the flour, ginger, cinnamon, cloves, allspice, nutmeg, baking powder, baking soda, and salt together. Stir in the candied ginger making sure each tiny piece is coated with flour.
Slowly add the dry ingredients to the butter mixture, just until well combined. (The dough will be very thick).
Using your hands liberally greased with butter, divide the dough in half. On the parchment paper lined baking sheet, pat each half into a 10×2-inch rectangle.
Bake in a pre-heated 350-degree oven for 20 to 23 minutes, or until a light golden brown and slightly firm to the touch but NOT hard. Remove from oven.
Cool for 10 minutes. Leave the oven on. After 10 minutes, cut each log diagonally into 1-inch-thick slices.
Turn cut side down on the baking sheet and bake for 14-16 minutes. (They should be slightly golden on both sides.)
Remove from oven and place on a wire rack to cool completely before drizzling with melted white chocolate. Allow white chocolate to harden before storing the biscotti in an airtight container.
This time of year, it is always nice to have an easy appetizer recipe ready for any unforeseen eventuality. Like when you are invited spur of the moment to someone’s home for dinner and you offer to bring an appetizer, and they say yes. Yikes! Now what do you do?
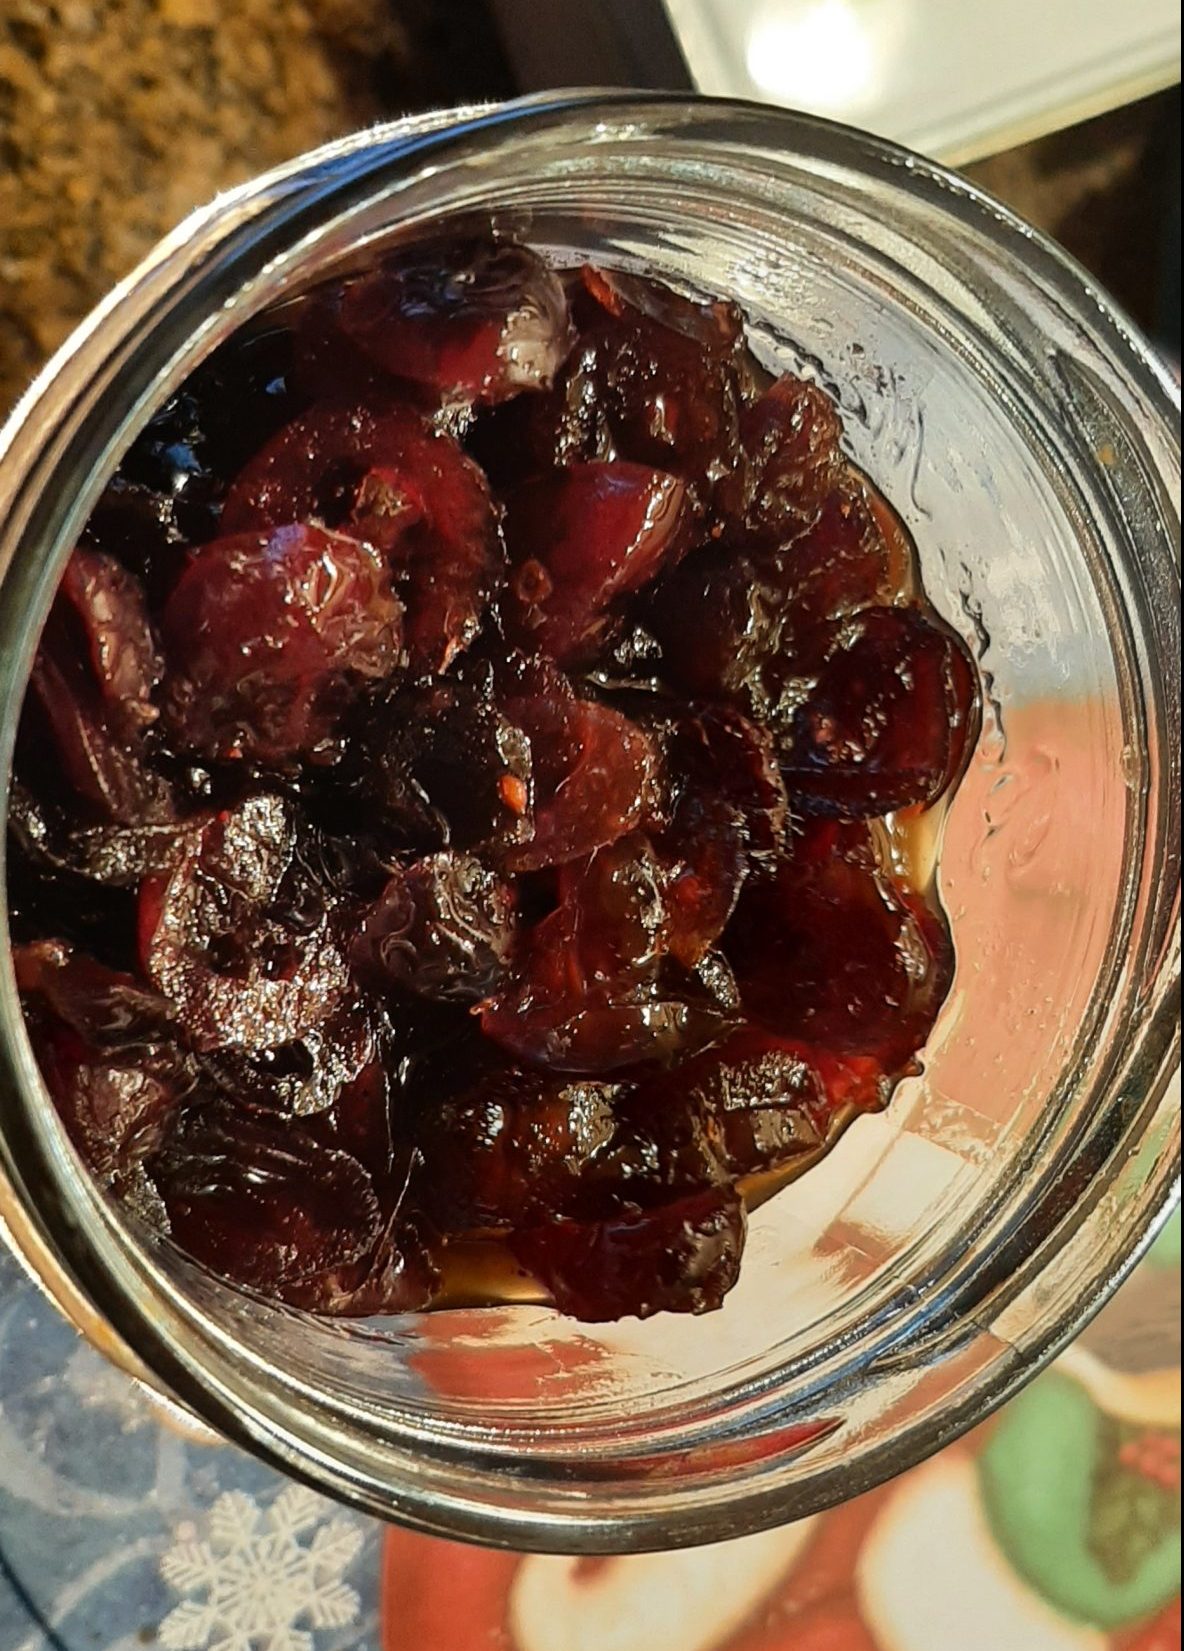
Well, I’ll tell you what you can do. You can make this delicious topping for baked brie. (You can pick up the brie from your local grocery store on your way over to your friend’s home if you don’t already have some on hand. Crackers too.)
Anyway, this topping takes only minutes to prepare. And it tastes like you slaved over a hot stove for a great deal longer than 5 minutes!
So, during this busy holiday season, I suggest you at least have the ingredients on hand to make this delicious appetizer. And even if you don’t wind up taking this delightful dish with you, you can always make it for yourself. And I am here to tell you, you will not feel bad at all if you have to eat the whole thing by yourself. (Or decide to be magnanimous and share it with your spouse or partner.) You will earn points. That is a true fact.
Well, both Mr. C. and I have come down with whatever this nasty respiratory “thing” is that is going around. We don’t feel bad. We just keep coughing and hacking and keeping each other awake all night long. Hopefully whatever has got us will depart our bodies before Christmas eve, Christmas day, and the 26th. Because we have plans to spend the holiday with our family and extended family friends. And it just so happens that we really like these people. So, it would be a real bummer if we couldn’t participate in the revelries. (Not to mention the great food we would be missing!)
But like with everyone, it is completely out of our control. We are vaccinated against all most anything you can name, wear our masks when it seems prudent, and try our darndest not to pick up germs from, or leave germs with anyone with whom we come in contact. But as experience has shown, somewhere along the line we are all vulnerable.
In the grand scheme of things, we remain well and truly blessed. May you too be happy and thankful for the many blessings that have found their way into your lives.
Peace and love to all.
1 c. dried cranberries
½ c. brown sugar
¼ c. orange juice
pinch ground cinnamon
a few grains of coarse kosher salt
2 T. brandy
1 (8-oz.) round or wedge of brie
½ c. walnuts, opt.
Combine the dried cranberries, brown sugar, orange juice, cinnamon, and salt in a small heavy pan. Bring to boil, reduce heat, and simmer for about 2 minutes. Remove from heat and stir in the brandy. Allow to cool, then store in your refrigerator until ready to use.
When ready to serve, place the brie in an oven-proof container and bake in a pre-heated 350-degree oven for about 15 minutes or until the cheese is softened. (Or nuke the brie until soft. Either way works.)
While the brie is in the oven, re-heat the topping. When the brie is soft, remove from oven and slather the topping all over the cheese. Then sprinkle on the nuts. Serve with crackers or Crostini (See how to make crostini on this site.)
Before I write anything about this recipe, I need to apologize for not posting a recipe since December 5th. But I have some very good reasons. My grown children’s goodie packages take precedence over any other use of my time once the calendar reflects that December has once again rolled around. And the older I get, the more Christmas seems to take me by surprise. And really, I have been cognizant of Christmas since I was about 3 years old. By 78 years old, you would think that there should be no shocker value associated with the fact that Christmas is about to descend on us, with what seems to me, at an ever-increasing rate of speed. But every darn year, I am unprepared for the fact of Christmas, even though there have been Christmas decorations in stores since before Halloween! And BTW, what’s with that? Can’t stores just finish one holiday before they start touting products for two holidays hence?
Anyway, the bottom line is that I have been madly wearing my Mrs. Santa hat, and basically loving every minute of it. Nothing makes me happier than making cookies and candy for my kidlets, other family members, and close friends. And of course, figuring out what gift would be most appreciated by my kids and other family members and friends. (Thank God for Amazon prime is all I have to say!) But back to the real reason for this post.
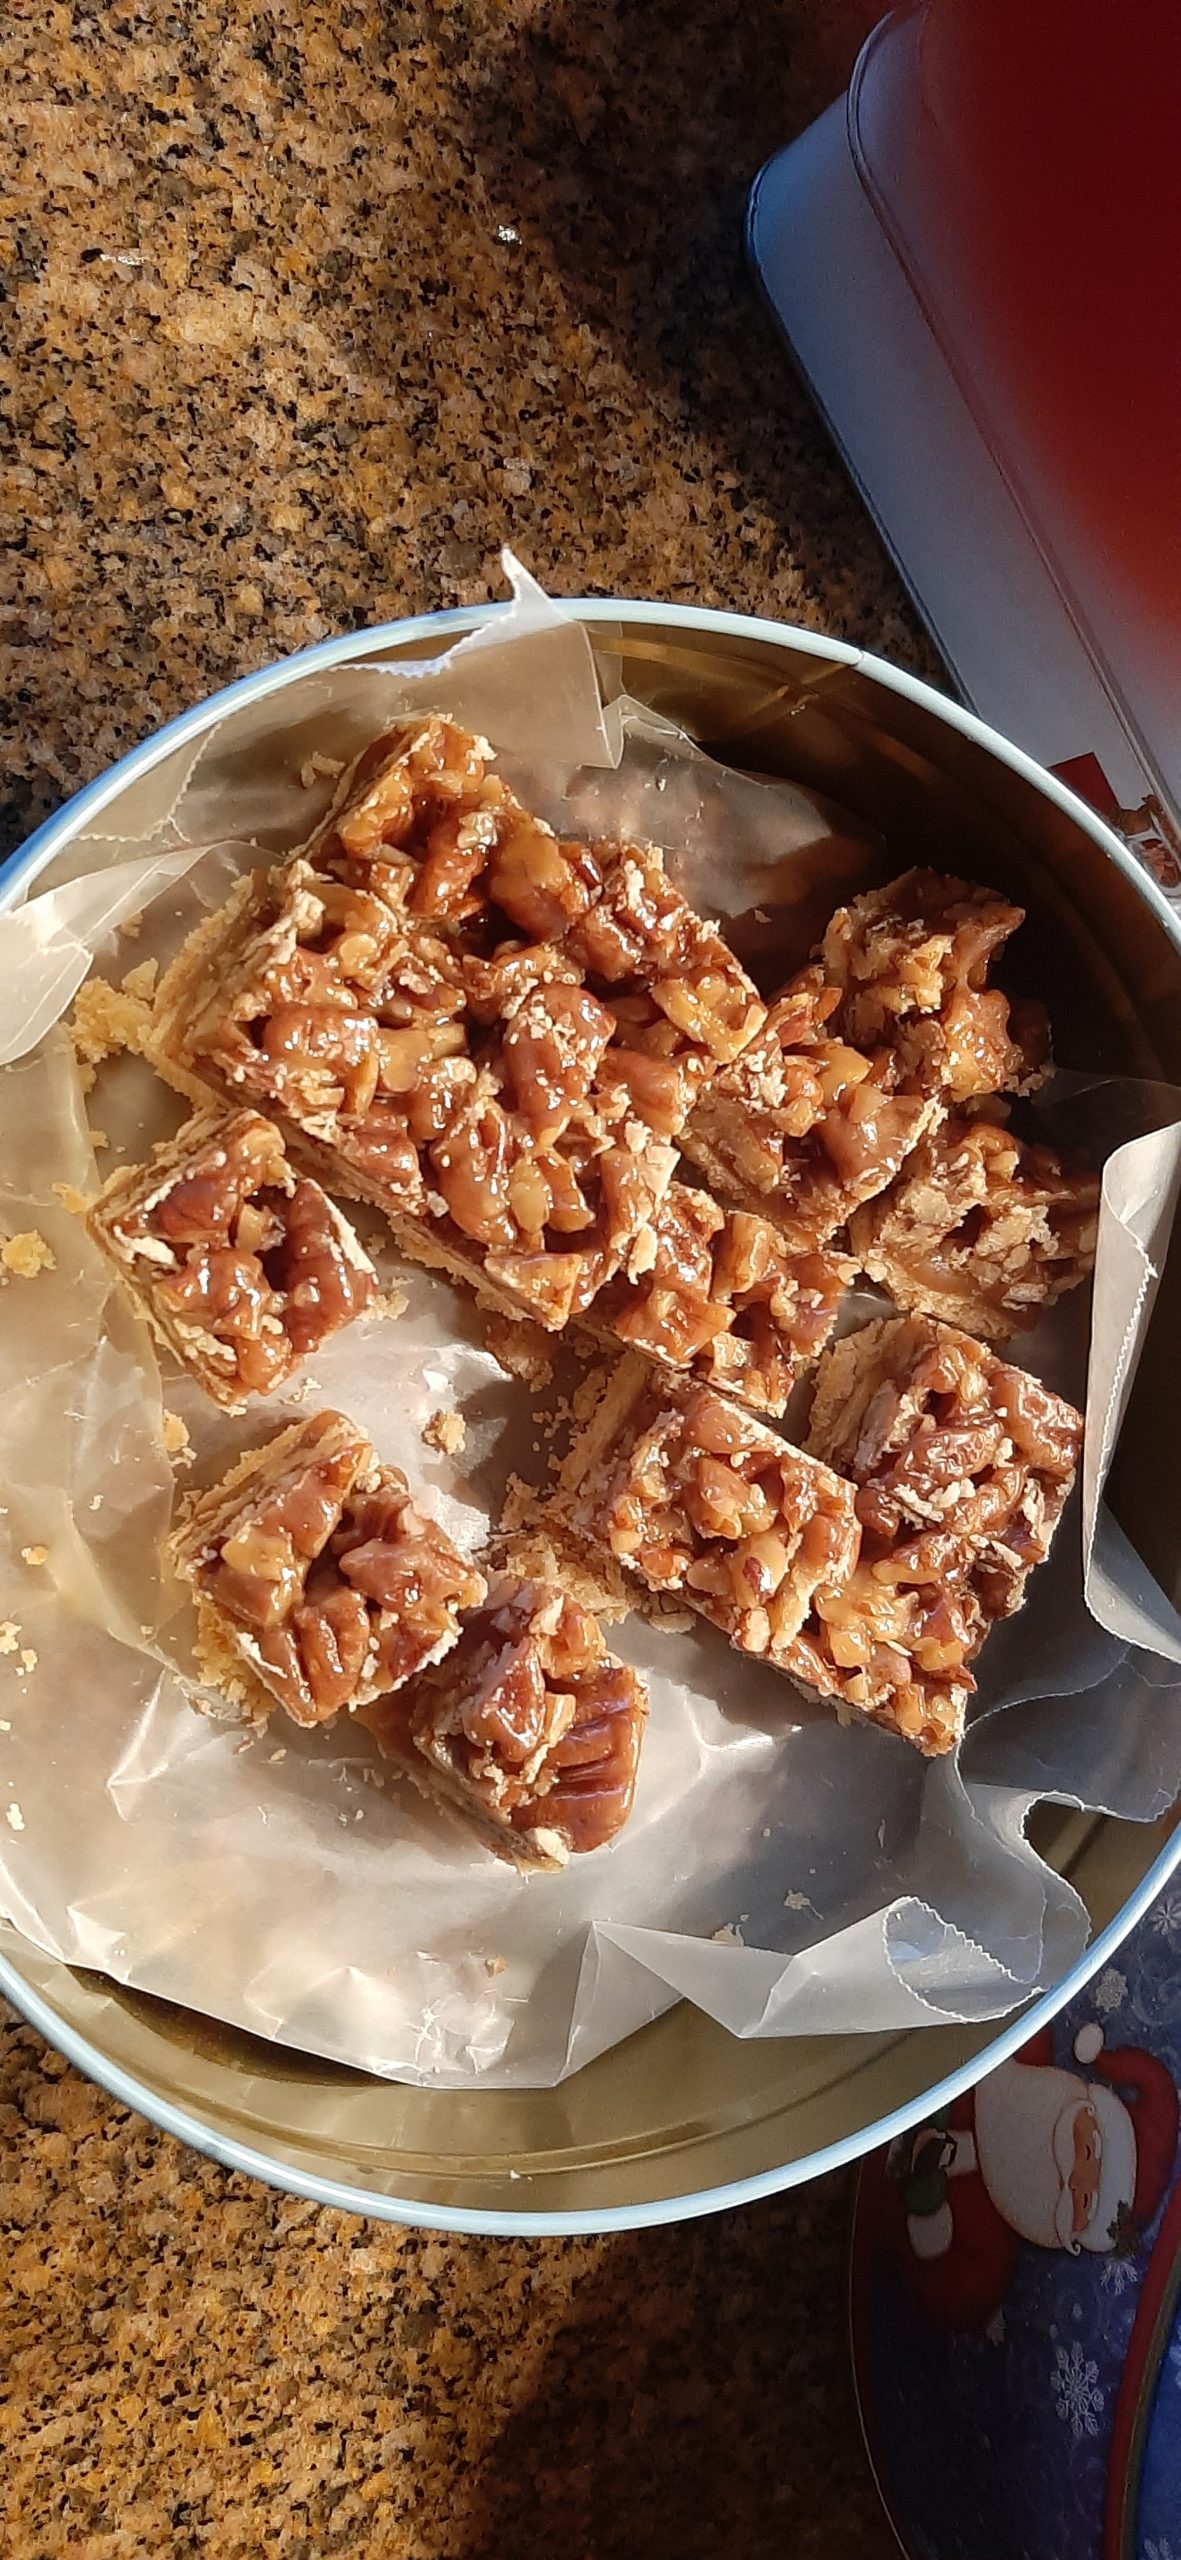
Every year, our dear neighbor Joanna leaves a Christmas tin full of cookies and peanut brittle on our front porch. And every year she includes these incredible bar cookies in the mix. I always know that it’s time for me to get going with my baking when our Christmas tin from Joanna arrives. So, this year I decided my kids needed some of these delicious bar cookies in their goodie package too. And since you all have been so good this year (Santa told me so), I am going to pass along this wonderful recipe via epicurious.com and Joanna.
I plan to serve these bars in lieu of pecan pie this year because after eating all the other offerings on the Christmas dinner table, most people only need a small bite or two of dessert. So, I am also making apple pie bars instead of apple pie, for just that very reason.
May you too have a full to the brim Christmas and a great 2023. We have all had a rough time the past 3 years, but to my eyes, things appear to be looking up a bit. I continue to have hope that the earth’s citizens can all pull through the various messes we have gotten ourselves into. And can learn from our mistakes.
In the meantime, let your holidays and years to come be full of laughter, love, family, friendship, and joy.
And as always, peace and love to all.
Crust:
1¾ c. unbleached all-purpose flour, fluffed
⅓ c. powdered sugar
¼ c. cornstarch
½ tsp. kosher salt
¾ c. (1½ sticks) cold unsalted butter, cut into ½-inch pieces
Line a 13×9-inch baking pan with parchment paper, leaving 1 inch overhang on all sides. Lightly butter the parchment paper. (Glass pan is best for this recipe.)
Blend flour, powdered sugar, cornstarch, and salt in food processor. Add butter and process until mixture begins to clump together. Press dough evenly onto bottom of prepared pan.
Bake crust in a pre-heated 350-degree oven until set and light golden, about 25 minutes. Remove from oven. Let stand while preparing topping. Reduce oven temperature to 325-degrees.
Topping:
1¼ c. brown sugar (packed)
½ c. light corn syrup
¼ c. (½ stick) unsalted butter
4 c. coarsely chopped pecans
½ c. heavy cream
2 tsp. vanilla extract
Stir brown sugar, corn syrup, and butter together in a heavy medium sized saucepan over medium-high heat until sugar dissolves and mixture boils; boil 1 minute. Add pecans and cream; boil until mixture thickens slightly, about 3 minutes. Stir in vanilla. Pour hot topping over warm crust.
Bake nut-topped crust until caramel is slightly darker and bubbles thickly, about 20 minutes. Transfer pan to rack. Cool completely in pan (topping will harden).
Lift parchment paper out of pan onto cutting board. Using a heavy sharp knife, cut cookies into 1-inch squares. (These cookies are very rich.) Store between sheets of waxed paper in an airtight container at room temperature.
OK, this is not a recipe for food. It’s a recipe for fun! And although I mainly post recipes for food, I have found that munching away on your favorite snacks and playing this game with family or friends is a smashing combination. (A drink on the side doesn’t hurt either!) And all the better if you are spending time with family or friends at one of your favorite campgrounds. (Of course, sitting in front of a fire after skiing all day would also be wonderful. But alas, for us, skiing vacations with family and friends are regrettably far behind us. (Sigh) But back to this game.
The first thing that is great about this game is that it is played with a single deck of cards. No fancy bits to keep track of and no problem finding storage space in your recreational vehicle or tenting equipment containers.
The next thing that makes this game especially appreciated by me is that it is easy to learn. And as with many simple and fun games, if you win it’s basically the luck of the draw. Of course, there is some skill involved. But really, you can become adroit after a round or two. (Seriously, if I can learn this game quickly, anyone can! Because truthfully, I don’t have a lot of experience playing card games.)
So, if you too want to add an easy and fun game to your “what to do on vacation” repertoire, I recommend this easy to learn game. This game was introduced to us by our new friend Phyliss while we were camping together in Entiat, Washington. We had such a fun time getting to know Phyllis and her husband Tim and spending time with them and our dear friends Margo and Jim. Good friends and good food equal good times. May you too be blessed with good friends. As for the food part, I trust you have that covered.
And as always, peace and love to all.
THE WHOLE ENCHILADA (a card game)
a very fun and easy to learn card game for 3 to 5 players
The person with the lowest score wins!
This game uses a regular 52 card deck. No jokers allowed!
Each person gets dealt the same number of cards.
3 people playing, set aside 1 of the 2’s and deal out all the rest of the cards
4 people playing, use the full deck and deal out all the rest of the cards
5 people playing, set aside 2 of the 2’s and deal out all the rest of the cards
You play the game by taking tricks.
Highest card in suit that is led takes the trick.
Each player must follow suit if possible.
The player who takes a trick, then puts down the first card for the next trick.
Aces are high.
The person to the left of the dealer leads the first trick.
After each hand, the deal passes to the left for the next hand.
The game is played in 6 rounds (6 hands)
Hand #1 – every trick you take awards you 10 POINTS
Hand #2 – every heart – 10 POINTS
Hand #3 – queens – 25 POINTS
Hand #4 – king of spades – 100 POINTS
Hand #5 – last trick – 100 POINTS
Hand #6 – THE WHOLE ENCHILADA – all of the point values from previous hands
So, for example, on hand number 6 if you took 3 tricks (30 points), 1 heart (10 points), 2 queens (50 points), the king of spades (100 points), and the last trick (100 points). That’s a total of 290 points. You have probably just lost the game!
We would truly enjoy eating fresh seafood on a weekly basis. Not only for the health benefits* seafood supplies, but also because we both love the taste of almost any critter which spent its entire life in either fresh or salt water. But regrettably, dining on fresh seafood weekly just doesn’t quite happen for us. For one thing, I don’t trust the “fresh” fish selection offered by our local grocery store. (Name withheld to protect the innocent.) Second, we don’t go to Costco weekly although I love Costco’s fresh seafood selection, and finally, because fresh seafood is bloody expensive!
And granted, if push came to shove, we could afford to eat seafood on a more frequent basis. But it still doesn’t happen. So, when we do get an opportunity to feed on fish, I try my darndest to prepare it in a way that will emphasize its most admirable qualities.
So, please allow me to elucidate on the qualities of fresh halibut since that’s what this recipe is all about.
Halibut is a very lean fish, with almost sweet tasting flesh. And when cooked properly, the firm but tender texture of the fish flakes into large segments that literally melt in your mouth. (So, no pressure involved with preparing a lovely halibut fillet to avoid rendering it dry and tasteless! Right? Wrong! Unfortunately, over cooking seafood is the easiest thing in the culinary world to achieve!)
If I have learned anything in all my years of cooking seafood, it’s to err on the side of underdone. Because you can always cook it longer if necessary. But, unless you are not of this world or have some voodoo knowledge of which I am unaware, you can’t undo overdone. My solution – an instant read thermometer. And I recommend you adopt this simple solution to overcooked seafood anytime you also prepare fish. Actually, when you prepare any meat for that matter. (OK, not the meat in stew for example. You can be sure stew meat is perfectly cooked when it falls apart when you bite into it. But for rare steak, perfectly cooked pork, chicken, or slightly rare lamb, an instant read thermometer is indispensable.)
Now, about this recipe. I wanted to prepare a baked halibut dish that featured a bit of a savory topping that I hoped would complement the flavor of the fish, not disguise it. And be very easy to prepare. And with this recipe I believe I achieved my goal.
So, if you too love halibut, or any firm white fish, and want to give it a bit of a special fixing, I invite you to try this recipe. All I can say is that halibut fixed this way made for mighty fine dining for us the other evening. (If I say so myself!)
Well, that’s all I have to say on the subject of fish today. Happy cooking, happy eating, and try to stay healthy. There is a miserable cold like “something” going around our area. And I have heard it’s no darn fun. So, take especially good care of yourself as we go into the cold and flu season.
And as always, peace and love to all.
1 lb. halibut fillet
2 T. melted unsalted butter
2 tsp. fresh lemon juice
1 sm. garlic clove, finely minced
1/8 tsp. dried parsley
¼ tsp. paprika
½ tsp. kosher salt
freshly ground black pepper
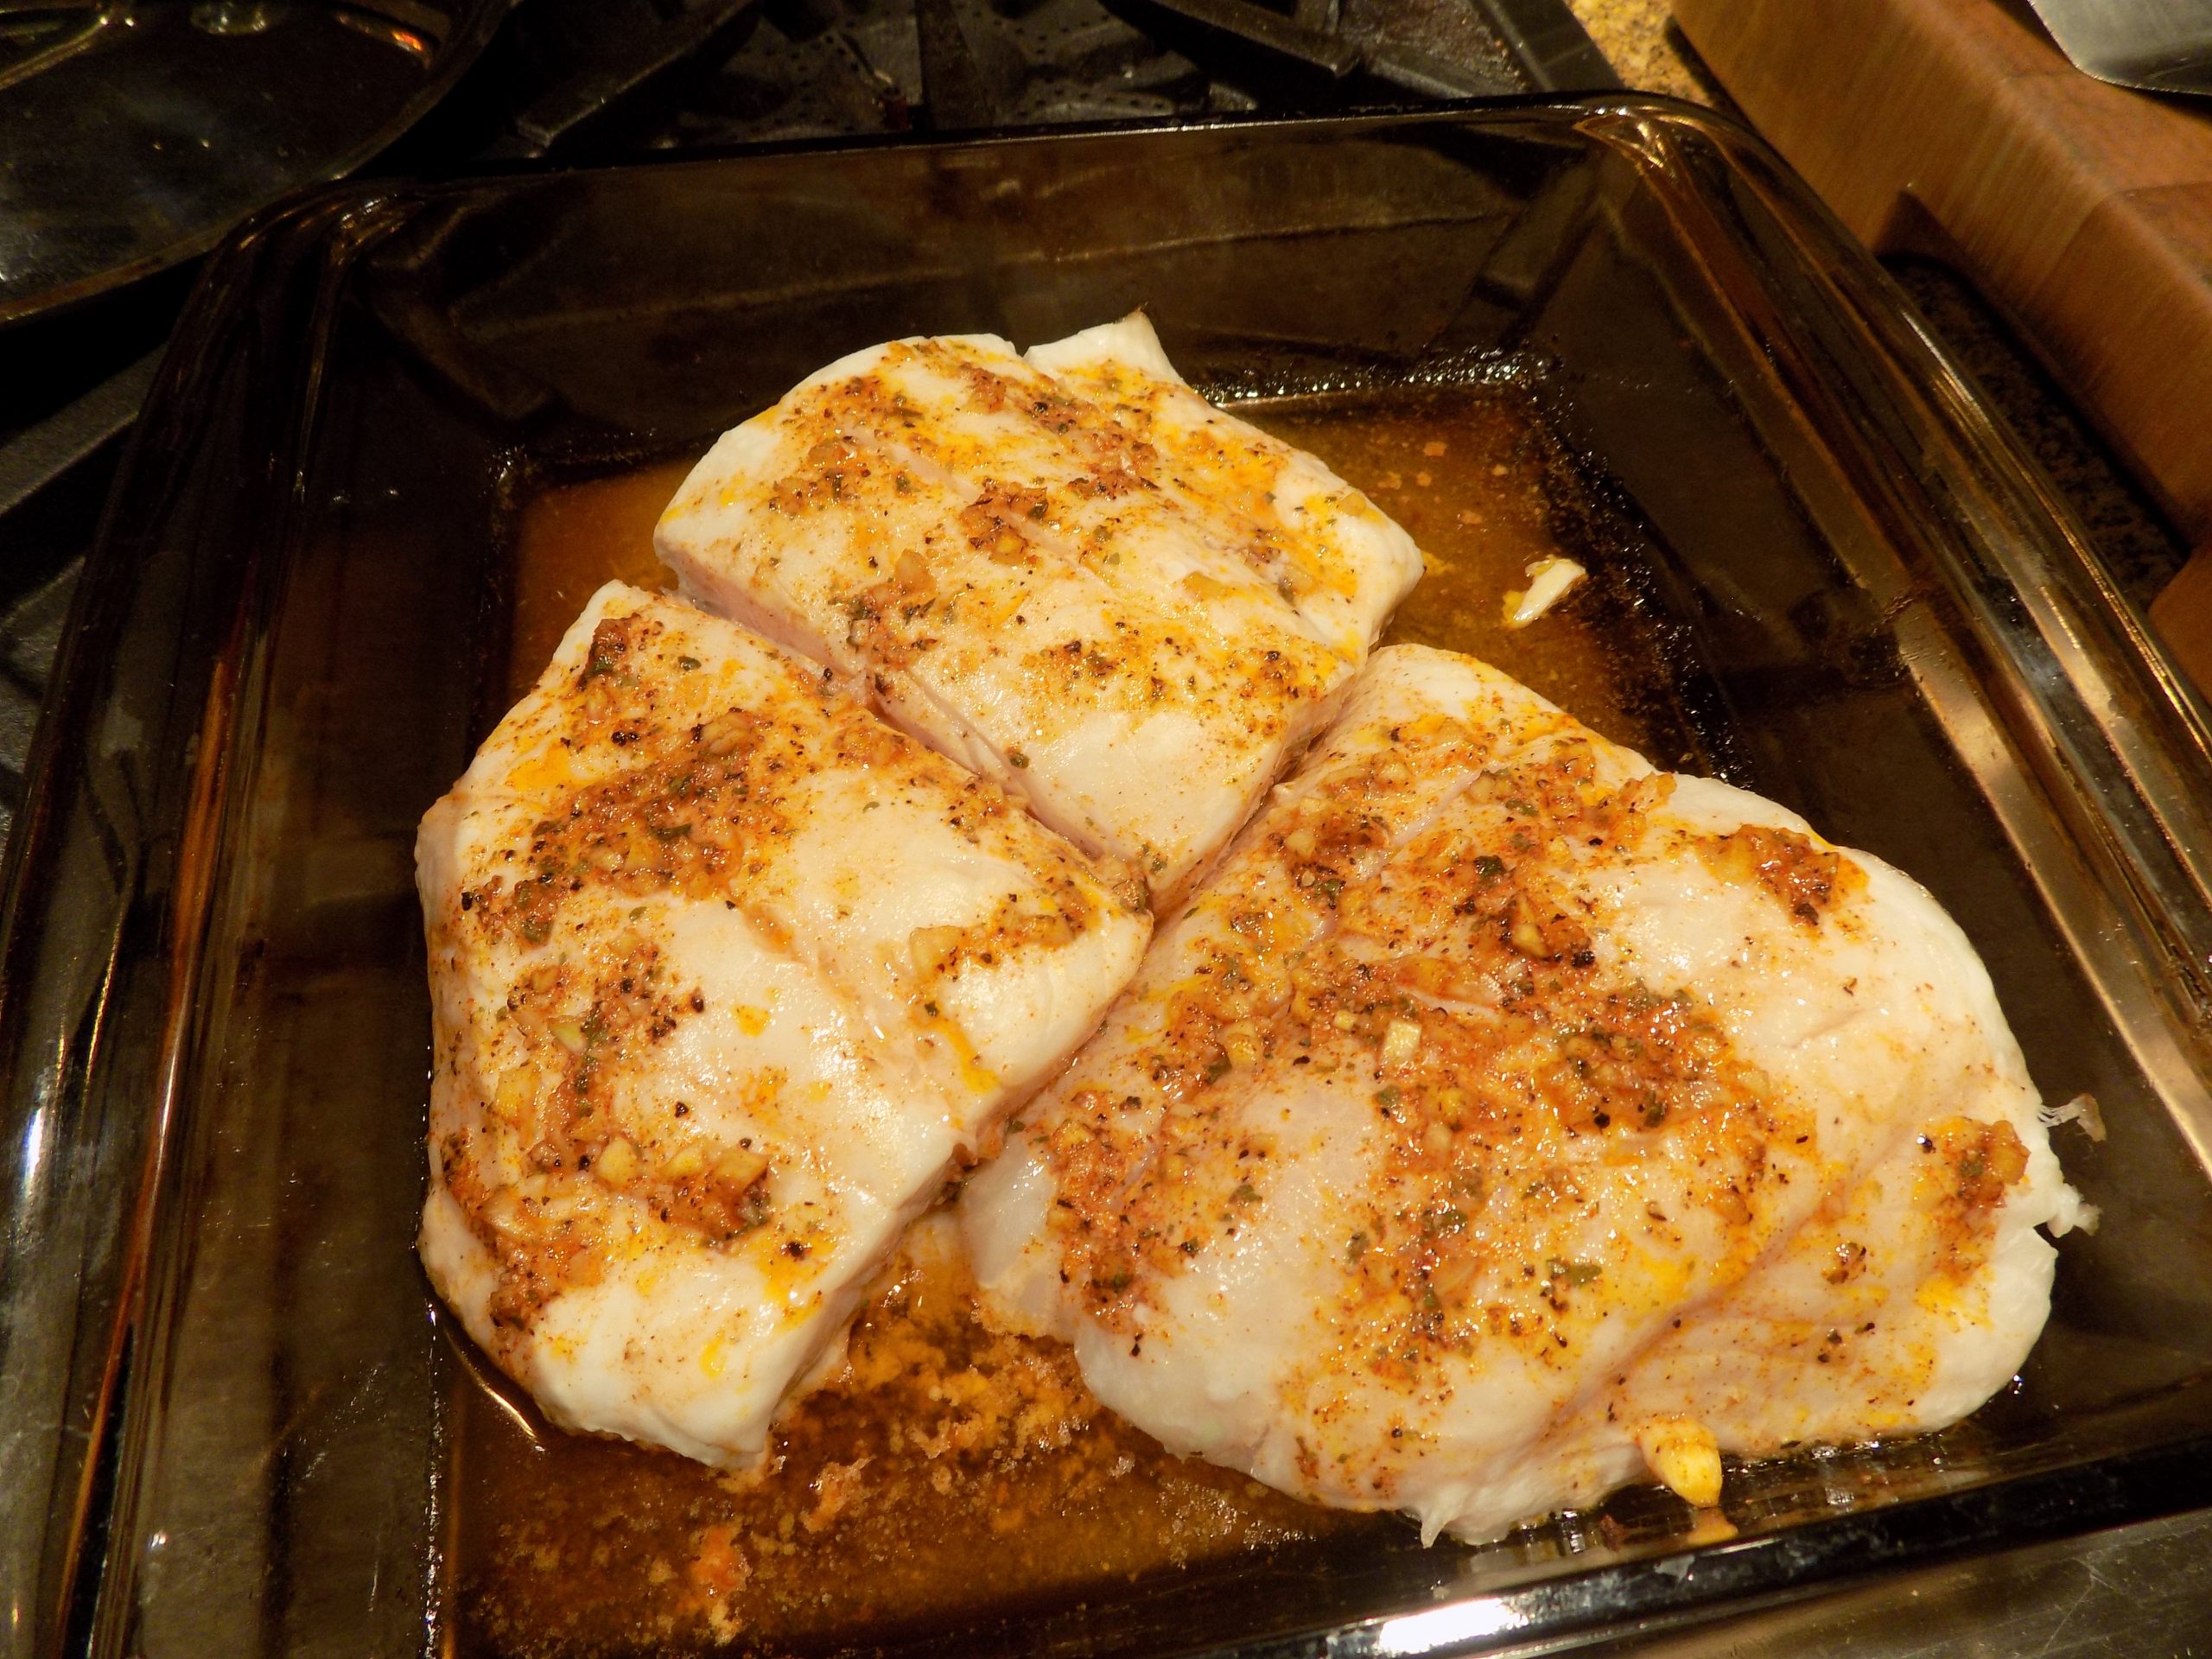
Place halibut in a lightly greased baking dish.
In a small bowl, combine the melted butter, lemon juice, minced garlic, dried parsley, paprika, salt, and black pepper. Pour this mixture over halibut.
Bake in a pre-heated 400-degree oven for 12 to 15 minutes or until the fish is no longer transparent. The internal temperature should reach between 137 and 140-degrees and the fish should flake easily when tested with a fork.
Remove from oven and serve immediately.
* Seafood is known to be an excellent source of lean, high quality, easily digested protein. A 3.5-oz. serving provides almost half of an adult’s daily protein needs for only 100 to 200 calories. Seafood is also low in saturated fat and sodium and is a rich source of many essential vitamins and minerals.
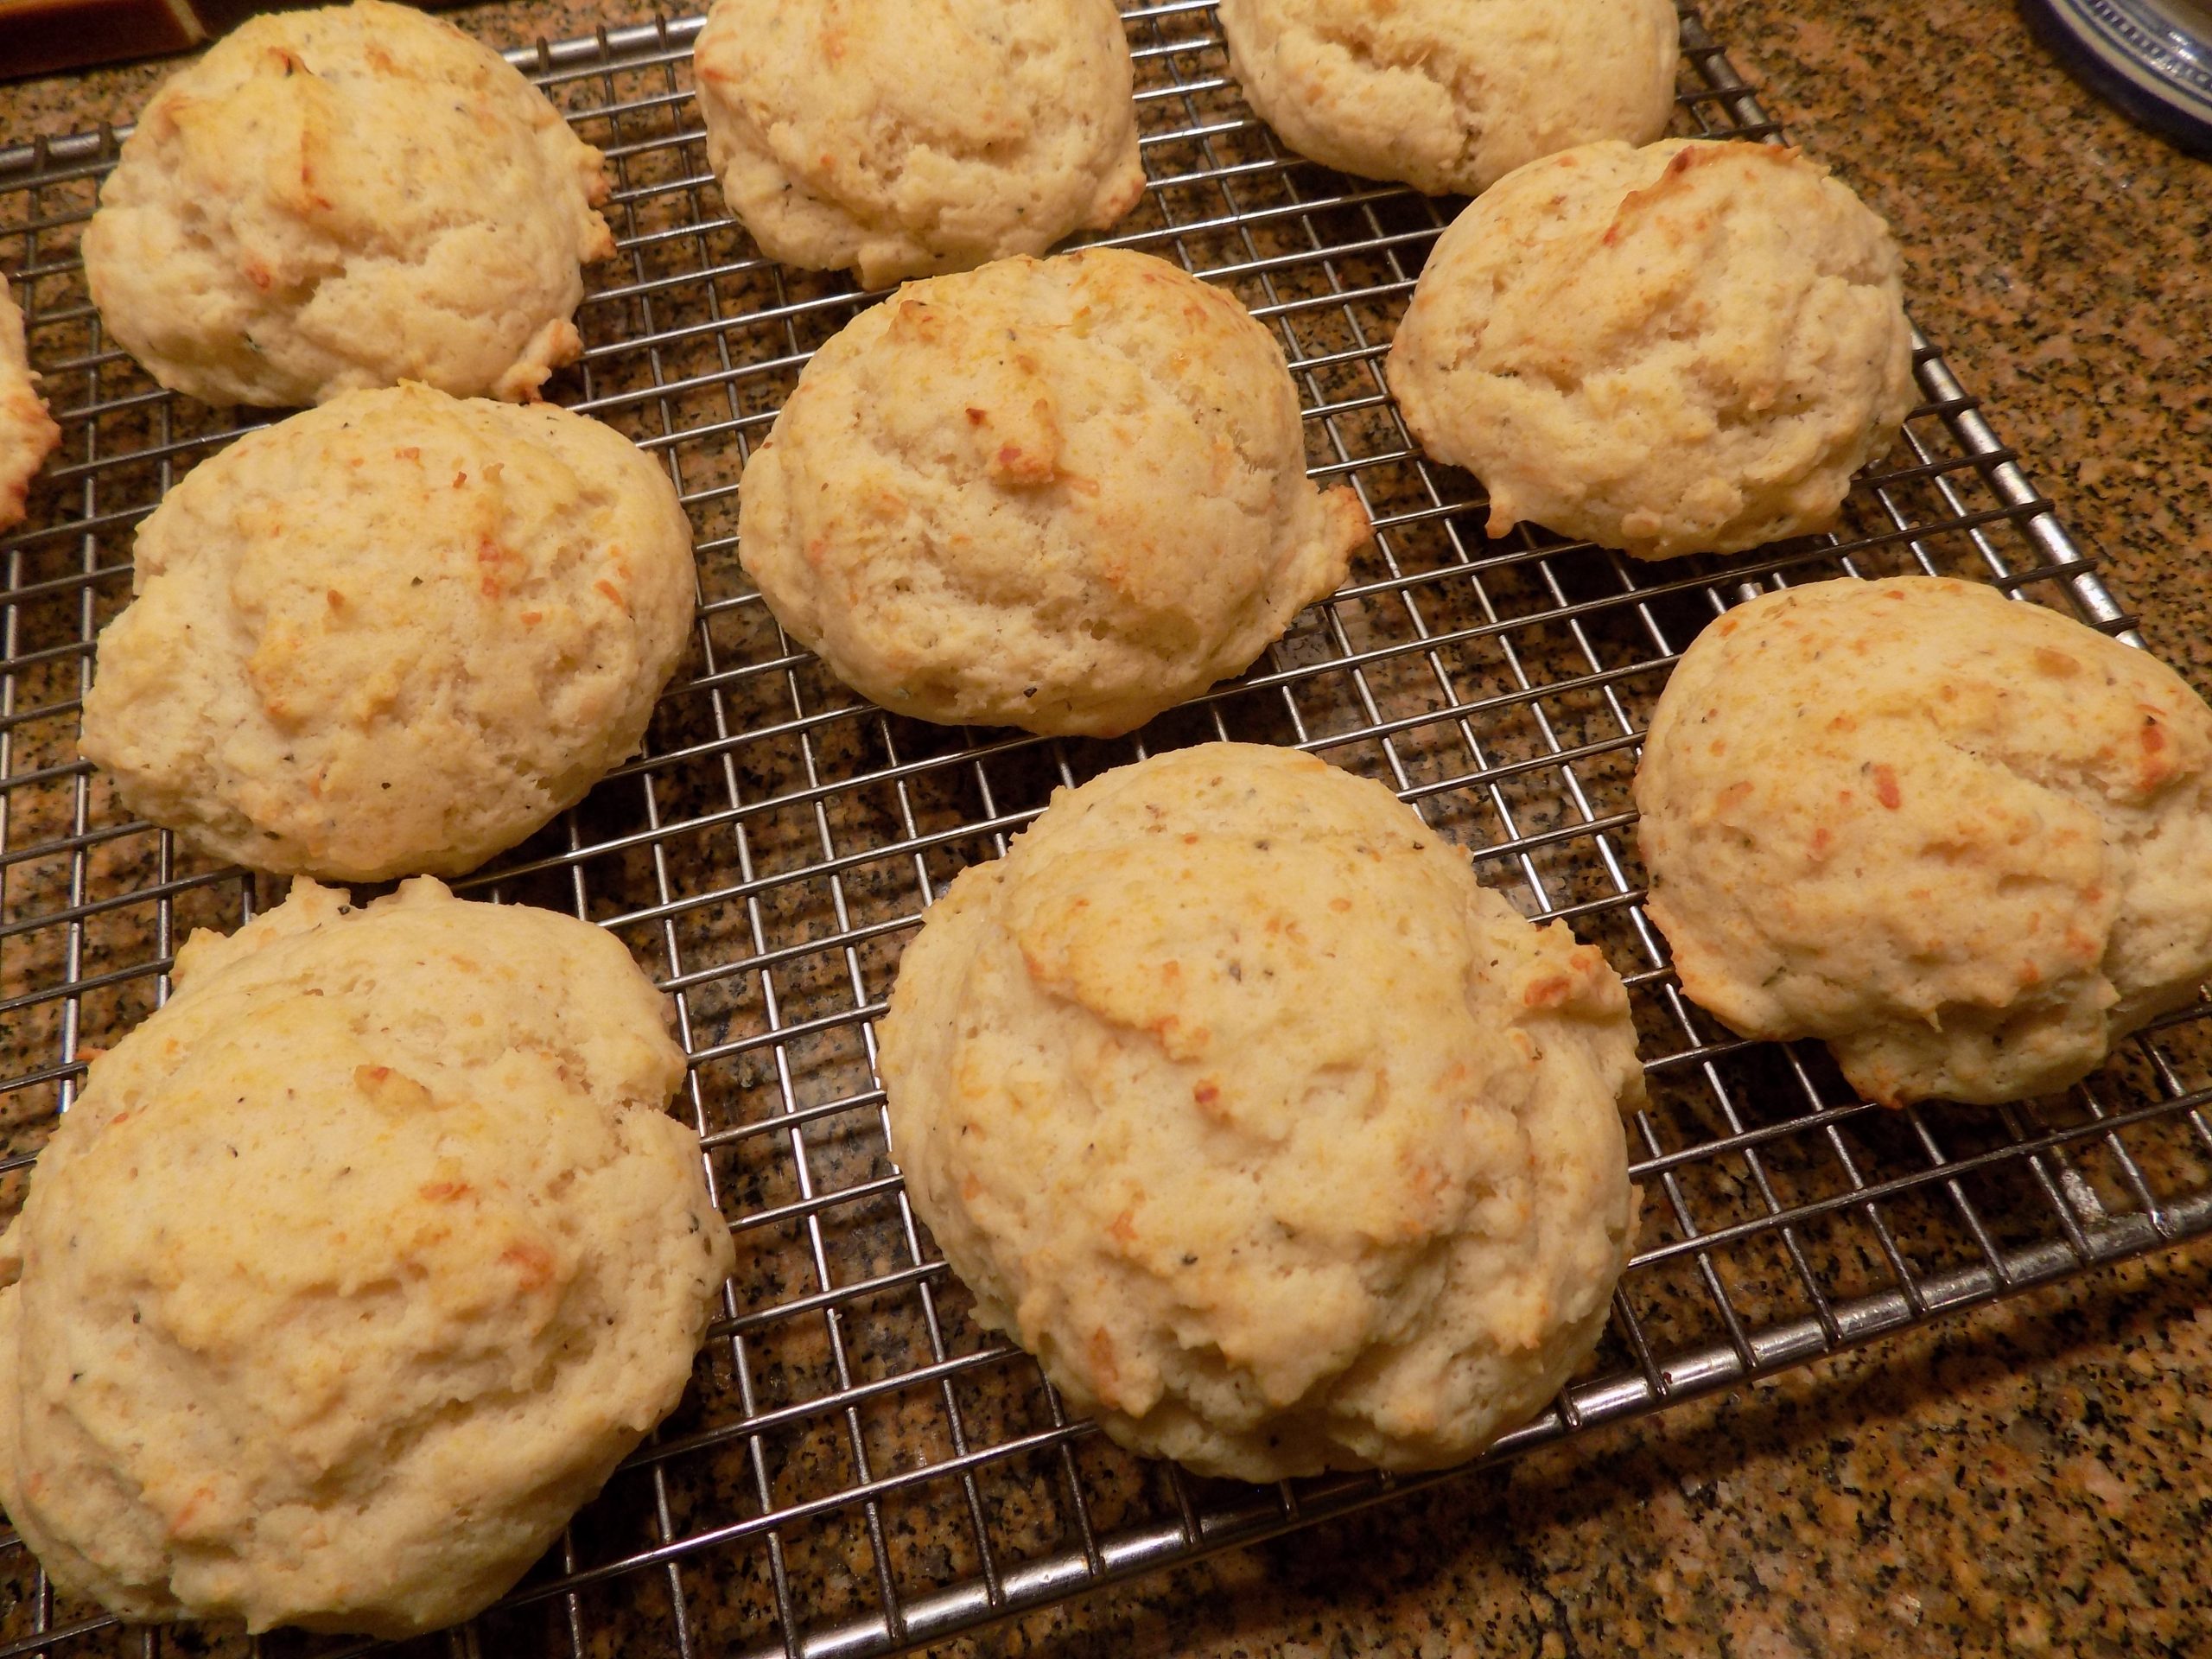
As many of you know, I am a bread lover. Matters not whether it’s rye bread, sourdough, biscuits, bagels, quick bread, cornbread – you name it. If it smacks of bread, I am all over it. So, the other evening having just received my latest A1C blood test results and learning that I am no longer classified as a diabetic, I celebrated. I fixed these delicious rolls to go along with Duck Sausage and Bean Soup. (Recipe already on site.) And the combination of these biscuits and the soup turned out to be perfect! And thank you Pam from 101milekitchen.com for this great recipe.
And the best part. (Well, almost the best part, was how easy the biscuits had been to make.) (The actual best part was how wonderful these biscuits tasted. And how delicious they still were the second and third day!) One bowl and hardly any prep time. In fact, the oven took longer to come to temperature than it took for me to mix and shape the biscuits. How cool is that!
And cleanup was a snap. So, all in all, a recipe destined to be prepared and served over and over at Chez Carr. And each time I plan to make them a bit different. As examples, next time I make these biscuits, I’m going to use grated sharp cheddar cheese and a pinch of chili powder. Or crumbled blue cheese, granulated garlic, and a pinch of dried thyme. The possible variations are truly endless.
So, if you too like soft, flavorful, and easy to prepare biscuits, this is the recipe for you.
Well, the weather Goddess doesn’t seem to be able to decide what to do regarding precipitation around here. Mixed rain and snow are being threatened by the weather forecasters. But looking out the den windows, the mountains are in the sun’s spotlight. All the new snow that has fallen over the past week has turned even the low foothills into a snowy wonderland. Grey clouds are high in the sky, but the mountains themselves look Christmas card worthy. Truly beautiful to behold.
Speaking of Christmas, how did it come around again so soon? I sincerely hope you were paying more attention than I was, because so far, I haven’t given Christmas gifts and goodies even the slightest thought. Perhaps I should work on Christmas this weekend. But first there are World Cup matches to watch. And I do have my priorities after all! Christmas will just have to get sorted out between games. Besides, after all the Christmas’s I have withstood, I know everything will work out just fine in the end. It always does!
May you too adopt a more cavalier attitude towards the holidays this year. We are all so blessed and have so much to be thankful for. If all the cookies don’t get baked as planned, or a tree doesn’t get decorated this year, or you decide to go away for the holidays, so be it. Just be joyful and thankful for what was accomplished. If you are like me, you sometimes set the bar too high. Lowering the expectations you set for yourself could be the best way to truly enjoy this wonderful time of the year.
Peace and love to all.
1¾ c. unbleached all-purpose flour, fluffed
1 T. baking powder
½ tsp. kosher salt
freshly ground black pepper (just a smidge)
⅓ c. finely grated Parmesan cheese or grated cheese of choice
½ tsp. Italian seasoning or favorite combination of dried or fresh herbs
1 c. whole milk or half whole milk and half buttermilk
6 T. extra virgin olive oil
Line a baking sheet with parchment paper or a silicone baking mat.
In a medium mixing bowl whisk the flour, baking powder, salt, Parmesan cheese, and Italian seasoning together. Pour the milk and olive oil over the dry ingredients. Stir just until the dry ingredients are incorporated. Don’t overmix.
Using a #24 (3 tablespoons) ice cream scoop, drop the biscuits onto the prepared pan. Bake in a pre-heated 425-degree oven for 14-16 minutes or until the bottom side of the biscuits are a nice golden brown. Remove from oven and serve immediately or allow to cool and warm just before serving.
OK, not everyone has a neighbor that gifts them with a package of duck sausages just for the fun of it. But I do! (Vicki, my dear friend next door.) But then, what the heck to do with the sausages? So, bottom line, the poor sausages languished in our freezer for several months before I had the courage to use them in a dish. That, and Mr. C., who happens to have taken on the dubious task of “keeper of the freezer”, had grown weary of asking me when I planned to do something with the sausage. (Somebody has to make sure the freezer is always well stocked, and I am not that person. I am great at keeping the fridge and pantry in good supply. But I am terrible when it comes to the freezer. It lives in our garage, so out of sight, out of mind as the old saying goes! You know how it is!)
Anyway, I finally decided that the sausage would be perfect in soup. And where better to look for a recipe than on the site that sells all things duck – D’Artagnan. (Great site BTW!)
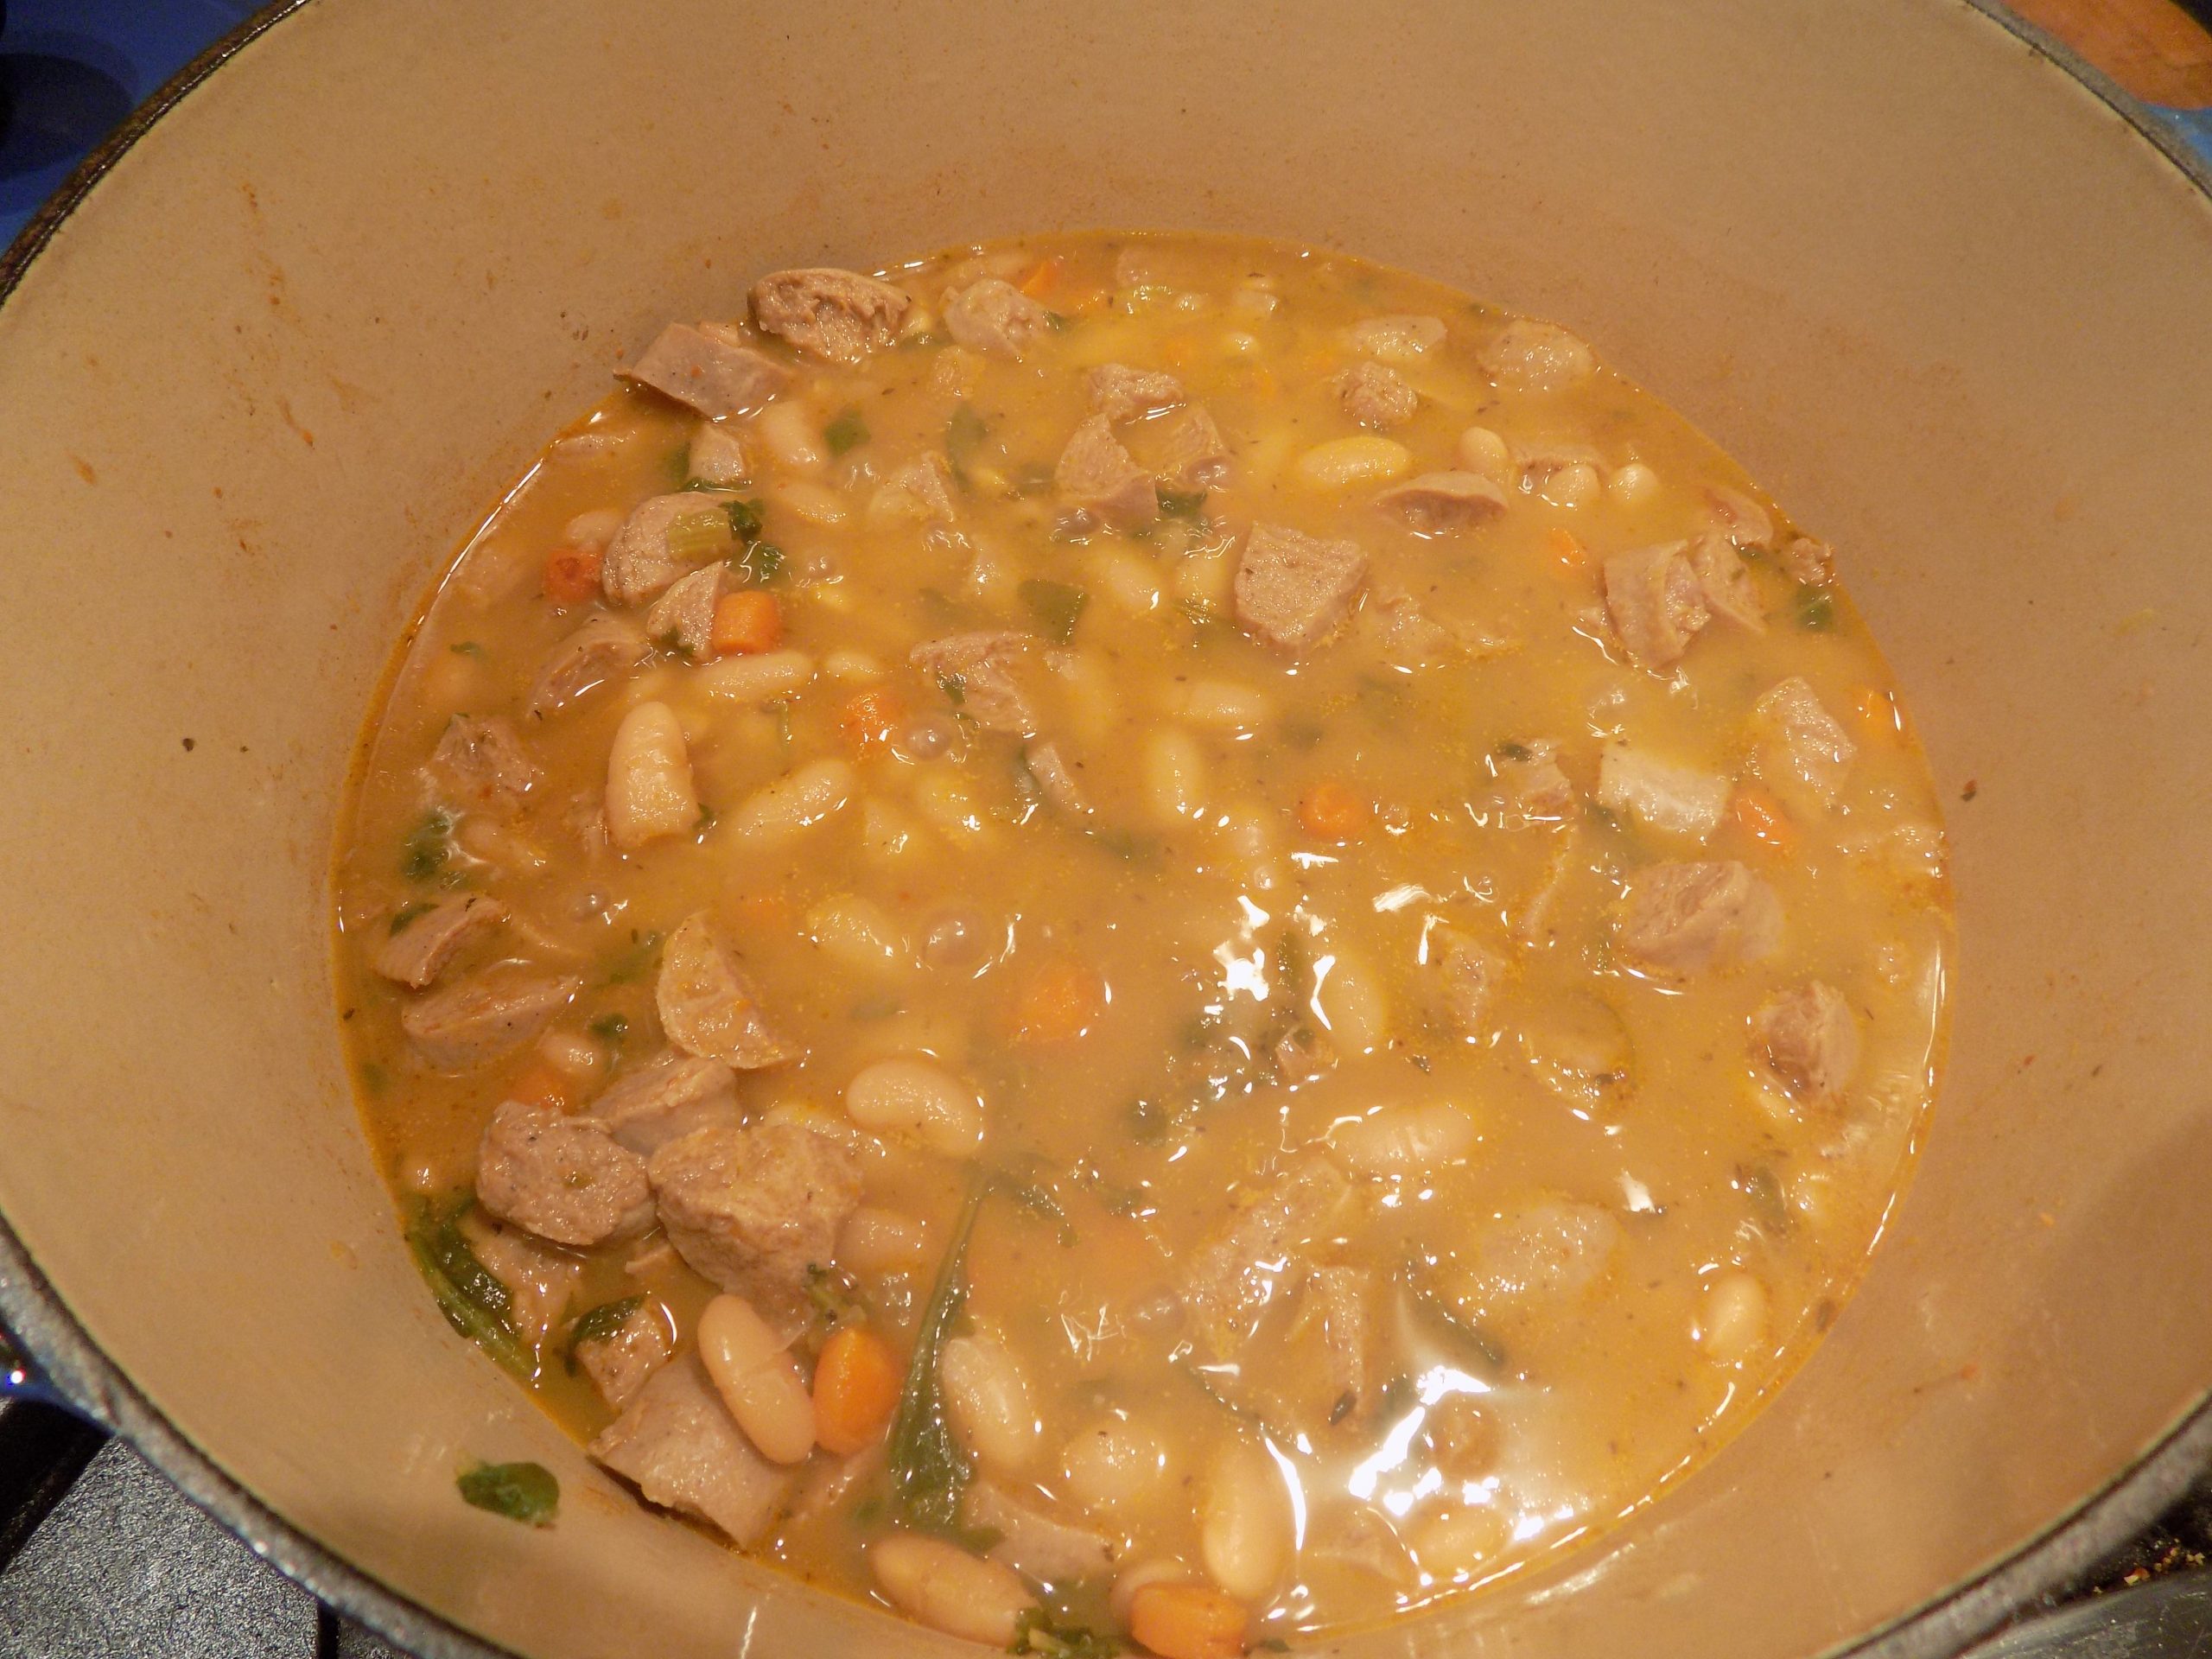
So, this is my version of D’Artagnan’s White Bean & Duck Sausage Soup. (Why do I always think of the Marx Brothers when I say duck soup?)
Anyway, the soup turned out to be quite delicious, and very easy to build. There is one difficult step however, but that step happens almost every time I make soup. It’s the waiting time while the soup burbles away to yummy perfection. Because all the time soup is cooking, great smells emanate from the kitchen. And this soup was no exception when it came to smelling delightful as it cooked.
So, if you too just happen to have some duck sausage laying around, make this soup. It is ever so nourishing and makes your mouth happy while filling your tummy. A perfect winter treat! If you don’t have any duck sausage on hand, then consider ordering some online. It is very rich and delicious. And an 8.5-oz. package goes a long way.
Well, that’s all for today. It’s very cold outside. And mother nature can’t decide whether to cover us with snow or torture us with the fact that the clouds could dump on us at any old time. So, we wait. And watch. And change a couple of appointments just in case. Never a dull moment. But then, that’s OK too!
Peace and love to all.
1 c. dry cannellini beans
2 T. extra virgin olive oil, divided
1 (8.5-oz.) pkg. Duck and Armagnac Sausage, removed from casings and cut into small dice (duck sausage available at D’Artagnan – on line)
1 lg. shallot, chopped
½ c. chopped onion
1 lg. carrot, chopped
1 rib of celery plus leaves, chopped
4 cloves garlic, finely minced
2 tsp. tomato paste
4 c. chicken stock
1 lg. bay leaf
¼ tsp. dried thyme
¼ tsp. kosher salt
freshly ground black pepper
½ tsp. Aleppo pepper or half Spanish paprika and cayenne or Piment d’Espelette
2 c. arugula, Swiss chard, kale, or baby spinach, finely chopped
2 tsp. cognac, opt.
The night before you plan to build the soup, rinse beans under cool running water then place in a large non-reactive container and cover with 2-inches of cool water. Let beans soak at room temperature overnight. Or, rinse the beans, cover with 3-inches of water, bring to a boil, remove from heat, cover, and let sit for 2-3 hours.
Heat 1 tablespoon of the olive oil in a covered large pot or Dutch oven over medium-high heat. Thoroughly brown the sausage then remove it to a small bowl. Set aside to cool then place in your refrigerator until called for.
Add the second tablespoon of olive oil to the pan along with the shallot, onion, carrot, and celery. Season with salt and pepper. Sauté vegetables until shallots are translucent and carrots start to soften slightly, about 7 minutes. Add the garlic and cook for 1 minute.
Stir in the tomato paste and cook for about 3 minutes. Add the chicken stock, stirring up any browned bits at the bottom of the pan. Add the bay leaf and thyme. Bring the mixture to a boil, then turn down the heat to medium-low, drain beans, rinse, then add to the pot. Cover the pot and simmer the mixture for about 2½ hours, or until beans are cooked through. Remove bay leaf.
When the beans are tender, stir in the sausage, arugula, and Aleppo pepper. Continue to cook over medium heat for 20 minutes. Adjust seasoning and add the cognac. Serve hot.
Olive Oil Drop Biscuits are great with this soup. Look for recipe on this site in the very near future.
This is the extract I used. Very strong, so go lightly.
Mr. C. and I had the very great pleasure of spending Thanksgiving with his 2 sisters (Nancy and Katie), their spouses (Paul and Rick), and Paul and Nancy’s two daughters Erin and Dana and their husbands (Gideon and Jason) and Gideon and Erin’s delightful daughter Clara (almost 8). The event was held in Pullman, Washington at Dana and Jason’s home. Both Jason and Dana are on the WSU faculty.
Dana, with Veterinary Microbiology & Pathology, is a PhD scientist with cross disciplinary training in microbiology, immunology, and entomology. While Jason is a PhD research assistant professor in the College of Veterinary Medicine, investigating Anaplasma – a pathogen spread by ticks that infects humans and large mammals. As Jason so aptly put it “Dana and I will tell a brick wall about our research if it stands still for 15 minutes, and we are definitely each other’s constant advisors and critics. Our shared interests in microbiology was definitely something we connected over and continues to be a part of our shared life.”
So, as you can imagine, we had a wonderful time. And, we didn’t even have to pet any ticks! What we did get to do was converse, cook and eat together, laugh a great deal, and do all the normal things that families who get along very well do to entertain themselves. So, a most pleasant 5 day get-away for us. Of course, the first day’s travel over Snoqualmie pass was not at all enjoyable. But I won’t go into that because I am still a bit terrorized by the whole ordeal!
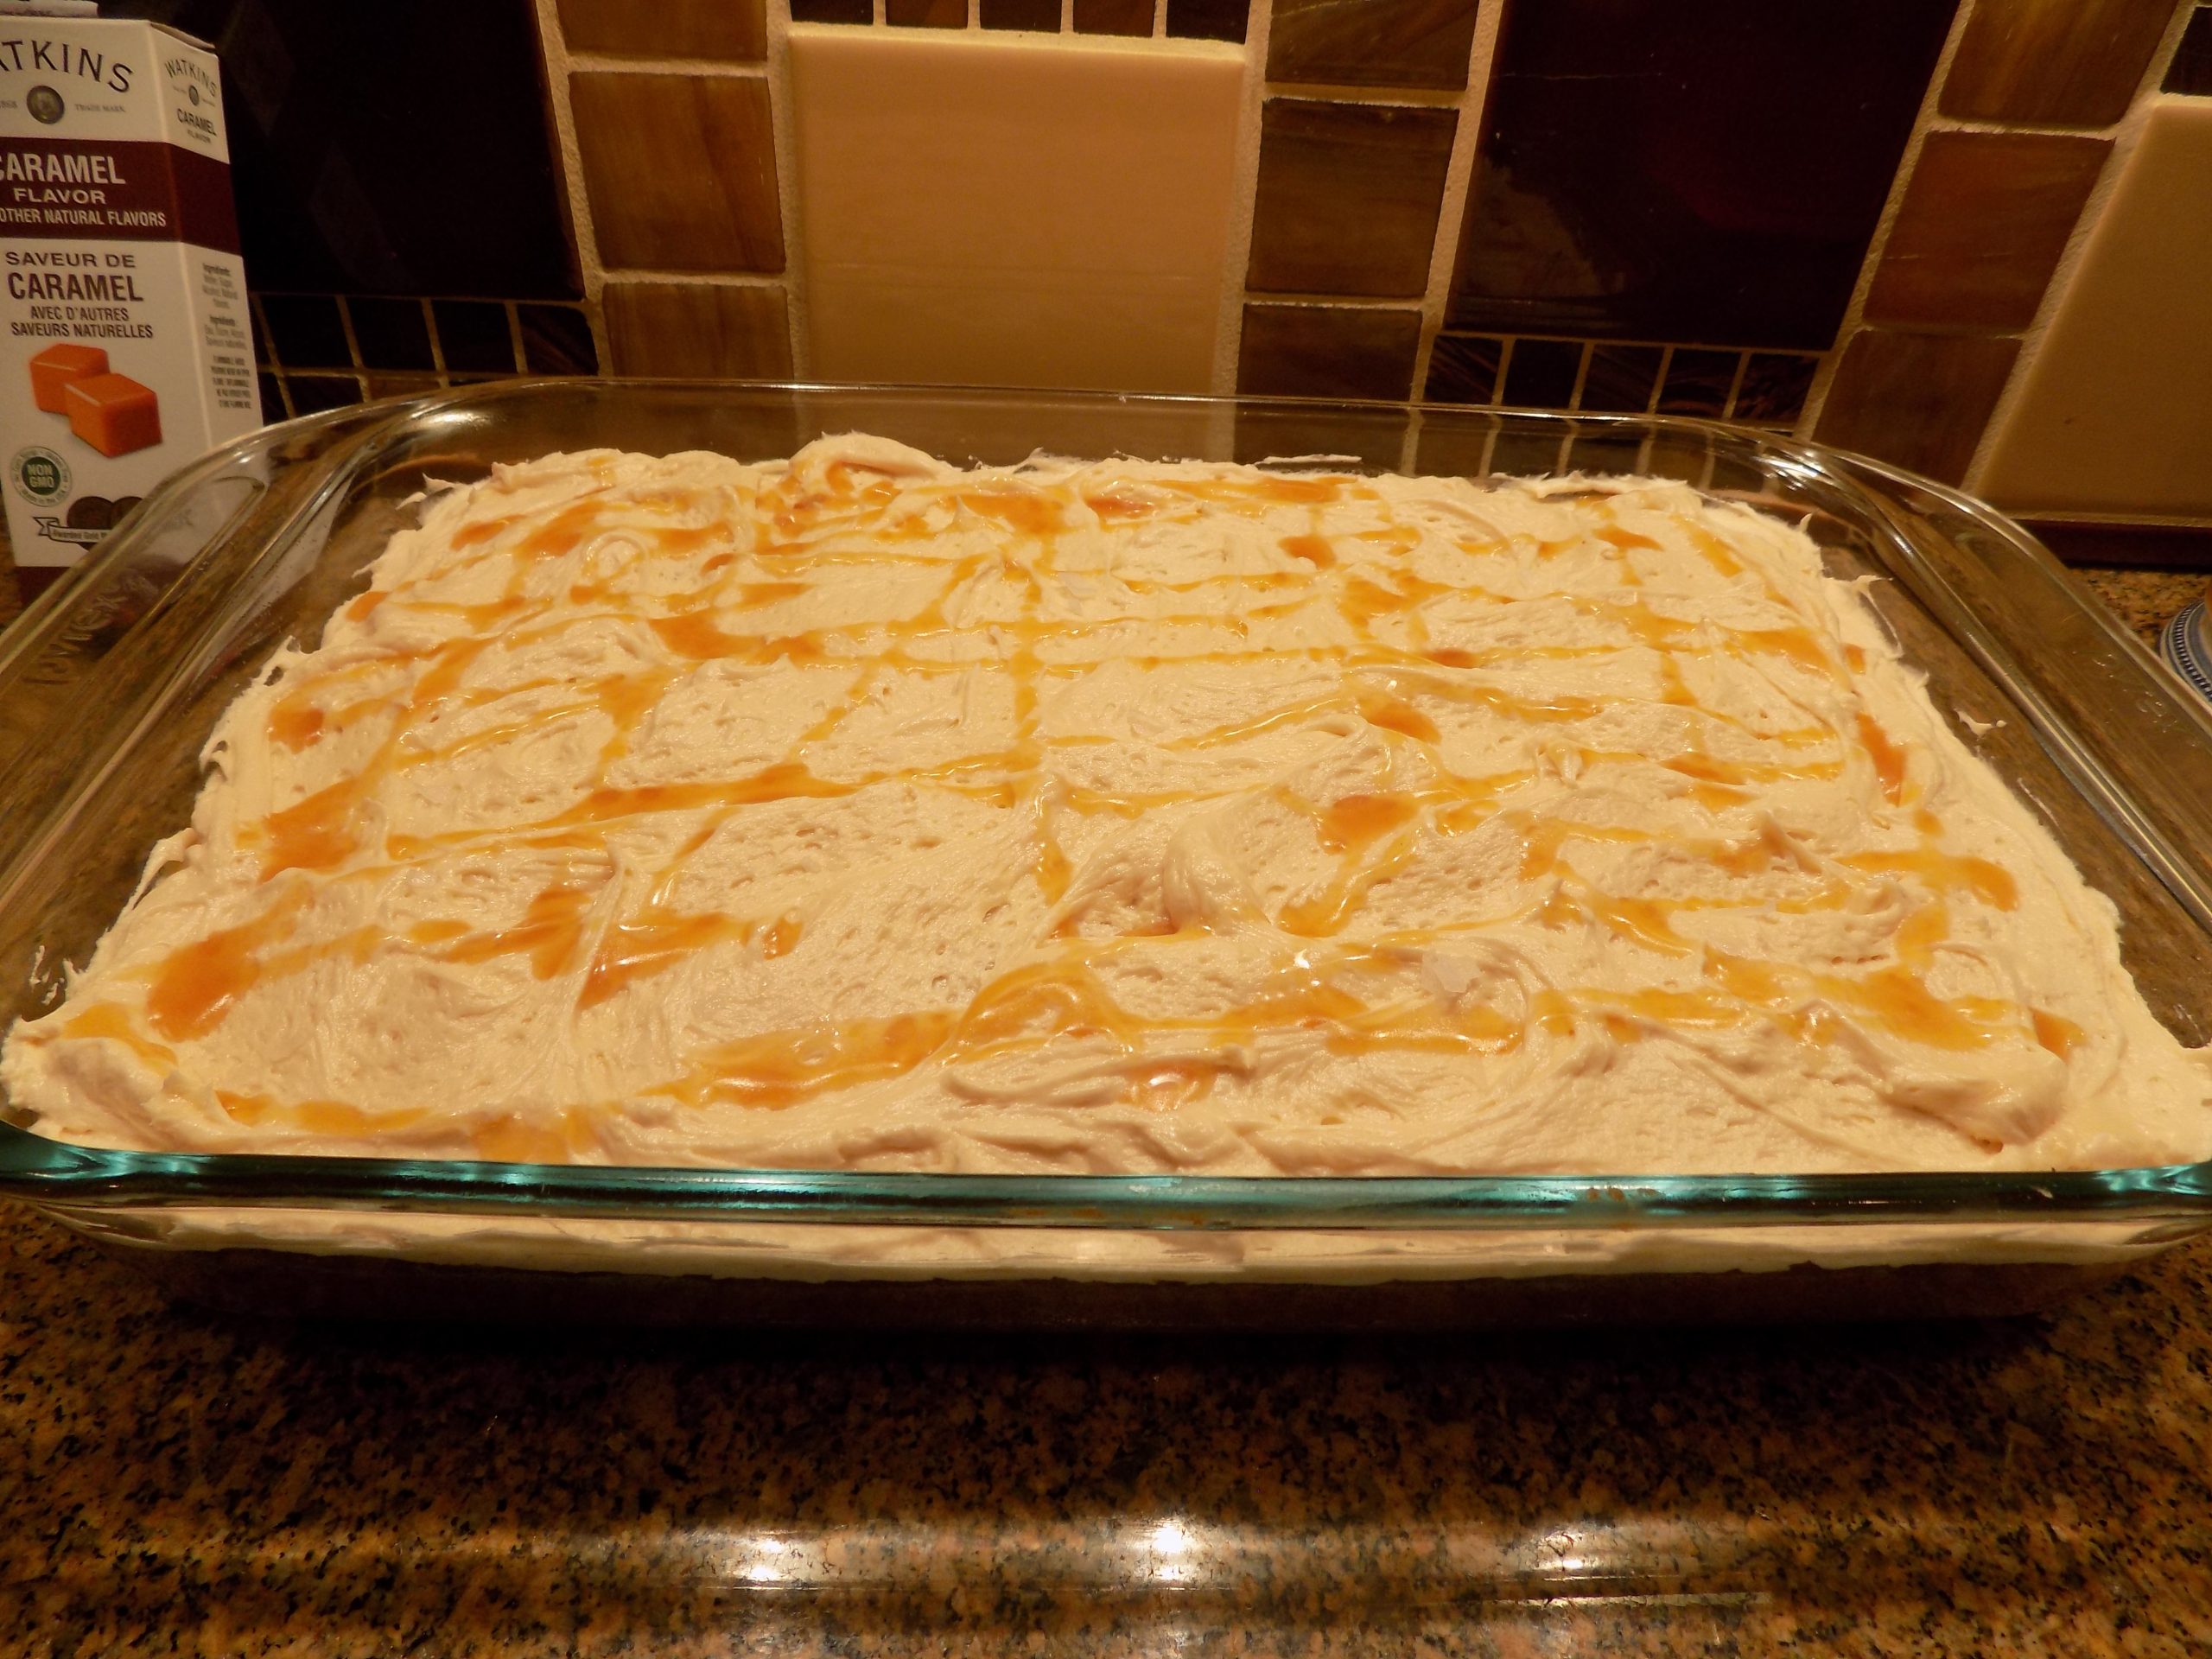
In preparation for leaving to spend Thanksgiving away from home, I decided to make this cake, and a couple other food items to take along. Especially for the first evening since I wouldn’t be around during the day to contribute to any of the meal preparation. I figured bringing some goodies was the least I could do. So, along with this cake I took along some breakfast bread, candied ginger shortbread cookies, and 2 appetizer spreads. But I must say, this cake was my star contribution.
I started with my favorite yellow cake recipe, swapped out a bit of granulated sugar with brown sugar, and added a wee bit of caramel extract. Then I prepared a simple buttercream frosting containing some of Mr. Cs caramel sauce that he always has on hand for caramel lattes to give the frosting a light caramel flavor. Yum! It worked. And the cake had been very easy to make, and the frosting was a piece of cake. You know what I mean! The frosting was also easy to build. And the best part. The cake did not have to be refrigerated. Which is a darn good thing since there was absolutely no refrigerator space available by the time we arrived on the scene. (Can you ever really have enough refrigerator space? I don’t think so either!)
Well, that’s it for today. Sorry I haven’t posted for a few days, but I have a very good excuse. I was having way too much fun! May you too be blessed with having way too much fun with family and friends during this holiday season.
Peace and love to all.
For the cake:
1 c. (2 sticks) unsalted butter, room temperature
⅓ c. vegetable oil
2 c. granulated sugar
½ c. light brown sugar, packed
6 lg. eggs, room temperature
2 lg. egg yolks, room temperature
5 tsp. pure vanilla extract
¼ tsp. caramel extract, opt. (I use Watkins brand)
3 c. fluffed or sifted cake flour
1 tsp. baking powder
½ tsp. salt
1 c. sour cream
In the bowl of your stand mixer, cream the butter, oil, and sugars on high until light and fluffy, about 5-6 minutes. (Do not skip this step. Very important.)
Add eggs and egg yolks one at a time until well incorporated. Scrape the bowl as needed. Add in the vanilla and caramel extracts and mix until well combined.
In a medium sized bowl whisk the cake flour, baking powder, and salt together.
At low speed, alternate adding in the flour mixture and sour cream just until combined. Do not over mix.
Grease and flour 1 9×13-inch cake pan (glass is best) and 1 8-inch round cake pan or 3 8 or 9-inch round cake pans. (If you plan to remove the cakes from the pans before frosting them, then grease and flour the pans as directed above and line the pans with parchment paper sprayed very lightly with cooking spray.)
Scoop the batter evenly into the prepared pans. Even off the batter with an offset spatula. (See directions for frosting a three-layer cake below.)
Bake the 9×13-inch pan in a pre-heated 350-degree oven for 33-35 minutes or until a toothpick stuck into the middle of the pan comes out clean. Do not overbake.
Bake the 8 or 9-inch round pan or pans for 28-30 minutes or until a toothpick stuck into the middle of the pan comes out clean. Again, do not over bake.
Allow cakes that you plan to remove from the baking pan or pans to cool for 10 minutes on a wire rack before gently removing the cake from the pan. If using parchment paper, gently peel it off and allow the cake to cool completely on a pretty cake plate before frosting.
For the 9×13-inch cake, just remove from oven and allow to cool completely on a rack before frosting. After frosting, keep covered at room temperature.
For the frosting:
1 c. unsalted butter, room temperature
1 tsp. vanilla extract
⅓ c. + 3 T. caramel topping, plus more to drizzle over cakes
pinch of kosher salt
4 c. powdered sugar
whole milk or heavy cream, if needed
flaky sea salt, for garnish
Beat the room temperature butter using a hand mixer or stand mixer with paddle attachment until soft and fluffy. Add the vanilla, caramel topping, and kosher salt, mixing until thoroughly combined.
Add the powdered sugar on low speed. Add milk or cream a few drops at a time until the frosting is light and fluffy and to your desired consistency.
Frost the cakes. When the frosted cake looks perfect to you, drizzle on as much caramel topping as you want. (If the caramel topping doesn’t drizzle easily, warm it up a bit in your microwave.) After the drizzle is in place, lightly sprinkle on a bit of flaky salt.
How to create a beautiful 3-layer cake:
Remove pans from oven and place on cooling racks for 10 minutes. Then gently remove cakes from pans and allow the cake to cool completely before icing.
Place one of the cakes upside down on your cake plate. Spread frosting over layer. (Not too much.) Place the second layer on the first layer and spread frosting. (Again, not too much. Add the top layer and frost the top and if you would like, the sides of the cake too. Then drizzle on some caramel sauce and sprinkle with flaky salt.
Please note: if your cakes are rounded at the top, slice off a bit of the cake to make the top flat before frosting. If the cake layers start sliding around, stick a couple of long picks through the layers to keep the cake together. Store at room temperature.