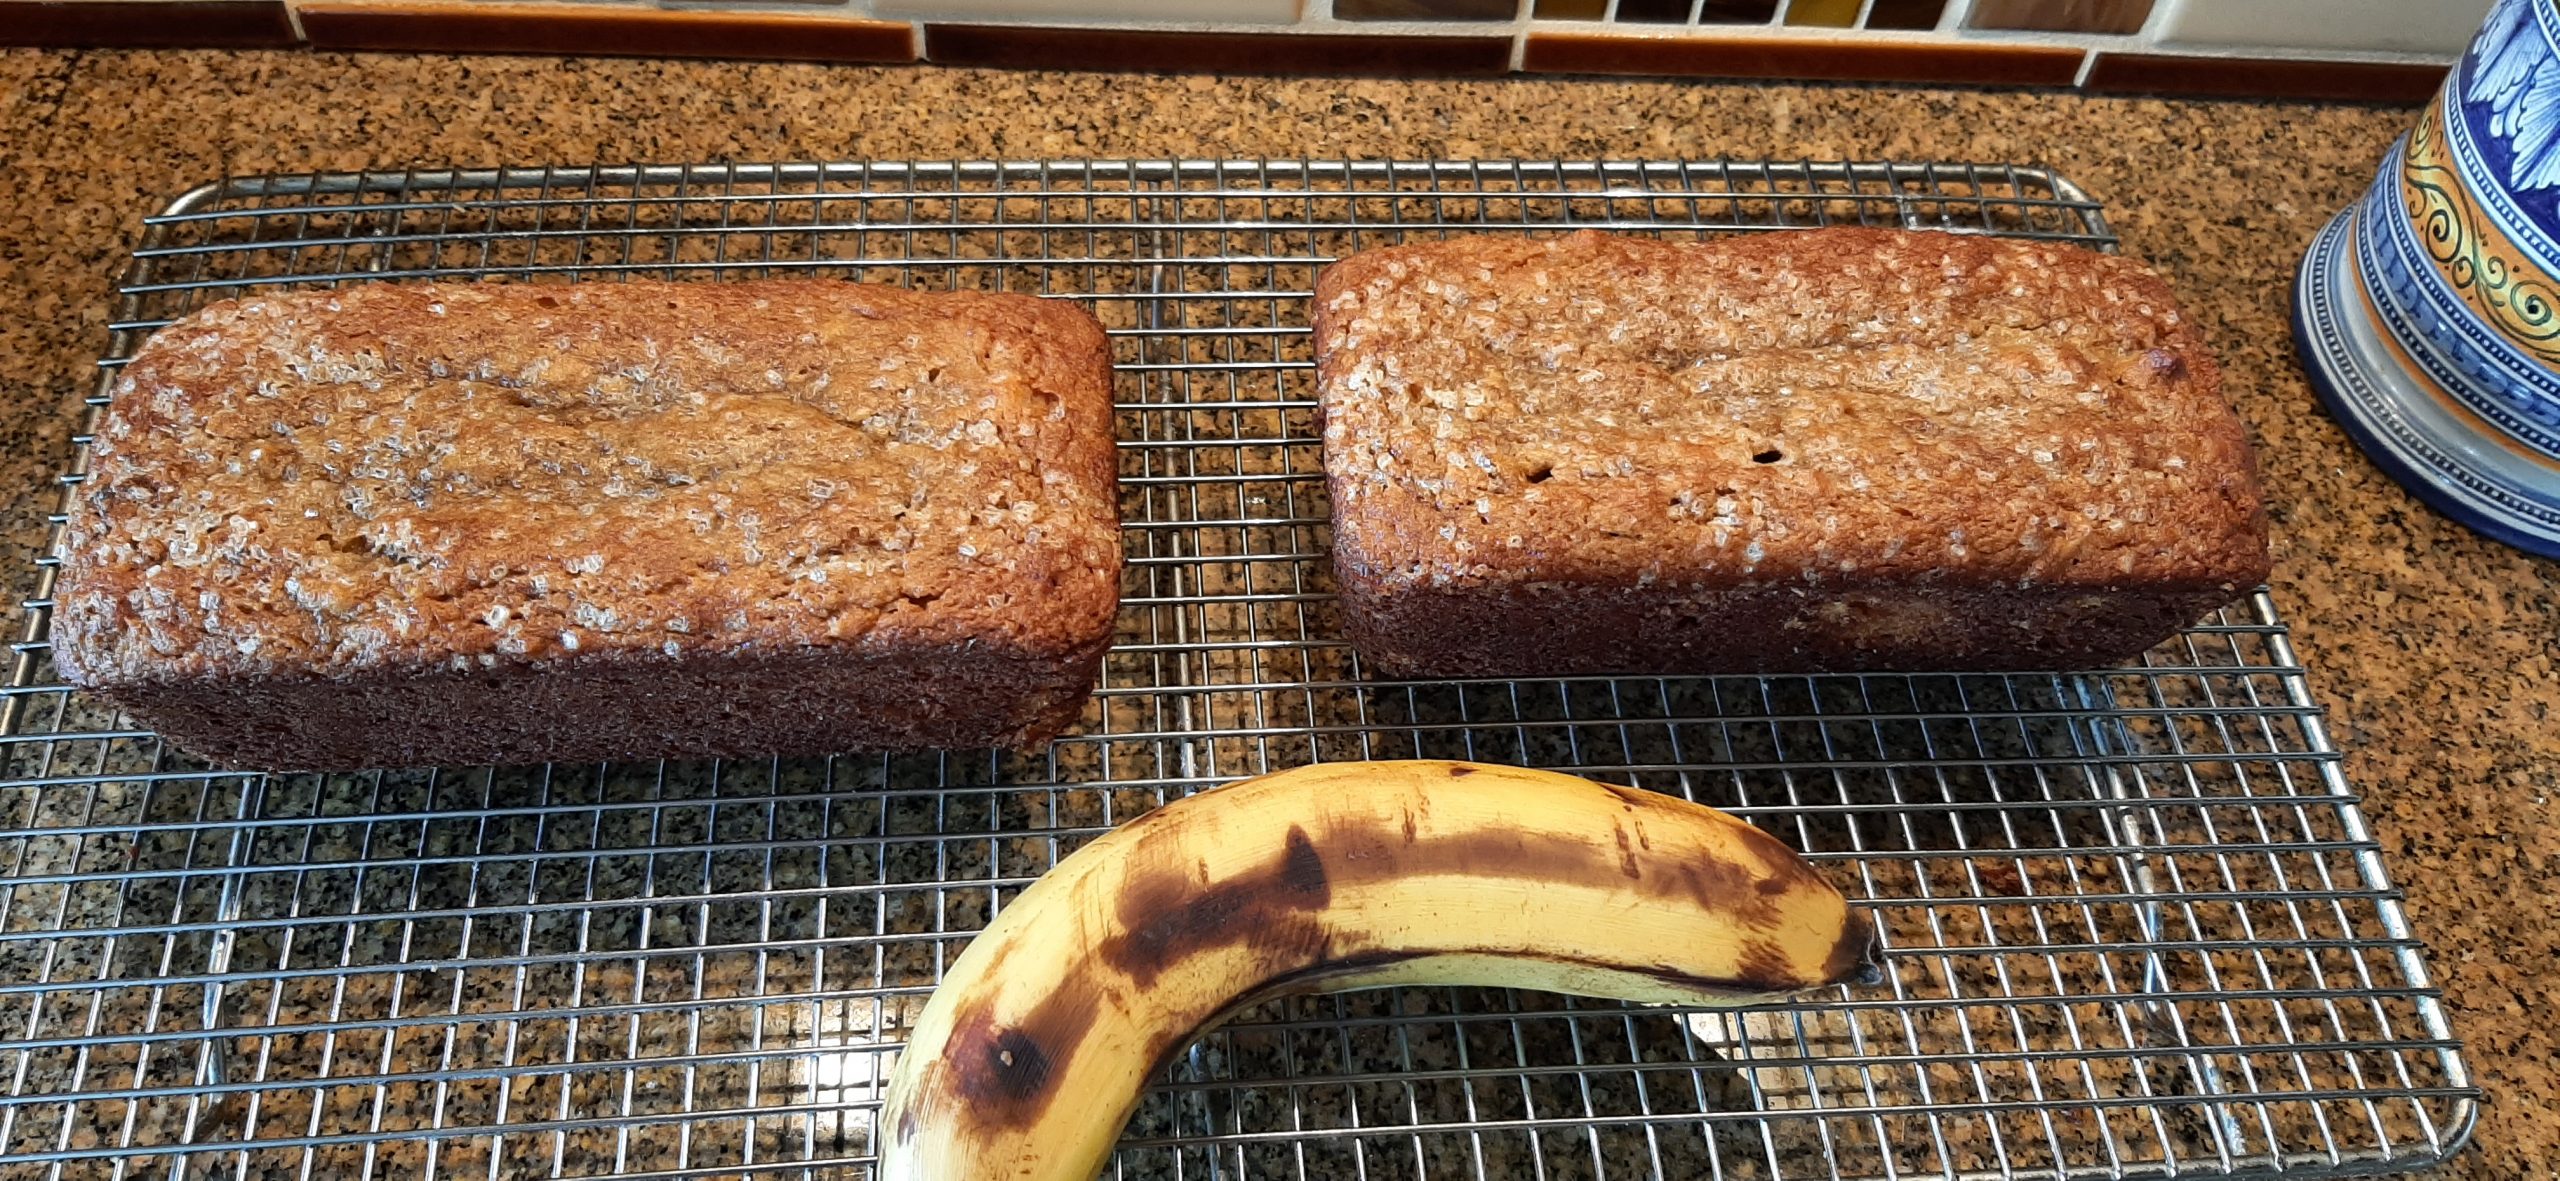
Author Archives: Patti

CRUMBLE TOPPED PUMPKIN SPICE MUFFINS WITH WALNUTS

These muffins came about because I made Curried Pumpkin and Peanut Soup (recipe on this site) for dinner the other evening. What is the connection, you might wonder? Well, the only pumpkin I had in the pantry at the time was a large (29-oz.) can. And all I needed for the soup was two cups. That left me with a surplus of about a cup and quarter of pumpkin. And knowing myself as well as I do, unless I did something with that tiny bit of pumpkin right away, it would undoubtedly reside in a small container in our freezer until which time I decided the freezer needed cleaning out. Then I’m reasonably sure I would throw the pumpkin out just on general principle. So, I’m sure as you can clearly understand why I needed to do something with the extra pumpkin right away. And what better use of pumpkin than in a pie, or bread, or muffins.

So, never having worked up a pumpkin muffin recipe, I decided it was jolly well about time! And the recipe you find below is what I came up with.

And of course, because I have a propensity towards gilding a lily, I figured a crunchy crumble topped muffin would be preferable to just a regular, run of the mill unadorned muffin. And guess what? I was right! Because this recipe makes for a wonderful, tasty treat.

Now I am not going to fool you into thinking that this is a healthy treat. Because you can find hundreds of healthier ways to make a pumpkin muffin. But, if you are like us, we don’t eat muffins very often. So, when we do, we want to go first cabin. (So to speak.) And if this isn’t a “first cabin” muffin, then I never learned to drive when I was 12. And I did learn to drive when I was 12! On my uncle and aunt’s farm in Nebraska. On the narrow lanes that accessed various fields of corn in my parent’s brand new 1956 Ford station wagon. And because I couldn’t go very fast, I couldn’t have hurt myself or the car even if I had tried. The 8-foot stalks of corn were obviously at risk, however. But somehow, I managed to keep the car in the middle of the lanes. And boy oh boy was that fun. I still remember that exhilarating experience. And I still can’t begin to believe my parents actually let me drive the car all by myself. Now, would I have let my own children do anything like that at 12 years old? Heck no. But I’m still glad that my parents were crazy enough to put their trust in me.

So, if you too want to bake a muffin that is sure to please anyone who is lucky enough to sample your largesse, then may I suggest you give this recipe a try. And the crumble part, it would be perfect for just about any type of muffin. Sure, it adds unnecessary calories to any muffin. But hey, life’s short. We need to treat ourselves periodically. So, I say – go for it!

Peace and love to all.  

Crumble Topping recipe:

½ c. unbleached all-purpose flour

¼ c. granulated sugar

¼ c. brown sugar

pinch kosher salt

½ tsp. ground cinnamon

4 T. (½ stick) unsalted butter, slightly melted

Combine the flour, granulated sugar, brown sugar, salt, and cinnamon in a small mixing bowl. Slowly drizzle the butter into the bowl while stirring the mixture with a fork until crumbles form. Do not over-mix. (You want chunks of dough.)

Store in the refrigerator until ready to use. (It will harden.) Then, evenly drop bits of the mixture across muffins just before plopping the muffins into the oven.

Muffin Batter recipe:

1⅔ c. unbleached all-purpose flour, fluffed

½ c. granulated sugar

½ c. light brown sugar

1 tsp. baking soda

1½ tsp. ground cinnamon

slightly rounded ½ tsp. ground ginger

slightly rounded ¼ tsp. ground nutmeg or freshly grated nutmeg

½ tsp. kosher salt

¾ c. chopped walnuts

2 lg. eggs

½ c. vegetable or canola oil

1¼ c. canned pumpkin  

¼ c. whole milk

Line a muffin tin with muffin liners.

In a large bowl mix the flour, granulated sugar, brown sugar, baking soda, cinnamon, ginger, nutmeg, and salt together. (I do this with my right hand making sure all the brown sugar lumps are broken down and evenly distributed.) Then stir in the chopped walnut pieces.

In a medium bowl, whisk the eggs, oil, pumpkin, and milk together until well blended.

Pour the pumpkin mixture into the flour mixture and mix gently just until combined. Do not overmix. 

Using a #16 levered (scant ¼ cup) scoop, plop the pumpkin mixture into the paper liners filling them a little over ¾ full. Just before baking, sprinkle evenly with crumble mixture.

Bake in a pre-heated 375-degree oven for about 20 minutes or until a toothpick inserted into the center of a muffin comes out clean.

Remove from oven and allow to cool for 5 minutes in the pan, then transfer to a wire rack to cool completely.

The muffins will stay moist for up to 5 days. Keep them in the fridge in an airtight container. Bring them to room temperature before serving. The muffins can also be frozen for up to 2 months. Makes 16 muffins.


SOFT SOURDOUGH CORNMEAL DINNER ROLLS (added yeast)

OK, I get bored easily. When it comes to food that is. Everything else, well suffice it to say I truly haven’t been bored since I was about 12. And then only during the summer because I had two younger brothers who bugged me, and I had read all the books at our local branch of the King County library deemed appropriate for my age.

So, the other evening when I decided to serve chili for dinner, I decided to prepare some kind of new bread offering as an accompaniment.

I began by searching the internet for inspiration. I knew I wanted to include some sourdough starter and cornmeal, but my mouth was really wanting more of a soft dinner roll. Basically, I wanted a fusion roll. (After all, it’s very hip to prepare fusion cuisine these days. So, why not a fusion bread somewhere between sourdough bread and cornbread? Just proves I can be just as cool and trend conscious as the next dame given the right impetus!)

Anyway, I found this wonderful recipe on the zestysouthindiankitchen.com site. Well, this recipe with a couple of minor changes, that is. And the rolls turned out just what my mind envisioned. And my taste buds craved. Well, almost. The rolls were a bit sweeter than I like, even though I had already reduced the amount of sugar from Swathi’s original recipe. So, below you will find the sugar amount given in a range. Next time I will use only 2 teaspoons of sugar. But if you like sweeter rolls, go for the larger amount of sugar.

Well, I’m off to do battle with WordPress (WP), my self-publishing blogging platform. (Think of WP as a factory for making web pages.) It appears that people who signed up to receive automatic notification of new posts on their email are no longer receiving notice. And I can’t always get pictures transferred from my computer to my posts. Grrrrrr. So, I am at a bit of an impasse as to how to get my problems resolved. There is really no one I can just call for assistance. Well, that is, without an outlay of dollars and a considerable amount of frustration! (On both sides I might add! Because I am definitely not what anyone would consider a “tech savvy person”. In fact, quite the opposite.)

In the meantime, if you have signed up for automatic notification, just go to my site every few days or whenever you have nothing better to do, to find out what I have been up to and to view new recipes hot off the press.

Well, Mr. C. had a gig last night and another one tonight. So, that’s 2 days in a row that he will be keeping me up past my bedtime. But that’s just fine with me. Anytime I can spend an evening listening to Andy play with others to make really good live music, I am a happy camper. My wish for you is that you too get to experience something you truly enjoy as often as you wish. (Or even a little bit more often than you think you can reasonably handle.) Because this is it dear friends. And we only go around once.  

Peace and love to all.

½ c. + 2 T. sourdough starter (either fed or discard)

1½ tsp. active dry yeast

1 c. whole milk

2 tsp. – 2 T. granulated sugar (depends on how sweet you like your dinner rolls)

1¼ tsp. kosher salt

4 T. (½ stick) unsalted butter, room temp.

⅓ c. fine cornmeal

2 T. potato flour, instant mashed potatoes, potato flakes, or leftover mashed potatoes

2⅔ c. unbleached all-purpose flour, or more as needed

veggie oil (to grease the bowl)

1 sm. egg + 1 T. water for egg wash

In the bowl of your stand mixer, mix the sourdough starter, yeast, milk, and sugar together. Let sit for 5 minutes. Then add the salt, butter, cornmeal, potato flour, and 2 cups of the all-purpose flour. Using the dough hook, knead the dough until soft and elastic. Add additional flour as needed. (The dough should form a ball around your bread hook with just a bit of dough sticking to the bottom of the bowl.)

Pour a bit of oil around the dough in your mixing bowl, and using a stiff plastic spatula and your hands, form the dough into a lightly greased ball. Cover the bowl with plastic wrap and let the dough rise for 60-90 minutes or until doubled in bulk.

Gently deflate the dough and divide the dough into 10 rolls (or how many ever you want). Place on a parchment paper lined baking sheet. (The dough will be sticky, so a bit of butter on your hands helps you form the dough into balls.)

Cover and set aside for another 45-60 minutes. While the rolls rise, whisk the egg and water together. After the second rise the rolls should be puffy but not to the point of being doubled in volume.

Carefully brush the rolls with the egg wash and bake in a pre-heated 350-degree oven for 25-30 minutes or until golden brown. The internal temperature should read around 200-degrees.

Remove from oven and allow to cool before serving.

Great with soup, chili, or stew. Or any old time for that matter! Absolutely delicious sliced into two halves and toasted for a breakfast treat. Jam or honey is fabulous on these rolls.

CHICKEN SAUSAGE CHILI   

Last evening, I served this chili to our dear friends Mark and Vicki and of course Mr. C. and I enjoyed our share too. Mr. C. had asked for chili the day before, and being the kind and submissive wife that I am (just joking about the submissive part), I acquiesced. Actually, I was delighted to make chili for dinner, providing me once again with an opportunity to explore the wonderful world of all things chili. Chili, as it happens, is one of our all-time favorite dishes. So, to the internet I proceeded. And I found this recipe on the onceuponachef.com site. (One of my favorite cooking sites BTW.) I made a couple of minuscule changes, but not enough to never mind. So, the person you have to thank for this fantastic recipe is Jenn Segal.

Now one of the things I especially liked about this recipe is that it is chock full of healthy ingredients. And of course, the fact that this chili is mighty delicious didn’t hurt the cause. The flavor is mellow enough that I’m sure children would love this chili as much as the older folks at table. And when served with some type of bread product like corn bread, crusty sourdough rolls, or Soft Sourdough Cornmeal Dinner Rolls (to be posted in the near future), this makes for a simple dinner fit for company.

So, if you too love chili but would appreciate a new recipe that would thrill and delight your family, I suggest you give this recipe a try. It’s simple to prepare and is even more delicious the next day.

Well, that’s it for now. Sorry about not posting any new recipes for a the last couple of weeks, but first we were away for a week, and then upon our return I decided it was time to start booking for our fall adventure. So, I’ve been preoccupied this last week with booking air tickets, rental car, and overnight accommodations for our upcoming trip to Greece. And if you have ever been the planner of a month-long adventure, especially to a country you have never visited, you are aware of how much research must be conducted before you even begin spending your children’s inheritance. But all reservations have been confirmed and I can relax and get back to my daily routine of researching recipes, preparing new recipes, sharing the recipes that work out, and hitting the delete button for those that I wouldn’t share with my worst enemy. (Actually, I don’t have any worst enemies. But even if I did, I still wouldn’t share some of the regrettable recipes I have tried with them!)

And as always, peace and love to all.

1 T. extra virgin olive oil

1 lb. bulk chicken sausage or ground chicken  

1 med. yellow onion, chopped  

1 stalk celery, diced (plus leaves)

1 red, orange, or yellow bell pepper, diced

3 garlic cloves, finely minced

1½ T. chili powder

1½ tsp. ground cumin

1 tsp. ground coriander

pinch crushed red pepper flakes  

½ tsp. dried oregano

½ tsp. kosher salt

freshly ground black pepper

1 (28 oz.) can tomatoes (preferably Italian tomatoes) (I use Cento brand crushed tomatoes)

1 c. water

1 heaping teaspoon chicken base (I use Better Than Bouillon Chicken base)

½ tsp. sugar

2 (15 oz.) cans Cannellini or other white beans, drained and rinsed

sliced green onion, garnish (opt.)

sour cream, garnish (opt.)

Heat the oil in a large, covered pot or Dutch oven over medium heat. Add the chicken sausage and cook until lightly browned. Break the sausage up while it cooks. Add the onion, celery, and diced bell pepper and cook, stirring frequently, until onion softened, 8 to 10 minutes. Add the garlic and cook for about one minute more.

Add the chili powder, cumin, coriander, crushed red pepper flakes, oregano, salt, and black pepper.  

Add the tomatoes, chicken broth, and sugar. Bring to a boil, then reduce the heat to low, and simmer covered for about one hour, stirring occasionally.

Stir in the Cannellini beans and simmer, covered for another 50 minutes more, or until the meat is tender and the flavors are well combined. Taste and adjust seasoning just before serving.

Great served with corn bread or my soon to be posted recipe for Soft Sourdough Cornmeal Dinner Rolls.

WILTED SPINACH (OVER CHEESY GRITS)

Yesterday when I was contemplating what to serve with the fresh catfish Andy had brought home from the grocery store, I decided to go all New Orleans for dinner. But then I thought maybe something green would look nice on our plates. I remembered that I had just a small amount of baby spinach happily residing in our fridge. And wouldn’t it serve nicely as that needed bit of color with the cornmeal coated catfish (yellow) and Cheezy Grits (see recipe below) (also pale yellow) that I planned to serve. But then, how to serve the spinach? I didn’t really have enough spinach to serve as a real side dish. Then I thought, maybe a quick stir fried spinach would look and taste good on top of the grits. So, that’s just what I did. And it worked. Made for tasty eating and a lovely presentation.

I have provided you with the recipe for the grits I served last evening as an example of how this spinach recipe can be used. As for the catfish, it was OK. But once again, a fabulous recipe for oven baked “fried” fish has escaped me. I will probably continue to try producing a delicious and crispy oven fried fish fillet until I can no longer tell the difference between a wooden spoon and a potato peeler. But after all the times I have imagined winning such a daring feat, just to have my good intentions shattered, I still have a thread of hope. And as the old saying goes – hope springs eternal. The problem is that I don’t “spring” any longer. I’m more of a “shuffler” at this point in my life. But ever the optimist, I’m sure there is a perfect recipe for oven fried fish out there just waiting to be discovered. And I’m going to find it and share it with you as soon as possible. (Don’t hold your breath!)

In the meantime, do make wilted spinach. It’s delicious and super easy to prepare. As are the grits.

And as always, peace and love to all.

1 tsp. extra virgin olive oil

1 garlic clove, thinly sliced

2 big handfuls baby spinach leaves

kosher salt

freshly ground black pepper

Heat a small skillet over medium-high heat. When hot, reduce heat a bit and add the olive oil and garlic. Sauté the garlic for about 2 minutes, or until the garlic is golden on both sides.

Add the spinach and stir until the spinach is coated with the oil. When the spinach is just starting to wilt, after about 1 minute, remove from heat and season very lightly with salt and pepper. Serve as a side veggie or over the top of grits, polenta, or any of your favorite grains.

And of course, you can make a double, triple, etc. batch of this spinach. Do remember to use a larger pan, however.  

CHEESY GRITS

1½ c. whole milk  

1 c. water

¾ tsp. kosher salt

freshly ground black pepper

½ tsp. granulated garlic  

½ c. + 2 T. stone ground corn grits – not instant or quick-cooking grits 

3 T. unsalted butter

1 c. grated sharp cheddar cheese (or half cheddar, half pepper Jack)

Mix the milk, water, salt, black pepper, and granulated garlic in a covered sauce pot. Set over medium-high heat and bring to a boil.

Once boiling, gradually whisk in the grits, until there are no clumps. Lower the heat to medium-low. Cover and simmer for 12-20 minutes, (depending on the package instructions), stirring occasionally.

Once the grits seem soft and thick, stir in the butter and grated cheese. Taste, then adjust seasonings as needed.

If the grits are thicker than desired, stir in ¼ – ¾ cup hot water. The grits will continue to thicken as they cool. Serve topped with Wilted Spinach.


PEAR AND BLUE CHEESE SALAD  

This is one of the easiest to prepare and best tasting salads you will ever have the pleasure of devouring or serving to others. (Sharing, is actually optional. I should know because I swear, I could eat this whole salad all by myself. Well, at least my taste buds think it’s a good idea. My stomach and brain on the other hand, are not quite up to the challenge. But believe me, if I could, I would! And guilt be damned!)

Anyway, next time you need a really delicious salad to impress the pickles out of someone (even if it’s yourself), I suggest you follow this recipe to the letter. It’s just a fabulous mix of ingredients.

Well, that’s it for today. We are heading out of town for a few days leaving our home and cats in the capable hands of our dear friend Peggy. We will be celebrating our 30th wedding anniversary with Andy’s best man (Jim) and his wife (Margo). It only makes sense to celebrate with these two fabulous people because they went with us on our honeymoon. Along with my maid of honor Linda, who BTW gave me this wonderful recipe, we all had a great time skiing at Whitefish Mountain Resort (think Big Mountain) north of Whitefish, Montana.

And no, we are not going skiing again to celebrate this momentous occasion. Our knees simply aren’t up to swooshing down a mountain side any longer. So, we are going in the opposite direction. We are going to the coast. Where we will sit in comfy chairs at a condo, with good books in hand and try to remember to occasionally look outside to check the condition of the sky and water. Then, at about 5:00 pm every evening, we will rally ourselves enough to enjoy a pre-dinner drink before setting off to dine at one of the local eateries. That’s about as active as we plan to be except for the occasional walk along the town’s short board walk. Or into one of the small towns along the coast to check out any art galleries that might possibly be open in the off season. Or visit the local bakery for a little something. We might even go to a movie one evening, if there’s anything playing that is of any interest at all. But that’s about it!

But even if this sounds terribly sedentary to you, to us it sounds like a perfect way to celebrate. However anyone chooses to mark a special occasion, they should always be honored. Because milestones matter. People matter. And to my thinking, special attention should always be paid to birthdays, anniversaries, achievements earned, etc. We only go around once my friends. And the more we can celebrate with each other, the better it enriches each of our lives.

Peace and love to all.  

3 T. raspberry vinegar

3 T. honey

⅓ c. extra virgin olive oil

tiny pinch kosher salt

freshly ground black pepper

8 very thin slices red onion, separated

12 c. coarsely chopped red leaf lettuce

1-2 bosc pears, thinly sliced

⅓ c. toasted chopped walnuts

⅓ c. crumbled blue, Gorgonzola, or Roquefort cheese

Whisk the vinegar, honey, olive oil, salt, and pepper together in a large salad bowl. Add the red onion slices.

Just before serving, gently toss the lettuce, pear slices, walnuts, and blue cheese together with the dressing and onions. Serve immediately.   

OVERNIGHT PAIN DE CAMPAGNE (FRENCH SOURDOUGH COUNTRY BREAD) – added yeast

And you’re correct, I already have a recipe for Pain de Campagne on this site. And it too makes for wonderful eating. But it’s not a recipe for overnight bread. And sometimes what I require is for the dough and first rise to happen one day, and the baking of said dough to occur the next day. Because somewhere along the line we have become super busy. And our social life recently seems to have spun a bit out of control. Now do not get me wrong. I love being involved with Andy’s musical events and get-togethers with friends. But our bustling schedule often leaves me with time constraints. And who doesn’t have time issues if they are busy living a full and rich life? So, concessions must be made. And preparing the bread dough on day 1 and baking the bread the next day is an allowance I am gladly willing to make if it results in homemade bread. So, you will undoubtedly be seeing more recipes from me that feature 2 day breads.

There are excellent articles provided by the fine people at the King Arthur Baking Company that explain the how and why of making bread in more than one day. Two articles that I was lucky enough to find were most beneficial. “Why multiday breads are actually the easiest breads of all” and “Can I refrigerate my bread dough and bake it later?” I suggest you read these two articles if you also find yourself in the position of not having a chunk of time long enough to devote to baking bread. I learned a lot from these two articles, and plan to use my newfound knowledge with some of my favorite same day bread recipes.

Now about this bread. It’s really good. It possesses enough flavor from the small amounts of rye and whole wheat flavor to be interesting. The texture is a bit chewy and perfect for wiping up any gravy or sauce on your plate that might happen to require mopping up. (So much more dignified than licking your plate or bowl.)  

So, if you too are a bread lover, give this recipe a try. And if you do bake bread routinely and have yet to bake a loaf in a cast-iron Dutch oven* or clay baker*, then I encourage you to seek out a cast-iron Dutch oven at your earliest convenience. And if you happen to already own a 5.5 to 6-quart cast-iron Dutch oven, you are set to go. If not, a garage sale, Good Will, your local thrift store, or brand new from William-Sonoma purchase would suit just fine. Plus, you can always use your Dutch oven to make stew and other delectable dishes. So, a very versatile kitchen tool to own.

And baking bread is an easy and cost effective way to ensure your kitchen smells wonderful. Because I’m telling you the truth, nothing smells better than bread in the oven. If I go to heaven, and that’s a big “if”, you realize, I want my room to smell like baking bread 24/7. I mean really, what could be more heavenly!?

As always dear friends, peace and love to all.

1¼ c. warm water

1 c. sourdough starter discard

1½ tsp. active dry yeast

1½ tsp. kosher salt

2 T. rye flour

6 T. whole wheat flour 

1 T. vital wheat gluten flour

3 c. bread flour, more or less

extra virgin olive oil 

Place the warm water, sourdough starter, and yeast in the bowl of your stand mixer. Let sit for 5 minutes. Add the salt, rye flour, wheat flour, vital wheat gluten flour, and 1 cup of the bread flour. Mix together with your bread hook. Let sit for 5 minutes.

Add enough remaining bread flour to make a soft, elastic dough. Dough should ball up around the bread hook, leaving just a bit stuck to the bottom of the bowl. The dough should be a bit sticky, but not tacky. Pour a bit of oil in the bowl and using your hands and a stiff rubber spatula, form the dough into a ball, completely greased with the oil.

Cover with plastic wrap and allow to rise until doubled in volume, about 90 minutes. Punch down once during this rising.

Cover a small cookie sheet with a rectangle of parchment paper. (Use a large enough piece of parchment paper to allow for lifting the dough into a Dutch oven or clay baker.) Gently shape the dough into a ball. Place the dough ball on the parchment paper. Dust with a bit of flour and place in refrigerator overnight. (No need to cover the dough.)

Remove the dough the next day and slash an “X” on the top. Allow the dough to sit on the counter for about an hour while you pre-heat your oven to 500-degrees. If you are using a Dutch oven or clay baker, place it along with the lid on the middle rack of the oven at the same time you start your oven pre-heating. You want your clay baker or Dutch oven to get hot right along with the oven.

Remove the Dutch oven or clay baker from the oven being very careful not to burn yourself. Carefully, using the sides of the parchment paper, lower the dough into the hot Dutch oven or onto the base of the clay baker. Cover and carefully return to the oven. If you are using a baking sheet, just place the baking pan in the oven.

If you are using a Dutch oven or clay baker, bake covered for 30 minutes, then uncover and allow to finish baking. Total baking time is about 40-minutes. The top should be a lovely golden brown. The internal temperature should reach at least 205 degrees. If using a baking pan, check if your bread is done after 40 minutes.

Remove from oven and carefully lift the parchment paper and bread out of the clay baker or Dutch oven onto a wire rack to cool. Cool completely before slicing.

*The high heat inside the Dutch oven or clay baker allows the water inside the dough to evaporate. Because you have the lid on top, the steam is trapped inside and creates a hot and steamy environment. This helps your bread to stay moist and flexible so it can rise and expand easily. The humid environment also promotes a crispy and shiny crust.

CREAMY BLUE CHEESE PASTA WITH MUSHROOMS, SPINACH, AND WALNUTS

When do I not love a great pasta dish? Never. Actually, I should be the poster child for pasta lovers everywhere. (I wonder where I go to apply for the position?) Anyway, last evening I wanted to serve a quick and easy main dish. And in doing so, I really wanted to use up the already cooked pasta I had in the fridge. Along with some blue cheese that was quickly becoming a darker and unhealthier shade of blue than God intended, a few button mushrooms heading towards extinction, and some heavy cream past its pull date. What immediately sprang to mind was a blue cheese sauce over pasta. But how to incorporate the other ingredients?

I immediately remembered that walnuts and blue cheese were practically invented to be used together. And mushrooms? Why not? And when did heavy cream ever hurt a sauce? And for a small nod towards eating healthy, some roughly chopped fresh spinach. (I use spinach a lot in dishes, because it’s green, it’s chock full of vitamins, and it comes pre-washed in a nice plastic container.)

So, that’s the history of this pasta dish. Quick and easy to prepare and darned yummy if I do say myself.

It’s semi-sunny here in our part of the world right now. I can’t see any snow-capped mountains because of some low-lying clouds hiding them from view, but Port Susan Bay is looking calm and lovely. Andy has a big band gig tonight and I’m going along for the ride. And of course, for the music. And to watch the dancers. Not to mention that we will be having dinner out after the dance. As much as I love to cook, I also appreciate it when someone else places a plate of food in front of me. And I always remember to say thank-you. Just like Mr. C. always says thank you to me after every meal I set in front of him. It’s called common courtesy. Granted, an old-fashioned concept, but one I find extremely endearing. May you too find common courtesy a routine part of your everyday life.

Peace and love to all.

3 T. unsalted butter, divided

½ lb. button mushrooms, sliced

½ c. finely diced onion

2 garlic cloves, finely minced

½ tsp. kosher salt

freshly ground black pepper

1 T. all-purpose flour

1 c. whole milk

½ c. heavy or whipping cream 

1 c. blue cheese crumbles, or more to taste

6 oz. pasta (your choice) cooked al dente (save some of the water)

2 c. roughly chopped baby spinach

1 c. toasted chopped walnuts

Melt 1 tablespoon of the butter in a large saucepan or Dutch oven. Add the mushroom slices and cook until the mushrooms are nicely browned. Remove to a small bowl and set aside.

Add the remaining 2 tablespoons of butter to the pan and sauté the onion until it is soft. Add the garlic and cook for another minute.

Add salt, pepper, and flour to the pan. Mix all together and cook for about a minute. Then slowly stir or whisk in the whole milk and cream. Cook until slightly thickened. About 2-3 minutes.   

Add the crumbled blue cheese. Simmer gently until the blue cheese is almost melted. Then stir in the reserved cooked mushrooms, al dente pasta, and spinach. Allow to simmer for a couple of minutes until the baby spinach is a bit wilted.

Taste and add additional blue cheese crumbles or adjust seasonings. If the sauce is too thick, stir in a bit of pasta cooking water.

Just before serving, stir in the walnuts, reserving a few for garnish.  


VIEUX CARRÉ COCKTAIL

A Vieux Carré (pronounced in the Cajun and Creole style “vyur kaa ray”) is a classic cocktail straight from 1930s New Orleans. The name is French for “old square”, in reference to the city’s French Quarter neighborhood.

The cocktail originated with Walter Bergeron, a bartender at the Carousel Bar in Hotel Monteleone, New Orleans. The drink remains a specialty of the establishment and sipping one at Monteleone’s spinning Carousel Bar is said to be a memorable experience.

So, last evening when Mr. C. made one of these drinks, he offered me a sip. Well, as much as I am not a whiskey lover or connoisseur, I thought the drink tasted OK. But Andy was very pleased with the result. In fact, he deemed it “a winner”.

So, once again the resident mixologist has perfected another fancy drink from which to tantalize the taste buds of guests or enjoy as a before dinner cocktail for himself. And although I deemed the tiny sip last evening OK, I will never forsake Tanqueray gin for any drink containing whiskey.

But isn’t it fun for Mr. C. to have choices. And whereas I am always trying out new food recipes, Andy takes just as much pleasure in perfecting new drink recipes. What a team, eh? The salt n’ pepa of Lightning Way.              

Well, that’s it for now. Mr. C. is in Seattle rehearsing for a friend’s PhD recital this weekend followed by a piano lesson. Then this evening a board meeting of our homeowner’s association. So, in between, I need to find something for him to eat. And since I have no idea at this junction what that “something” might be, I best put on my thinking cap and get with the program.

I hope you enjoy this new drink recipe. Although even one tiny sip will never again pass my lips, I’m sure Mr. C. will be enjoying this cocktail for many years to come. And if he says this drink is delicious, you can count on it being just that! (If you’re a whiskey lover, that is!)

As always, peace and love to all.

1 oz. rye whiskey
1 oz. cognac

1 oz. sweet vermouth

1 bar spoon Bénédictine*

2 dashes Peychaud’s bitters**

orange zest, opt. garnish

maraschino cherries, garnish (Andy uses Tillen Farms Bada Bing Cherries Pitted & Stem-On or Luxardo Maraschino Cherries in his drinks)

Pour all ingredients into a mixing glass with ice cubes.  Stir well.  Strain into a chilled cocktail glass.

Serve straight up or over ice cubes. Garnish with orange zest and one or two maraschino cherries.

*Benedictine is a rich, aromatic, floral, and herbaceous liqueur that has notes of clove, honey, orange peel, and saffron.

** Peychaud’s Aromatic Cocktail Bitters is made with pure grain alcohol infused with flavorings including bitter gentian root, anise, and mint and has a pungent, woody flavor. It is also unique among aromatic bitters for its tart and fruity flavors, with lots of rhubarb-like vegetal twang and the sweet juiciness of cherry candy. Synonymous with New Orleans cocktail culture, it is an essential ingredient in a Sazerac or Mint Julep cocktail.  

SAVORY OVERNIGHT SOFT DINNER ROLLS    

There is not one person I know who doesn’t enjoy a great bit of homemade bread with dinner. Not one! But because most of us don’t eat bread with dinner every evening, dinner rolls especially have become kind of a specialty item with nostalgic overtones.

Thick slices of homemade bread or dinner rolls were always served at dinner when I was a child, along with coffee for the adults and milk for us kids. I’m sure milk is still served to kids routinely, but as far as coffee and some type of bread product at each and every dinner, I think things have changed dramatically in that regard. At least coffee is never served with dinner here at Chez Carr, and bread only sparingly.

Personally, I would love to have bread with every meal. But realistically eating bread 3 times a day is not the best choice for continued good health. We almost always have some type of bread product with our easy over eggs for breakfast. But lunch and dinner we try to be good. Doesn’t always work out that way. Because what would I be thinking if I didn’t serve cornbread with chili, for example. (You see how this works? How I justify a bread product with dinner occasionally?)

So, I guess what I’m trying to say is that for me bread is a treat. And I love it when bread is served in a restaurant. Because it’s usually pretty darn good bread. So, realizing I’m not any different than most people, I love to serve homemade bread to dinner guests. The menu doesn’t always warrant a side of bread. But when it does, I try to make it happen.

So, if you too enjoy serving bread to your family and friends, I hope you enjoy this slightly altered recipe that I was lucky enough to find on the sallysbakingaddiction.com site. (Great site BTW!) Easy rolls to prepare. No special ingredients required. Just a perfect, soft, buttery, slightly herby flavored delight. And a great recipe for entertaining because the shaped rolls must spend some quality time in the refrigerator. So, making the dough and shaping the rolls the day before is a great way to free up some of your time when you are preparing a meal for guests.

This recipe is just a bit different than the Overnight Soft Herb Rolls recipe already on this site. So, now you have a choice. And who doesn’t appreciate choices? Unless of course, it’s a choice between a freshly baked plain croissant or a lovely pain au chocolat croissant. That my friends, is an awful choice to have to make!

Peace, love, and happy baking to all.

1 c. whole milk, warmed to about 110-degrees

2½ tsp. or 1 pkg. active dry yeast 

2 T. granulated sugar

1 lg. egg, at room temperature

¼ c. (½ stick) unsalted butter, divided

1 tsp. kosher salt

1 T. finely chopped rosemary

1 T. finely chopped fresh basil

1 T. finely chopped fresh parsley

1 T. minced fresh chives

2 tsp. minced garlic

3 c. bread flour, fluffed, plus more for work surface

veggie oil

coarse sea salt, for topping

Whisk the warm milk, yeast, and sugar together in the bowl of your stand mixer. Cover and allow to sit for 5 minutes.  

Add the egg, 2 tablespoons of the butter that has been melted and cooled to lukewarm, salt, rosemary, basil, parsley, chives, garlic, and 1 cup of  flour. Using your dough hook, mix on low speed for 30 seconds, scrape down the sides of the bowl with a rubber spatula, then add the remaining flour. Beat on medium speed until the dough comes together and pulls away from the sides of the bowl, about 2 minutes. If the dough seems too wet add more flour a little bit at a time. The dough should be soft and a little sticky. Knead the dough for an additional 3 full minutes with your mixer.  

Pour a bit of oil into the mixing bowl. Using a stiff rubber spatula and your hands, shape the dough into a lightly greased ball.  

Cover with plastic wrap or a clean tea towel. Allow the dough to rise on your counter for 1-2 hours or until double in size. (Takes about 2 hours for my dough to rise.) 

Liberally butter a 9×13-inch baking pan.

When the dough is ready, punch it down to release the air. Shape the dough into 24 small balls. (Just eyeball it– doesn’t need to be perfect!) Arrange in prepared baking pan.  

Cover the shaped rolls tightly with plastic wrap and refrigerate overnight. Remove the rolls from the refrigerator, keep covered, and allow to rise on the counter for about 2 hours before baking.  

Bake in a pre-heated 350-degree oven on a rack towards the bottom for 23-27 minutes or until golden brown on top. If you notice the tops browning too quickly, loosely tent the pan with aluminum foil.

Melt the remaining 2 tablespoons of butter just before the rolls are due to come out of the oven. Remove the rolls from the oven when they are golden brown, and the internal temperature reaches at least 190-degrres on an instant read thermometer.

Immediately brush the hot rolls with the melted butter and lightly sprinkle the tops with sea salt.

Cover leftover rolls tightly and store at room temperature for 2-3 days or in the refrigerator for up to 1 week.


OVERNIGHT WHOLE WHEAT DINNER ROLLS

For last Sundays before concert meal in our home, to be served at exactly 1:15 pm, I prepared these whole wheat rolls and my soon to be published recipe for Savory Overnight Soft Dinner Rolls. Both offerings were well received. And the glorious thing, besides the ease of preparation and wonderful taste of both of these rolls, is that I must make and shape the rolls the day before I plan to serve them. And if you have ever made a full dinner for a large number of people, you know that every dish cannot be made the day of the event. So, every part of every dish that can be made ahead, must be made ahead. So, all I had to do Sunday morning was take the 2 9×13-inch pans out of my fridge, let them sit for about 1½ hours on the counter to come to room temperature (and perhaps rise a bit more), and then throw the pans in the oven. Done deal!

It always amazes me that people question whether I indeed made whatever type of bread I am serving. And I feel a bit bad when I have to admit that bread is just so darn easy to make. And also, so bloody forgiving. With cake, for example, you must measure the ingredients to a gnat’s eyelash. But with bread dough, you can fling just about anything into the mix, and it comes out fine.

So, as with this recipe, I added more butter than originally called for, less sugar, a tablespoon of vital wheat gluten*, and used 2 types of whole wheat flour. And the resulting dinner rolls were soft and delicious. Just enough whole wheat taste to be perfect when spread with soft butter. And as a roll to be eaten with breakfast liberally spread with either jam or honey, there is simply no equal.

So, next time you need a dinner roll that is perfect with just about any dish, give this simple recipe a try. You will not be sorry. Except of course when all the rolls have been eaten.

And as always, peace and love to all. 

1 T. active dry yeast

1¼ c. warm water

¼ c. granulated sugar

6 T. melted butter, cooled to lukewarm

1 lg. egg

1½ tsp. kosher salt, plus more for sprinkling

1 T. vital wheat gluten

2 c. whole wheat flour

1¾ – 2 c. whole wheat pastry flour

veggie oil

1 egg white, beaten

In a large stand mixer fitted with a dough hook, dissolve yeast in warm water. Let sit for 5 minutes, then mix in the sugar, melted butter, egg, and salt.

With your mixer running on low, add the vital wheat gluten and the 2 cups of whole wheat flour and about a 1¾ cups of the whole wheat pastry flour. Increase speed to medium and keep mixing until dough pulls away from sides of bowl and is smooth and elastic.  (If dough seems too sticky, add 1 tablespoon of flour at a time until dough pulls away from the sides of the mixing bowl.)

Add a bit of veggie oil to the bowl, and using your hands and a stiff rubber spatula, form the dough into an evenly greased ball. Cover bowl with plastic wrap and let dough rise in a warm place 1½ to 2 hours or until doubled in size.

Once dough is doubled, punch down and divide into 20 pieces. Shape each portion into a ball and place balls in a buttered 9×13-inch baking pan. Cover pan with plastic wrap and refrigerate overnight.  

Remove dinner rolls from refrigerator, remove the plastic wrap, cover with a clean tea towel, and let sit on your counter for about 1½ hours. Brush with the beaten egg white and lightly sprinkled with kosher salt just before placing in the oven.

Bake rolls in a pre-heated 375-degree oven for 20-23 minutes or until golden brown. The internal temperature of the rolls when taken with an instant read thermometer should be at least 190-degrees. (And yes, with bread of any sort, I always take the internal temperature before declaring it ready to be removed from the oven!)

* Vital wheat gluten is not technically flour. But rather a flour-like powder that contains nearly all gluten and minimal starch. It is produced by hydrating wheat flour, which activates the gluten protein, and then processed to remove everything except the gluten. Afterwards it is dried and ground back into a powder.

Since vital wheat gluten is a concentrated wheat protein, just a tablespoon or two in your bread dough can improve its texture, elasticity, and create a better crumb and chewiness in the final product. Vital wheat gluten is especially helpful for bread recipes using low-protein flour varieties, such as whole wheat or rye flour. It is also good for breads containing mix-ins like nuts or fruits. Vital wheat gluten helps provide more structure and stability to the final product.