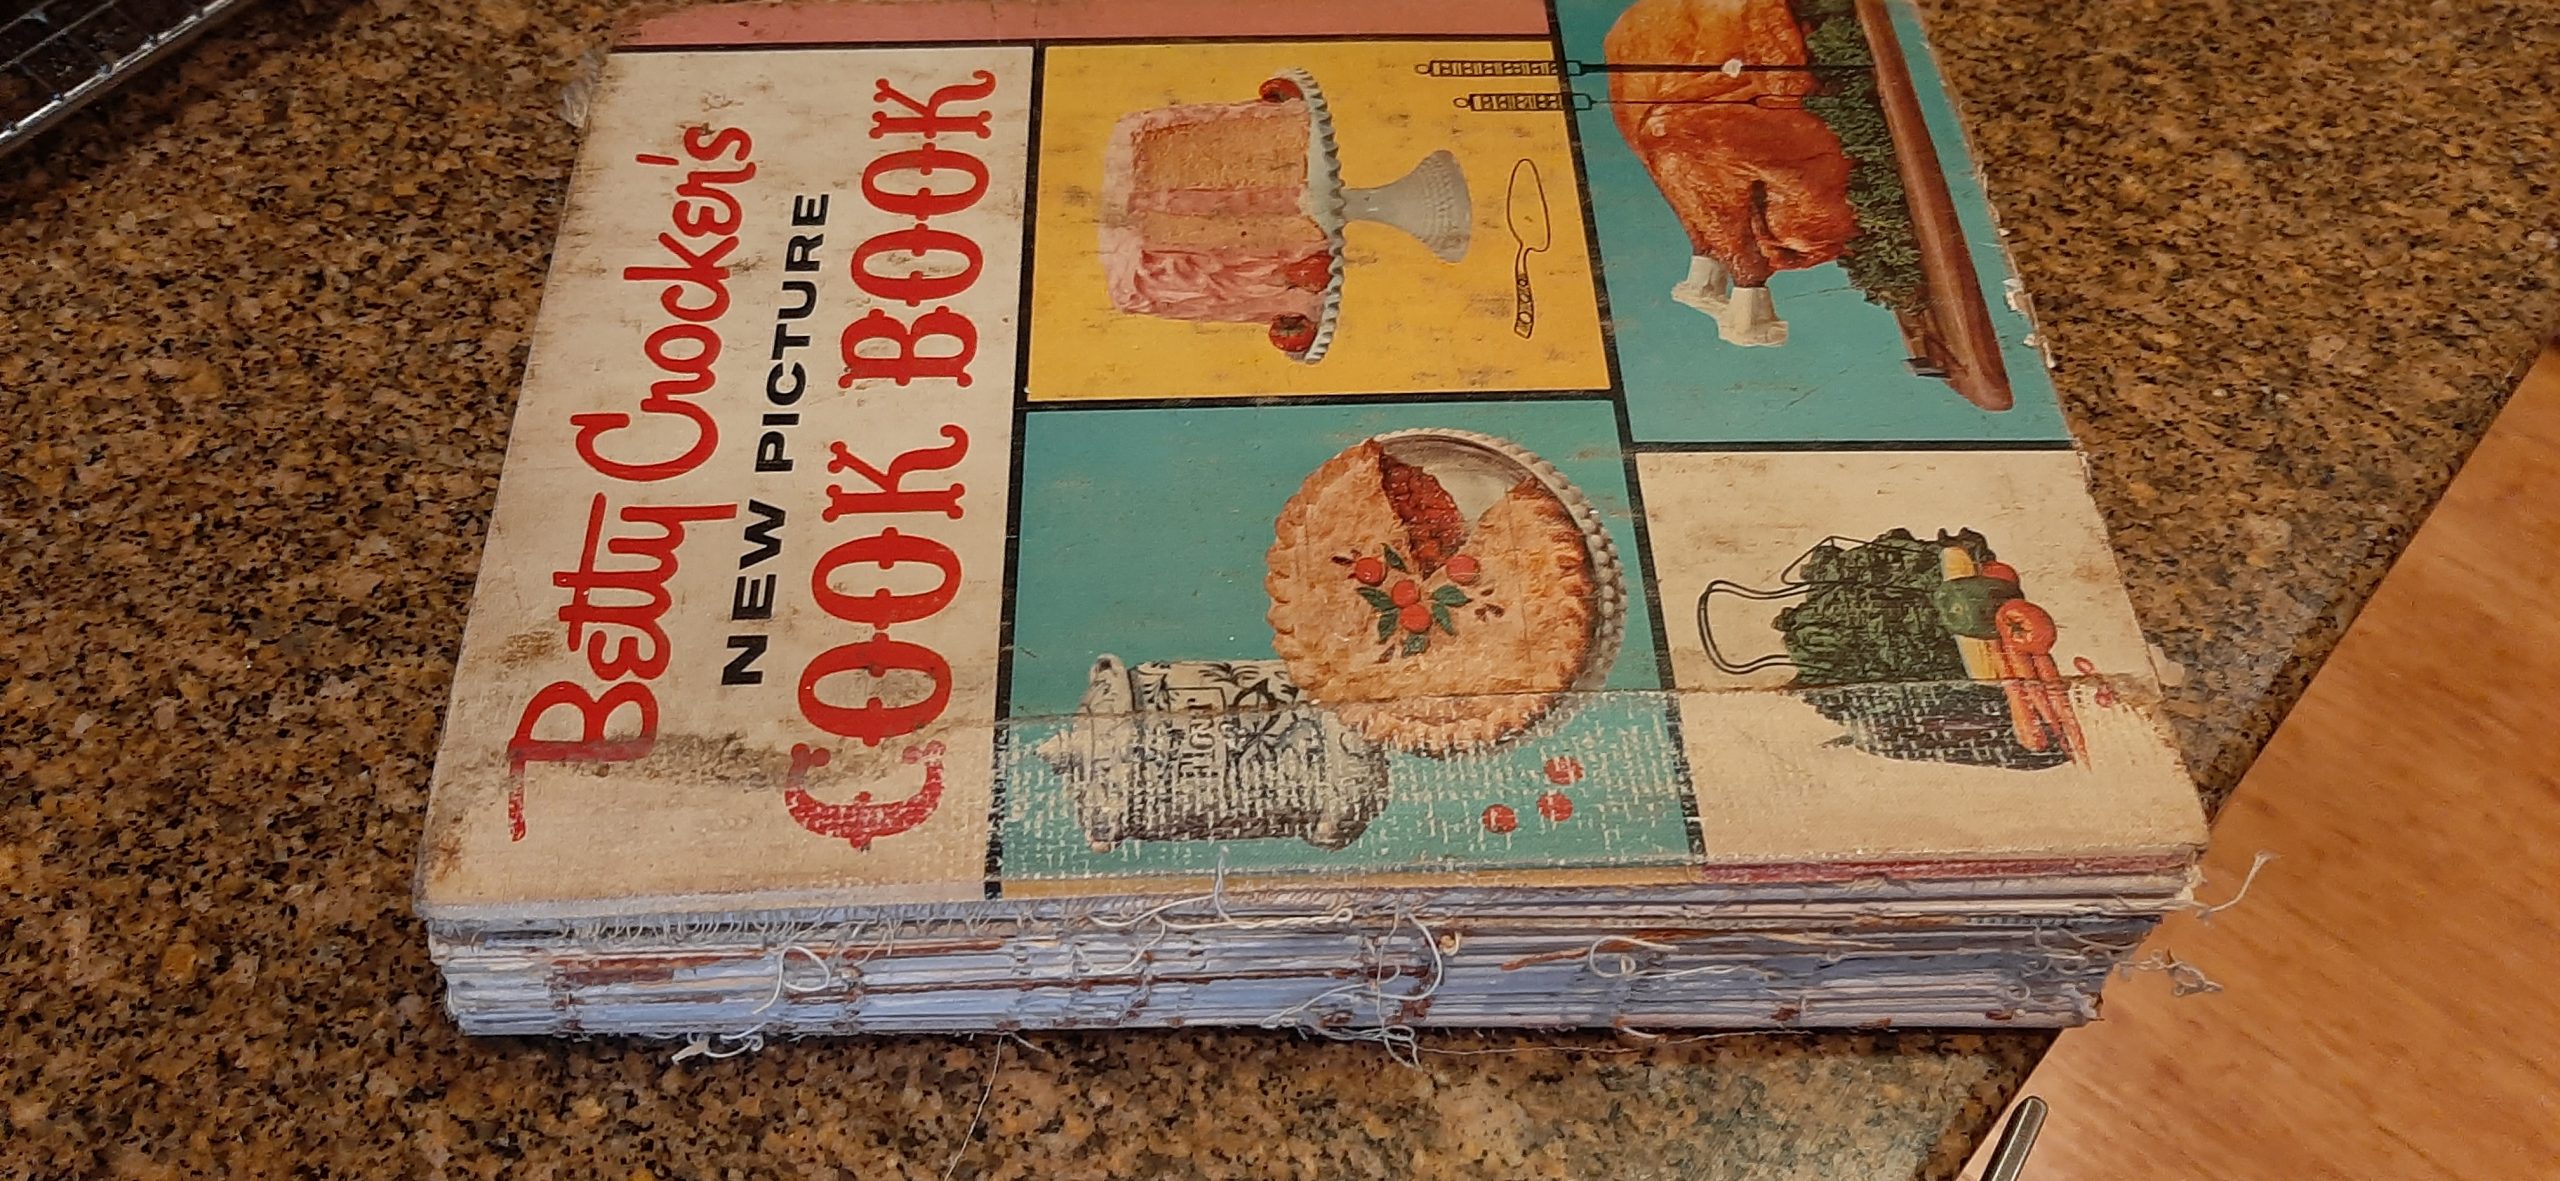
Author Archives: Patti

OVERNIGHT ITALIAN BREAD

OK all you bread bakers, have I got a quick and easy bread recipe for you where the dough positively MUST SPEND THE NIGHT IN YOUR REFRIGERATOR! I know, gasp! Must be refrigerated? Well, OK, I confess I haven’t tried to let it rise the usual way – 60 to 90-minutes on the counter. But to develop the lovely flavor I obtained by refrigerating the dough, you just need to trust me and put the darn dough in your refrigerator and walk away until the next day. Which for many of us who entertain over 4 people on a regular basis, is a God send.

Because all that needs to be done on the day of the event is to take the formed dough out of the refrigerator. Then allow it sit for a while on your counter and contemplate its very existence. Then heat your oven, make a few slits on top of each loaf, and pop the loaves in the oven.

While the oven is doing the hard work of turning raw dough into a work of art, you can be preparing every other dish you plan to serve while totally stressed to the max. (No wait, that might not be your situation. You might be the kind of person who has everything under control.) (I hate you BTW if that’s the case. Just kidding!) (Well, kind of kidding!)

But for me, one less menu item to worry about (on the day guests will be in my home at any minute) is ONE LESS MENU ITEM TO WORRY ABOUT! (And yes, I am a charter member of the Department of Redundancy Department. And proud as punch to be one too!)

Anyway, I came up with this recipe the other day when in late afternoon I invited our dear friends Jim and Margo over for dinner the next evening. Without any kind of idea what I was going to serve these fine people, I figured a nice bread would surely come in handy at some point. So, to the kitchen I proceeded with nary a recipe in hand. I just kind of winged it as I proceeded, writing down the recipe as I went along. Which BTW, brings me to a very good point.

Always, always, always WRITE DOWN YOUR LIST OF INGREDIENTS AND HOW MUCH OF SAID INGREDIENT YOU USED AS YOU INVENT A NEW DISH. Because, if the dish turns out to be the best stew, soup, casserole, bread etc. etc. you ever made, you are going to hate yourself if you didn’t write down how you created this masterpiece. Believe me, when you go to replicate the dish 6 months later because your family has been begging you for months to make it again, and you don’t remember what you did, YOU ARE GOING TO FEEL QUITE THE FOOL FOR NOT LISTENING TO MY WARNING/ADVICE.

Well, I’ve taken up enough of your time today. And I have been rather snarky, which really is unusual for me. (Right, Patti!) Anyway, you know that I love you all and only want the best for each and every one of you. And sometimes tough love is what’s required. My job therefore is done for the day.

Peace and love to all.  

1¾ c. warm water

1 T. granulated sugar

2½ tsp. instant yeast  

2 tsp. kosher salt

2 T. extra virgin olive oil, plus more for oiling the dough

1 T. unsalted butter, room temp.

5 c. unbleached all-purpose flour

2 T. cornmeal

Combine warm water, sugar, and yeast. Allow to sit for 10 minutes until the yeast foams. Add salt, olive oil, butter, and 4 cups of flour. Knead in your stand mixer using the dough hook, adding more flour as necessary to make a smooth, silky dough.

Form into 2 rectangles and roll into long loaves. Place on a baking sheet that has been sprinkled with corn meal. Oil the tops and place plastic wrap on top. Refrigerate overnight.

Remove from refrigerator and allow to rise on your counter for 1½ to 2 hours.

Pre-heat your oven to 425-degrees with a pan of hot water on the bottom rack. Just before placing the loaves in your oven, make 4-5 slits on the top of each loaf.

Bake for about 20 minutes or until the internal temperature reaches at least 210-degrees.

Remove from oven and allow to cool completely before slicing. Serve as is or dipped in OLIVE OIL AND BALSAMIC VINEGAR BREAD DIPPING SAUCE or sliced and toasted for CROSTINI. (See how to make both below.)

OLIVE OIL AND BALSAMIC VINEGAR BREAD DIPPING SAUCE

¼ c. extra virgin olive oil  

1 sm. garlic clove (finely minced)

¼ tsp. dried basil  

¼ tsp. dried oregano (Mexican oregano preferably)  

2-3 crushed red pepper flakes – more if you are so inclined

pinch of kosher salt

freshly ground black pepper

2-3 tsp. balsamic glaze or good balsamic vinegar

Whisk the olive oil, garlic, dried basil, dried oregano, crushed red pepper flakes, salt, and pepper together in a small serving bowl. Let the mixture sit for a bit.

When ready to serve with Italian bread, drizzle 2 -3 teaspoons of balsamic glaze or balsamic vinegar over the olive oil mixture.

CROSTINI

Italian Bread

extra-virgin olive oil

flaky or fine sea salt, to taste

Pre-heat your oven to 450-degrees. Line a rimmed baking sheet with parchment paper for easy clean-up. 

Slice the bread on the diagonal into pieces no wider than ½-inch. Lightly brush both sides of each slice with olive oil.

Place the slices in a single layer on your prepared baking sheet and bake them on the middle rack for about 9 minutes, or until they are crisp and nicely golden on top. Remove from oven and sprinkle lightly with salt. Serve immediately.

SAVORY CHICKEN VEGETABLE POT PIE

Before I put the crust on top

After the pot pie is baked

Comfort food. Oh, how I love comfort food. And if there is anything as comforting as a big old bowl of homemade soup, then it would have to be pot pie. And OK, I know! I already have several pot pie recipes on this site. But darn, I like experimenting with new flavor combinations and I love pot pies. So, when deciding to serve pot pie the other evening, I just had to play mad scientist again. And what I came up with turned out to be pretty darn good. Thus, the fact that I am sharing the recipe with you.

If you only knew how many recipes, I don’t share with you. Because like all creative cooks, some recipes you think might work, actually do work. Others are so wrong you wonder what you were thinking. Or perhaps what you were smoking? (I don’t smoke anything, so that isn’t ever going to be my excuse.) But rest assured, I have made every recipe you find on this site. And enjoyed it. Except for most of the drink recipes Mr. C. comes up with and wishes me to share with you. Because in the wide world of adult beverages, my taste buds are terribly particular. Some might even go so far as to call my taste buds plebian when it comes to alcohol. (I’m fine with that BTW!) Because unless it’s a Tanqueray martini, one of Mr. Cs Margaritas, a gin gimlet, or an ice-cold IPA in a frosted glass, I’m usually not interested. But for most adults, a wide variety of drink recipes from which to choose is especially delightful. And Mr. C. is a very good mixologist. So, all the drink recipes on this site are wonderful too (or so I’ve been told) and have the Andy Carr seal of approval. (I do also love wine and would happily partake, except that as I have gotten older, wine no longer seems to like me! Grrrrrr)   

So, now that you know all about my drinking habits and that I am a true comfort food lover, I hope you enjoy this recipe for pot pie. It’s a bit time consuming to prepare, but well worth the effort.

Peace and love to all.

For the filling:

1½ c. chicken broth

1 lg. bone-in chicken breast

1 bay leaf

2 fresh sage leaves or a tiny pinch ground sage

¼ c. (½ stick) unsalted butter, divided

½ med. onion, chopped

½ c. diced carrot  

½ c. diced celery

½ c. diced zucchini

½ tsp. seasoned salt

freshly ground black pepper

2 tsp. dried thyme leaves

1 tsp. finely chopped fresh parsley

½ tsp. finely chopped rosemary

pinch granulated garlic

¼ c. dry white wine  

¼ c. all-purpose flour

2 T. half & half, or more as needed

¾ c. frozen peas

¾ c. frozen corn

Pour the chicken broth into a small pan. Add the chicken breast, bay leaf, and sage leaves. Bring to a boil, reduce heat, cover, and cook just until the chicken is completely cooked. Remove the chicken and set aside to cool. Cut away from the bone and into small dice when cool. Save the broth.

After removing the bay leaf and sage leaves from the cooking broth, add the seasoned salt, black pepper, thyme, parsley, rosemary, and granulated garlic. Cover the pan and let simmer gently over low heat.    

Melt 2 tablespoons of the butter in the large frying pan over medium heat. Add the onion, carrot, and celery; cook and stir for 5-7 minutes or until the carrot is crisp tender. Add the zucchini; cook and stir for 1 minute. Add wine to skillet; bring to boil. Transfer the veggies and any remaining liquid into a small bowl and set aside. (If you have already cut up the chicken, you can add the veggies to the same bowl.) Don’t wash the fry pan.

Melt the remaining 2 tablespoons of butter in the frying pan over medium heat. Sprinkle with flour. Stir with whisk until mixture is well blended.

Reduce heat to medium-low; cook and stir for about 3 minutes. Immediately add 1 cup of the broth, whisking until the chicken pot pie filling mixture is smooth. Whisk in remaining broth and half & half. Whisking constantly, bring to boil over medium-high heat and boil 1 minute or until sauce is thick. Taste and adjust seasoning. Stir in the diced cooked chicken, veggie mixture, peas, and corn. If the sauce seems too thick, stir in a bit more half & half.   

Fill 3 (5-inch wide and 2½-inch deep) Corning Ware French White casserole dishes or baking dishes of choice.  

For the Crust:

1¼ c. unbleached all-purpose flour, fluffed

½ tsp. kosher salt

½ c. (1 stick) cold unsalted butter, diced

2-4 T. ice water (I used 3 tablespoons)

Combine the flour and salt in your food processor. Pulse once to mix. Add the butter and process until it resembles coarse crumbs. Add 2 tablespoons of water and pulse the mixture for a few seconds. If you find your mixture is too dry, you can add more water, one teaspoon at a time. 

Turn the dough out onto a lightly floured surface. Divide dough into thirds. Roll out each piece of dough into about a 6½-inch circle or circles about 1½-inches wider than the top of the baking dishes you will be using. (This will allow dough to hang over the sides of the baking dish).

Place the pie crusts on top of the filled dishes and cut at least 4 slits in the pastry. (Make sure the slits go completely through the pastry allowing steam to escape.) Place the baking dishes on a baking sheet. (In case any of the filling manages to escape!)  

Bake the potpies in a preheated 425-degree oven for 35 to 40 minutes or until the filling bubbles and the crust edges turn golden. (If you look at the pot pies about 20 minutes into the baking time and find that the crust edges are getting dark, cover with thin strips of aluminum foil for the last part of the baking.)

Serve hot out of the oven.

OLIVE OIL AND FRESH LEMON VINIAGRETTE

Well, as promised, just a lovely lemon dressing recipe for you to try next time you need a quick and easy dressing for almost any kind of salad containing a combination of greens. With perhaps a few curls of Parmesan cheese to make for a perfect combination of flavors.

I found this recipe on the liveeatlearn.com cooking site. And although I was skeptical about using lemon juice and red wine vinegar together, it made for just a delicious and well-balanced salad dressing. (If only I were as well-balanced! A problem I freely admit to and write about at the bottom of this preface.)

So, next time you need an easy and affordable dressing for your salad, give this recipe a try. You will not believe how good it is.

Well, that’s it for today. Mr. C. is at a rehearsal in Port Townsend. One cat (Max) is performing his daily ablution in the cat bed on Andy’s desk. While the other one is sleeping in the cat bed in front of the fireplace. The fireplace isn’t on (it’s propane), but Miles hasn’t quite figured that out. Unless of course, it’s a not-so-subtle hint for me to turn on the fire thus saving him frostbite. Both boys can be so dramatic when given even the slightest provocation. (I wonder where they get that?)

Anyway, I’m having a quiet day working up yet another recipe for chicken pot pie.

It seems like all I have been craving lately is comfort food. And I bet I’m not alone. Because the world is not a very pretty place right now. And food can provide that little bit of comfort that we all need at one time or another. And I need an abundance of any kind of comfort right now!

I have always been an avid newspaper reader and news hound. But I can hardly stand to read our local Seattle paper because of all the stories about yet another shooting, war reports, in-fighting happening on the political scene, and now all the antisemitic and anti-Palestinian behavior taking place around the world.

I can’t even begin to understand how anyone can find fault with or act against a Jewish or Palestinian person who lives in Seattle, for example. Do these prejudiced idiots really believe that a 10-year-old child is making the decision to bomb innocent people? Or any person, for that matter, who is not themselves calling the shots? (So, to speak!)

But somehow, these militants believe they have the right and the moral high ground to call people different than themselves names, make threats, and cause physical harm. How have we managed to instill so much hate in some of our citizens? And why have we, as a society, failed to learn from history? Taken the hard lessons our ancestors learned at great expense and apply them to what’s happening today. Why can’t we inculcate compassion as the framework for civility, rather than fostering hate?

I know, I do get worked up about what I deem horrific behavior. But at some point, we should all take a stand and say how we feel. We should never be made to feel that we can’t express ourselves, or the guys in black hats are going to win. They might win anyway, but at least we will have had our say. Thanks for listening. And happy cooking.

Peace and love and understanding to all.

2 T. extra virgin olive oil

2 T. fresh lemon juice 

1 T. red wine vinegar

1/8 tsp. kosher salt

freshly ground black pepper  

1 tsp. Dijon mustard

2 cloves garlic, finely minced

Whisk or shake all the ingredients together. Set aside or refrigerate until needed.

Great over plain salad greens with a curl or two of Parmesan for garnish.


SLOPPY JOE STUFFED GREEN PEPPERS

There is just something about stuffed green peppers that practically brings me to my knees. First of all, I am a veggie lover. Have been my entire life. My parents often told the story that as a toddler I preferred green onions to ice cream. I’m not sure I believe them, but I stole veggies out of the garden as a child, (especially peas and tomatoes) so, my parents may have been telling the truth. (They usually did!) Anyway, I have loved stuffed green peppers from my earliest recollection. What I didn’t have as a child, however, were sloppy Joes. And there’s a good reason for that.

Some attribute the original Sloppy Joe to a cafe in Sioux City, Iowa, where, in 1930 a cook named Joe added tomato sauce to his “loose meat” sandwiches. Voila: a new between-the-bread offering, and the sandwich’s official name.

Well, I didn’t grow up anywhere near Iowa, and Manwich, a portmanteau of man and sandwich, was the brand name for a canned sloppy joe sauce produced by ConAgra Foods and Hunt’s, introduced in 1969. And that was long after I had gone away to college.

Apparently, this canned product contained seasoned tomato sauce that was to be added to ground beef. It was marketed as a quick and easy one-pan meal for the whole family. Which, BTW, you can still buy at your local grocery store. But please don’t!

Sloppy Joes are just so much better made from scratch and don’t contain ingredients that no one can pronounce and require a PhD in food chemistry to analyze. So, if you are so inclined to make a real sloppy Joe some evening for dinner, you will find my recipe under the captivating title – Sloppy Joes. But back to these stuffed green peppers.

Since I already had several recipes for stuffed peppers on this site but am always up for changing things up a bit, I thought using meaty sloppy Joe sauce as the filling for stuffed peppers would make a nice change of pace. And boy howdy, were these babies tasty. And just the right amount of filling for 3 halved peppers. (And how often does that happen? In my case, never!) Anyway, we thoroughly enjoyed our dinner last night. Along with half a baked sweet potato each, we feasted in style.

And tonight, for dinner, I am going to serve the leftover peppers with Cheesy Grits (see recipe below) and Fried Zucchini (also find recipe below). So, another opportunity to eat like kings.

And isn’t that the way it should be. Good homemade food with just a minimum of processed ingredients. Of course, a true food snob  would look askance at store-bought ketchup and bottled Worcestershire sauce. But you know, there is being reasonable and then there’s being crazy. And to the best of my knowledge, I haven’t reached the “crazy” classification yet. (I don’t make homemade mayonnaise either.) (But I do make homemade hollandaise, but then that’s entirely different!)

Anyway, for every person there is what works for them in the kitchen. And a lot of it depends on time, monetary, and physical constraints. For me, I can still make most things from scratch. But that doesn’t mean that in 5 years (or less), I won’t be eating the words I wrote above about serving only homemade this and that. We can only do what we can do.

So, if taking shortcuts here and there gets delicious and nutritious food on your table, then go for it. We are after all, only human.

Peace and love to all.  

1 T. extra virgin olive oil

1 lb. lean ground beef

1 med. white or yellow onion, diced

2 lg. clove garlic, minced

1 tsp. dried marjoram

½ tsp. chili powder

1 tsp. kosher salt

freshly ground black pepper

¾ c. water

3 T. tomato paste

2 tsp. beef base (I use Better Than Bouillon Beef Base)

¼ c. ketchup

2 T. packed brown sugar

3 T. Worcestershire sauce

2 T. red wine vinegar

1 T. yellow mustard (don’t even think about using a fancy mustard)

3 green bell peppers, cut lengthwise (or red, yellow, or orange bell peppers)

1/3 c. beef broth (or water and beef base)

1 c. grated Mozzarella cheese

paprika

In a large, covered pan, heat the oil over medium-low heat; add ground beef and sauté until browned. Add onion and garlic and continue cooking until onion translucent. Add marjoram, chili powder, salt, pepper, water, tomato paste, beef base, ketchup, brown sugar, Worcestershire sauce, vinegar, and mustard.

Bring to a boil, reduce heat, and let simmer until filling is thick, about 20 minutes.

Place the cut pepper halves in a large baking dish. Divide the beef mixture evenly between the 6 halves. Pour the beef broth into baking dish (to help peppers steam) and cover with foil.

Bake in a pre-heated 400-degree oven until peppers are tender, about 60 minutes. Uncover, and top with the mozzarella cheese. Bake another few minutes until the cheese is melted.

Remove from oven and lightly sprinkle with paprika. Serve immediately.

CHEESY GRITS

1½ c. whole milk  

1 c. water

¾ tsp. kosher salt

freshly ground black pepper

½ tsp. granulated garlic  

½ c. + 2 T. stone ground corn grits – not instant or quick-cooking grits 

3 T. unsalted butter

1 c. grated sharp cheddar cheese (or half cheddar, half pepper Jack)

Mix the milk, water, salt, black pepper, and granulated garlic in a covered sauce pot. Set over medium-high heat and bring to a boil.

Once boiling, gradually whisk in the grits, until there are no clumps. Lower the heat to medium-low. Cover and simmer for 12-20 minutes, (depending on the package instructions), stirring occasionally.

Once the grits seem soft and thick, stir in the butter and grated cheese. Taste, then adjust seasonings as needed.

If the grits are thicker than desired, stir in ¼ – ¾ cup hot water. The grits will continue to thicken as they cool.

FRIED ZUCCHINI

1 egg, or more as needed

½ c. cornmeal, or more if required

butter

zucchini, cut into 1/3 inch thick slices

seasoned salt

freshly ground black pepper

Beat the egg in a shallow container. (I use an 8-inch round cake pan.) Pour cornmeal in another shallow container. (You got it, I use another cake pan.)

Melt as much butter as it takes to cover the bottom of a griddle or fry pan.

Dip the cut zucchini in the egg (both sides), then the corn meal (both sides), and place on the griddle.

Sprinkle on seasoned salt (don’t be shy) and a nice sprinkling of pepper. Using a paring knife, cut off small amounts of butter and tuck them in between each of the pieces of zucchini on the griddle. (This dish requires a bit more butter than is usually associated with a fried veggie dish. Thank you, grandma!)

Fry the zucchini until it is crispy brown on the bottom side. Carefully flip the pieces and fry the second side until crispy brown. Serve hot off the griddle. 


CACIO E PEPE (CHEESE AND PEPPER) PASTA

The other evening, I was in the mood for pasta. And lately I have been craving dishes that are either meatless or contain much less meat than I would have enjoyed a few years ago. Plus, I wasn’t in the mood to spend a great deal of time in the kitchen. So, I decided to make this recipe and a grilled romaine salad. We enjoyed the dressing I made for the grilled romaine, but my technique for grilling romaine halves leaves much to be desired. So, I will be posting the Lemony Vinaigrette recipe soon while continuing to perfect the grilled romaine part.

I had been looking at this recipe I had found online several years ago, but never made it because, well, it just seemed too good (and easy) to be true. But now I wonder why in the world I waited. Yes, it’s easy to fix. And it only takes a few minutes to prepare. Plus, the ingredient list could not be shorter. But does that make it less delicious than a dish with 46 ingredients. I think not! It just makes it perfect for weeknight meals and old ladies who upon occasion are not 100% in the mood to spend hours in the kitchen! (That would be me!)

Cacio e Pepe (pronounced ca-cho ee pepe) is a Roman pasta dish that translates to “cheese and pepper”. This simple 4 ingredient dish consists of butter, black pepper, Pecorino Romano cheese (or Parmesan if you prefer a milder flavor), and al dente spaghetti. It is truly the quickest and easiest pasta dish I have ever prepared. Used as a main dish, it’s perfect with a side salad. Used as a side dish, it would be perfect with a roasted pork tenderloin, baked chicken, flank steak, you name it. And did I mention that it is very quick and easy to prepare.

Anyway, next time you can’t think of anything to prepare for dinner, give this simple dish a try. Add a steamed green veggie or simple salad, and dinner is on the table in no time flat. What could be better than that!?

Peace and love to all.   

8 oz. dried spaghetti or bucatini

2 T. unsalted butter

½ tsp. cracked black pepper

½ c. finely grated Pecorino Romano cheese, plus more for garnish

Fill a pot with water and bring to a boil over high heat. Add a small bit of salt and pasta to boiling water.

Cook pasta, stirring occasionally until al dente, 6 to 8 minutes. While the pasta cooks, melt the butter in a frying pan. Add the pepper and let it bloom* for about 2 minutes. Over low heat.

Drain the al dente pasta, reserving 2/3 cup of the pasta water.

Pour the al dente pasta into the frying pan with the butter and pepper along with 1/3 cup of the reserved pasta water. Add the grated cheese and continue to toss together until cheese melts and the sauce is nice and creamy. Add additional hot pasta water as needed.

Top with more grated cheese and serve.

*Blooming (the heating of spices in fat) draws out and extends the spice flavor to spread throughout a dish. Blooming is most often done at the start of the cooking process because, once infused in oil, the spice flavors more easily permeate a dish as it cooks.

BEEF GRAVY WITH MUSHROOMS AND ONION

There are just those times when a bit of gravy would be nice. But you don’t happen to have any gravy happily residing in your refrigerator. As happened to me the other evening when I wanted to serve chicken fried steak over mashed potatoes smothered in gravy. (It is after all comfort food season.) So, now what to do? Plus, I had some mushrooms that really needed to be used or added to the yard waste receptacle. And who wants to do that when given a choice? So, mushroom gravy came to mind. But, how to make a beefy mushroom gravy without dripping from a beef roast?

After much deliberation, I decided to wing it. And what I came up with is the recipe you find below.

Now, my recipe for “wing it” beef gravy will never be as delicious and have the same depth of flavor as a gravy starting with roast beef drippings. I’m not a magician after all! But, when desperate, and you still want to serve beef gravy, this recipe might possibly also work for you. Because it sure as heck worked for us.

So dear readers, I offer this recipe as a quick and easy substitute for the real thing.

Speaking of real things, Thanksgiving is just around the corner. And if there was ever a time to offer thanks, it is now.

Most of us live in this country where, yes, bad things happen. But at least in the USA we are not being bombed. Women can still take advantage of educational opportunities, and everyone who is eligible can cast a vote for the future of our country. These are precious advantages that should be the norm for every living being. But they are not. There are just so many people living with hardships that are unimaginable to most of us. Innocent men, women, and children we are powerless to help.

So, I invite you to share your wonderful life with others. Host Thanksgiving dinner. Or get together with friends and family at someone else’s home or at a restaurant. Take a pie or some cookies to a neighbor who might not be able to celebrate with family or friends. Or just smile and say hello to a stranger. We can make a difference.  By our example, if nothing else.

Happy Thanksgiving to all. And as always, peace and love.

2 T. unsalted butter

½ c. finely chopped onion

8-12 sliced mushrooms

2 T. dry sherry

1 tsp. Kitchen Bouquet*

1 tsp. Dried Mushroom Powder Seasoning, opt. (see recipe below) or Wild Mushroom Seasoning Salt

pinch dried thyme leaves

freshly ground black pepper

2 T. all-purpose flour

1½ – 2 c. water

2 heaping tsp. beef base (I use Better Than Bouillon Roasted Beef Base)

Melt the butter over medium heat and add the onion. Sauté until the onion is almost tender. Add the mushrooms and cook until they are brown. Gradually pour in the sherry. Add the Kitchen Bouquet, mushroom seasoning, thyme, and black pepper. Then stir in the flour and let it cook for a good 3 minutes, stirring all the while.

Starting with 1½ cups water, gradually add the water and beef base stirring for as long as it takes to make a smooth consistency. Let it cook for about 20 minutes, stirring periodically. If you prefer a thinner gravy, add a bit more water. Taste and adjust seasoning.

Serve drizzled over anything that might benefit from a bit of gravy.  

*Kitchen Bouquet is a browning and seasoning sauce primarily composed of caramel with vegetable flavorings. It has been used as a flavoring addition for gravies and other foods since the late 19th century. And by me since the early seventies in every turkey gravy I have ever made. Also, in beef stew or any time my gravy, savory sauce, or soup needs a bit of a flavor boost. It is truly a wonderful ingredient.  

DRIED MUSHROOM POWDER SEASONING

3 T. ground dried mushrooms** (cremini, shiitake, porcini, etc.)  

1 T. granulated onion

1 T. kosher salt

1 T. freshly ground black pepper

2 tsp. dried thyme

2 tsp. dry mustard

1 tsp. granulated garlic

**Place any combination of dried mushrooms (about 9 tablespoons) in a spice grinder. (I use a coffee grinder dedicated to spices and herbs.) Whirl until the mushrooms are powdered.

Then mix with the other ingredients. Store in an airtight container.

This seasoning is wonderful any time an extra bit of flavor would be welcome. Great in stews, soups, sauces, gravies, and broth. (And yes Mark, this is the seasoning I gave you for Christmas a couple of years ago.)

WILD MUSHROOM SEASONING SALT

3 T. dried thyme

1 T. black peppercorns

2/3 c. coarse salt

pinch cayenne pepper

3 T. granulated onion

1 T. granulated garlic

1/3 c. powdered dry mushrooms (I used dried shiitake mushrooms)  

Whirl the thyme, black peppercorns, and salt together in a spice grinder until finely ground. Stir into a bowl containing the cayenne, granulated onion, granulated garlic, and powdered dry mushrooms. Whisk well to combine.

Store in an airtight container. 


LEFTOVER BRATWURST AND FRENCH GREEN LENTIL SOUP  

With Fall comes soup. Yeah! Of course, I never let the weather outside stop me from making soup, even on really hot days, because I happen to LOVE, LOVE, LOVE SOUP! OK, I don’t make soup as often during the summer. But when Fall arrives, I build us a soup at least every 10 days or so. And even more often in Winter. Soup is just so darn easy to make, relatively inexpensive to prepare, and always eagerly gobbled up at table.

This soup came about because I had left-over brats in the fridge. And not wanting to eat them again with just a side of mustard, I decided to use them in a soup. So, I went online and found the bones of this recipe on the kalejunkie.com site. I made some minor changes, but mainly this wonderful soup is our gift from Nicole.

And although at first glance, it looks like there are a lot of ingredients, the soup comes together very quickly. And boy oh boy is this soup tasty.

You will notice from the title that I use green lentils in this recipe. Green lentils are like other lentils, but they have a thicker skin than most, and that helps keep their shape during cooking. They also have a more peppery taste. But any type of lentil would be great in this soup. And in case you didn’t know, lentils are very nutritious. Their health benefits include fiber, protein, and key vitamins.

So, without further ado, a recipe for a savory soup I believe your whole family will enjoy.

Peace and love to all.

2 T. extra virgin olive oil

1 c. finely chopped onion

1 c. diced carrot

1 c. diced celery

¾ c. chopped green cabbage, opt.

3 cloves garlic, finely minced

1 T. tomato paste

1 T. chopped fresh parsley or 1 tsp. dried parsley

1 tsp. dried basil

½ tsp. dried oregano

½ tsp. dry mustard

freshly ground black pepper

1 tsp. Worcestershire sauce

1 tsp. hot sauce

6 c. chicken broth

2 c. beef broth

1 (14.5-oz.) can diced tomatoes

1⅓ c. dry French green or brown lentils, rinsed

2-3 c. diced cooked brats or any cooked sausage (your choice)

sour cream, opt.

Heat the olive oil in a large heavy covered pot. (I use my Le Creuset Dutch oven.) Add the diced onions, celery, carrots, and cabbage and sauté until the onion becomes soft. Add the garlic and cook for 1 minute.  

Add the tomato paste; cook for 2 minutes. Then stir in the parsley, basil, oregano, dry mustard, black pepper, Worcestershire sauce, and hot sauce. Stir in the chicken broth, beef broth, and rinsed lentils.

Bring to a boil, reduce heat, cover, and simmer for about 1 hour or until the lentils are tender. Stir occasionally.

Just before serving, stir in the cooked sausage and bring soup to a boil.

Great served with a small dollop of sour cream. Toasted Light Rye Bread (recipe on site) and icy cold beer are great accompaniments.   


BRIOCHE DINNER ROLLS

In my opinion, there is just nothing better than homemade bread. And I don’t care whether the bread comes in the form of loaves or rolls. I’m easy in that regard. So, when I was planning the menu for our last JazzVox home concert meal, I decided to make 2 kinds of bread. Why? Because bread is easy and inexpensive to make, and people love it. So, in combination with Light Rye Bread (recipe on site already), our guests gobbled up all but 1 of these rolls and a few slices of rye bread. Thank goodness there was at least a bit of bread left for us. Because dang, there is no such thing as left over bread at this household.

What wasn’t left was any of the double batch of Kräuterbutter (German Herb Butter) I had made to slather on the rye bread. Well, that didn’t go as planned. People frosted both kinds of bread with this amazing, flavored butter. (Find the recipe for Kräuterbutter below.) And frankly, given the opportunity I would have done the same thing.

Anyway, the main thing you should know about these rolls is that they are really quick and easy to build, and absolutely delicious. And you don’t even need bread flour for this recipe. Just plain old all-purpose flour. And as you can see from the picture, they are beautiful to boot.

And remember, Thanksgiving will be fast upon us. And these rolls would be perfect on your table. And because I am the kind of person I am, I’ve included directions so that you can make the dough and form the rolls one day and bake them off the next day. So, no excuses about dinner rolls being too hard to make, too time-consuming, or being too last minute. Nonsense! There is nothing easier than this recipe to build delicious dinner rolls to serve your family and friends. And boy will you be the hero of the day!

Well, it’s sunny outside. A bit of scattered cloud cover here and there. But although the sun is shining, it’s cold. So, I’ve built some soup that is happily burbling away on the stove. Along with a couple slices of leftover rye bread, we will be dining in style at the dinner table tonight.

May you too find happiness at your dinner table sharing the wonderful world of fine cuisine with your family and friends. For me, there just isn’t anything more rewarding than seeing someone smile when they bite into something I have served them. As you may gather from this comment, I live for those smiles.

As always, peace and love to all.

¾ c. whole milk, slightly warm   

2 tsp. instant dry yeast

¼ c. granulated sugar    

1 tsp. kosher salt

4 c. unbleached all-purpose flour, fluffed

4 lg eggs, divided

½ c. unsalted butter, room temperature and cut into chunks

veggie oil

In the bowl of your stand mixer, mix the warm milk, yeast, and sugar together. Let sit for about 10 minutes or until it becomes frothy. Add salt, flour, and 3 eggs to the bowl. Using your dough hook, mix the dough until all the flour is absorbed. Then add the butter cubes. Knead the dough until it is smooth, elastic, and only a smidge sticks to the bottom of the bowl. If needed, add a bit more flour.  

Pour a small amount of oil into the bowl, and using your hands and a stiff spatula, shape the dough into a round, lightly greased ball. Cover with plastic wrap and let rise for 75-90 minutes or until doubled in size. Meanwhile, make an egg wash by whisking the remaining egg with 1 teaspoon of water.

Shape the dough into 15 rolls and place in a lightly greased 9×13-inch pan. Let rise again for about an hour, then brush with egg wash. (For building the rolls on day 1 and baking them off on day 2, see directions below.)

Bake in a pre-heated 350-degree oven for 23-25 minutes. The internal temperature should reach at least 190-degrees.

Remove from oven and serve slightly warm or at room temperature.

For making the dough ahead and baking it the next day, once the rolls are formed, cover and refrigerate them overnight. They will rise while in the fridge and be ready to bake in the morning. Make sure to let them sit out for about 20 minutes to come to room temperature before brushing with the egg wash and baking them in a pre-heated 350-degree oven for 23-25 minutes. The internal temperature should reach at least 190-degrees when they are done.

Remove from oven and serve slightly warm or at room temperature.

KRÄUTERBUTTER (GERMAN HERB BUTTER)

½ c. (1 stick) unsalted butter, room temp.

1 tsp. fresh lemon juice

1 T. finely chopped fresh chives

2 tsp. finely chopped fresh parsley

2 tsp. finely chopped fresh basil

¼ tsp. dried dill weed

¼ tsp. dried marjoram

¼ tsp. granulated garlic

¼ tsp. kosher salt

¼ tsp. finely chopped fresh or scant 1/8 tsp. dried rosemary

freshly ground black pepper

Mush all the ingredients together with a table fork and refrigerate covered until ready to serve at room temperature. (Best made the day ahead so the flavors have time to get to know each other.) This butter is a great spread for rye bread. (Or any other kind of bread for that matter!)


BLACK FOREST SHEET CAKE

How the top looks

A cut piece of cake

This Black Forest Cake can be made 2 ways. My way or my other way. Allow me to explain.

I needed a large sheet cake to serve roughly 40 people. I knew I wanted to make a Black Forest Cake because I was serving Octoberfest food. But making food for that many people requires planning. And refrigerator space.

So, I decided as the top layer of my Black Forest sheet cake, I would use frosting rather than whipped cream. Made sense at the time. (I would have to refrigerate this huge sheet cake if I used whipped cream. Whereas frosting would be fine sitting on top of the cake at room temperature for a few hours.)

So, as planned, I served this cake to 36 people yesterday. And not one of them told me they never wanted me to serve this dessert again. In fact, the guests I heard from proclaimed it a winner. And to top things off, my dear friend Margo requested this cake for her upcoming birthday. So, there you go.  

What I told a few of our guests, and now I am telling you, was that I glommed this recipe together using my all-time favorite chocolate cake recipe. Then for the sauce, I agonized over whether to use some kind of cherry liqueur or cherry flavored brandy (think Kirschwasser) in the sauce. But finally, I chose to use bourbon, my favorite liquor to flavor everything from caramel sauce to BBQ sauce. And I think I made the right decision. Because bourbon lends such a lovely sweetness to all kinds of dishes, and it didn’t fail me in the cheery sauce either.

Since I was under cooking/baking time restraints, not to mention refrigerator space limitations, I made the cake on Wednesday and froze it. Then I made the cherry sauce on Thursday and refrigerated it. I left making the frosting until Sunday morning, the day of the home concert. And using frosting rather than whipped cream topping on the cake, I could leave the cake on a counter until needed.

At 5:00 am Sunday morning I woke up in a panic. How in the wide world of sports was I going to spread frosting over a sauce? (And why hadn’t I considered this aspect of putting the cake together a bit earlier?) But here I was on Sunday morning with 36 hungry mouths to feed (including Andy and me) and our guests due to arrive at 1:00 pm. And of course, with a lot of other last-minute food details that needed my attention.

So, Mr. C. took the cake out of the freezer when he first got up Sunday morning. A little while later I slathered on the cherry sauce, and then the fun began. (Just as I had predicted would happen at 5:00 am.)

Frosting absolutely does not like being spread over sauce. In fact, it rebels at the very thought of being accommodating to the poor cook who failed to take this fact of nature into consideration. But I won in the end. As will you if you decide to make this cake and use frosting instead of at the last-minute slathering on a thick coating of whipped cream. But truly, either using a butter cream frosting or a lovely cherry flavored whipped cream, it matters not. Both are going to make for one darn good piece of cake. And perfect for this time of year.

Well, that’s it for today. If you want to know how I made it work (spreading frosting over a sauce) you’ll just have to read the directions below. And yes, I made a double batch of the cake batter, cherry sauce, and the frosting to feed my guests. A bit left, but then that’s a win for Mr. C. and me!

And with that, as always, I wish you peace and love.

CHOCOLATE CAKE:  

1 c. unsalted butter, room temperature

3 c. packed brown sugar

4 eggs, room temperature

1 T. vanilla extract

3 c. unbleached all-purpose flour. fluffed

¾ c. cocoa powder

1 T. baking soda

½ tsp. salt

1 rounded tsp. instant espresso powder

1½ c. water

1-1/3 c. sour cream

Cream the butter and brown sugar together. Add the eggs, one at a time, beating well after each addition. Beat in the vanilla. Whisk together the flour, cocoa powder, baking soda, salt, and espresso powder. Add to creamed mixture alternately with water and sour cream, beating well after each addition.

Pour into a greased and lightly floured 10×16-inch cake pan, or 1 9×13-inch cake pan and 1 8×8-inch cake pan. Bake in a pre-heated 350-degree oven for 25-35 minutes or until a toothpick inserted near the center comes out clean. Don’t over-bake! Remove from oven and place pan on a wire rack to cool completely. Or freeze until needed.  

TART CHERRY SAUCE WITH BOURBON:  

2 lbs. frozen pitted tart cherries, halved

¼ c. bourbon

6 T. cherry juice (from defrosted cherries)

2 T. cornstarch

¾ c. granulated sugar

Place the frozen cherries in a colander set over a bowl. Allow the cherries to thaw. (This takes several hours.) Save the juice for this recipe and for the buttercream frosting or whipped cream topping.

Whisk the bourbon, cherry juice, and cornstarch together in a large heavy pot. Add the sugar and defrosted cherries. Bring to a boil, stirring to avoid burning.  

Once the sauce thickens up a bit, remove from heat, cool, and refrigerate until needed. (It will thicken up more as it cools.)

BUTTERCREAM FROSTING

½ c. unsalted butter, room temperature

1 tsp. vanilla extract

3 T. cherry juice (from thawing the frozen cherries), or more if needed

tiny pinch of kosher salt

4 c. powdered sugar, or more as needed

whole milk or heavy cream, if needed

Beat the butter until soft and fluffy. Add the vanilla, cherry juice, and kosher salt, mixing until thoroughly combined.

Add the powdered sugar on low speed. Add more cherry juice or milk or cream a few teaspoons at a time until the frosting is light and fluffy and to your desired consistency. (The frosting needs to be very soft to spread over the cherry sauce.) (And I use the term “spread” very lightly!)

WHIPPED CREAM TOPPING

2 c. (1 pint) heavy whipping cream, or more if you like lots of whipped cream

½ tsp. vanilla bean paste or vanilla extract, or more to taste

2 tsp. cherry juice, or more to taste

6 T. powdered sugar, or more to taste

Whip the cream to hard peaks. Add the vanilla bean paste, cherry juice, and powdered sugar. Whip until blended.

ASSEMBLE THE CAKE:

chocolate shavings

Top with Frosting:

Spread the cherry filling over the cooled cake with an offset spatula. Place the cake in your freezer and chill for 30 minutes to set.

Taking small dollops of frosting at a time, gently spread the frosting over cherry filling with an offset spatula. The sauce will come through during this process, but it looks nice and tastes wonderful. Top with chocolate shavings.

The cake can sit at room temperature for several hours.

Top with Whipped Cream:

Carefully spread the whipped cream evenly over the cherry sauce. Top with chocolate shavings. Serve immediately or refrigerate until ready to serve, but not more than 2-3 hours.   

SAVORY STOVE TOP DRESSING (think stuffing)

Well, last night I had a mad craving for a game hen and the dish that is really one of my all-time favorite accompaniments to any baked poultry – dressing. You know, the side dish that used to be called stuffing until placing the flavored bread cubes in the cavity of a turkey or chicken became scary. (The safety concerns have to do with salmonella and other bacteria, which can come from eggs in the stuffing or from the interior surface of the turkey’s cavity. If the bird is removed from the oven before the stuffing reaches 165-degrees, some of the bacteria could remain alive and make people ill.) Anyway, whatever you want to call this caloric dish, I wanted some. But not being a fan of boxed stuffing mixes, I decided to make my own stove top dressing.

I used whole wheat bread last evening in the dressing because that’s what I had on hand. Tasted great! But I think any type of bread would work in this recipe.

Now, something you should know. I do not like wimpy tasting dressings. I want lots of flavor. So, if you like a mellow flavored dressing, you might want to cut back on the herbs a bit. But if you want a mouth full of flavor with every bite, then add the herbs as listed below.

Well, that’s it for today. I’m busy getting ready for our next JazzVox home concert. So, today I baked the chocolate cake for the base of the Black Forest Cake I plan to serve on Sunday. It’s busy cooling right now. So, before I lovingly wrap the cooled cake in preparation for placing it in the freezer, I decided to take this opportunity to share this recipe with you. I hope you enjoy it.

And just so you know, I miss stuffing. When seasoned wet bread is stuffed into a bird, it comes out moister and more flavorful than when it is placed in a casserole dish and baked. Not to mention how much fun it is to single handedly push wet bread into the cavity of a slippery bird. Ah, those were the days my friends. Those were the days!  

Peace and love to all.   

6-7 slices bread, (whole wheat, sourdough, etc.) cut into 1/3-inch cubes

3 T. unsalted butter

¼ lg. white or yellow onion, finely chopped

¾ c. chopped celery, (stalks and leaves)

4-5 lg. mushrooms, chopped

1 T. finely chopped fresh parsley

½ tsp. finely chopped fresh sage

½ tsp. poultry seasoning, or more to taste

1/8 tsp. dried thyme

tiny pinch savory, either powdered or dried leaves

tiny pinch dried marjoram

scant ¼ tsp. kosher salt

freshly ground black pepper

1 egg

1 c. chicken stock, or more as needed

Place the bread cubes on a baking sheet in a single layer. Bake in a pre-heated 150-degree oven for about 90 minutes or until dry and hard. Remove from oven and set aside.  

Meanwhile, in a covered pan, melt the butter and add the onion and celery. Cook until the onion and celery are both tender. Add the mushrooms and cook until they are brown.

Add the parsley, sage, poultry seasoning, thyme, savory, marjoram, salt, and pepper. Cook for about 5 minutes to blend the flavors. Meanwhile, in a small bowl, whisk the egg and chicken stock together.

Add to the pan and stir until hot. Gently stir in the dry bread cubes, adding additional chicken stock if needed to moisten the bread. Cover and let sit for 15 minutes. Fluff and serve immediately.