Author Archives: Patti

STUFFED BELL PEPPER SOUP  

Mr. C. and I love stuffed bell peppers. But sometimes I don’t want to go to the effort or take the time to make proper stuffed peppers. So, I got the idea to make stuffed bell pepper soup.

Now, this was obviously, based on the hundreds of recipes for stuffed bell pepper soup already on the internet, not an original idea. (And I thought I was being so clever!) (Wrong again, Mrs. Carr!)

Anyway, most of the recipes included cooked rice, some added corn, or a bit of granulated or brown sugar to balance out the acidity, and even hot sauce or crushed red pepper flakes to up the heat level. But I didn’t want rice in my soup, or corn, or sugar, or even a bit of heat. (But these all would be delicious additions if you chose to include them in your soup.)

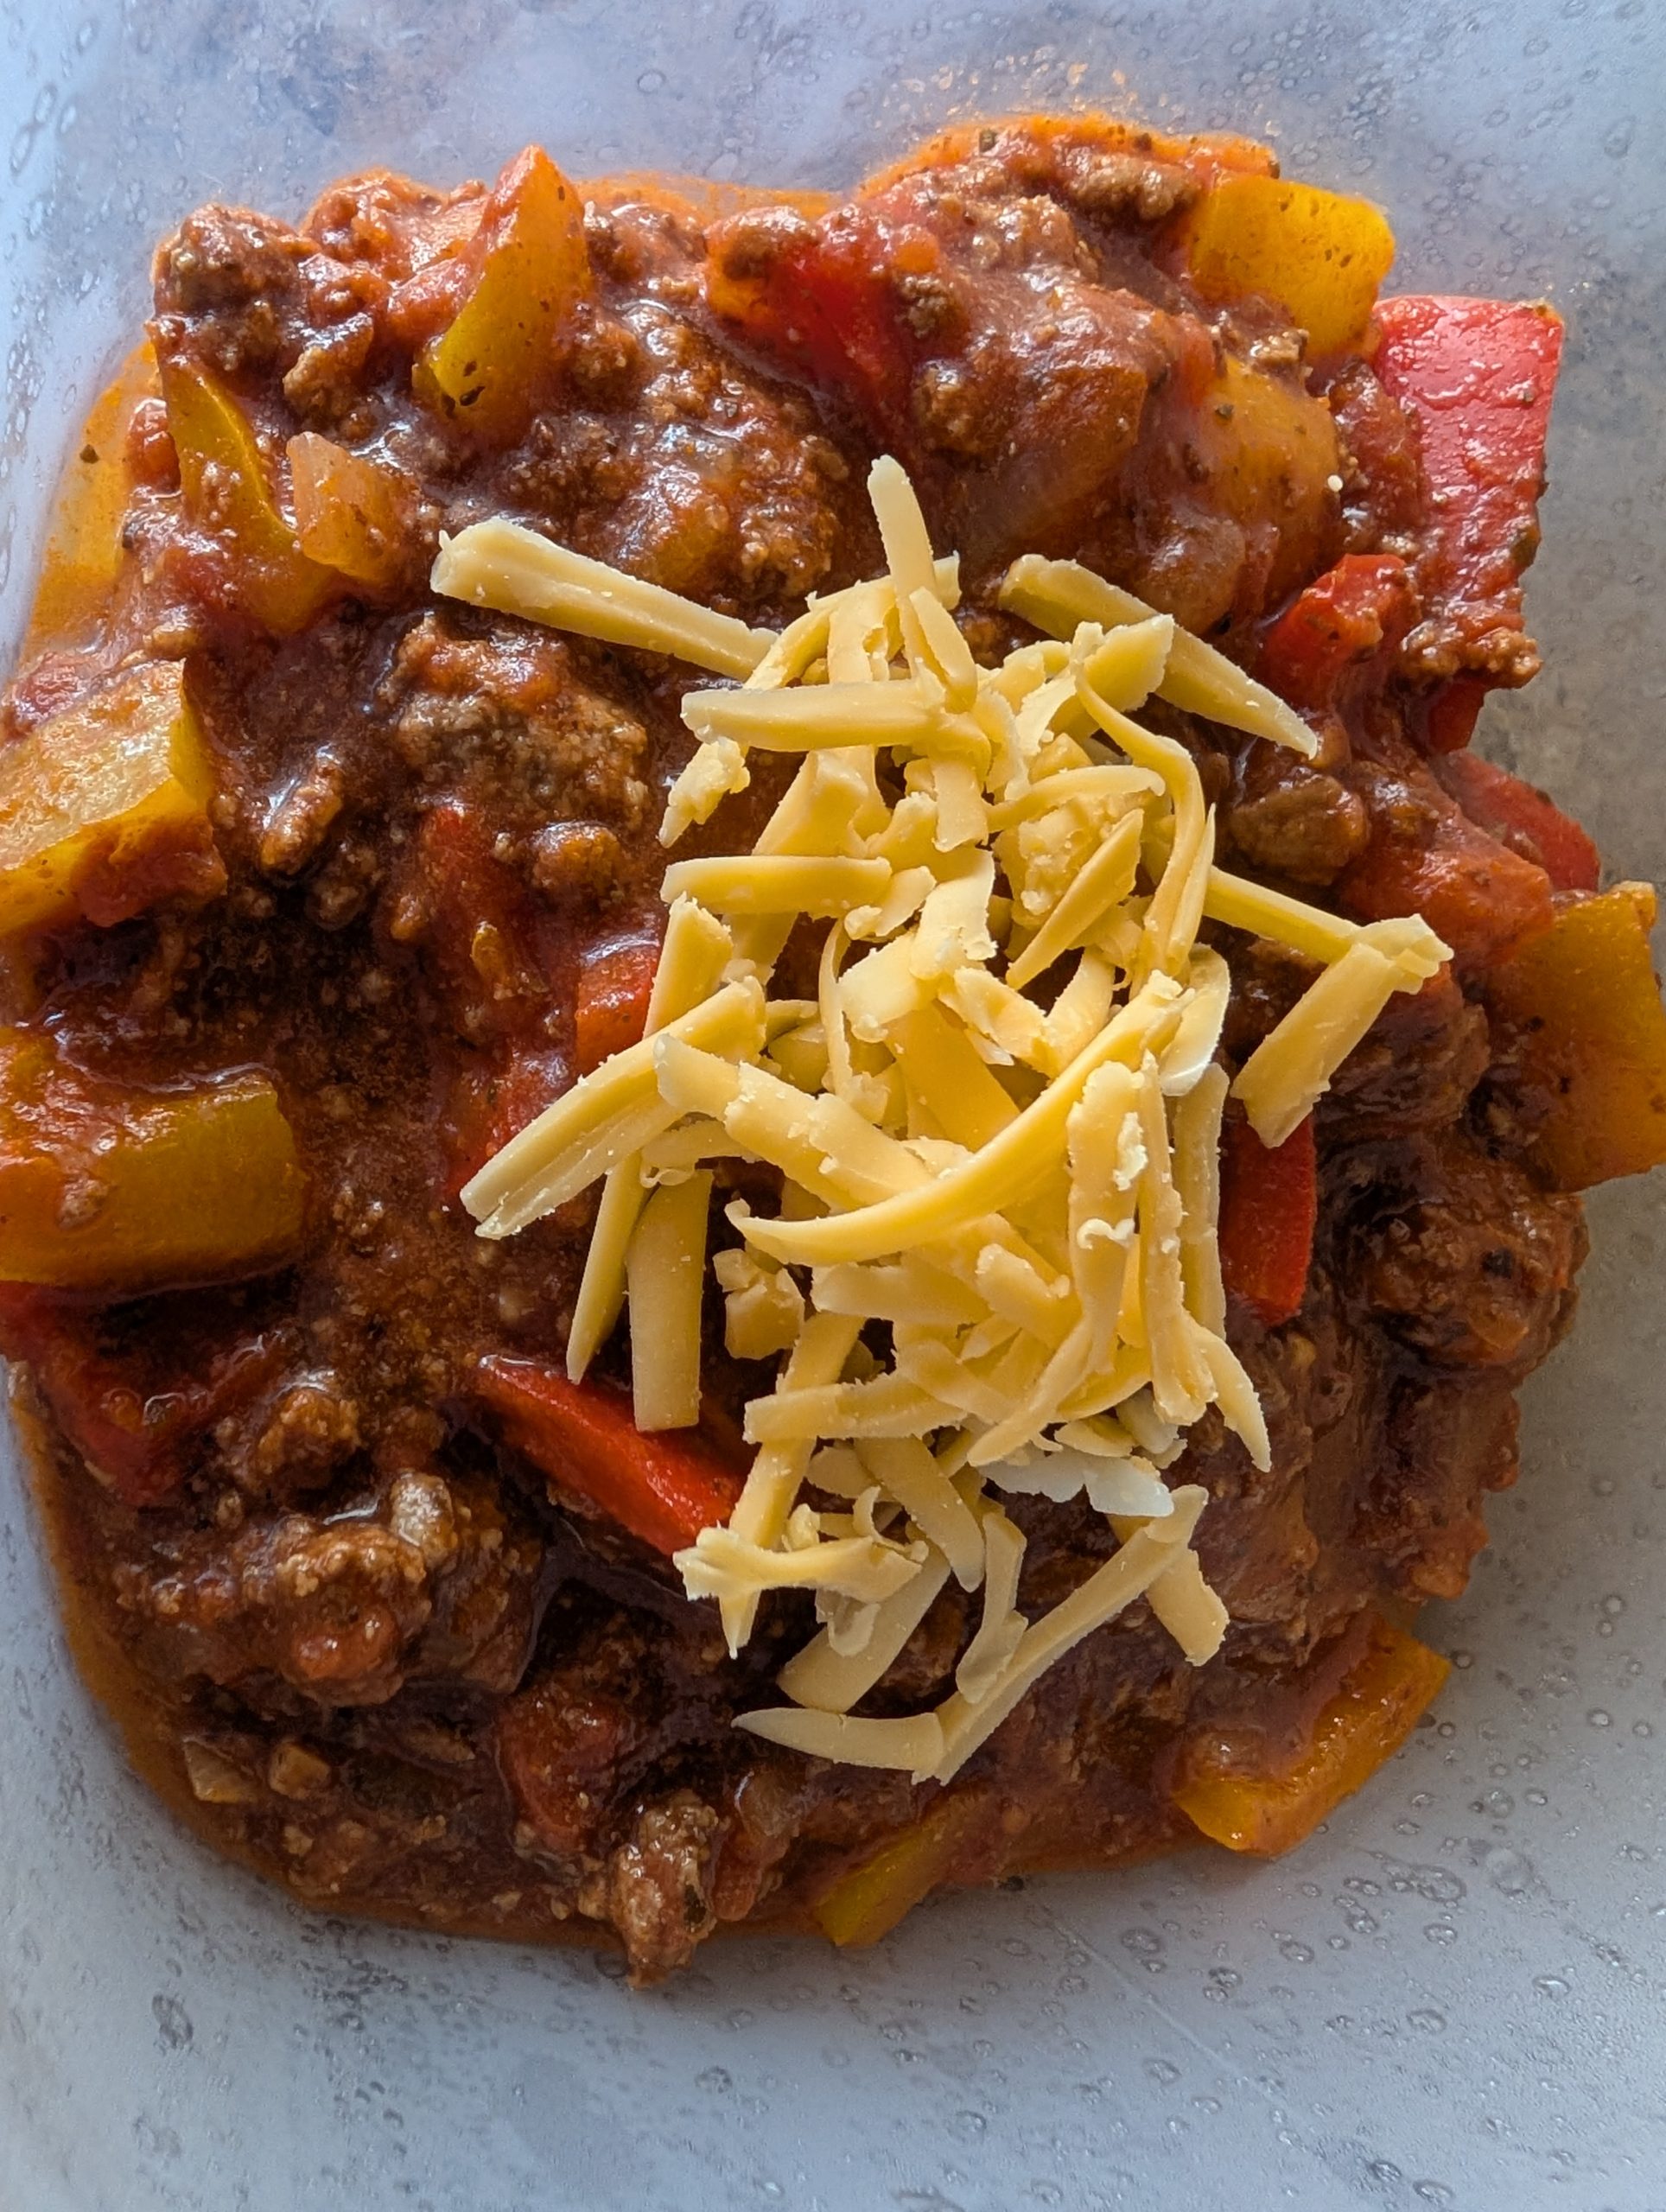
But what I didn’t find in any of the recipes I perused was cheese. How can you possibly make a perfect stuffed bell pepper without lots of cheese? Inconceivable!

So, I took bits and pieces from numerous recipes and came up with this quick and easy recipe. And we loved the soup. But I made sure there was plenty of grated cheese on the table to add to the soup while it was piping hot!

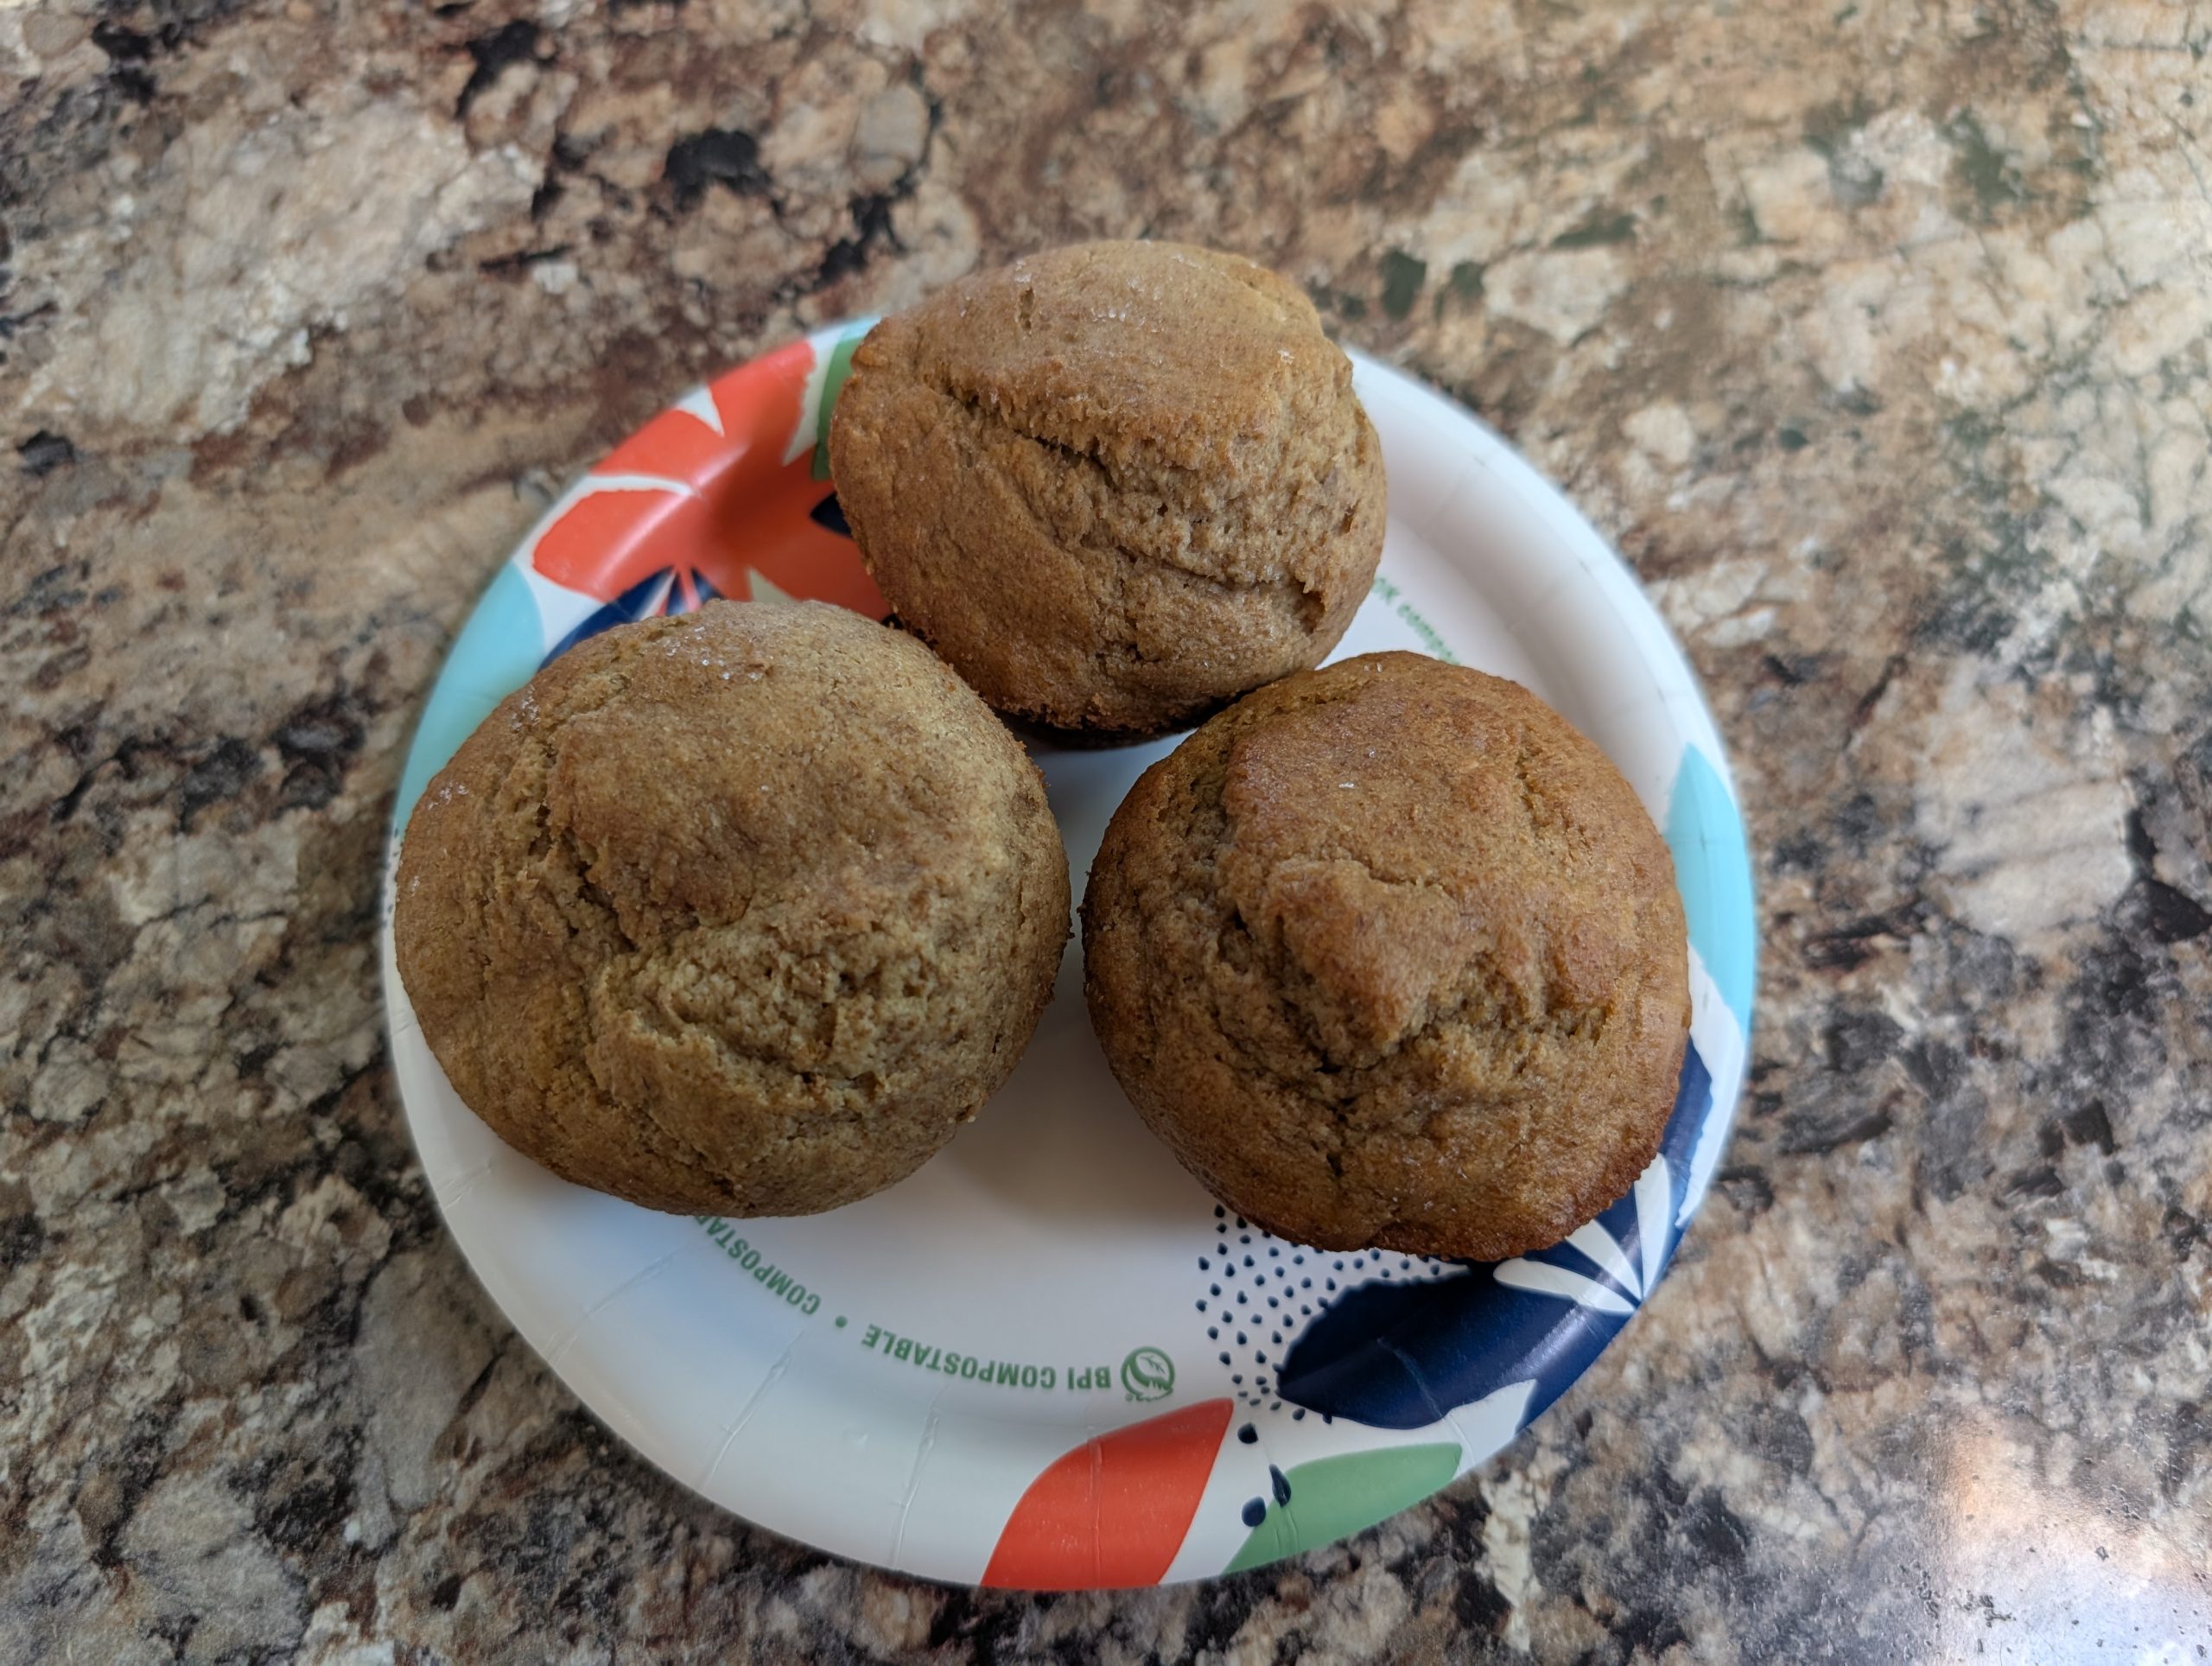
I served the soup with cornbread, and we were both happy to enjoy the soup two nights in a row. (I’m becoming a real fan of leftovers! Just sayin’)

So, if you too love stuffed bell peppers, then I suggest you give this recipe a try. It is ever so much easier to prepare than real stuffed bell peppers. And just as tasty.

Well, that’s it for today. I’m simply worn out from opening our front door 6 times, for a total of 13 trick or treaters, last evening. And from finding a hiding place for the left-over candy, so that I can’t reach it without Mr. C’s assistance. (He’s much taller than I am and has promised me that he will not help me get at it no matter how much fuss I make or even if I threaten vengeance.) (He has, after all, my best interests at heart.)

So, on that happy note, I bid you farewell for now.

And as always, peace and love to all.    

1 T. extra virgin olive oil

1 lb. lean ground beef 

1 c. chopped onion

½ c. finely diced celery

2 garlic cloves, finely minced

½ tsp. kosher salt

¼ tsp. seasoned salt

freshly ground black pepper

3 bell peppers, cut into ½-inch pieces (I used 1 red, 1 yellow, and 1 orange bell pepper)

1 (14.5 oz.) can diced or crushed tomatoes (Italian tomatoes preferred)

1 (15 oz.) can tomato sauce (again, Italian tomatoes preferred)

1 c. water

1 T. beef base (I use Better Than Bouillon Beef Base)

1 tsp. Worcestershire sauce

2 tsp. Italian seasoning

grated mozzarella, sharp cheddar, and/or Monterey Jack cheese, garnish, opt.

Heat the olive oil in a large pot over medium high heat. Add the ground beef and cook until browned, breaking the meat up into smaller pieces with a spatula.

Add the onion and celery to the pot and cook for 4-5 minutes or until the onion is softened. Add the garlic and cook for 30 seconds.

Add the salt, seasoned salt, black pepper, and the cut bell peppers to the pot and cook for 2-3 minutes.

Add the diced tomatoes, tomato sauce, water, beef base, Worcestershire sauce, and Italian seasoning to the pot; bring to a boil.

Reduce the heat, cover, and simmer for 20-30 minutes or until the pepper pieces are tender. Taste and adjust seasoning.

Serve in soup bowls. Pass the grated cheese.  

WHIRLEY POP KETTLE CORN

The crazy lady who is going to open the door this evening to trick or treaters. Good luck kids!

So, it’s Halloween, and I wanted some kind of fun and festive sweet treat to celebrate All Hallows’ Eve*. But I didn’t want to steal any of the small candy bars bought specifically for trick or treaters. So, why not popcorn balls? Well, too much sugar. Then, how about caramel corn? Nope. Again, too much sugar.

Then I remembered the kettle corn I had gone crazy over at the last Anacortes Arts Festival. (Actually, my first time ever having kettle corn.) But again – way too much sugar and salt. But I was so curious about how to make kettle corn at home, that I went online. And after reading several recipes for homemade kettle corn, I got out my trusty Whirley Pop Popcorn Popper (say that three times very quickly). And my first try was very successful. But I thought the kettle corn should be just a wee bit sweeter, so I upped the sugar by 1 tablespoon in the recipe you find below. But 2 tablespoons works just fine if you are watching your sugar intake. (Which I should be doing too. But darn, it’s Halloween!) Anyway – a Whirley Pop Popcorn Popper is perfect for this recipe. And honestly, I don’t think just using a lidded pan would work as well. You might burn yourself. So, I feel, a Whirley Pop Popcorn Popper is the only way to go if you want to use this recipe.

Well, this is my second post for the day. Mr. C. just left for a gig at a retirement home, I have leftover Stuffed Bell Pepper Soup (recipe soon to be published) and cornbread to serve for dinner when he gets home, and I just finished making this delicious kettle corn.

So, I have decided that I am pretty much done for the day. Except of course to greet trick or treaters this evening and get rid of all the candy we purchased earlier this week that has been calling to me EVERY SINGLE MOMENT SINCE WE BROUGHT IT INTO THE HOUSE!

May you too be lucky enough to have costumed children come to your home for candy. I’d be so happy if I could give some of this homemade kettle corn away. But I know that things have changed dramatically since I was a child going to my neighbors’ home for Halloween treats like popcorn balls, homemade cookies, or invited inside to bob for apples. Or when my children were young knowing full well that anything offered by our neighbors would be safe to eat.   

I truly miss the days when it was common for me to offer homemade cookies, homemade candy, popcorn balls, or candy that didn’t come in sterile packaging to all who knocked on our door. Or when I still felt trusting enough to welcome any of our adult neighbors who came over for a bit of “Trick or Drinking”.

But those days are over, and I find that a real shame. We had so much fun. Life was just a whole lot simpler.

But I saw a very spot-on and refreshing post this morning that really resonated with me. It reminded all of us to open our doors to one and all even if the costumed trick or treaters seem too old to still be trick or treating. They are still children. And while they are still children, let’s let them be children. It’s only candy! And we can demonstrate kindness by just being kind. And by wishing each and every trick or treater, regardless of how tall they are, a HAPPY HALLOWEEN, HAVE FUN, AND BE SAFE!

And as always, peace and love from our spooky house to yours.

2 T. veggie oil (I use Canola)

3 T. granulated sugar

¼ tsp. fine sea salt, or more to taste

½ c. uncooked popcorn  

Mix the veggie oil, sugar, and salt together in the bottom of your Whirley Pop. Then stir in the popcorn kernels until each kernel is well coated.

Over medium heat, whirl away until the pops only come every half second or so.

Remove from heat and carefully pour the popped corn into a large bowl.

Stir with a big spoon to break apart the kernels.

For an easier cleanup, put water and soap immediately into the popper to soak.

After the kettle corn has cooled thoroughly, keep in an air-tight container.

*And no, Halloween is not All Saints’ Day; rather, Halloween (October 31st) is All Hallows’ Eve, the evening before All Saints’ Day (November 1st) and the start of Allhallowtide, a three-day period for honoring saints and the deceased. The name “Halloween” is a contraction of “All Hallows’ Eve,” meaning “the evening before All Hallows’ Day”.    

POTSTICKER SAUCE

OK, this is going to be a short post today. Because there are few people who will find this recipe of any value at all. But, for those of you, like myself, who almost always keep potstickers in their freezer (homemade or store bought), you might find this recipe helpful.

So, first, I’m sure you are asking yourself, why in the bloody hell does Patti keep potstickers in her freezer at all? Well, the answer is simple. Potstickers are a quick and easy side dish when nothing else appeals. And I use them in my recipes for Potsticker Soup, Chicken Egg Drop Soup w/Diced Chicken Pieces, and Easy Chinese Dumplings/Potstickers Anyone?  

So, the other evening I had leftover Chinese food in the fridge. Not a lot, but the beginning of a nice, simple dinner. And while thinking about what other easy to prepare additions I could add to round out the meal, I went to my freezer for inspiration. And there they were. Potstickers. Yeah!

But I didn’t want to spend a lot of time making a sauce. So, I decided to throw some ingredients together. And this is what I came up with. Easy to prepare. Very few ingredients. And delicious. Along with steamed rice, dinner was a success.

If you too like a nice tangy sauce for dipping almost any type of Asian dumpling, this is the recipe for you.

Well, that’s it for today. It’s Halloween, and the weather prediction is not at all good for Camano Island trick or treaters. It’s supposed to be very rainy and very windy. And of course, there’s our very steep driveway to climb before a bit more candy can be placed in each trick or treater’s bag.

But for those willing to sacrifice warmth and comfort, there will be a reward. There will be candy. And there will be a silly old woman at the door who obviously had too much fun with her makeup bag, teasing what hair she has, and donning her blouse only worn for Halloween, Mardi Gras, and Day of the Dead parties.

A HAPPY AND SAFE HALLOWEEN TO EVERYONE.

And peace and love to all.    

1/4 c. soy sauce

1/4 c. rice vinegar

1 T. finely minced green onion

1 tsp. sriracha

1/2 tsp. toasted sesame oil

pinch granulated garlic

pinch granulated onion

Whisk all ingredients together in a small bowl or shake up in a sealed jar. Serve with any of your favorite Asian dunkables.   

MEATBALLS AND EGG NOODLES IN SOUR CREAM GRAVY

OK, this is one yummy dish. The flavor is reminiscent of beef stroganoff, but without mushrooms. (And of course, if you want to add mushrooms to this recipe, go for it! But the day I made this; there was nary a fresh mushroom to be had in my kitchen.)

Anyway, I put this recipe together from bits and pieces of other recipes, and Mr. C. and I both thought it was a keeper. Great the first night, and even better the second night. And absolutely perfect for a cold, rainy, winter dinner. Add a nice green salad and you have a meal everyone will enjoy.

Well, that’s enough about meatballs and on to books I’ve read lately. (Just so you know, after spending time in my kitchen, reading is my favorite way to spend time. Well, of course, right up there with cooking and reading you’ll find me devoted to attending plays, concerts, live music in restaurants, spending time with family and friends, traveling all over the world, towing our trailer through the western part of the United States and Canada, and dining in great restaurants. But what you should also know, is that there are things I don’t do that any reasonable person enjoys.

I don’t watch TV, attend live or watch sporting events on TV, buy expensive coffee drinks at coffee stands, or go to events in the Seattle vicinity where thousands of people are milling around (like Seafair, Bumbershoot, the Washington State Fair, or the Fremont Oktoberfest.) (I realize that knowing this about me has nothing to do with cooking. But if you are like me, I love knowing a bit about the cooks who post recipes for all the world to see. So, now you know some of my idiosyncrasies too.)

And now for something completely different – a list of new to me authors I would recommend if you also read murder mysteries like they are going out of style: Carolyn Hart (Annie and Max Darling series), Chris Hammer, Camilla Grebe, D. D. Black (Thomas Austin series), and finally Georges Simenon (Inspector Maigret series).

So, farewell for now. Stay positive. Stay informed. Stay civil. Bake cookies for friends. We are all in this crazy new hellish political scene together. And we can always make life a bit better for others if we show compassion, demonstrate civility, and make simple acts like opening doors for others as routine as saying “excuse me” after sneezing.

Peace and love to all.

For the meatballs: Please note: This recipe makes twice the meatballs needed in this recipe. But do yourself a favor and make the full recipe anyway and freeze the other half. Trust me, you will thank me when you can make this dish again in half the time! Or use the second half of meatballs in any other dish that calls for meatballs.

½ c. finely chopped onion

2 garlic cloves, finely minced

2 T. chopped fresh parsley

½ tsp. ground savory*

½ tsp. dried thyme leaves

½ tsp. seasoned salt

¼ tsp. paprika

¼ tsp. dried rosemary

freshly ground black pepper

pinch ground nutmeg

2 eggs

2 T. milk

¾ c. old fashioned oats, broken up a bit in a food processor

1 lb. lean ground beef

1 lb. bulk pork sausage

Combine the onion, garlic, parsley, savory, thyme, seasoned salt, paprika, rosemary, black pepper, nutmeg, eggs, and milk together in a medium bowl. Add the oats, ground beef, and ground pork and stir just until combined. Using an ice cream scoop, form balls and place on a rimmed baking sheet lightly greased or lined with parchment paper.

Bake in a pre-heated 400-degree oven for 20-25 minutes (depending on the size of the meatballs) just until the balls are baked through. (Don’t over bake or they will be dry.) Remove them from oven and set aside.

For the sauce:

1 T. veggie oil

1 T. unsalted butter

1 c. diced onion

2 garlic cloves, finally diced 

½ tsp. paprika

½ c. dry white wine 

2 T. unbleached all-purpose flour

2 c. beef stock

¼ tsp. kosher salt

freshly ground black pepper  

2/3 c. sour cream

1 tsp. Worcestershire sauce 

½ tsp. Dijon mustard 

dash of nutmeg

6 oz. thick egg noodles, cooked al dente

1 T. finely chopped fresh parsley, opt. 

Heat the oil and butter in a large skillet over medium heat. Add onion and sauté until tender. Add garlic and paprika. Cook for 1 minute.

Add wine to pan; cook until most of the liquid has evaporated.

Sprinkle flour evenly over mixture; cook for 30 seconds, stirring constantly.

Add beef stock; bring to a boil, reduce heat, and simmer 3 minutes or until sauce thickens slightly. Remove pan from heat.

Stir in salt, pepper, sour cream, Worcestershire sauce, Dijon mustard, and nutmeg. Taste and adjust seasonings.

Add meatballs and al dente noodles to sauce; toss to coat. Sprinkle with parsley.

Serve immediately.

*I love using savory. This lovely herb tastes peppery and minty, with a flavor like a blend of thyme and marjoram. It has a clean, herbaceous quality, and its flavor can be described as a warming, slightly piney spice.

I primarily use it in meat dishes and soups.  

HALLOWEEN PARTY SUGGESTIONS (or any cocktail party for that matter)

A typical cocktail party spread.

Hosting Halloween parties started for me in the late 60’s. I had just met Dick and Eloise, and enjoying multiple dinners together we quickly became more than lifelong friends. We became extended family. So, just after they moved into their new home in Medina on Lake Washington, they asked me if I would like to co-host a Halloween party with them. Being a stay-at-home new mommy at that time, I was thrilled to help in any way I could. Plus, that would give me a good reason to expand my cooking skills. And to make a fuzzy pink bunny costume.

So, that was the beginning of annual Halloween parties given by and for our extended family and friends. I think the last Halloween party I hosted was in 1990, but don’t quote me on that. By then I’d been single for several years, my youngest daughter had just graduated from college, and I had no idea Mr. C. was about to come into my life. Plus, being in my late 40’s, I had outgrown costume parties. I found I much preferred hosting small dinner parties or cocktail parties with fancy hors d’oeuvres and appetizers. Along with sophisticated adult beverages.

It’s amazing how age plays such a large part in how we entertain. I may not throw Halloween parties any longer or even be interested in dressing up in a fuzzy pink bunny suit to attend one given by someone else. But I still love to feed people in my home. And do so on a regular basis.  

Since 2008, Mr. C. and I have hosted 112 (soon to be 113) jazz concerts and 1 classical concert in our home. Plus, several large birthday parties, and many small gatherings and holiday get togethers. And not once have I been tempted to wear a costume. (Well, just once. But only for trick-or-treaters brave enough to walk up our steep driveway in 2009.)   

Now I know, many people my age still enjoy dressing up for Halloween and God bless them, one and all. And for that very reason, I decided to share with you all, my list of the perfect appetizers and drinks to serve your Halloween guests who expect to be fed and their thirst quenched by homemade and delicious appetizers and sophisticated cocktails.

And of course, every single one of these recipes can be found on this site and are appropriate for any type of party you might feel like hosting.

A note about the cocktail recipes: some contain several ingredients and some with rather special ingredients. So, you might want to limit your drink options to two standard cocktails like Martinis and Manhattans and one or two “specialty” cocktails. And beer and wine, of course. And non-alcoholic beverages for sure!

May you too continue to or begin to open your home to guests for holidays or “no reason at all” gatherings. The more we share our time and effort with family and friends, the more we encourage civility. And we need those positive connections with our friends and family more than ever before. Be that person that brings people together reminding one and all that we are not alone. That we are each a part of an extended family or group of friends that care for each other, want the best for each other, and are always there to lend a hand, wipe away a tear, or bake a batch of cookies when only a cookie can make everything better.   

And as always, peace and love to all.

APPETIZERS

Bacon and Parmesan Stuffed Mushrooms

Bacon Wrapped Water Chestnuts

Buffalo Wings

Butternut Squash, Blue Cheese, and Walnut Tart

Charcuterie Board

Cheddar Pecan Crackers

Creamy Curry Dip

Crostini (great base for all kinds of spreads)

Deviled Eggs

French Chicken Liver Pâté

Guacamole

Hot Pepper Chicken Bites with Cilantro Sour Cream Sauce

Hummus A Tune Mr. C. (two recipes in one)

Marinated Goat Cheese

Olive Stuffed Cheese Balls

Onion Dip

Parmesan Crackers

Pastrami Roll Ups

Quick and Easy Party Mix

Rosemary Roasted Cashews

Rotolo Al Forno

Smoked Salmon Spread

Southern Pimento Cheese Spread

Sun Dried Tomato and Basil Spread

Tapenade

Viennese Liptauer

COCKTAILS

Ancho Problem

Corpse Reviver

Cosmopolitan

El Grito

French 75  

Gin Gimlet and Gin Rickey

Kentucky or Moscow Mule

Margarita

Martini (see recipe below)

McQueen

Paper Plane

Penicillin

Presbyterian Revenge

Revolver

Rob Roy

Sidecar

Toronto

Vieux Carré 

Whiskey Sour (this post also includes pictures and descriptions of the different types of glasses used for cocktails)

MARTINI

1 cold martini or coupe glass (see picture of a Champagne Coupe glass on Whiskey Sour recipe)

2½ oz. gin (Tanqueray preferably or vodka, for a vodka martini)

½ oz. (more or less) dry vermouth

ice

skewer

1–3 olives (garnish)

Chill the glass.

Combine gin and vermouth in a cocktail shaker with ice or a mixing glass filled with ice.

Stir or shake until the liquid is ice-cold.  

Strain the liquid into the chilled cocktail glass. (If you are like me, I want some of that ice in my drink. I like my martini to stay cold.)

Skewer one or more olives and gently plop in the drink.

Serve immediately.  

SIMPLE SHORTBREAD REFRIGERATOR COOKIES

When I served these cookies at a recent event, I explained that the cookies were simply shortbread. And the first comment I received was “and who doesn’t love shortbread?”) Right you are. Because if there is one cookie that pretty much everyone loves, it’s shortbread. You can enjoy shortbread with your morning coffee or tea. As a quick and easy nibble with your eleven o’clock coffee. Or to get you through an afternoon slump at work, or with your warm milk before going to bed. (Does anyone really drink warm milk before going to bed?) (Of course not!)

Anyway, I just threw that in because advising you to munch on a shortbread cookie while drinking hot chocolate or sipping on an aged scotch right before bed didn’t seem like a very nutritious recommendation. (But still a better choice than drinking warm milk, Yuk!!!)

Anyway, back to why you should bake these cookies at your earliest convenience. The first reason being that they are absolutely delicious. And yes, I have several recipes for shortbread cookies with additives like chocolate chips, etc. already on this site. And truly, they are delectable too. But if you are a purist and delight in crispy, buttery, and vanilla flavored cookies, this is the cookie for you.

And although I have yet to mention how easy these cookies are to build, please allow me to do so now. THEY ARE FREAKIN’ EASY TO PREPARE. However, they do require some patience on your part. (And isn’t that the hardest part for all of us with the patience of a hungry wolverine.) But chilling cookie dough is worth the wait. And there is a reason for this besides patience being a virtue.

According to King Arthur Baking “Chilling cookie dough before baking solidifies the fat in the cookies. As the cookies bake, the fat in the chilled cookie dough takes longer to melt than room-temperature fat. And the longer the fat remains solid, the less cookies spread.

In addition, the sugar in the dough gradually absorbs liquid. If you bake the dough immediately, before sugar has a chance to absorb much liquid, that liquid remains “free” in the dough, and promotes spread. Think of this in terms of thin vs. thick pancake batter: the more liquid in batter, the more it spreads, right? Same with cookies.

As the dough chills, it gradually dries out, concentrating on the flavors of all the ingredients. Think of watered-down lemonade, vs. lemonade with less water: dull flavor vs. bright, tangy flavor. Same with cookies.

Something else happens as the dough rests: part of the flour breaks down into its component parts, including a simple carbohydrate, sugar. Thus, since sugar is a flavor enhancer (like salt), the cookies may taste more flavorful, as well as sweeter after aging.”

Well, that’s all for today. And because I am starting next Sunday to prepare food for an upcoming house concert, I’m allowing myself to have a very lazy day today. See how that works. But giving myself permission to take it easy has not been easy.

When I first retired, I felt like my days should still be terribly productive. And for years I wouldn’t even allow myself to read until evening. But I am proud to say I have conquered that ridiculous tendency. I now read whenever I want to. So, I figure if I can change my habits and read whenever I want, I might be able to learn patience. Wish me luck.

And as always from our home to yours, peace and love to all.  

1 c. (2 sticks) unsalted butter, room temp.

1 c. powdered sugar

1 tsp. vanilla

½ tsp. fine sea salt

2 c. unbleached all-purpose flour, fluffed

granulated sugar

With an electric mixer, beat butter, powdered sugar, vanilla, and sea salt until smooth.

With mixer at low speed, add flour, mix just until dough forms.

Place dough on a long piece of plastic wrap. Sprinkle granulated sugar on and around the log. (How much sugar is up to you.)

Using your hands, wrap the dough into the plastic wrap firmly shaping it into a round log about 1¼-inches round. 

Refrigerate for at least 1 hour. (Overnight is best.)

Pre-heat oven to 350-degrees. Un-wrap log and using a sharp knife slice dough 3/8 inch thick (if dough feels hard, leave at room temperature for 5 to 10 minutes). Arrange slices, about 1-inch apart, on a baking sheet lined with parchment paper.

Bake until golden around the edges, 15 to 20 minutes. (Do not under-bake.)

Remove from oven and cool the cookies on the baking sheet for 1 to 2 minutes before transferring them to a wire rack to cool completely.

Store in an airtight container.   

CRISPY OATMEAL REFRIGERATOR COOKIES  

OK, there are very few cookies that I make that Mr. C. and I don’t agree that they are definitely worthy of my time and effort. In fact, I don’t remember a single instance of Mr. C. not praising me on the cookies that have just come out of the oven. Until this cookie, that is.

I fell in love with these crispy cookies immediately. But Mr. C. announced after biting into one, that these cookies “were not one of my best efforts.” What he was really saying was that he preferred “regular” oatmeal raisin cookies (studded with raisins and nuts) to crispy oatmeal cookies. But for me, I think these cookies are fantastic. I love the crunch and the fact that the prominent flavors are vanilla and oats.

I made these cookies, along with Simple Shortbread Refrigerator Cookies (recipe soon to be published), for our annual homeowner’s association meeting this past Saturday. They were a hit, and I got a ton of compliments from the attendees. In fact, people were taking 2 or 3 home with them when they left because they liked them so much.

Now, this only proves that not everyone, my husband included, has the refined palate that was given to me at birth. I was just lucky enough to be gifted with a perfect set of taste buds that immediately know if something tastes good or does not warrant even a second chance at anyone’s table. Like cilantro, tarragon, broccoli rabe, parsnips, rutabagas, and definitely lima beans! Who in their right mind could not want any of these foods relegated to a hazardous waste bin?! I rest my case!

Anyway, I have realized that it’s OK for Mr. C. not to like these cookies as much as I do. It only means that the next time I make them, because of course there will be a next time, I will have them all to myself. And we all (those of us with perfect taste buds that is) have Leigh Anne’s wonderful cooking site – yourhomebasedmom.com to thank for this recipe.

Well, enough about Mr. C. and me. (BTW, Mr. C. knows that I only poke fun at someone secure enough in their own mental acuity to handle a bit of fun at their expense.) (And Mr. C. definitely possesses one of the best minds I know of that can handle a bit of fun aimed right at him!)

So, on that happy note, I bid you adieu.

But first, on a more serious note, as you are I’m sure aware, our country is under siege. We are being attacked by certain elected (or unelected) “politicians” who vowed to defend our constitution, no matter what the cost to themselves. Which is simply not happening. Our democracy is being torn apart by the very people who pledged allegiance. Who swore to uphold the constitution and better the lives of those who believed what they avowed in their many speeches.

If you care about your country, especially if you live in a red state, please write to your congress person and tell them to stand up for the rights of every single person, regardless of color, religion, or sexual persuasion. If you don’t share your feelings with these representatives, they are going to assume you agree with what is happening to Medicare, people at risk, veterans, blue cities, medical insurance, etc. etc.

Just like raising a child takes a village, so does protecting the rights of everyone. Take a stand, even if you thought the “One Big Beautiful Bill” would never affect you personally.

If that is the case, you should, if you are paying even the least bit of attention, by now realized that you have been purposely misinformed. You, or someone you love, are going to be adversely affected. There is no way you or those you love can avoid feeling some kind of negative impact. But if you stand up for your rights and let your representatives know that you disapprove of their tactics, you will have done the most you can to help not only yourself but others as well.

Peace and love to all.  

1 c. (2 sticks) unsalted butter, room temp.

1 c. brown sugar, packed

1 c. granulated sugar

1 tsp. vanilla

2 lg. eggs

1½ c. unbleached all-purpose flour, fluffed

1 tsp. baking soda

1 tsp. fine sea salt

3 c. old fashioned oats (not instant oats)

In the bowl of your stand mixer, beat the butter until creamy. 

Add brown sugar, granulated sugar, vanilla, and eggs. Mix until light and fluffy.

In a separate bowl, whisk the flour, baking soda, and salt together, then stir in the oats.

Add the flour mixture to the wet ingredients and mix just until combined.

Divide the dough into two parts. Form each into a log.

Wrap in plastic wrap or wax paper and refrigerate for at least an hour. (Overnight is best.)

Slice chilled dough into generous ¼-inch rounds. Place on a parchment paper lined baking sheet about 1-inch apart.

Bake in a pre-heated 350-degree oven for 10-12 minutes.

Remove from oven and cool completely before serving. Store in an airtight container.

QUICK AND EASY INDIAN CURRY SAUCE WITH CHICKEN

Confession time. I really love Indian curries. Thai curries, not so much. Part of the reason might be that I started making and loving Indian curries in my 20’s. And hadn’t tasted a Thai curry until a few years ago. And there is a considerable difference in the ingredients used in the preparation of these two main types of curry. And even though I have tried Thai curries, I absolutely prefer the ingredients used to make Indian curry.

Indian curry is prepared from a base of onions, often tomatoes, and ginger-garlic paste, flavored with a medley of spices like turmeric, cumin, coriander, and chilies, and can include various proteins such as chicken, lamb, seafood, and lentils. 

Whereas Thai curries primarily feature a blend of aromatics and spices including chili peppers, garlic, shallots, galangal, lemongrass, and cilantro, often combined in a creamy coconut milk base. Additional common ingredients include protein (like chicken), vegetables such as bell peppers or green beans, and seasonings like fish sauce and lime juice to balance the rich flavors. And Thai curries are generally hotter and spicier than Indian curry. And as I’ve gotten older, spicy for me has gone from 2-3 to under 1 if possible. But before I go any further, a bit of history from the napoleon.com site:

“Curry originated from the word Kari, which is a spice blend that was brought to the rest of the world by British traders from the British East India Trading Co. in the mid-17th century. The spices were pre-mixed and ground before being traded to the British for export, however, you will not find what we know as Curry Powder in India. Coriander, turmeric, cumin, fenugreek, and powdered chili peppers are the basis for Indian Curry Powder. These elements are toasted and hand-blended by a chef in India, where a wide range of additional spices may be added depending on where in India the curry is being made, and what other ingredients are going in the dish.

The British East India Trading Co. is also credited with introducing the chilies that originated in Mexico and South America to the Asiatic countries. They were then added to curry and became a phenomenon that spread across the continent.”

Now that I have rambled on about why I prefer one curry over the other, which is of no real value to any of you reading this, I will get to the point.

This is a quick and easy recipe that works well for weeknights even if you don’t get home from work until 5:30 or 6:00 pm. I know that to be true, because I used to prepare this dish fairly frequently when I was a working mom with 4 starving children to feed.

I’d walk in the door, be greeted with “what’s for dinner”, pour water and raw rice into my rice cooker before changing clothes, and come back and prepare this dish while the rice was cooking. Oh, and steam broccoli or green beans too. Voila! Dinners ready! And yes, all my children loved curry. And to the best of my knowledge, they still do. And of course, garnishing the curry with chopped cashew nuts, chopped green onions, and savory Major Grey chutney never hurt. (If you’re going to do it, do it right.)

Well, that’s it for today. Mr. C. has a gig tonight at the Rockfish Grill in Anacortes. So, dinner is on them. And I can take it easy today knowing someone else has their apron on and will be preparing my meal.

We all need a break from whatever it is that makes us happy. For me, being in the kitchen is my happy place. But so is the chair where I spend hours reading. And speaking of reading, I just finished an interesting book lent to me by my friend Laura. The title of the book is The Paris Bookseller, written by Kerri Maher. It is the dramatic historical fiction account of how a humble bookseller fought against incredible odds to bring one of the most important books of the twentieth century (James Joyce’s Ulysses) to the world.

Even though The Paris Bookseller was set in Paris during the 20’s and 30’s, it is very relevant to what is happening in America today. Books were being banned in America, the nationwide ban on alcohol known as Prohibition, increasingly harsh limitations on immigration, which disproportionately affected non-white people and immigrants from Southern and Eastern Europe, the rise of industrialization, and anxieties about social changes and economic competition. All contributed to a very hard time in America. And once again, we are being attacked by our own leaders who were elected to protect our democracy.

If you are not as scared as I am for the future of America, and the world at large, you are just not paying attention. But if you are paying attention, then please work in your own way, to inform your friends of the real facts (not Fox News), be available to talk calmly and respectfully with your friends, and be the best person you know how to be. Your example is worth a thousand words.

Peace and love to all.

3 T. unsalted butter

1 c. diced boneless, skinless chicken breast

⅓ c. finely diced carrots

⅓ c. finely diced onion

2 garlic cloves, minced

2 T. dry vermouth

1 tsp. dried parsley

2 T. flour

3-4 tsp. curry powder, or more to taste

freshly ground black pepper

1 can cream of mushroom soup

½ c. whole milk

1½ c. sour cream

chopped cashew nuts (opt.)

finely chopped green onions (opt.)

chutney (opt.)

Melt butter in a medium sized saucepan. Add the chicken and cook just until done. Remove from pan and set aside.

Add carrot and onion to the pan and sauté for about 5 minutes. Add garlic and cook for one minute.

Deglaze the pan with vermouth. Whisk in the parsley, flour, curry powder, black pepper, cream of mushroom soup, and milk. Bring to boil, reduce heat, and simmer on low for about 5 minutes. Carefully whisk in the sour cream and add the cooked chicken.

Taste and adjust seasoning. Serve over rice garnished with cashews, green onions, and chutney, or any combination thereof.

EASY FRIED CHICKEN STRIPS  

The first thing I need to tell you is that I have been trying to make a simple to make, truly great pan-fried chicken for decades. Decades.

At first, I blamed the chicken. Totally unfair. I grew up on a chicken farm and many after church Sunday dinners (about 2:00 pm) consisted of fried chicken and mashed potatoes and gravy. Heaven! Then we would have a light supper around 7:00 pm. Maybe waffles or an omelet, that sort of thing.

But fried chicken was, and still is, one of my top 10 favorite foods. Good fried chicken, that is! And yes, I am mighty picky about my fried chicken. What took me years to figure out was that the fried chicken of my youth was made with home raised, well-fed young chickens that had just been slaughtered. And then they were probably fried in lard. Hello! I simply couldn’t replicate that in today’s world. Unless of course I started raising chickens, and that just wasn’t going to happen. In Bellevue. In these shoes! I don’t think so!

So, as hard as I tried, I just wasn’t satisfied with the results. Oh, the chicken was edible. But not up to my childhood standards. (And you know how persnickety children can be!)    

I do have 2 fabulous recipes for fried chicken already – (Spicy Fried Chicken Thighs and Smothered Fried Chicken), but they are both fairly time consuming. But what I have tried to make unsuccessfully all these years is a truly tasty fried chicken that does not require too many ingredients, a lot of time to sit in a buttermilk bath in the fridge, or to be cooked in a quart of cooking oil in a deep fat fryer. Until now.

So, this recipe, after numerous “this is OK, but not good enough” tries, is now my “I can do it, I can now make quick and easy fried chicken.” (Maybe even better than my grandmas!)

So, if you too love fried chicken, but don’t want to spend hours in the kitchen, I suggest you give this recipe a try. I truly was pleased with this recipe after waiting 60 years to find one that satisfied my “quick and easy (but delicious) fried chicken” stipulation! The crust is crisp and very tasty, and the chicken is tender and juicy. Who could ask for anything more?

And with that happy thought to leave you with – peace and love to all.

2 boneless, skinless chicken breasts

½ c. – 2/3 c. buttermilk

2/3 c. unbleached all-purpose flour

1 tsp. kosher salt

1 tsp. seasoned salt

freshly ground black pepper

1½ tsp. granulated garlic 

1½ tsp. granulated onion

¾ tsp. paprika

1 egg

1 c. cooking oil (I use canola oil)

Cut each breast into 4-5 equal sized strips (or pieces) depending on the size of the chicken breasts. Place the pieces in a glass bowl with a lid. Pour in enough buttermilk to coat the chicken pieces. Cover and refrigerate for at least an hour. (2-3 hours is even better.)

Whisk the flour, kosher salt, seasoned salt, black pepper, granulated garlic, granulated onion, and paprika together in a shallow dish.

Whisk the egg in another shallow dish.   

After the chicken pieces have spent some time in the fridge, remove each piece from the buttermilk, and roll the chicken strips in the flour mixture until they are lightly coated with flour.

Then, dip each piece in the beaten egg and return to the seasoned flour. Roll in the flour again until each strip/piece is coated, and transfer to a platter.

Just before frying the chicken, sprinkle the pieces one last time with any remaining seasoned flour.

Heat the cooking oil in a large skillet (cast iron is best) to 325-degrees.   

Gently place each strip in the hot oil and cook for 4 minutes or until nicely browned. Using a pair of tongs or a spatula, gently flip each strip, and cook for 3-4 more minutes, or until the chicken reaches at least 160-degrees at the thickest part. (Do not overcook. That leads to dry chicken.)

When fully cooked, transfer the fried chicken to a paper towel lined platter.

Serve immediately or keep warm until served.

SIX WEEK BRAN MUFFINS

The first thing you should know is that as the recipe title implies, this amazing batter can be stored in your refrigerator for up to six weeks. The second thing you should know is that the recipe below is for half an original batch. So, feel free to double this recipe, because we already know it will double beautifully. But, at this time in our lives, unless I am planning to feed 60 people, half the original recipe is still a lot for 2 senior citizens to consume, even if it is over a six-week period! (My story and I’m sticking to it!)

But the most important thing you should know is that this recipe has been around for decades because it produces absolutely delicious muffins. And bran is good for most of us because it is a rich source of fiber, vitamins, and minerals. 

But no, this is not the healthiest bran muffin recipe out there. But I challenge you to find a better tasting bran muffin recipe.

So, if you want to ramp up your breakfast enjoyment, I suggest you add muffins to your list of breakfast favorites. And this muffin recipe is a good one to start with. Easy to build, and even easier to eat.

Well, that’s it for today. Andy’s sister and her husband are coming for breakfast tomorrow morning. And since I have been hungry for maple bars for weeks now, I finally have the excuse to bake up a batch. That’s right. My recipe – Quick and Easy Baked Maple Bars, are baked rather than deep fat fried. And believe it or not, they are even yummier than the ones you get from a bakery.  

So, I will build the dough today and let it sit in my fridge overnight and bake it off just before they arrive. Then slather the bars with maple frosting a few minutes before they are to be served. Yum.

For how to build yeast dough one day, and bake it off the next, read my simple technique below.

So, farewell for now. Keep smiling. Be strong. And as always, peace and love from our home to yours.

3 c. bran cereal (I use Kellog All-Bran Buds)

1 c. boiling water

½ c. vegetable oil

1½ c. granulated sugar

2 lg. eggs

2 c. buttermilk 

2½ c. unbleached all-purpose flour, fluffed

2½ tsp. baking soda

1 tsp. kosher salt

In a large mixing bowl, pour the boiling water over the bran buds and let the mixture sit for 5 minutes or more.

In a separate bowl, whisk the vegetable oil, granulated sugar, eggs, and buttermilk together.

In yet another bowl, whisk the flour, baking soda, and salt together.

Using a large wooden or metal spoon, stir the liquid mixture (veggie oil etc.) into the moistened bran until well combined.

Then add the flour mixture, stirring just until combined, being careful not to overmix.

Cover the batter and refrigerate. The batter is best if chilled for at least six hours before the first batch is baked.

To bake, pre-heat your oven to 400-degrees. Grease a muffin tin or line it with paper liners. (I use parchment paper liners. See my recipe for Streusel Topped Blueberry Breakfast Muffins for why.)

Fill the muffin cups about two-thirds full. (Batter should still be cold when you fill the paper liners.) (For filling the paper liners, I use a large ice-cream scoop).

Then bake in the pre-heated oven for 15–20 minutes, or until a toothpick inserted into the center of a muffin comes out clean.

Remove from oven and allow the muffins to cool before serving. 

This recipe yields about 2½ dozen regular sized muffins.

For 2-day yeast bread:

  1. After building the dough, cover the mixing bowl with plastic wrap, and allow the dough to rise for about 20 to 30 minutes on the counter before sticking it in the fridge. Make sure your mixing bowl gives plenty of room for the dough to expand.
  2. The next day, before shaping the dough, allow your dough to regain some warmth on the counter for 40 to 60 minutes and become slightly puffy before shaping it.
  3. Then follow the original recipe for the second rise.