Hosting Halloween parties started for me in the late 60’s. I had just met Dick and Eloise, and enjoying multiple dinners together we quickly became more than lifelong friends. We became extended family. So, just after they moved into their new home in Medina on Lake Washington, they asked me if I would like to co-host a Halloween party with them. Being a stay-at-home new mommy at that time, I was thrilled to help in any way I could. Plus, that would give me a good reason to expand my cooking skills. And to make a fuzzy pink bunny costume.
So, that was the beginning of annual Halloween parties given by and for our extended family and friends. I think the last Halloween party I hosted was in 1990, but don’t quote me on that. By then I’d been single for several years, my youngest daughter had just graduated from college, and I had no idea Mr. C. was about to come into my life. Plus, being in my late 40’s, I had outgrown costume parties. I found I much preferred hosting small dinner parties or cocktail parties with fancy hors d’oeuvres and appetizers. Along with sophisticated adult beverages.
It’s amazing how age plays such a large part in how we entertain. I may not throw Halloween parties any longer or even be interested in dressing up in a fuzzy pink bunny suit to attend one given by someone else. But I still love to feed people in my home. And do so on a regular basis.
Since 2008, Mr. C. and I have hosted 112 (soon to be 113) jazz concerts and 1 classical concert in our home. Plus, several large birthday parties, and many small gatherings and holiday get togethers. And not once have I been tempted to wear a costume. (Well, just once. But only for trick-or-treaters brave enough to walk up our steep driveway in 2009.)
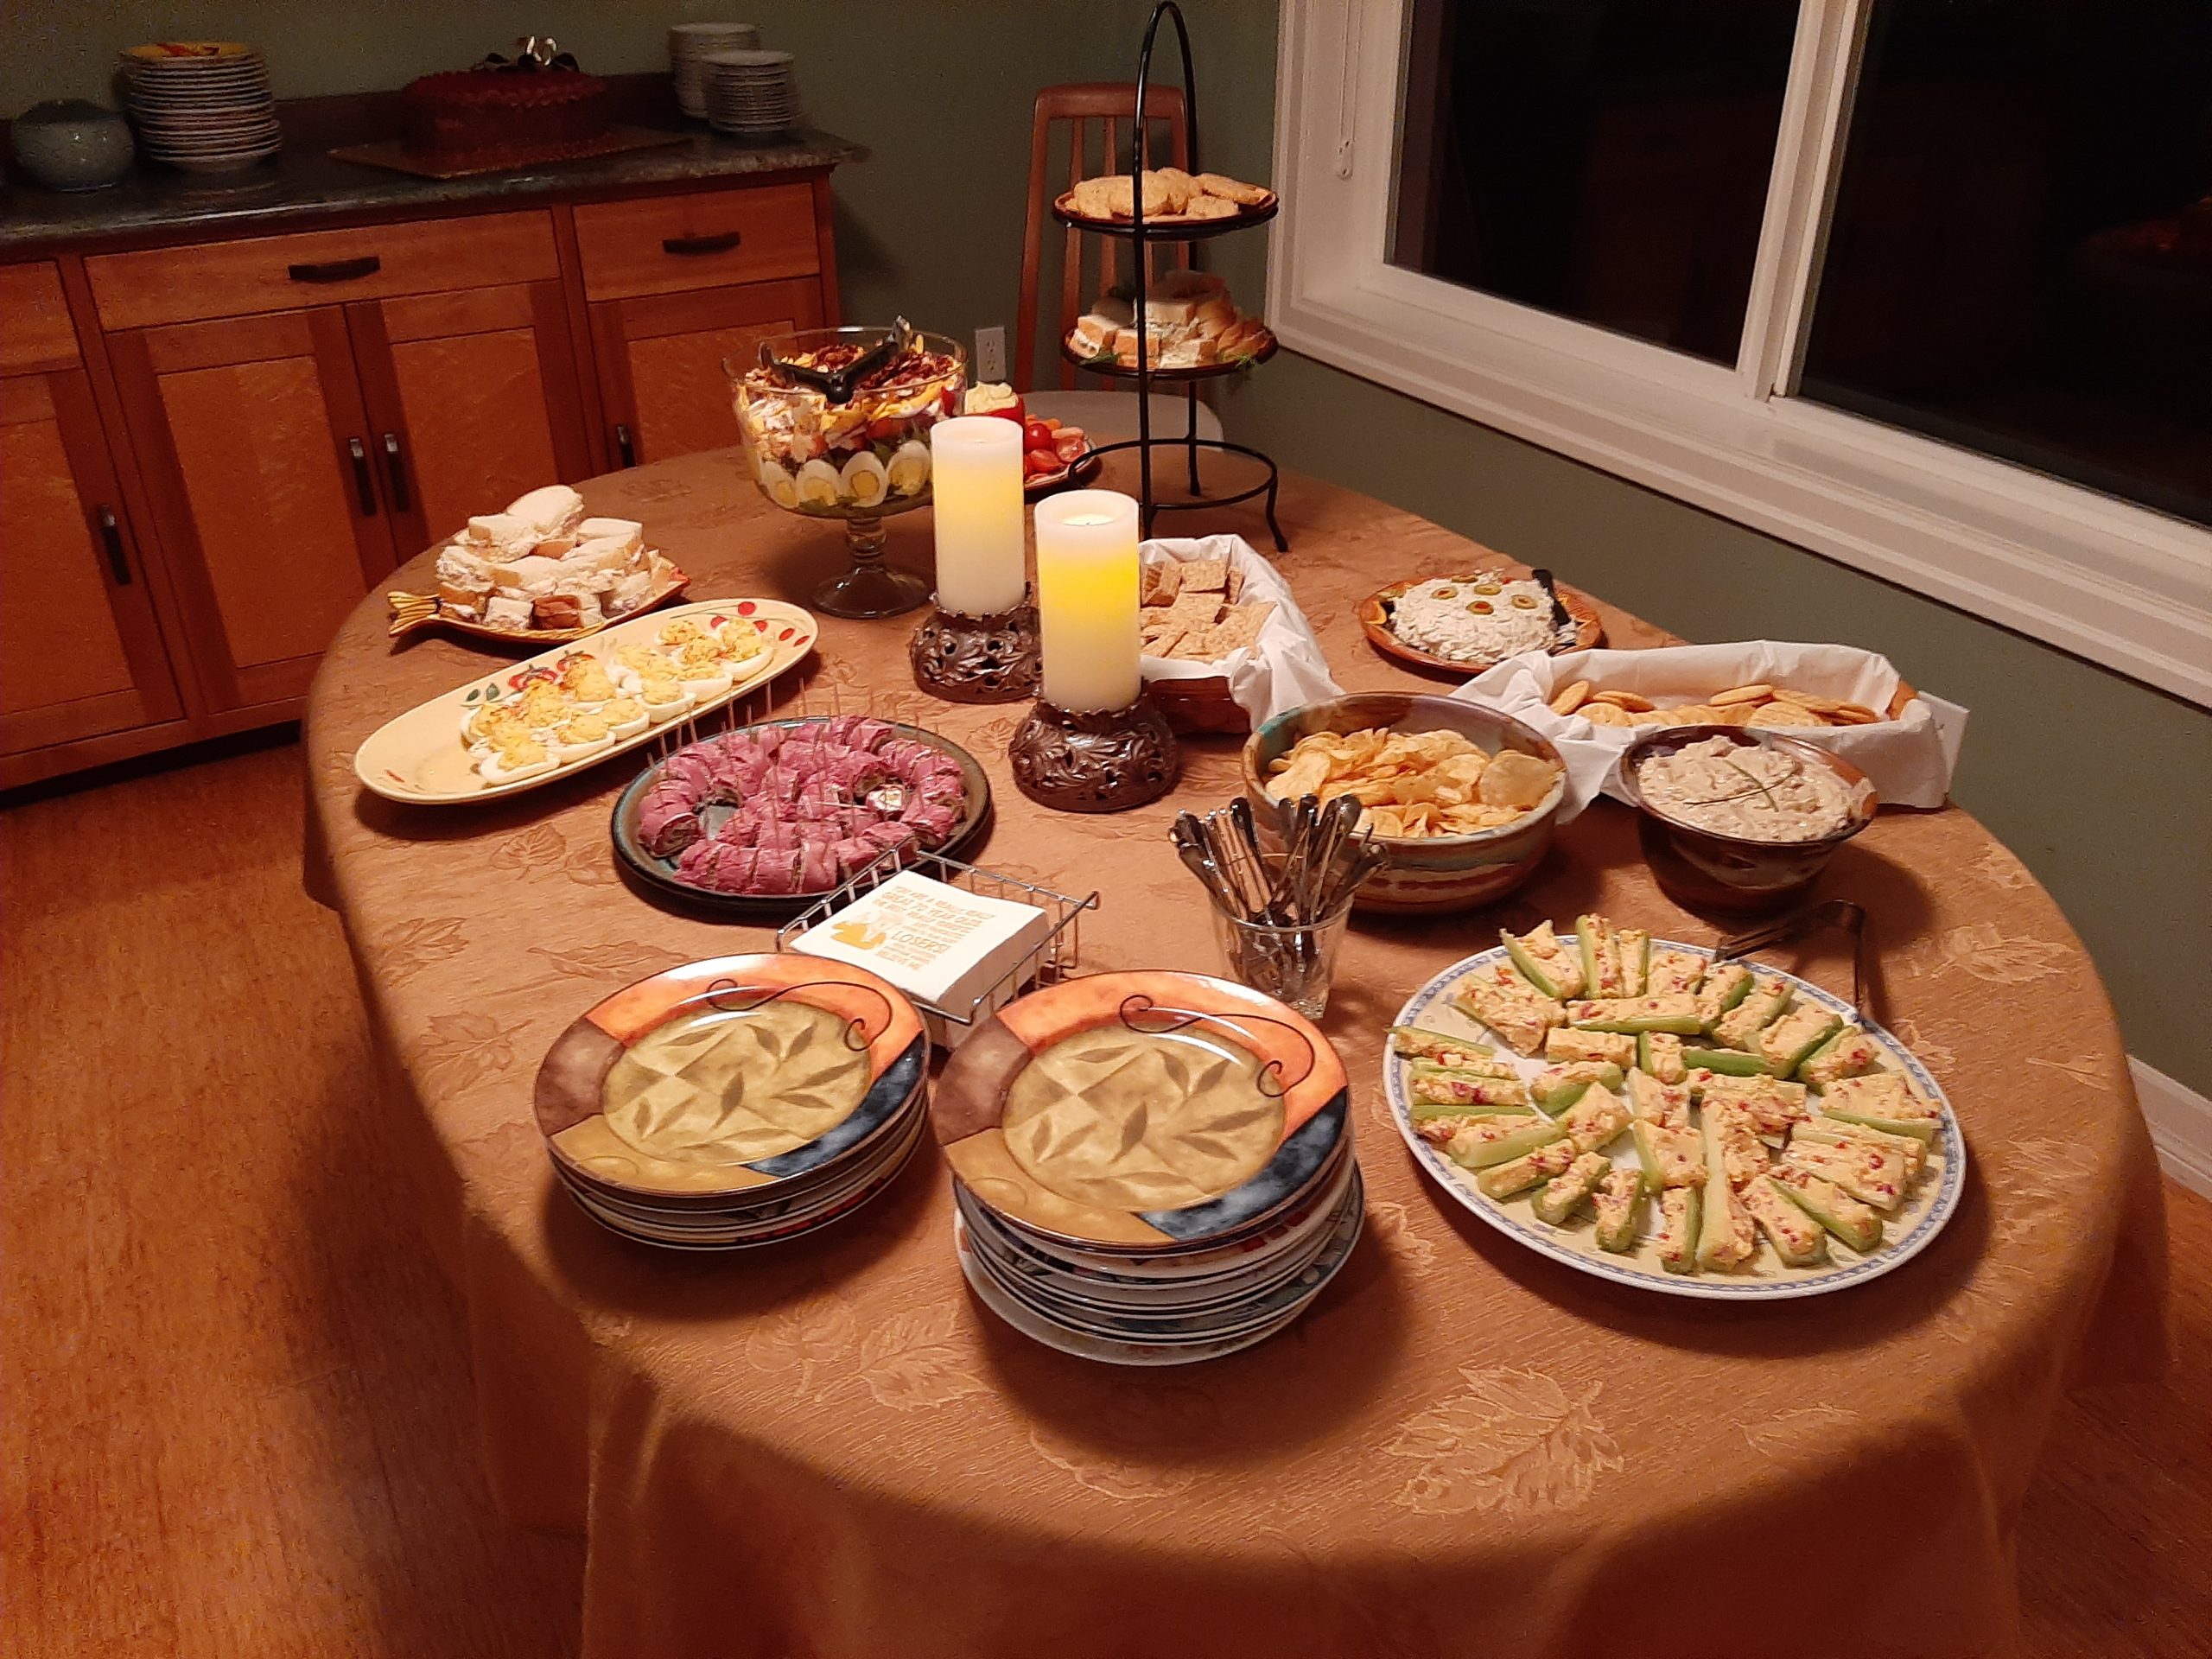
Now I know, many people my age still enjoy dressing up for Halloween and God bless them, one and all. And for that very reason, I decided to share with you all, my list of the perfect appetizers and drinks to serve your Halloween guests who expect to be fed and their thirst quenched by homemade and delicious appetizers and sophisticated cocktails.
And of course, every single one of these recipes can be found on this site and are appropriate for any type of party you might feel like hosting.
A note about the cocktail recipes: some contain several ingredients and some with rather special ingredients. So, you might want to limit your drink options to two standard cocktails like Martinis and Manhattans and one or two “specialty” cocktails. And beer and wine, of course. And non-alcoholic beverages for sure!
May you too continue to or begin to open your home to guests for holidays or “no reason at all” gatherings. The more we share our time and effort with family and friends, the more we encourage civility. And we need those positive connections with our friends and family more than ever before. Be that person that brings people together reminding one and all that we are not alone. That we are each a part of an extended family or group of friends that care for each other, want the best for each other, and are always there to lend a hand, wipe away a tear, or bake a batch of cookies when only a cookie can make everything better.
And as always, peace and love to all.
APPETIZERS
Bacon and Parmesan Stuffed Mushrooms
Bacon Wrapped Water Chestnuts
Buffalo Wings
Butternut Squash, Blue Cheese, and Walnut Tart
Charcuterie Board
Cheddar Pecan Crackers
Creamy Curry Dip
Crostini (great base for all kinds of spreads)
Deviled Eggs
French Chicken Liver Pâté
Guacamole
Hot Pepper Chicken Bites with Cilantro Sour Cream Sauce
Hummus A Tune Mr. C.(two recipes in one)
Marinated Goat Cheese
Olive Stuffed Cheese Balls
Onion Dip
Parmesan Crackers
Pastrami Roll Ups
Quick and Easy Party Mix
Rosemary Roasted Cashews
Rotolo Al Forno
Smoked Salmon Spread
Southern Pimento Cheese Spread
Sun Dried Tomato and Basil Spread
Tapenade
Viennese Liptauer
COCKTAILS
Ancho Problem
Corpse Reviver
Cosmopolitan
El Grito
French 75
Gin Gimlet and Gin Rickey
Kentucky or Moscow Mule
Margarita
Martini (see recipe below)
McQueen
Paper Plane
Penicillin
Presbyterian Revenge
Revolver
Rob Roy
Sidecar
Toronto
Vieux Carré
Whiskey Sour (this post also includes pictures and descriptions of the different types of glasses used for cocktails)
MARTINI
1 cold martini or coupe glass (see picture of a Champagne Coupe glass on Whiskey Sour recipe)
2½ oz. gin (Tanqueray preferably or vodka, for a vodka martini)
½ oz. (more or less) dry vermouth
ice
skewer
1–3 olives (garnish)
Chill the glass.
Combine gin and vermouth in a cocktail shaker with ice or a mixing glass filled with ice.
Stir or shake until the liquid is ice-cold.
Strain the liquid into the chilled cocktail glass. (If you are like me, I want some of that ice in my drink. I like my martini to stay cold.)
Skewer one or more olives and gently plop in the drink.
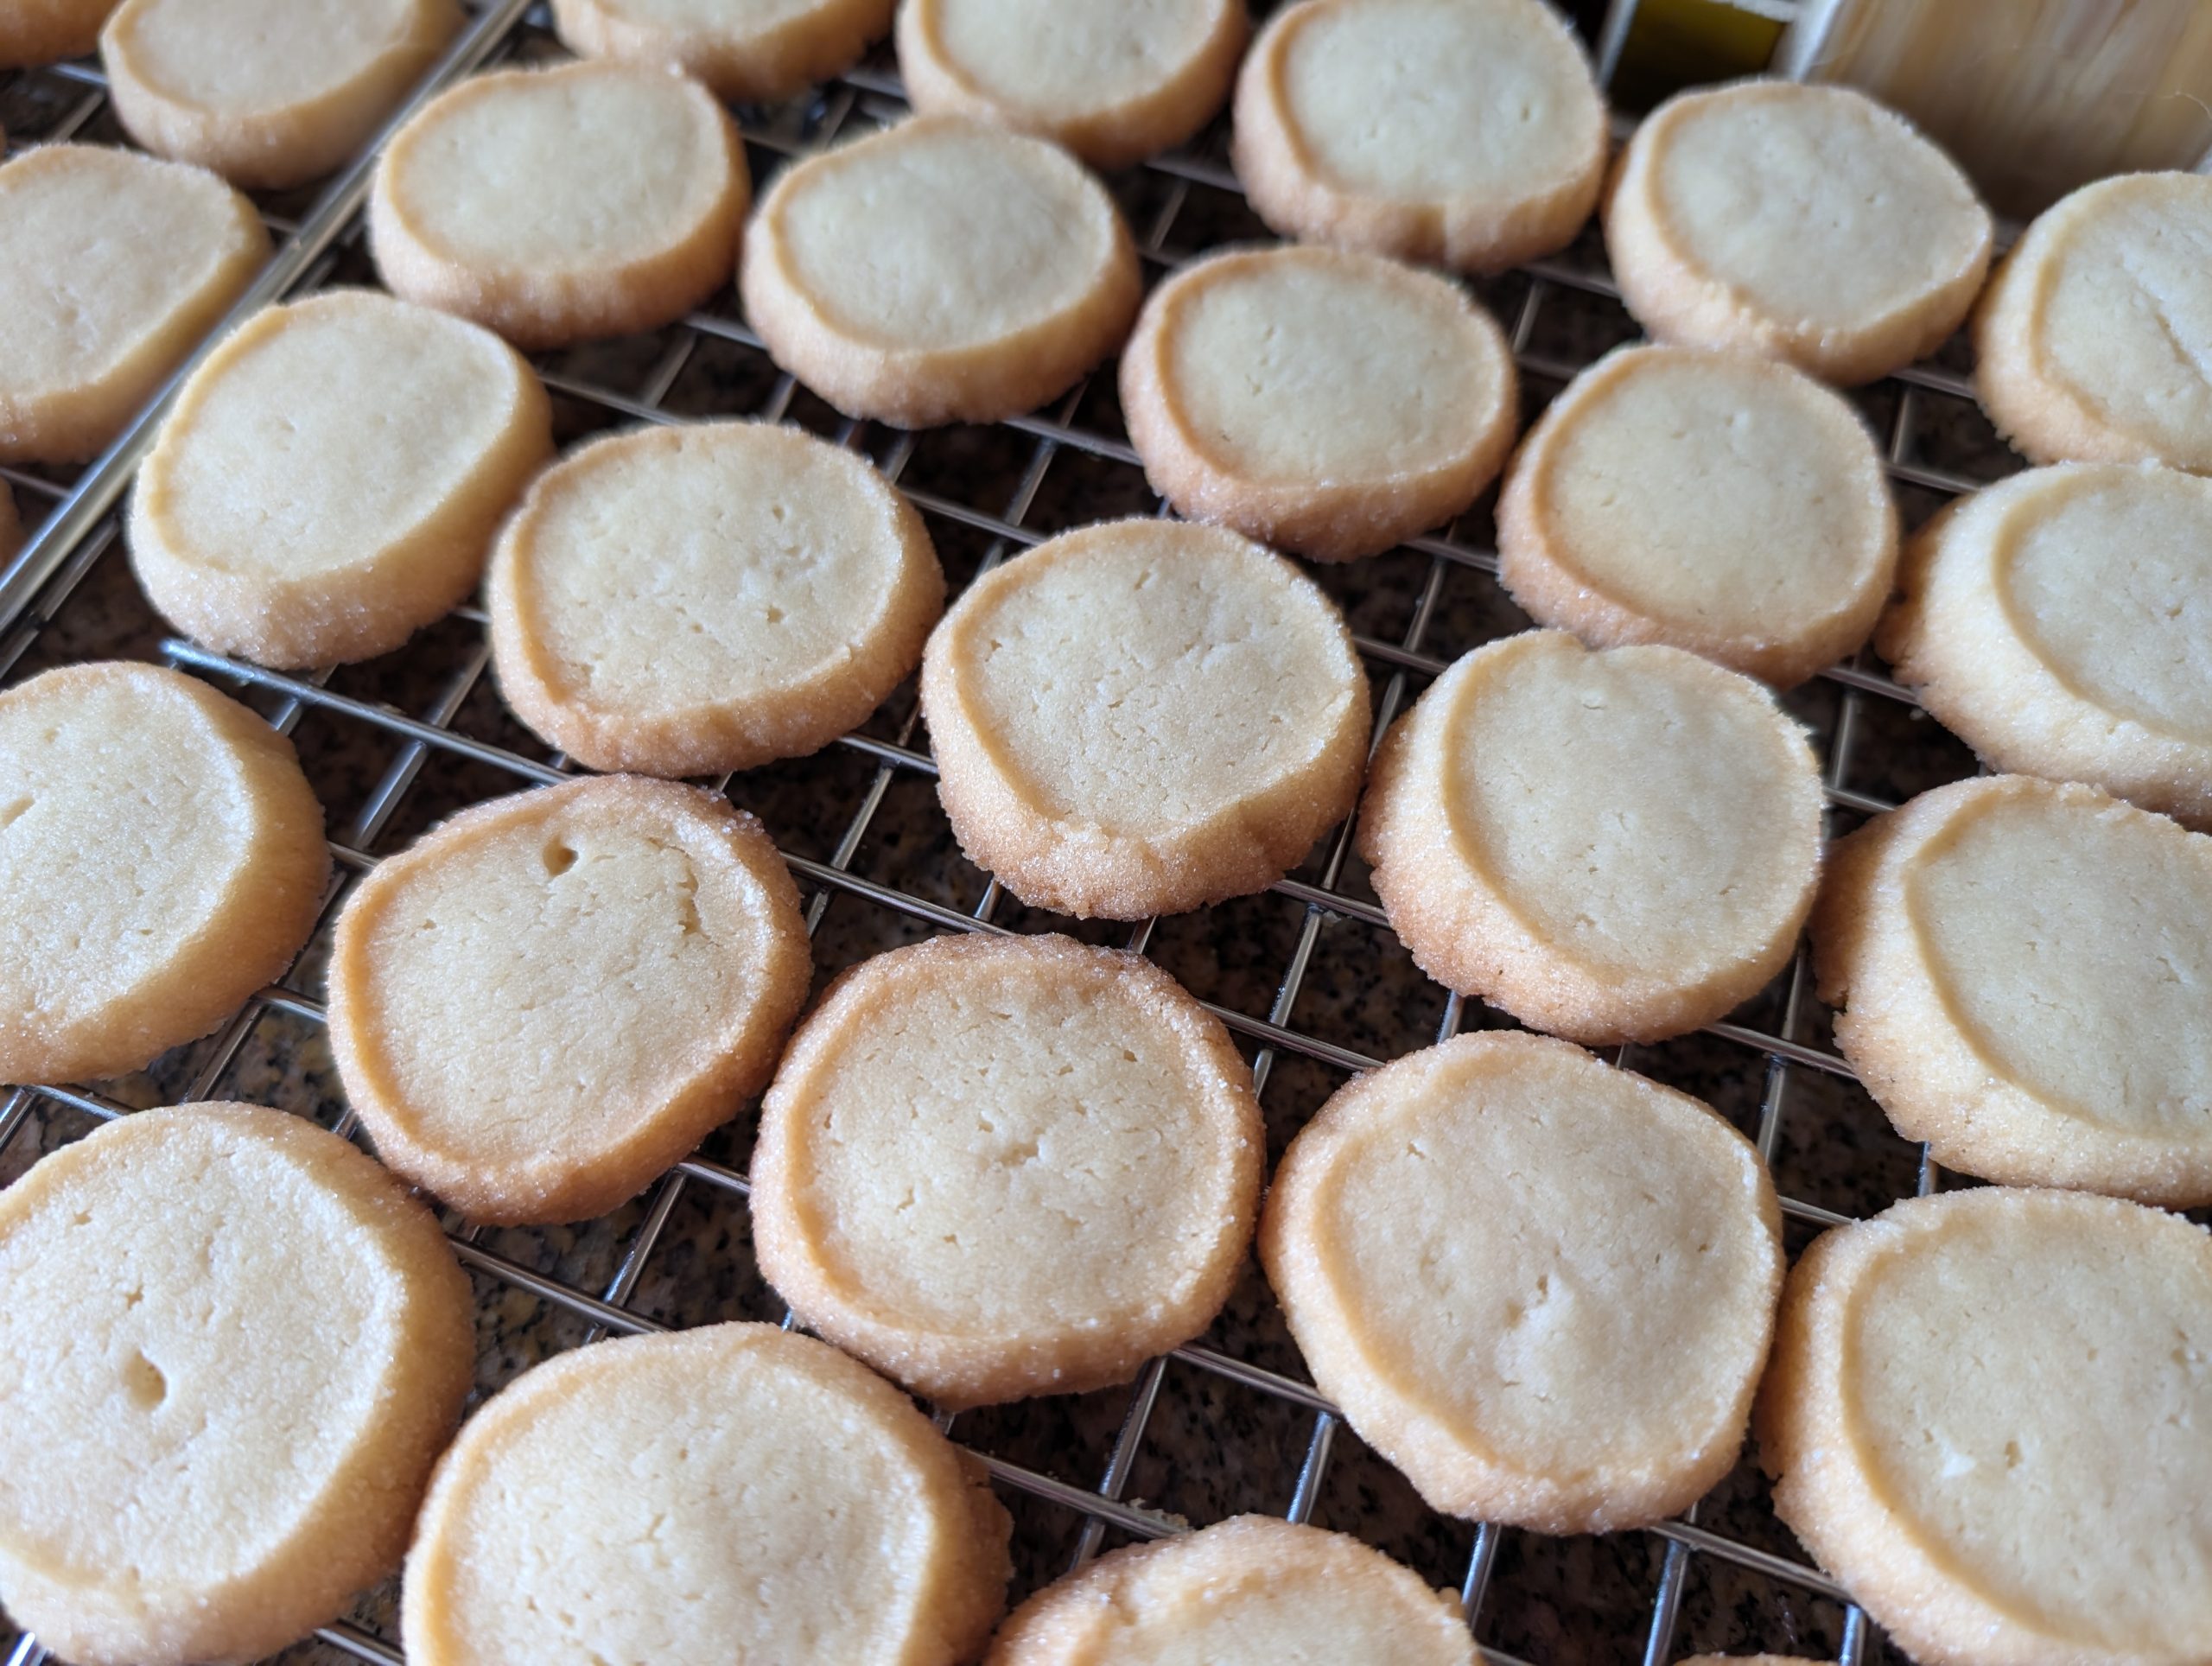
When I served these cookies at a recent event, I explained that the cookies were simply shortbread. And the first comment I received was “and who doesn’t love shortbread?”) Right you are. Because if there is one cookie that pretty much everyone loves, it’s shortbread. You can enjoy shortbread with your morning coffee or tea. As a quick and easy nibble with your eleven o’clock coffee. Or to get you through an afternoon slump at work, or with your warm milk before going to bed. (Does anyone really drink warm milk before going to bed?) (Of course not!)
Anyway, I just threw that in because advising you to munch on a shortbread cookie while drinking hot chocolate or sipping on an aged scotch right before bed didn’t seem like a very nutritious recommendation. (But still a better choice than drinking warm milk, Yuk!!!)
Anyway, back to why you should bake these cookies at your earliest convenience. The first reason being that they are absolutely delicious. And yes, I have several recipes for shortbread cookies with additives like chocolate chips, etc. already on this site. And truly, they are delectable too. But if you are a purist and delight in crispy, buttery, and vanilla flavored cookies, this is the cookie for you.
And although I have yet to mention how easy these cookies are to build, please allow me to do so now. THEY ARE FREAKIN’ EASY TO PREPARE. However, they do require some patience on your part. (And isn’t that the hardest part for all of us with the patience of a hungry wolverine.) But chilling cookie dough is worth the wait. And there is a reason for this besides patience being a virtue.
According to King Arthur Baking “Chilling cookie dough before baking solidifies the fat in the cookies. As the cookies bake, the fat in the chilled cookie dough takes longer to melt than room-temperature fat. And the longer the fat remains solid, the less cookies spread.
In addition, the sugar in the dough gradually absorbs liquid. If you bake the dough immediately, before sugar has a chance to absorb much liquid, that liquid remains “free” in the dough, and promotes spread. Think of this in terms of thin vs. thick pancake batter: the more liquid in batter, the more it spreads, right? Same with cookies.
As the dough chills, it gradually dries out, concentrating on the flavors of all the ingredients. Think of watered-down lemonade, vs. lemonade with less water: dull flavor vs. bright, tangy flavor. Same with cookies.
Something else happens as the dough rests: part of the flour breaks down into its component parts, including a simple carbohydrate, sugar. Thus, since sugar is a flavor enhancer (like salt), the cookies may taste more flavorful, as well as sweeter after aging.”
Well, that’s all for today. And because I am starting next Sunday to prepare food for an upcoming house concert, I’m allowing myself to have a very lazy day today. See how that works. But giving myself permission to take it easy has not been easy.
When I first retired, I felt like my days should still be terribly productive. And for years I wouldn’t even allow myself to read until evening. But I am proud to say I have conquered that ridiculous tendency. I now read whenever I want to. So, I figure if I can change my habits and read whenever I want, I might be able to learn patience. Wish me luck.
And as always from our home to yours, peace and love to all.
1 c. (2 sticks) unsalted butter, room temp.
1 c. powdered sugar
1 tsp. vanilla
½ tsp. fine sea salt
2 c. unbleached all-purpose flour, fluffed
granulated sugar
With an electric mixer, beat butter, powdered sugar, vanilla, and sea salt until smooth.
With mixer at low speed, add flour, mix just until dough forms.
Place dough on a long piece of plastic wrap. Sprinkle granulated sugar on and around the log. (How much sugar is up to you.)
Using your hands, wrap the dough into the plastic wrap firmly shaping it into a round log about 1¼-inches round.
Refrigerate for at least 1 hour. (Overnight is best.)
Pre-heat oven to 350-degrees. Un-wrap log and using a sharp knife slice dough 3/8 inch thick (if dough feels hard, leave at room temperature for 5 to 10 minutes). Arrange slices, about 1-inch apart, on a baking sheet lined with parchment paper.
Bake until golden around the edges, 15 to 20 minutes. (Do not under-bake.)
Remove from oven and cool the cookies on the baking sheet for 1 to 2 minutes before transferring them to a wire rack to cool completely.
OK, there are very few cookies that I make that Mr. C. and I don’t agree that they are definitely worthy of my time and effort. In fact, I don’t remember a single instance of Mr. C. not praising me on the cookies that have just come out of the oven. Until this cookie, that is.
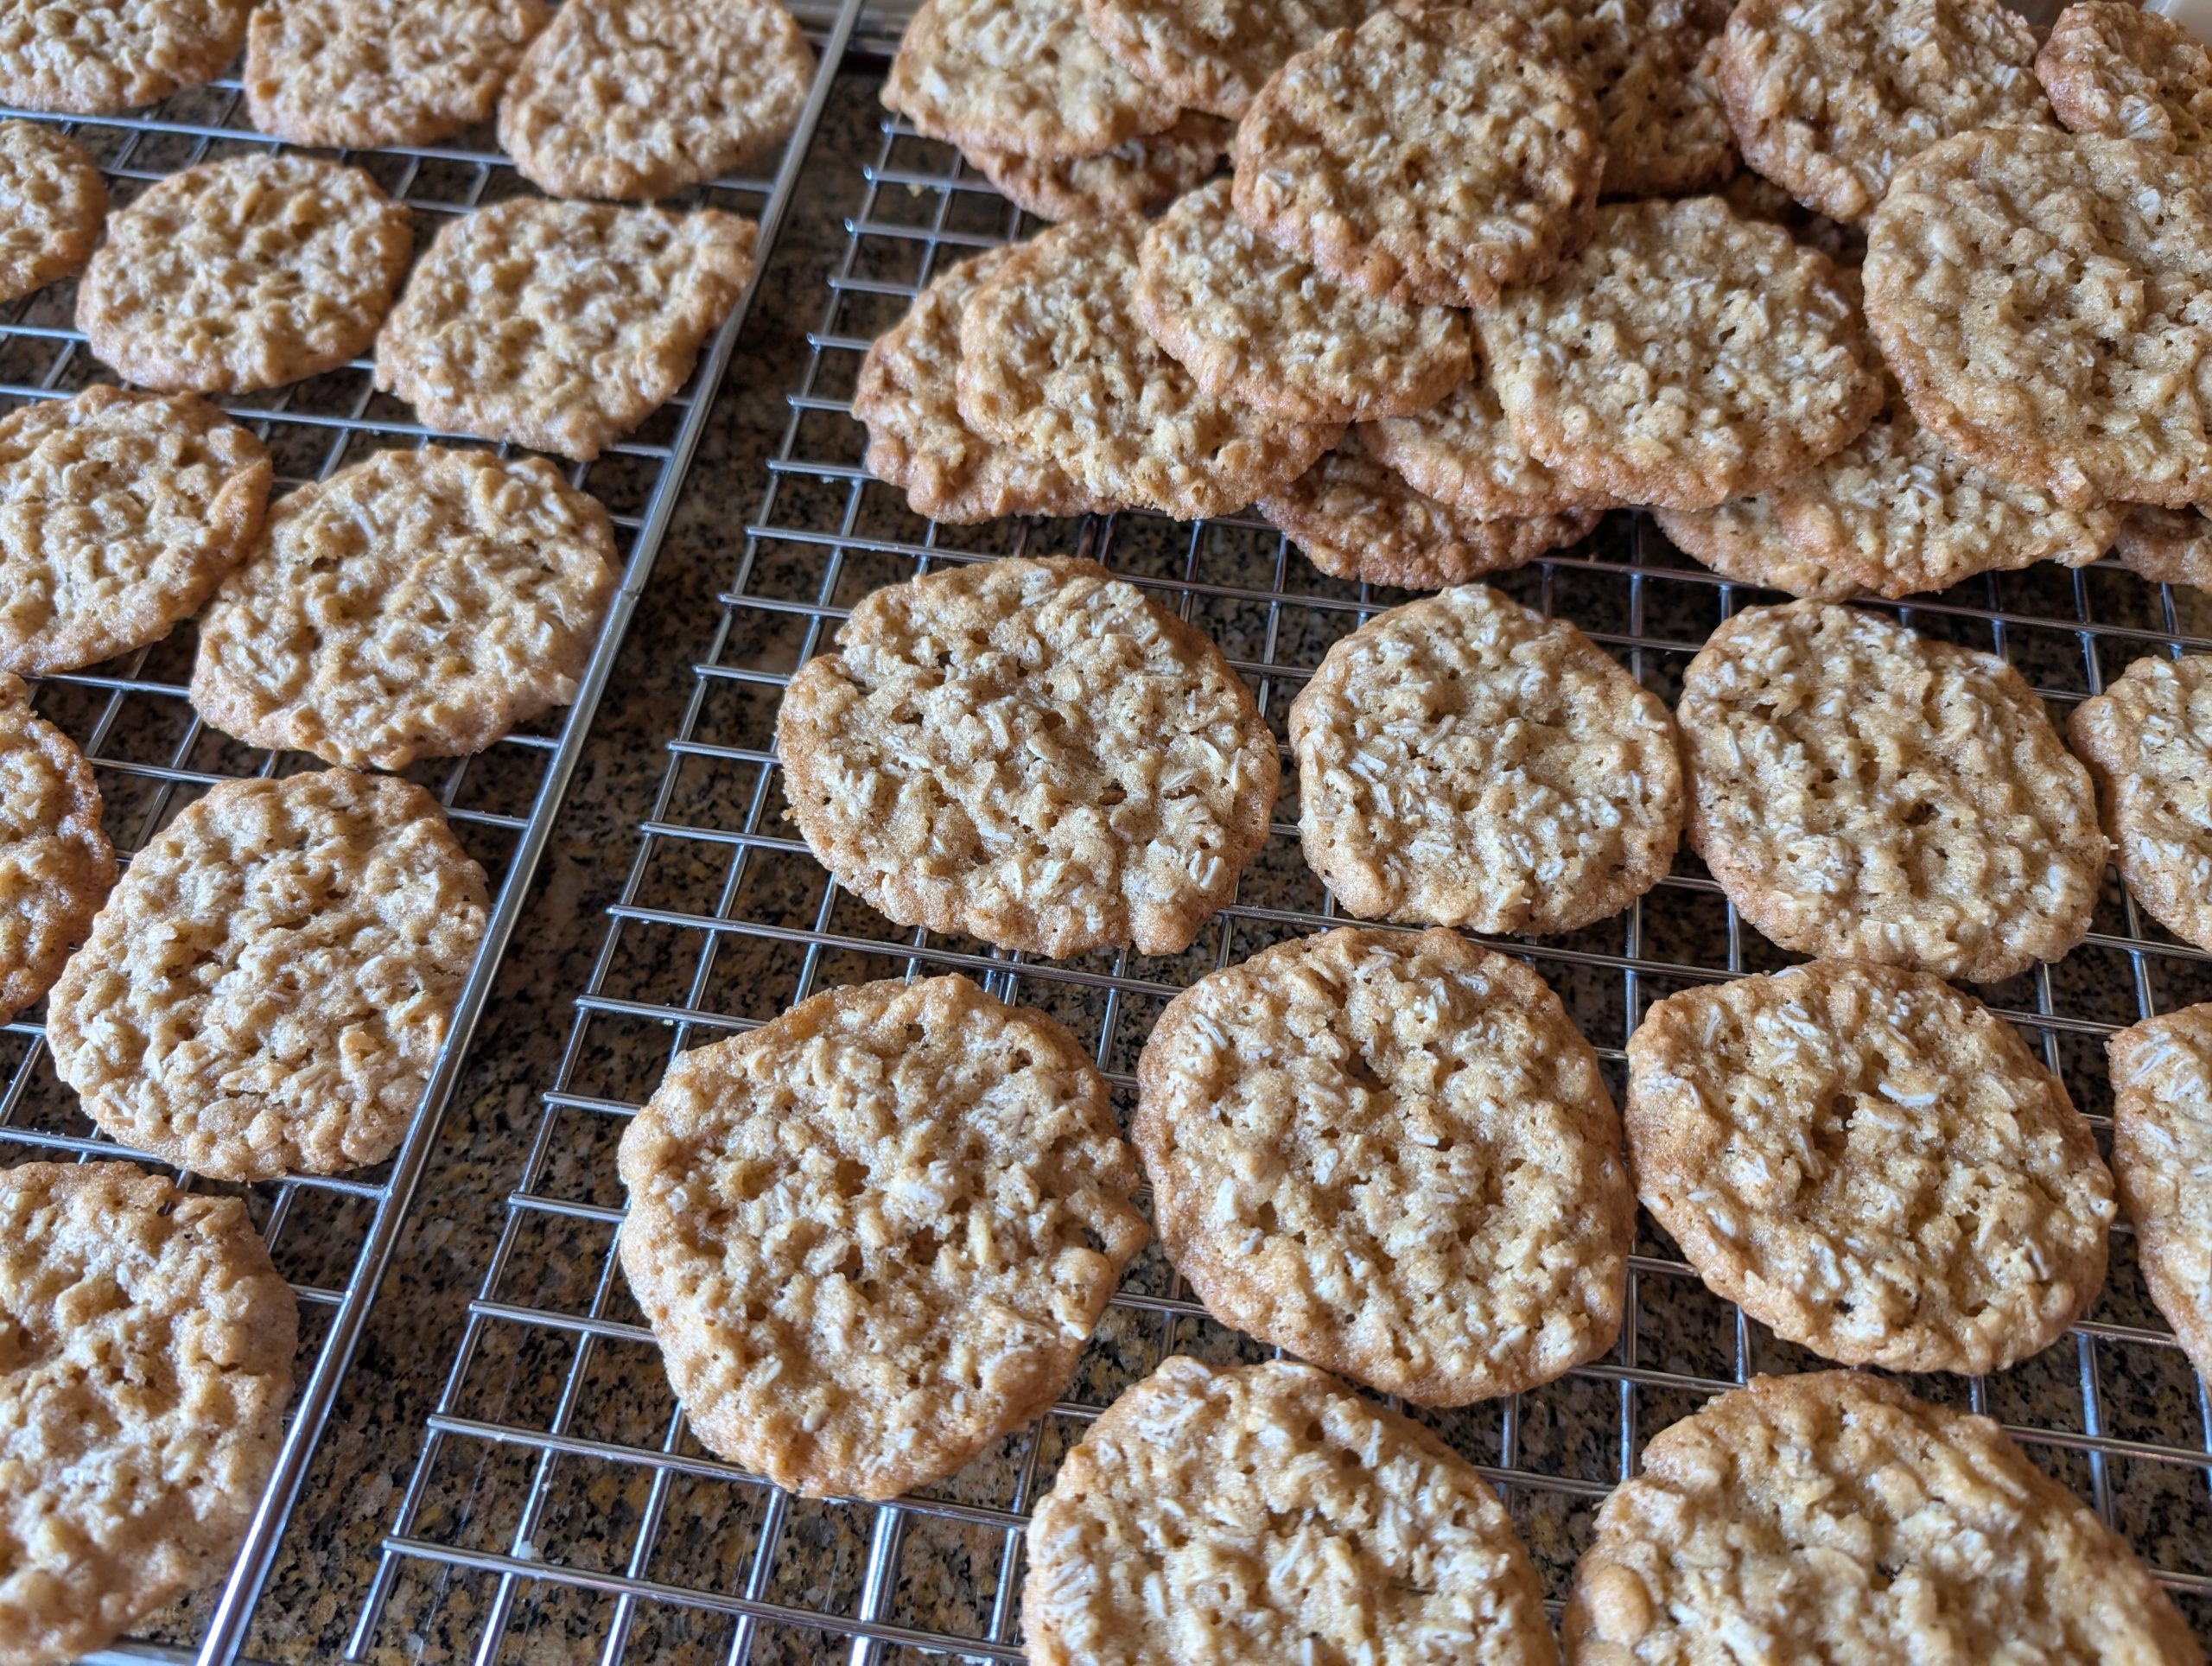
I fell in love with these crispy cookies immediately. But Mr. C. announced after biting into one, that these cookies “were not one of my best efforts.” What he was really saying was that he preferred “regular” oatmeal raisin cookies (studded with raisins and nuts) to crispy oatmeal cookies. But for me, I think these cookies are fantastic. I love the crunch and the fact that the prominent flavors are vanilla and oats.
I made these cookies, along with Simple Shortbread Refrigerator Cookies (recipe soon to be published), for our annual homeowner’s association meeting this past Saturday. They were a hit, and I got a ton of compliments from the attendees. In fact, people were taking 2 or 3 home with them when they left because they liked them so much.
Now, this only proves that not everyone, my husband included, has the refined palate that was given to me at birth. I was just lucky enough to be gifted with a perfect set of taste buds that immediately know if something tastes good or does not warrant even a second chance at anyone’s table. Like cilantro, tarragon, broccoli rabe, parsnips, rutabagas, and definitely lima beans! Who in their right mind could not want any of these foods relegated to a hazardous waste bin?! I rest my case!
Anyway, I have realized that it’s OK for Mr. C. not to like these cookies as much as I do. It only means that the next time I make them, because of course there will be a next time, I will have them all to myself. And we all (those of us with perfect taste buds that is) have Leigh Anne’s wonderful cooking site – yourhomebasedmom.com to thank for this recipe.
Well, enough about Mr. C. and me. (BTW, Mr. C. knows that I only poke fun at someone secure enough in their own mental acuity to handle a bit of fun at their expense.) (And Mr. C. definitely possesses one of the best minds I know of that can handle a bit of fun aimed right at him!)
So, on that happy note, I bid you adieu.
But first, on a more serious note, as you are I’m sure aware, our country is under siege. We are being attacked by certain elected (or unelected) “politicians” who vowed to defend our constitution, no matter what the cost to themselves. Which is simply not happening. Our democracy is being torn apart by the very people who pledged allegiance. Who swore to uphold the constitution and better the lives of those who believed what they avowed in their many speeches.
If you care about your country, especially if you live in a red state, please write to your congress person and tell them to stand up for the rights of every single person, regardless of color, religion, or sexual persuasion. If you don’t share your feelings with these representatives, they are going to assume you agree with what is happening to Medicare, people at risk, veterans, blue cities, medical insurance, etc. etc.
Just like raising a child takes a village, so does protecting the rights of everyone. Take a stand, even if you thought the “One Big Beautiful Bill” would never affect you personally.
If that is the case, you should, if you are paying even the least bit of attention, by now realized that you have been purposely misinformed. You, or someone you love, are going to be adversely affected. There is no way you or those you love can avoid feeling some kind of negative impact. But if you stand up for your rights and let your representatives know that you disapprove of their tactics, you will have done the most you can to help not only yourself but others as well.
Peace and love to all.
1 c. (2 sticks) unsalted butter, room temp.
1 c. brown sugar, packed
1 c. granulated sugar
1 tsp. vanilla
2 lg. eggs
1½ c. unbleached all-purpose flour, fluffed
1 tsp. baking soda
1 tsp. fine sea salt
3 c. old fashioned oats (not instant oats)
In the bowl of your stand mixer, beat the butter until creamy.
Add brown sugar, granulated sugar, vanilla, and eggs. Mix until light and fluffy.
In a separate bowl, whisk the flour, baking soda, and salt together, then stir in the oats.
Add the flour mixture to the wet ingredients and mix just until combined.
Divide the dough into two parts. Form each into a log.
Wrap in plastic wrap or wax paper and refrigerate for at least an hour. (Overnight is best.)
Slice chilled dough into generous ¼-inch rounds. Place on a parchment paper lined baking sheet about 1-inch apart.
Bake in a pre-heated 350-degree oven for 10-12 minutes.
Remove from oven and cool completely before serving. Store in an airtight container.
Confession time. I really love Indian curries. Thai curries, not so much. Part of the reason might be that I started making and loving Indian curries in my 20’s. And hadn’t tasted a Thai curry until a few years ago. And there is a considerable difference in the ingredients used in the preparation of these two main types of curry. And even though I have tried Thai curries, I absolutely prefer the ingredients used to make Indian curry.
Indian curry is prepared from a base of onions, often tomatoes, and ginger-garlic paste, flavored with a medley of spices like turmeric, cumin, coriander, and chilies, and can include various proteins such as chicken, lamb, seafood, and lentils.
Whereas Thai curries primarily feature a blend of aromatics and spices including chili peppers, garlic, shallots, galangal, lemongrass, and cilantro, often combined in a creamy coconut milk base. Additional common ingredients include protein (like chicken), vegetables such as bell peppers or green beans, and seasonings like fish sauce and lime juice to balance the rich flavors. And Thai curries are generally hotter and spicier than Indian curry. And as I’ve gotten older, spicy for me has gone from 2-3 to under 1 if possible. But before I go any further, a bit of history from the napoleon.com site:
“Curry originated from the word Kari, which is a spice blend that was brought to the rest of the world by British traders from the British East India Trading Co. in the mid-17th century. The spices were pre-mixed and ground before being traded to the British for export, however, you will not find what we know as Curry Powder in India. Coriander, turmeric, cumin, fenugreek, and powdered chili peppers are the basis for Indian Curry Powder. These elements are toasted and hand-blended by a chef in India, where a wide range of additional spices may be added depending on where in India the curry is being made, and what other ingredients are going in the dish.
The British East India Trading Co. is also credited with introducing the chilies that originated in Mexico and South America to the Asiatic countries. They were then added to curry and became a phenomenon that spread across the continent.”
Now that I have rambled on about why I prefer one curry over the other, which is of no real value to any of you reading this, I will get to the point.
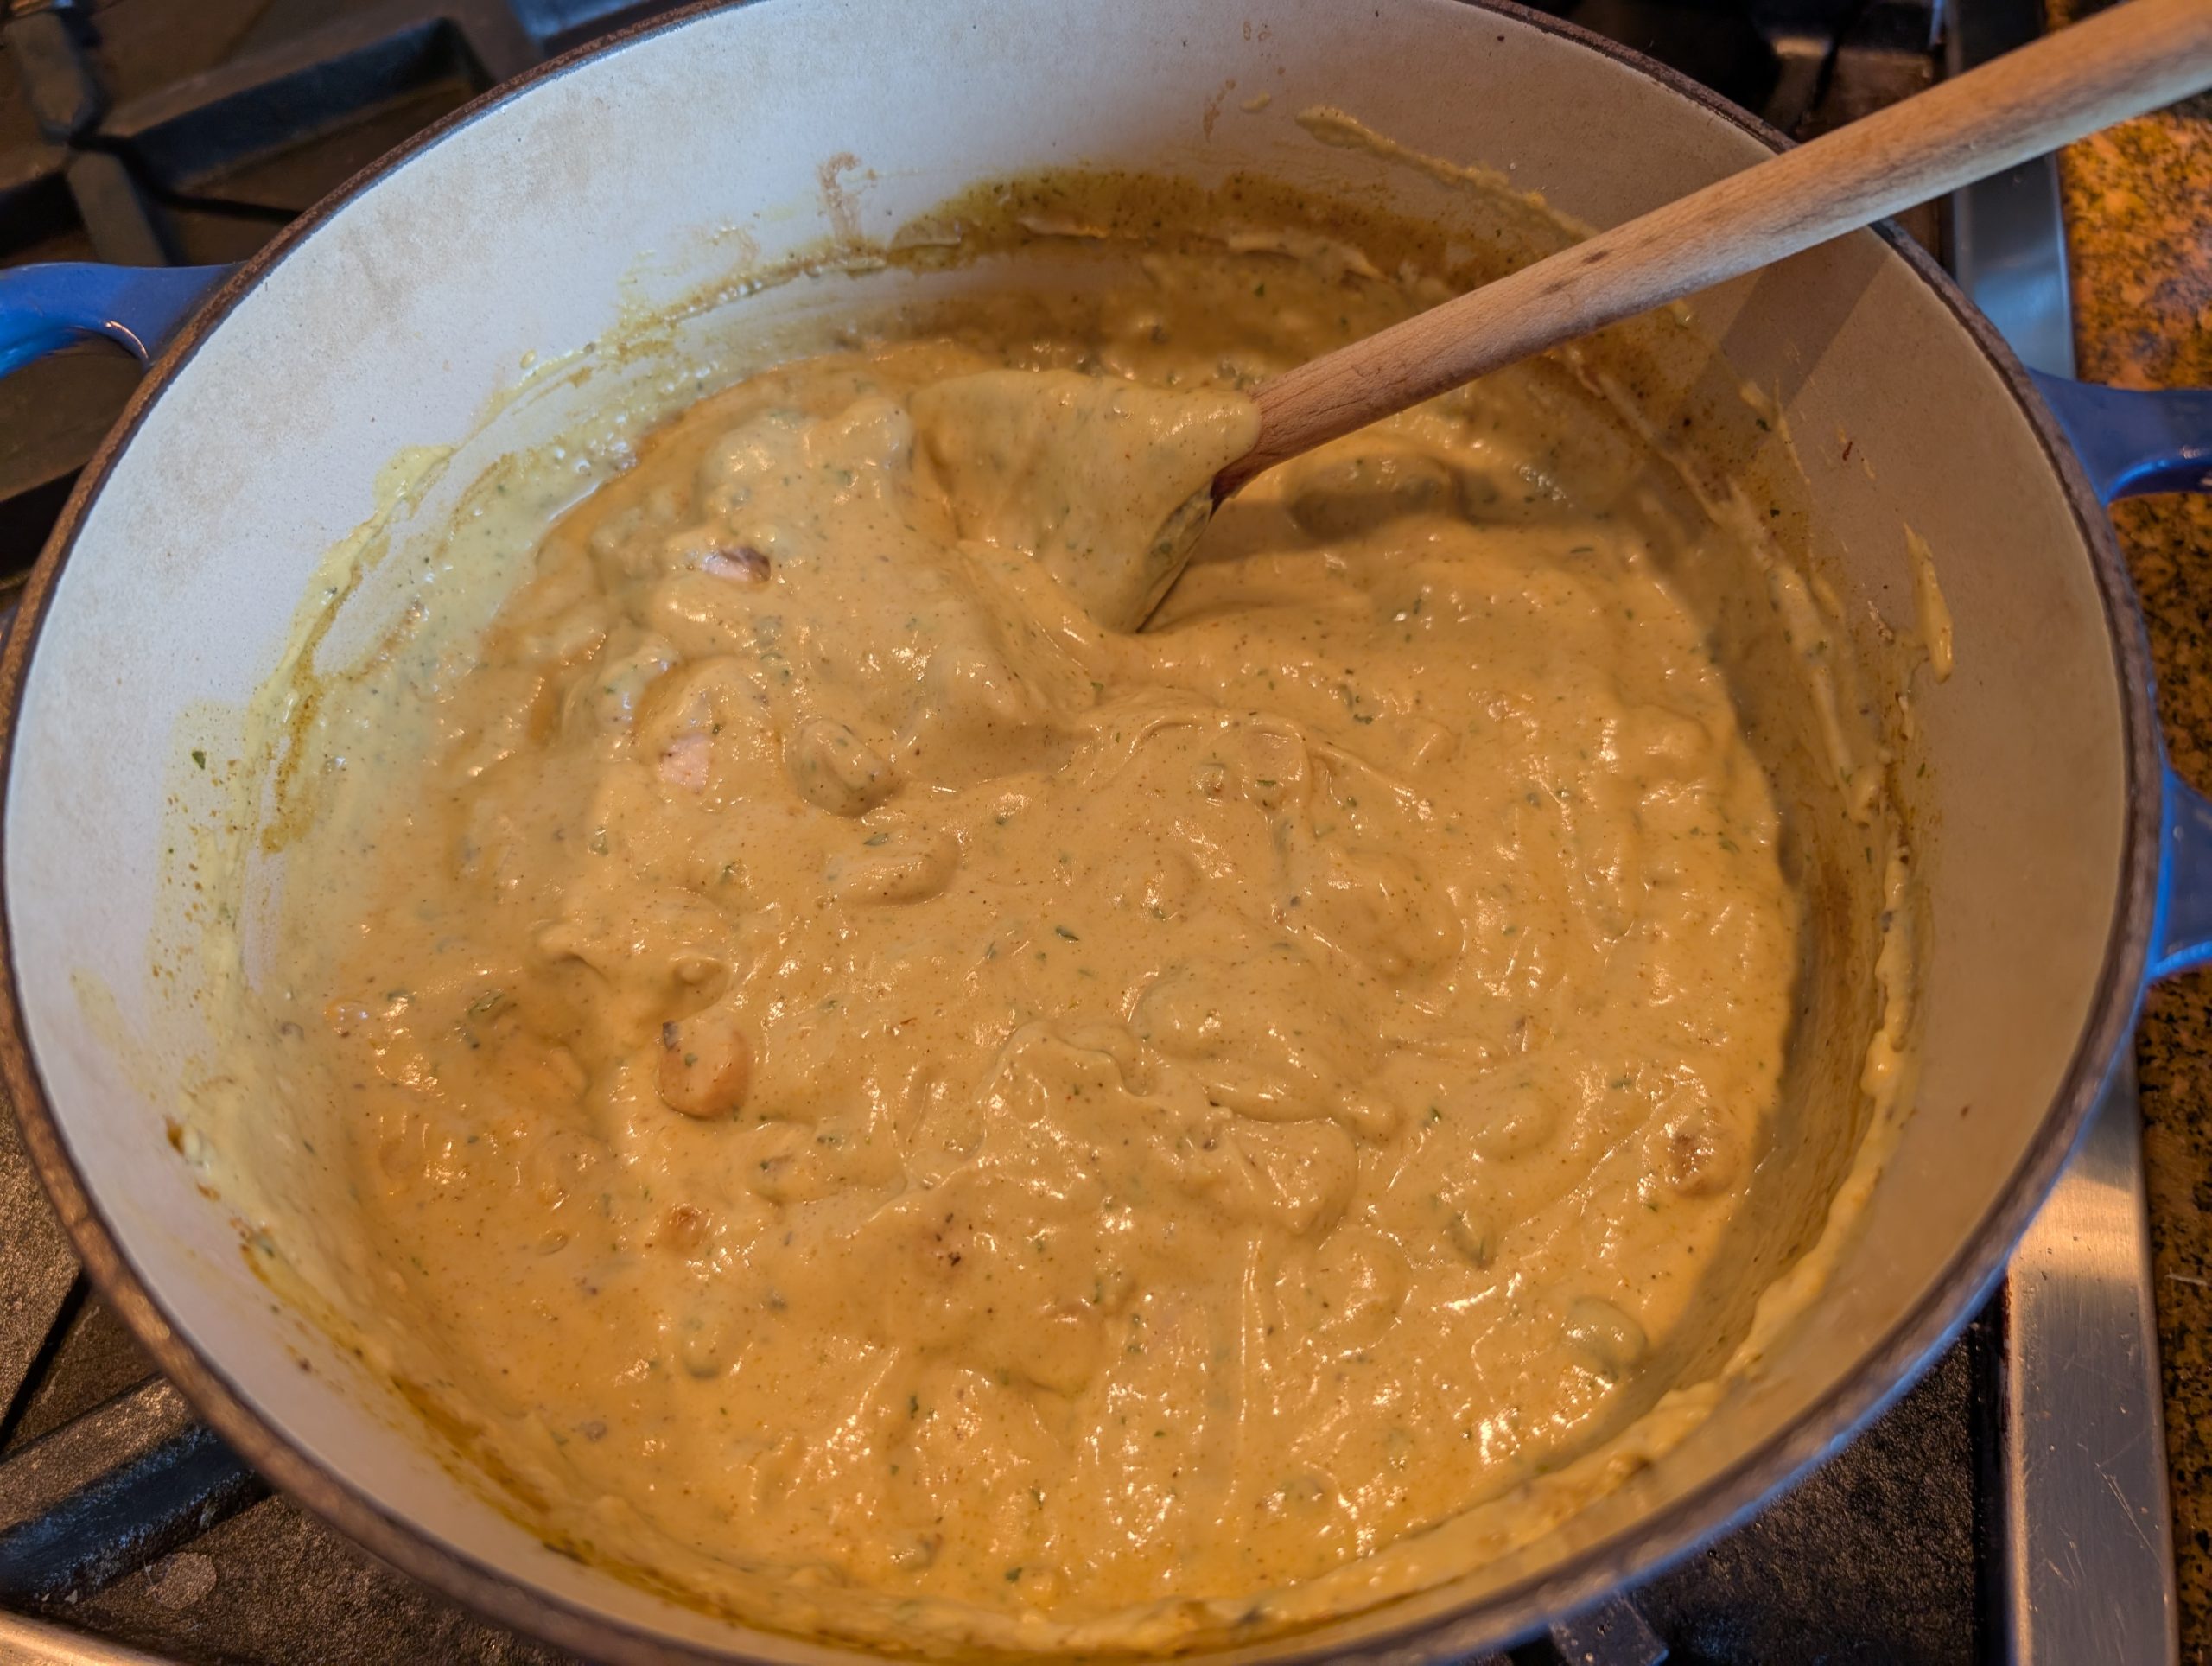
This is a quick and easy recipe that works well for weeknights even if you don’t get home from work until 5:30 or 6:00 pm. I know that to be true, because I used to prepare this dish fairly frequently when I was a working mom with 4 starving children to feed.
I’d walk in the door, be greeted with “what’s for dinner”, pour water and raw rice into my rice cooker before changing clothes, and come back and prepare this dish while the rice was cooking. Oh, and steam broccoli or green beans too. Voila! Dinners ready! And yes, all my children loved curry. And to the best of my knowledge, they still do. And of course, garnishing the curry with chopped cashew nuts, chopped green onions, and savory Major Grey chutney never hurt. (If you’re going to do it, do it right.)
Well, that’s it for today. Mr. C. has a gig tonight at the Rockfish Grill in Anacortes. So, dinner is on them. And I can take it easy today knowing someone else has their apron on and will be preparing my meal.
We all need a break from whatever it is that makes us happy. For me, being in the kitchen is my happy place. But so is the chair where I spend hours reading. And speaking of reading, I just finished an interesting book lent to me by my friend Laura. The title of the book is The Paris Bookseller, written by Kerri Maher. It is the dramatic historical fiction account of how a humble bookseller fought against incredible odds to bring one of the most important books of the twentieth century (James Joyce’s Ulysses) to the world.
Even though The Paris Bookseller was set in Paris during the 20’s and 30’s, it is very relevant to what is happening in America today. Books were being banned in America, the nationwide ban on alcohol known as Prohibition, increasingly harsh limitations on immigration, which disproportionately affected non-white people and immigrants from Southern and Eastern Europe, the rise of industrialization, and anxieties about social changes and economic competition. All contributed to a very hard time in America. And once again, we are being attacked by our own leaders who were elected to protect our democracy.
If you are not as scared as I am for the future of America, and the world at large, you are just not paying attention. But if you are paying attention, then please work in your own way, to inform your friends of the real facts (not Fox News), be available to talk calmly and respectfully with your friends, and be the best person you know how to be. Your example is worth a thousand words.
Peace and love to all.
3 T. unsalted butter
1 c. diced boneless, skinless chicken breast
⅓ c. finely diced carrots
⅓ c. finely diced onion
2 garlic cloves, minced
2 T. dry vermouth
1 tsp. dried parsley
2 T. flour
3-4 tsp. curry powder, or more to taste
freshly ground black pepper
1 can cream of mushroom soup
½ c. whole milk
1½ c. sour cream
chopped cashew nuts (opt.)
finely chopped green onions (opt.)
chutney (opt.)
Melt butter in a medium sized saucepan. Add the chicken and cook just until done. Remove from pan and set aside.
Add carrot and onion to the pan and sauté for about 5 minutes. Add garlic and cook for one minute.
Deglaze the pan with vermouth. Whisk in the parsley, flour, curry powder, black pepper, cream of mushroom soup, and milk. Bring to boil, reduce heat, and simmer on low for about 5 minutes. Carefully whisk in the sour cream and add the cooked chicken.
Taste and adjust seasoning. Serve over rice garnished with cashews, green onions, and chutney, or any combination thereof.
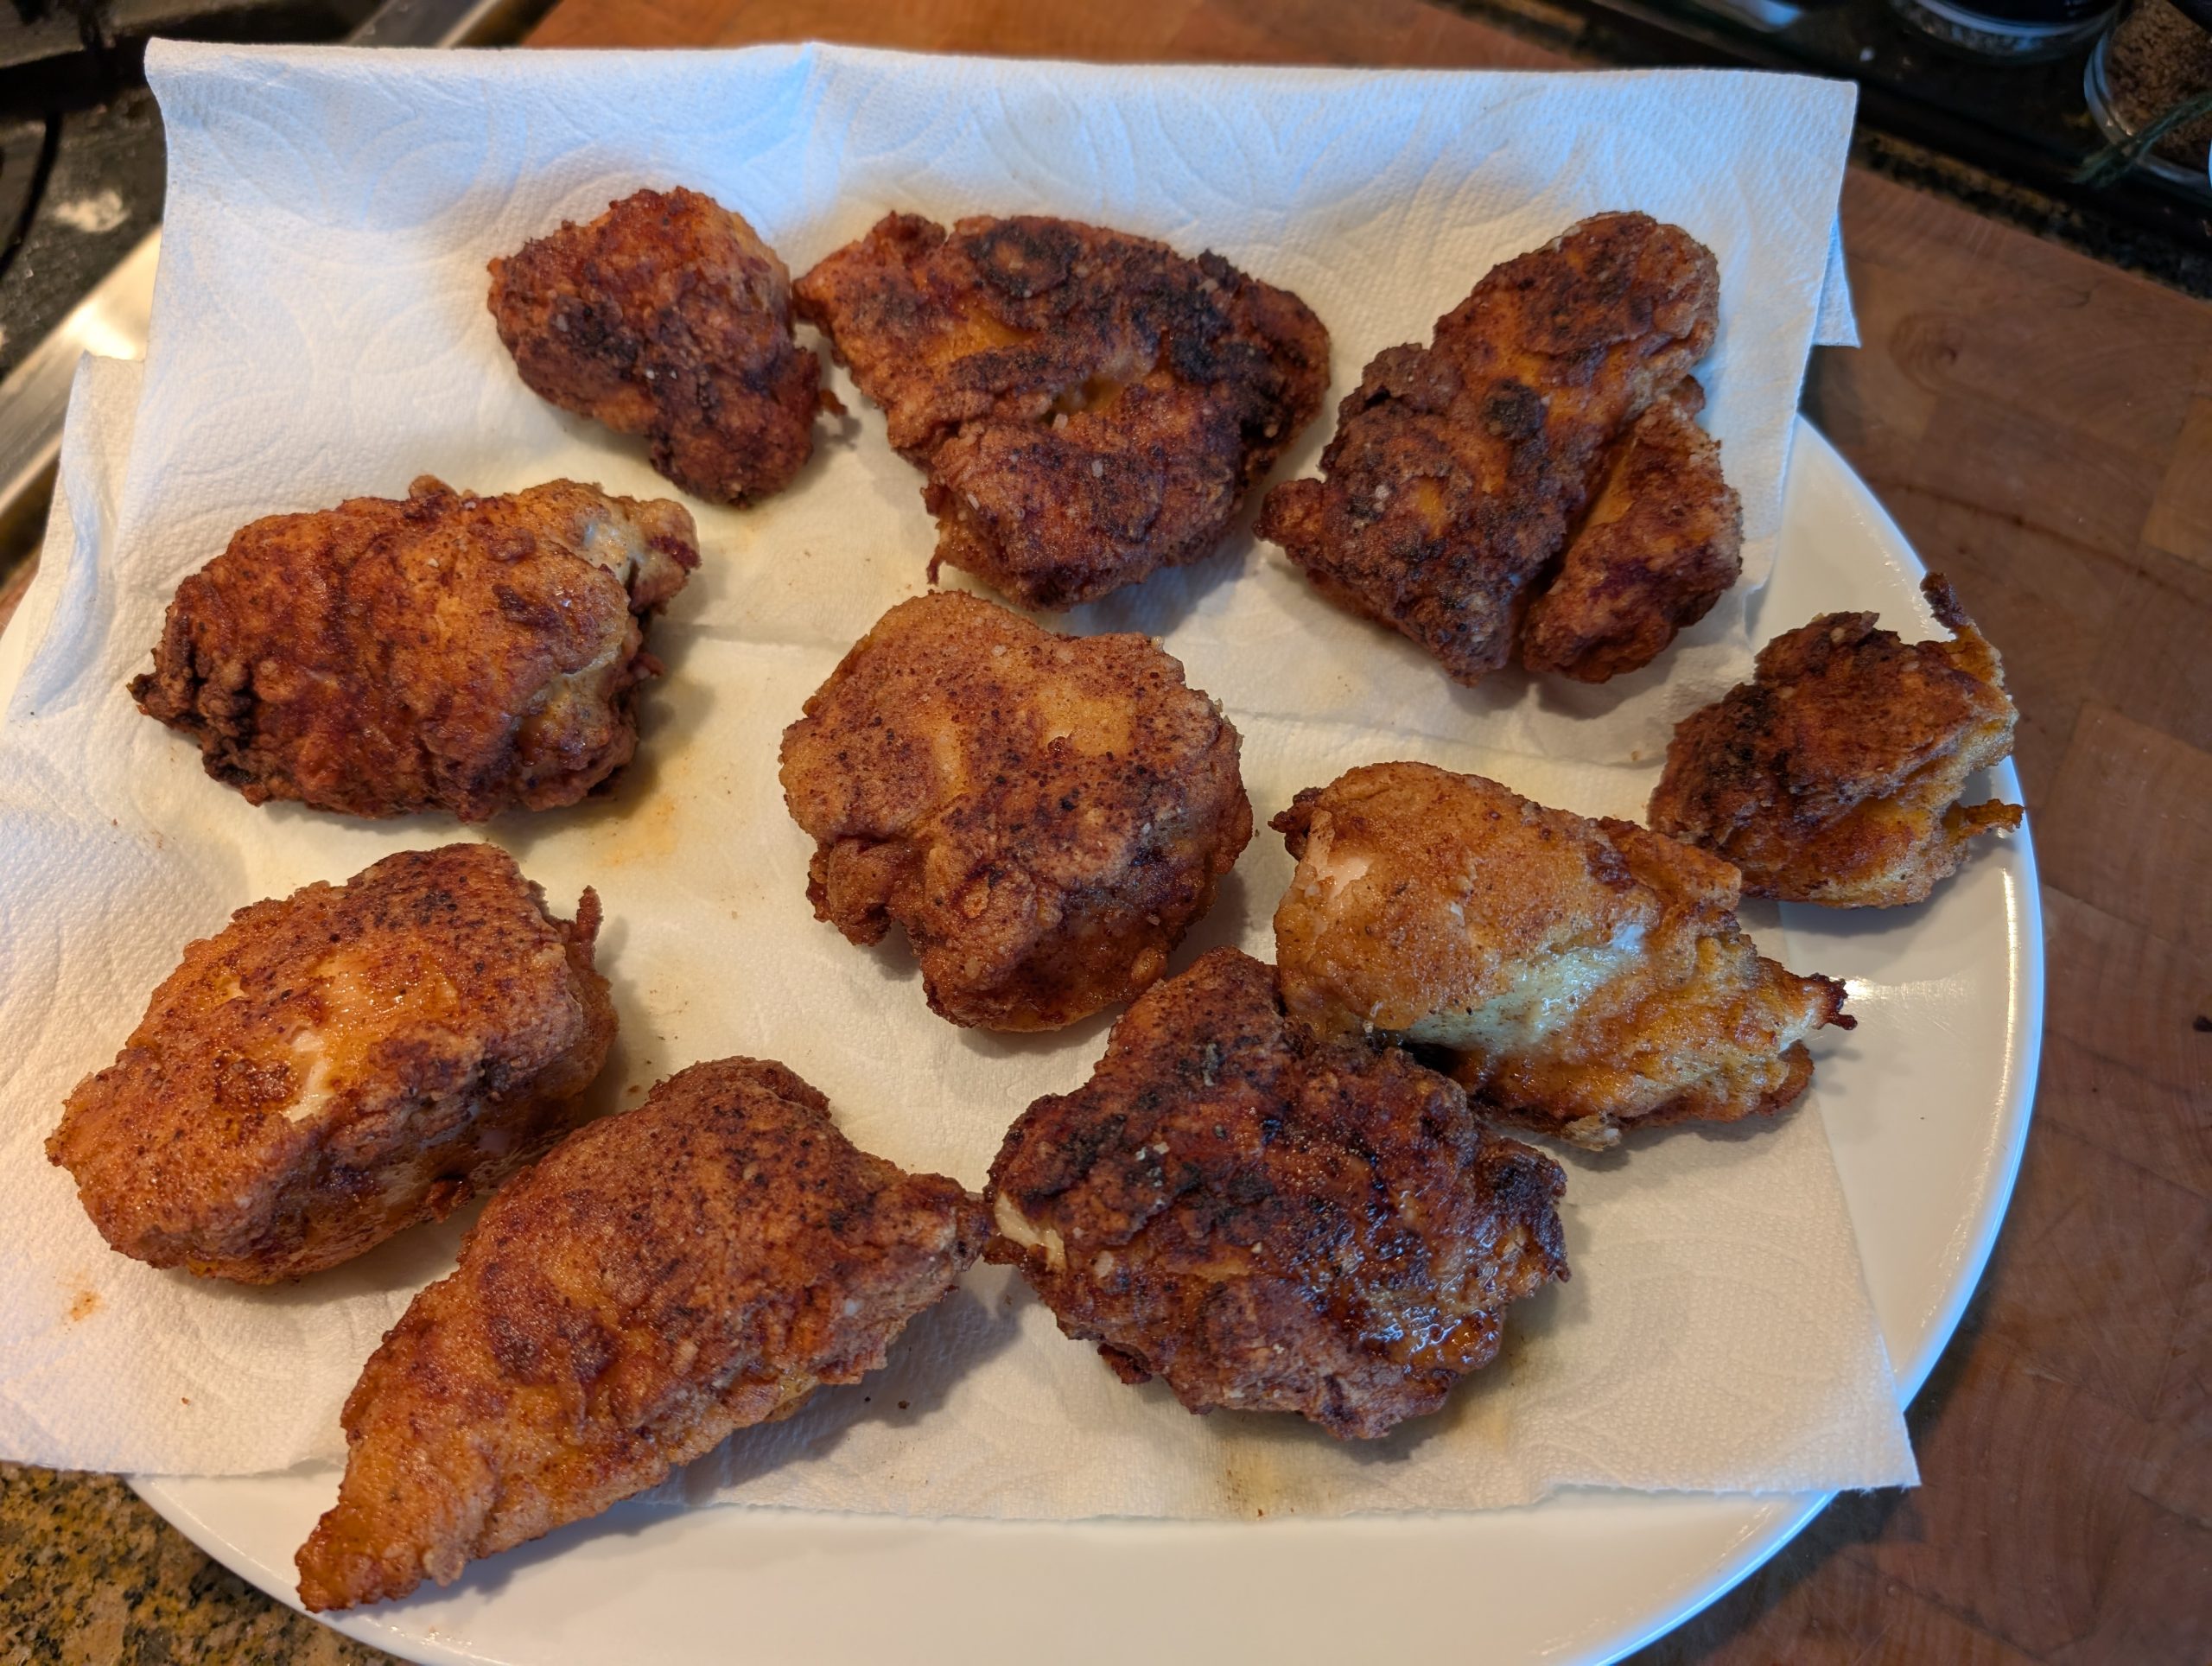
The first thing I need to tell you is that I have been trying to make a simple to make, truly great pan-fried chicken for decades. Decades.
At first, I blamed the chicken. Totally unfair. I grew up on a chicken farm and many after church Sunday dinners (about 2:00 pm) consisted of fried chicken and mashed potatoes and gravy. Heaven! Then we would have a light supper around 7:00 pm. Maybe waffles or an omelet, that sort of thing.
But fried chicken was, and still is, one of my top 10 favorite foods. Good fried chicken, that is! And yes, I am mighty picky about my fried chicken. What took me years to figure out was that the fried chicken of my youth was made with home raised, well-fed young chickens that had just been slaughtered. And then they were probably fried in lard. Hello! I simply couldn’t replicate that in today’s world. Unless of course I started raising chickens, and that just wasn’t going to happen. In Bellevue. In these shoes! I don’t think so!
So, as hard as I tried, I just wasn’t satisfied with the results. Oh, the chicken was edible. But not up to my childhood standards. (And you know how persnickety children can be!)
I do have 2 fabulous recipes for fried chicken already – (Spicy Fried Chicken Thighs and Smothered Fried Chicken), but they are both fairly time consuming. But what I have tried to make unsuccessfully all these years is a truly tasty fried chicken that does not require too many ingredients, a lot of time to sit in a buttermilk bath in the fridge, or to be cooked in a quart of cooking oil in a deep fat fryer. Until now.
So, this recipe, after numerous “this is OK, but not good enough” tries, is now my “I can do it, I can now make quick and easy fried chicken.” (Maybe even better than my grandmas!)
So, if you too love fried chicken, but don’t want to spend hours in the kitchen, I suggest you give this recipe a try. I truly was pleased with this recipe after waiting 60 years to find one that satisfied my “quick and easy (but delicious) fried chicken” stipulation! The crust is crisp and very tasty, and the chicken is tender and juicy. Who could ask for anything more?
And with that happy thought to leave you with – peace and love to all.
2 boneless, skinless chicken breasts
½ c. – 2/3 c. buttermilk
2/3 c. unbleached all-purpose flour
1 tsp. kosher salt
1 tsp. seasoned salt
freshly ground black pepper
1½ tsp. granulated garlic
1½ tsp. granulated onion
¾ tsp. paprika
1 egg
1 c. cooking oil (I use canola oil)
Cut each breast into 4-5 equal sized strips (or pieces) depending on the size of the chicken breasts. Place the pieces in a glass bowl with a lid. Pour in enough buttermilk to coat the chicken pieces. Cover and refrigerate for at least an hour. (2-3 hours is even better.)
Whisk the flour, kosher salt, seasoned salt, black pepper, granulated garlic, granulated onion, and paprika together in a shallow dish.
Whisk the egg in another shallow dish.
After the chicken pieces have spent some time in the fridge, remove each piece from the buttermilk, and roll the chicken strips in the flour mixture until they are lightly coated with flour.
Then, dip each piece in the beaten egg and return to the seasoned flour. Roll in the flour again until each strip/piece is coated, and transfer to a platter.
Just before frying the chicken, sprinkle the pieces one last time with any remaining seasoned flour.
Heat the cooking oil in a large skillet (cast iron is best) to 325-degrees.
Gently place each strip in the hot oil and cook for 4 minutes or until nicely browned. Using a pair of tongs or a spatula, gently flip each strip, and cook for 3-4 more minutes, or until the chicken reaches at least 160-degrees at the thickest part. (Do not overcook. That leads to dry chicken.)
When fully cooked, transfer the fried chicken to a paper towel lined platter.
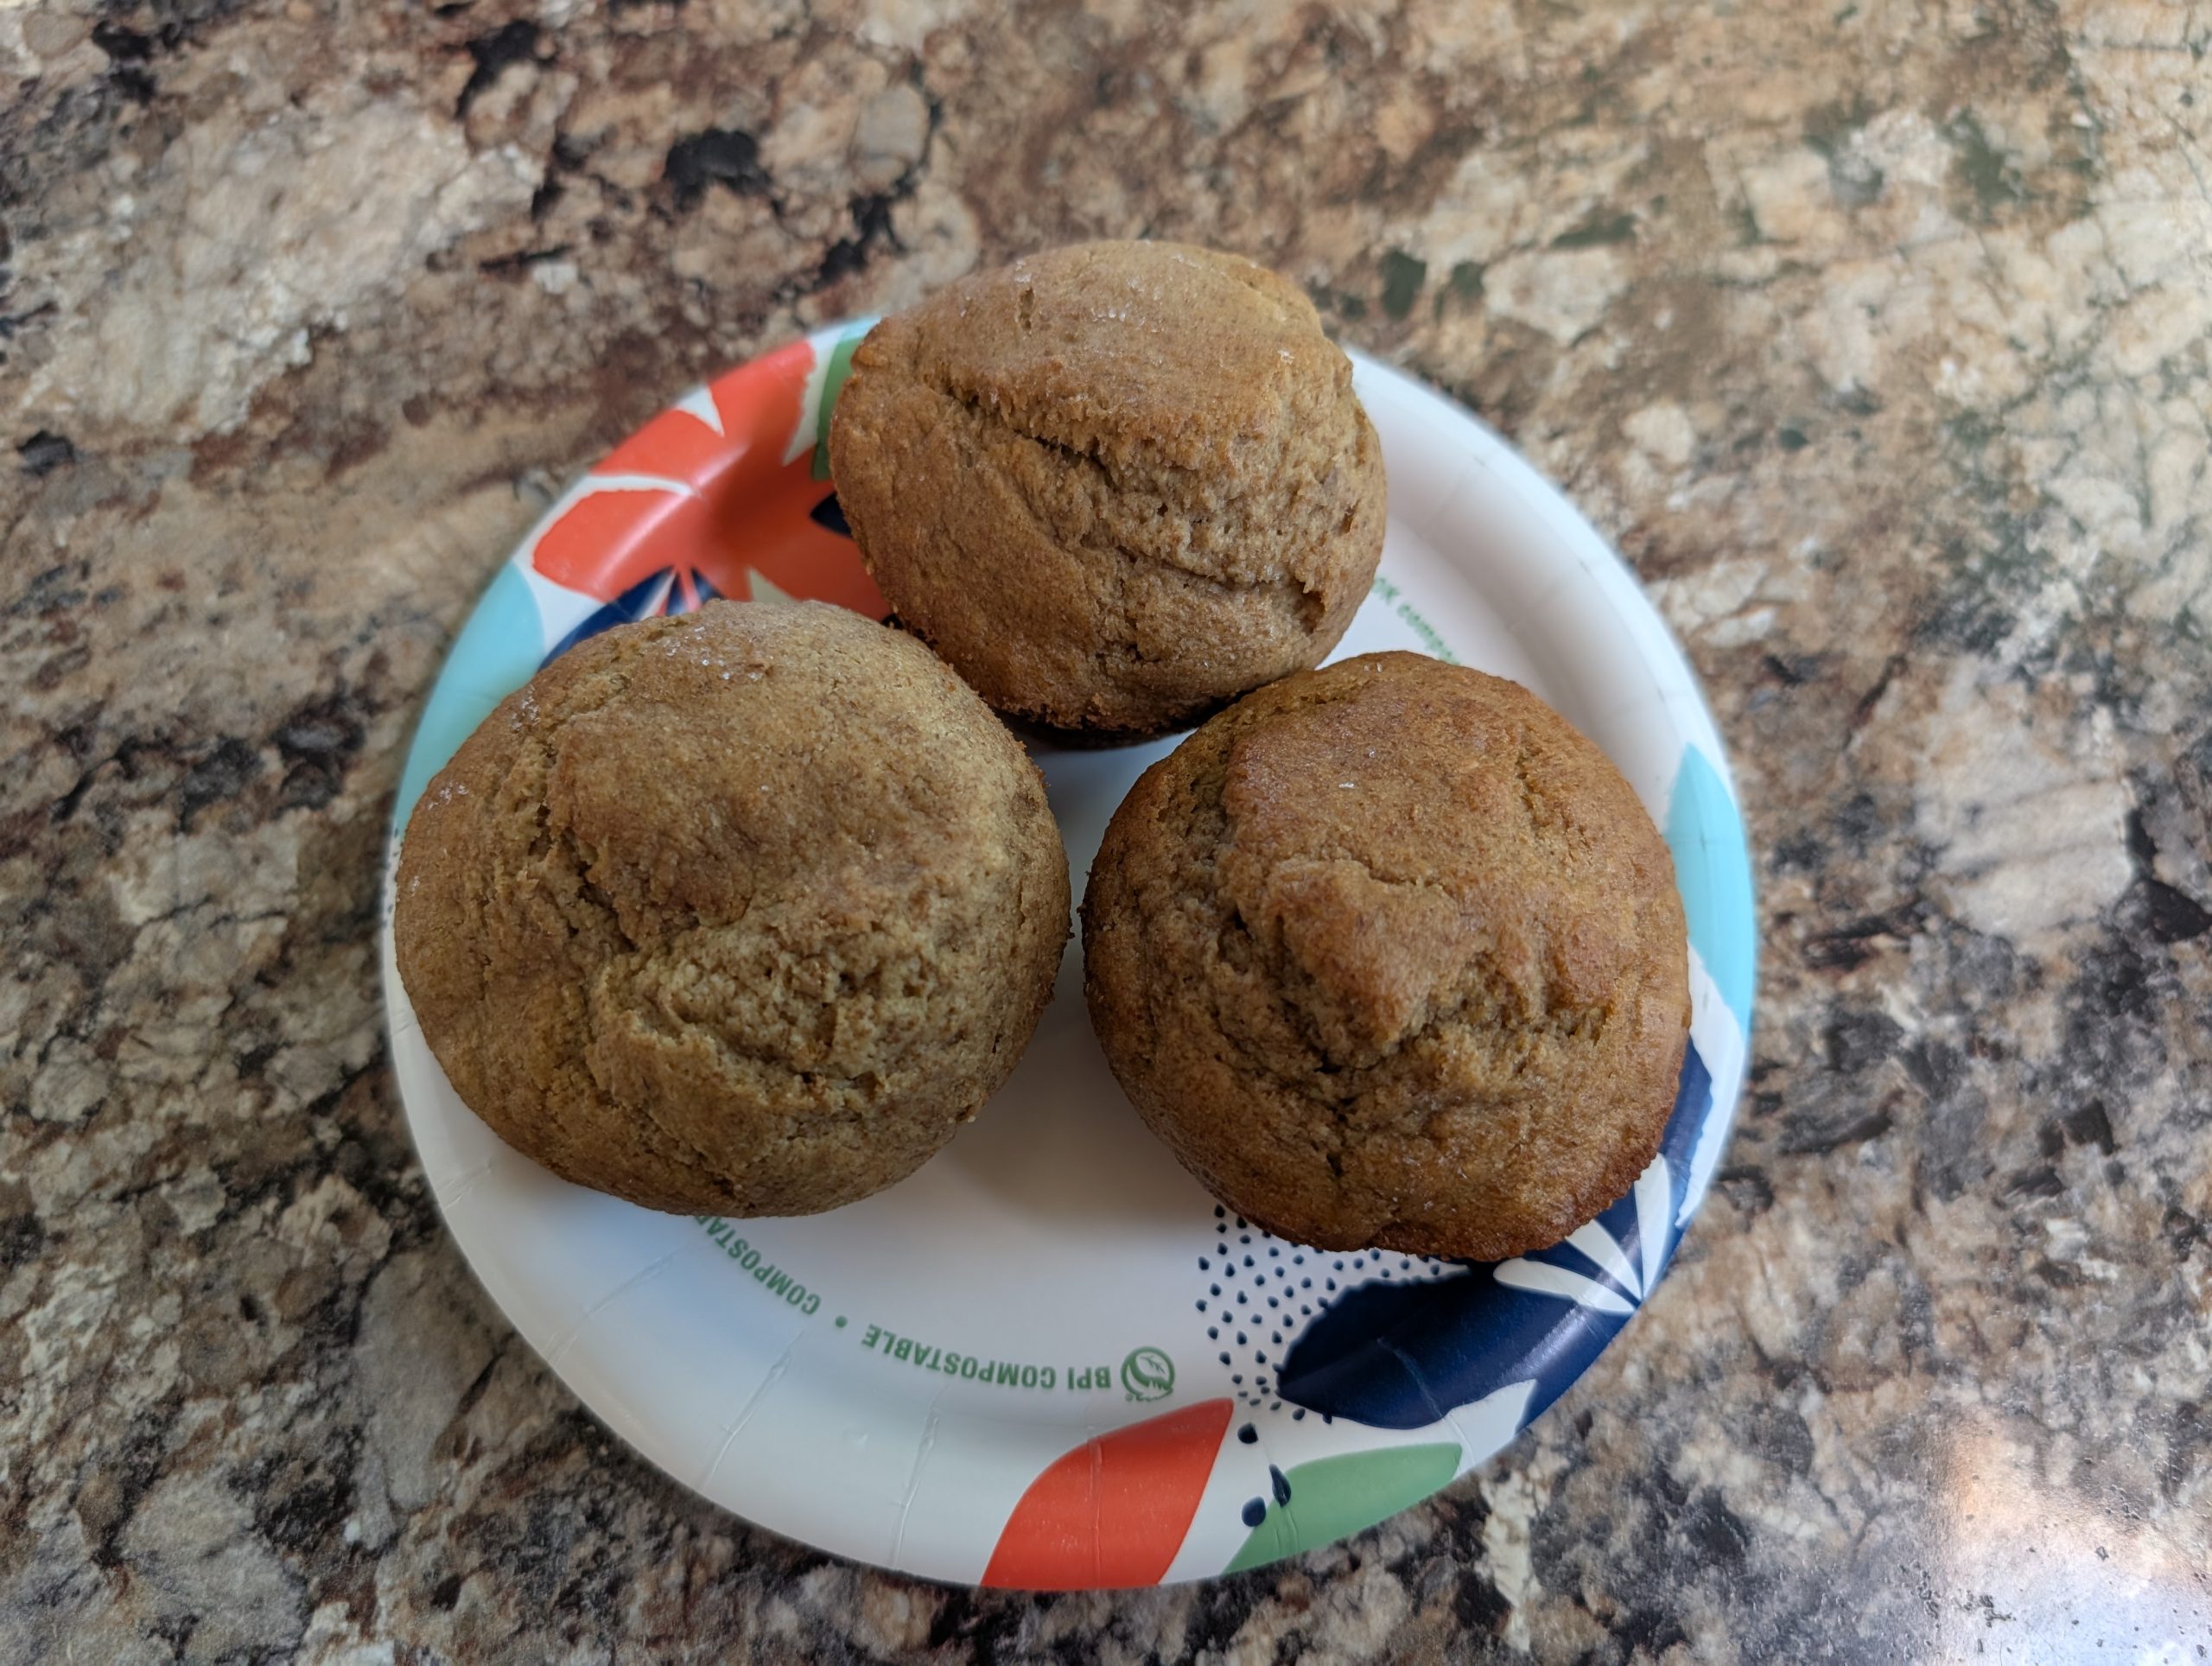
The first thing you should know is that as the recipe title implies, this amazing batter can be stored in your refrigerator for up to six weeks. The second thing you should know is that the recipe below is for half an original batch. So, feel free to double this recipe, because we already know it will double beautifully. But, at this time in our lives, unless I am planning to feed 60 people, half the original recipe is still a lot for 2 senior citizens to consume, even if it is over a six-week period! (My story and I’m sticking to it!)
But the most important thing you should know is that this recipe has been around for decades because it produces absolutely delicious muffins. And bran is good for most of us because it is a rich source of fiber, vitamins, and minerals.
But no, this is not the healthiest bran muffin recipe out there. But I challenge you to find a better tasting bran muffin recipe.
So, if you want to ramp up your breakfast enjoyment, I suggest you add muffins to your list of breakfast favorites. And this muffin recipe is a good one to start with. Easy to build, and even easier to eat.
Well, that’s it for today. Andy’s sister and her husband are coming for breakfast tomorrow morning. And since I have been hungry for maple bars for weeks now, I finally have the excuse to bake up a batch. That’s right. My recipe – Quick and Easy Baked Maple Bars, are baked rather than deep fat fried. And believe it or not, they are even yummier than the ones you get from a bakery.
So, I will build the dough today and let it sit in my fridge overnight and bake it off just before they arrive. Then slather the bars with maple frosting a few minutes before they are to be served. Yum.
For how to build yeast dough one day, and bake it off the next, read my simple technique below.
So, farewell for now. Keep smiling. Be strong. And as always, peace and love from our home to yours.
3 c. bran cereal (I use Kellog All-Bran Buds)
1 c. boiling water
½ c. vegetable oil
1½ c. granulated sugar
2 lg. eggs
2 c. buttermilk
2½ c. unbleached all-purpose flour, fluffed
2½ tsp. baking soda
1 tsp. kosher salt
In a large mixing bowl, pour the boiling water over the bran buds and let the mixture sit for 5 minutes or more.
In a separate bowl, whisk the vegetable oil, granulated sugar, eggs, and buttermilk together.
In yet another bowl, whisk the flour, baking soda, and salt together.
Using a large wooden or metal spoon, stir the liquid mixture (veggie oil etc.) into the moistened bran until well combined.
Then add the flour mixture, stirring just until combined, being careful not to overmix.
Cover the batter and refrigerate. The batter is best if chilled for at least six hours before the first batch is baked.
To bake, pre-heat your oven to 400-degrees. Grease a muffin tin or line it with paper liners. (I use parchment paper liners. See my recipe for Streusel Topped Blueberry Breakfast Muffins for why.)
Fill the muffin cups about two-thirds full. (Batter should still be cold when you fill the paper liners.) (For filling the paper liners, I use a large ice-cream scoop).
Then bake in the pre-heated oven for 15–20 minutes, or until a toothpick inserted into the center of a muffin comes out clean.
Remove from oven and allow the muffins to cool before serving.
This recipe yields about 2½ dozen regular sized muffins.
For 2-day yeast bread:
After building the dough, cover the mixing bowl with plastic wrap, and allow the dough to rise for about 20 to 30 minutes on the counter before sticking it in the fridge. Make sure your mixing bowl gives plenty of room for the dough to expand.
The next day, before shaping the dough, allow your dough to regain some warmth on the counter for 40 to 60 minutes and become slightly puffy before shaping it.
Then follow the original recipe for the second rise.
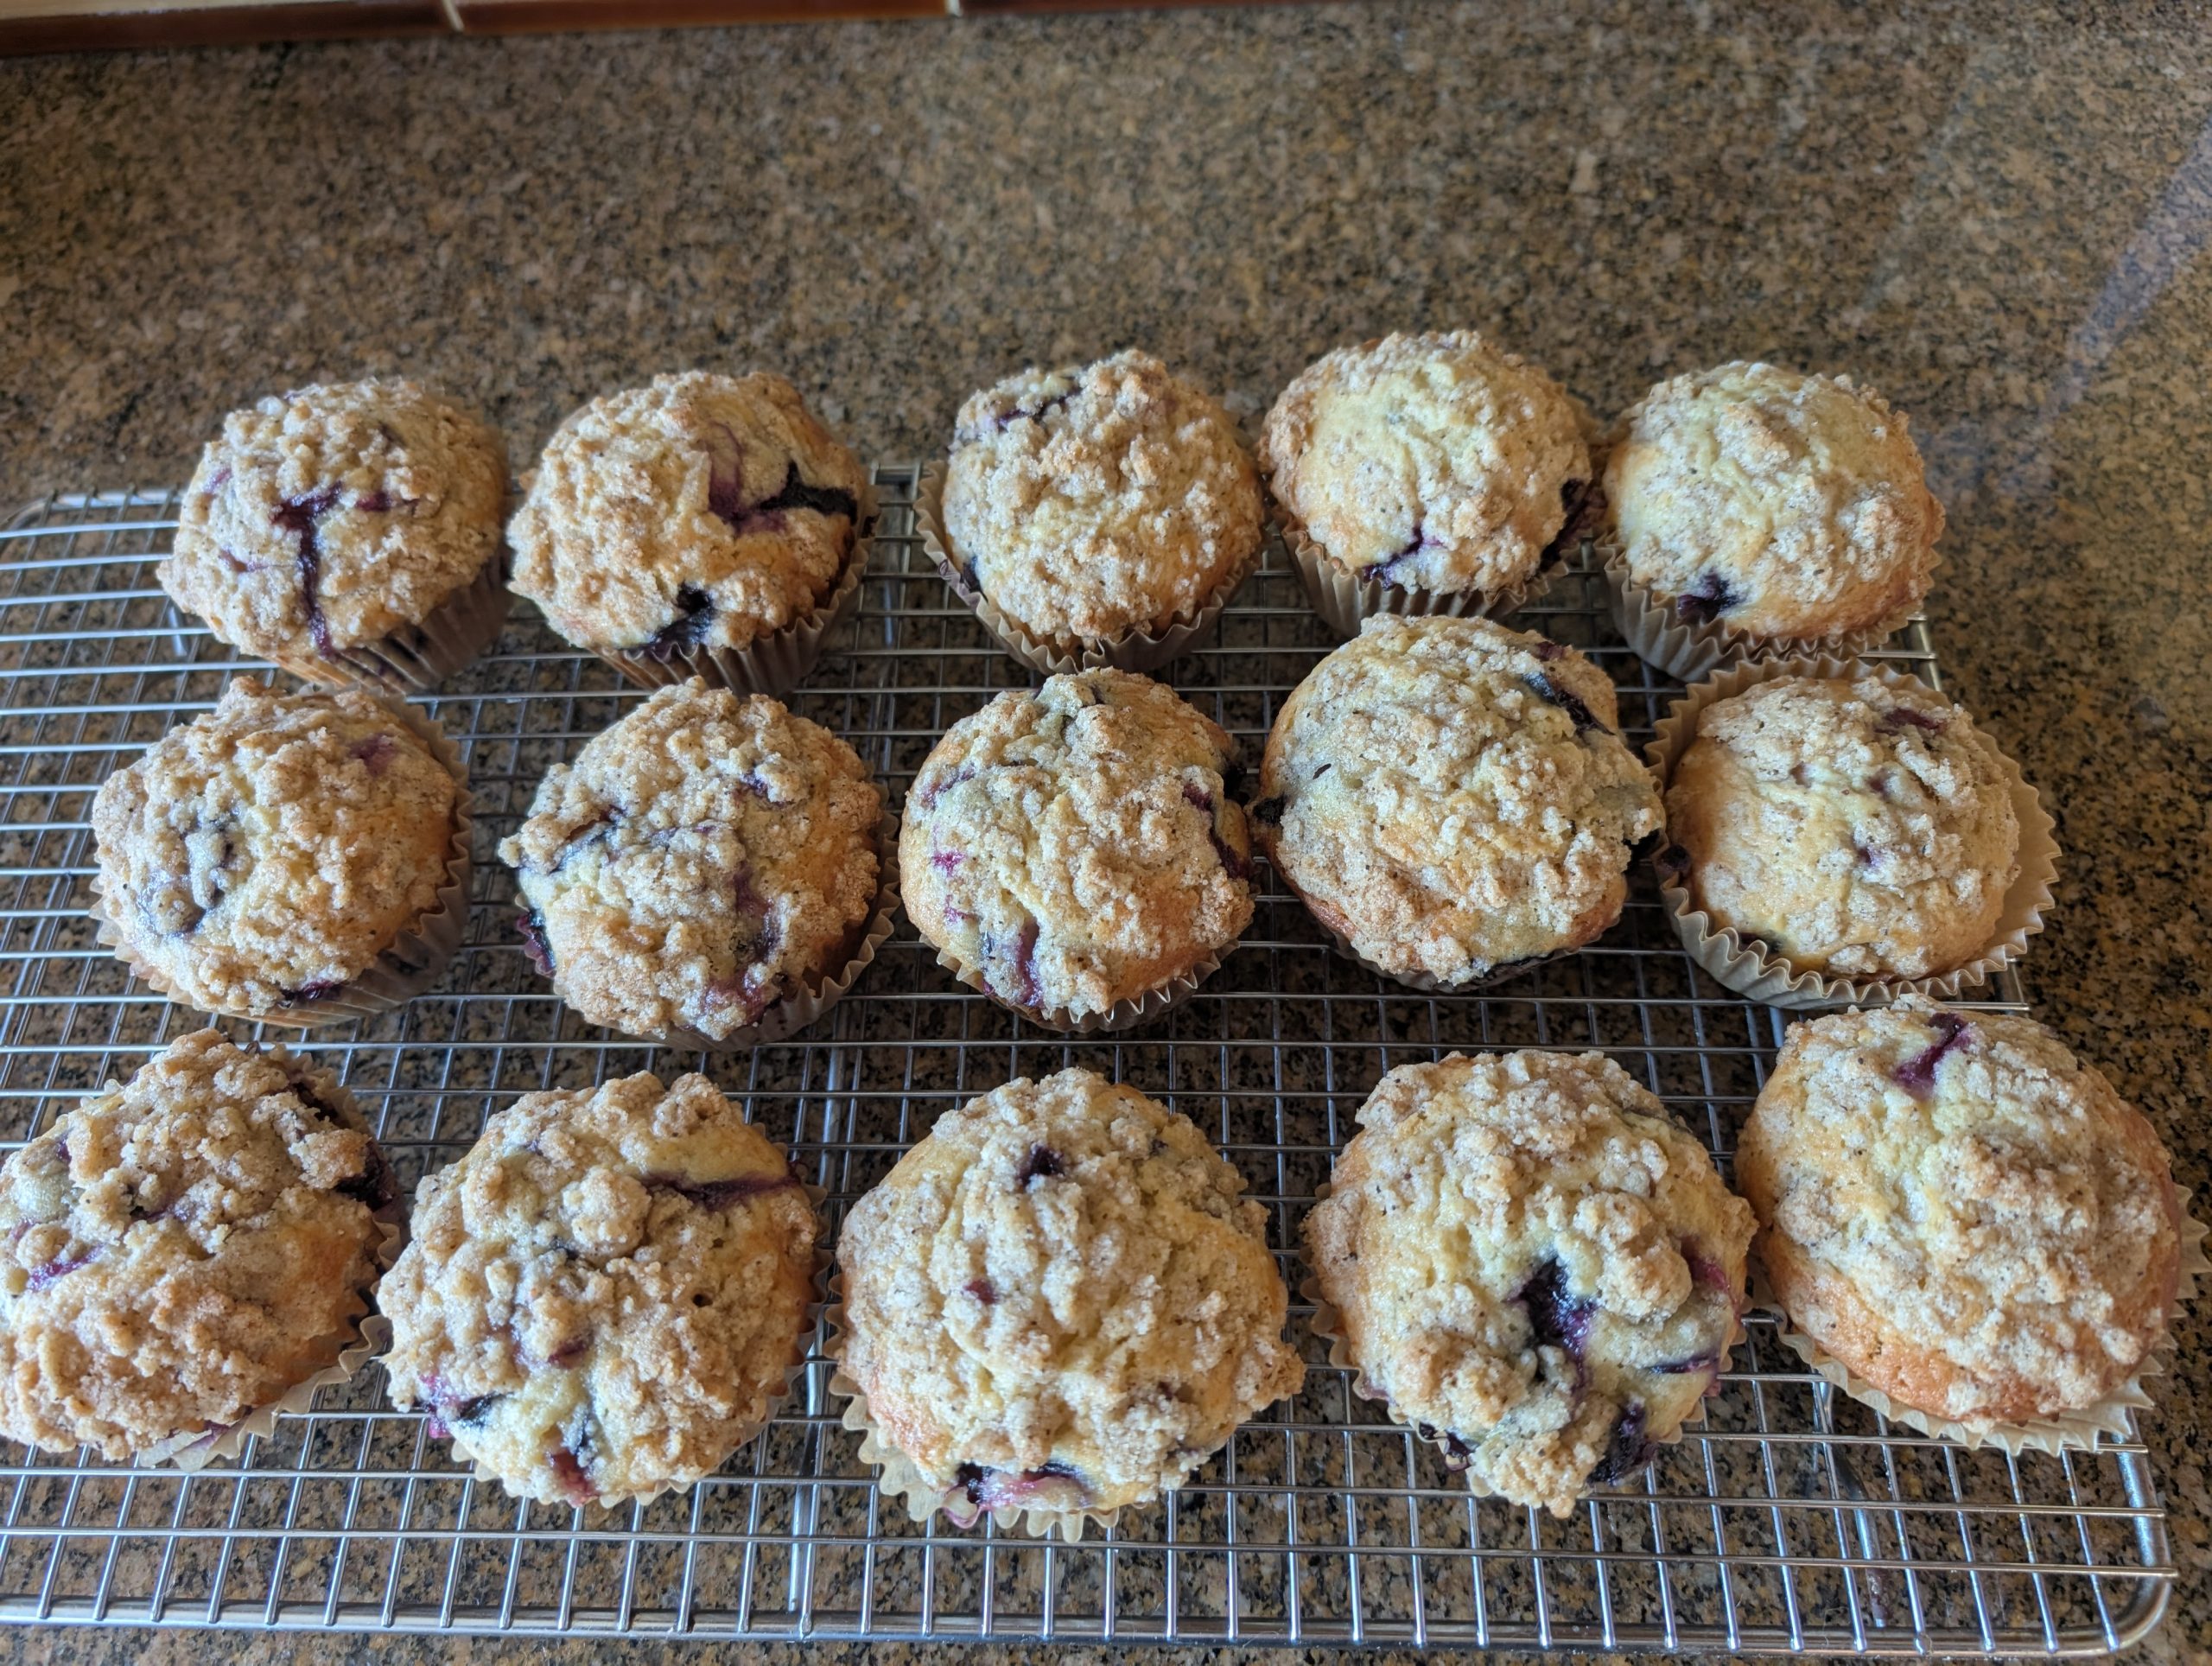
So, this recipe is especially for our dear friend Tim C. I served these on a recent trailer trip, and after biting into one Tim indicated that he wanted the recipe. So, I thought, while I was providing him with the recipe, I might as well share it with the world. (Like I wouldn’t do that anyway. But that’s not the point!) I want Tim to feel special, because he is special.
Now, the first thing you should know is that you don’t need a mixer for the muffin part. However, if you are as impatient as I am in mixing cold butter into a flour mixture, using a small food processor is the best way to easily incorporate cold butter into the flour mixture for the streusel topping. So, if truth be told, this recipe is not particularly quick and easy to prepare. But it is definitely worth the effort. And yes of course you can make just the muffin part and forget about the streusel topping. But why would you do that? If you only want a healthy muffin made from sawdust and nary an unhealthy ingredient, this is not the recipe for you. So, go the whole mile and add the topping. Believe me, you will not regret ignoring the angel on your right shoulder for the shear joy of following the little devil on your left shoulder. Now, I’m not suggesting that you ignore your good angel, in fact, most times your angel is by far the better choice. But once in a while, especially when it applies to a treat, we should all cave in and give the little devil his just desserts. (Sorry, I just couldn’t help myself!)
Anyway, just make these muffins. They truly are amazing.
Well, that’s it for now. I just finished posting my last travel report and find myself with absolutely no “must work my tail off” missions in the next week or so. So, I’m going to take it easy and finish reading, for the second time, Louise Penny’s wonderful mystery series starring Chief Inspector Gamache. If you love mystery series as much as I do, and haven’t read these books, you are missing out on not only a wonderful read but also a lesson on how to be a kind, caring, and responsible individual.
From Louise Penny’s “letter” she includes at the beginning of each book, the following has helped me work towards being a better person.
“No one quite appreciates, and recognizes, the light like those who’ve lived in darkness. That awareness is what I try to bring to my books. The duality of our lives. The power of perception. The staggering weight of despair, and the amazement when it is lifted.
The gap between how we appear and how we really feel.
Those are foundations of the Gamache books”
And as always, peace and love to all.
For the blueberry muffins:
2 c. unbleached all-purpose flour, fluffed
¾ c. granulated sugar
¼ c. brown sugar, packed
2 tsp. baking powder
½ tsp. kosher salt
2 lg. eggs
½ c. (1 stick) unsalted butter, melted
½ c. whole milk
1 tsp. vanilla extract
2 c. (1 pint) fresh blueberries (cut in half if the blueberries are large)
Pre-heat oven to 400-degrees. Prepare a muffin pan with cupcake liners*.
In a mixing bowl, whisk the flour, sugars, baking powder, and salt together.
In another bowl, whisk the eggs until smooth. Add the melted butter, milk, and vanilla. Whisk until combined. Stir the egg mixture into the flour mixture and stir until just combined. (The dough will be lumpy.) Carefully fold in the blueberries.
Fill the prepared muffin cups with batter. Top each muffin with streusel topping, about 1 tablespoon each. (See recipe below.)
Bake the muffins until a toothpick inserted in the center comes out clean with just a few crumbs attached, about 18 to 22 minutes.
Remove from oven and cool on a rack for several minutes before removing from pan. Cool completely and store the muffins in an airtight container. Or freeze them for later use. When ready to eat, nuke just until warm.
For the streusel topping:
¼ c. unbleached all-purpose flour, fluffed
2 T. brown sugar, packed
2 T. granulated sugar
¼ tsp. ground cinnamon
pinch kosher salt
2 T. (¼ stick) cold unsalted butter, cut in 8 pieces
Blend the flour, brown sugar, granulated sugar, cinnamon, and salt in your food processor. Add the cold butter and pulse until coarse crumbs form. (And of course, you can use a fork or grate the butter if you don’t happen to want to use your food processor. But I’m lazy and I use my small food processor which makes life so much easier.)
*I use muffin and cupcake liners made of parchment paper. I know, they aren’t elegant, but muffins and cupcakes don’t stick to the paper. Frankly, I’m more interested in getting every crumb than pretty paper that sticks to whatever I’m about to put in my mouth!
Wednesday, September 10, 2025 – Waterwheel RV Park and Campground – Chiloquin, Oregon
Well, sometimes it isn’t raining when you break camp, and then sometimes your poor spouse who does the outside work like dumping the black and grey water, undoing the freshwater hose, unhooking the electricity, etc. etc. gets soaked. But that was not the case this morning. It was actually sunny and warm.
So, off we went.
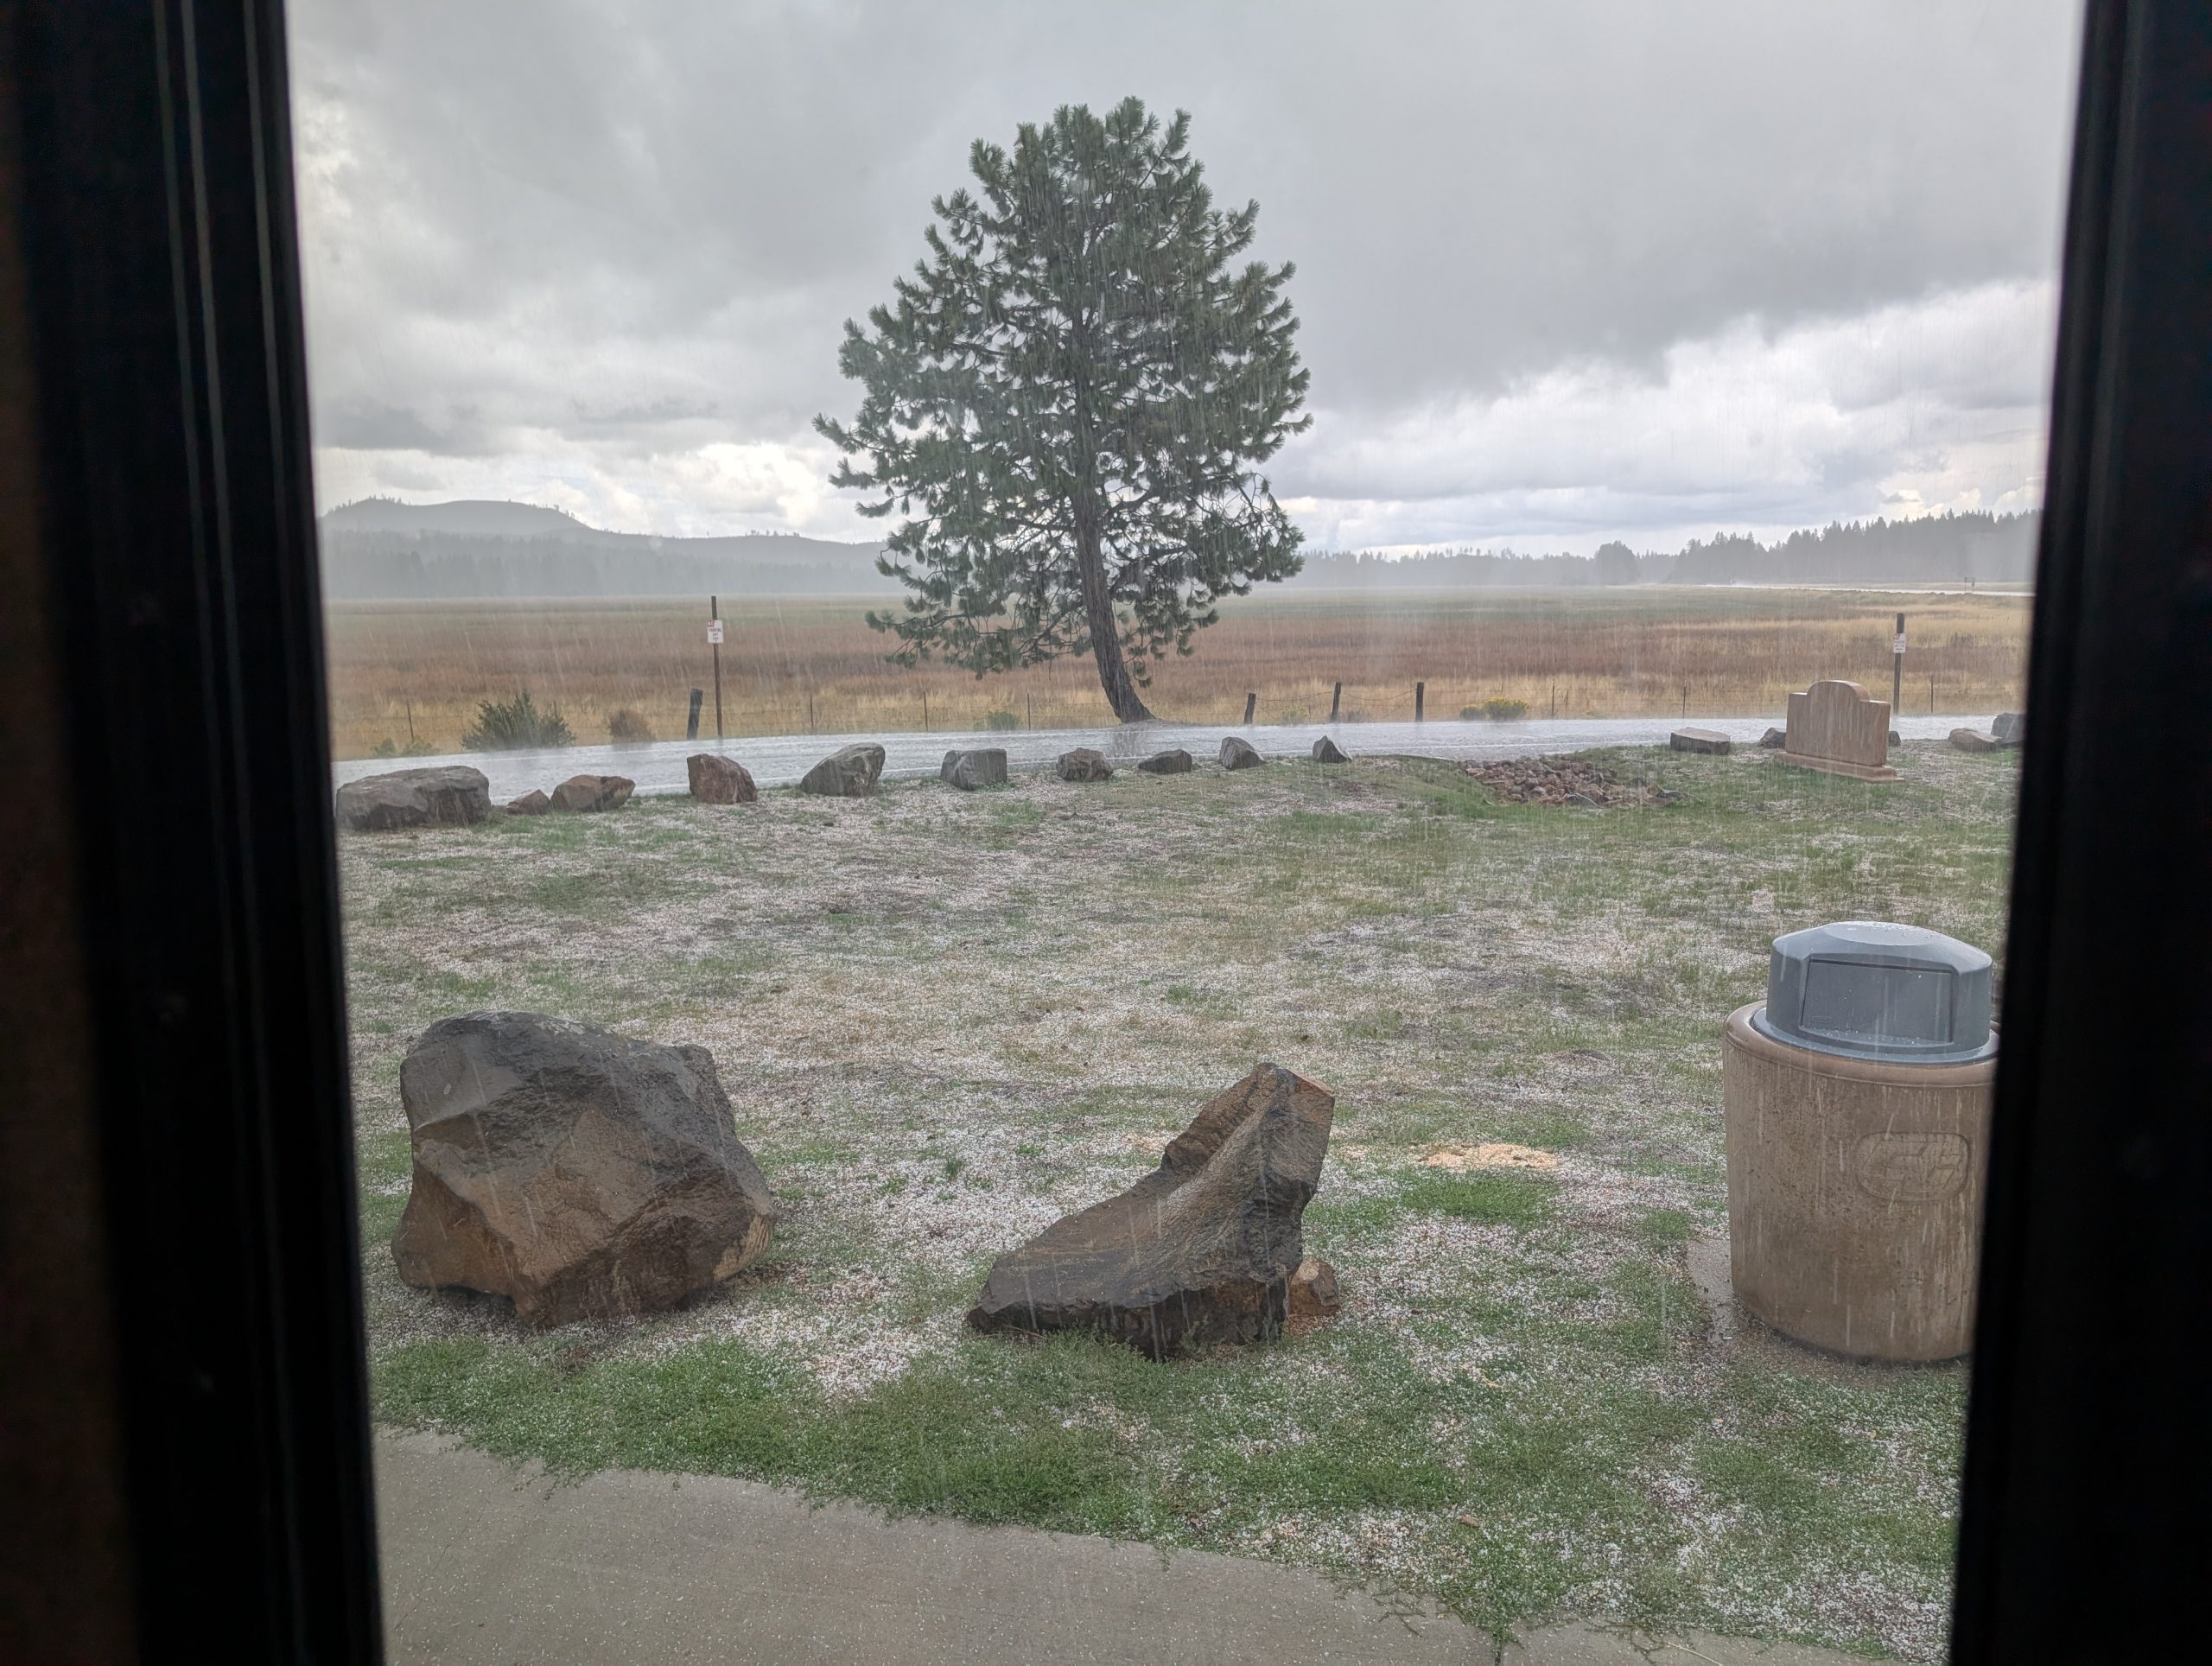
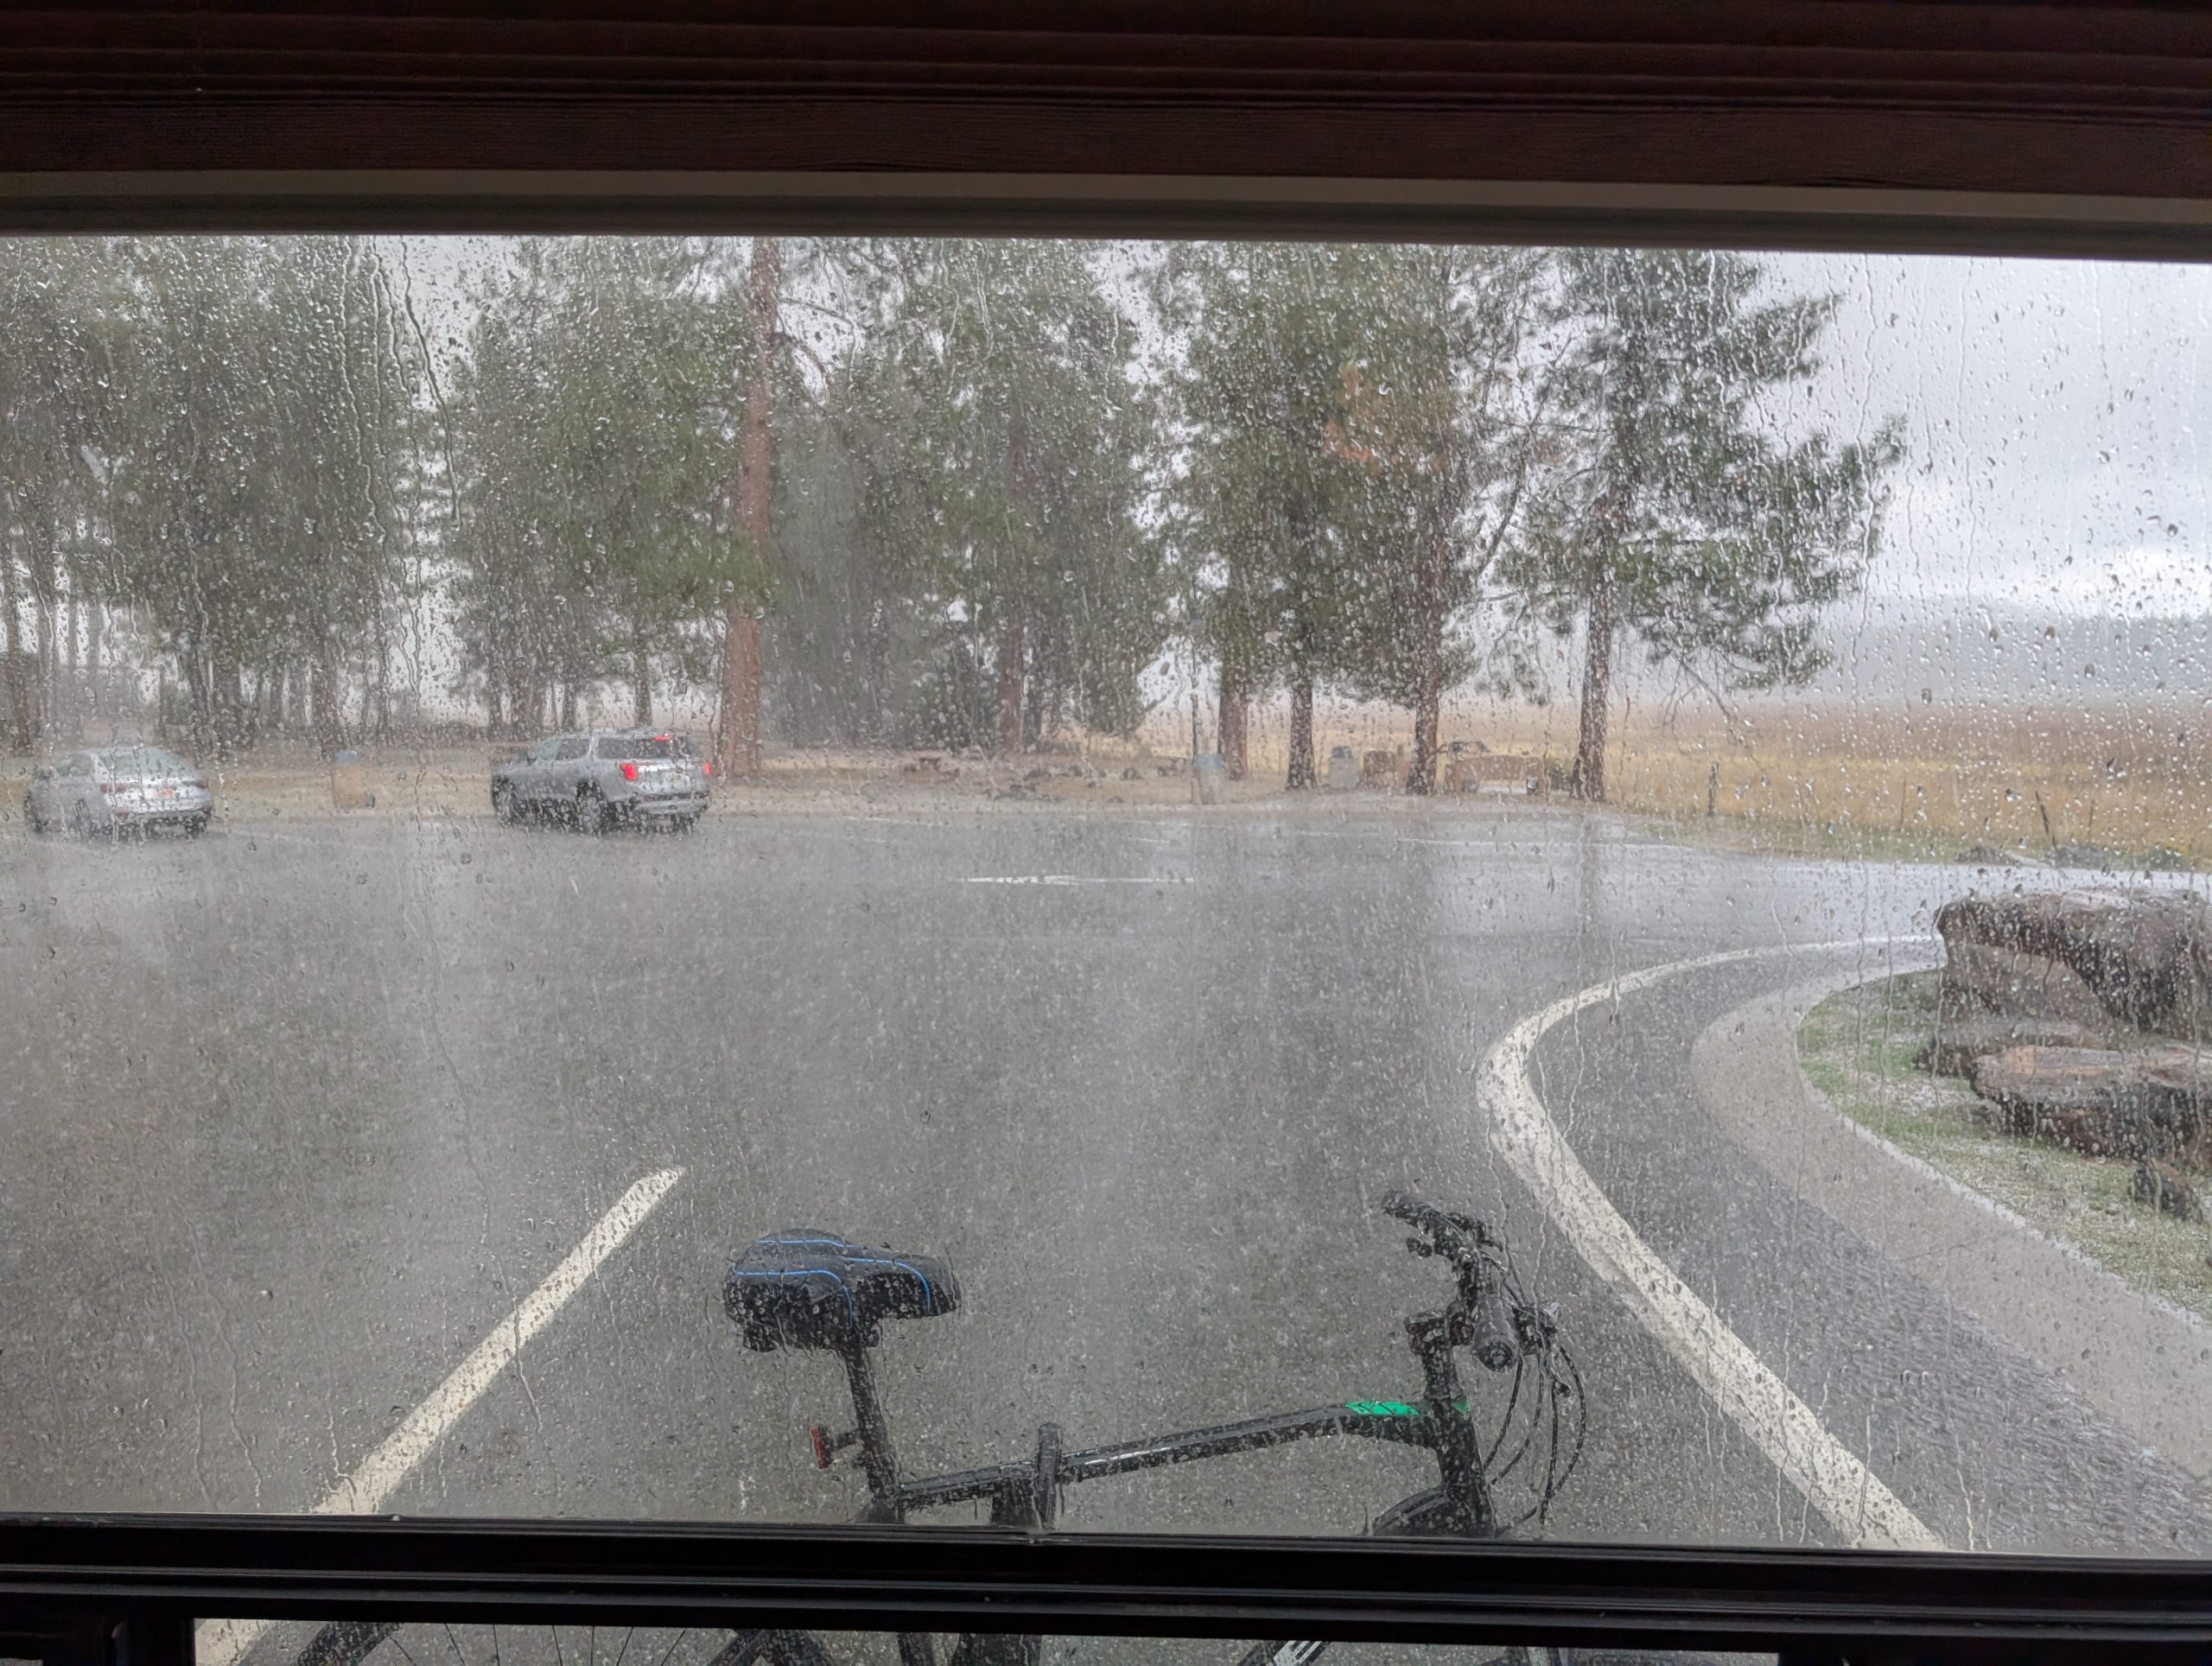
Now, there is a reason why our camp was called “Mountain Gate”. Because as soon as we left camp it was, up, up, up and into the Siskiyou Mountains. And what a scenic drive we had again today. And then it was time for a break. So, we stopped at a rest stop for lunch. As we were sitting in the trailer enjoying our sandwich, the sky decided to dump on us. Pouring down rain and hail. Yes, hail!
And yes, that is hail on the grass in the first picture. And as you can see, the rain/hailstorm was a downpour. A good reason to sit for a bit and let the storm pass over before heading off.
We waited for it to stop for a few minutes before we once again headed north. But in just a few miles, the rain had all but stopped (for the time) and we were able to enjoy the amazing countryside.
Our run today was beautiful. That is the only way to describe I-5 to Weed, California where we turned off onto SH 97. And then all the way to Chiloquin, there was something lovely to capture our attention. Going around Upper Klamath Lake was just grand, although driving through rain was not the ideal way to enjoy the ride. But by the time we got into camp, the rain had stopped. So, setting up camp without rain was a blessing.
Then I spent a bunch of time getting ready to serve spaghetti, salad, and garlic bread to the 6 of us.
Our campground is quite small. But the sites are flat and some backup to the Williamson River. Very nice.
After dinner it was back to our trailer (we had dinner in T&P’s trailer because they had room for all 6 of us) for me to write up today’s drive and to get yet another early to bed. I sleep more when we are in our trailer than ever at home. Somehow, my body just lets me know that there are not any pressing things that must be done. That basically it’s just fine if I relax and take it easy.
Thursday, September 11, 2025 – Waterwheel RV Park and Campground – Chiloquin, Oregon
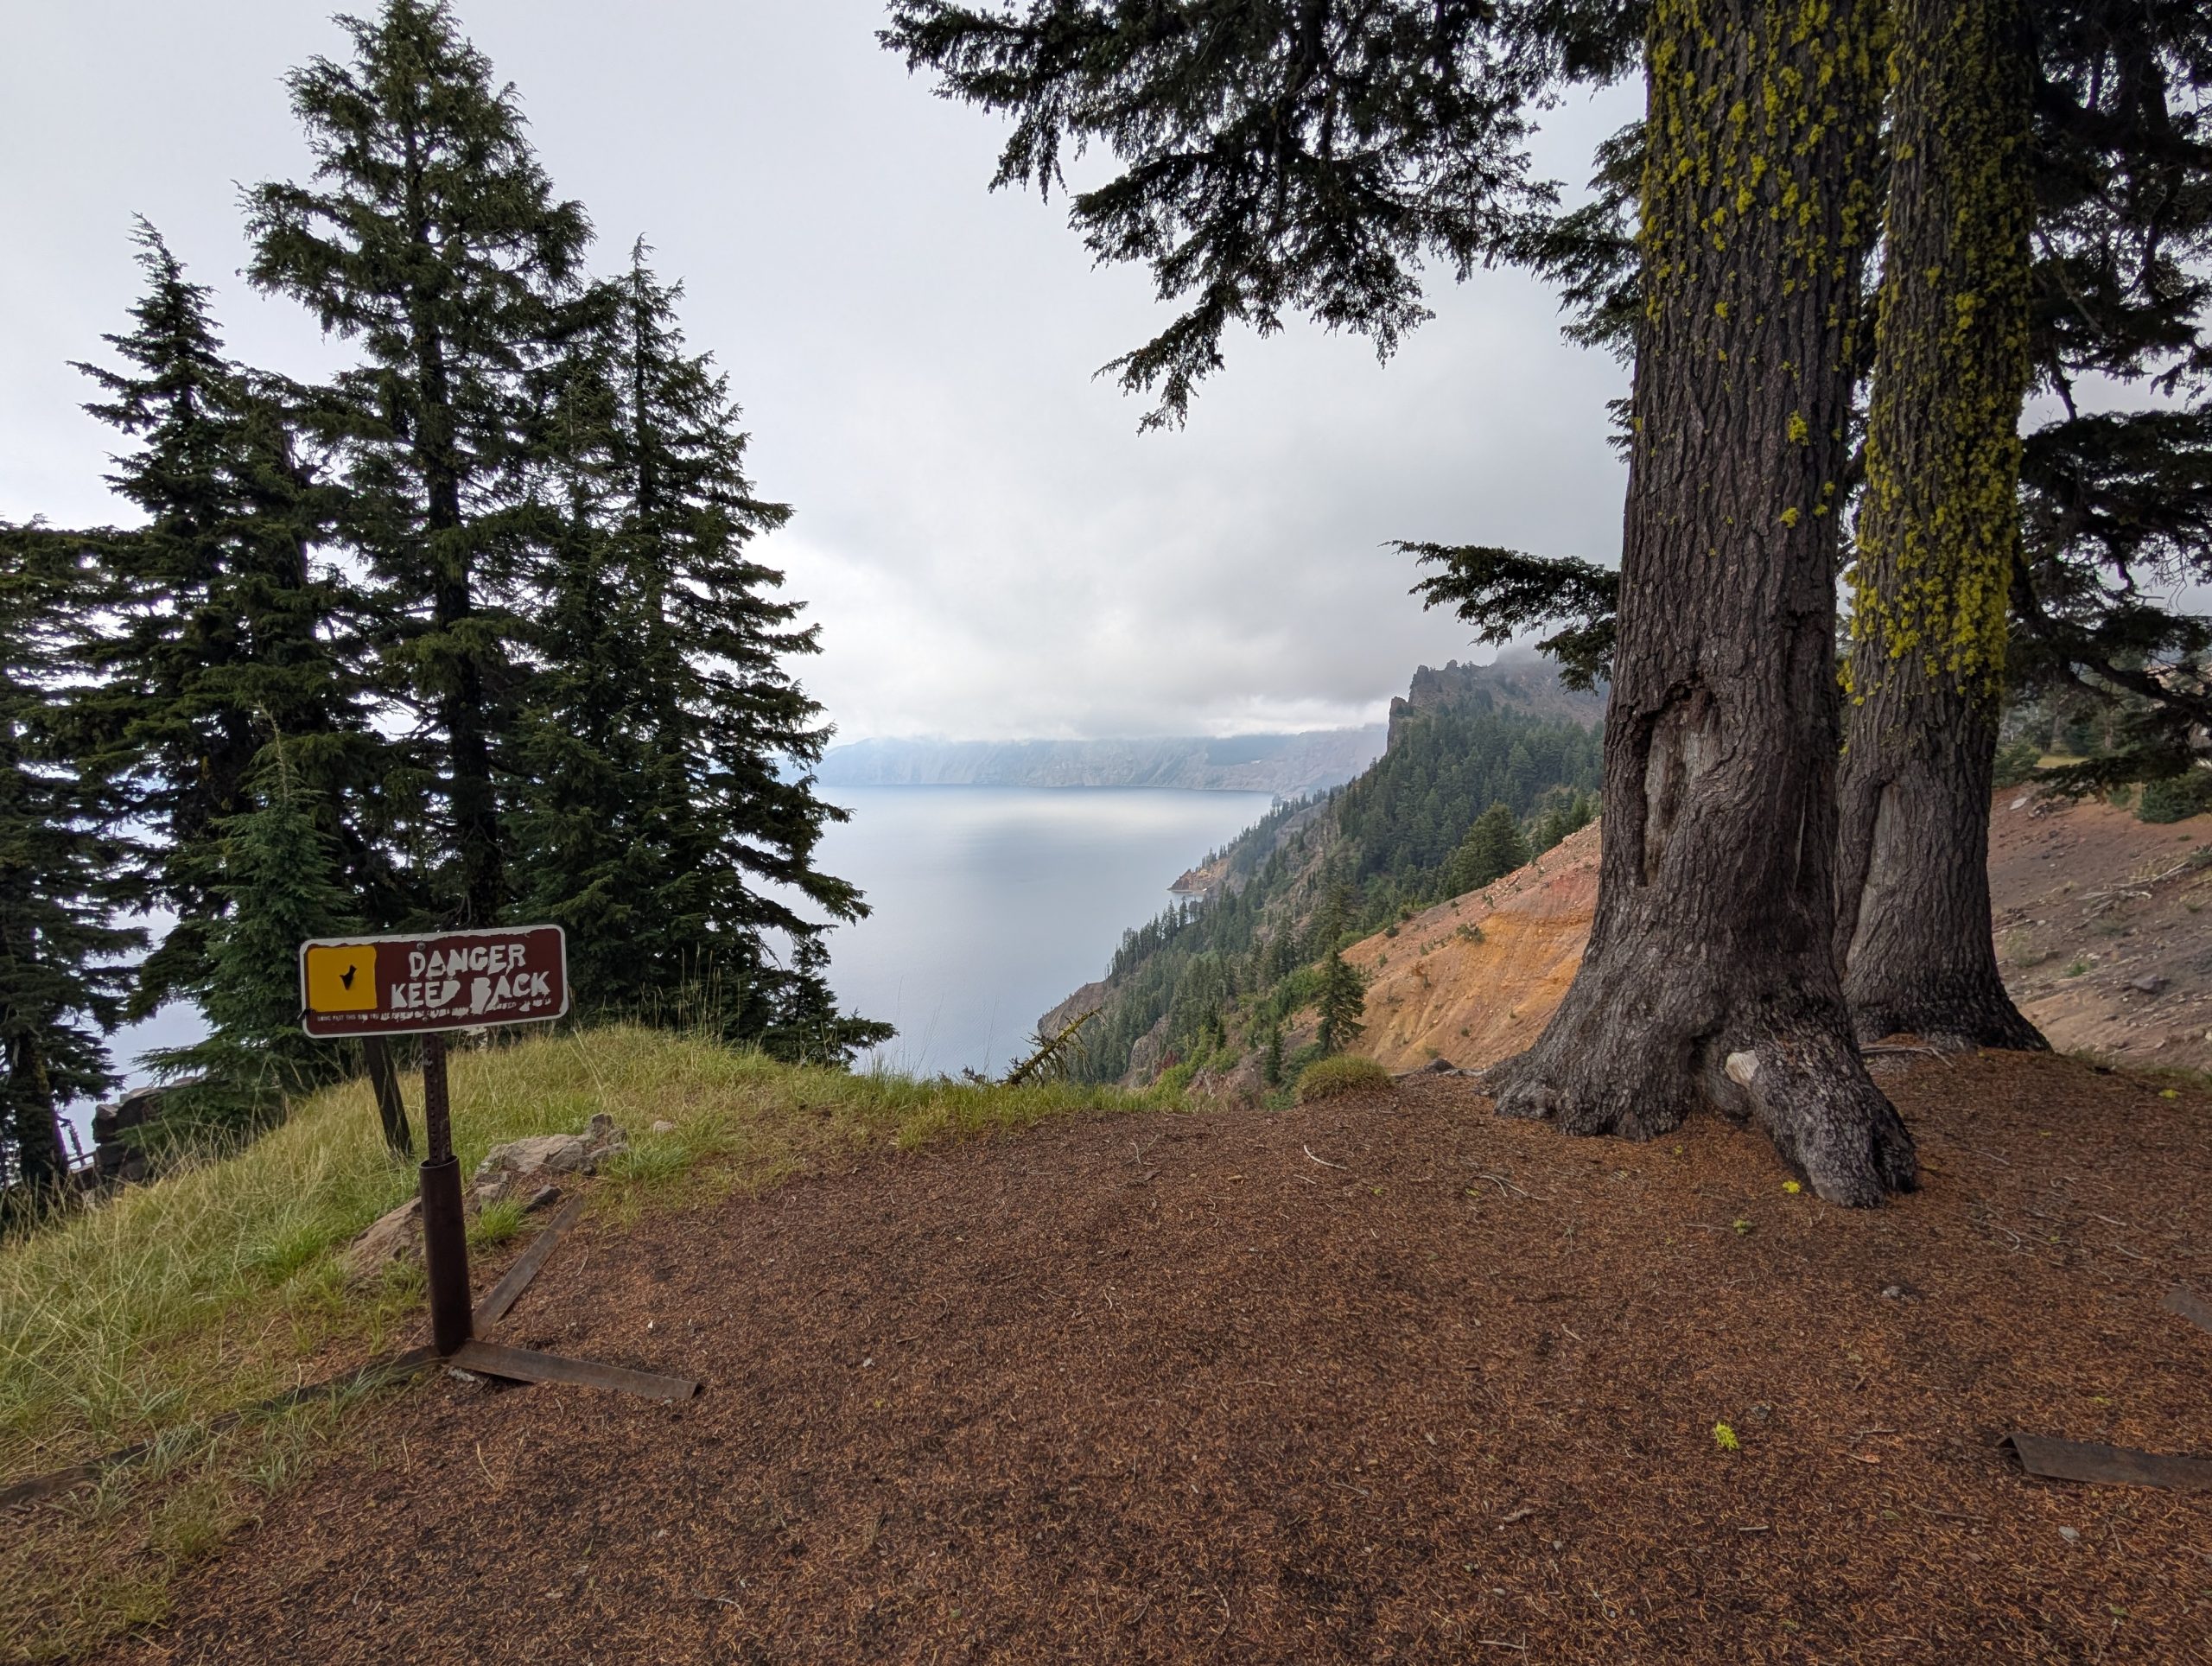
After a quiet morning, breakfast dishes but a distant memory, and the truck gassed up, we headed for Crater Lake National Park.
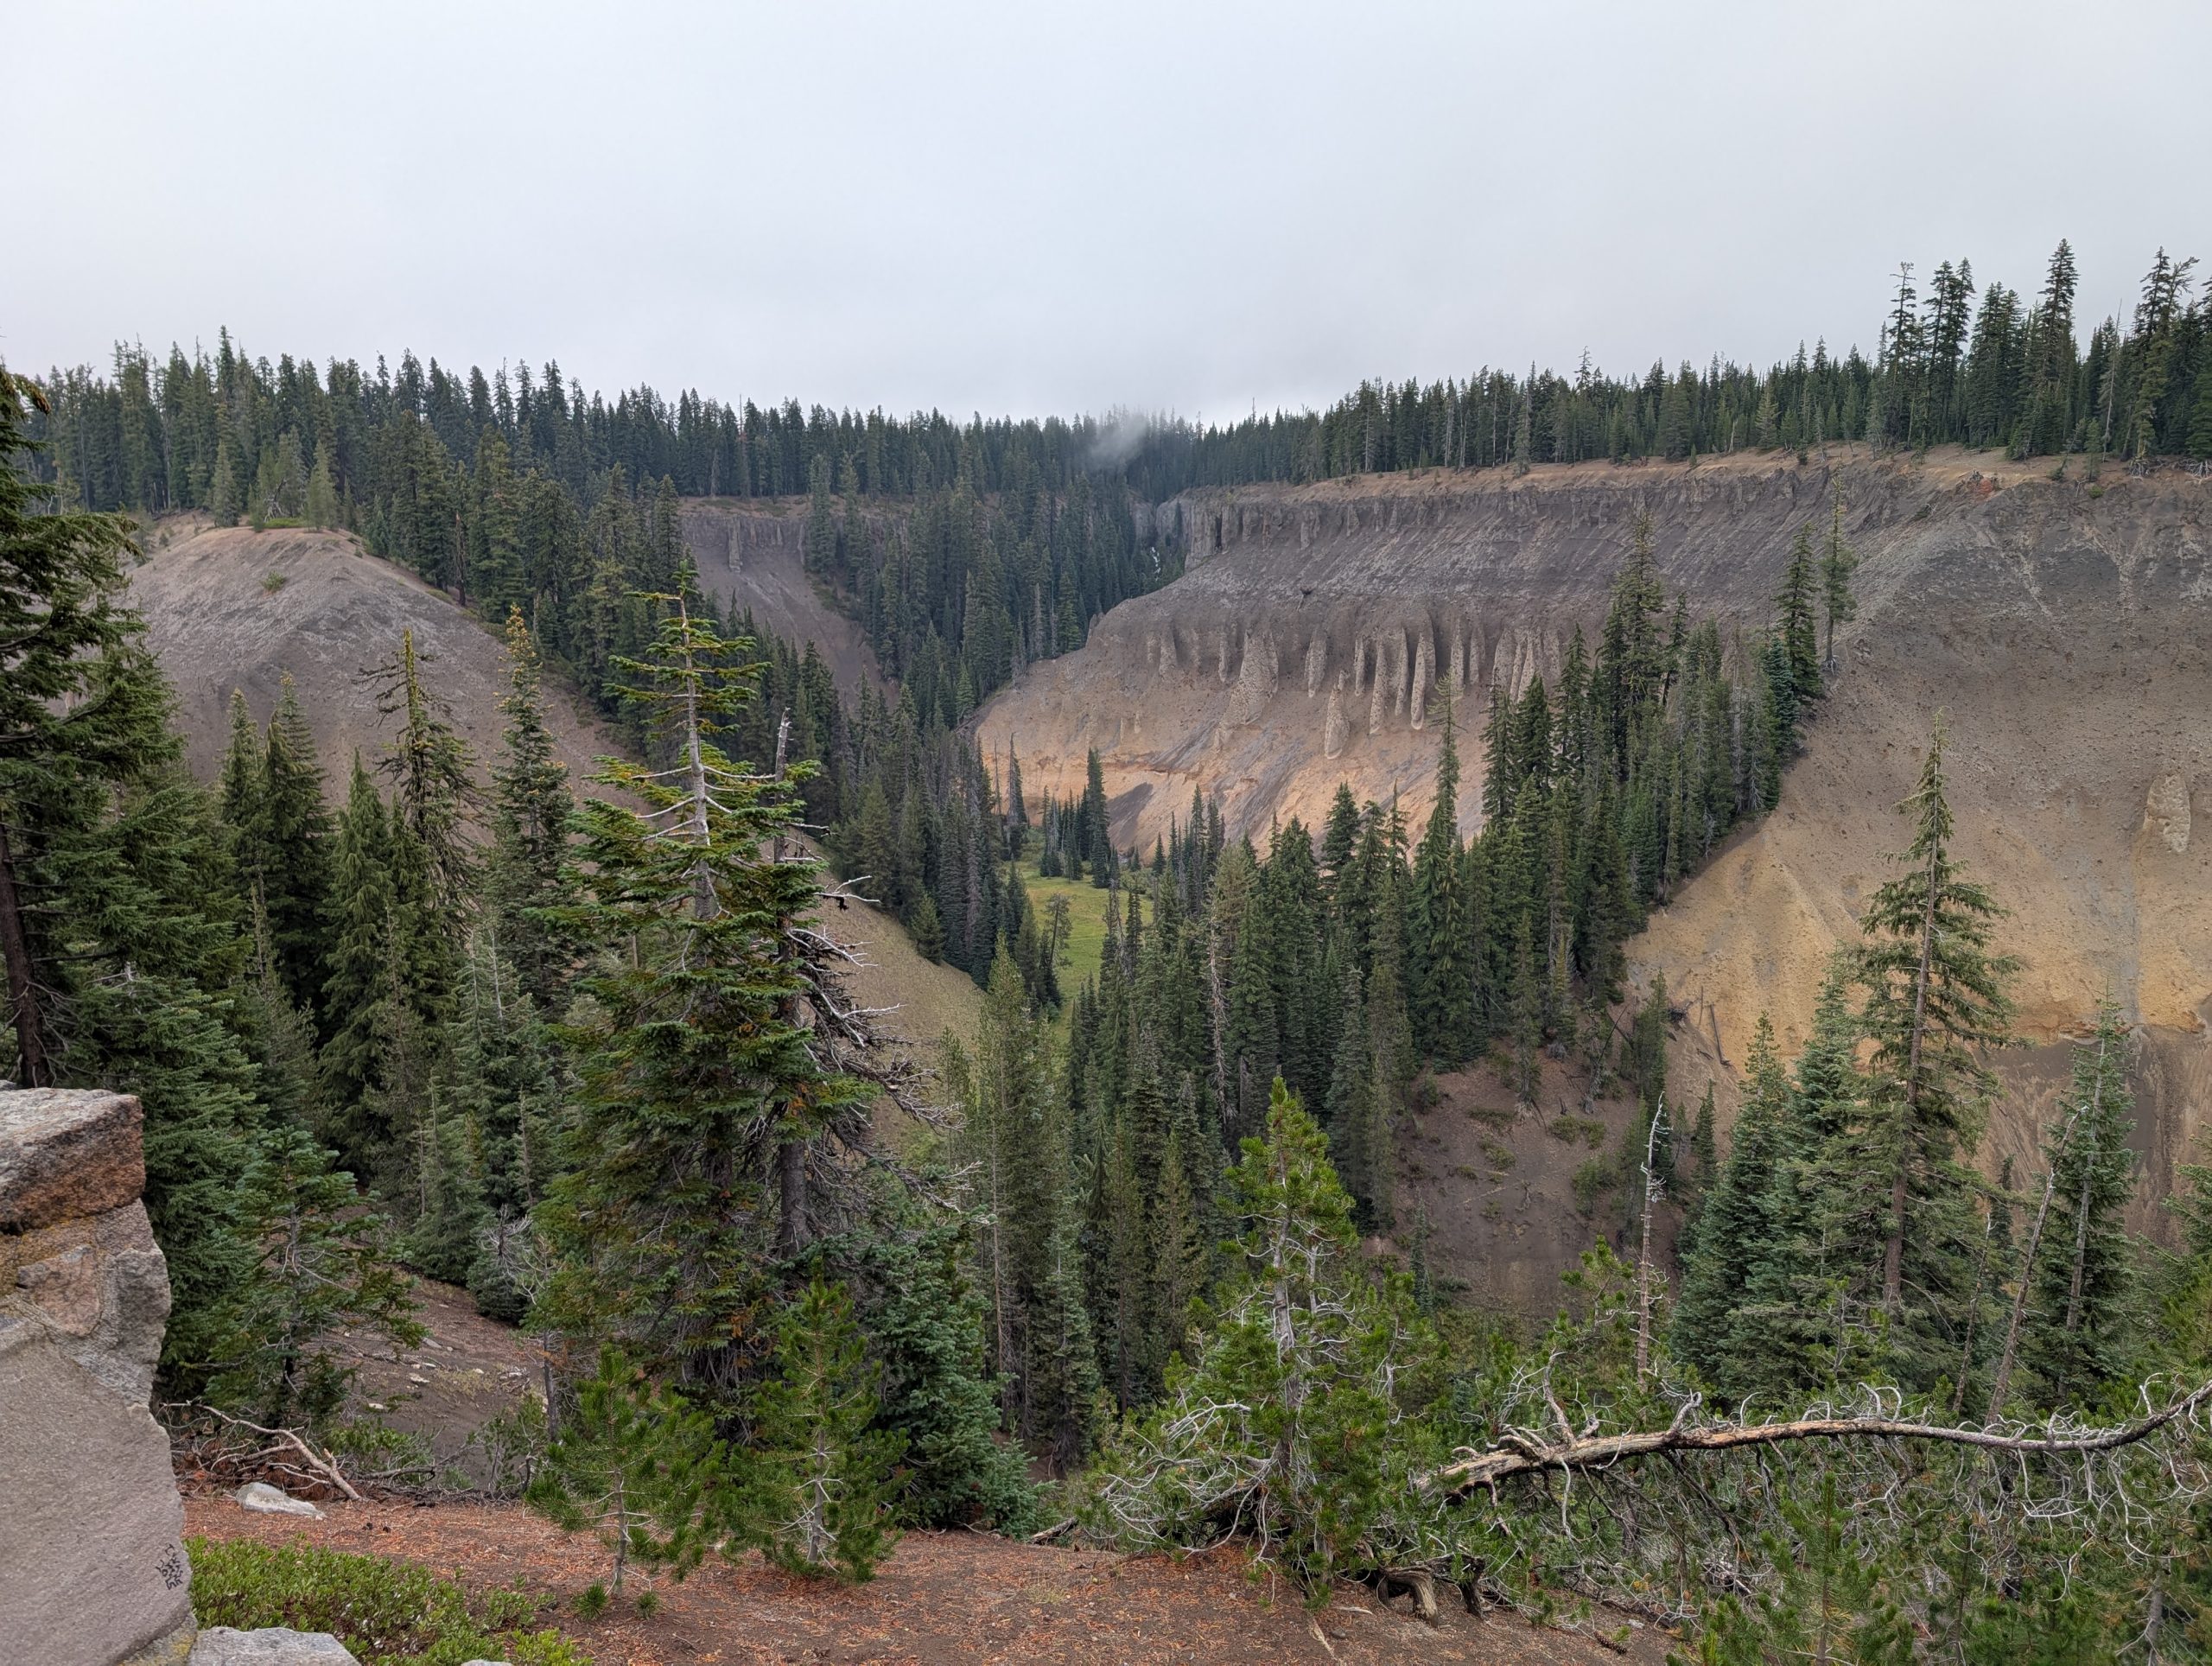
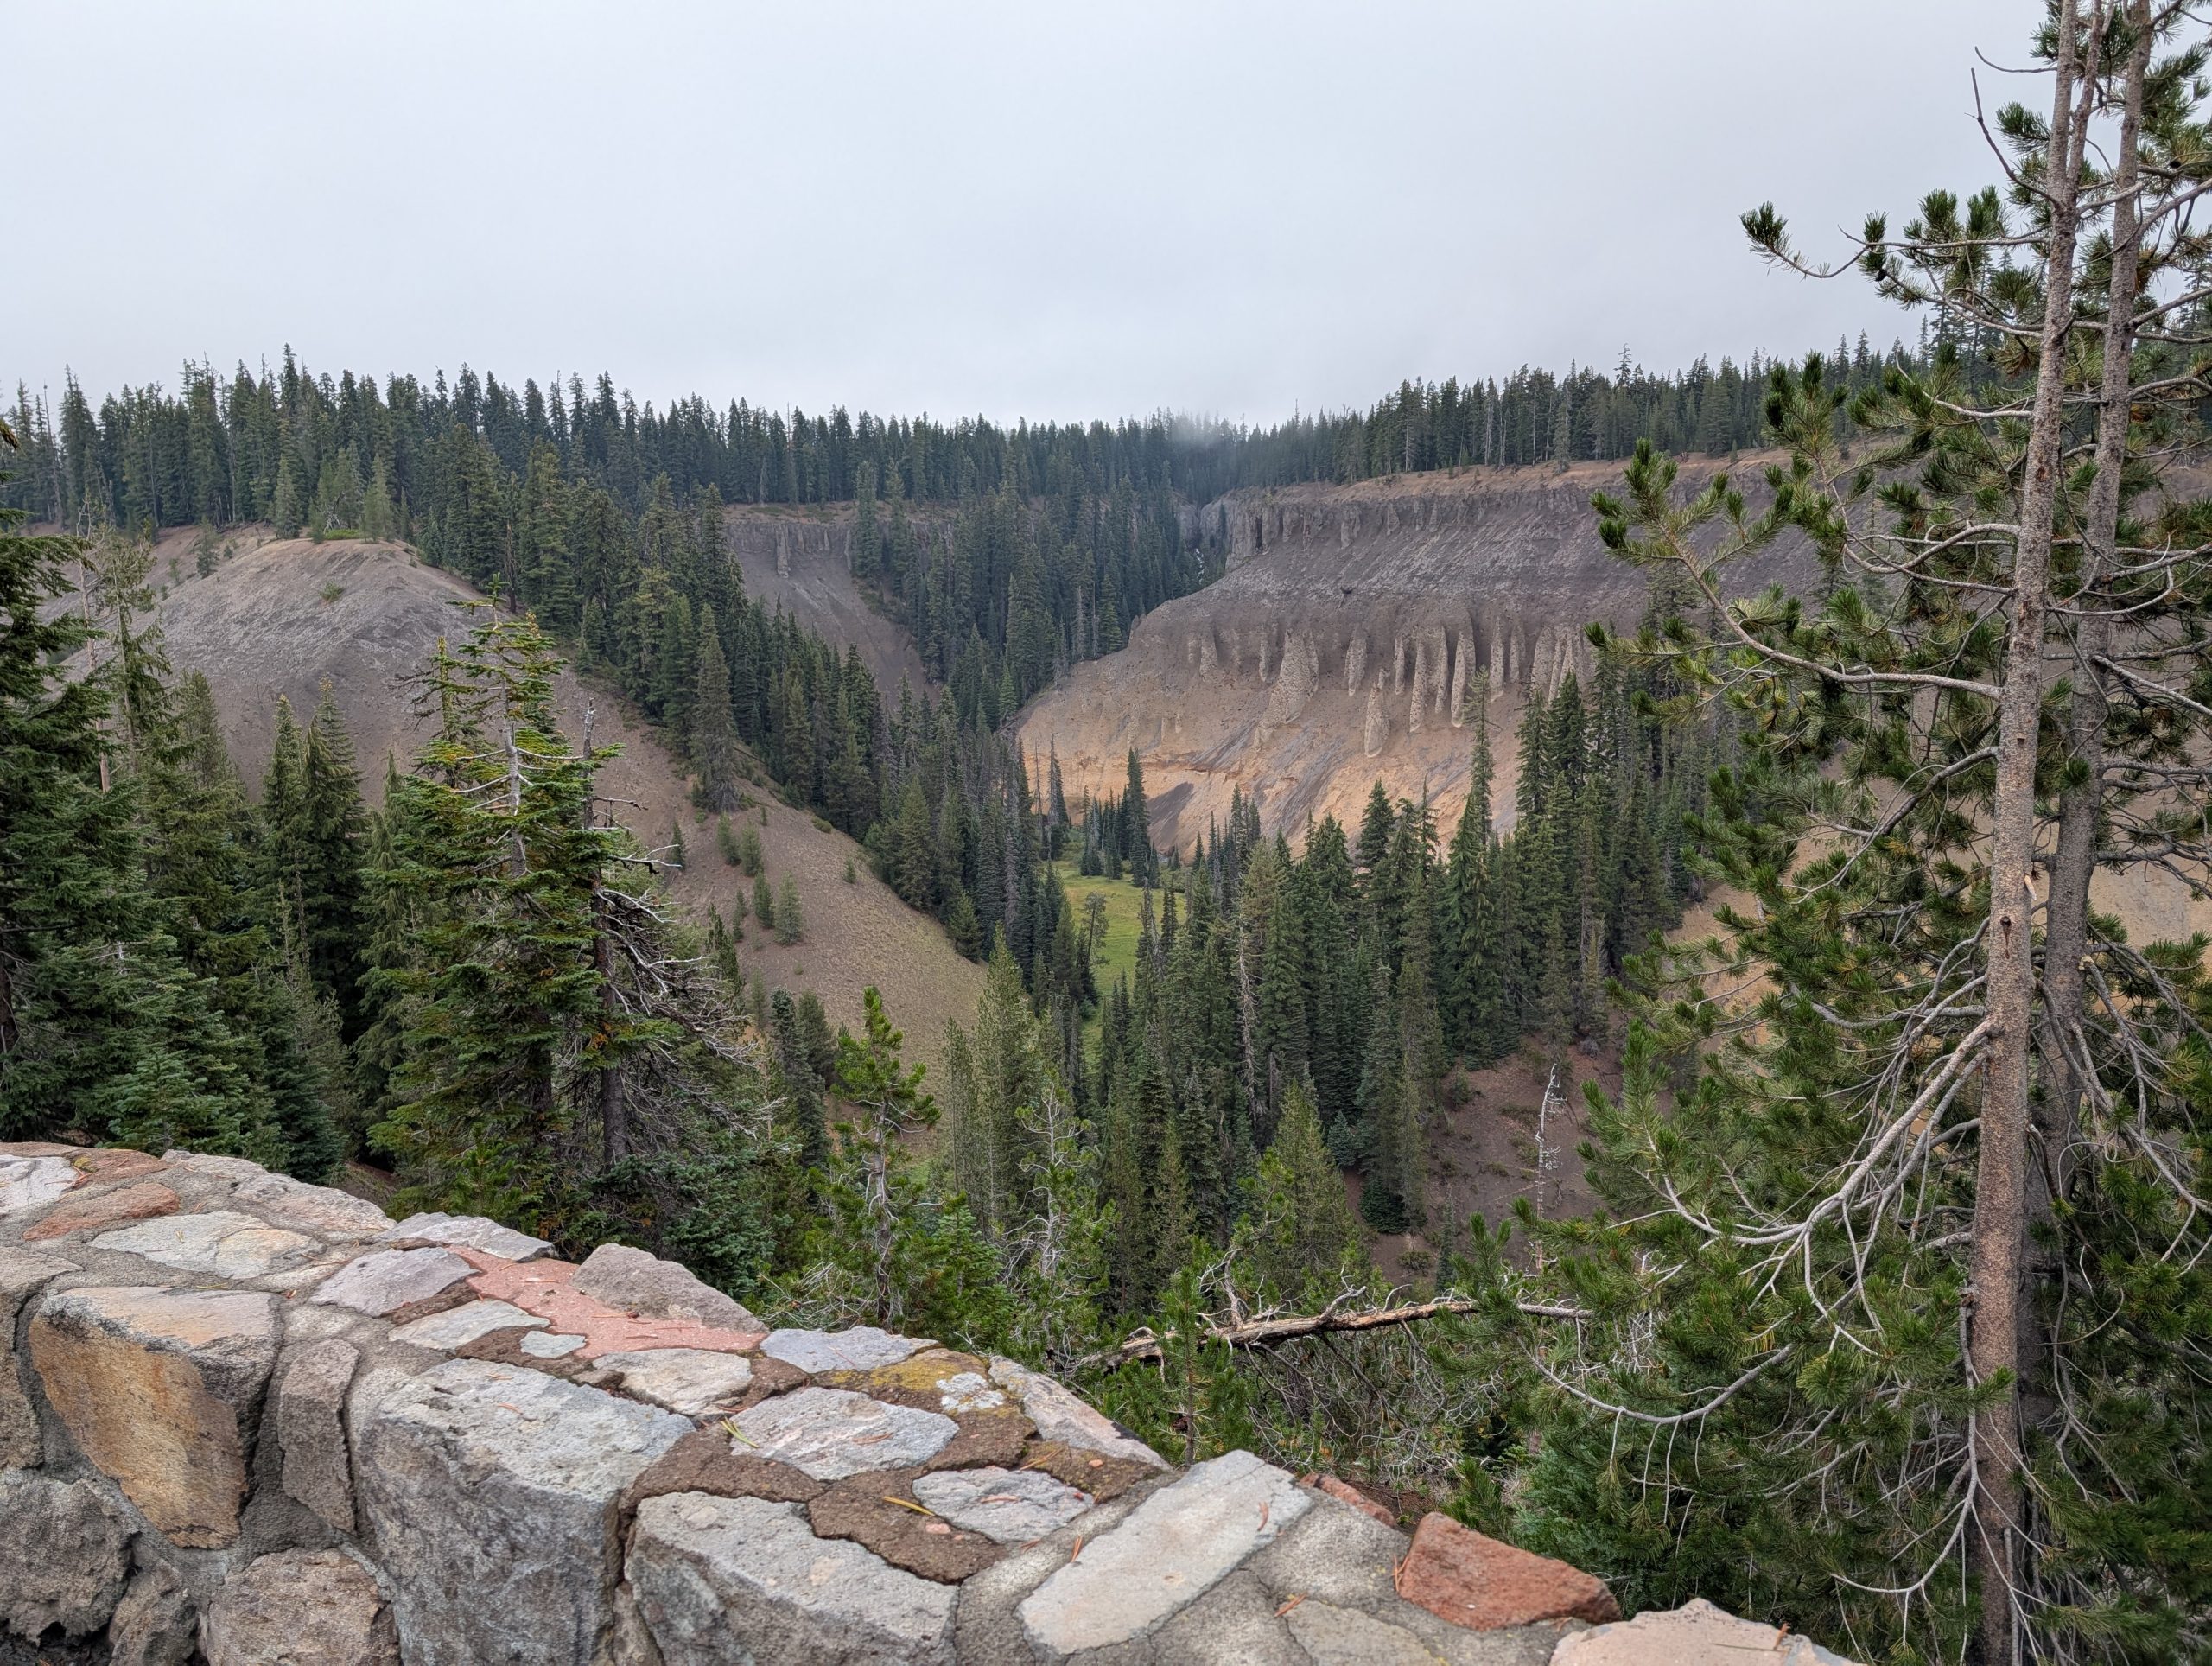
We had been to Crater Lake before, but it had been at least 25 years. So, the awe and majesty of the park left us breathless once again. Even before you go through the park gate, the canyon of Annie Creek is a wonder unto itself.
The walls of Annie Creek Canyon are primarily made of volcanic materials, including columnar scoria (cinder – a hardened, frothy volcanic rock) and volcanic. These formations are the result of Mount Mazama’s catastrophic eruption and the subsequent geological processes.
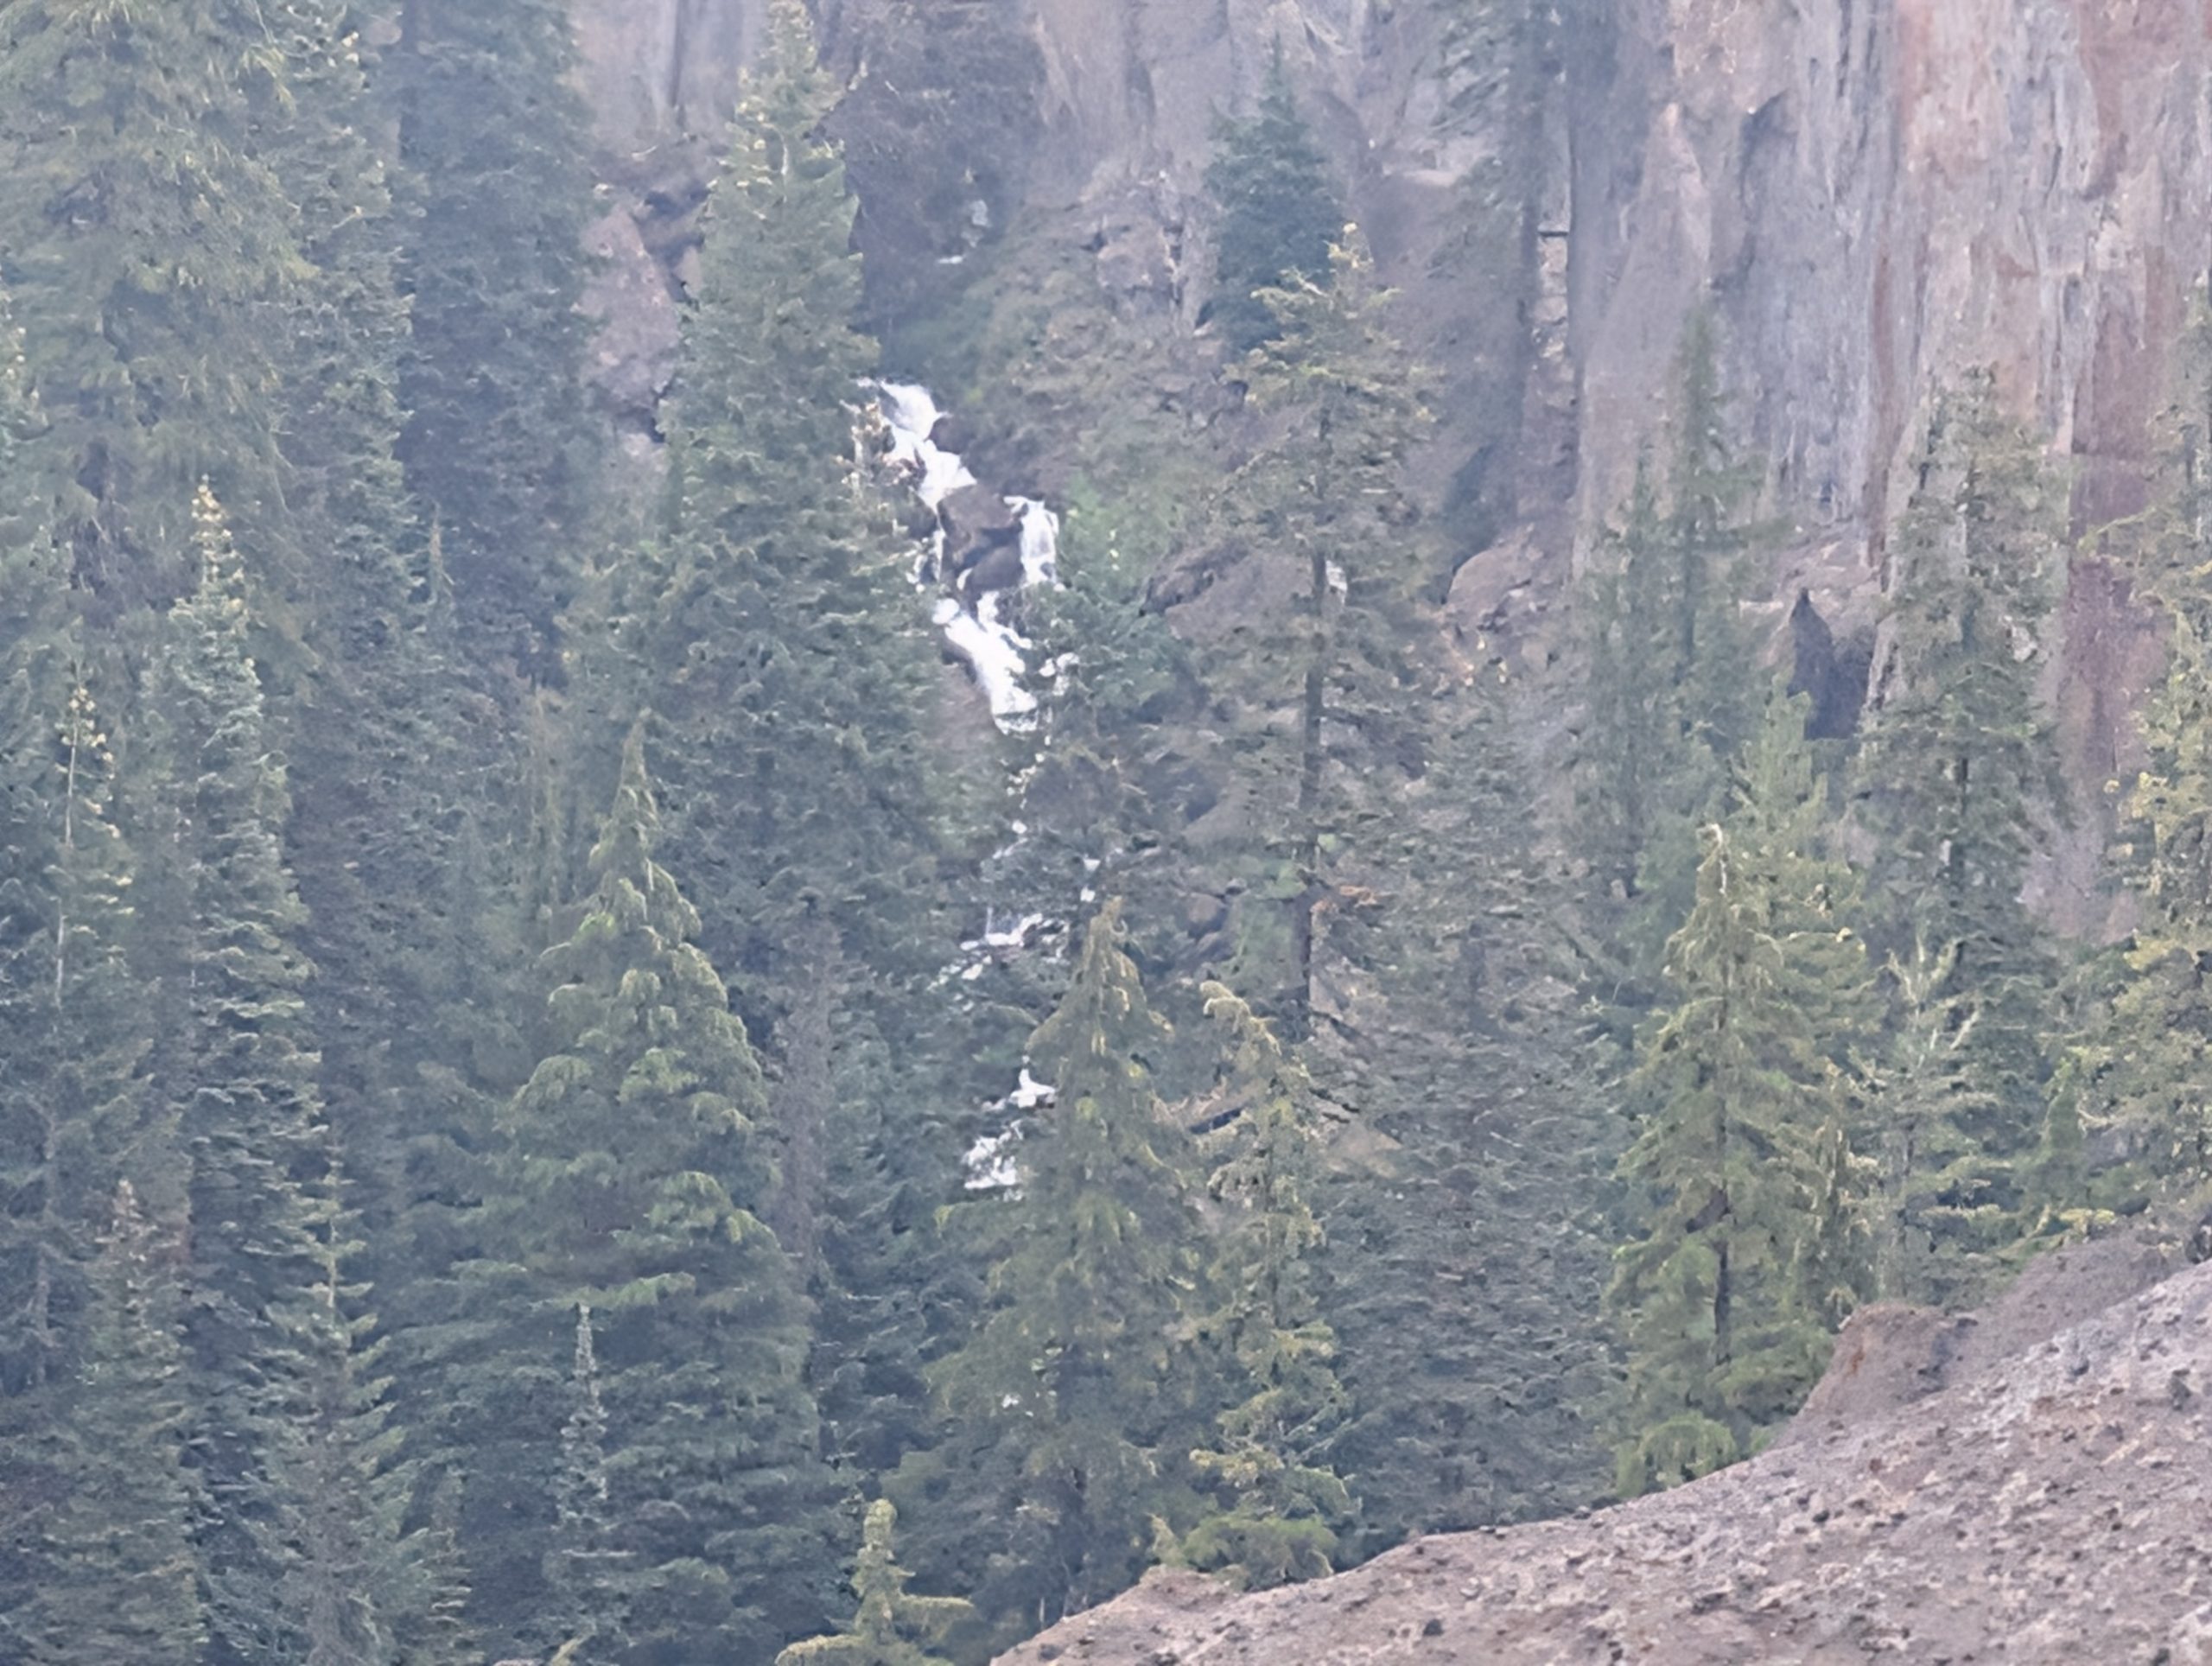
A lovely waterfall in the Annie Creek Canyon.
Atop the scoria, layers of petrified volcanic ash and buff dacite pumice can be found. These deposits are remnants of the massive eruption of Mount Mazama approximately 7,700 years ago.
The canyon also contains interesting volcanic spires, particularly along the southern portion. These formations, known as fossil fumaroles, were created when hot gases escaped through the pumice deposits, cementing the ash and making it more resistant to erosion. Annie Creek has since eroded the softer surrounding pumice, leaving the spires behind. All this even before you go through the National Park gate. Amazing. Then it’s into the park you go. And unlike most state or national parks, we drove right up to the entrance station. No line. Unbelievable.
And then it’s up, up, up a very windy but well-maintained road. And through beautiful forests.
Crater Lake National Park features four main forest zones dominated by different coniferous trees: Ponderosa Pine at lower elevations, transitioning to Lodgepole Pine higher up, then Mountain Hemlock around 6,000 feet, and finally Whitebark Pine in open woodlands at the highest elevations. Other conifers include Douglas Fir, White Fir, Western White Pine, and Alpine Fir. Some deciduous trees and shrubs are also found in moist areas and the underbrush.
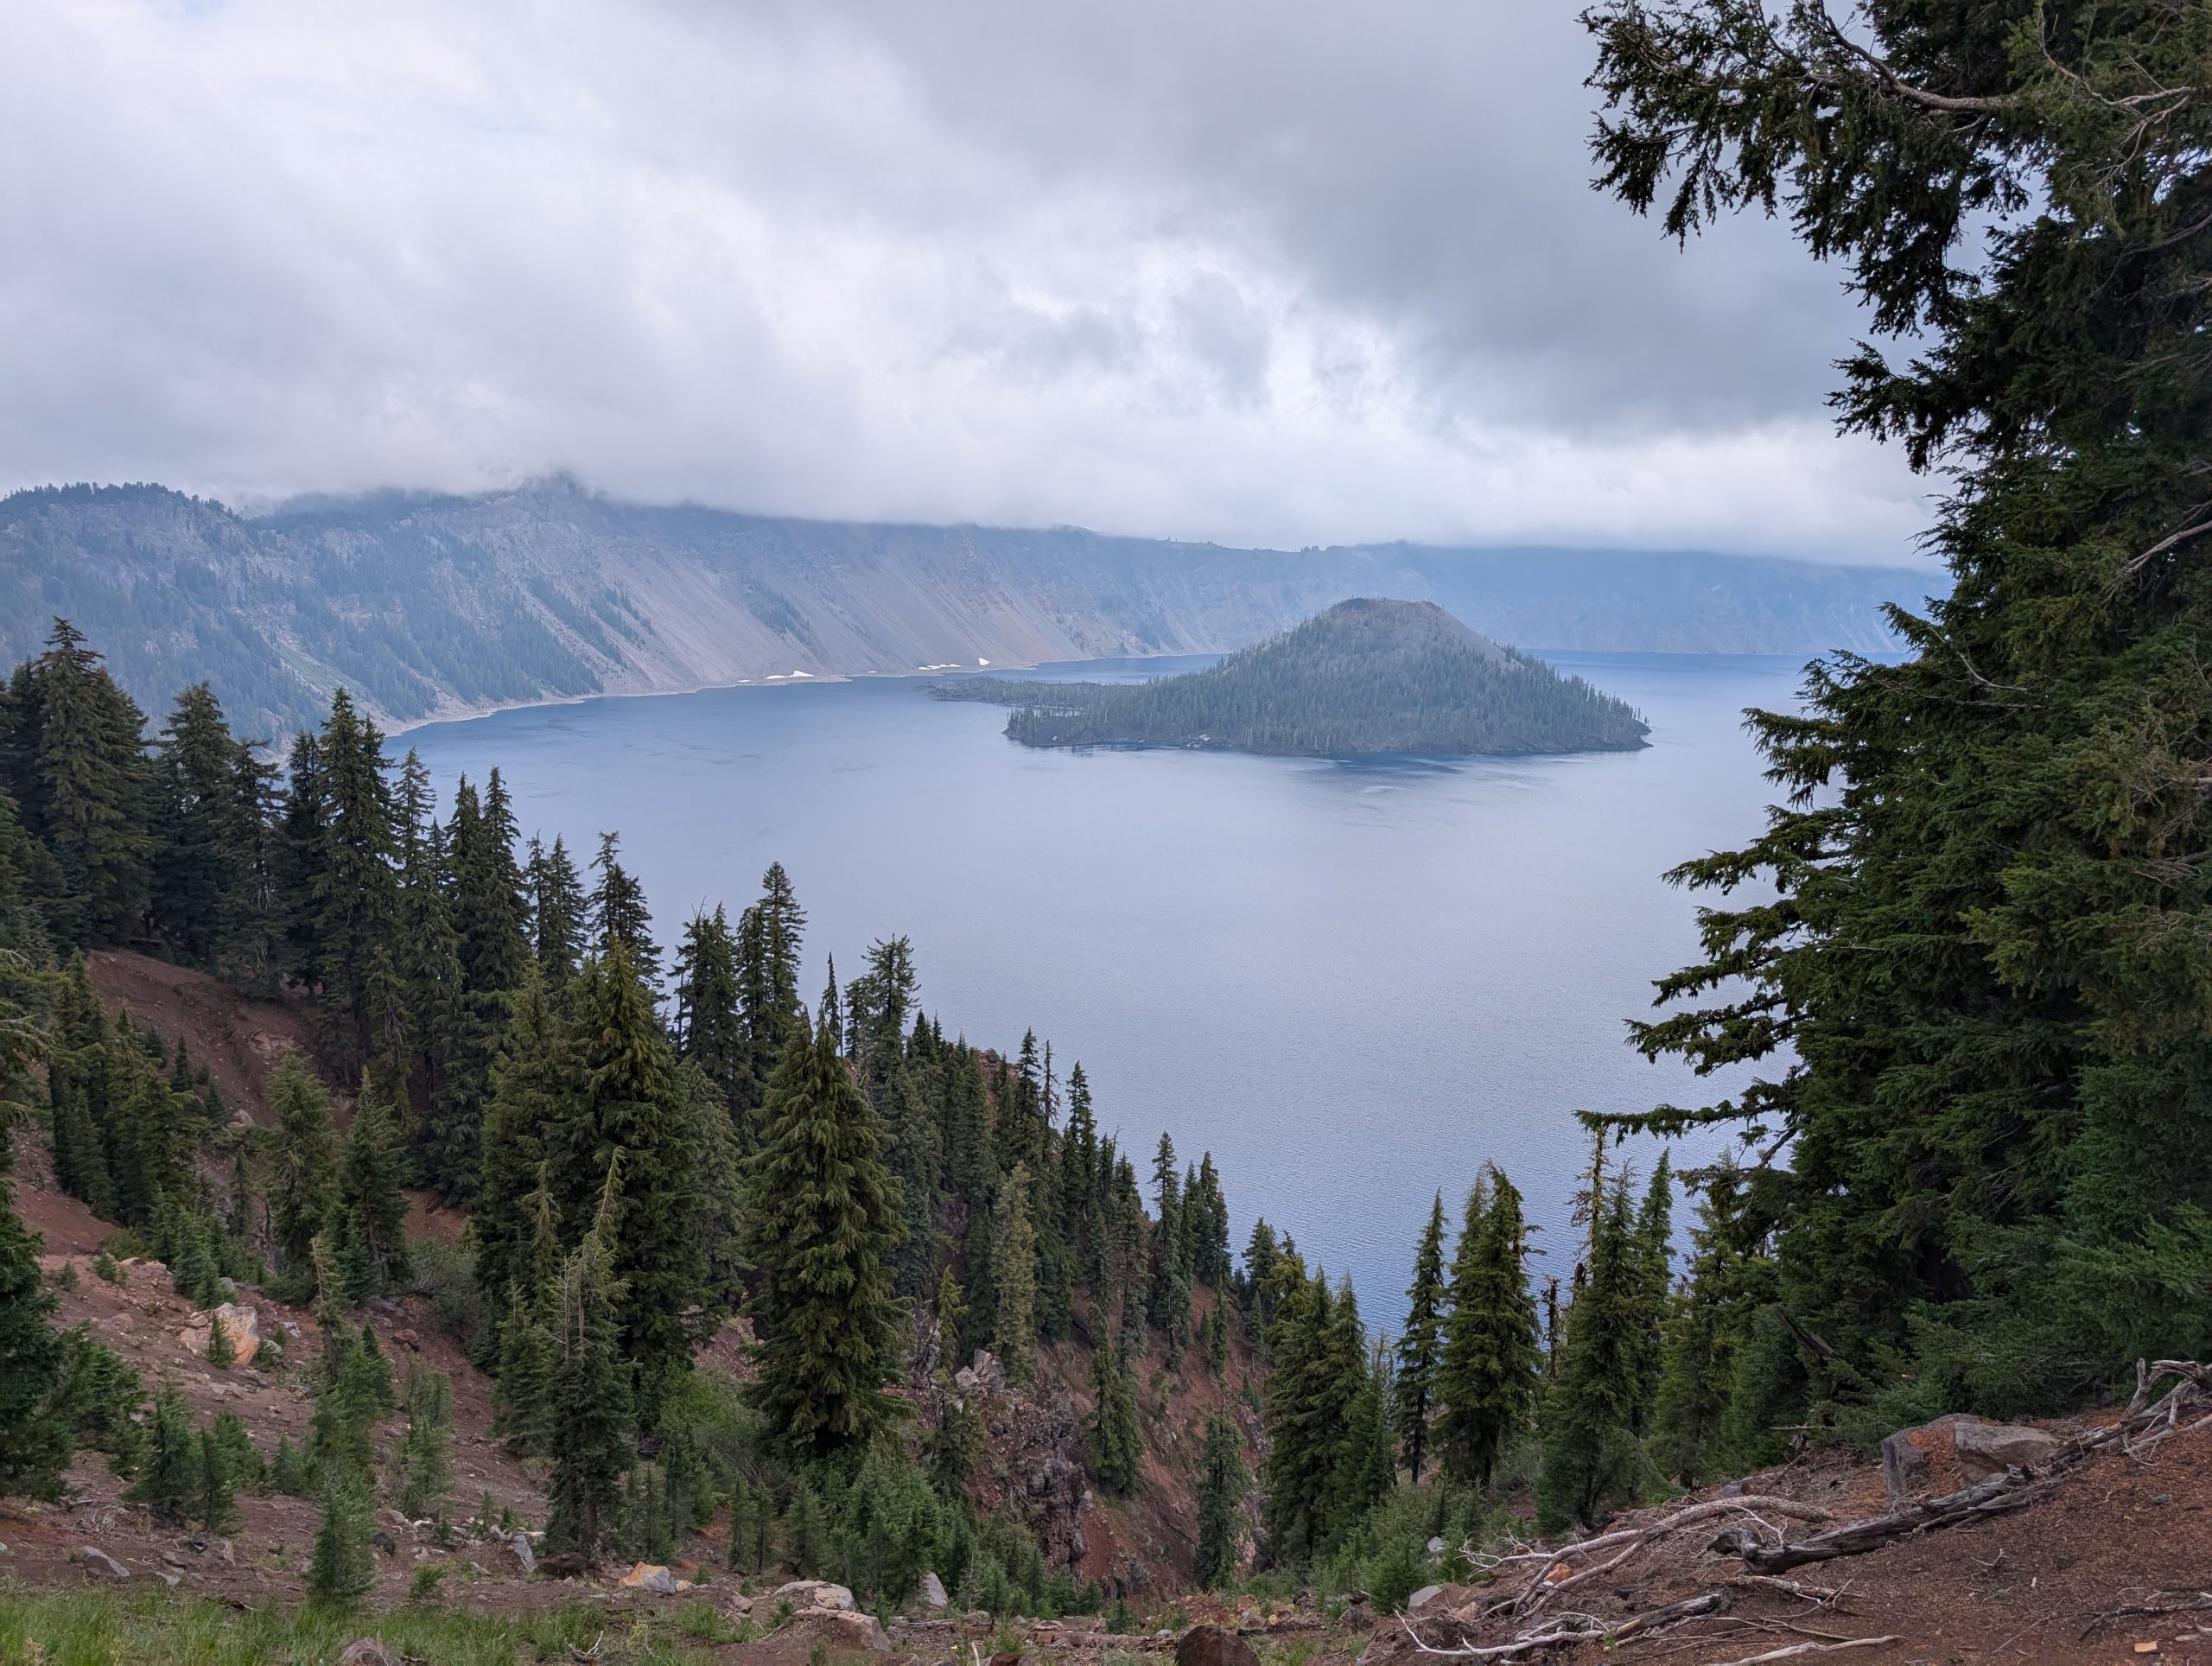
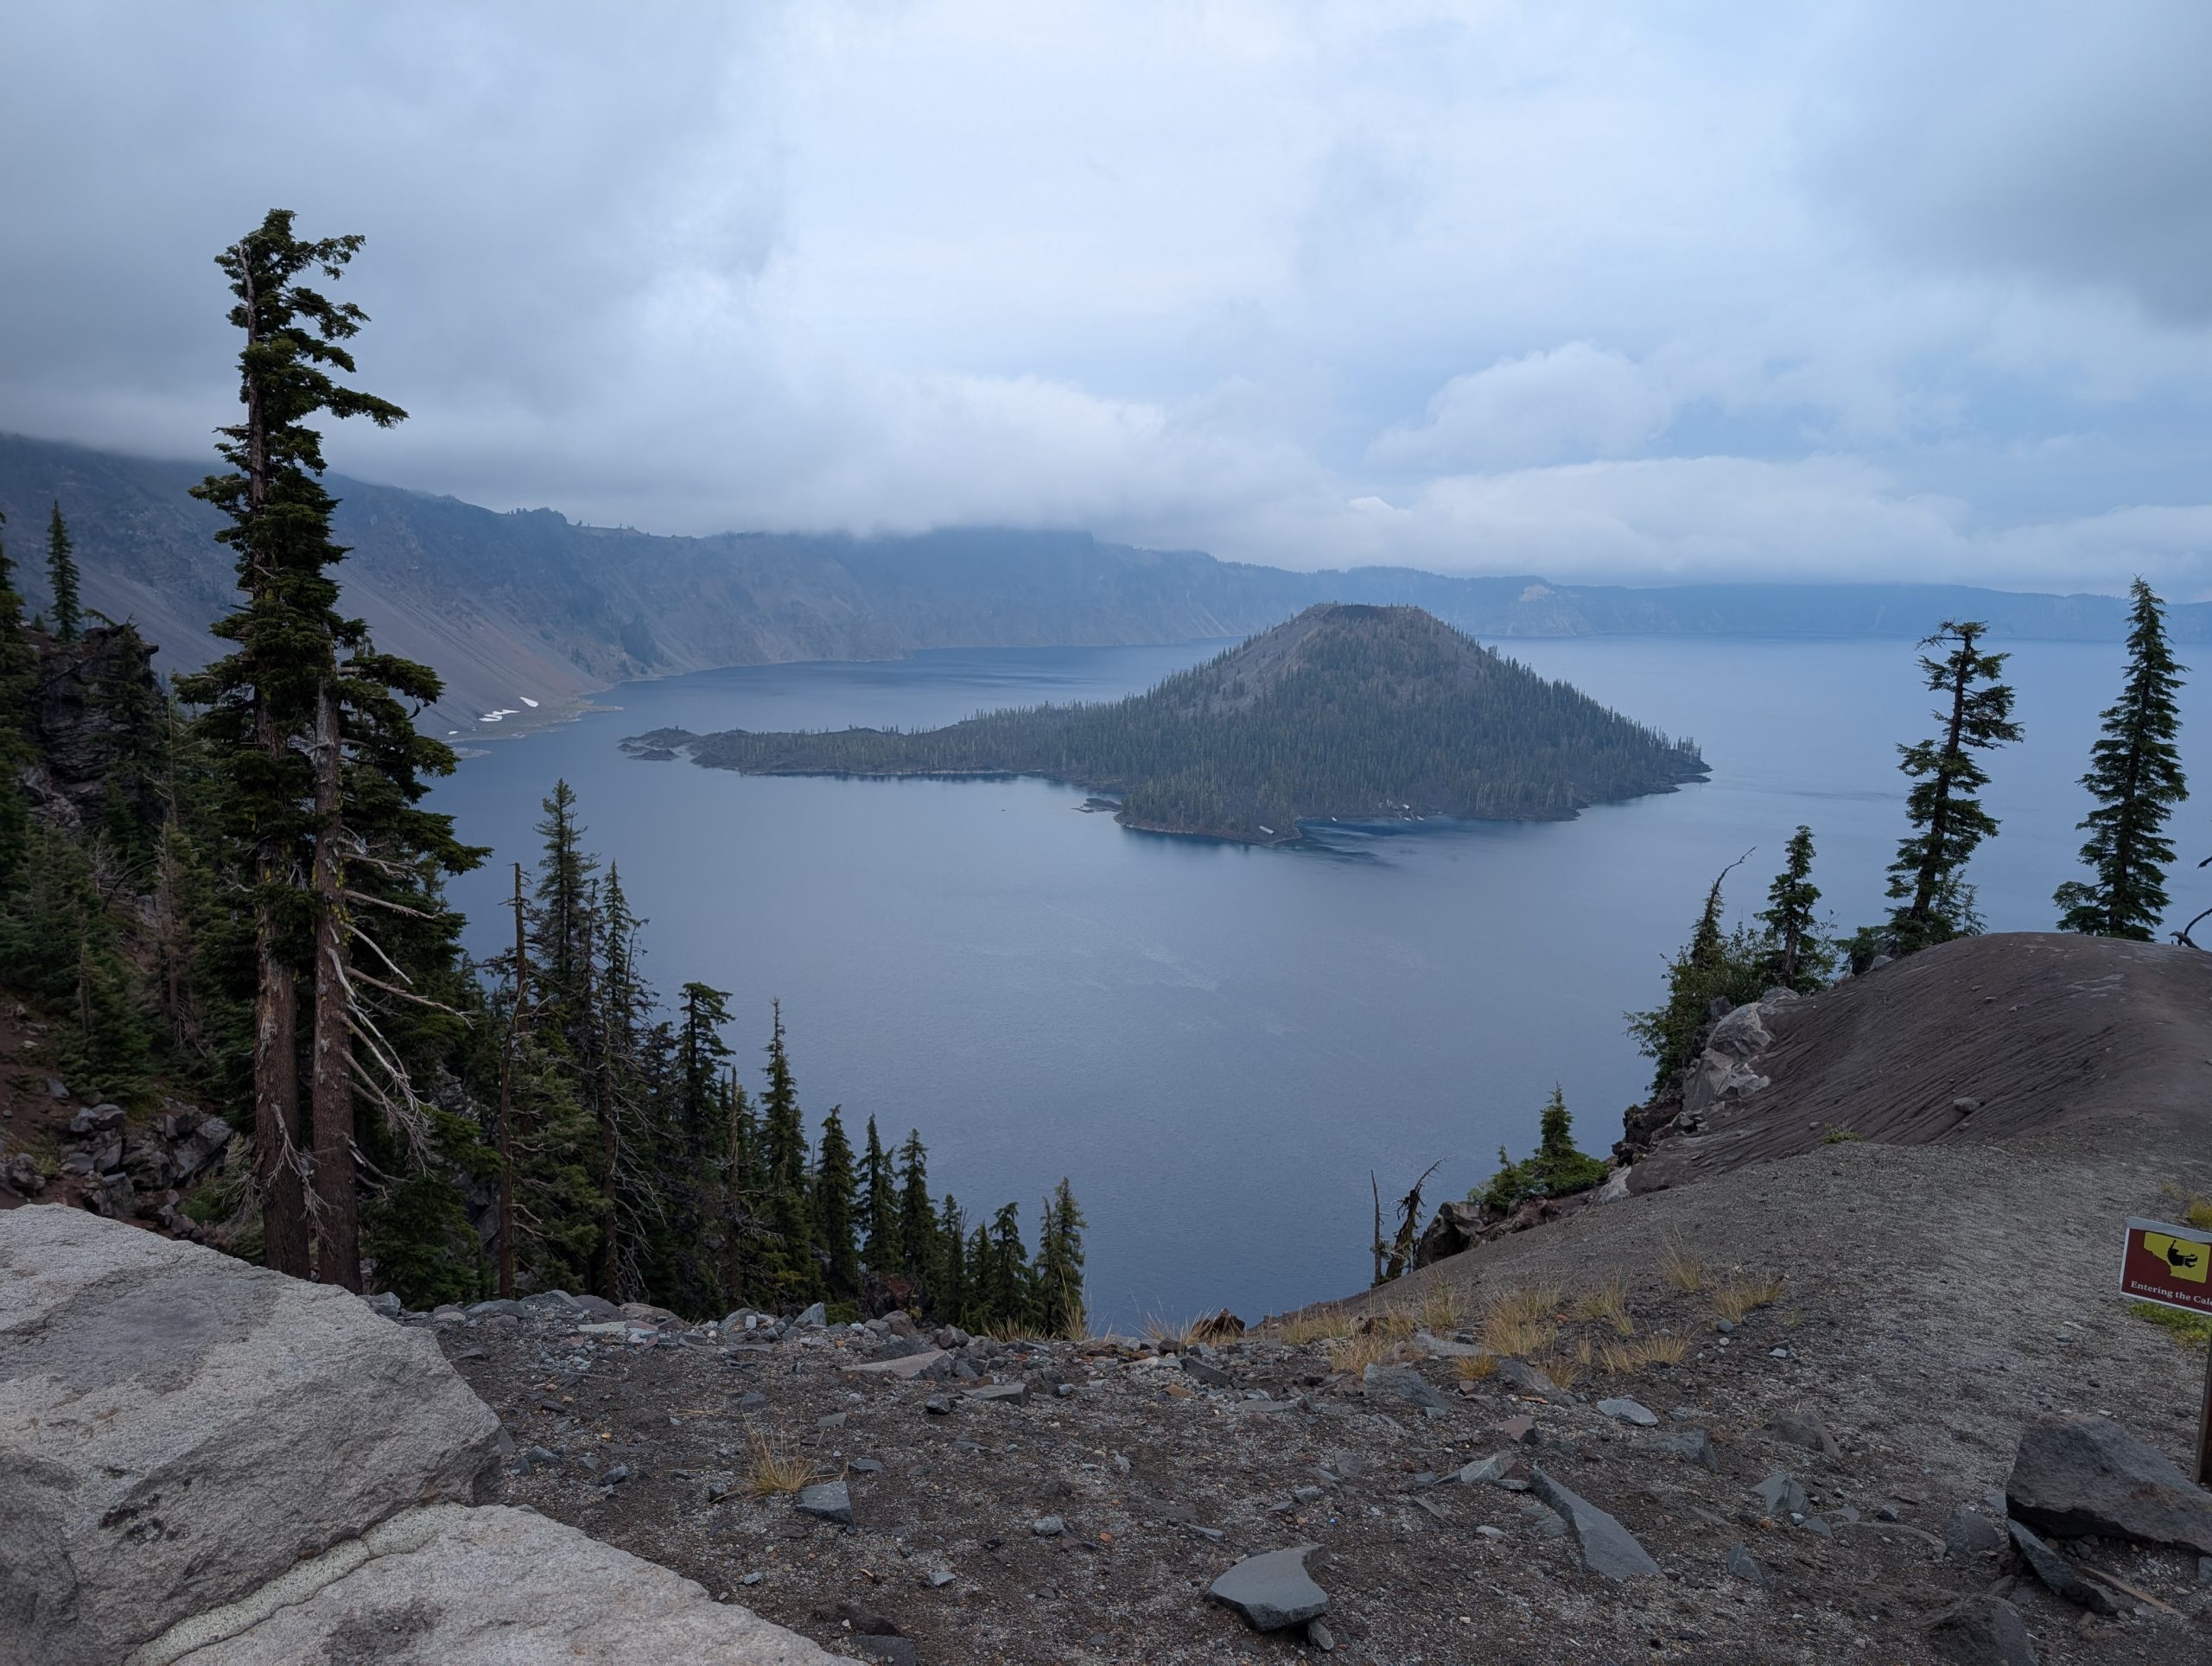
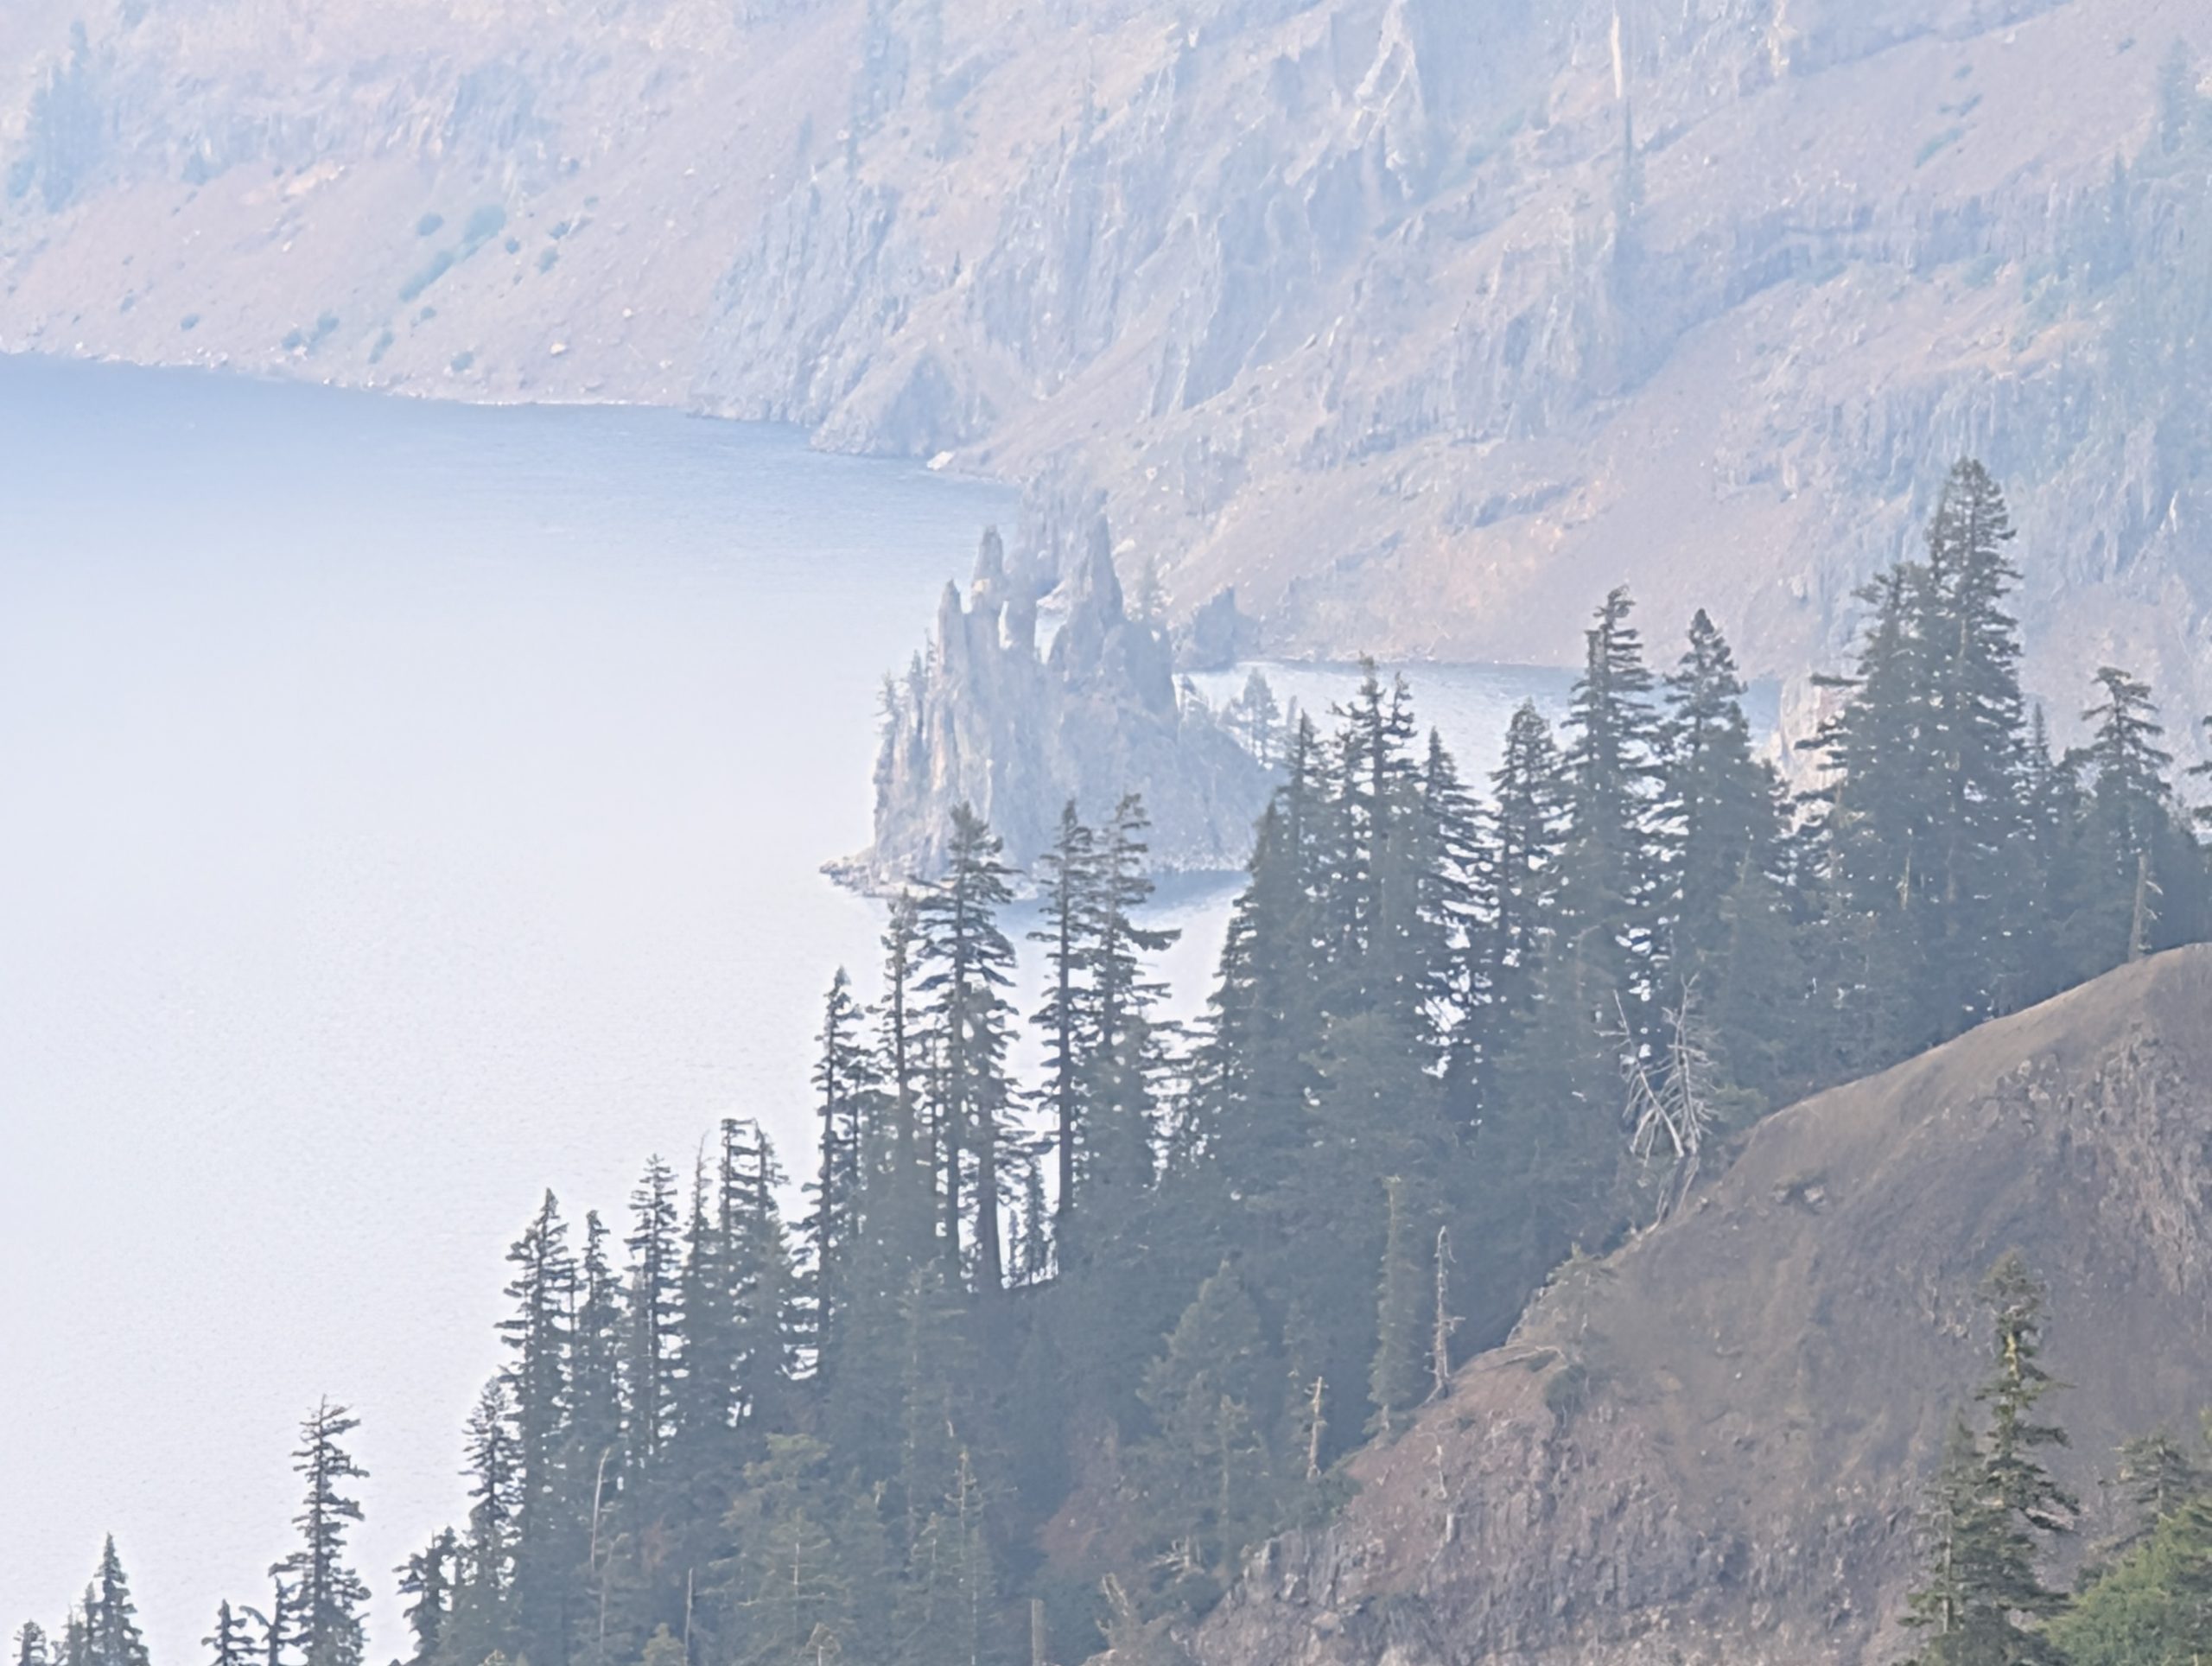
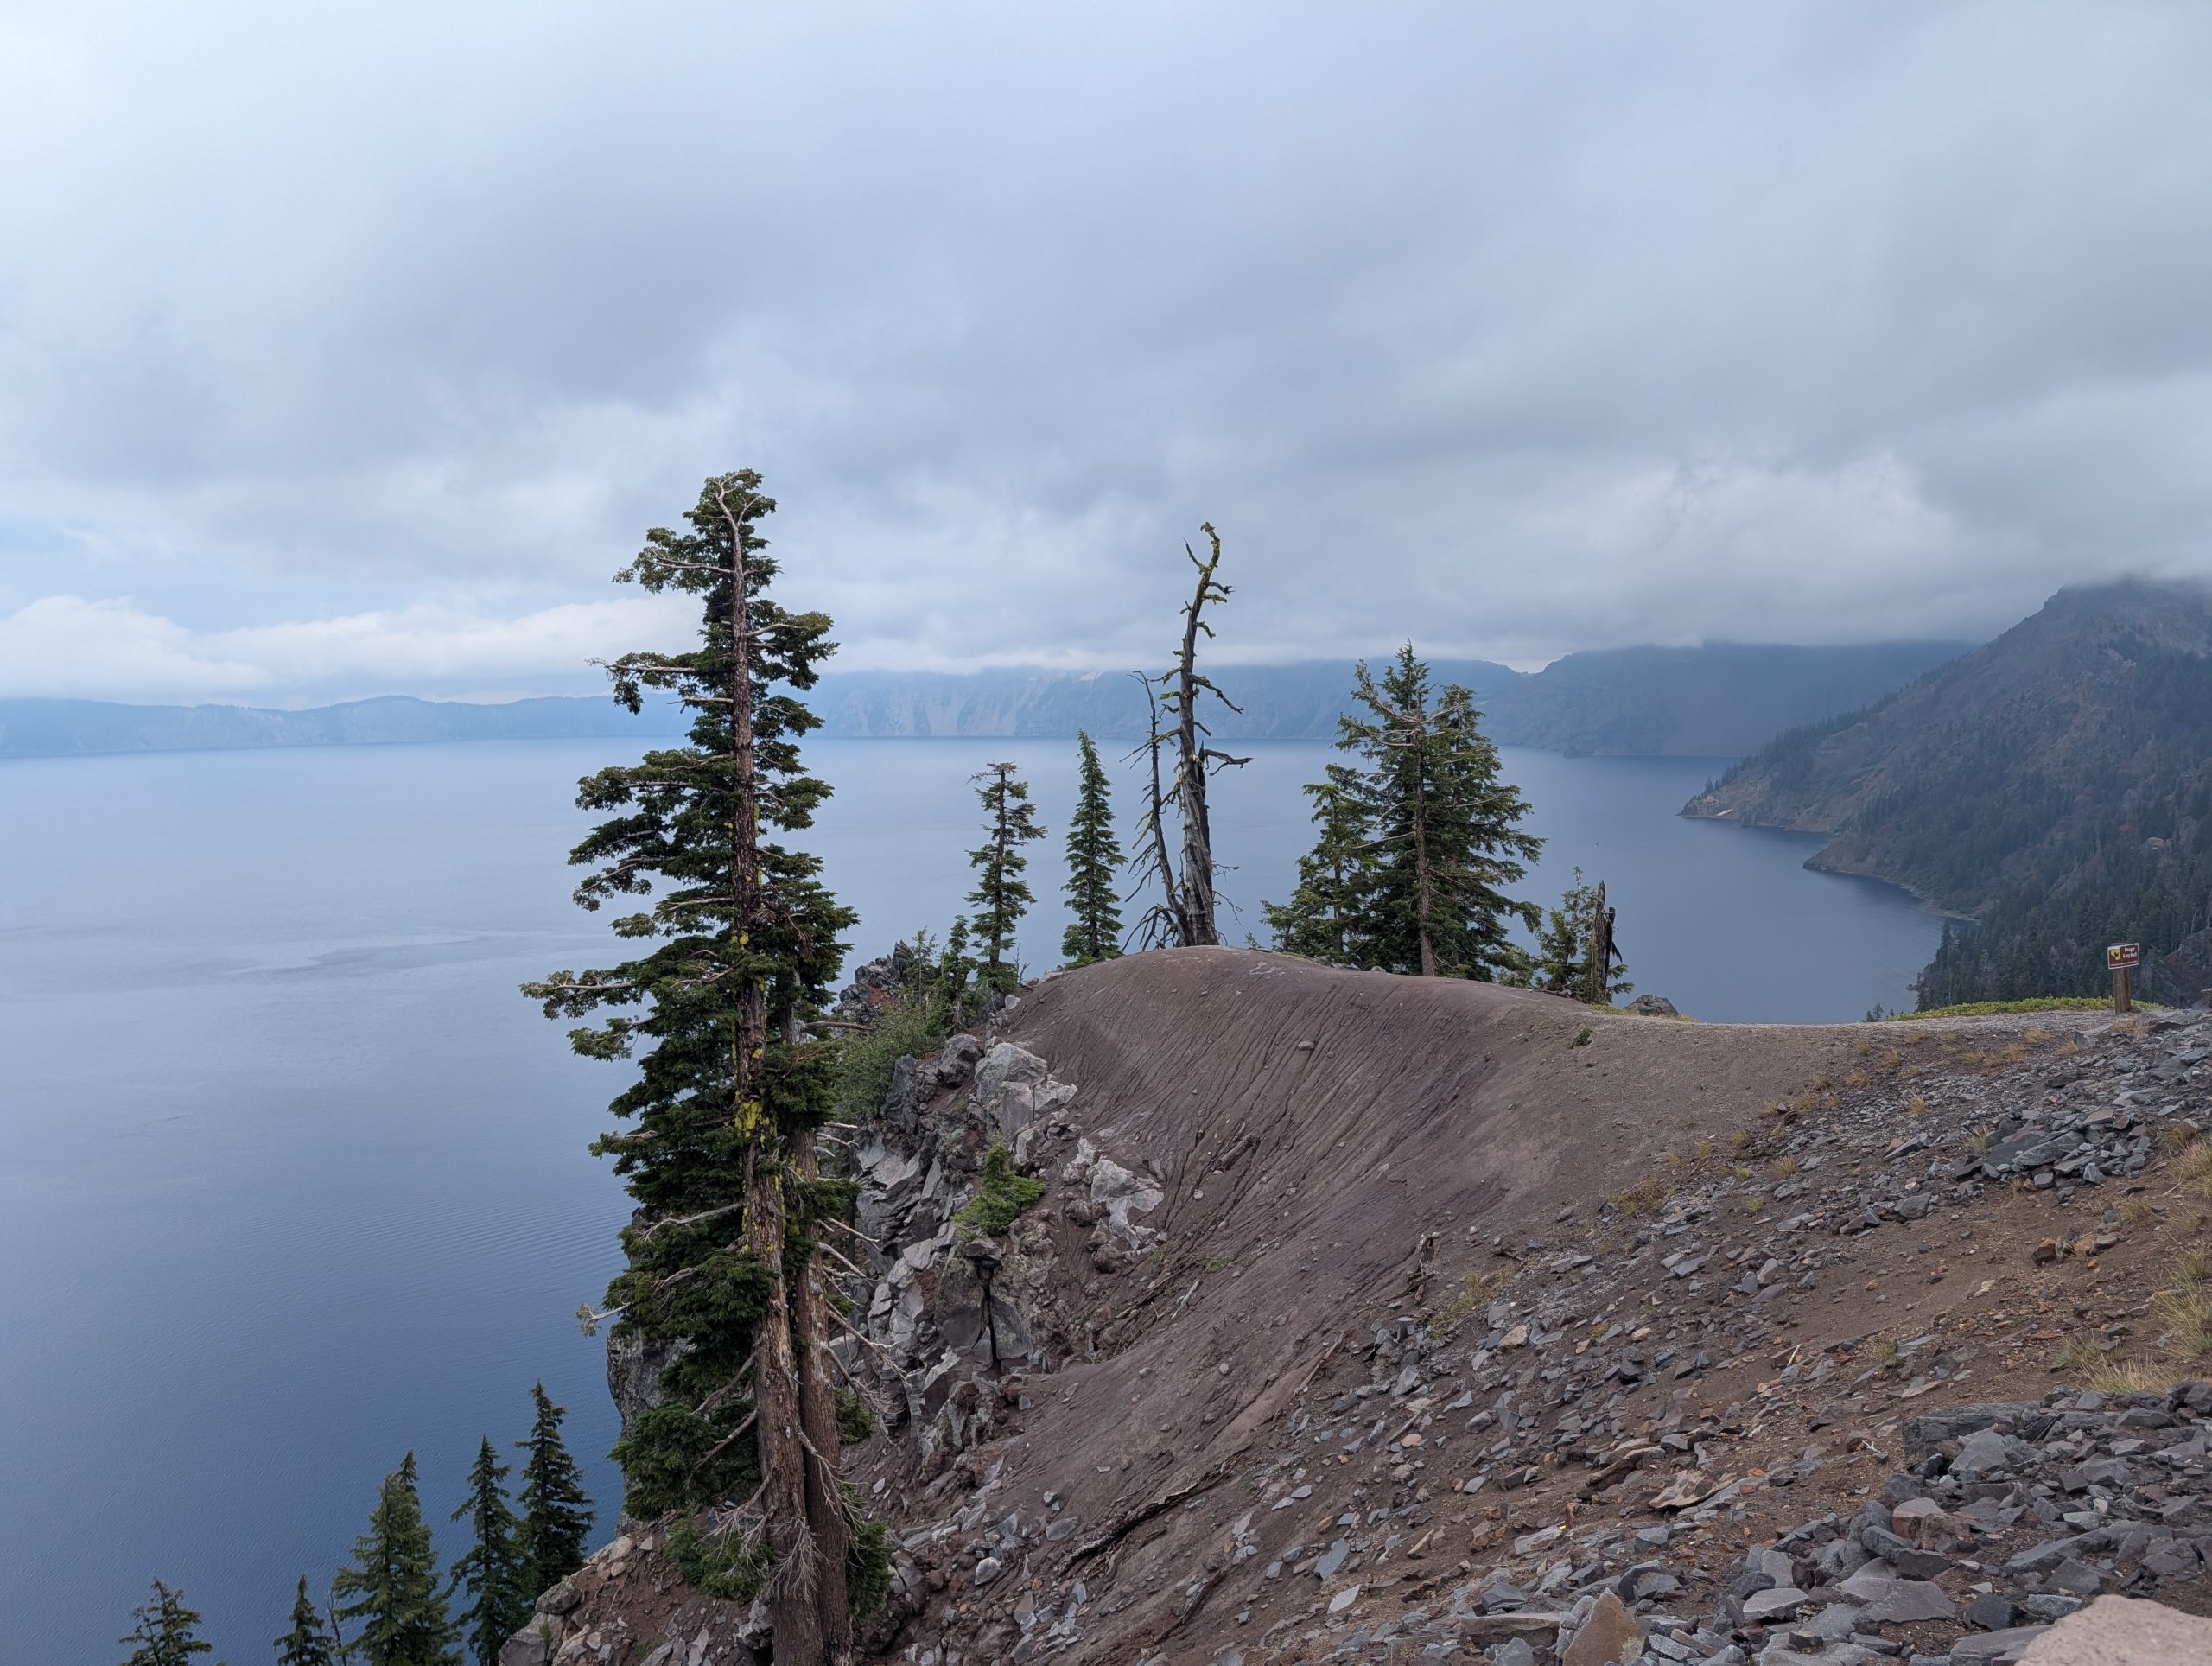
And then you get your first glimpse of this magnificent natural lake. Unlike many lakes, there are no inlets or outlets, making Crater Lake one of the purest water lakes in the world. At 1,943 feet, Crater Lake is the deepest lake in the United States and one of the deepest in the world. It is also one of the snowiest places in America, often getting over 40 feet of snow annually. A few pictures of this beautiful lake.
This upthrust in Crater Lake is called The Phantom Ship. Those spikes aren’t all trees. They are rock.
It is truly a magnificent natural wonder. And we feel blessed to have been able to see it in fairly decent weather. It wasn’t sunny and bright, but neither was it pouring down rain or too cold to be outside. As the old saying goes “you pays your money and takes your chances” and we got lucky.
Just outside the park entrance, the Annie Creek Restaurant (and gift shop) magically appeared. And since it was after 2:00 pm, we were hungry. Just as we were seated, T&P and J&M appeared. So, table for 6, please. And I must say the Bacon, Blue cheese, Bison burger Andy and I shared was one of the best burgers I ever had the pleasure of sinking my teeth into. The meat was thick and cooked to perfection. And the onion rings were plentiful and marvelous.
Then back to camp after topping off the gas tank and making a few, short, exploration side trips.
Once in camp reality reared its ugly head. Time to do laundry. So, on that happy note I will leave you to strip the sheets off the bed and count my quarters to see if I have enough.
After the sheets were safely back on our bed, it was time for dinner in Tim and Phyllis’s trailer. Wonderful ribs that Tim had prepared and had spent the day in a crock pot, along with mashed potatoes, risotto, and fresh veggies.
After dinner it was back to our trailer to read until the words became blurry and my pillow was calling me so loudly, I was afraid it might wake up our neighbors.
Another fabulous day in Oregon.
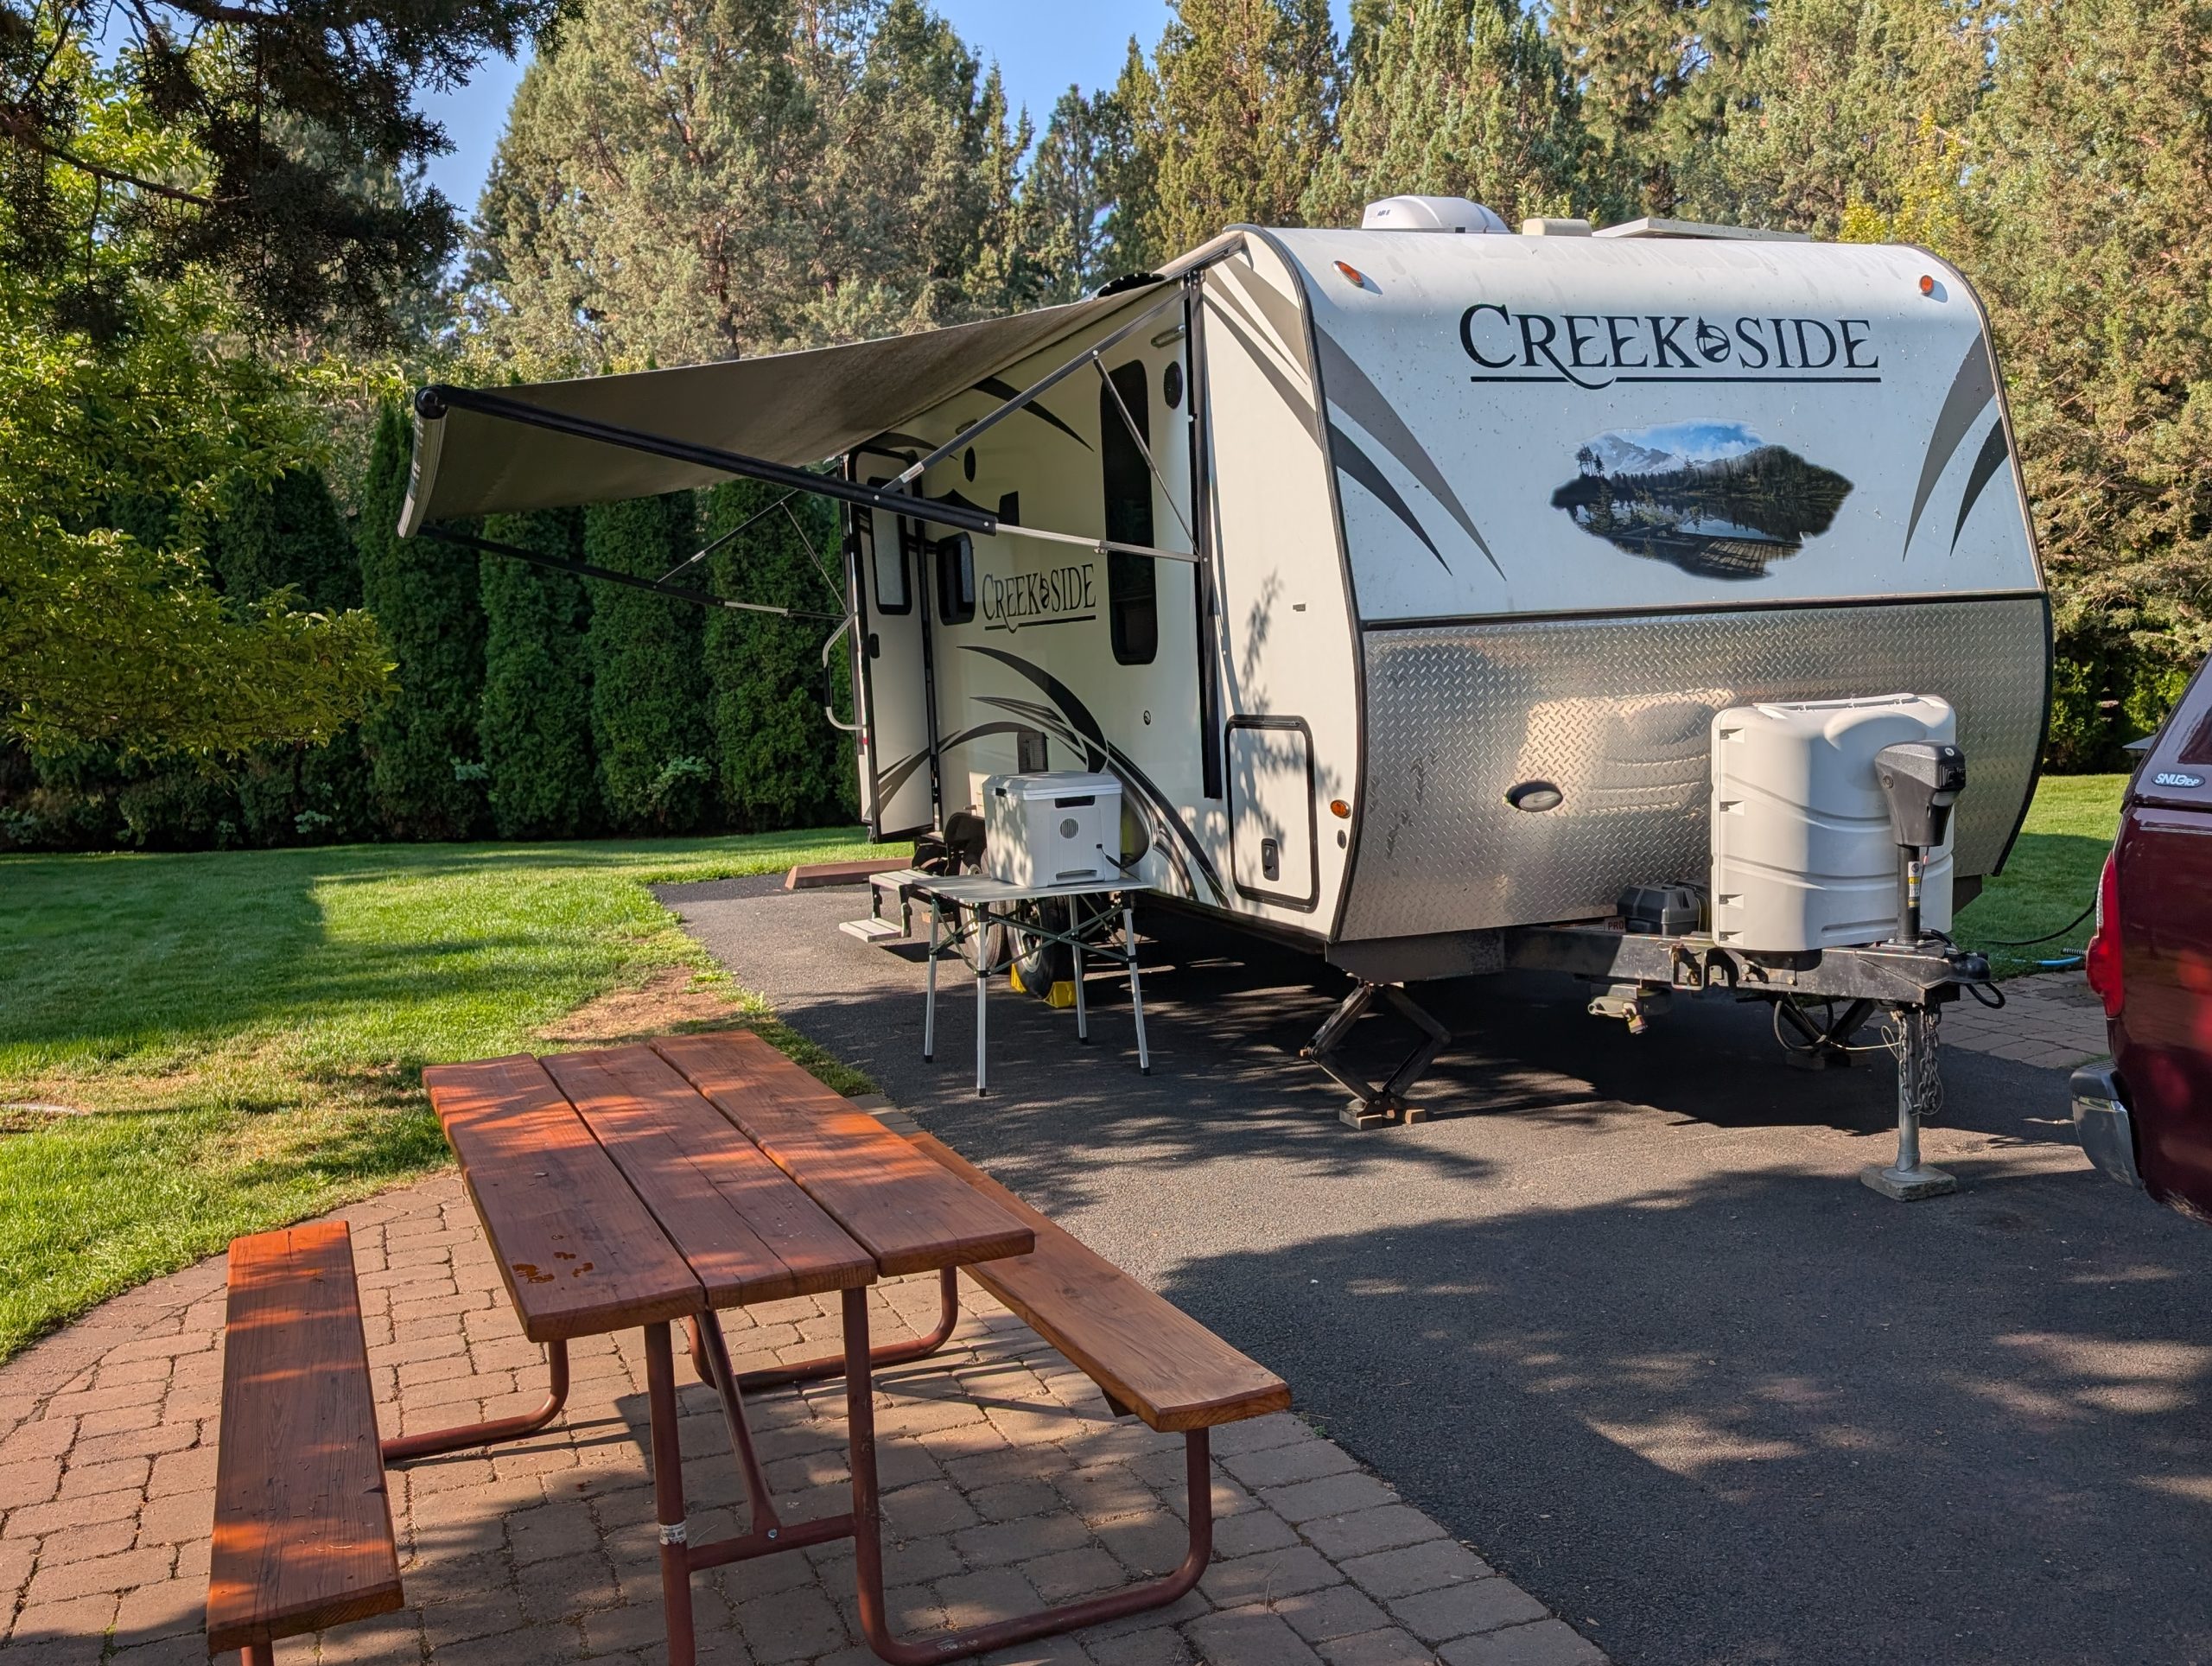
Friday, September 12, 2025 – Bend Sisters Garden RV Resort, Bend, Oregon
We had a leisurely start to our day, because we didn’t have all that far to go. So, at 11:00ish, we pulled out of the Waterwheel RV Park and back on to 97 going north. This is a very interesting stretch of road because at one point there is only one slight bend (about 10 degrees) in the road for almost 20 miles. You could practically take your hands off the wheel and take a nap if there weren’t other vehicles on the road to take into consideration. And except for a slight rise when you get just outside Bend, there is very little change in elevation the entire way from Chiloquin to Bend. Lots of trees along the way, and the area does not appear heavily forested.
After going through Bend, it’s a short drive until we take the exit to start our ride west on 20. And, as was not our experience the last couple of times we were in the area, it was lovely driving through Bend because of the new and very improved 4 lane road.
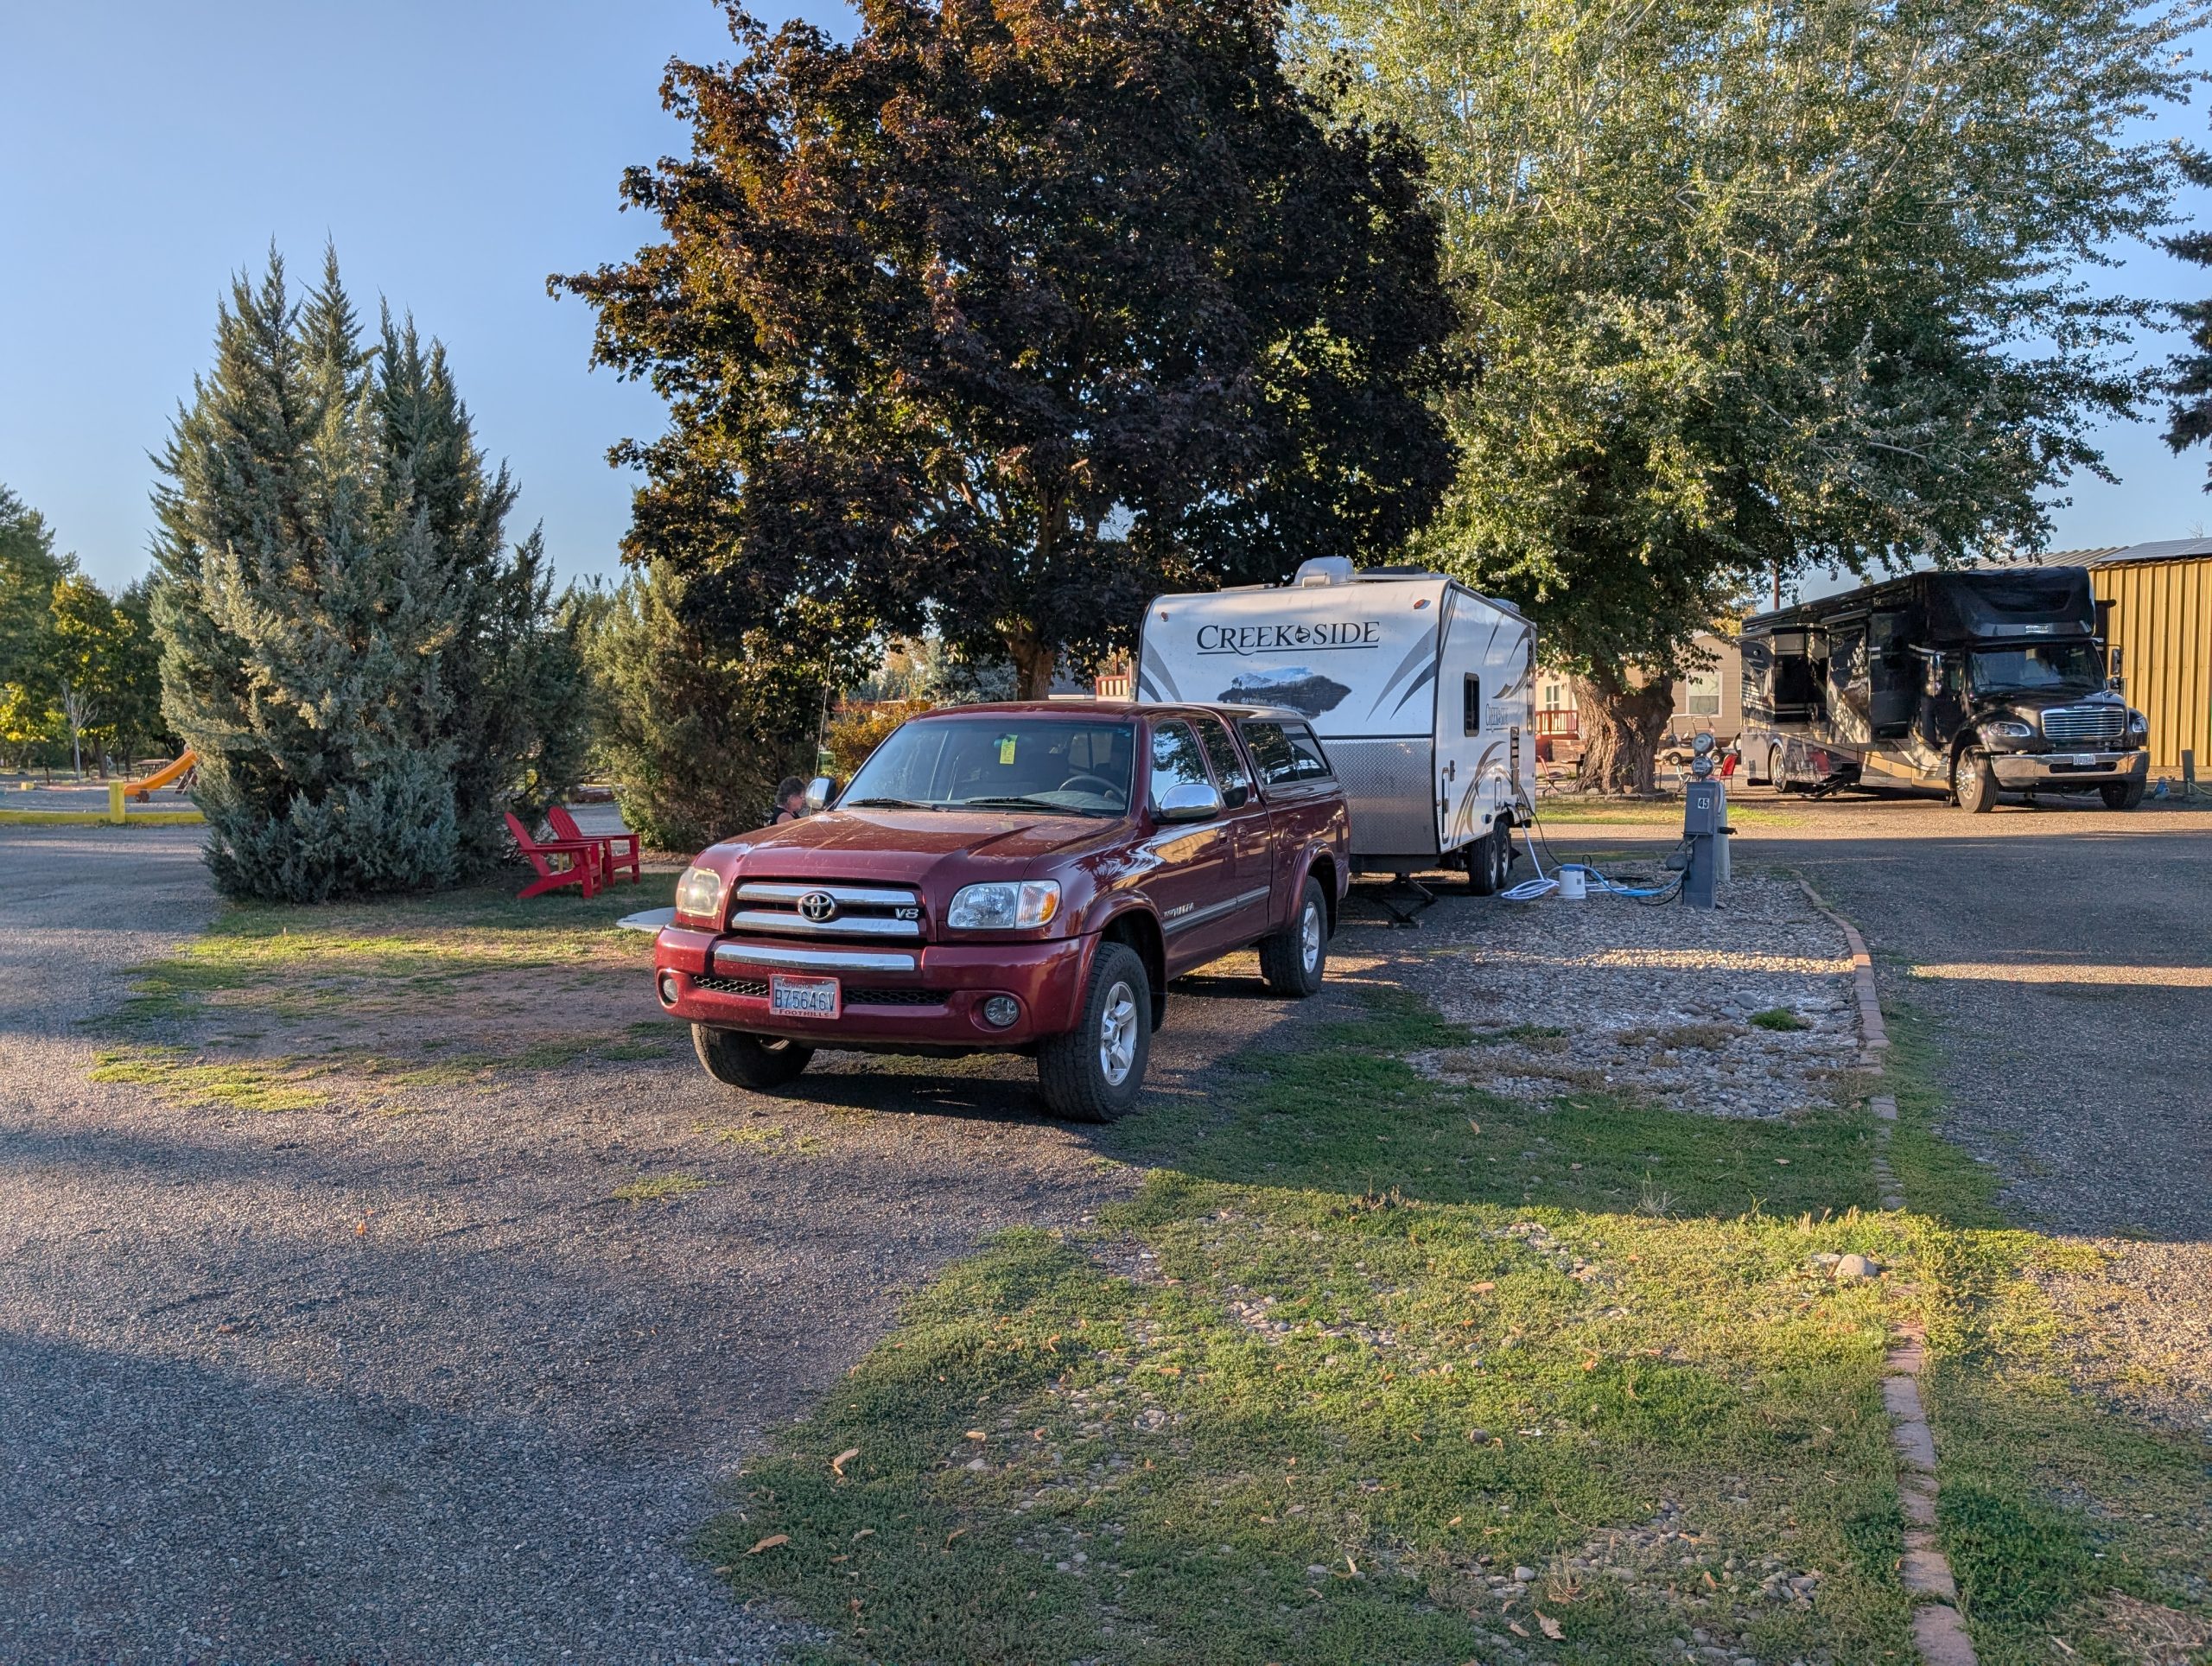
Last year when we were here with Todd and Cindy, it was a total mess. Construction all along the way through Bend. Now it’s smooth sailing. And the turn off to Sisters has also experienced wonderful new road improvements. Where there used to be lights, they have been replaced with traffic circles. So, smooth sailing all the way to our camp. And what a camp it is. Beautiful grounds including a man-made lake. And our sites are lovely.
After an enjoyable afternoon of reading it was time for dinner. I served guacamole, salsa, and chips for happy hour. Then Jim served a fantastic pollo al crema over rice. And for dessert, Phyllis brought us each, a mini-ice-cream bar. Just so you know, we do not go hungry when we camp. In fact, all of our waistlines are expanding at a very scarry rate! But we are on vacation. So, let the fun continue.
Then off to our own rigs to honker down for the night. Rain was predicted, so all chairs and little tables ran for cover. Assisted of course by their respective owners.
At one point during the night the rain was beating on our roof. But only for a short time. But loud enough to wake me up. Ah, the joys of a real roof over your head rather than a canvas tent. But I put my time in when I was younger with wet tents, moist sleeping bags, wet dogs, grumpy wet kids, and cooking under a tarp. But those memories remain some of my fondest. But at our ages, roughing it means having to use ice cube trays in our trailer instead of having a fridge/freezer combination at home with an ice maker.
Saturday, September 13, 2025 – Bend Sisters Garden RV Resort, Bend, Oregon
Today was very special. We were invited for lunch at our dear friend’s Tim and Susie’s camping site on the Metolius River. So, after a lazy morning we headed west on 20 through Sisters, then continued northwest on 20 until we turned right on to 14 after a few miles.
On 14 we drove north through Camp Sherman to the Smiling River campground. And followed the camp road until we found Tim, Susie, and Timber, their Brittany Setter waiting for us.
After saying hello and catching up a bit, we took a short walk along the river to see where they had happy hour every evening (unless it was raining of course). Then back to sit and talk about our adventures and hear what was happening to mutual friends. (And why I didn’t take any pictures of this lovely couple and their fabulous camping spot is beyond my comprehension. But sometimes I just get lost in the moment because I am having such a wonderful time. This was one of those times.)
Then lunch was served. A wonderful, curried chicken salad (I asked for the recipe), fresh bread with honey butter, crackers and a wonderful cheese, and chocolate for dessert. Yum, Yum, YUM!
After saying goodbye to our friends, we drove back and did some grocery shopping at the Ray’s grocery store in Sisters, (Nice store BTW.) Then back to camp to sit around and decide where to have dinner.
We ended up in Sisters at the Three Creeks Brewing Company for pizza.
After dinner it was back to camp, and since it was dark, we decided to call it a day. And what a nice day it had been.
As I was drifting off to sleep, I remembered to say thank you to whichever deity might be paying attention, for all the blessings I have been given throughout my life. And right at the top were our dear friends we are currently traveling with, and our dear friends we were lucky enough to visit today.
Sunday, September 14, 2025 – Peach Beach Resort, Goldendale, Washington
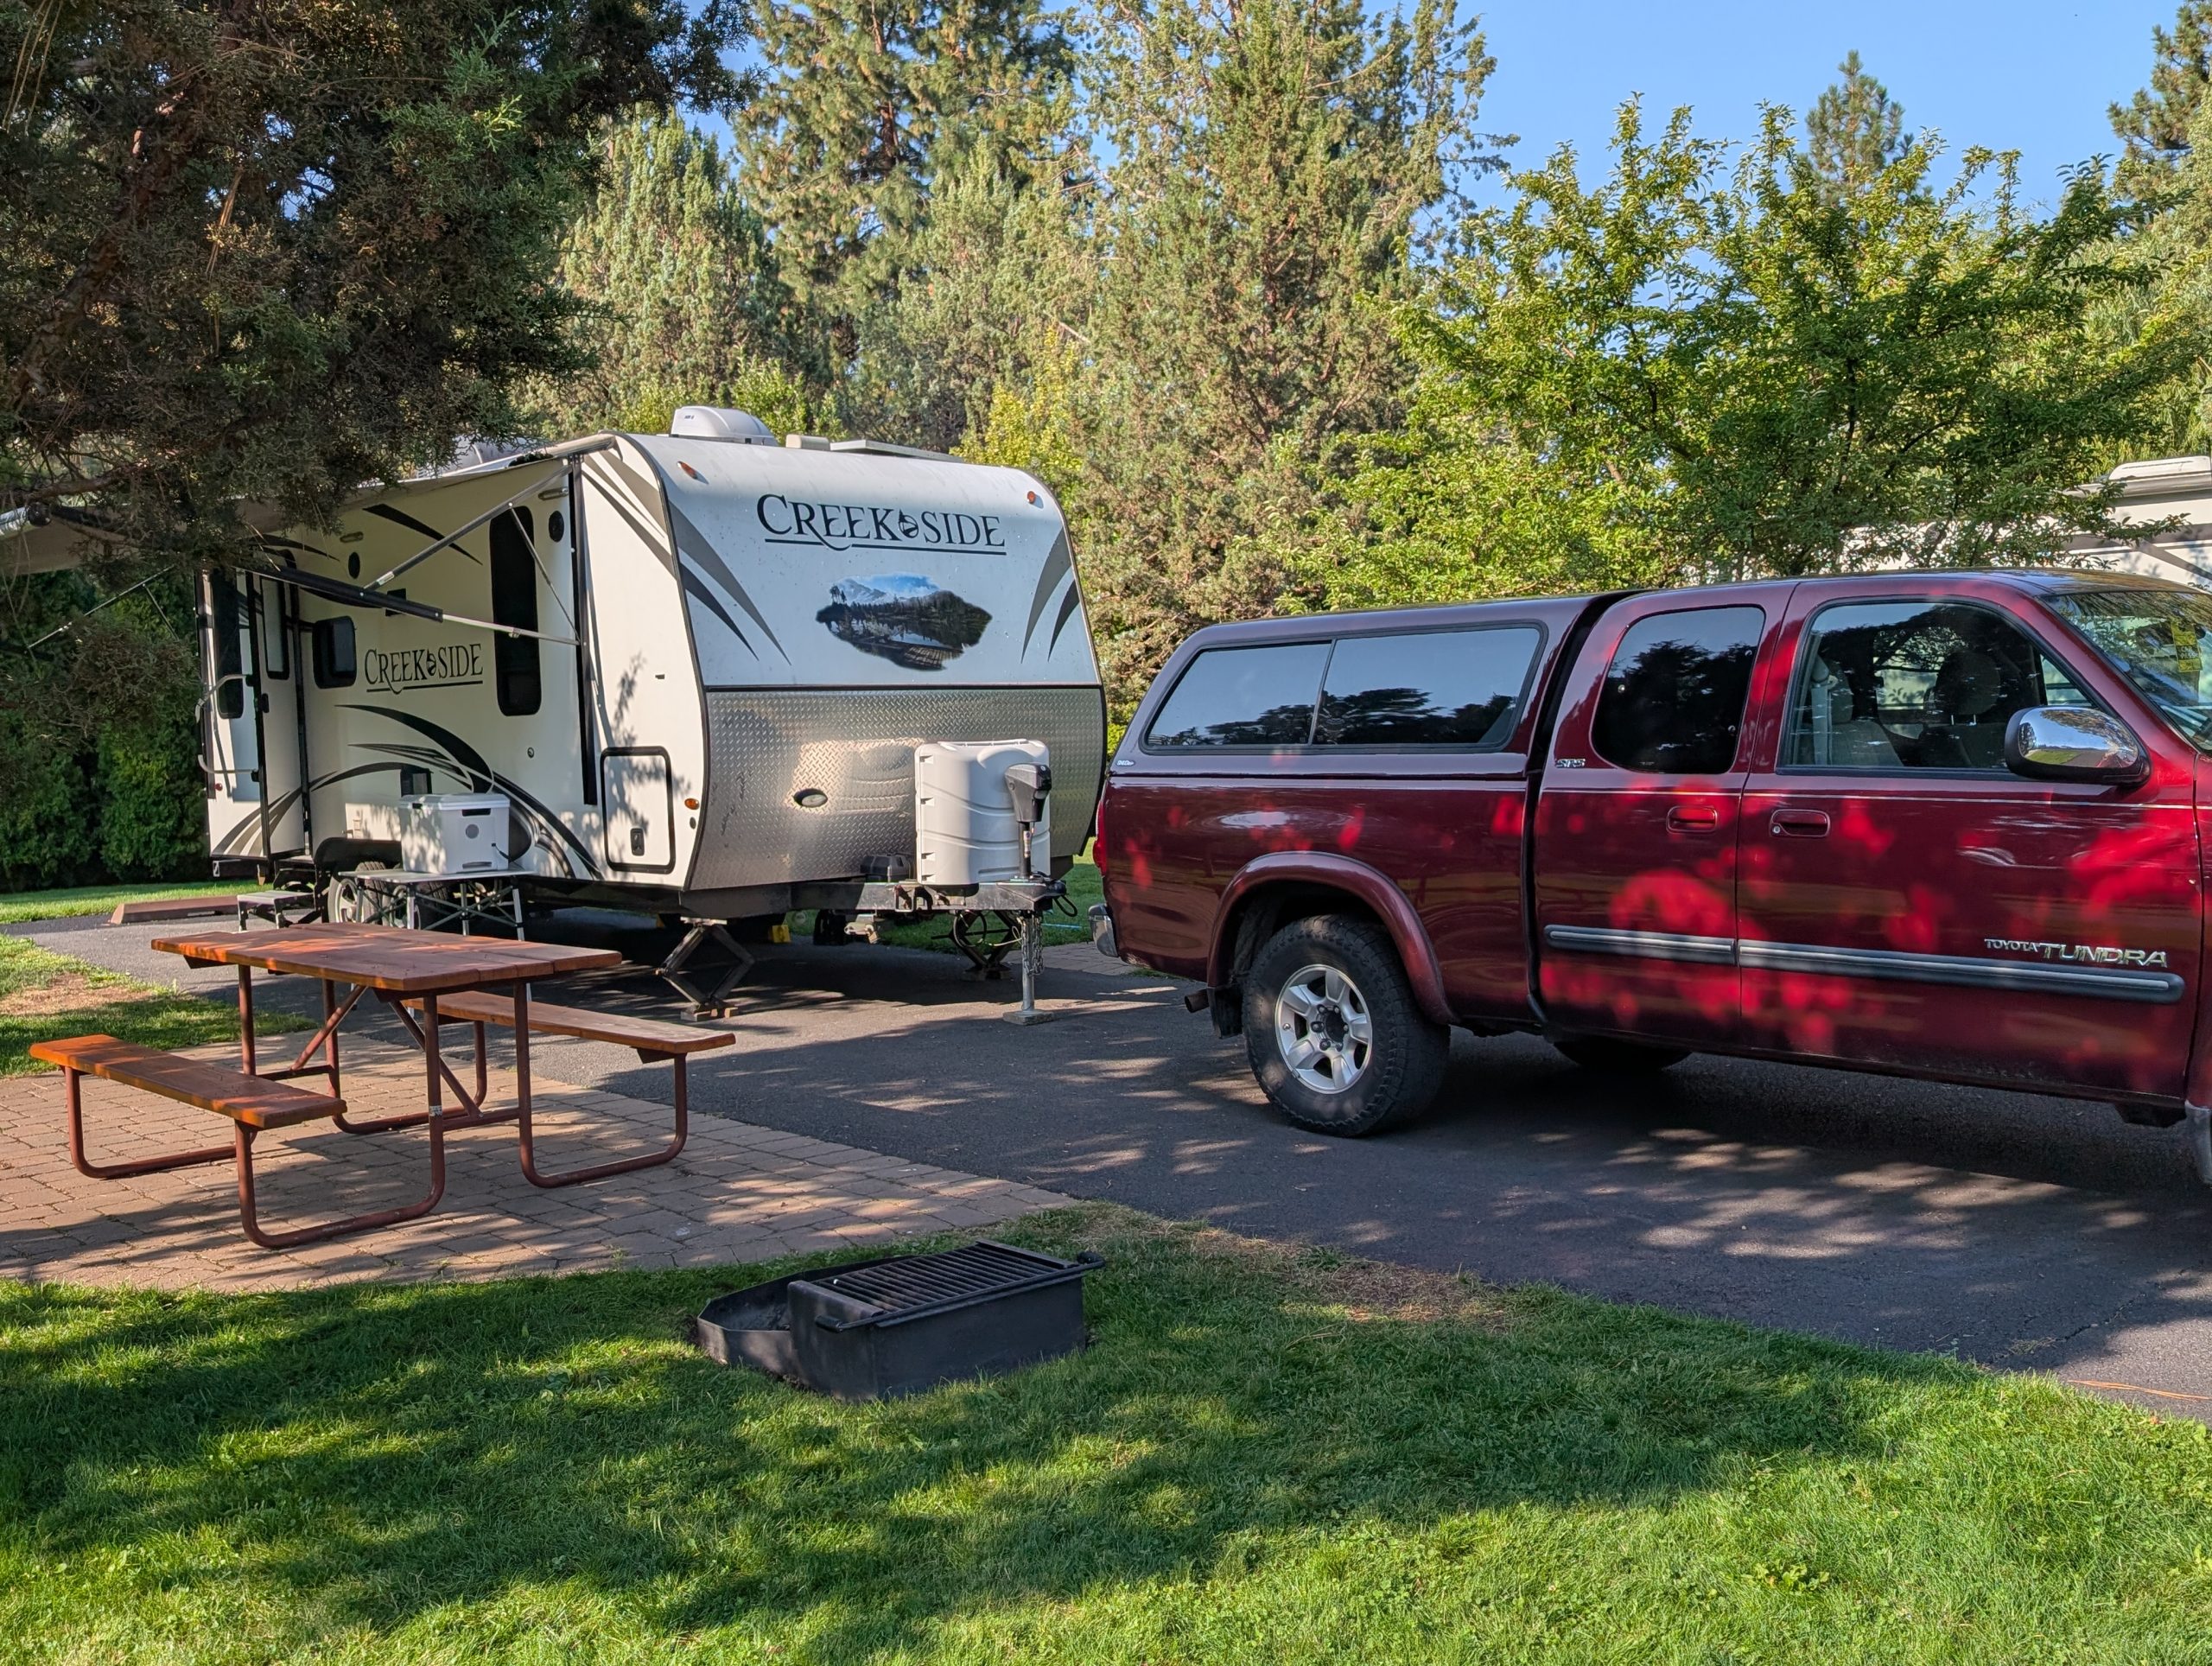
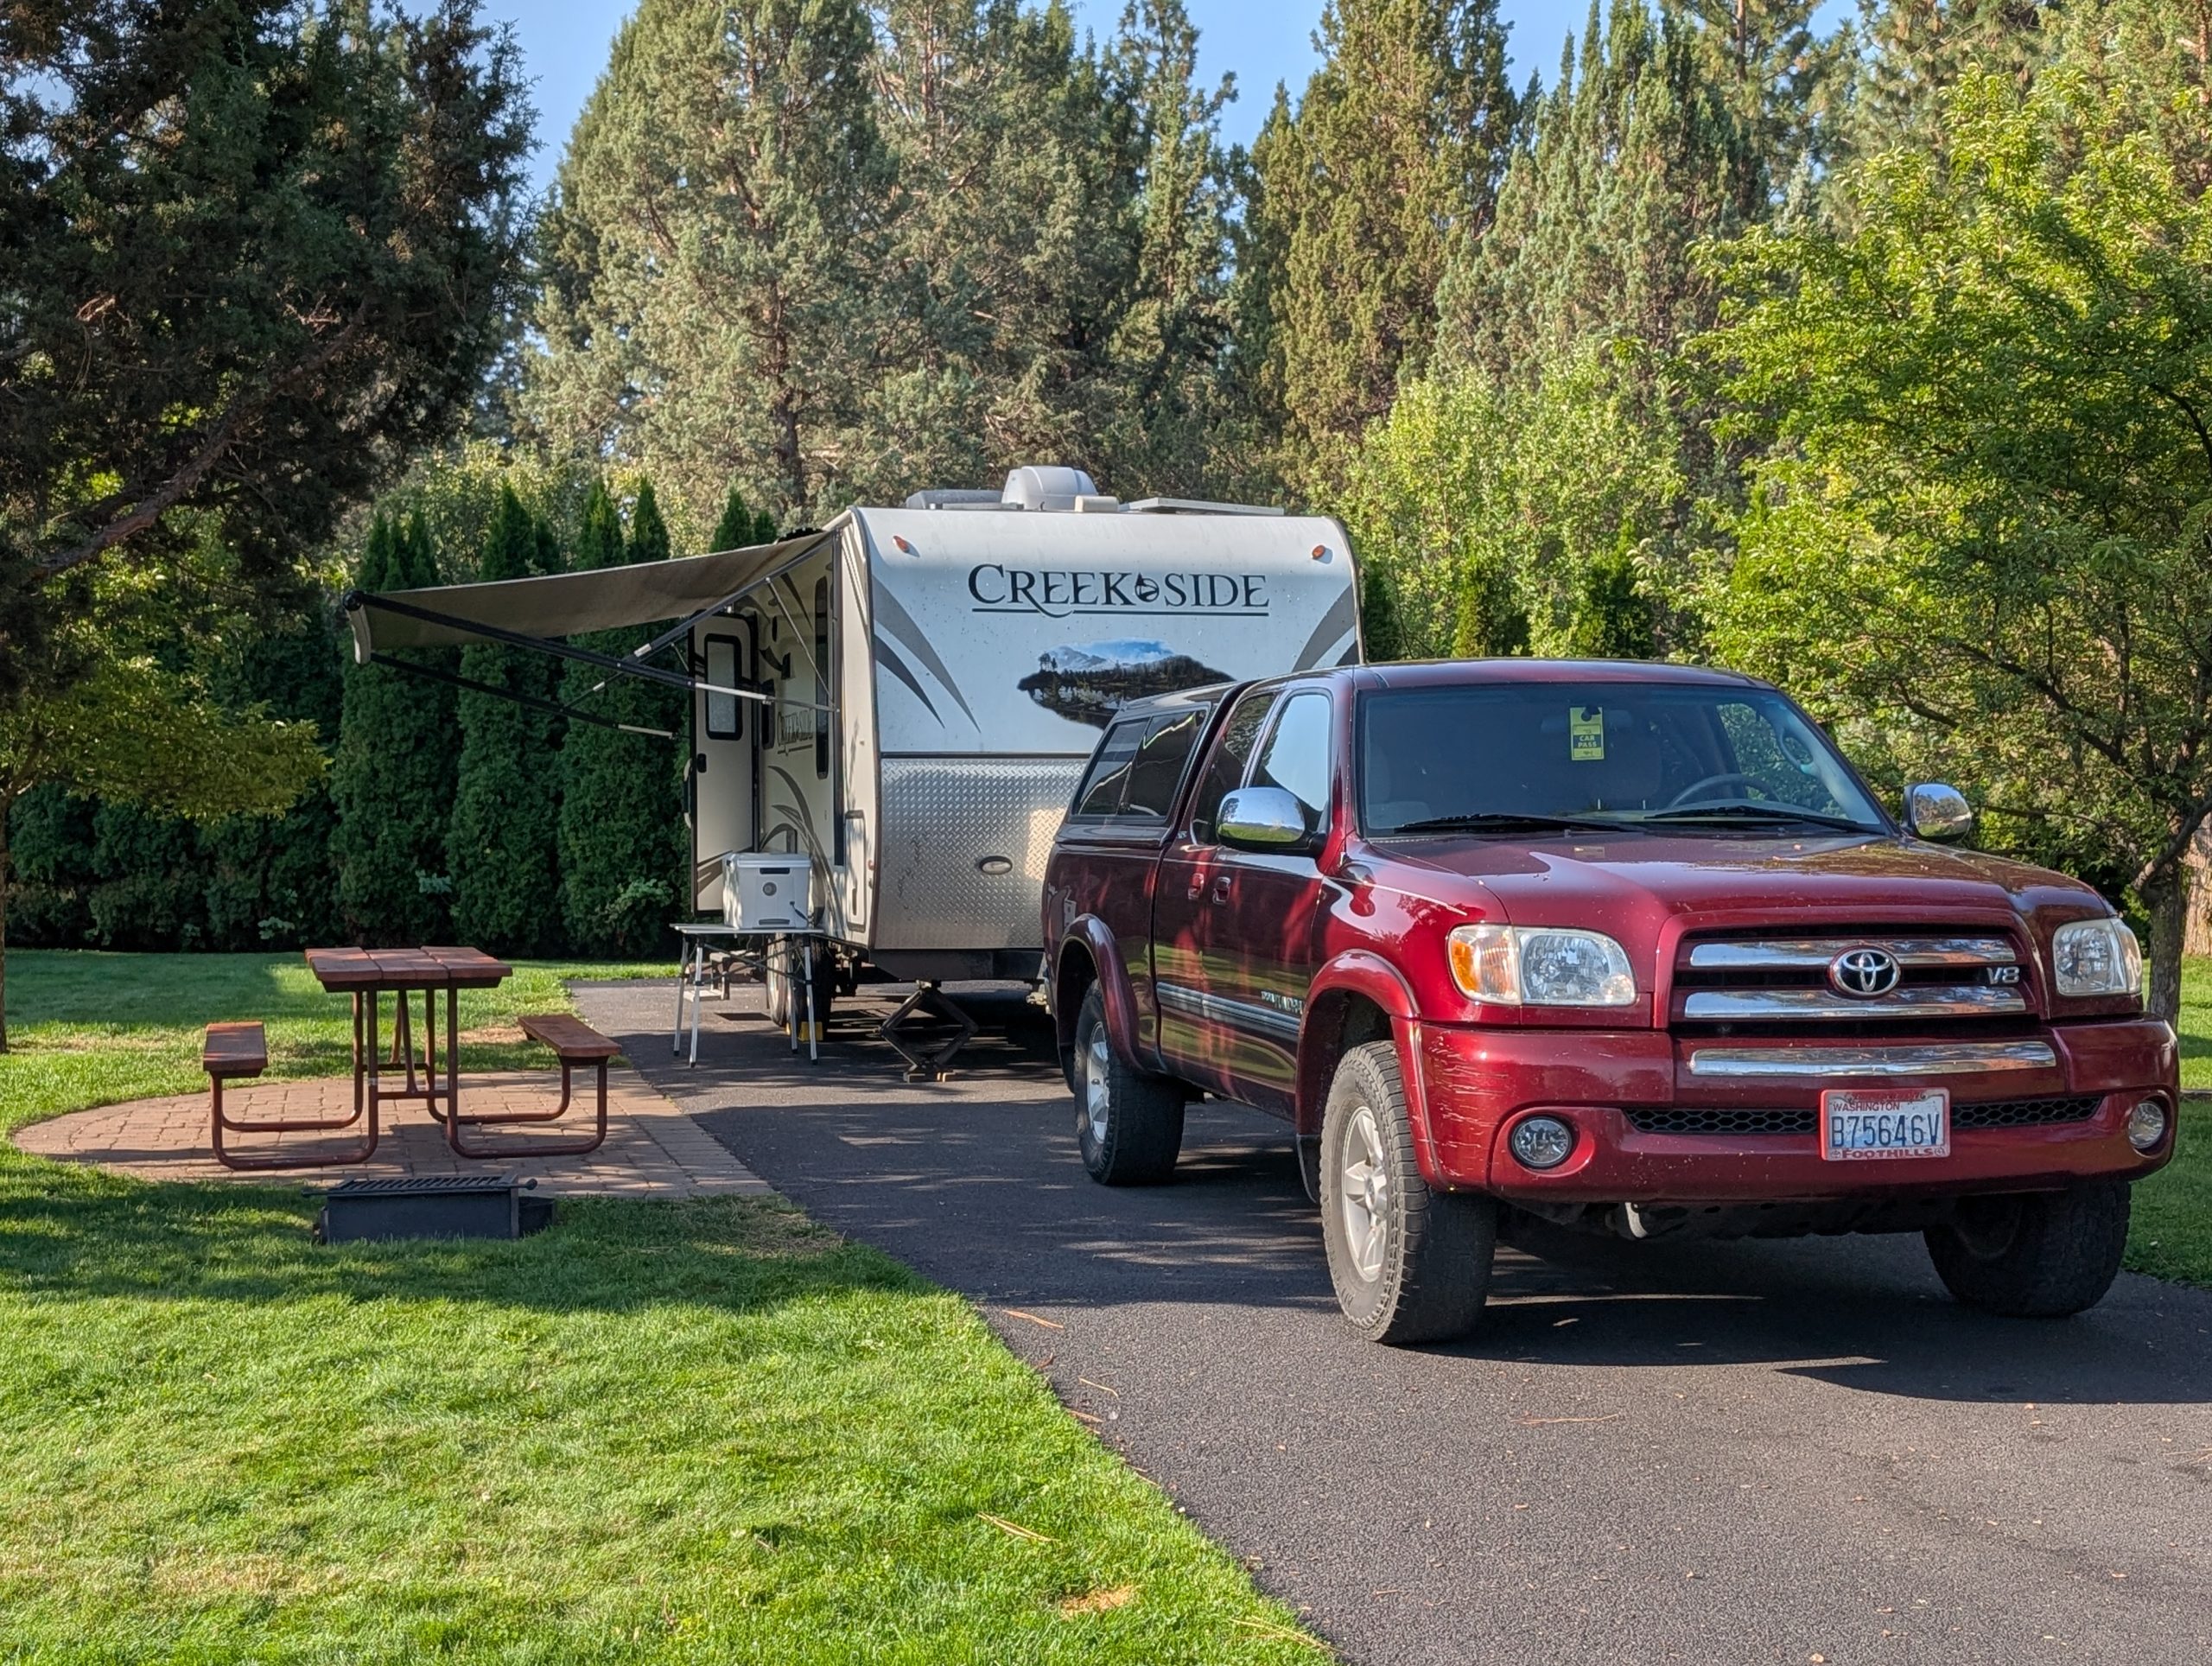
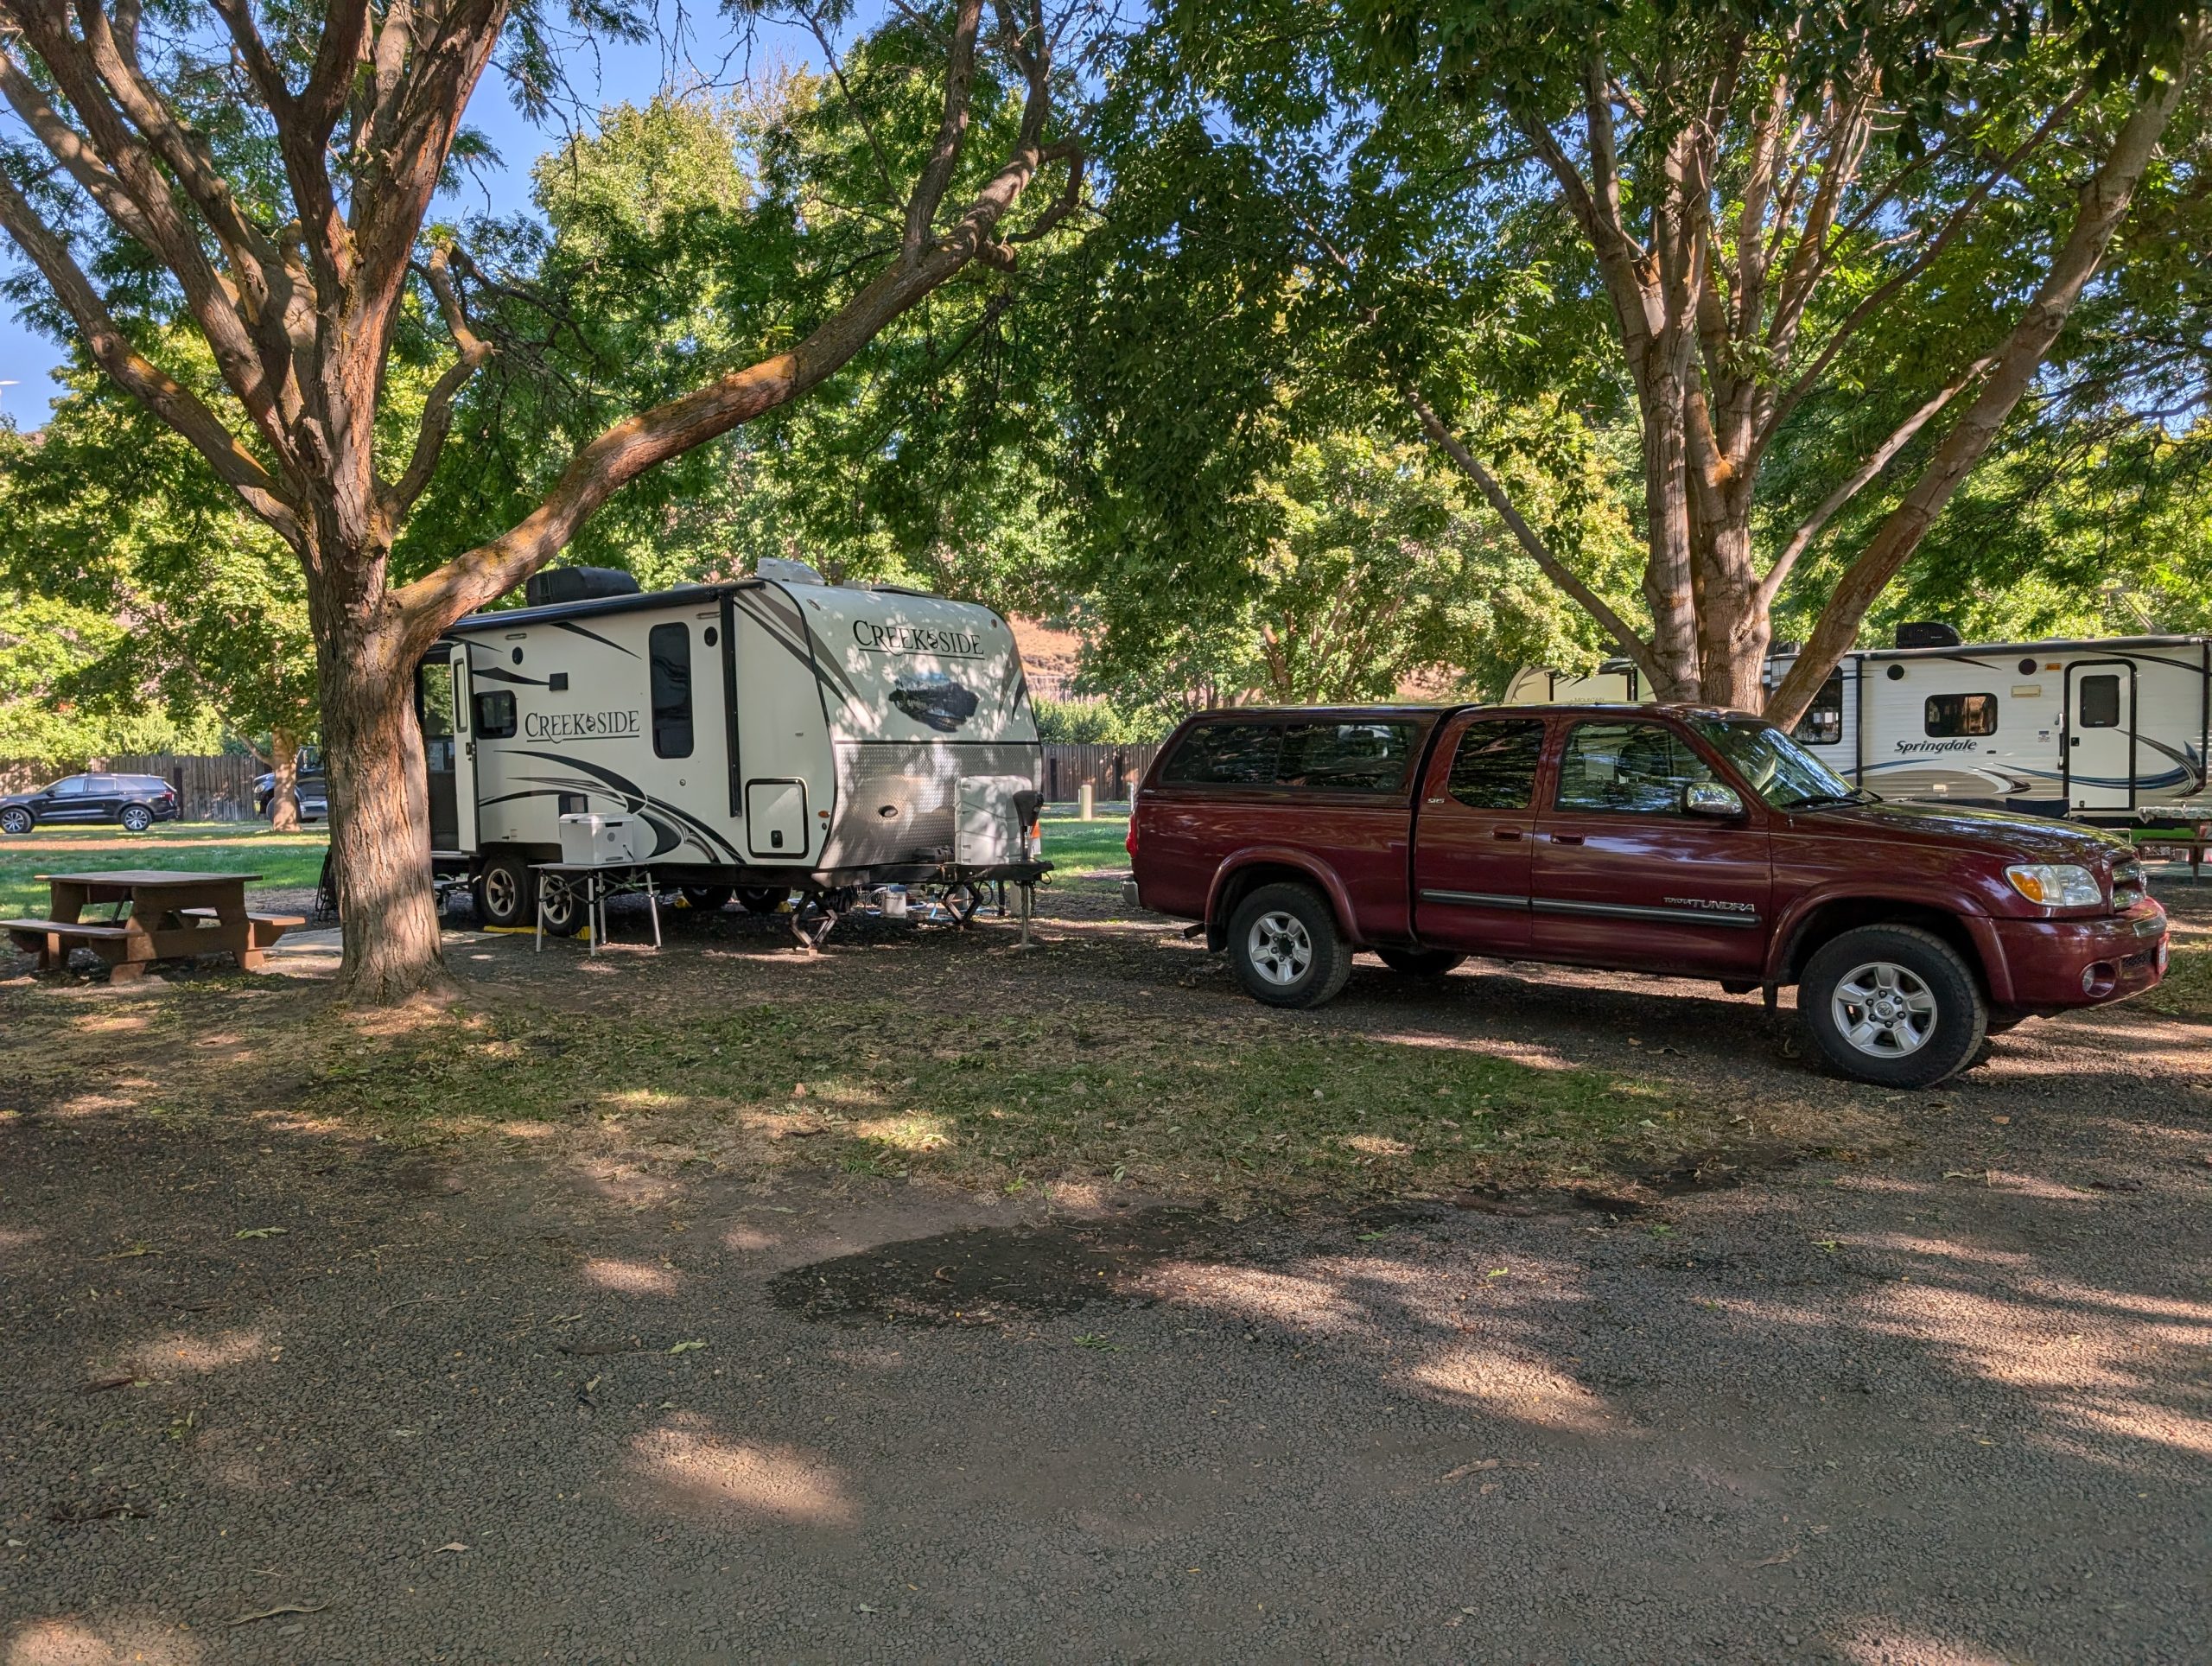
After a tasty (if I do say so myself) Patti MacMuffin (toasted English muffin, meat of choice (today’s meat – link sausage), sliced sharp cheddar cheese, and a fried egg, we leisurely broke camp because today was once again a short travel day on a road we knew very well. Our destination being Peach Beach, one of our favorite places to park our trailer.
But, while I’m on the subject of traveling pulling a trailer or driving any other type of RV, I must tell those of you who have never had the pleasure, that it’s simply not at all like driving a car. The entire time you are behind the wheel you must remain vigilant. No playing lookie lookie, no getting into any kind of serious conversation with your passengers, no eating a messy sandwich and dreaming of tonight’s steak dinner etc. etc. Not every driver out there knows or remembers that if you are pulling a trailer or driving a large rig, it takes much longer to stop or get out of the way of your foolishness. And believe me, there are lots of foolish drivers out there. And it is never more apparent than when you are hauling or commander of a very large rig.
Another aspect to be aware of when you see or are behind a RV, is that the driver may not know the location of their next stop. Oh, they know it by name, but not by ever having been there before. So, if they slow down, it may be because they will be turning soon. They just don’t know exactly where that turn will present itself.
So, when we consider how far to drive in one day, we try to keep it to around 150 miles. Just because it is a totally different experience when you are in a vehicle that takes every bit of your attention every mile of the way. So, the shorter the drive, the better. That doesn’t always happen, but it is our goal. That and switching drivers whenever the driver becomes the least bit fatigued. Which is happening increasingly as we fight our way into the golden years. But enough about traveling etiquette, and on to the trip itself.
When we left the beautiful Bend Sisters Garden RV Resort, we headed east to catch 97. Then north through Madris and right at the 97/14 junction where our road (14) brought us down to the Columbia River in Biggs, Oregon.
Then a short crossing of the mighty Columbia and a quick right into the entrance to both Maryhill SP and Peach Beach.
I happened to be driving at the time and was met by the camp hostess who not only checked us in but presented us with 2 wonderful peaches. How nice is that?
Then after getting all set up, all 6 of us sat in our comfy camp chairs between T&P’s trailer and our trailer to enjoy the afternoon. As the dinner hour approached, Phyllis brought out warm crostini topped with brie and jelly for us to enjoy along with our “it’s 5 o’clock somewhere” libation.
Then it was time for Jim to grill a marinated tri-tip, to go along with baked potatoes (Jim) and peas salad that I had prepared earlier in the day.
After dinner I provided the gang with cookies and chocolate.
So, as you can imagine, another fine meal.
But by the time we had consumed dessert, my body was letting me know that I had had enough fun for one day.
So, back to our cozy little trailer to read until the sentences failed to make any sense at all. I was first in bed, but after about 10 seconds of tossing and turning, I was gone for the night. Andy tells me he was right behind me but far be it from me to know if that actually happened.
Another wonderful day in paradise!
Monday, September 15, 2025 – Peach Beach Resort, Goldendale, Washington
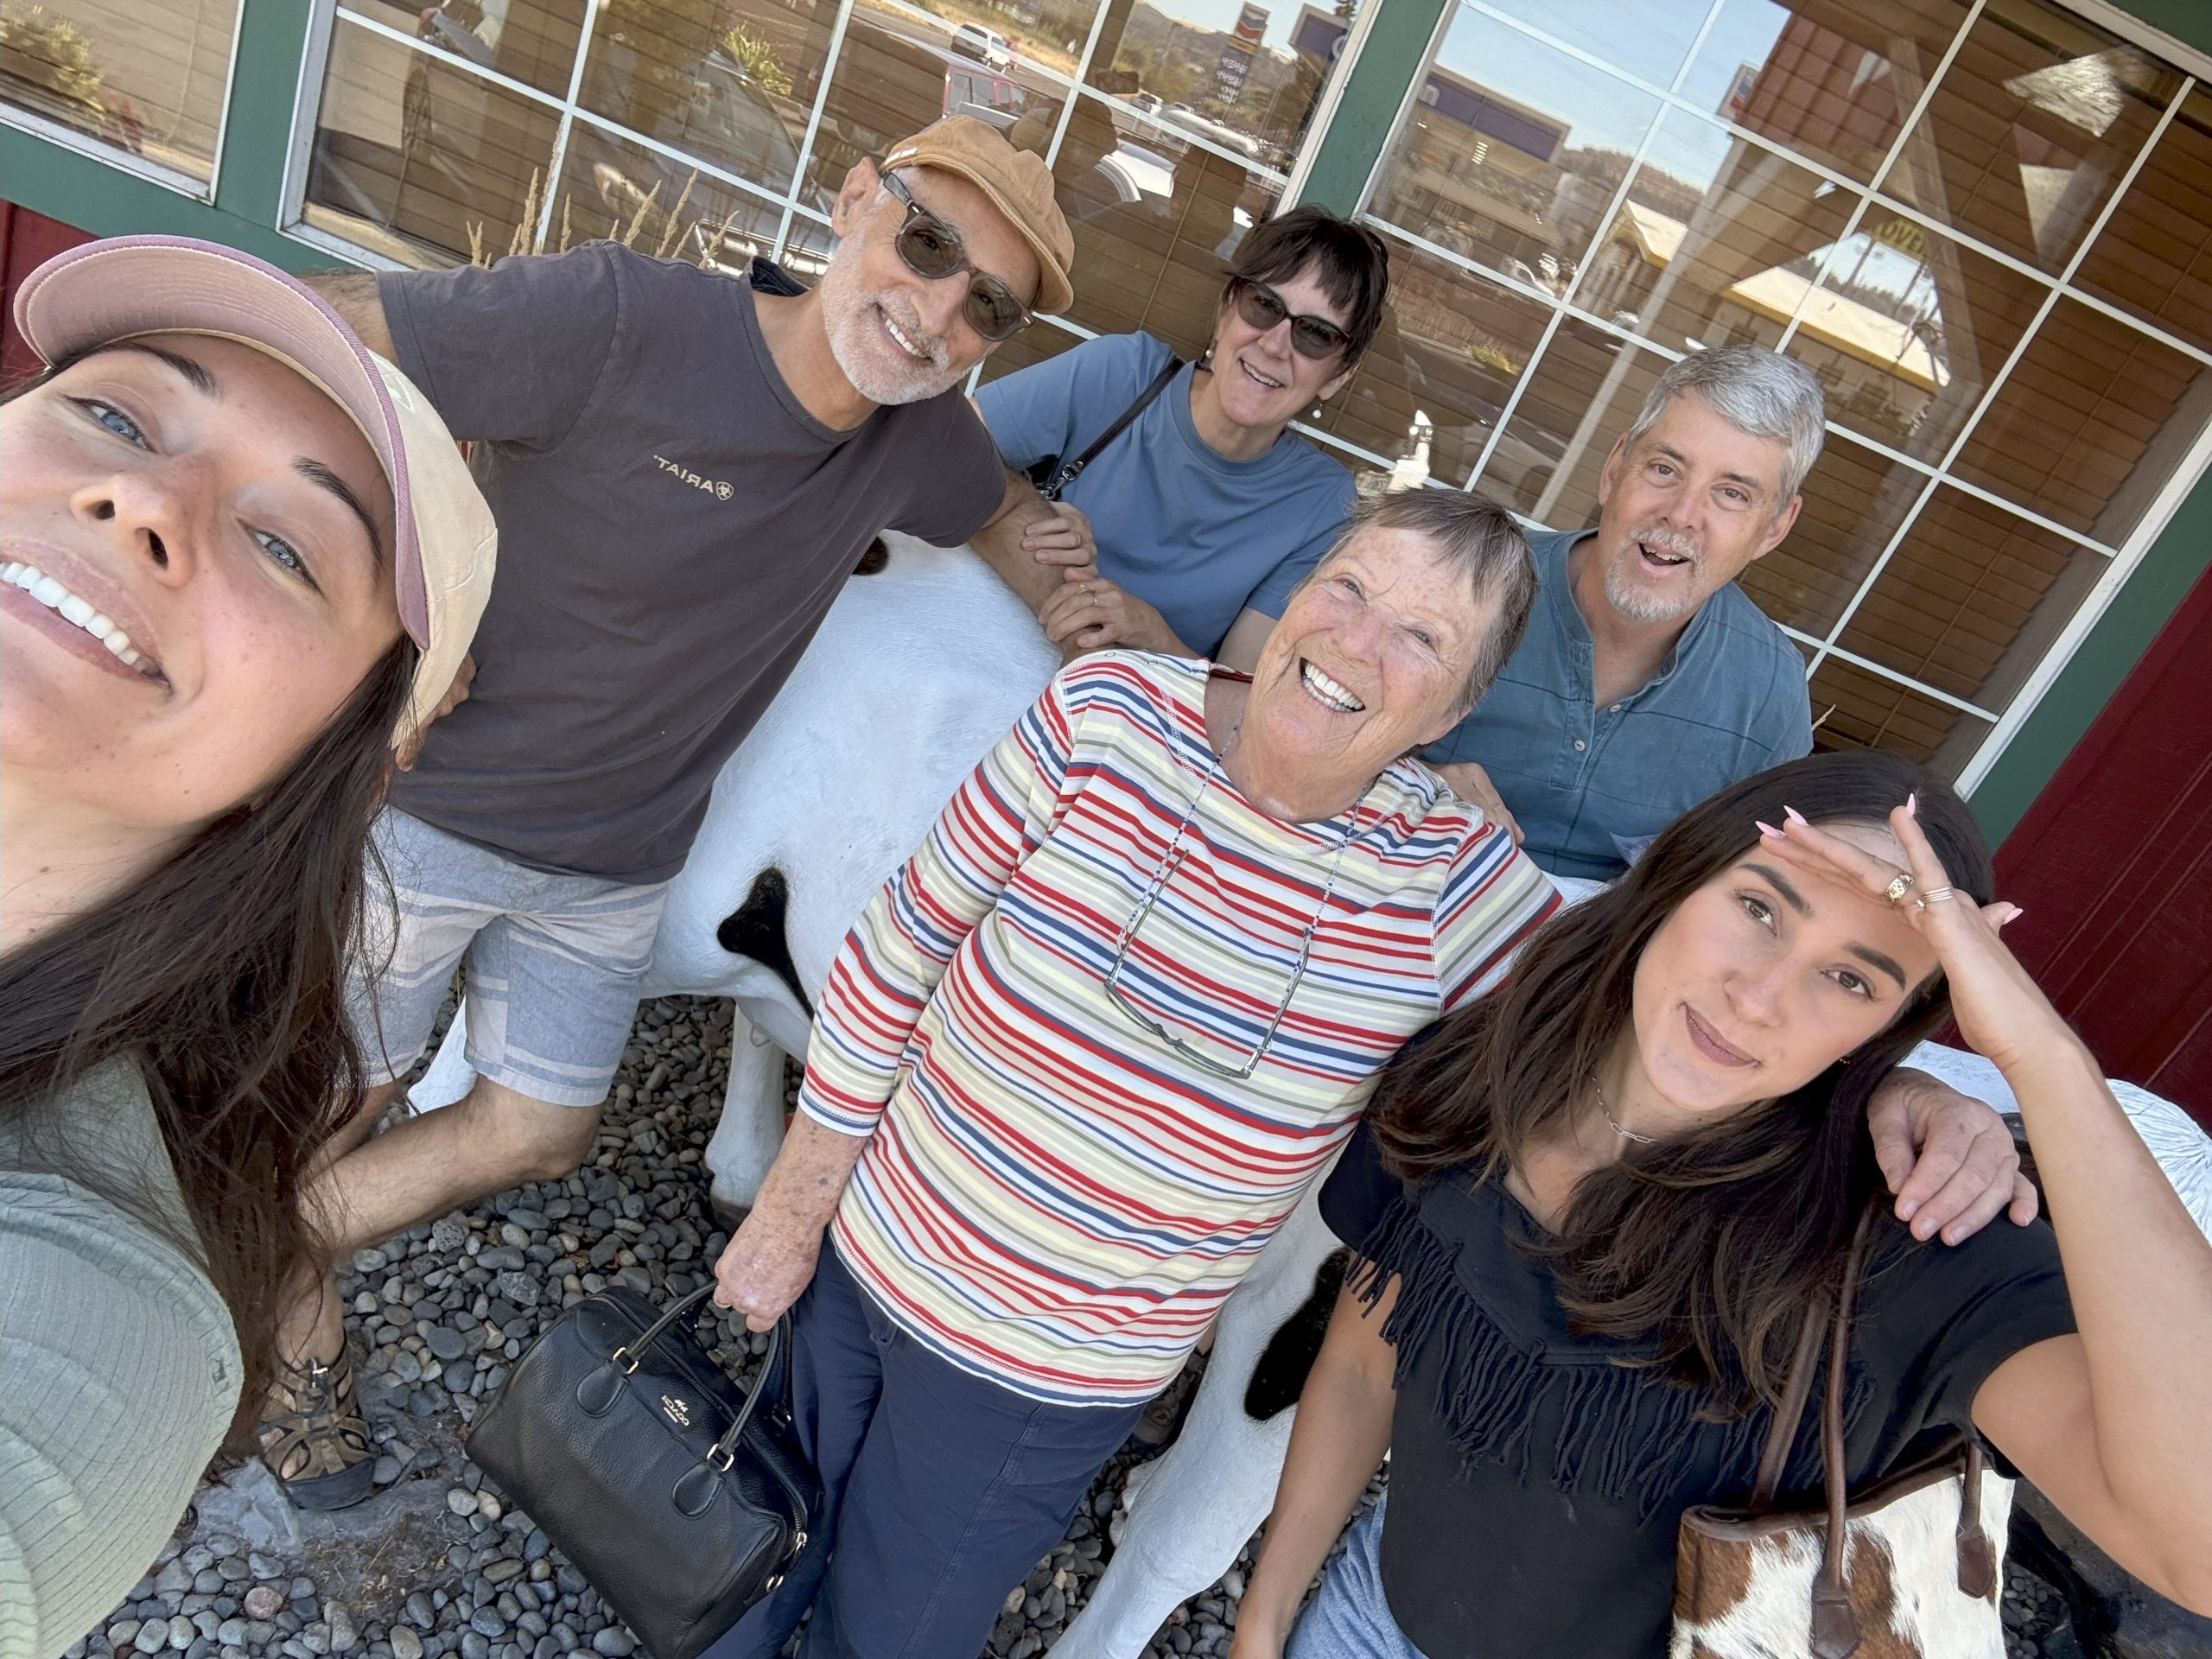
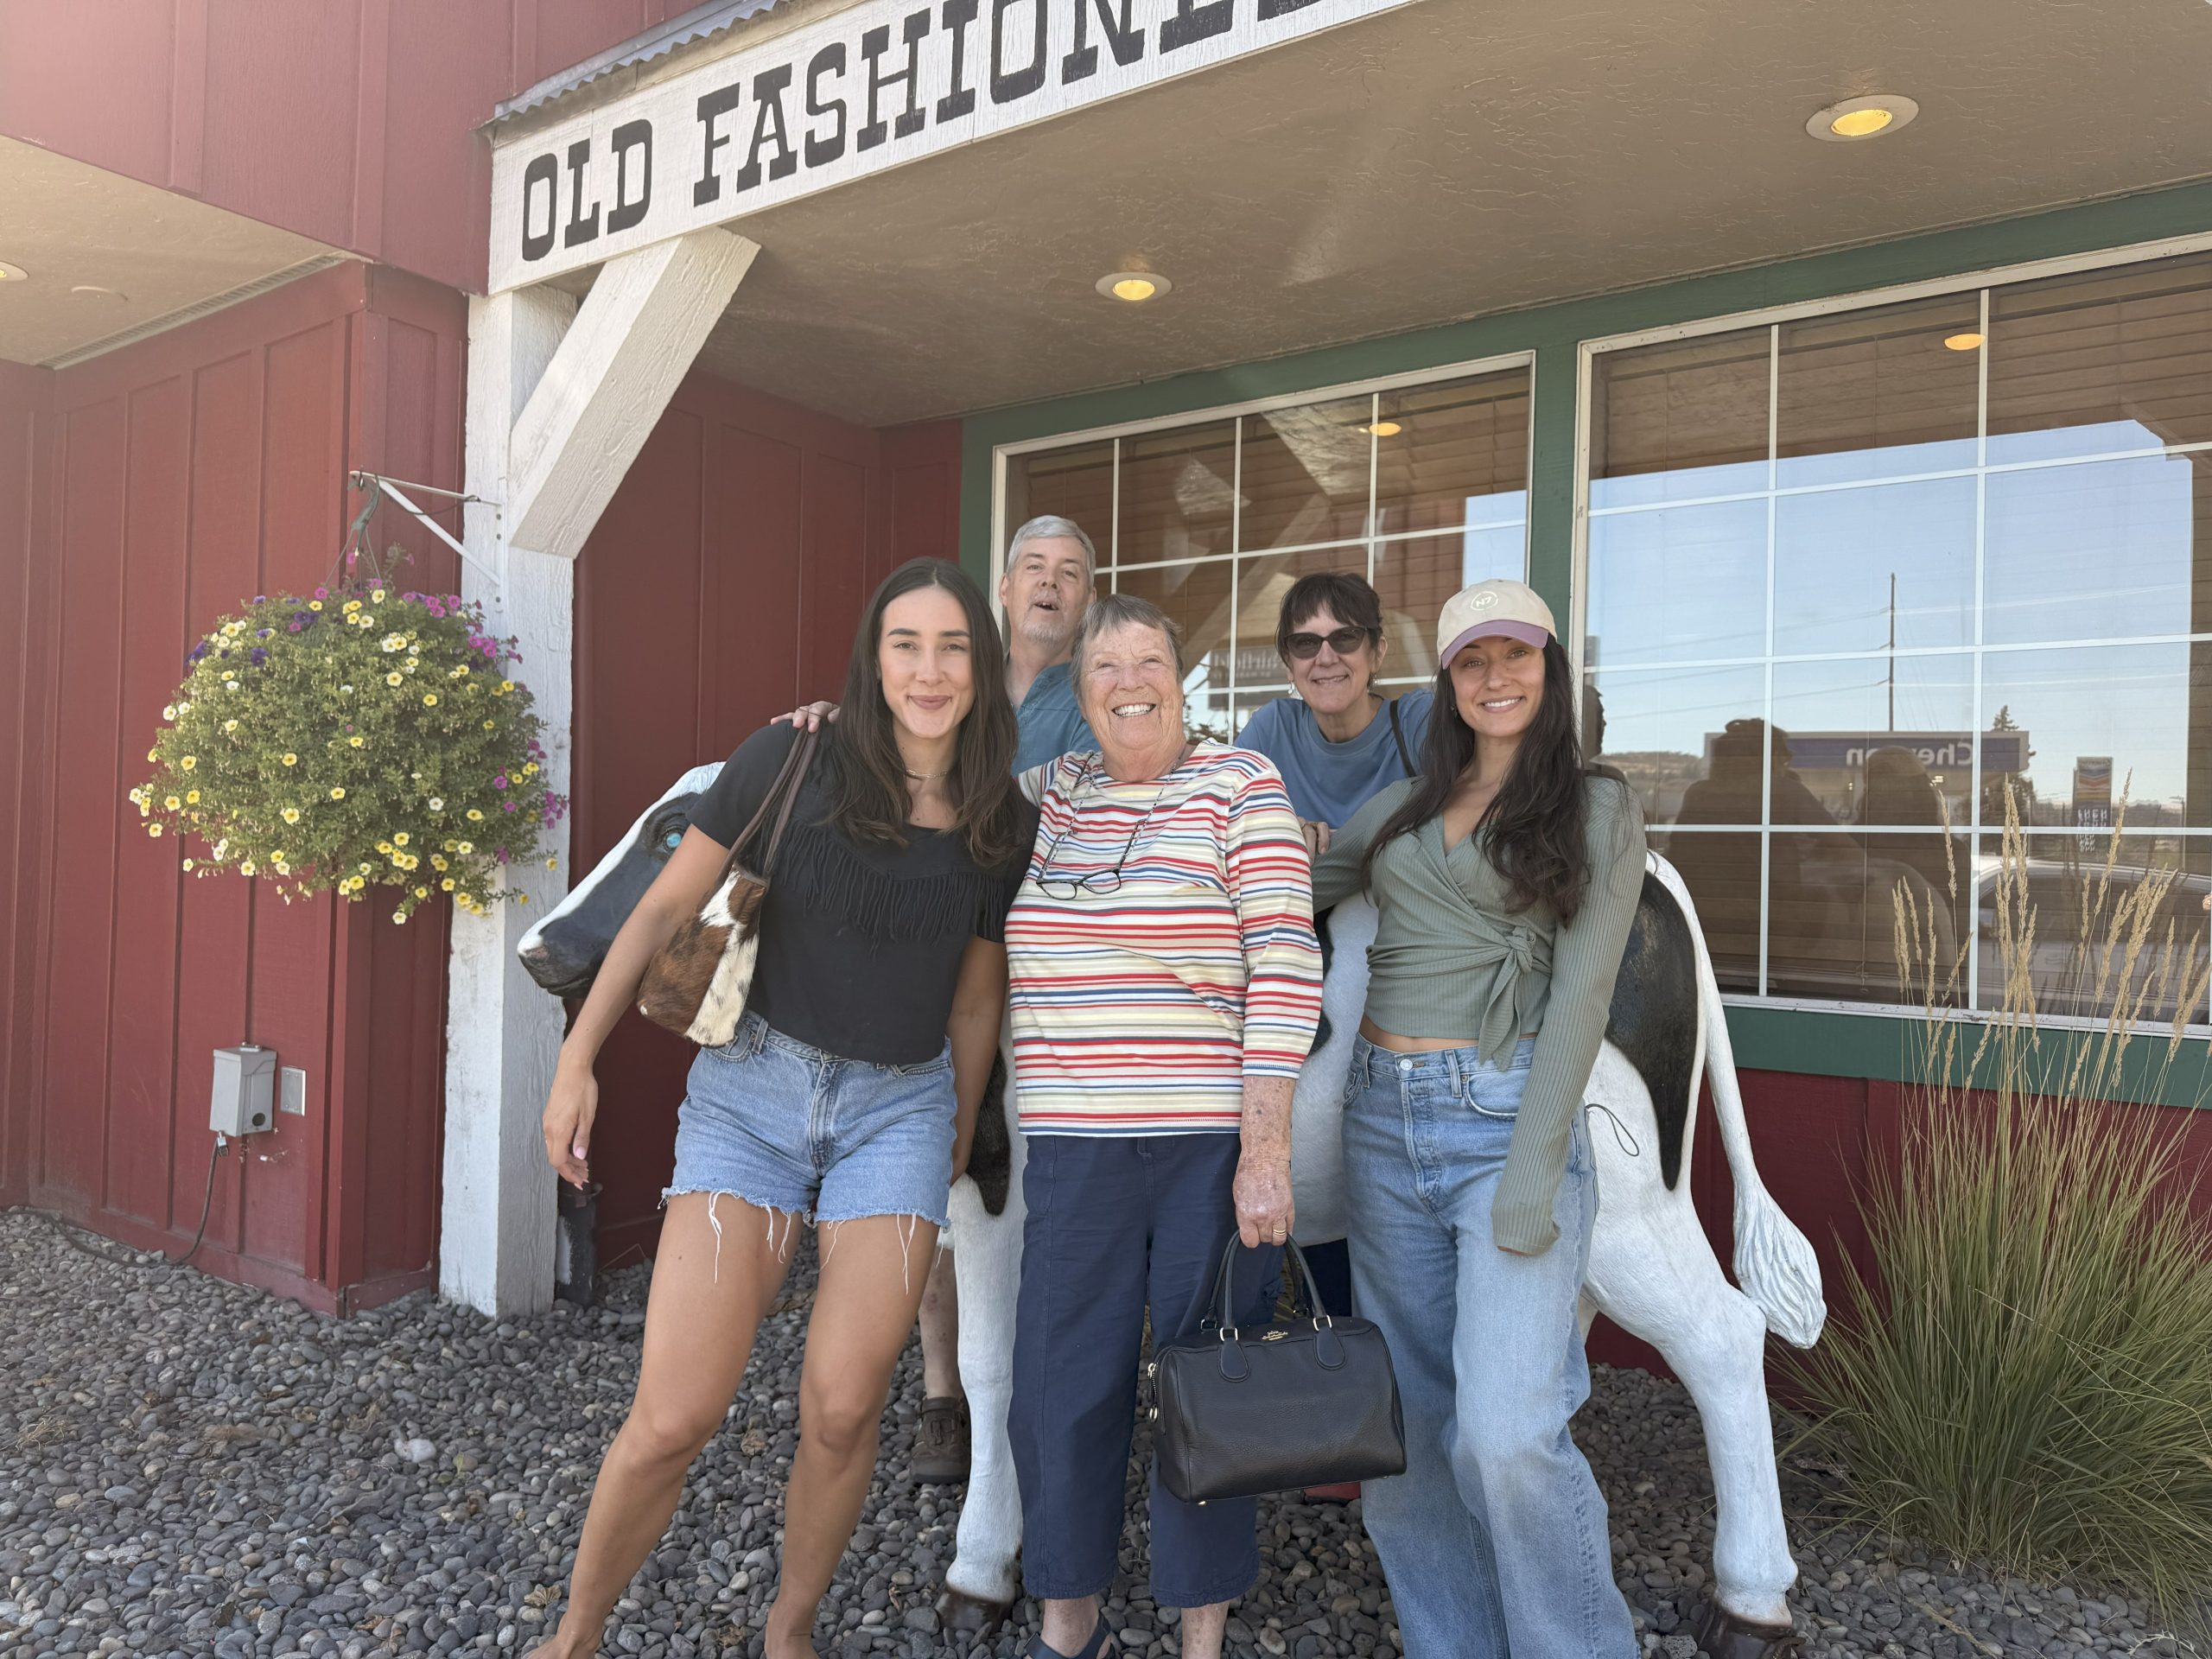
Today was another fun day, especially because we were going to have lunch with daughter Ursala and her husband Soroush. Yeah!
So, after a quiet morning of reading and writing, we left to meet the kids in The Dalles. When we arrived, we were thrilled to find out that both Nika and Jaleh (our granddaughters) were free to join us. Nika has her own dance studio and Jaleh has various interests including working part time at the White Salmon hospital as a clinical dietitian. It was just wonderful being able to spend time with daughter Ursala and family. We simply don’t see any of our kids as much as we would like. Not when one lives in Salt Lake City, 2 in Keiser, Oregon, and one in White Salmon, WA. But they all lead happy lives. And what parents could want more than that for their children. Of course, I miss seeing them more often. But being as busy as we are, they might never find us at home anyway. So, time together is precious.
From left to right, Nika taking the selfie, Soroush, Ursala, me, Andy, and Jaleh.
After saying goodbye, we did some provisioning and gassed up the truck. Then back to camp to sit outside our trailer and read until it was time to fix dinner.
Jim had brined, then marinated, the pork tenderloin I had brought along to BBQ. I made mac and cheese and cut up some heirloom tomatoes and a cucumber we had purchased at a local fruit stand. Phyllis warmed some bread, so another great meal was had by the 6 of us.
By the time we finished our picnic dinner, it was dark. So, to our individual rigs we hastened. To wash our dishes and hunker down for the night. What a great time we’ve had again while camping at Peach Beach. And as always, I can’t wait to come back here again.
Tuesday, September 16, Ellensburg KOA Journey, Ellensburg, Washington
Since we had a fairly short run today, we dawdled through breakfast and hitching up. Our aim – 11:00 am, the parks official checkout time. Plus, we simply didn’t want to leave this lovely park any sooner than necessary.
But at the stroke of 11:03, we were driving out of this wonderful campground, past one of the beautiful peach orchards, and turning right onto 97 for the short uphill pull away from the Columbia until we meet highway 14 heading east and west. Then left onto highway 14 for about 100 feet. And another quick right back onto 97 for the long uphill drive to Goldendale.
After Goldendale, we rolled through semi forested areas, some agriculture (but not much) and miles of seeing nothing but dessert terrain and occasional trees lining the Satus Creek after we start down into the Yakima Valley.
But along the way there is an obligatory stop that we always make. And that stop is for a bit of Greek food at St. John’s Monastery (Greek Orthodox) and Bakery.
The Holy Monastery of St. John the Forerunner was founded in 1995, when local Doctor Gerald Timmer donated his 48-acre property to the Greek Orthodox Diocese of San Francisco for the foundation of a women’s monastic community. Geronta Ephraim, a priest-monk and former abbot from Holy Mount Athos, Greece, was contacted to help establish the monastery in Washington. (“Geronta” in Greek means an “Elder” or “Abbot”.) Already the spiritual father/elder of 11 monasteries in Greece, 1989 he began the work of establishing monasteries in North America. There are now 17 such monasteries in North America. These communities have prayer for the world as their primary profession, and then to provide spiritual guidance to the faithful and help preserve the Holy Traditions of the Church through exemplary Christian life and devotion to God.
In their shop you can expect to find fabulous Greek food, (our favorite is their gyros with extra tzatziki sauce). But all the baked goods are delicious. You can also find, jams, jellies, candy, Christian icons, and fabulous espresso drinks. (Andy never takes a pass on their coffee drinks. They are always amazing!)
After our brief lunch, it was back in the car for me to take a short nap (luckily Andy was driving at the time) and to arrive at our destination about 2:30 pm.
We decided not to unhook since we would only be here for one night. But while Andy was attaching the electric and water hoses, I decided to turn on the air conditioning. After a short 7 minutes or so, the electricity went off. Then it was try to fix the problem.
Now, if you don’t know us well, you might be surprised to learn that we are the least mechanical couple you will probably ever meet. And if it had not been for Jim, we would still be trying to replace fuses in the trailer’s electrical panel with no success. In fact, both of us had gotten down on the floor to have a go at putting 2 new fuses in their respective receptacles. When, had we known what the heck we were doing, we would have just reset the main breaker switch, and the problem would have been immediately resolved.
But thank heaven Jim knew what to do. So, now Jim is on our floor and has taken the facing panel off (2 screws) and flipped the main switch and retrieved the fuses we both dropped in trying to get them properly seated in their receptacles. And now, we have electricity again. So, after everything was back on again, Andy decided to turn on the air conditioner. And after about 5 minutes, the same thing happened. But at least now he knew how to fix it. And not to turn the air conditioner on.
While we were discussing what could be the problem, both Tim and Jim thought it might be that the air conditioner coils and filters were probably coated with dirt.
So, there will be no air conditioner for the rest of the trip. But a thorough cleaning of the air conditioner added to the list of items to be looked at when we take the trailer in to be winterized. Who knew we should clean our air conditioner? Oh well. Live and learn.
After all this excitement, we decided to go out for Mexican food. Since both T&P and A&P decided not to unhook our trailers since we were only spending one night in Ellensburg, Jim ferried us to and from a nearby Mexican restaurant.
By the time we all arrived safely back in camp, it was time for my tired old body to call time out! So, after reading the same page in my book about 4 times, I took my evening pills, brushed my fangs, changed into my pajamas and after tossing and turning for about 10 seconds, I spent a good 10 hours in the land of nod.
Wednesday, September 17, 2025 – Icicle River RV Resort, Leavenworth, Washington
All together now, all together now……left to right, J&M, T&P, and A&P
Because we were still hitched up, I took my own sweet time getting dressed and getting breakfast on the table. So much so that we were 15 minutes late getting out of camp. Since most of the campground was already empty, the camp police did not come by and ticket us or charge us or in any way push us to hurry up. In fact, I don’t think they would have noticed if we had stayed a couple of hours. No nickel and dimming us in this campground.
However, for our next campground, we would have had to pay a $25 fee to arrive early. We chose instead to take our own sweet time getting to Leavenworth. So, instead of heading right to camp, we went into Wenatchee, and I made sandwiches as we sat under a shade tree at the Wenatchee Confluence SP.
After lunch, while we were driving north to Leavenworth, we were a bit apprehensive. Wenatchee had clear skies. But over Leavenworth there was what looked like one huge white cloud. Wildfire smoke. And the closer we got to our destination, the more we could smell smoke in the air. In fact, while Andy was sitting outside after we had gotten all set up, a cinder landed on his arm. And T&P’s picnic tablecloth was blessed with ash that had floated into our campground to say hello.
Every hour or so, a helicopter would fly fairly low directly over our RVs. It felt like we were either in a war zone or on the set of Mash.
After spending a leisurely late afternoon reading and napping, we enjoyed a wonderful chili and cornbread dinner provided by T&P.
Then, after a bit of dessert and after dinner libation, it was once again an early to bed for me.
I must state that I rarely get home from a trailer trip, tired. I sleep longer in our trailer than I ever do at home. But I do know that my bath scale is just gleefully waiting to once again prove that fresh air does not necessarily equate with weight loss. Quite to the contrary, in fact. Because on trailer trips we always eat as if calories don’t count when we’re on vacation. Now of course we know that isn’t true. But at our ages we have fooled ourselves for so long now that old habits are hard to break.
But there will be a reckoning the moment we set foot in our home. No more Cheetos or Fritos until our next trip. More salads and less desserts. Reality will once again raise its ugly head. (And people wonder why we travel so much. We blame it all on Cheetos and Fritos.)
Another wonderful day on the road.
Thursday, September 18, 2025 – Icicle River RV Resort, Leavenworth, Washington
After a great night’s sleep, we woke up to, what seemed like, less smoke in the air. And for me, the knowledge that we would be seeing our dear friend Linda this morning.
Linda and I have been the dearest of friends now for almost 45 years. And since she lives in Leavenworth, we don’t see each other nearly as much as either of us would like. But when we do see each other, it’s like we have never been apart.
And this morning T&P were serving all of us, including Linda, brunch. A yummy breakfast casserole and English muffins. I contributed a bowl of fresh peaches and blueberries to go with homemade granola. And one lone bran muffin and my favorite breakfast bread to round out the menu.
After brunch Linda headed back to her home since the next day, she and two friends were flying from SeaTac to spend a week in the Big Apple (NY City.) So, she had things to do to get her home ready for another great adventure.
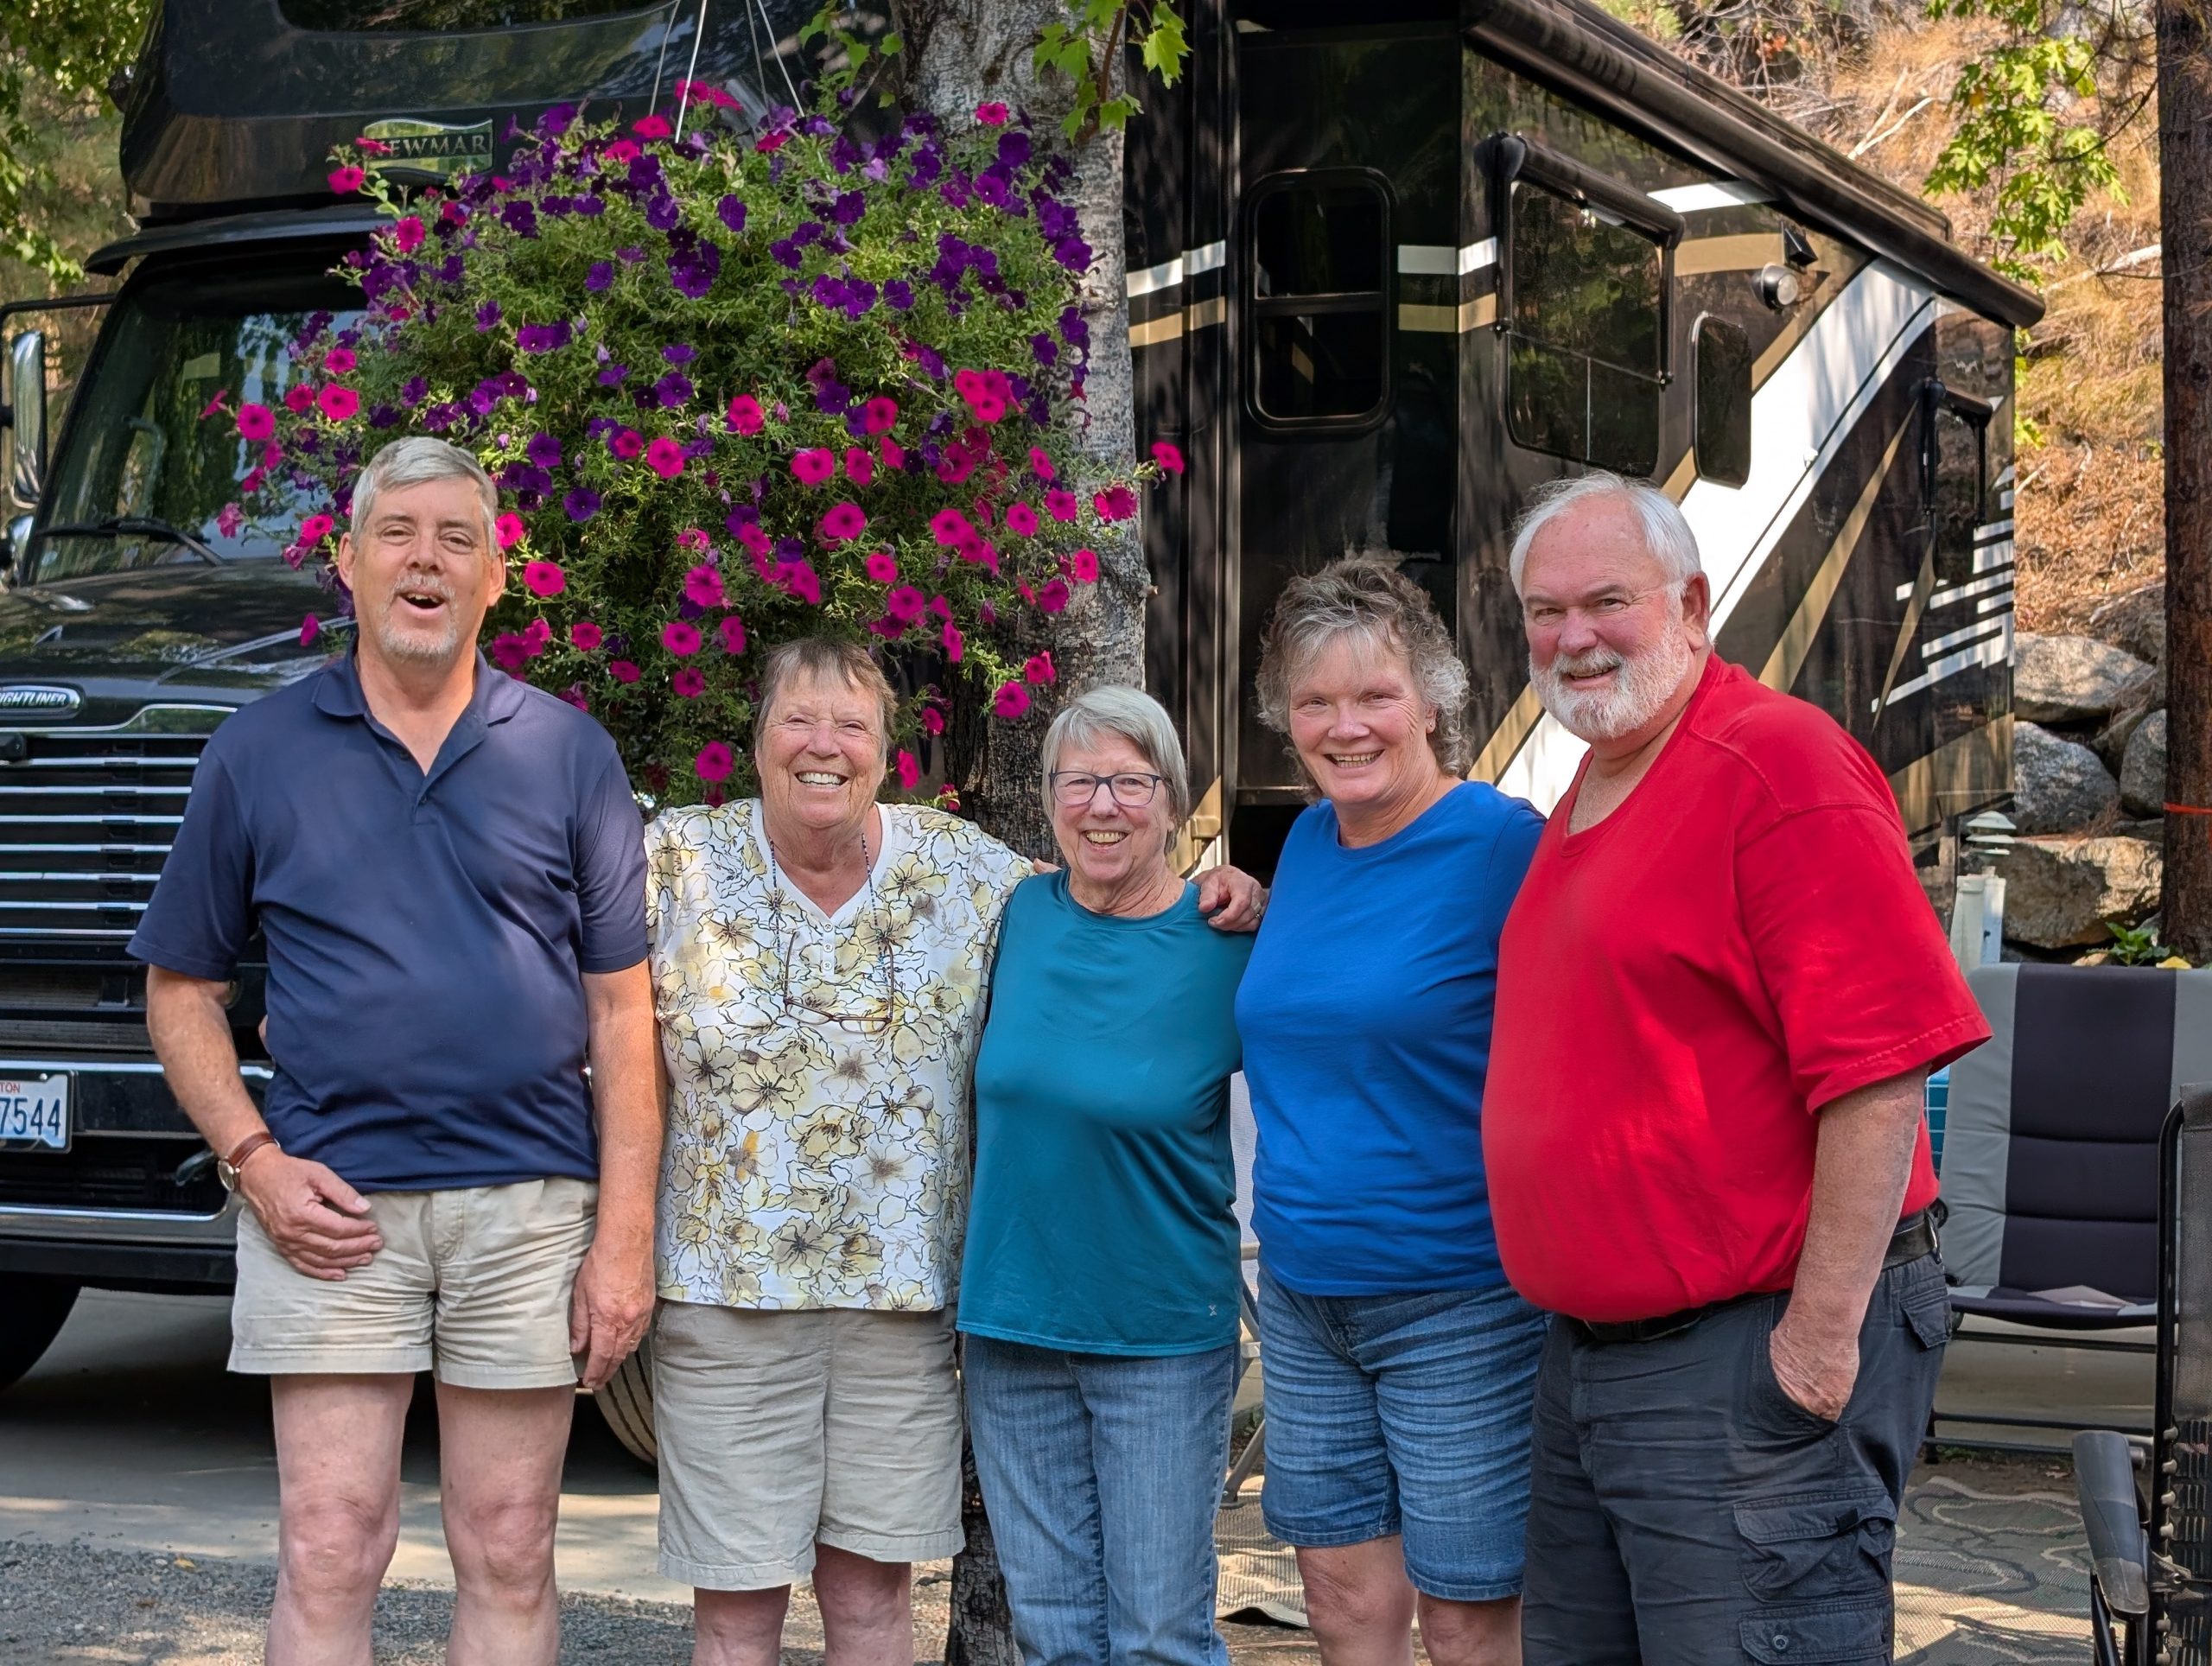
5 good friends who have known each other for a very long time. Left to right – Mr. C. Mrs. C. Linda, Margo, and Jim.
After Linda left, I climbed in the trailer to get caught up on this travel report. Next thing I know, I’m in my favorite camp chair and trying not to fall asleep. (I’m getting quite good at napping. All it takes is a comfy chair, and a really good book, and I’m sound asleep. One of the joys of being not only retired but old.)
And since we were going out for dinner, I had the whole afternoon to be lazy. BTW, I’m getting quite good at being lazy.
About 4:30 pm we left for the bustling berg which calls itself Leavenworth. We had reservations for 6 at Larch. An Italian restaurant. We each ordered a different dish, and they were all very good. So, I highly recommend this dining establishment next time you are lucky enough to be in this Bavarian village.
Then back to camp for ice cream bars and for those so inclined, an after-dinner tipple.
But as soon as it was dark, my pillow started calling me. Since it was only 8:00, I decided to ignore the pillow’s siren call, and read for about an hour. But eventually I felt that my pillow had the right idea. So, off to bed I went, knowing full well that it was the last night in the trailer. And the last night’s sleep without our kitty Max slammed up against me with his constant demands to pet me, pet me, pet me. But I would not trade that silly kitty or his brother Miles for the world. Our boys are a constant reminder that we aren’t only responsible for ourselves. But that other critters (human and not) depend on us for their good life too. If only certain politicians and their slimy compatriots understood that we are all in this together, and to feel truly free and fulfilled, we all need to help others find the same contentment.
But for the life of me, I can’t understand why some supposedly intelligent people can’t understand that we all do better when we all do better. How hard is that to grasp? And what do they lose or have taken away from them by helping others? What they do lose, is being able to look in a mirror and think to themselves – I’m proud of who I am, and what I’ve done, and how I’ve helped. And if there is a better feeling than doing the right thing, I have yet to figure out what that could possibly be.
Friday, September 19, 2025 – home
Left Leavenworth at 10:15 am. Heading west was easy. But it was amazing to see how much traffic was on highway 2 coming east. Especially this early in the day. I would not have traded places with any of those poor folk just trying to get where they were going. What a mess!
Along the way we stopped at our favorite highway 2 drive-in (Alpen) in Startup. Shared a burger and fries and chocolate milkshake.
Then back on the road to get to our trailer storage facility, unload all the perishables, along with our toiletries, computers, and most importantly our pillows.
Then after being home for a couple of hours, it was to get back in a vehicle, and drive to Oak Harbor for Andy’s gig with Herding Kats at Orlando’s BBQ.
By the time we were heading home, at 10:30 pm, we were both very tired. We basically kept a running commentary going the whole way home to keep each other awake. I’m still not sure who was actually driving, but whoever was behind the wheel managed to get us home safely.
Then to bed and had anyone been witness to our sleep that night, they might have mistaken us for two snoring logs. I honestly don’t think I even rolled over once during the 10 hours I slept. And the same goes for Mr. C.
So, what did I learn or rediscover on this trip:
We live in a beautiful part of the world
Camping on the Columbia River is heavenly
The Oregon coast is magical
Redwood trees are huge and magnificent
San Francisco is a really cool city to visit
The wineries in the Napa Valley are so prevalent that none are flourishing the way they were 20 years ago. Napa Valley is home to more than 400 wineries, with some sources citing over 500, making it one of the most concentrated wine regions in California. And the wine produced there, some of the best and most expensive. So, according to our hostess at Regusci Winery, sales are way down. Not only at their winery, but throughout the entire valley.
The Bend and Sisters, Oregon area is a wonderful place to spend several days
Crater Lake is a magnificent natural wonder
Peach Beach is still one of our favorite places to camp
Fresh peaches are a gift from the Gods
FROM NOW ON, STAY LONGER IN ONE PLACE. DO LESS DRIVING.
And the best thing of all – being reminded by all the wonderful places we were lucky enough to visit, how well and truly blessed we are. And how we wish everyone could make that same statement.
I hope you have enjoyed riding along on yet another adventure. And as always – peace and love to all.
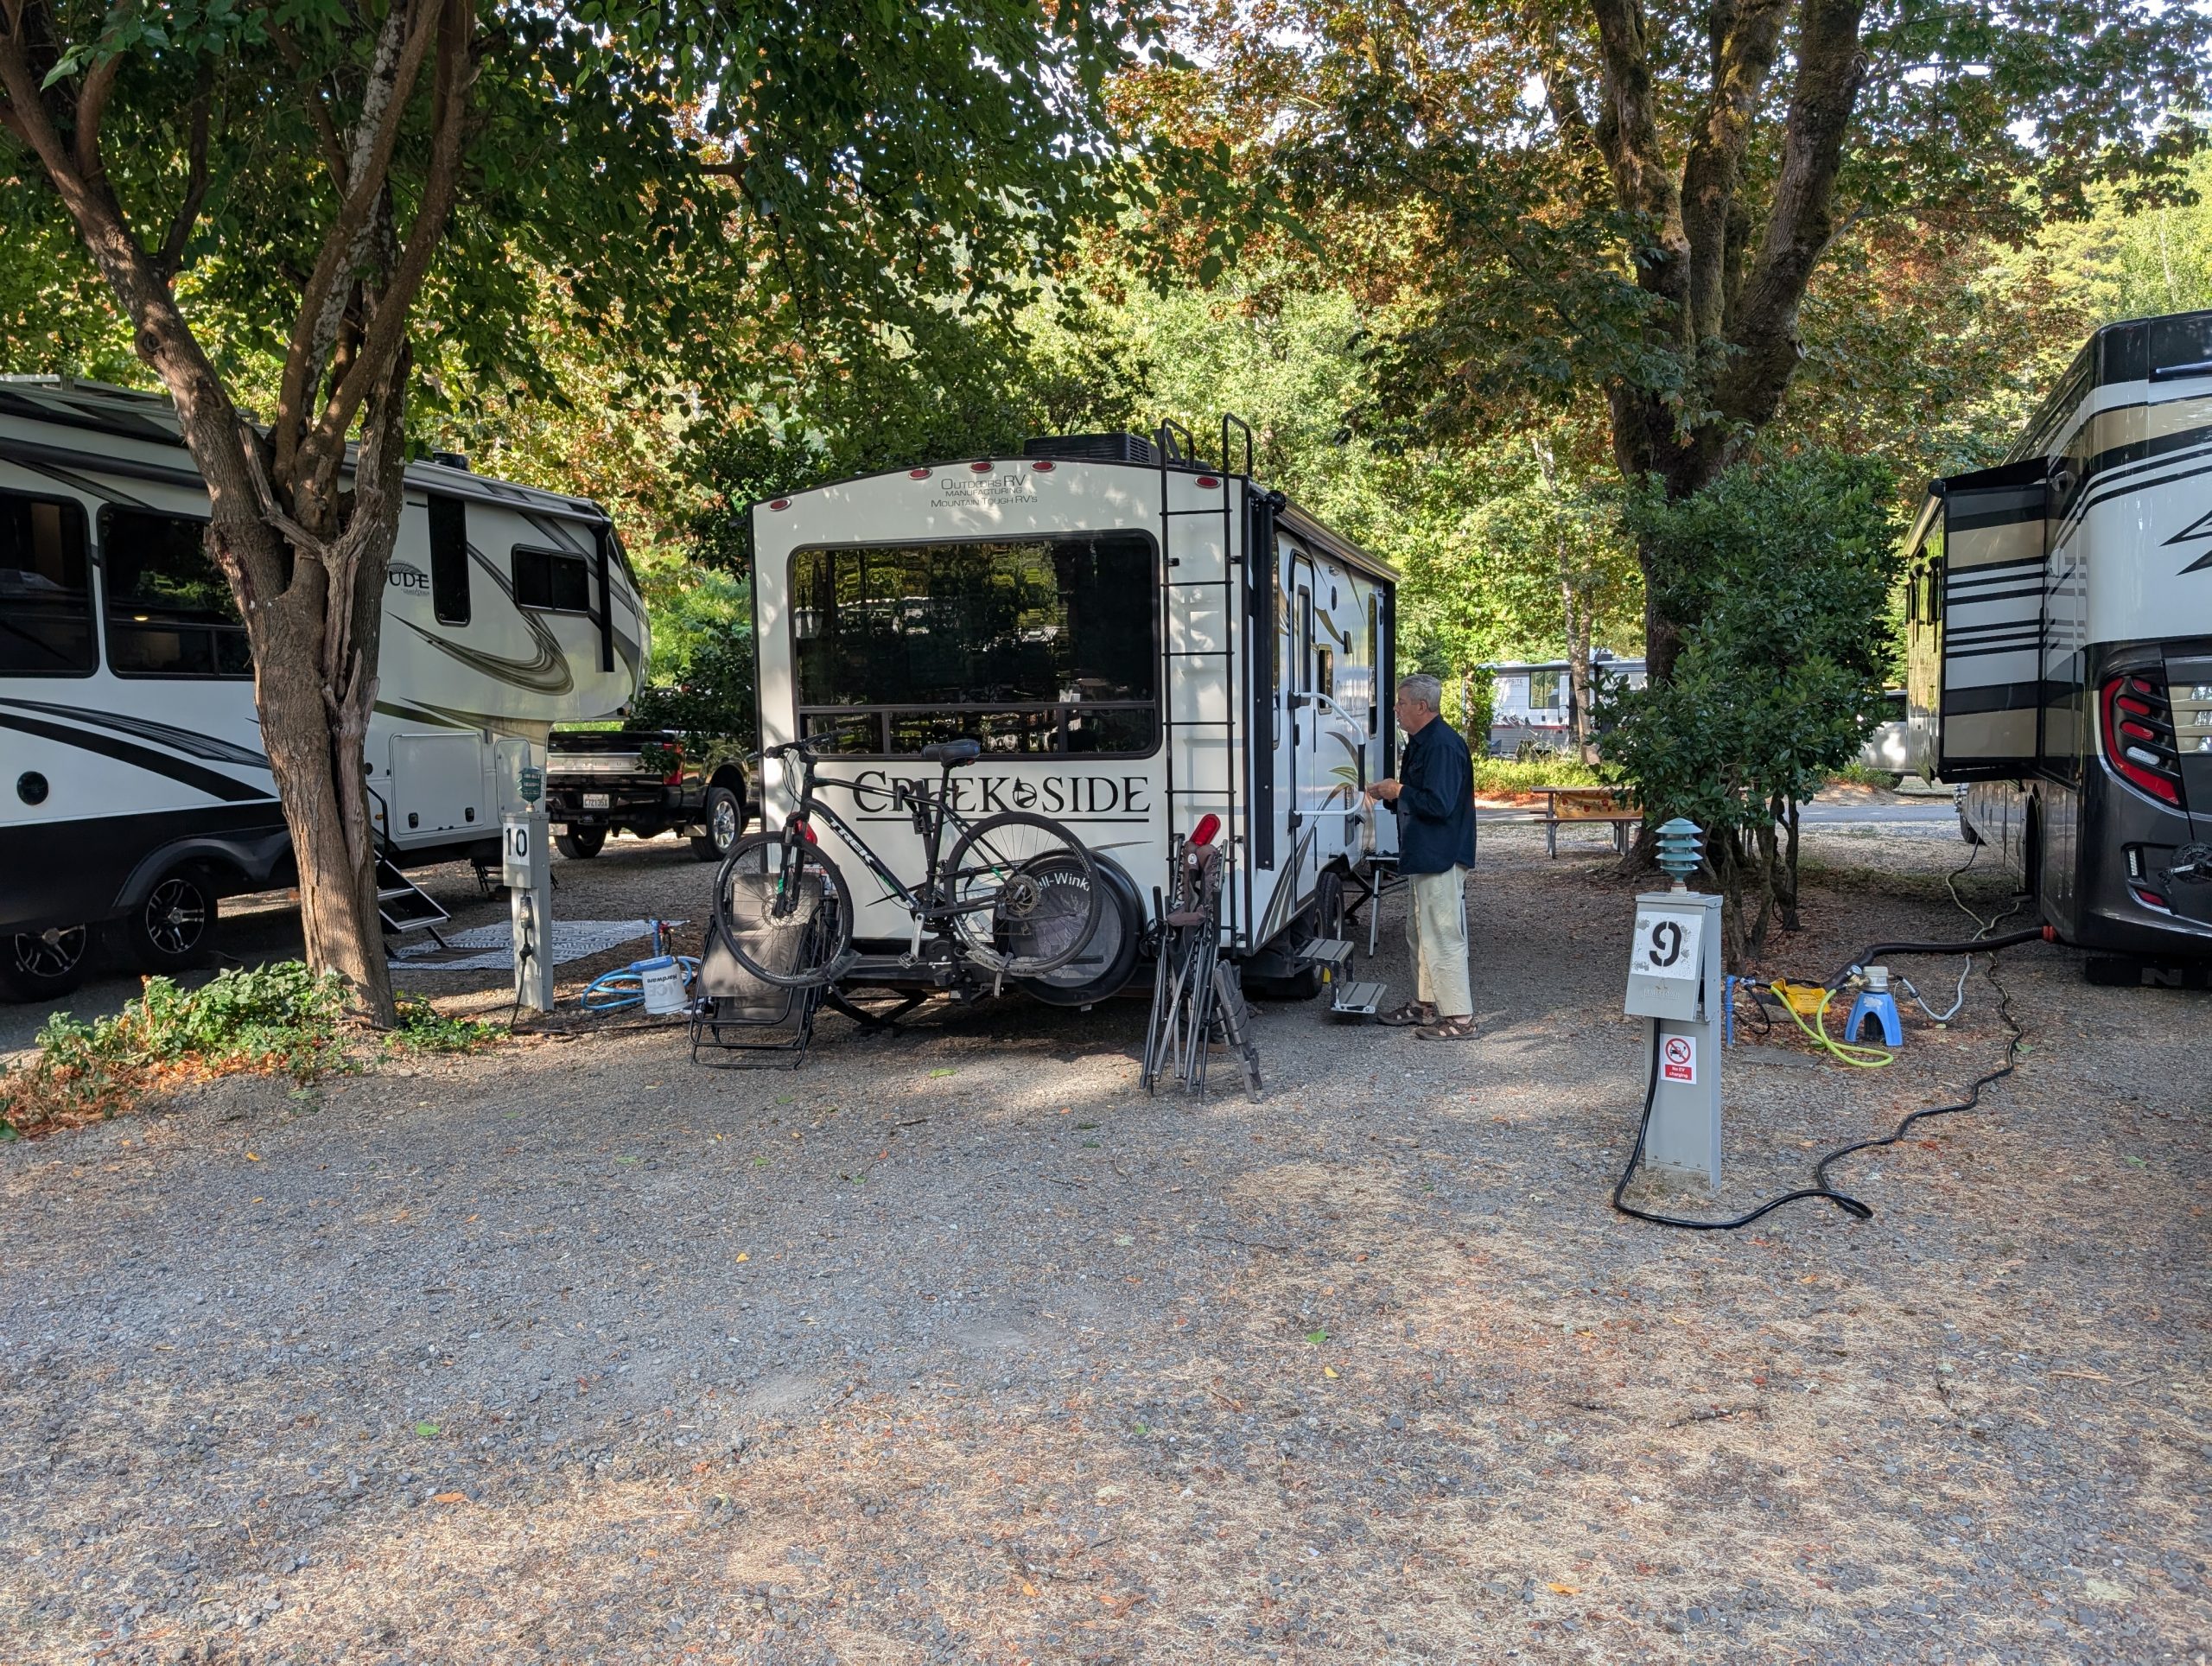
Wednesday, September 3, 2025 – Giant Redwood RV Park, Meyers Flat, California
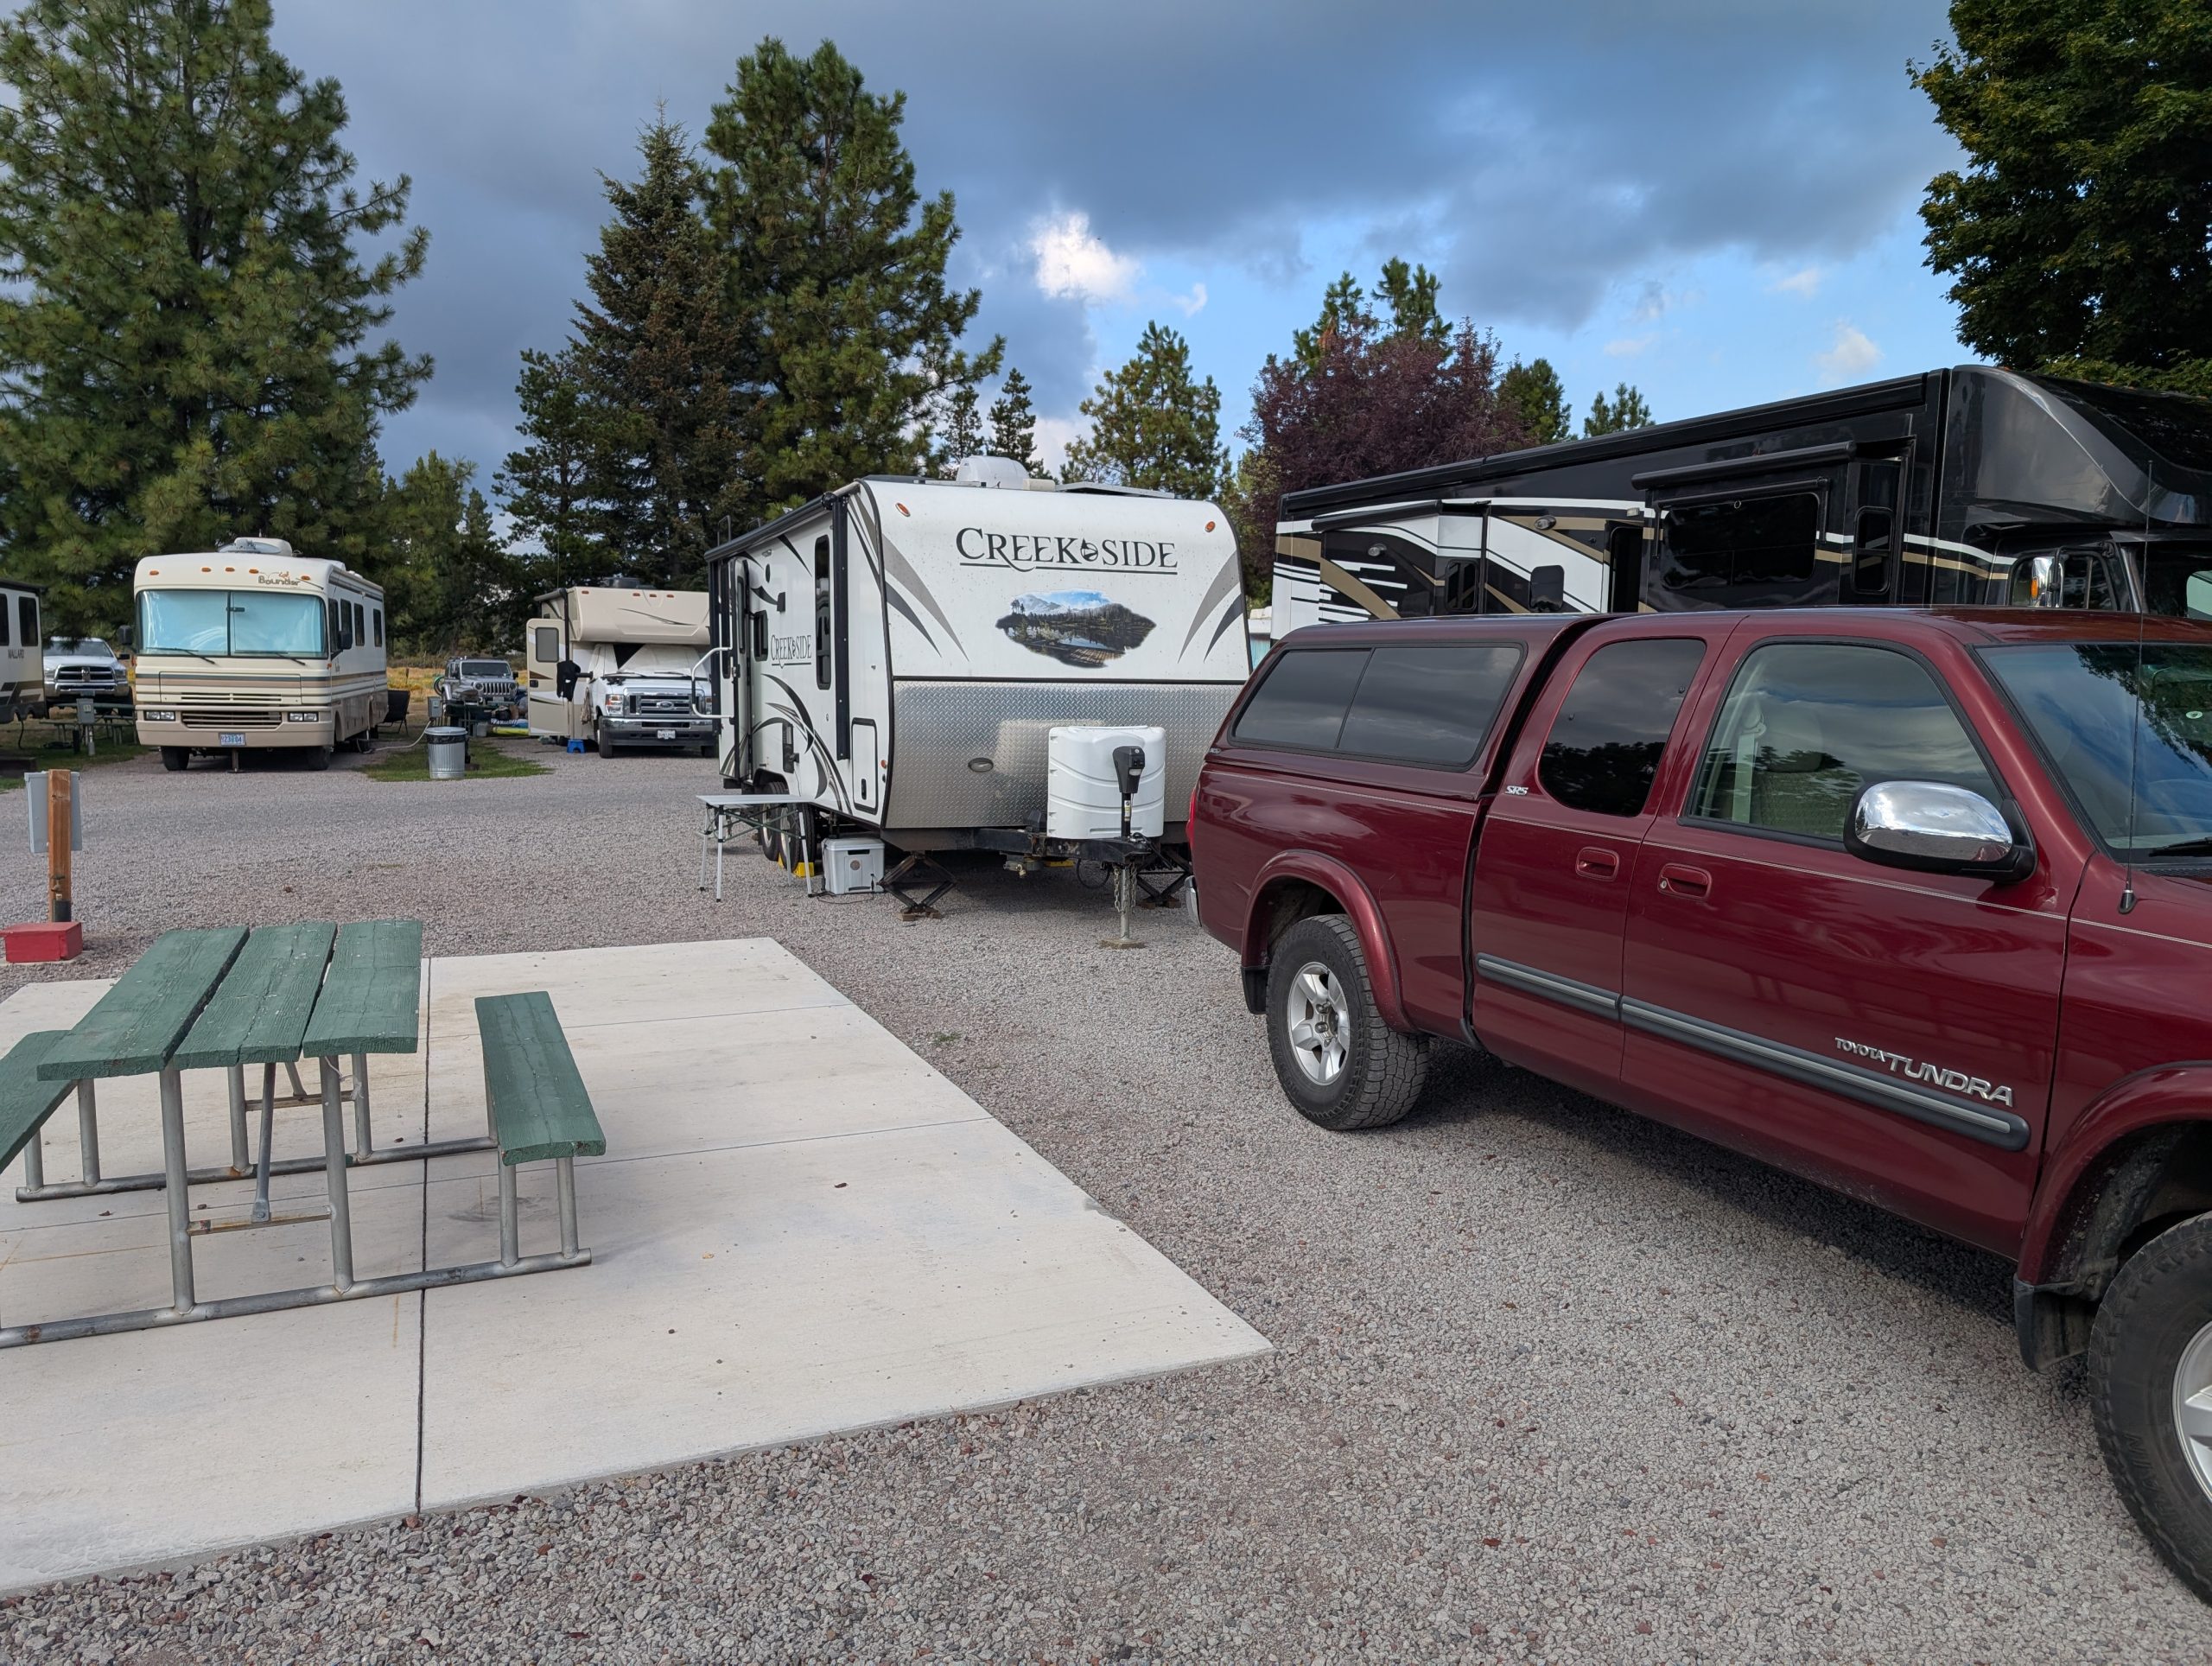
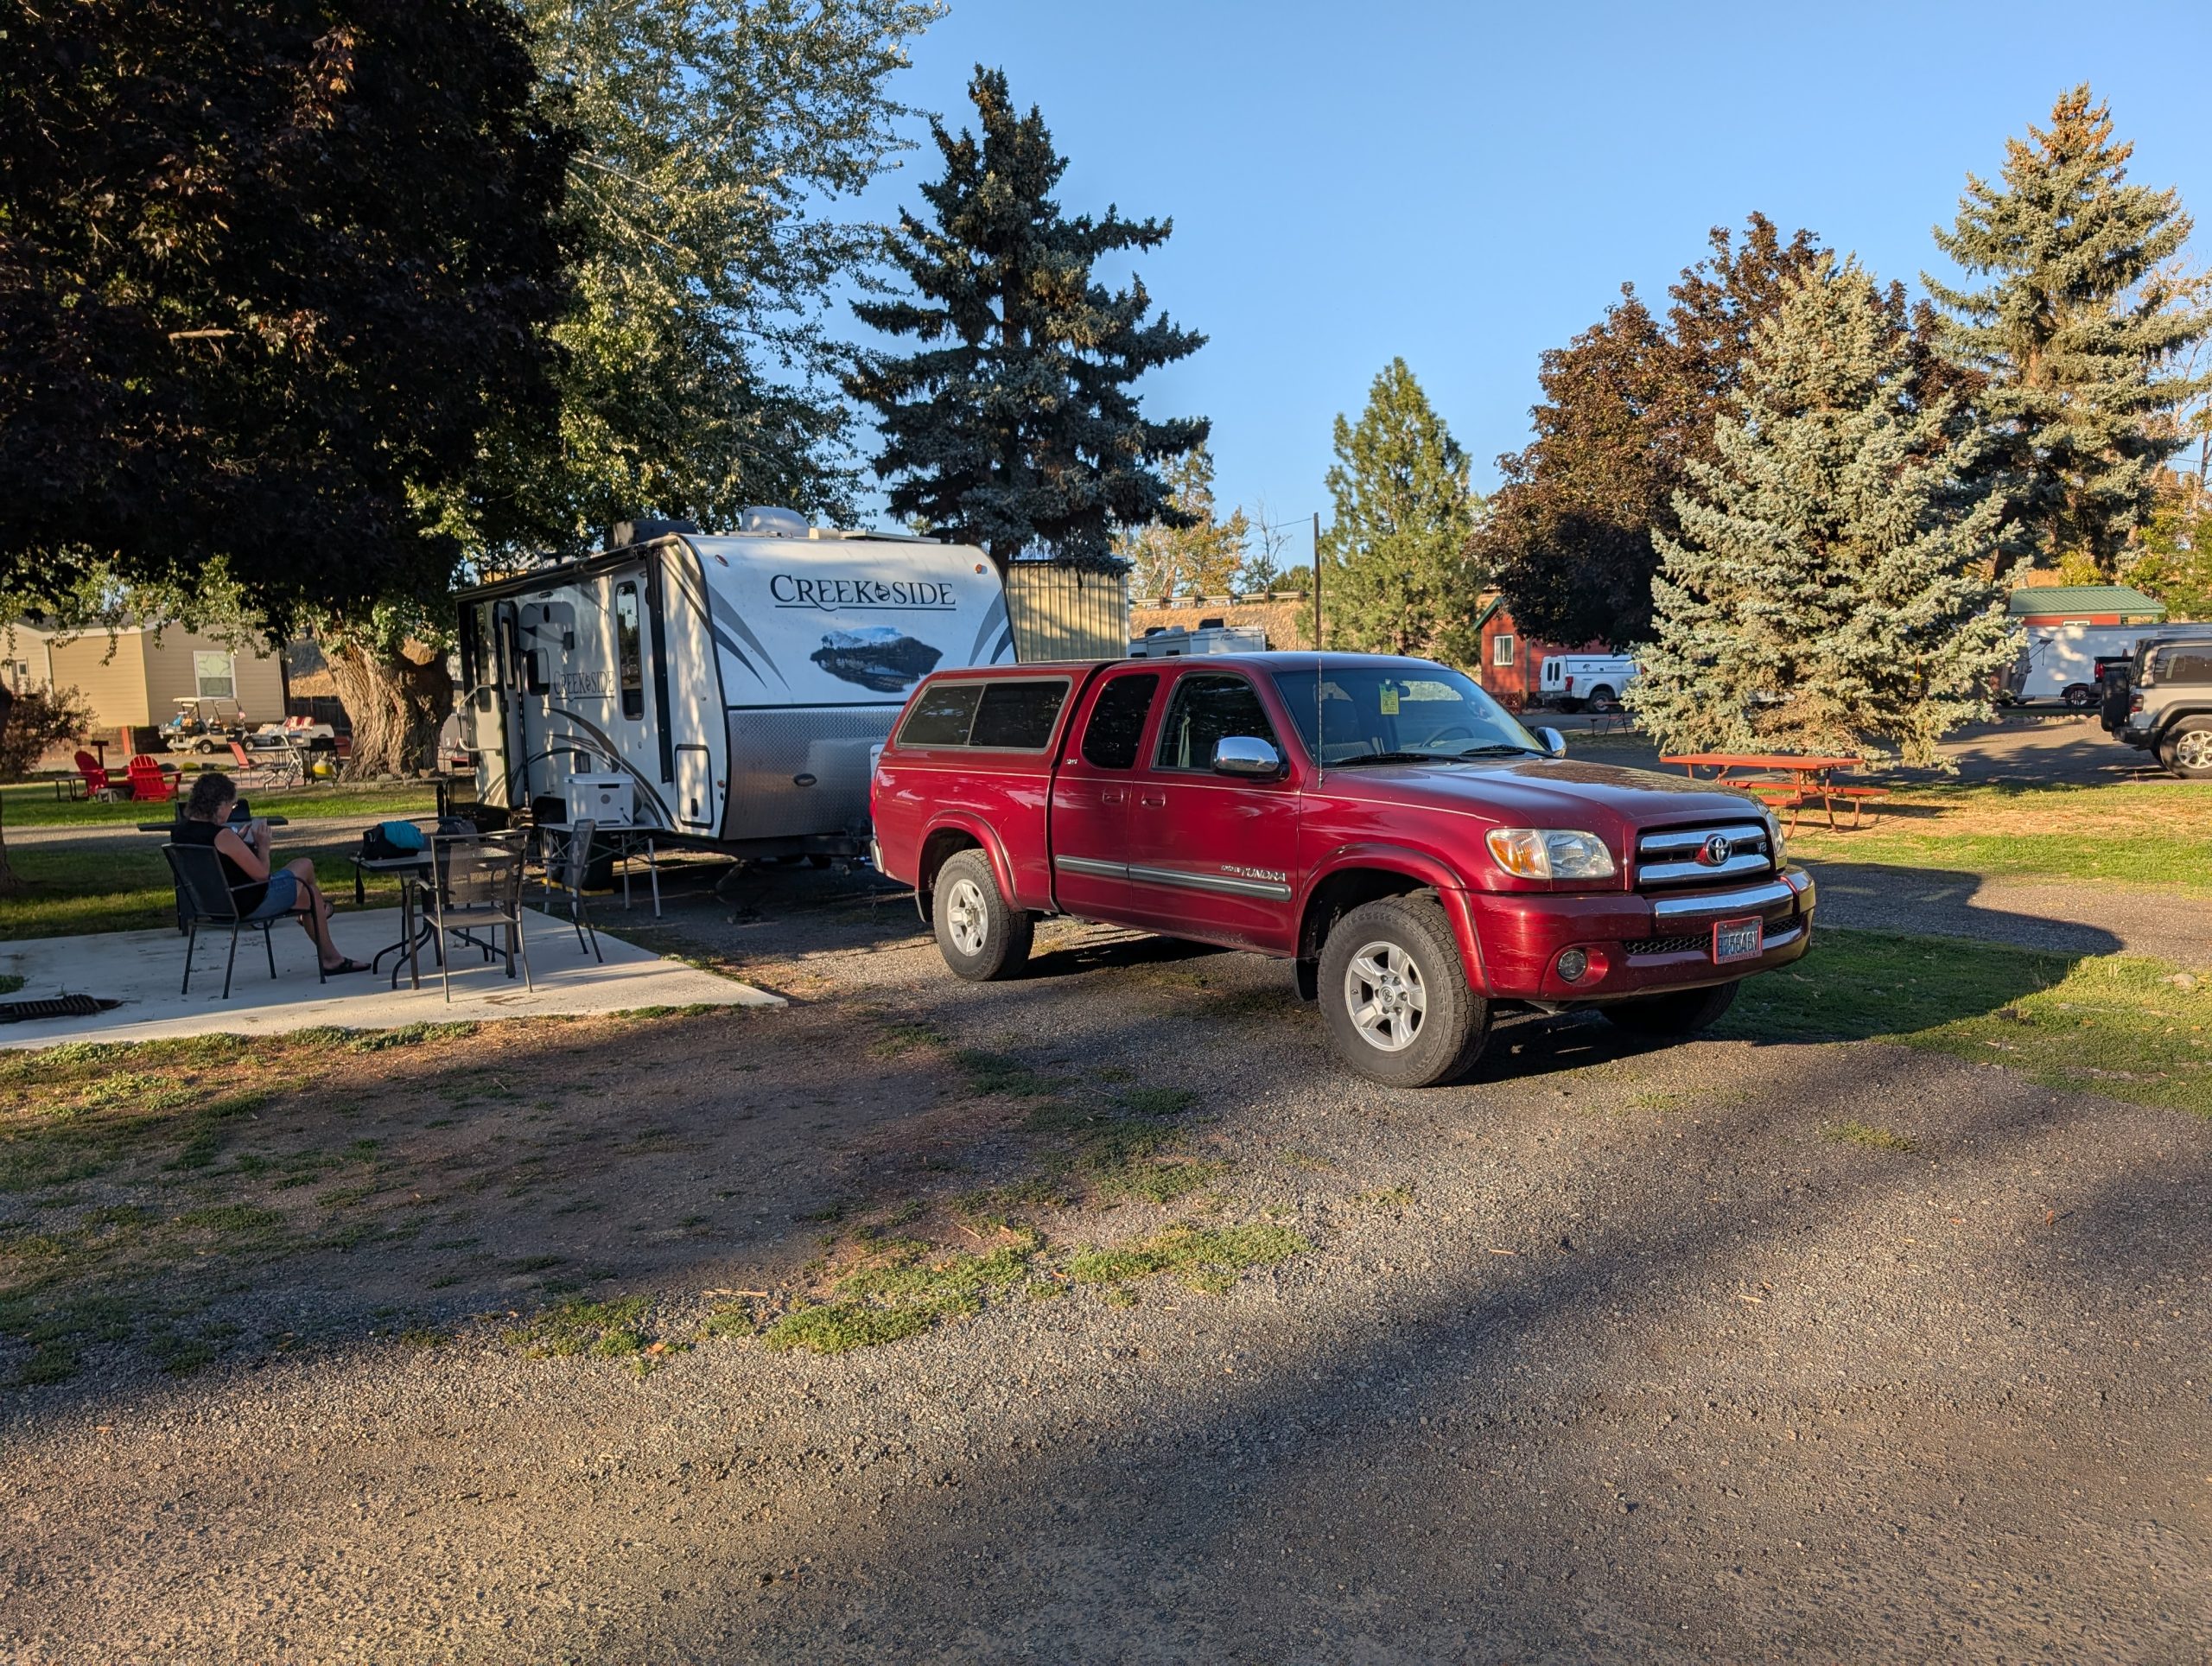
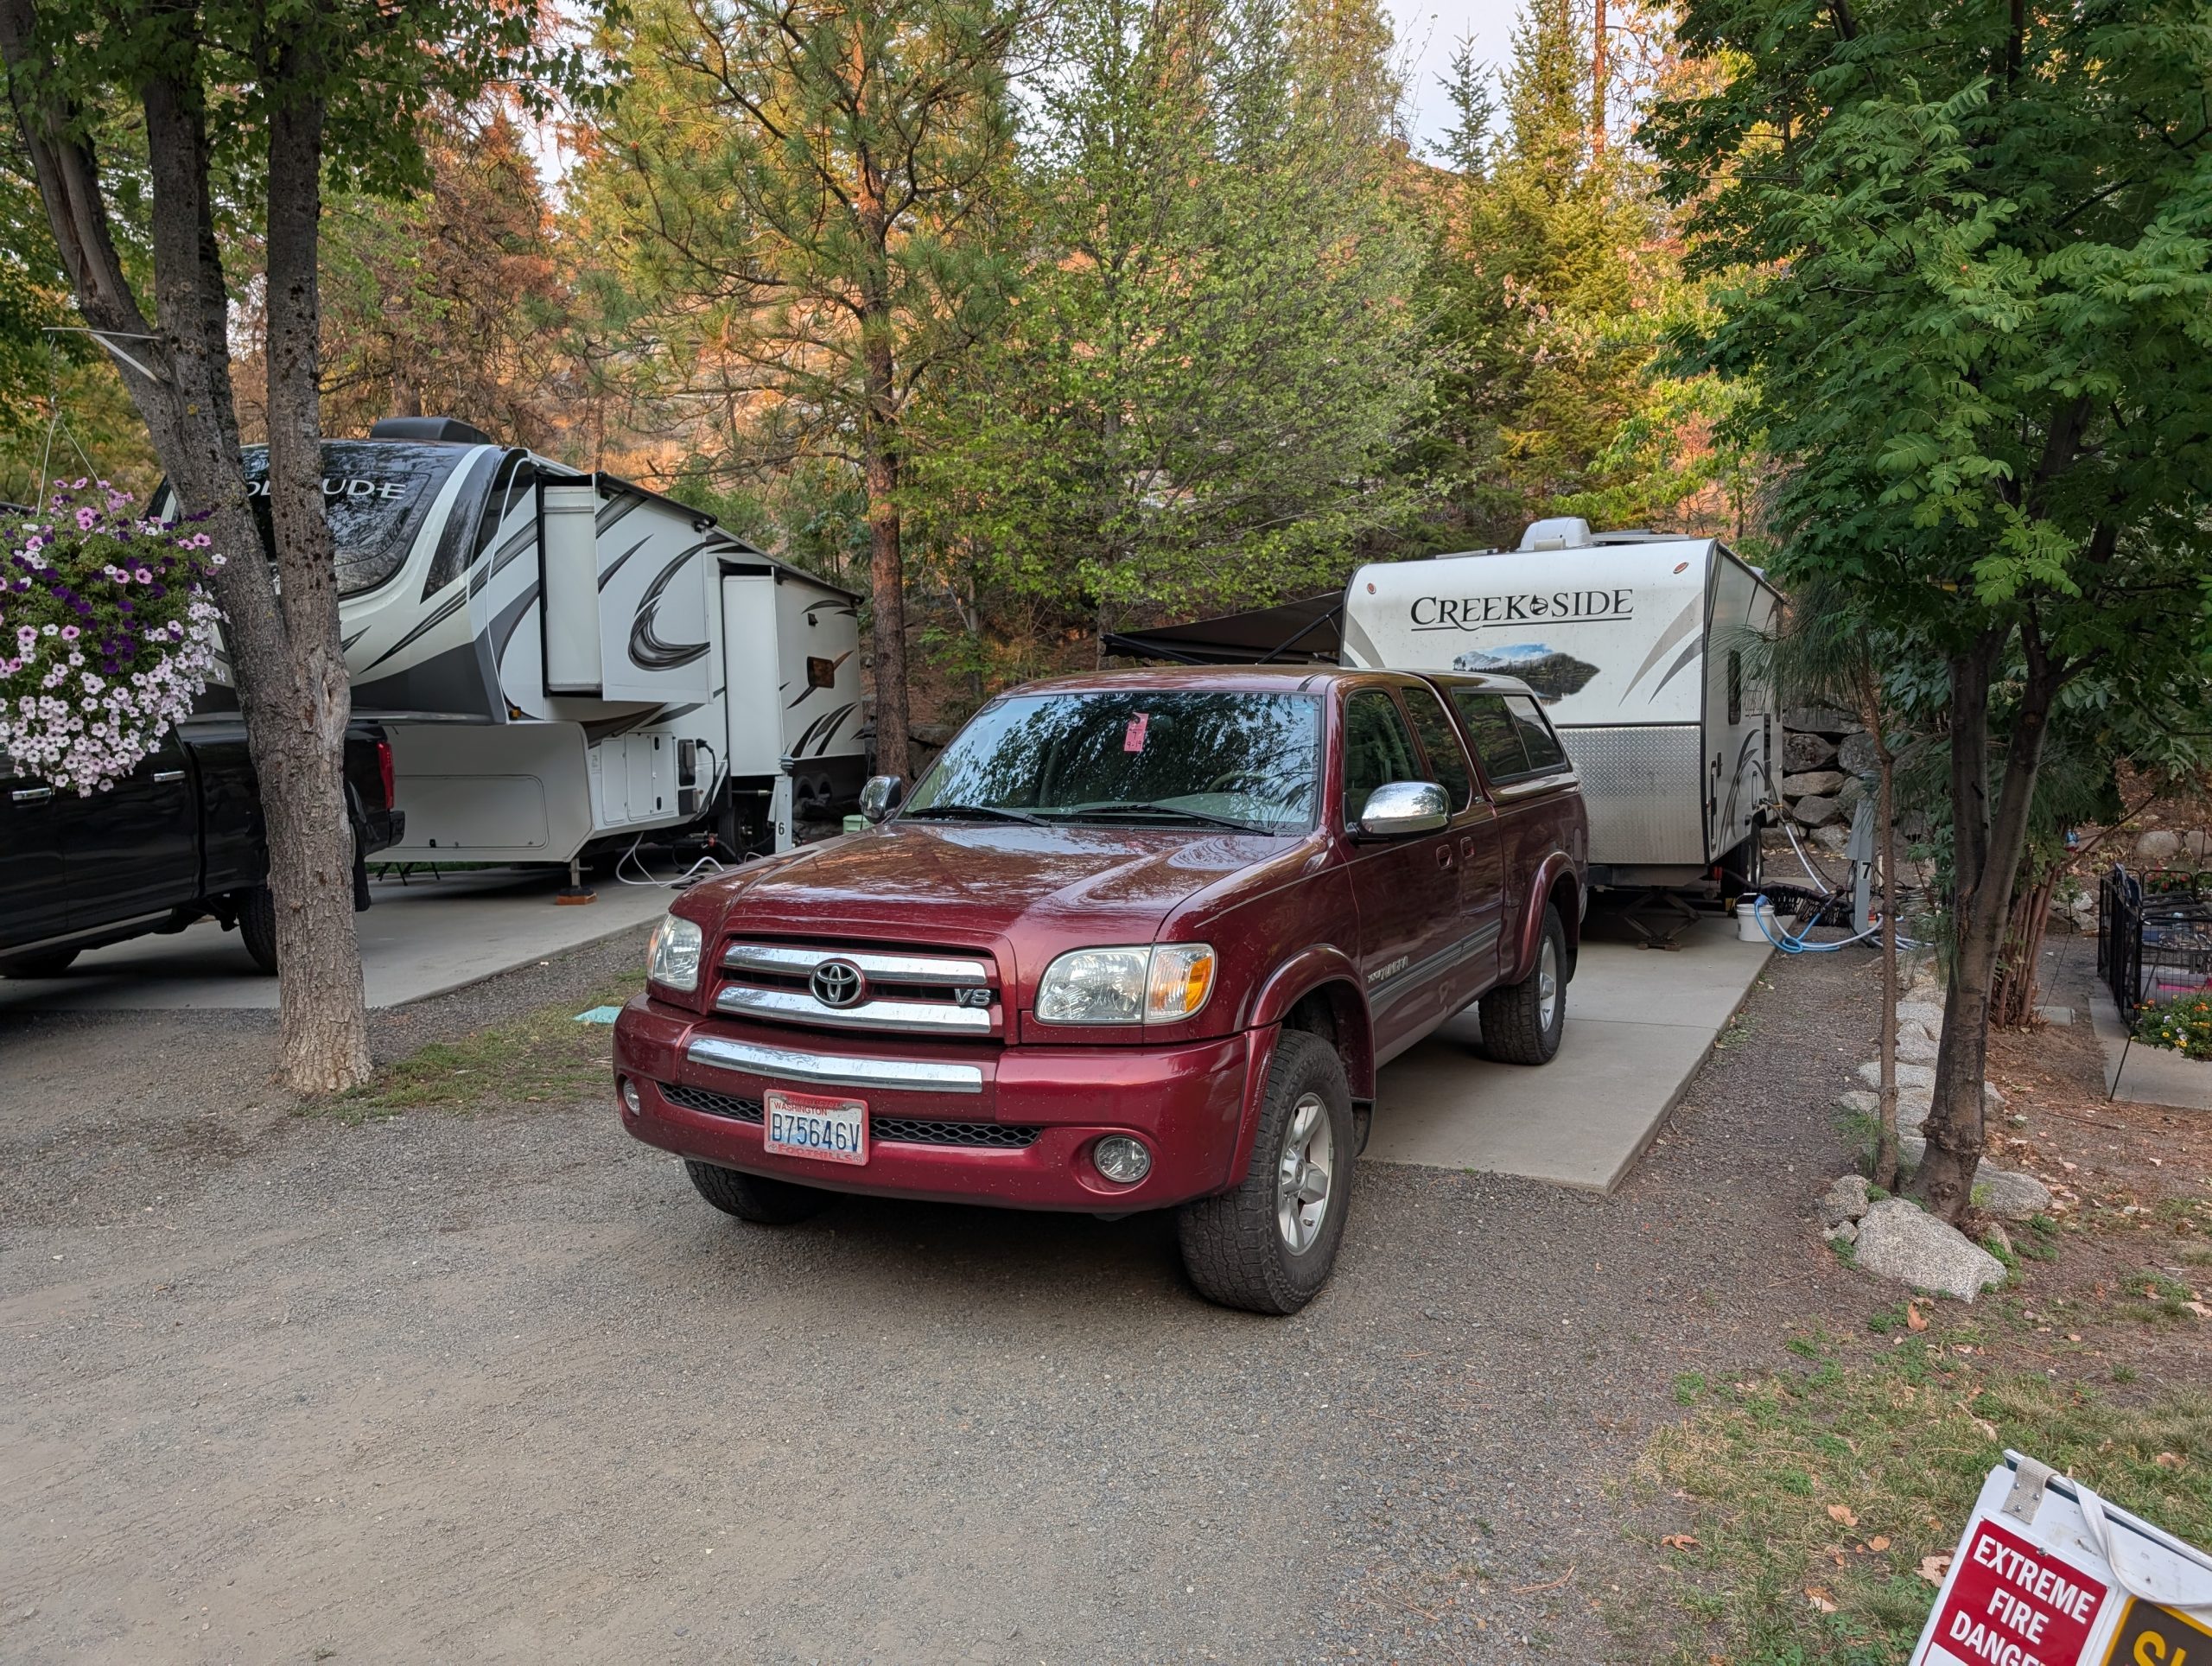
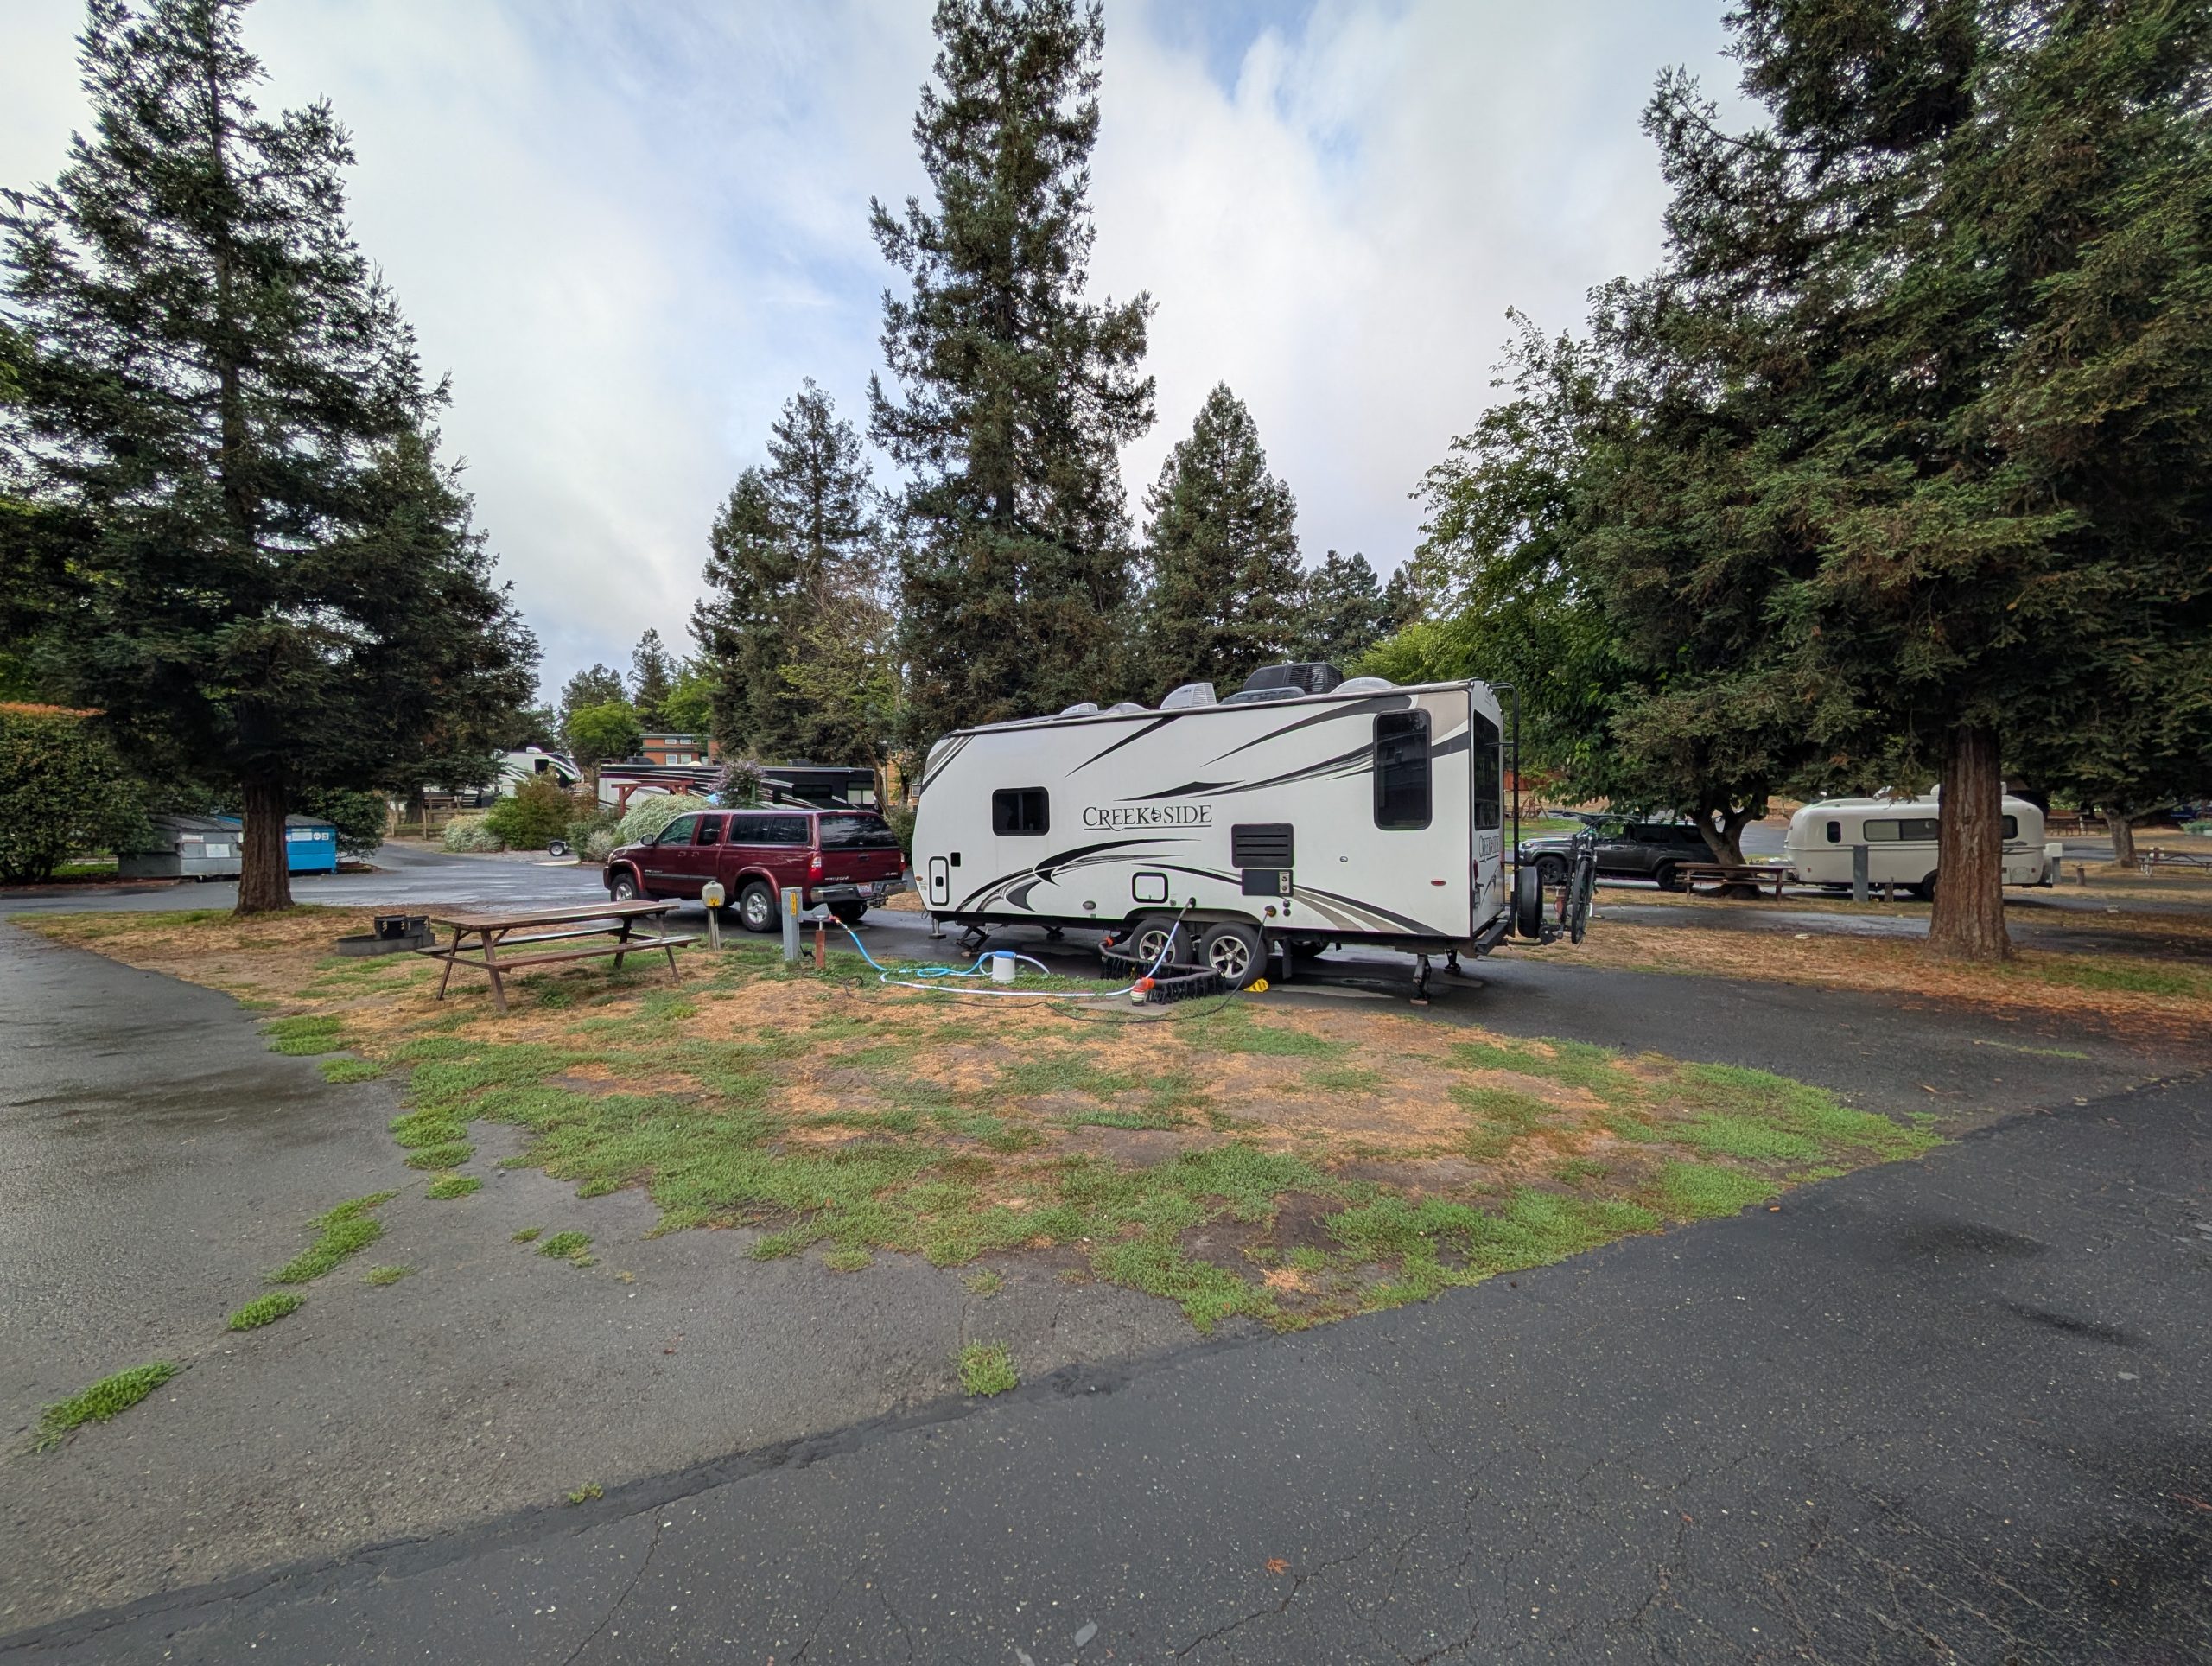
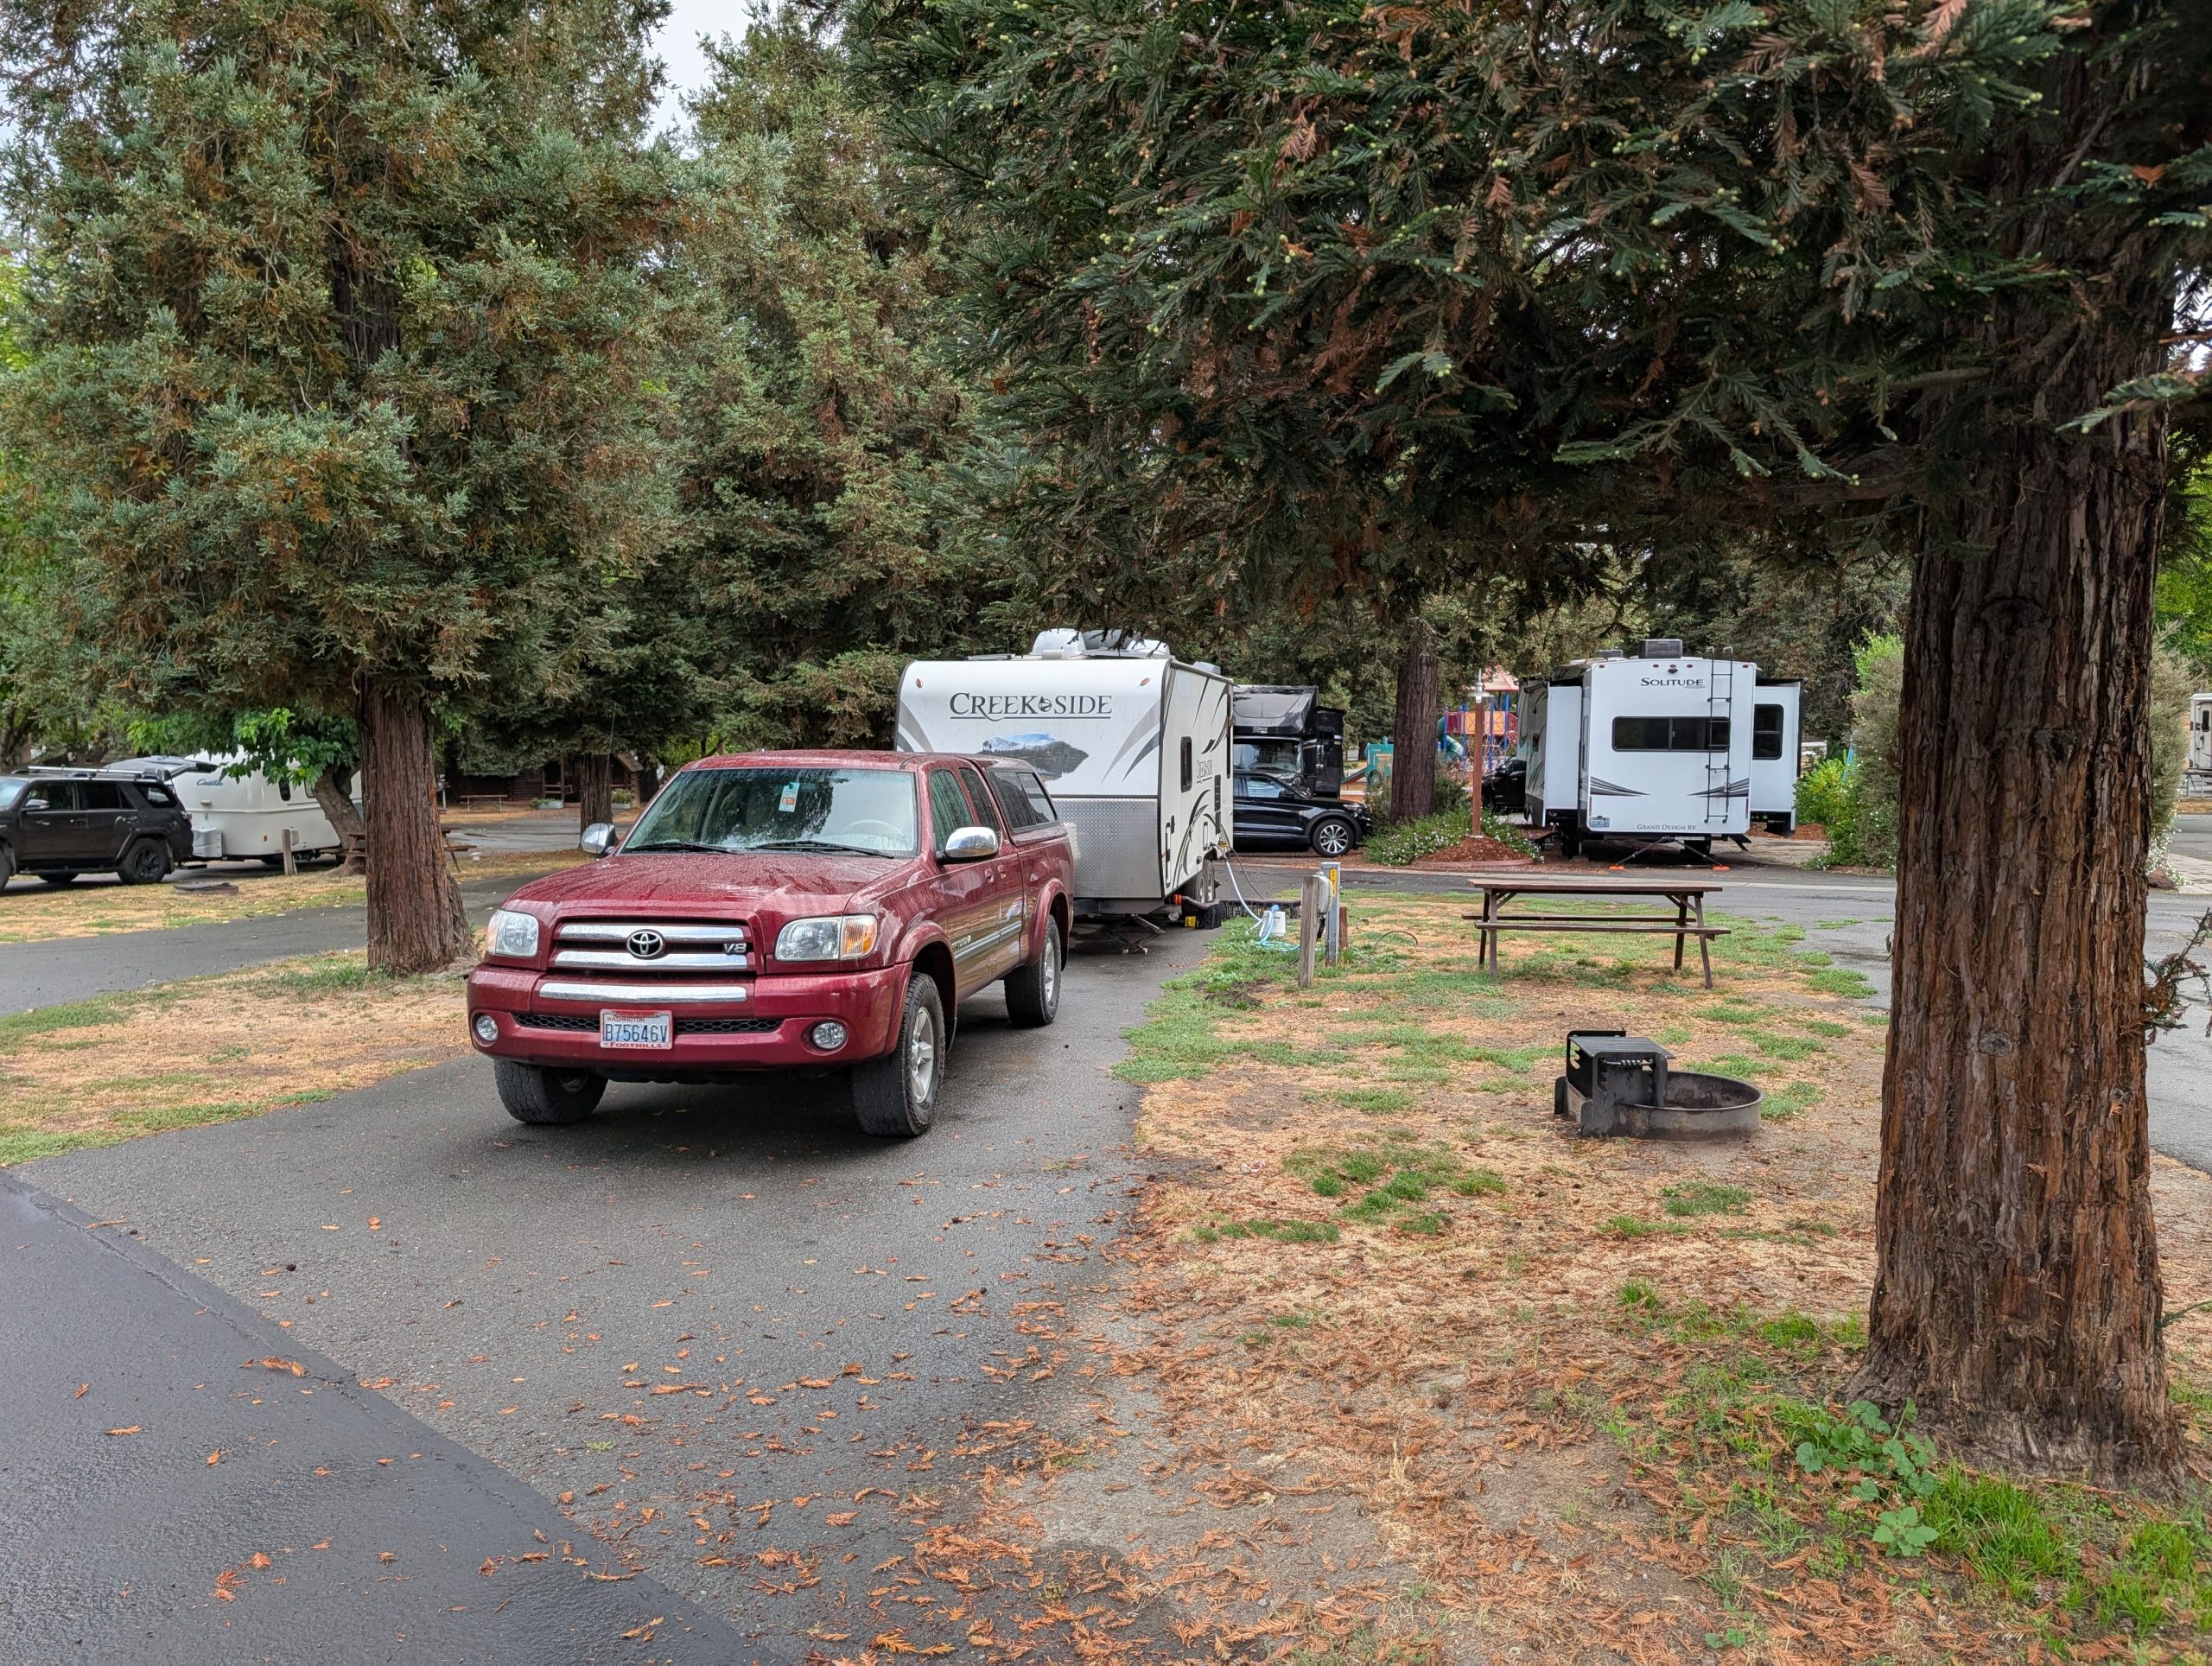
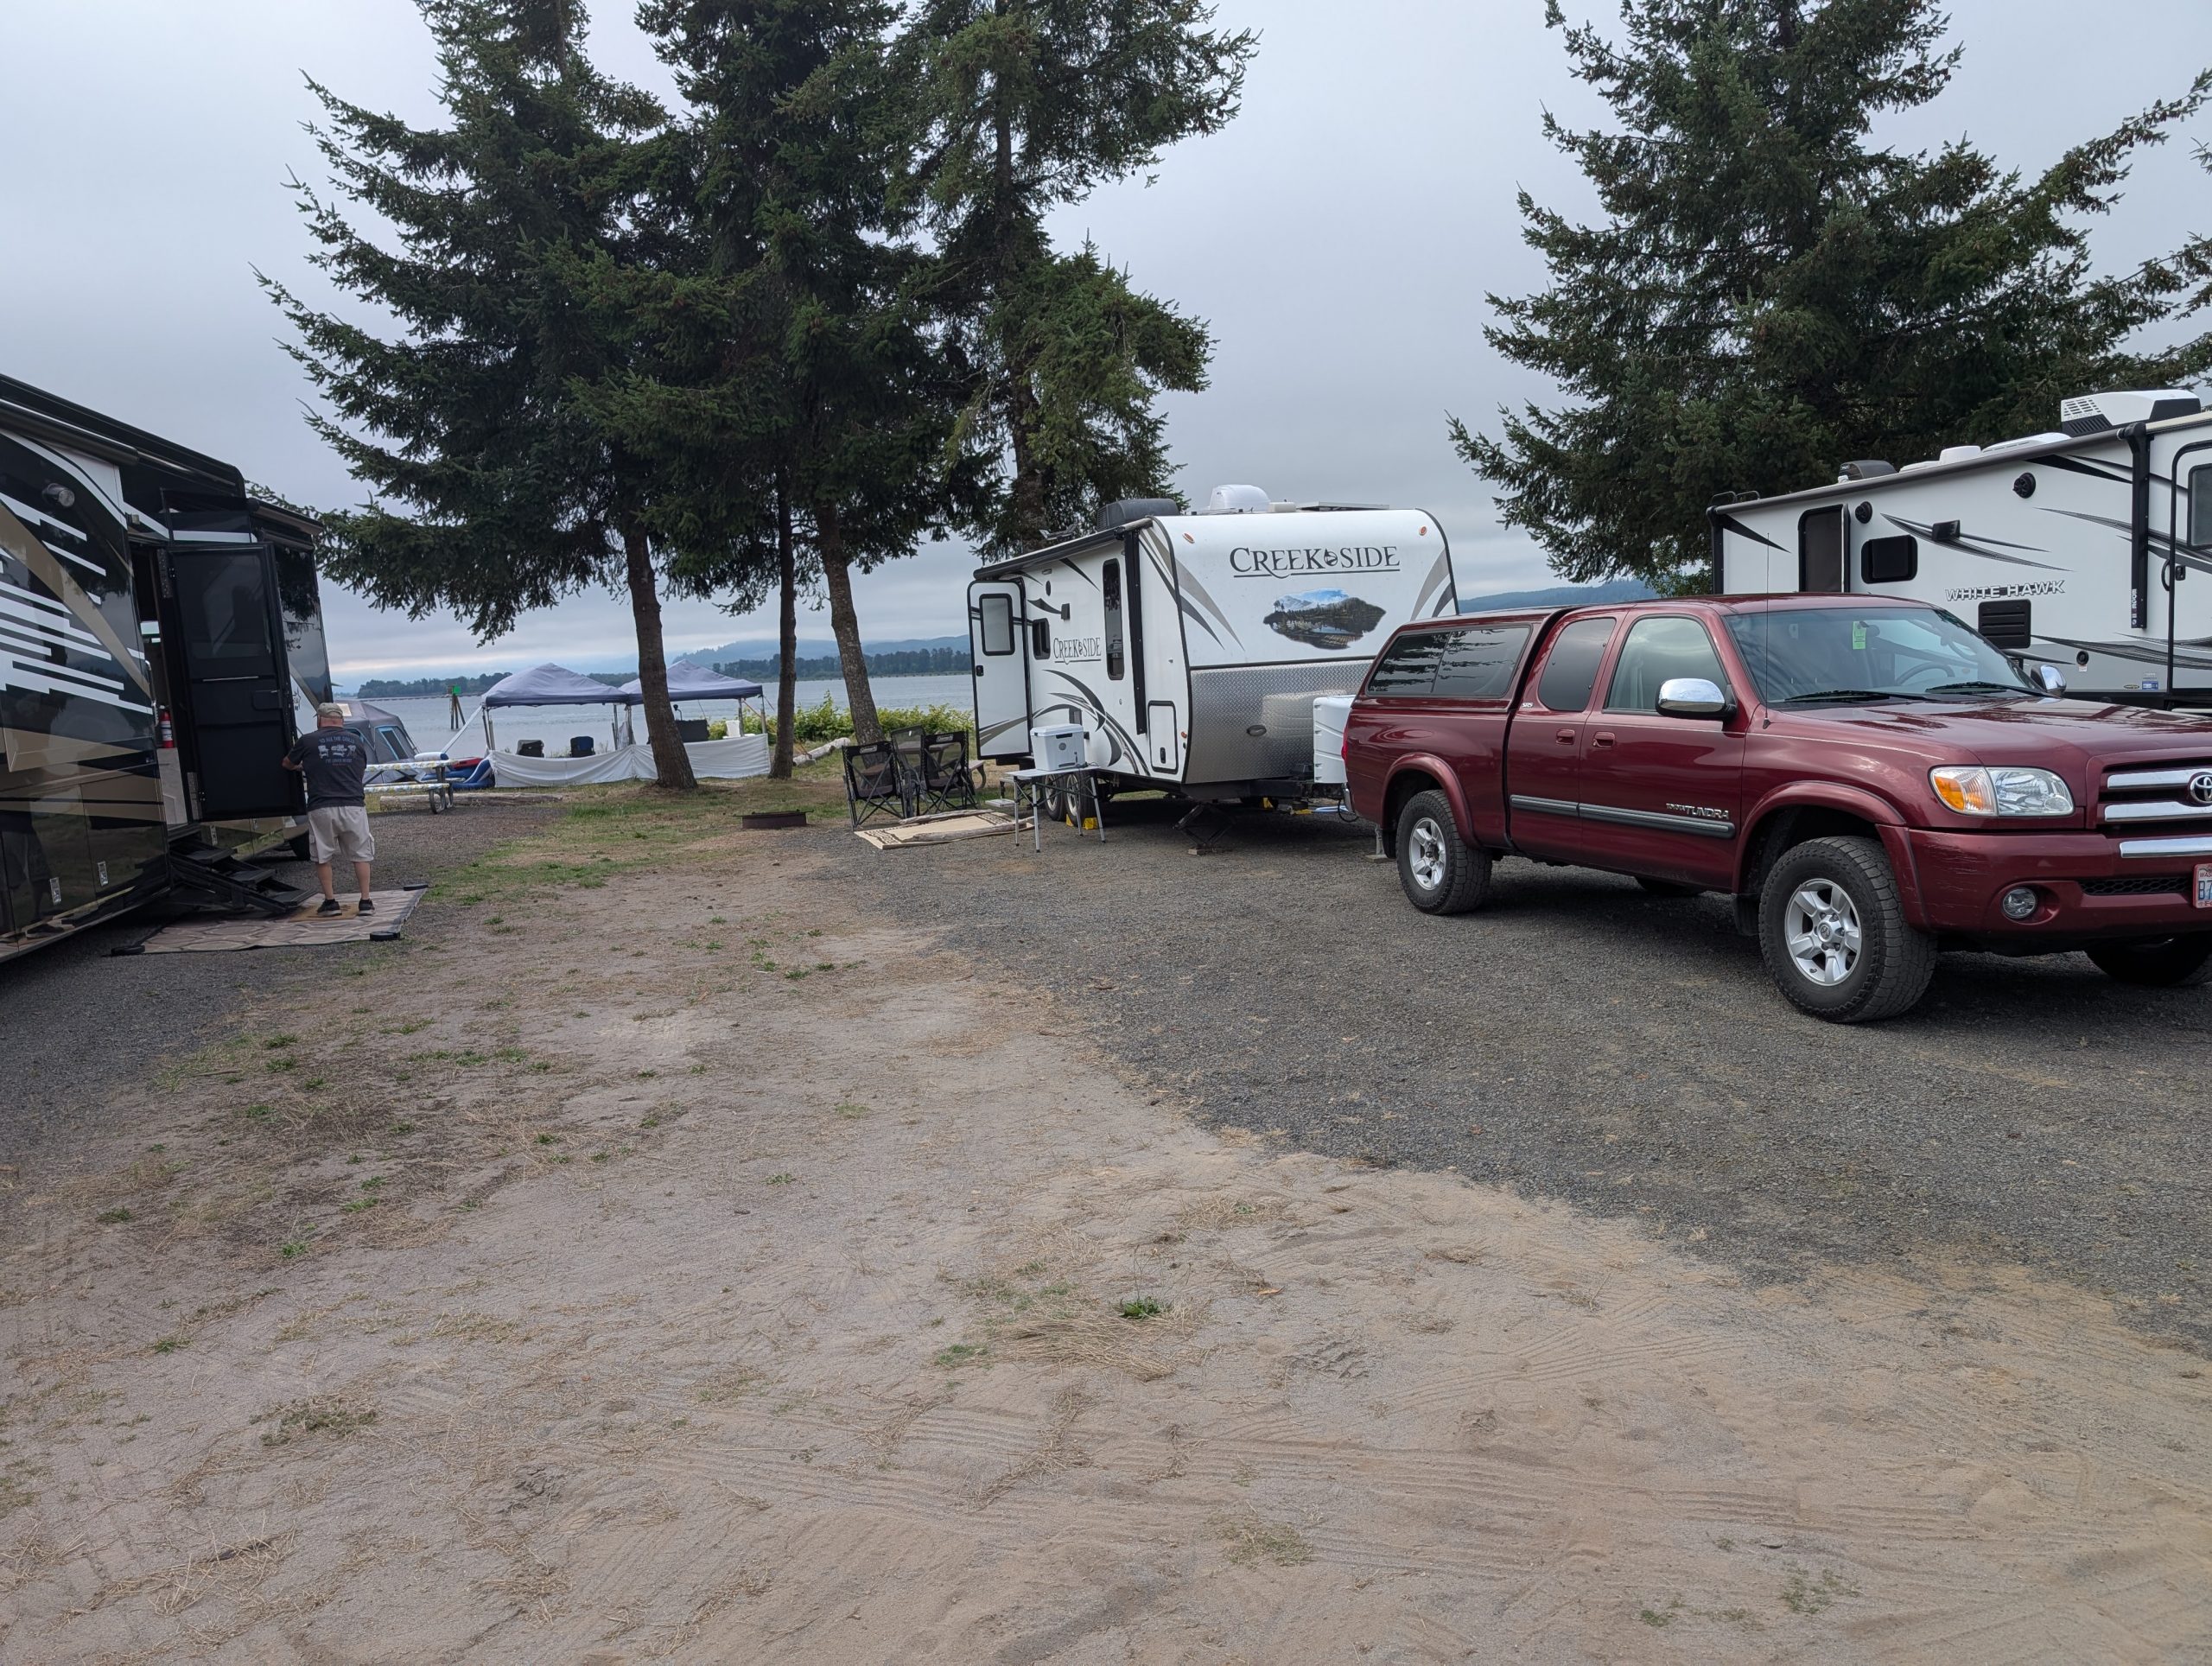
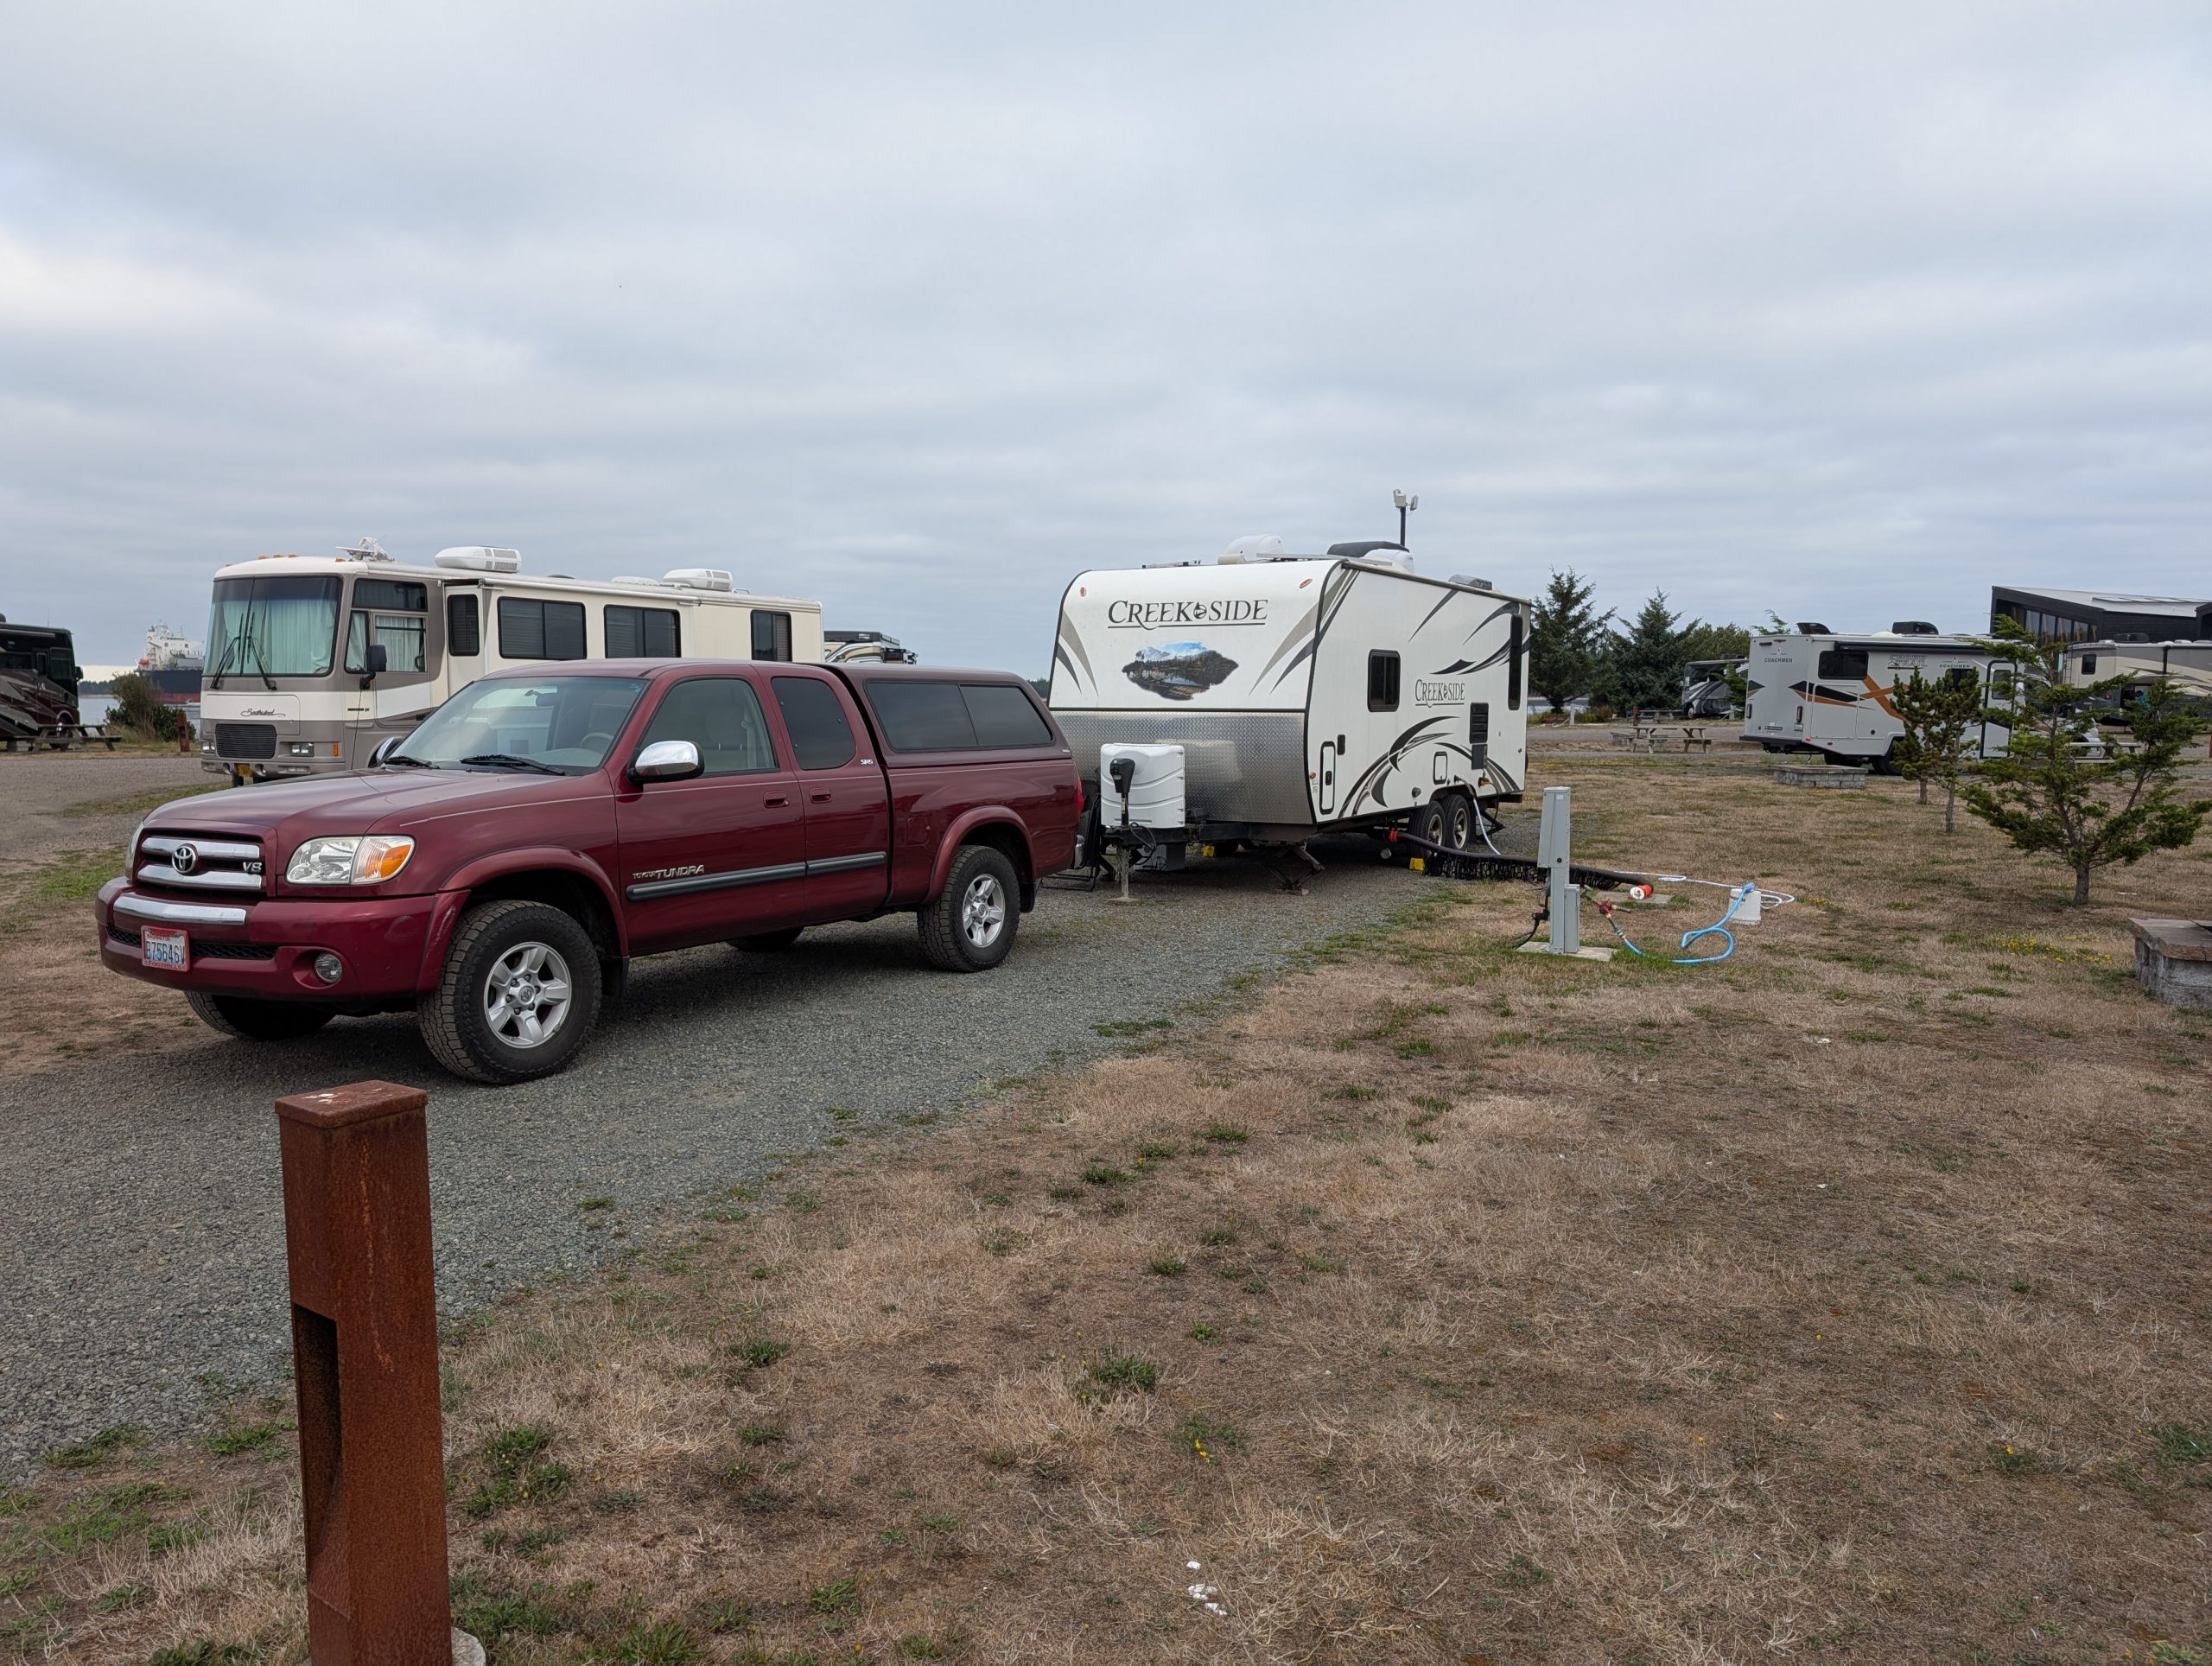
Tim and Phyliss’s trailer on the left. Jim and Margo’s rig on our right. Fabulous neighbors, BTW.
After a leisurely breakfast and knowing that it wouldn’t be an excruciatingly long day on the road, we left Harris Beach SP at about 11:15 am. Our next stop was Thomas H. Kuchel visitor center just south of Orick, California for lunch and bathroom break.
After lunch I wanted to take over the wheel, so with Andy navigating us through semi-remembered territory, we arrived at our campground at about 3:45 pm. I must say, even though much of our travel today was through marine onshore flow and therefore if there was water out there, it was hidden from view, what we were able to see was amazing. And driving through redwood habitat is an absolute treat.
And since you were wondering if redwood trees and sequoias are one and the same, the answer is no. They are, however, in the same family of trees and considered cousins. The primary difference is that coast redwoods are the world’s tallest trees, while giant sequoias are the world’s largest trees by volume. Coast redwoods, typically found in fog-prone coastal areas, have tall, narrow trunks with scalelike foliage and grow faster, whereas giant sequoias grow at higher elevations in the Sierra Nevada, have broader, more massive trunks, and possess egg-sized cones and juniper-like needles.
Giant sequoias are older than redwoods. The oldest known giant sequoia is around 3,200 years old, while the oldest known coastal redwood has been around for around 2,500 years.
After setting up camp, I did the prep work for tonight’s meal. Swedish meatballs served over mashed potatoes. Phyllis contributed salad and Jim and Margo, sliced tomatoes and cucumber. A very nice dinner enjoyed by all.
After dinner we sat around and chatted until we were ready to head in the trailer for me to write up today’s adventure, and Mr. C. to read.
Eventually we both decided we had enjoyed enough fun for one day and slid under our covers and were asleep almost immediately. Another fun day in our trailer.
Thursday, September 4, 2025 – Giant Redwood RV Park, Meyers Flat, California
Today we broke our fast with Eggs Benedict provided by J&M. Wow, talk about roughing it! Not! Fantastic!
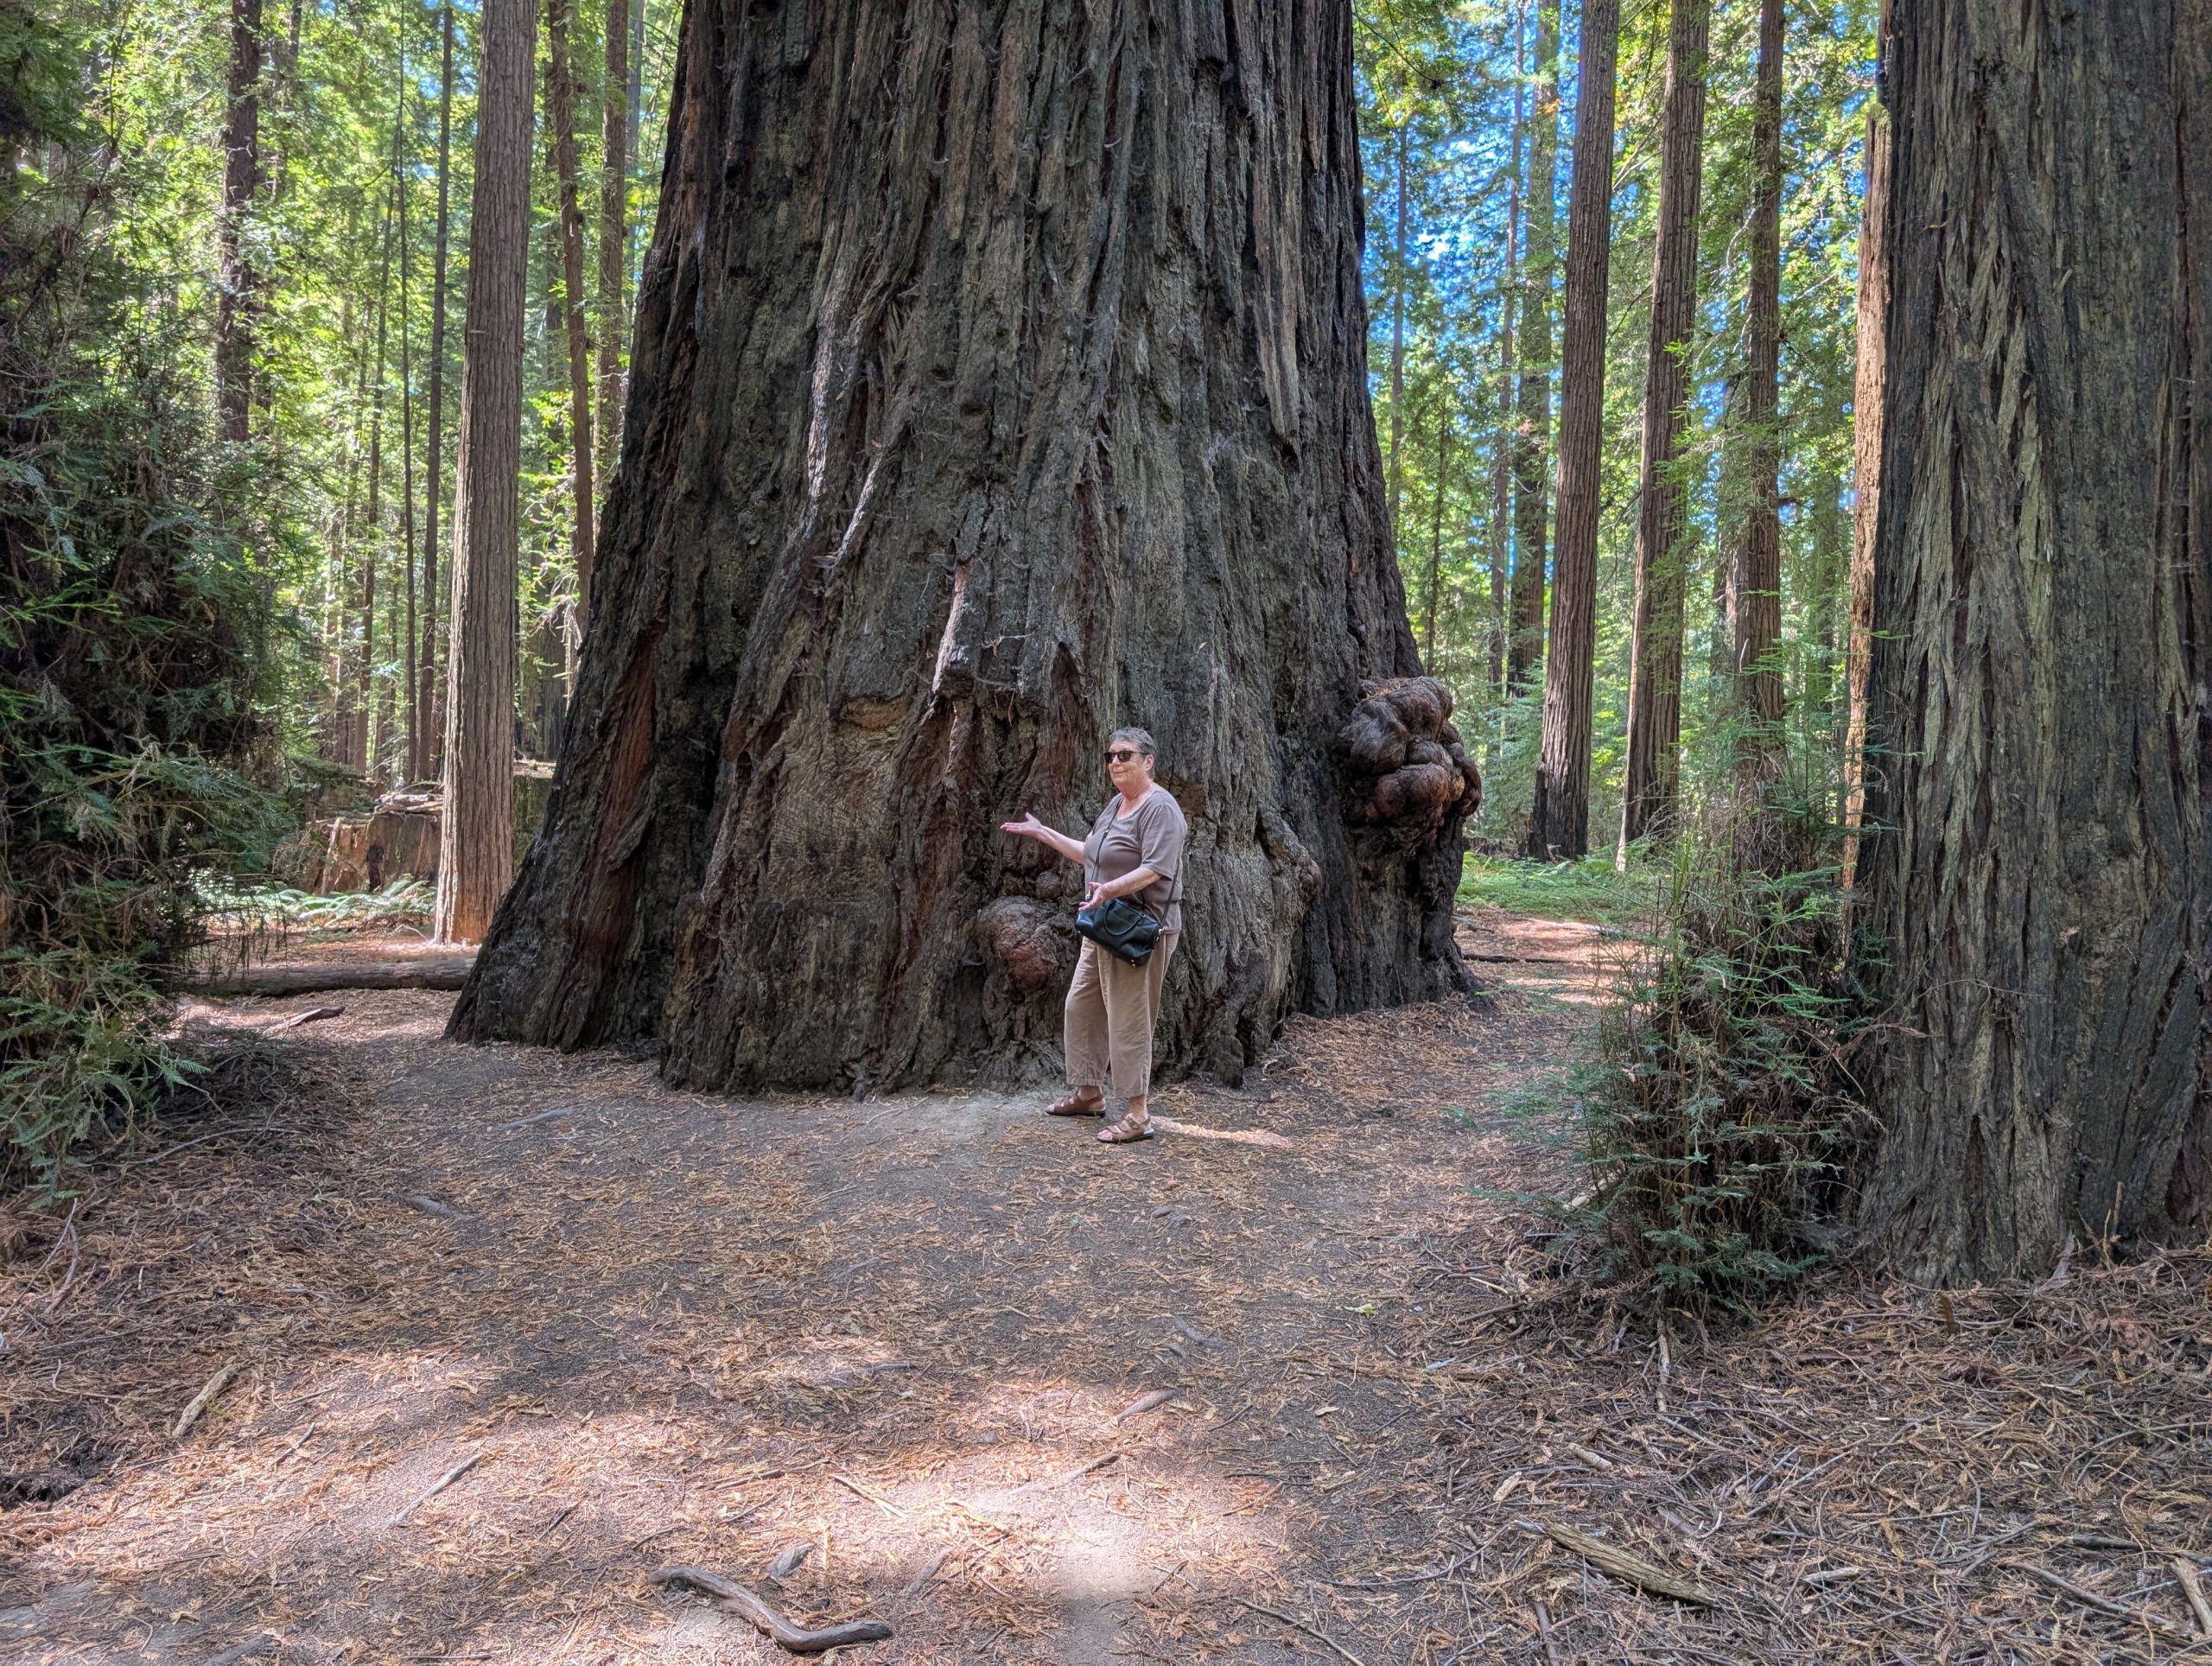
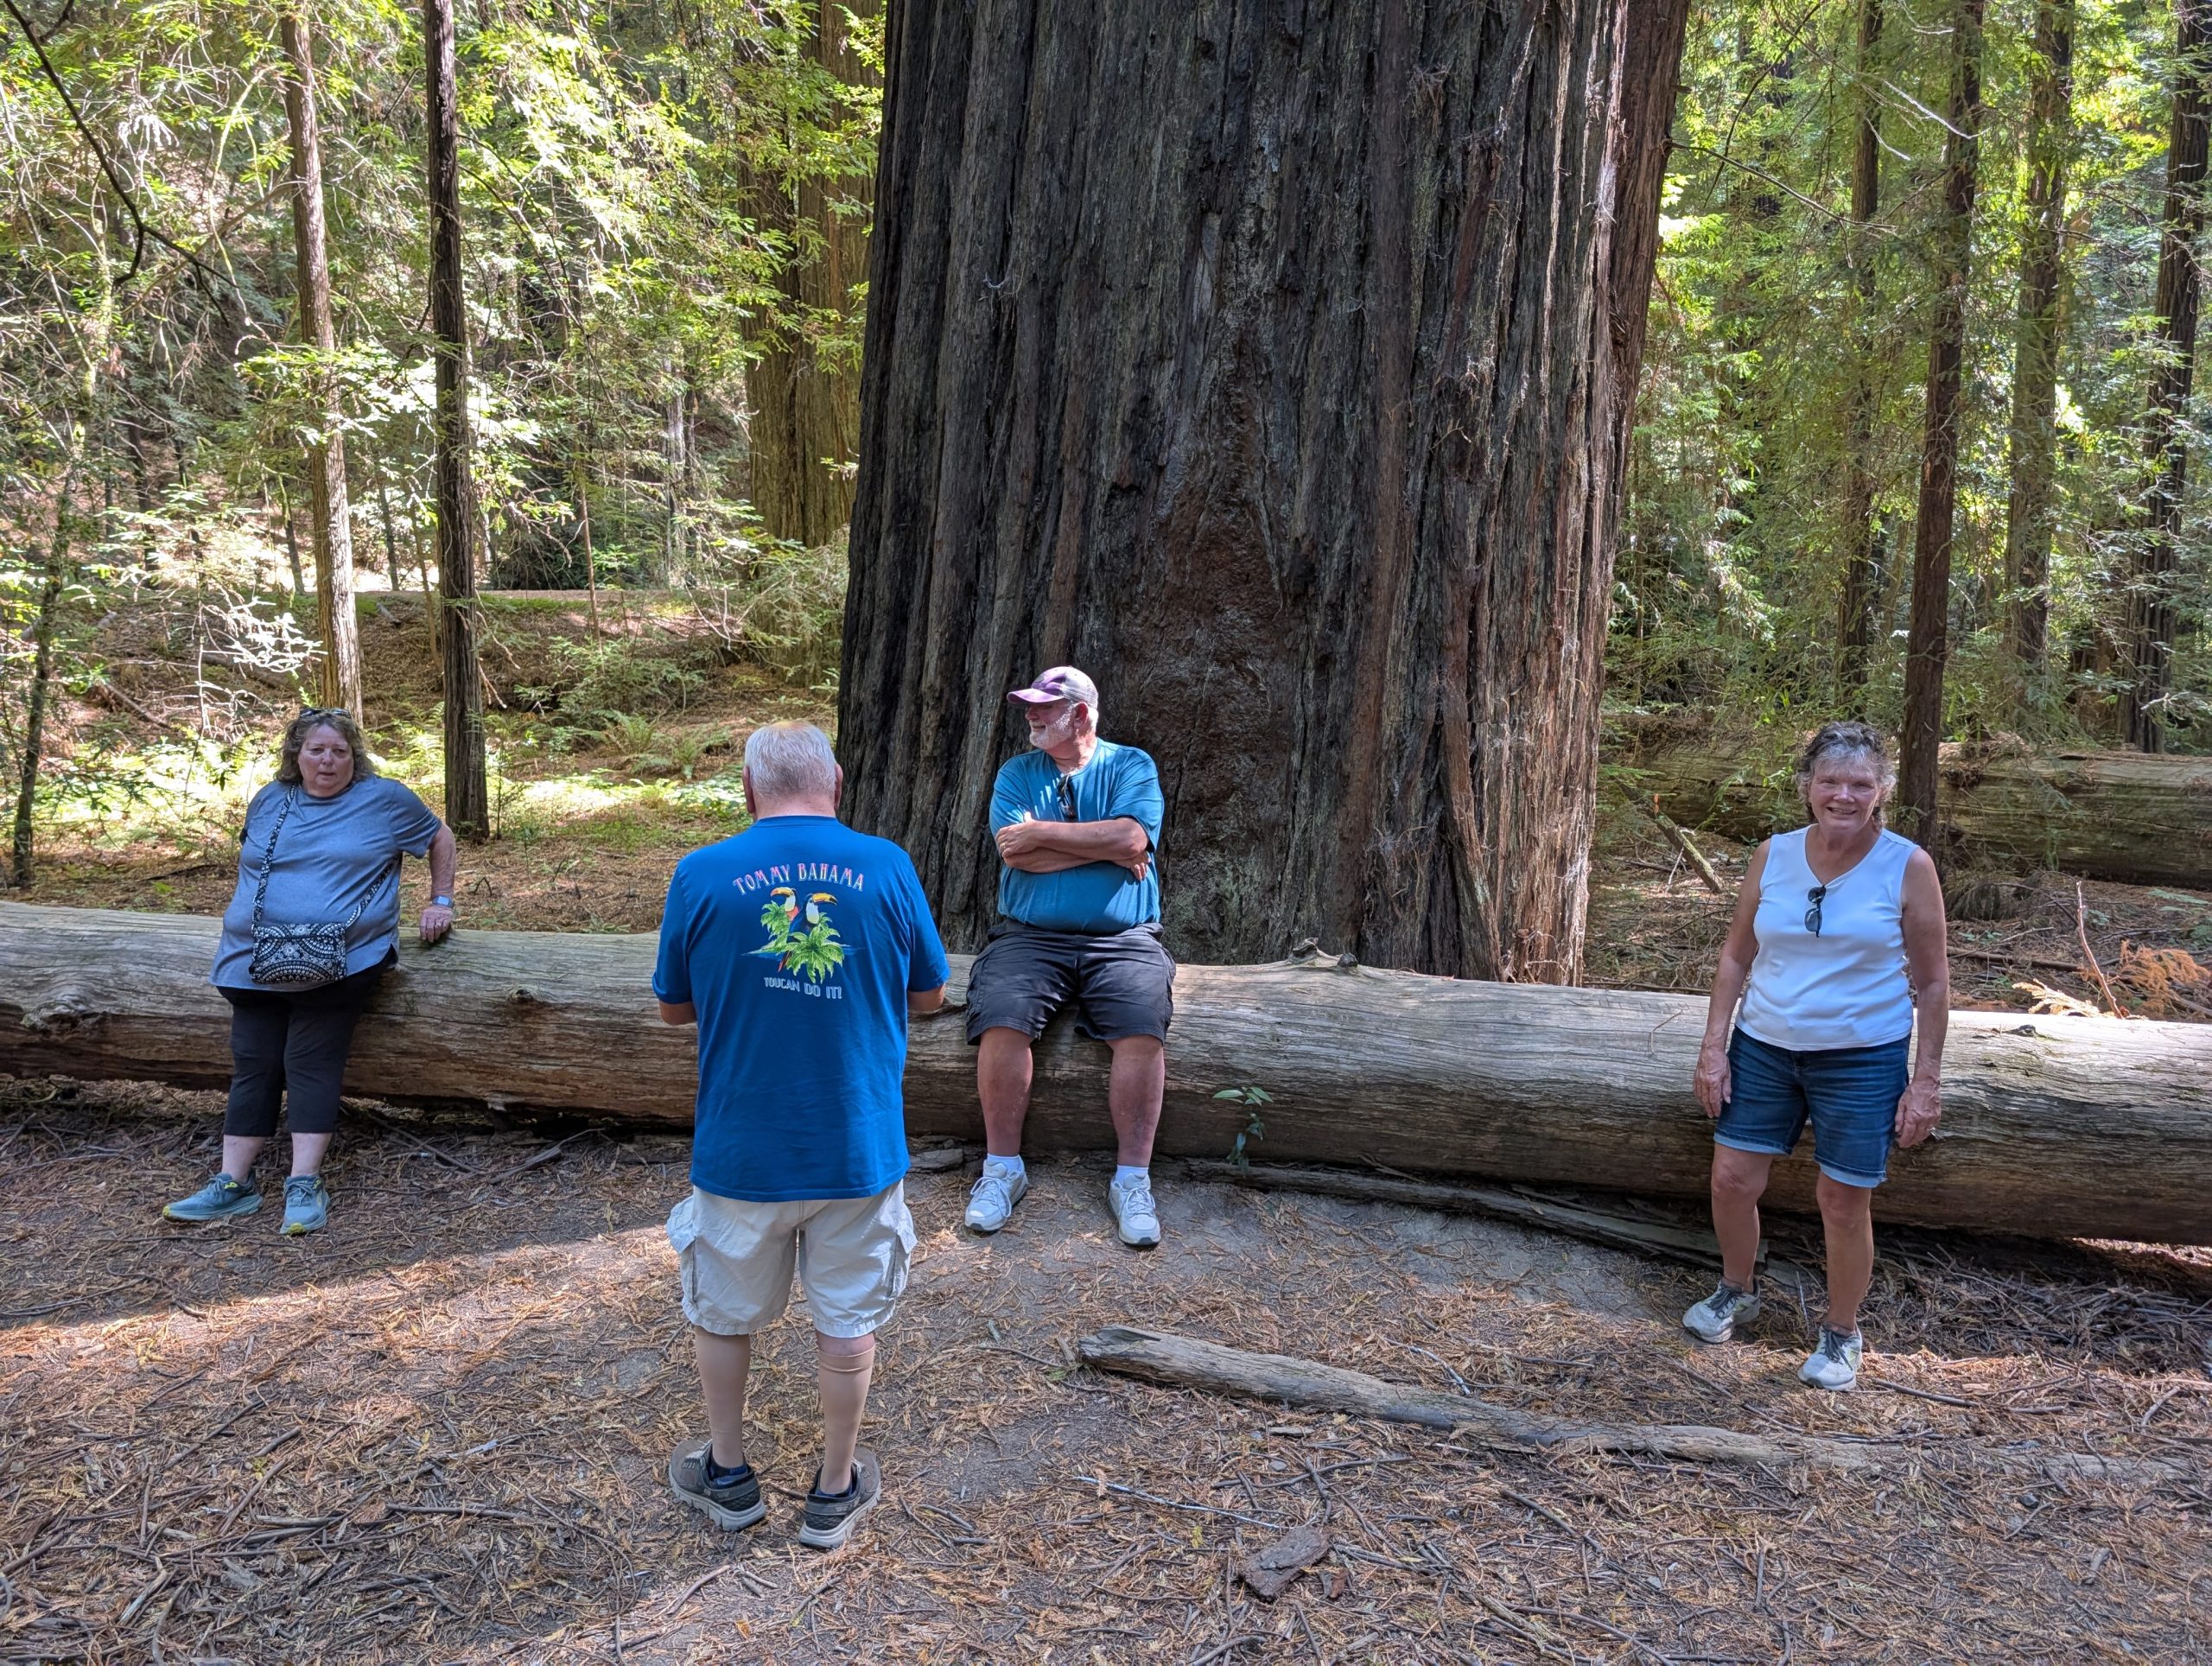
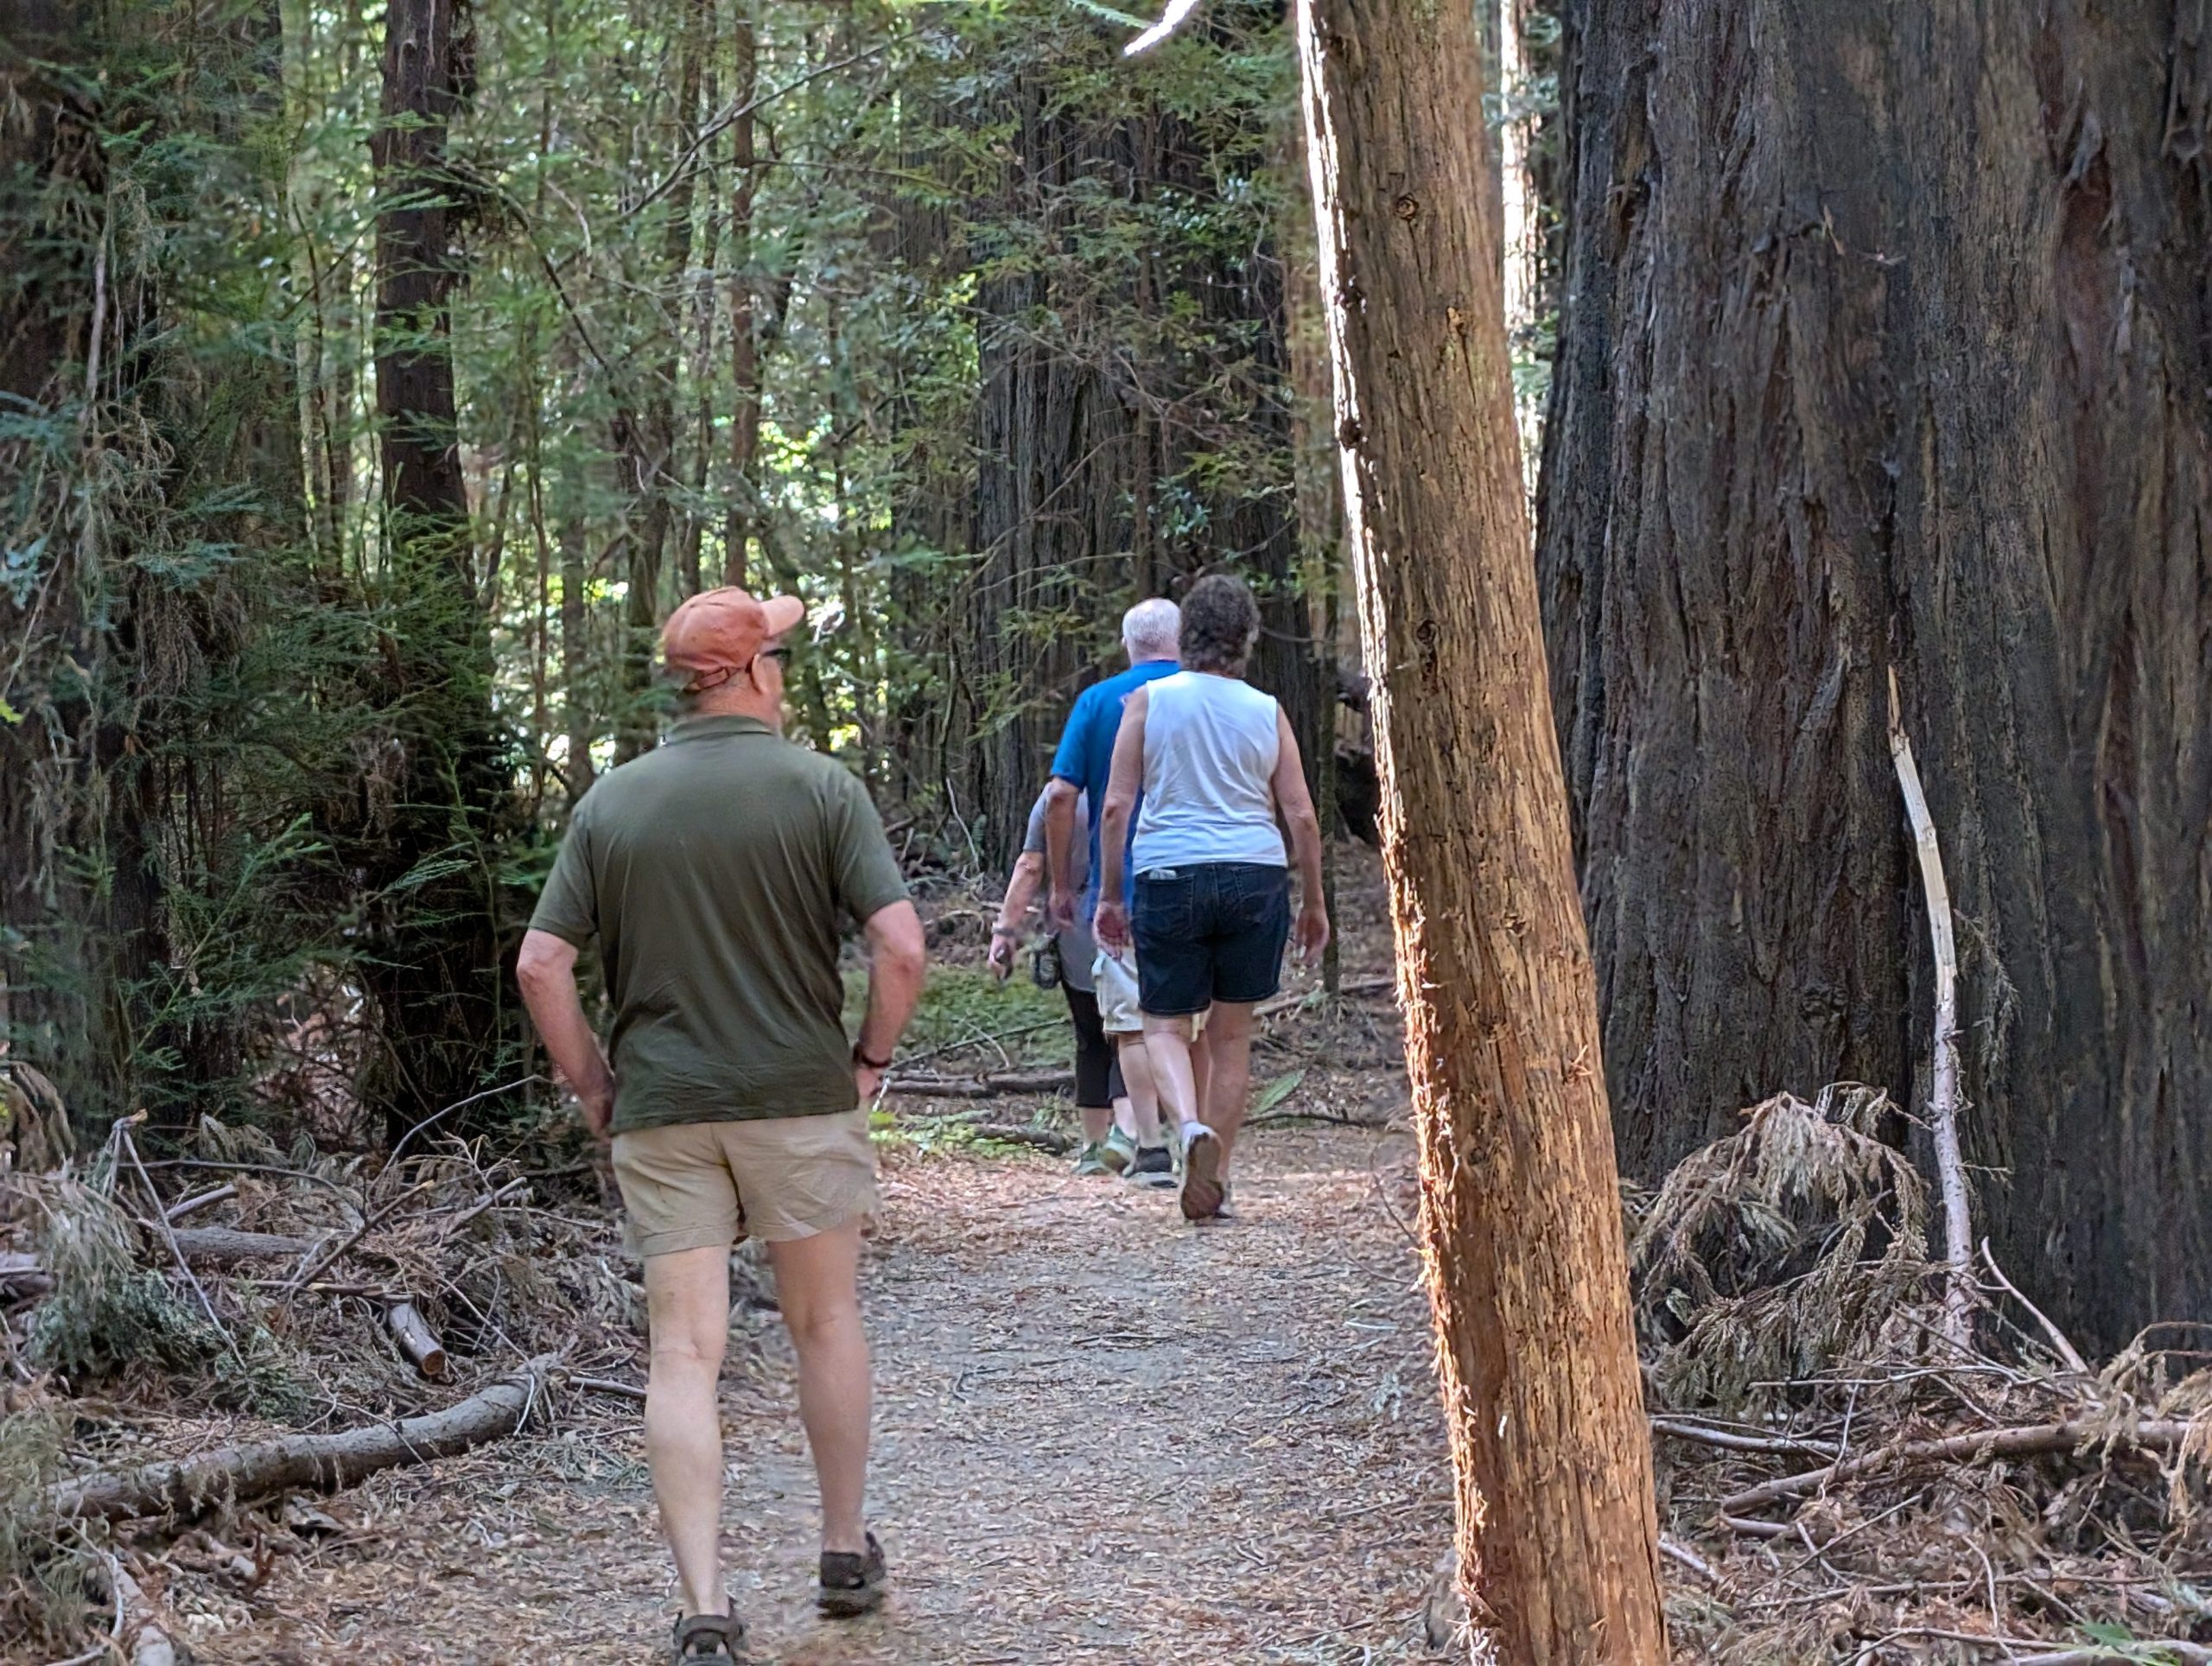
After letting our breakfast settle a bit, we decided to take a drive through the Avenue of Giants. Along the way we stopped and took a short 7/10 of a mile walk through these amazing behemoths in Miranda, Humboldt Redwoods State Park. And as luck would have it, today was sunny and warm. So, no jackets were required. But not too warm either.
That is some burl! Redwood trees develop burls as a natural stress response to injuries or infections, serving as a protective, wound-healing mechanism and a storehouse for unsprouted bud tissue. These knobby growths act like a protective scar, which contains the tree’s genetic code and can sprout to form new, cloned trees if the parent tree is damaged or falls.
Next stop, gas and a brief bit of grocery shopping at a remarkably nice (for being in the middle of nowhere) (but expensive) grocery store in Miranda. Since we all were a bit warm when we got back to camp, beer was a requirement upon arrival.
After a very pleasant late afternoon of sitting outside reading (all 6 of us), it was time for dinner. T&P provided Turkey Tetrazzini, while our offering was green salad with blue cheese dressing and garlic bread.
Then to top off the meal, T&P offered us a special treat. Vin Santo and biscotti, which is a pairing made in heaven. In case you are unfamiliar with Vin Santo, it is an Italian dessert wine, predominantly from Tuscany. It is made from grapes that are dried before pressing to concentrate their sugars, then aged for several years in small wooden barrels. Vin Santo is known for its amber color and complex flavors of honey, dried fruit, and nuts. Typically, a sweet wine, it can also be made in dry styles and is traditionally served with biscotti, though it pairs well with various desserts and cheeses.
And for the uninitiated, biscotti is a type of twice-baked Italian cookie, named for the Latin word “bis-coctus” meaning “twice baked”. This distinctive double-baking process gives biscotti its signature dry, hard, and crunchy texture, making it perfect for dipping in coffee, tea, or sweet wine. While traditionally made with flour, eggs, almonds, and sugar, modern variations include ingredients like chocolate chips, dried fruits, and citrus zest to create a variety of flavors.
After thoroughly enjoying the Vin Santo and biscotti, we continued to sit outside until, believe it or not, it cooled off enough to send us into our respective rigs to get warm.
Then we read for a while and finally – lights out. Another wonderful day in sunny California.
Friday, September 5, 2025 – Giant Redwood RV Park, Meyers Flat, California
After a great night’s sleep, we both woke eager to see what today would bring. But first, time to do laundry. So, with clothes happily being bathed in soapy water, I fixed breakfast.
After the breakfast dishes were done, we retrieved our clothes from the dryer and waited to find out when everyone was ready to go exploring again.
At about 11:00 am we headed north on the Avenue of Giants. Our aim today was the Humboldt Redwoods State Park Visitor’s Center. And what a nice center it turned out to be. We were all very impressed and glad that Phyllis had suggested we make this a priority.
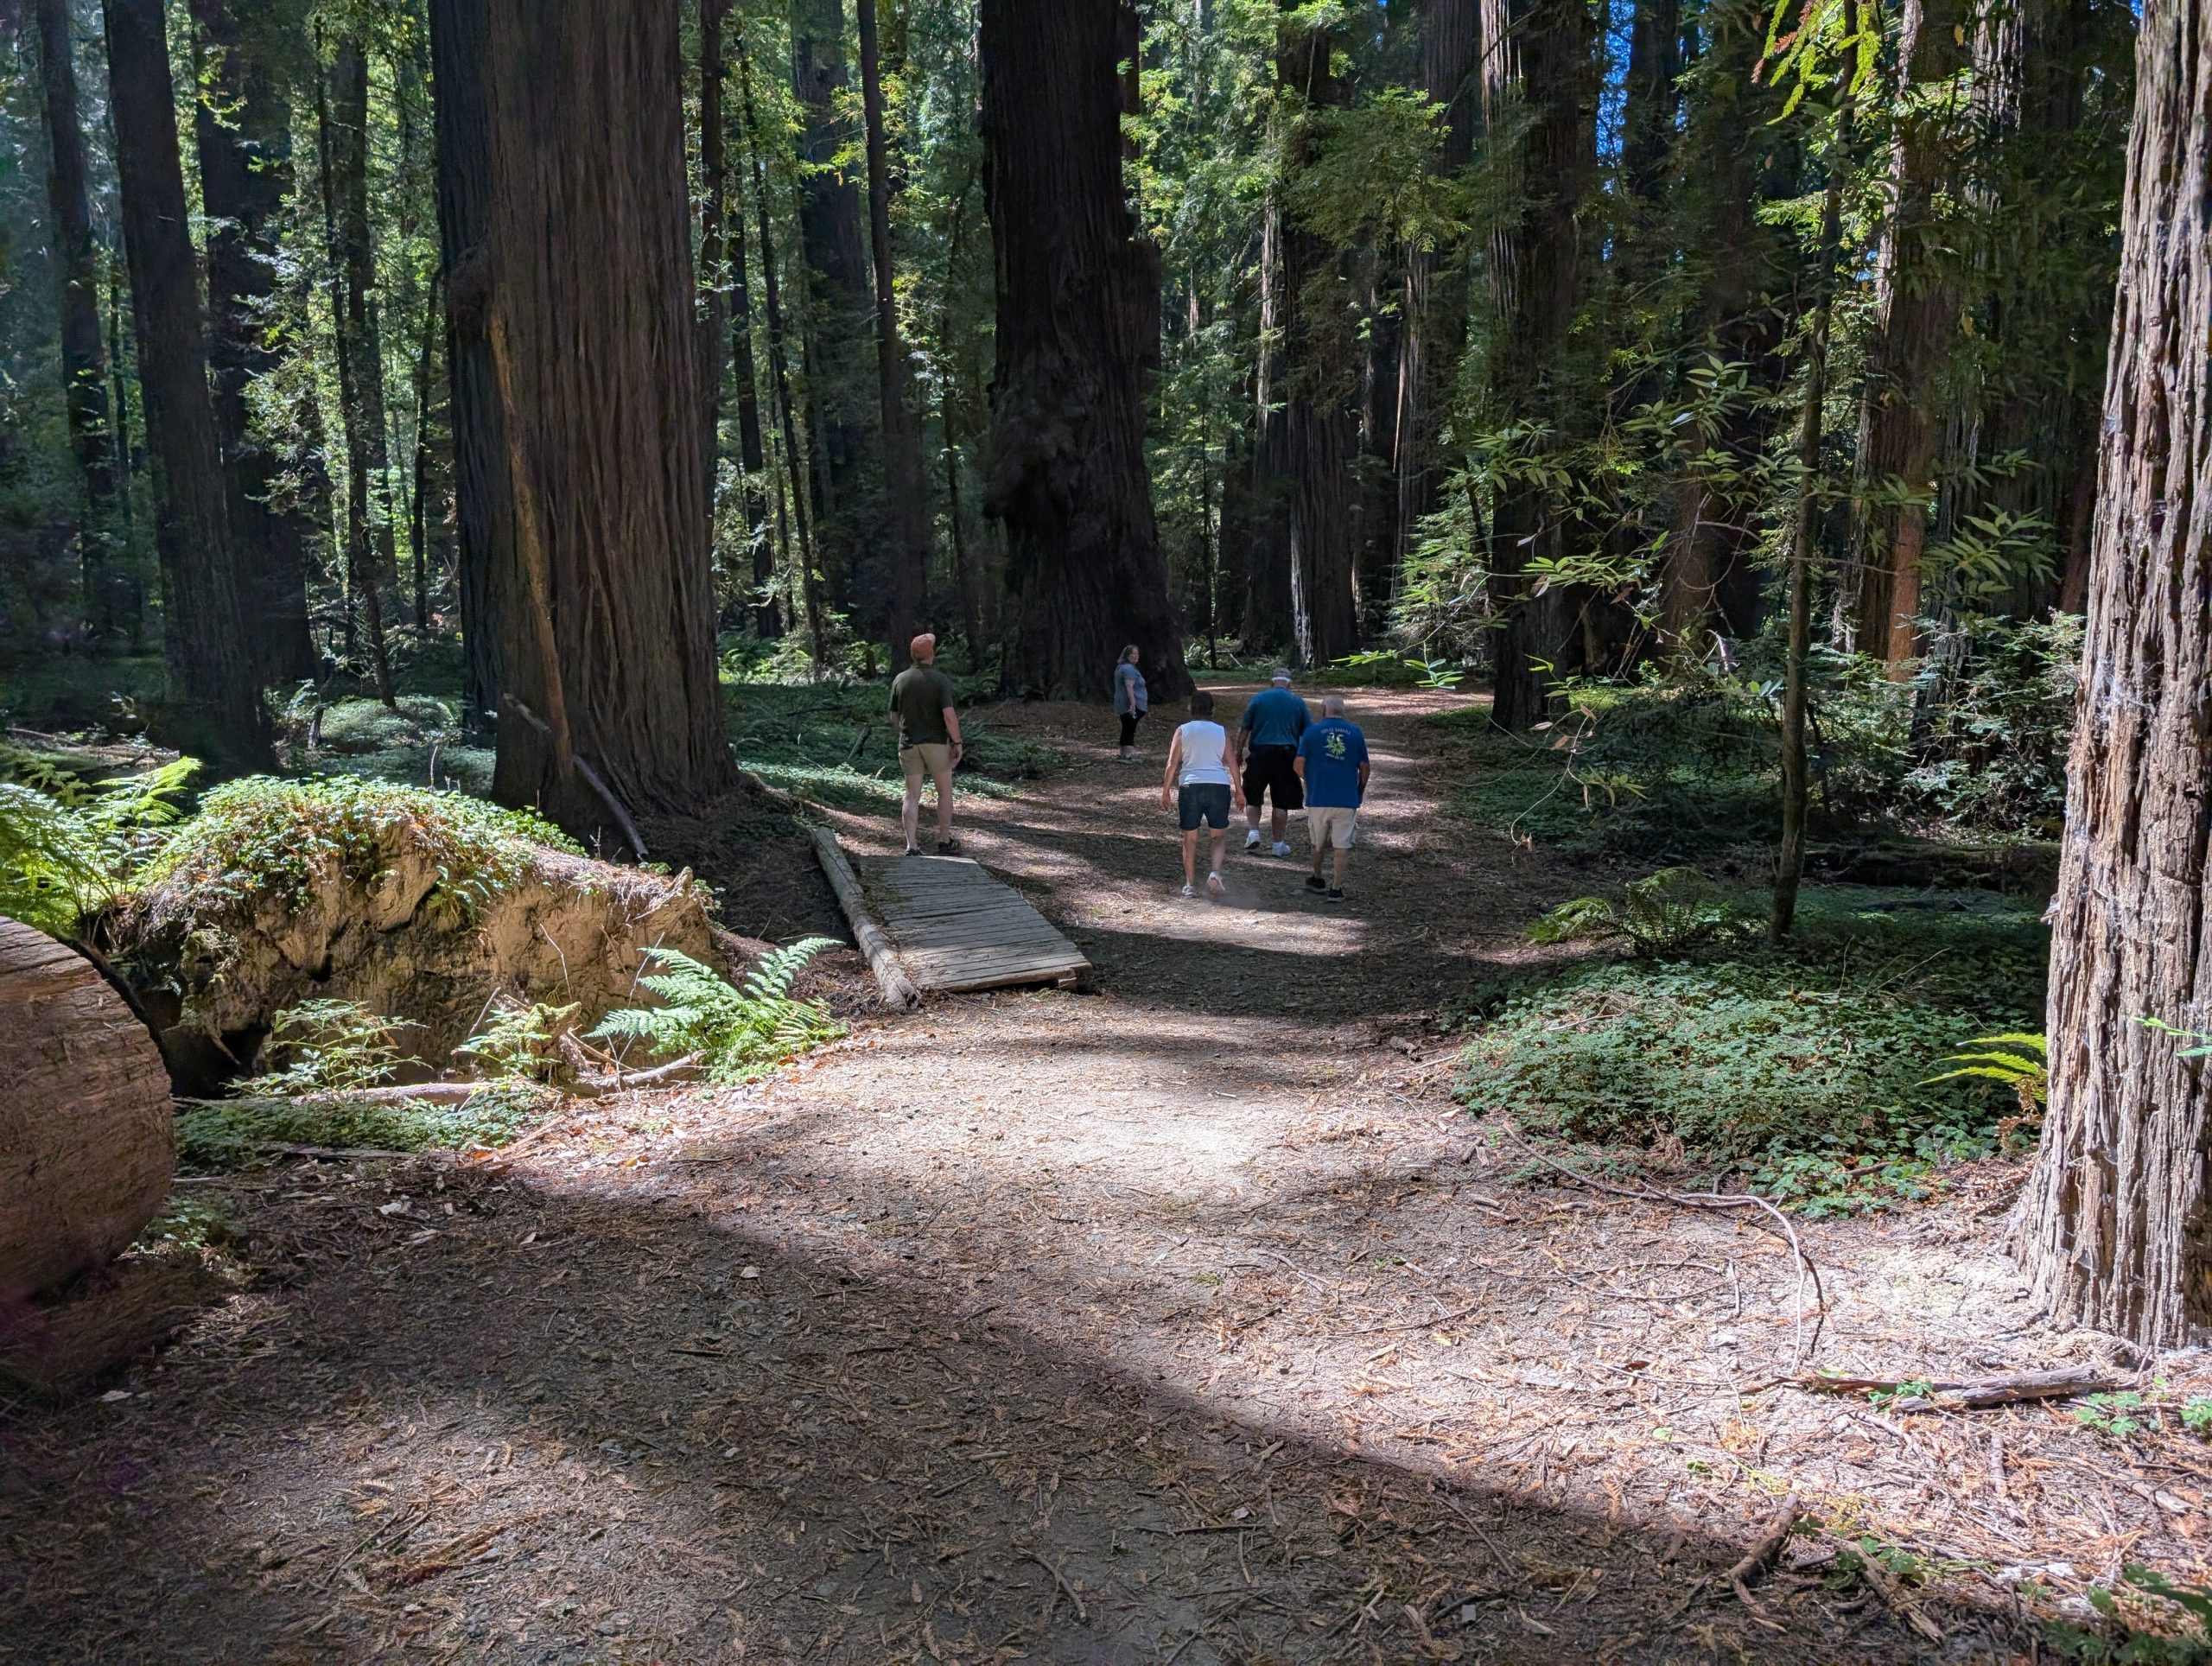
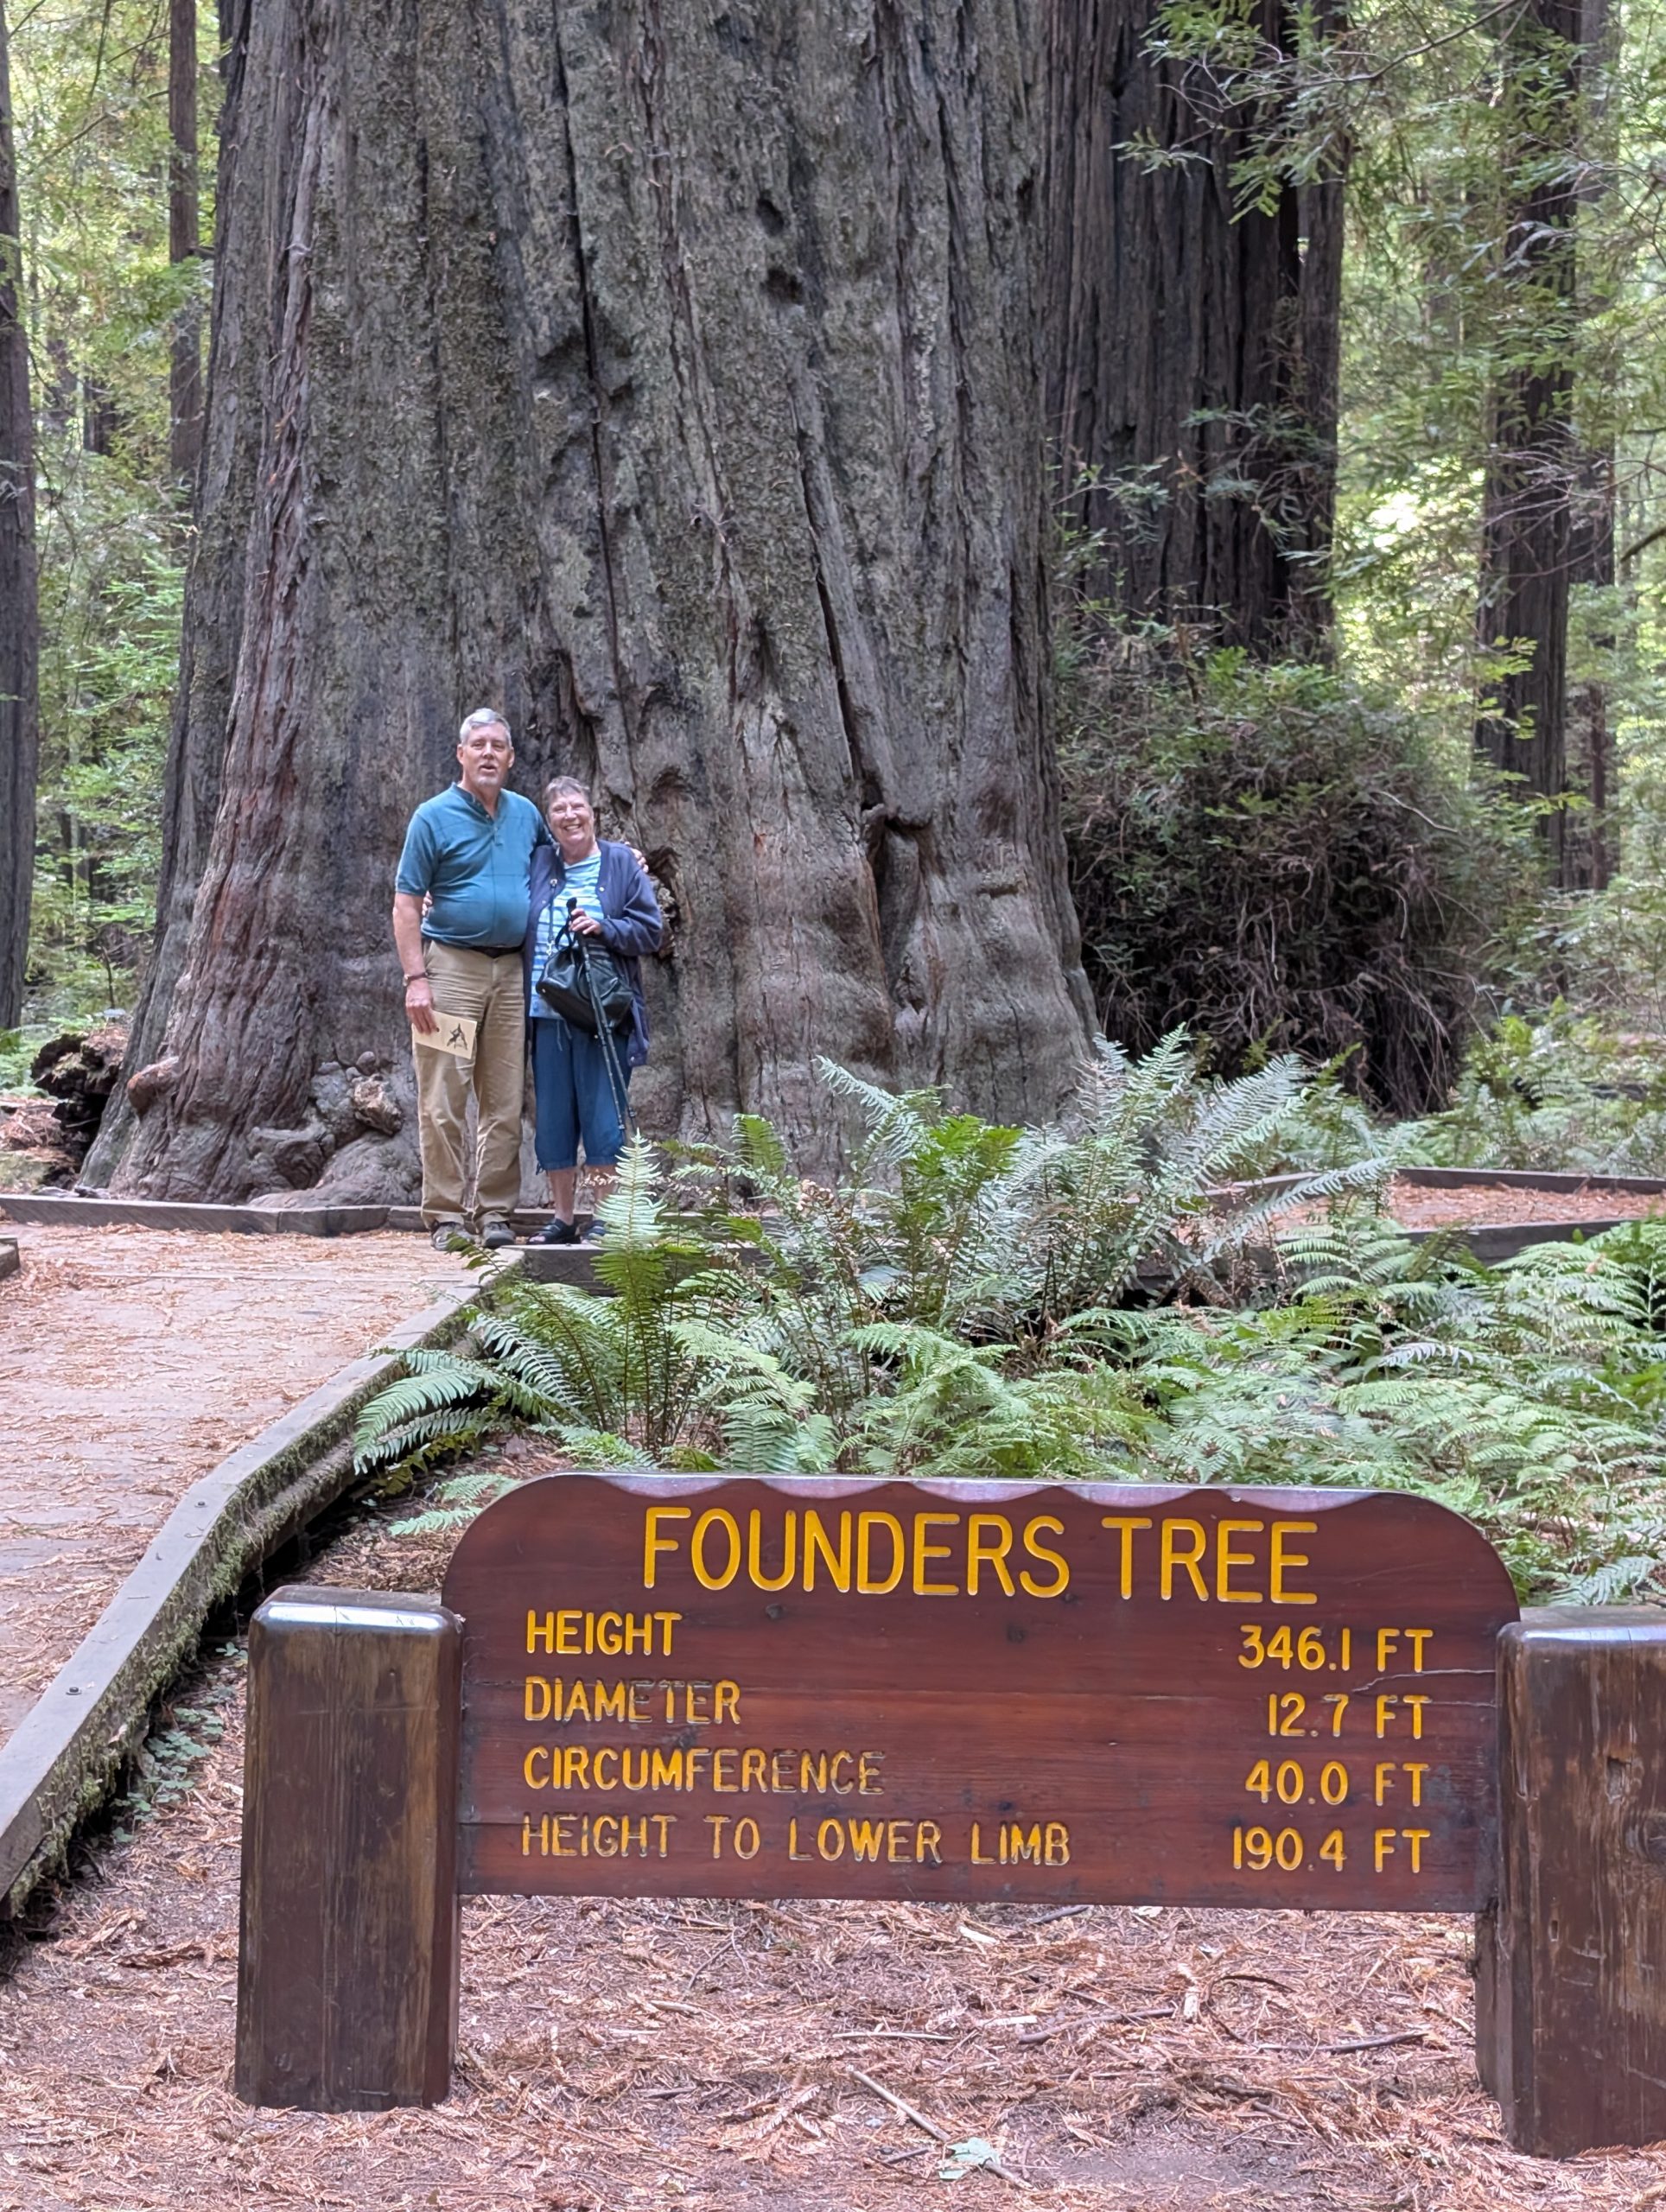
After leaving the center we drove further north to Founders Grove where we took a one-half mile, 20-minute (for those who can walk fast, that is) level walk through an ancient forest. This nature trail provided us with a glimpse into the past and a look into one of the greatest forests on earth.
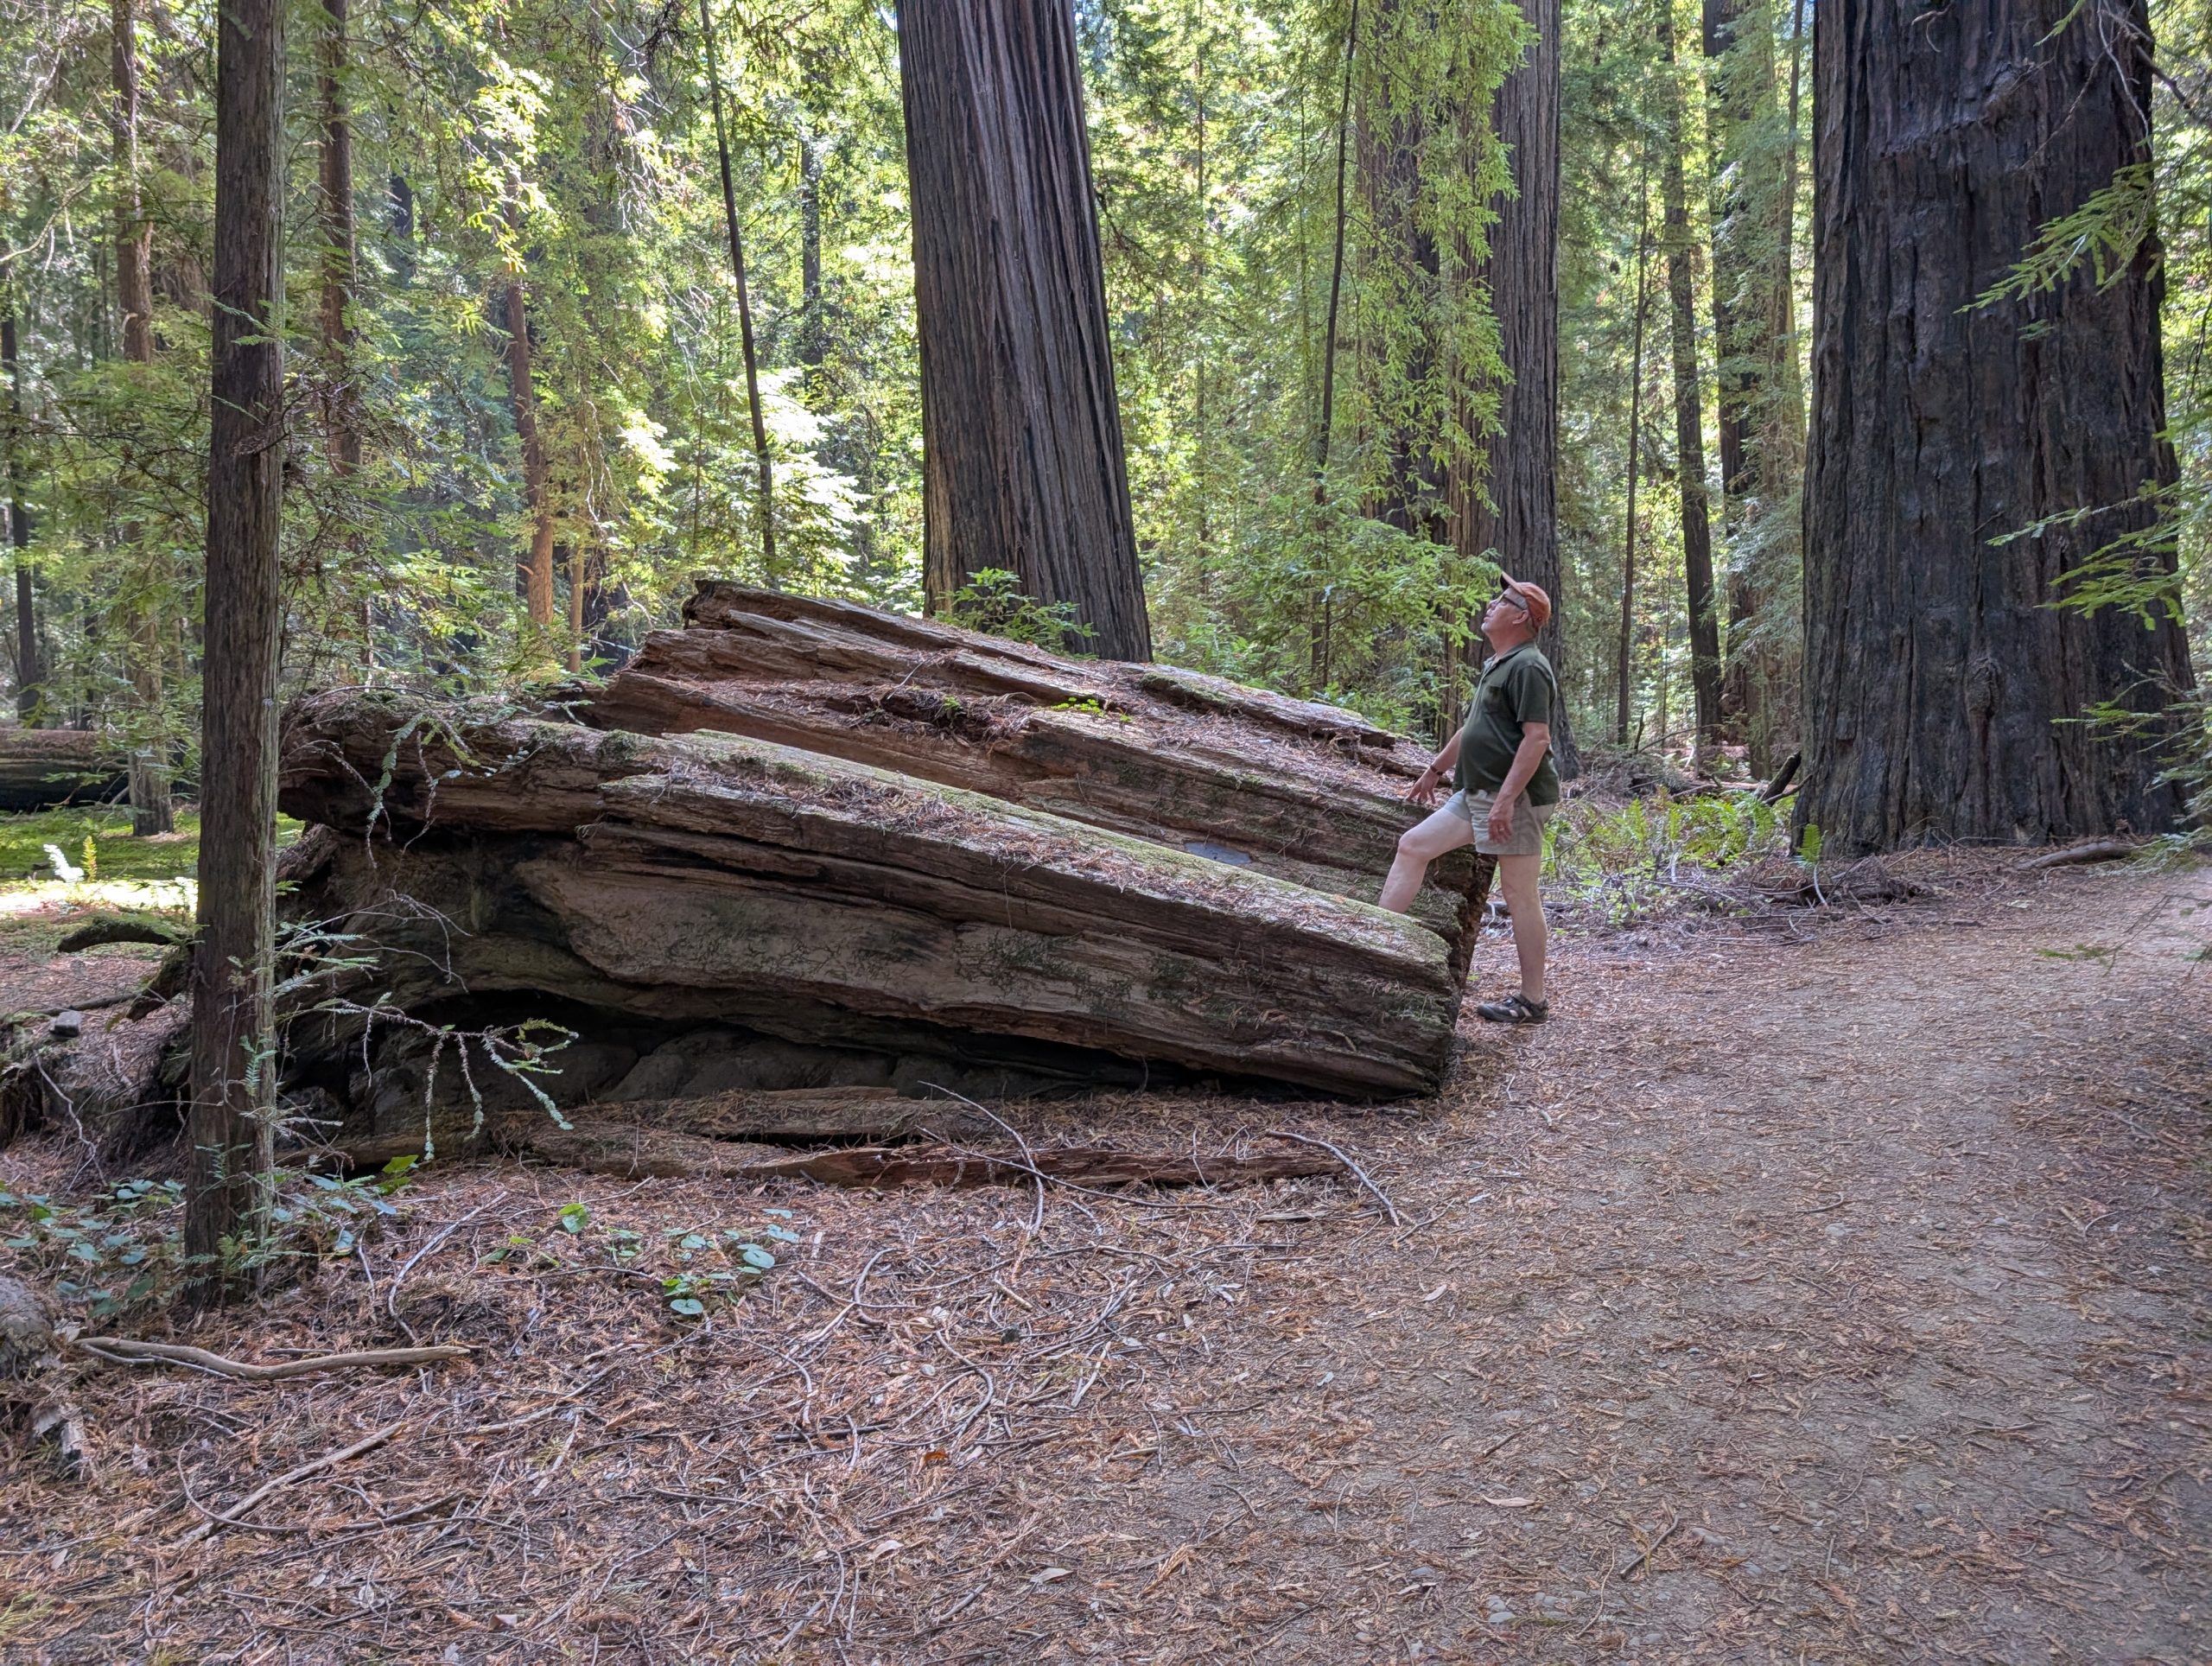
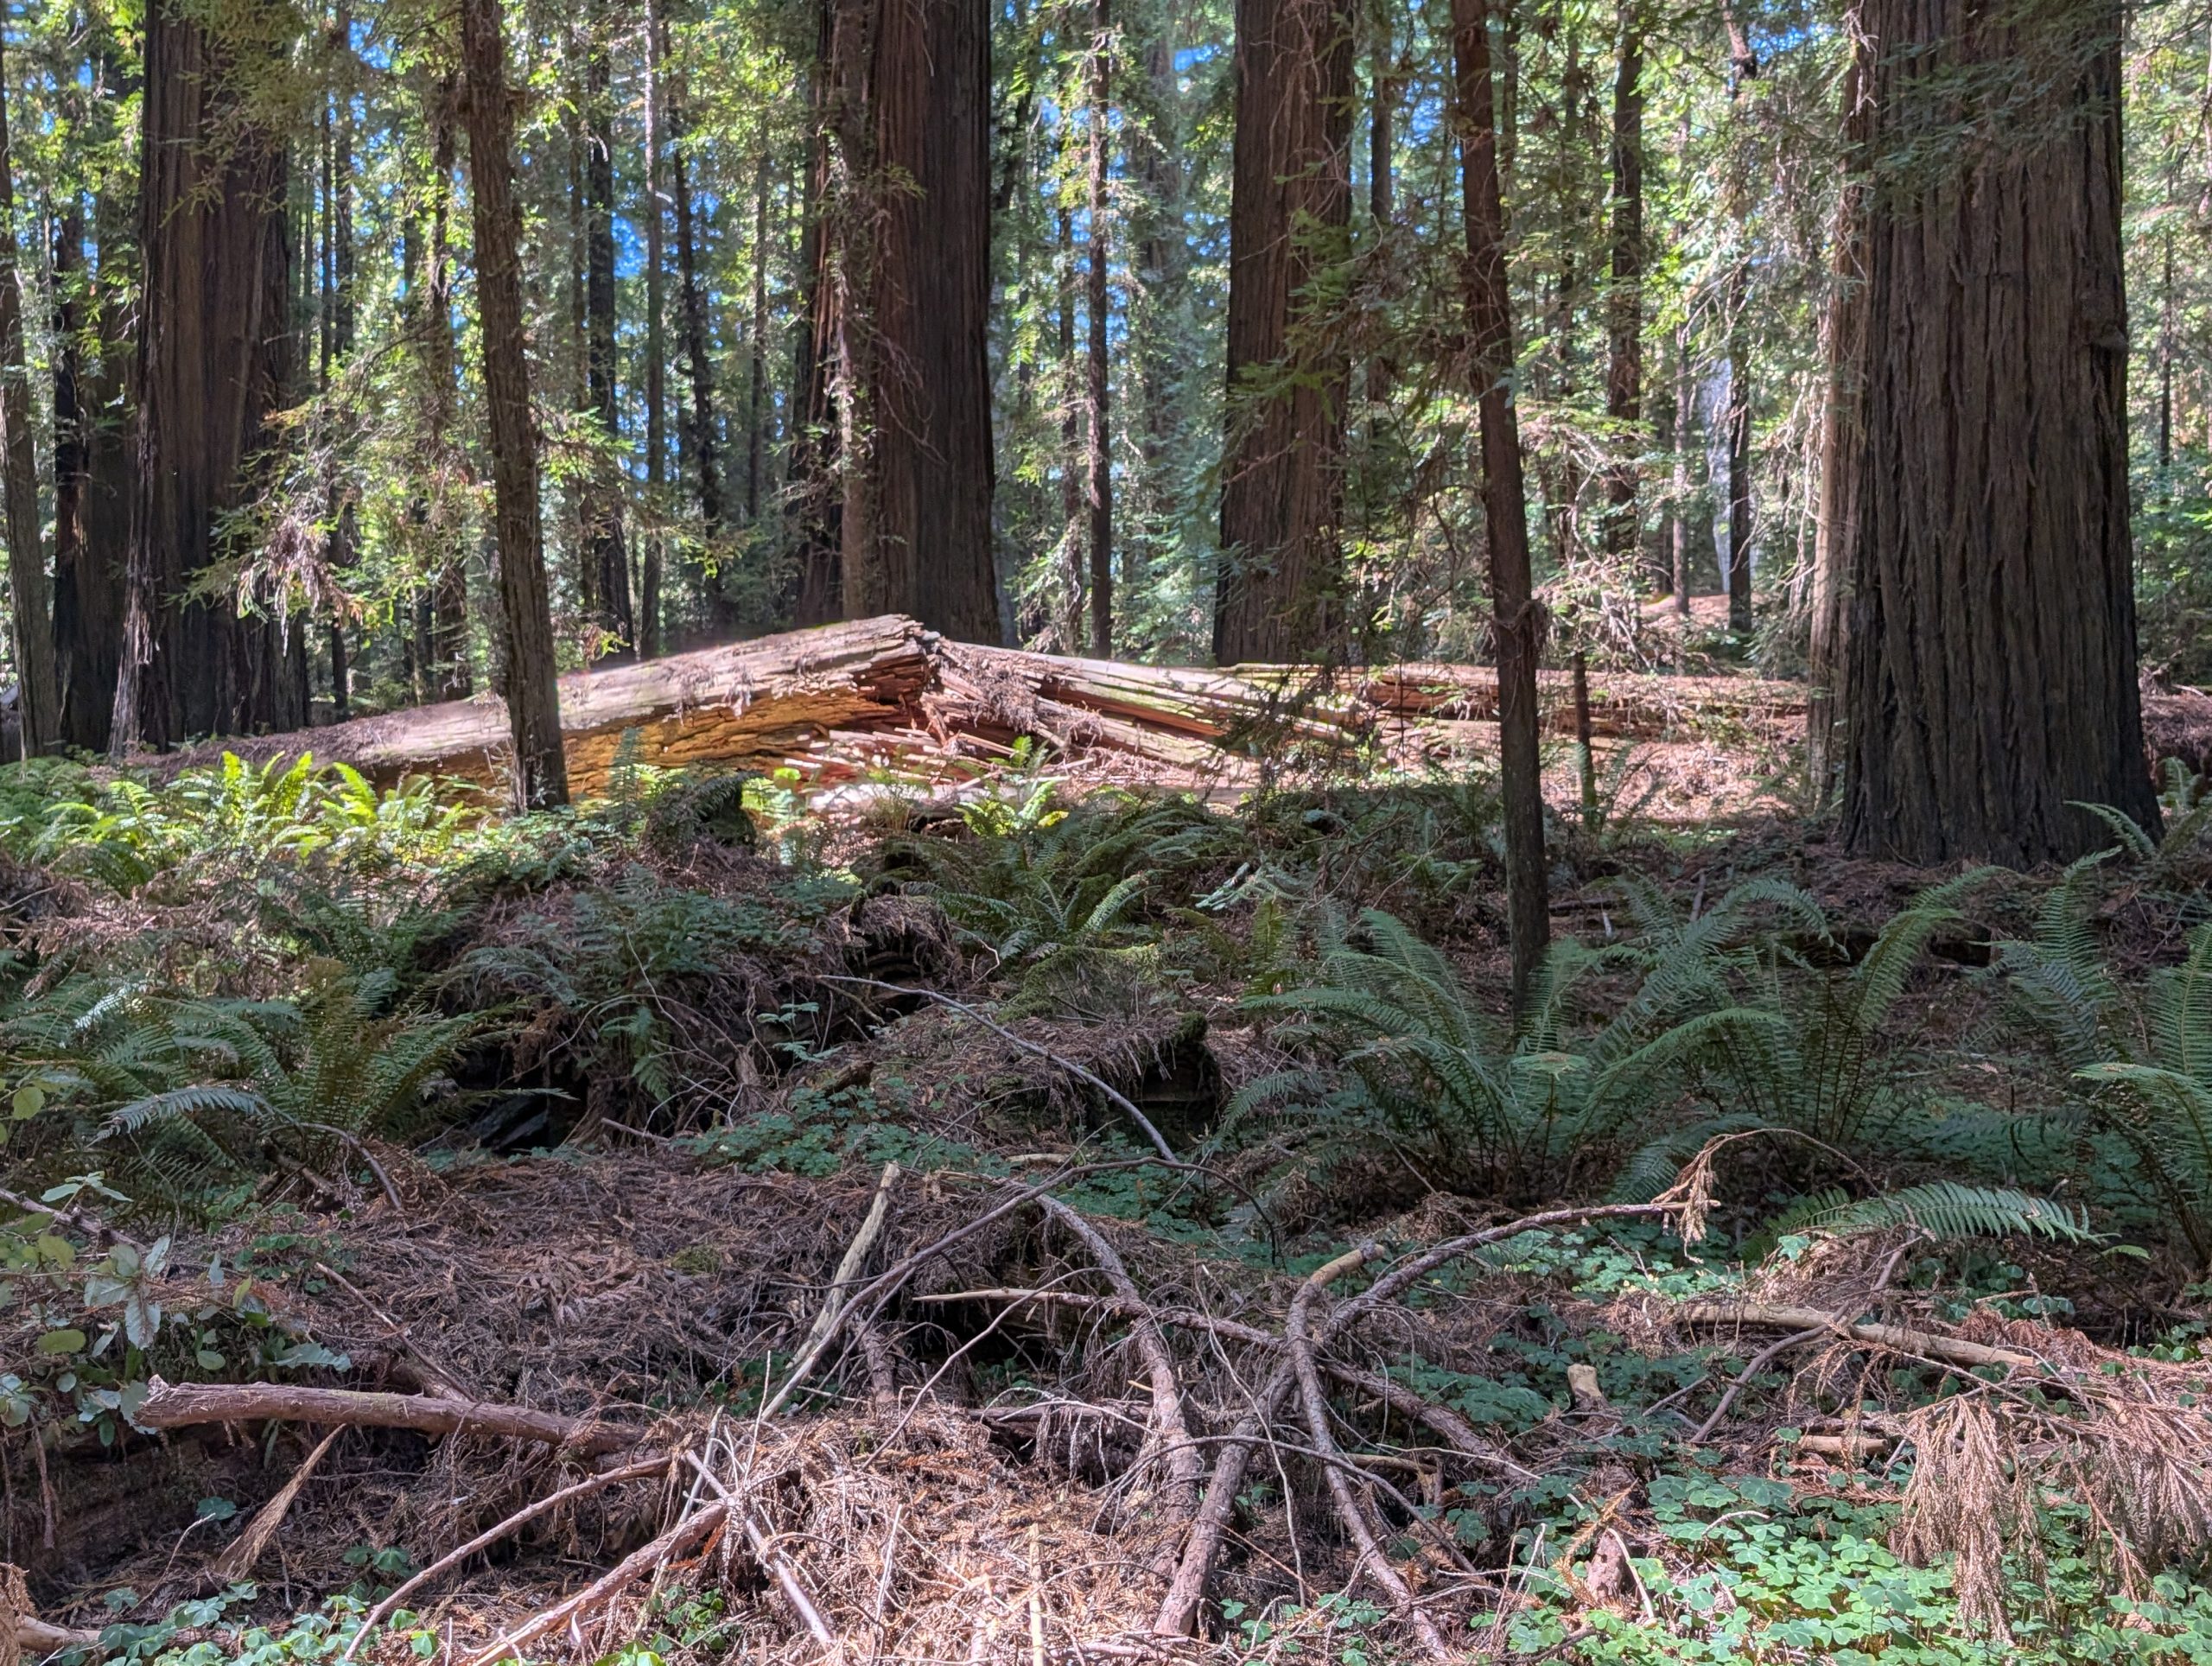
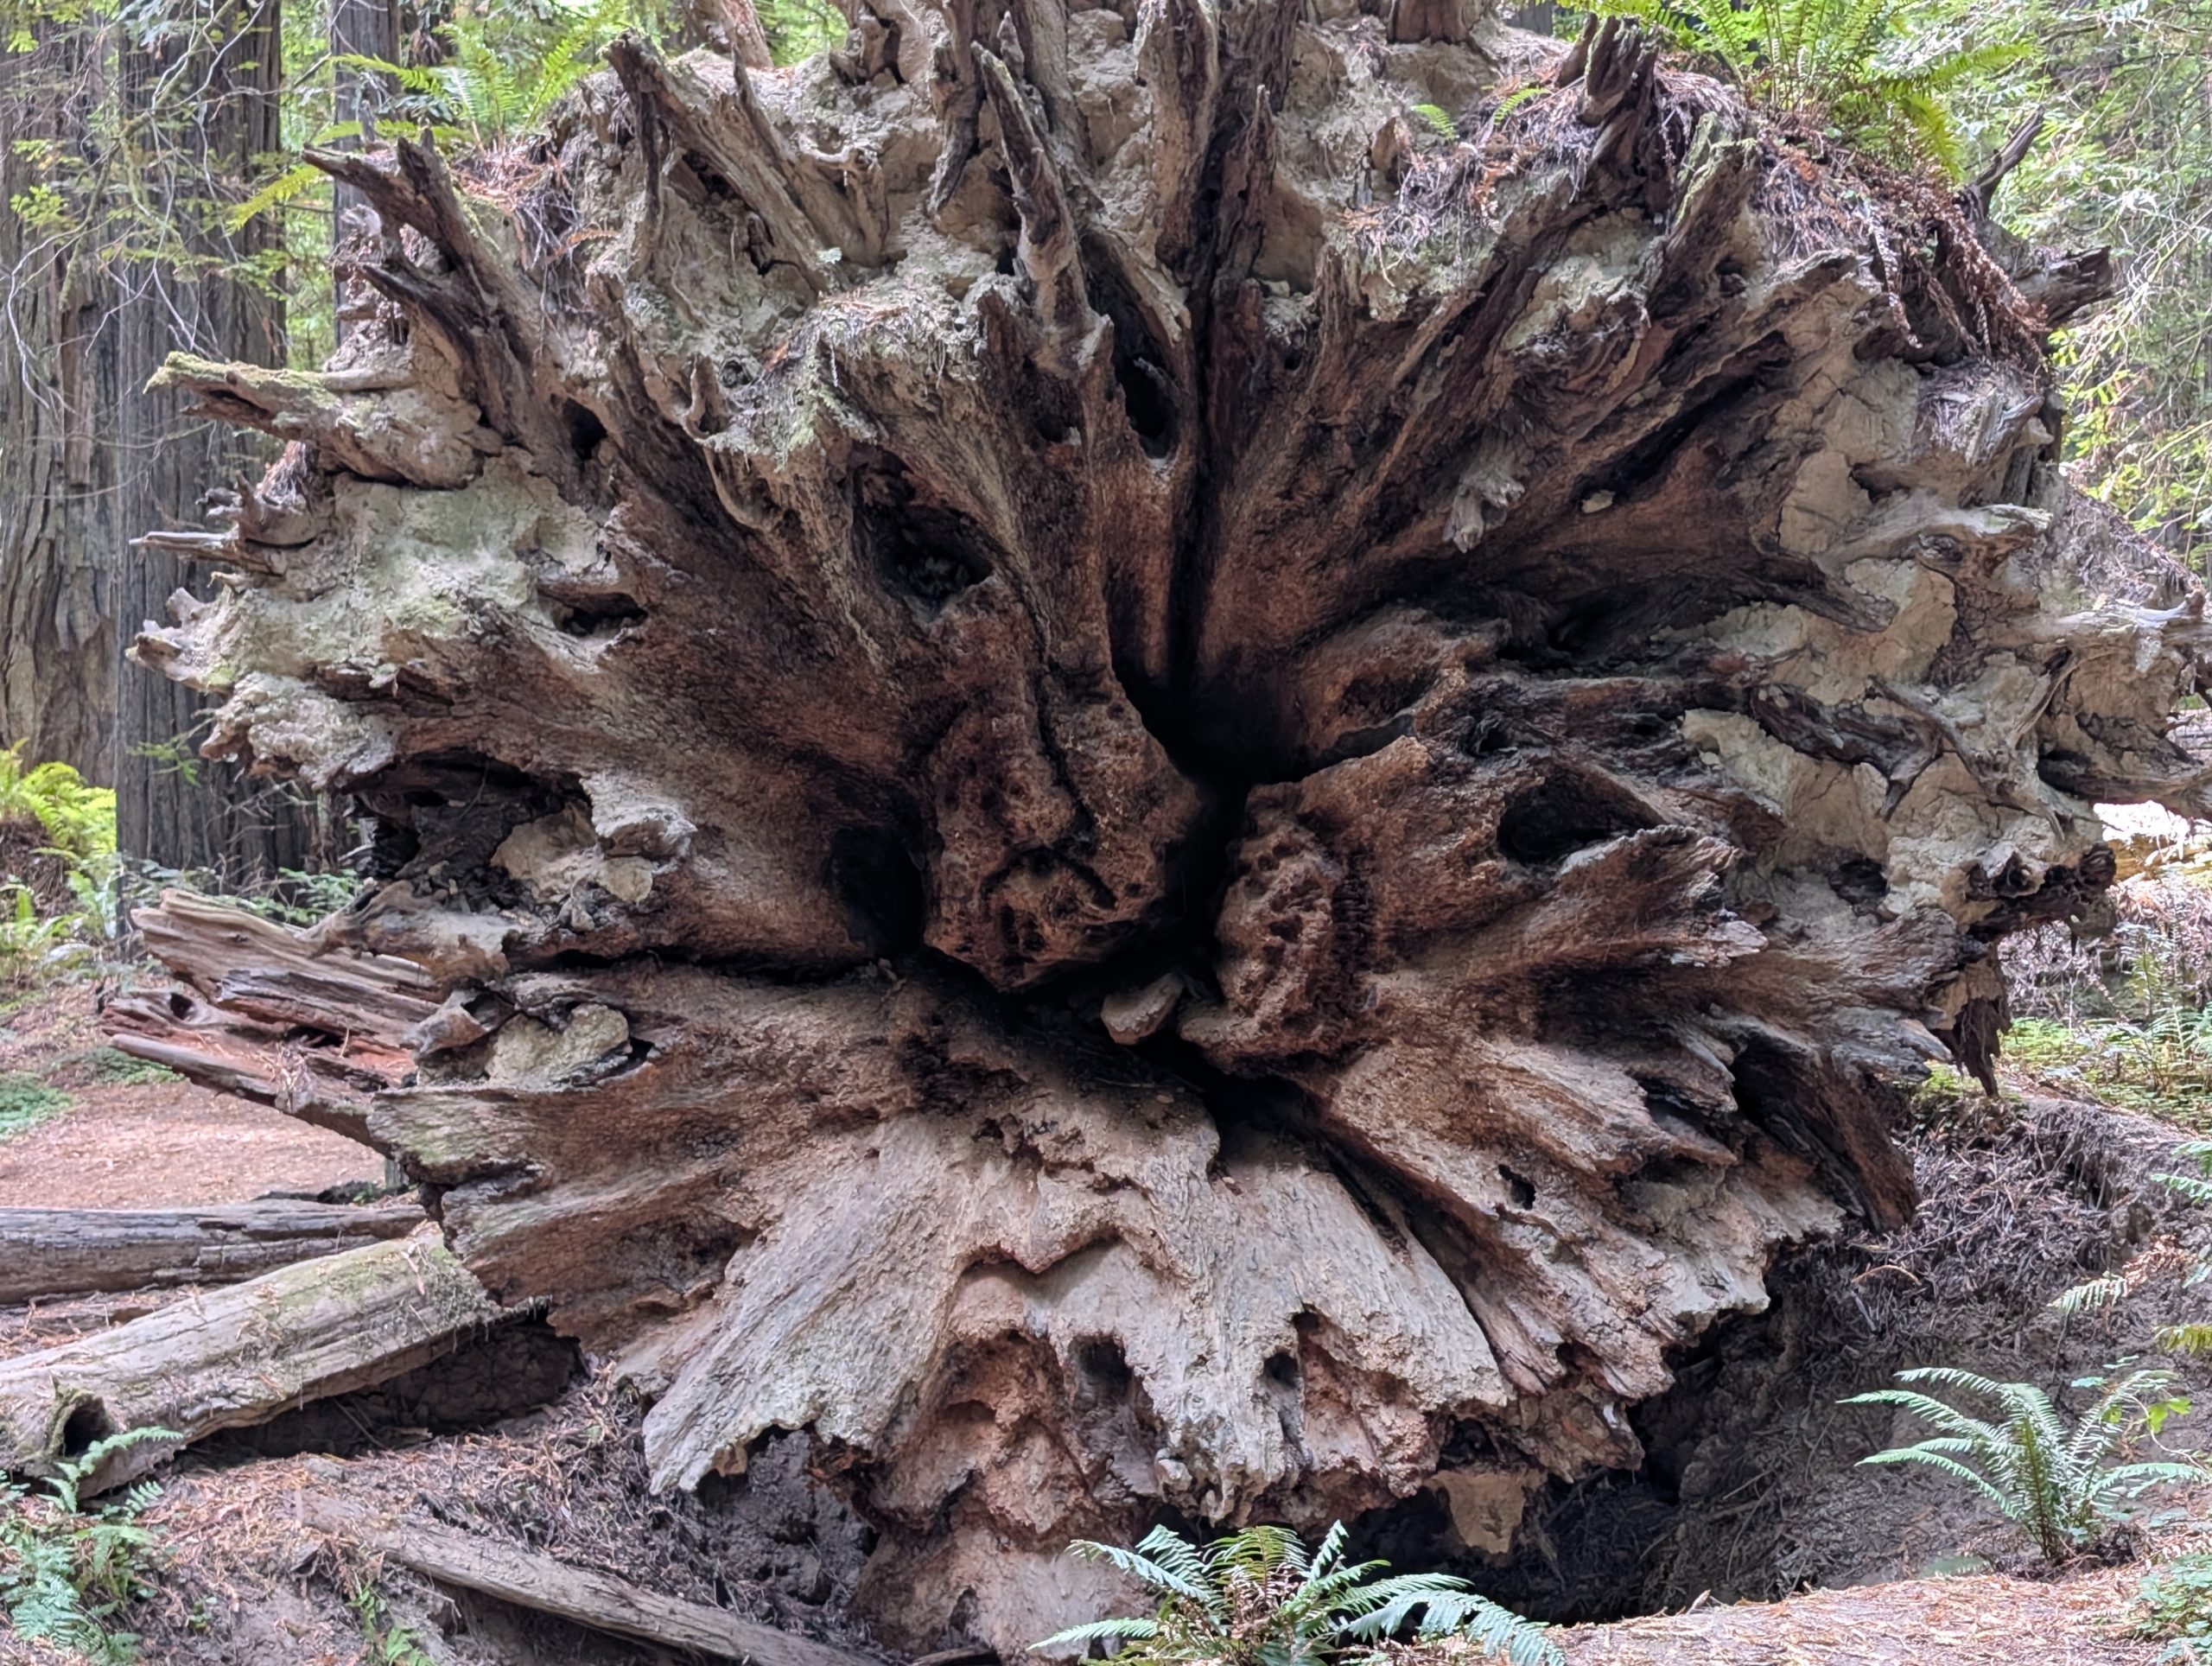
Not only were there many standing trees, but there were also many fallen with the base revealing the magnitude of the root system. (Which BTW is very shallow.) As trees get older, some can no longer withstand wind and rain. These trees give up their spot in the sun and fall to the forest floor.
The Dyerville Giant (see picture below), which stood for as long as 1600 years, was taller, larger, and older than any other tree around it. It just looked like it had started as a seedling in a far distant past. And it was lovely to see this very old tree, because very few of these ancient relics remain.
Then back to camp for a “charcuterie” lunch. After that, reading, writing, and arithmetic. (Just kidding about arithmetic.) (Well almost, as Andy checks our credit card purchases every day to make certain we really are where we think we are!)
Then off to dinner at The Brass Rail in Redway, California for burgers and beer. Great burgers and great beer.
After returning to our trailer, I proceeded inside to get warm and read. Andy decided to share some wine outside with Jim and Margo.
Then in bed for both of us at about 10:00 pm. I love the redwoods and would not have missed these three nights and 2 days of revisiting the area for anything.
And tomorrow we leave for our Napa and San Francisco excursions. This is such a fun trip.
Saturday, September 6, 2025 – Petaluma RV Resort, Petaluma, California
After an unhurried breakfast and on the road again at 11:00 am, we were once again heading south on 101. There is just something about 101 that is unique to other highways. It provides beautiful vistas every stretch of the way.
On one previous trip heading south, we left US 101 at Leggett, to drive west on the start of California Pacific Coast highway 1. Stretching from the beautiful redwood forests of northern California, all the way to southern California, this coastal highway winds along some of the most spectacular ocean views in the U.S. The highway contains countless examples of the many intrinsic qualities that make a highway a National Scenic Byway. Qualities like perfect views of ocean waves breaking on rocky shorelines and cliffs, dozens of historical landmarks like Spanish Missions and Spanish settlements, and limitless opportunities to participate in every kind of outdoor recreation imaginable. A traveler would have to take numerous other byways spread across the nation to view all the qualities contained on just this one byway.
But there are drawbacks to cutting over to highway 1 that anyone who gets nauseous while riding on exceedingly twisty-turny roads or pulling a trailer can attest to. This stretch of road which ends at the ocean, is not an easy or quick ride. Basically, there is nowhere on highway 1 that gets you from point “a” to point ”b” quickly. But if you have never gone this route, it certainly should be added to your travel “bucket list”.
Anyway, we did not cut over to highway 1. We stayed on 101 until we reached Petaluma and our 3-night stay in the Napa and San Francisco area.
One thing you should know about this campground. It’s HUGE. And noisy with children running amuck on every kind of mobile contrivance known to man! And many unsupervised. So, parking our rigs and trying desperately not to run over a kid while doing so, made a “safe arrival drink” absolutely necessary.
After our beer on T&P’s patio, it was time for some serious drinking and a fine dinner of leftover tetrazzini, Swedish meatballs, and a warm Italian loaf of bread. For dessert, cookies and a chocolate bar.
Then back to our trailer for reading and early to bed for me. Tomorrow – wine tasting.
Sunday, September 7, 2025 – Petaluma RV Resort, Petaluma, California
After a great night’s sleep, we woke up to another sunny day. After breakfast and getting ready for our day’s adventure, I wrote for a while then sat outside our trailer until it was time to head for Napa Valley. Our destination today, Regusci Winery.
If you ever find yourself in the Napa Valley region, and are looking for the best cabs, best experience, greatest winemakers, most knowledgeable, friendliest staff, and best pours in the valley, Regusci is the place for you.
Since Andy is a wine club member, (no charge to wine club members) with everyone’s agreement, he booked a tasting experience here for our group of 6. What a great decision. The wines were simply marvelous, and several bottles came back to camp with us.
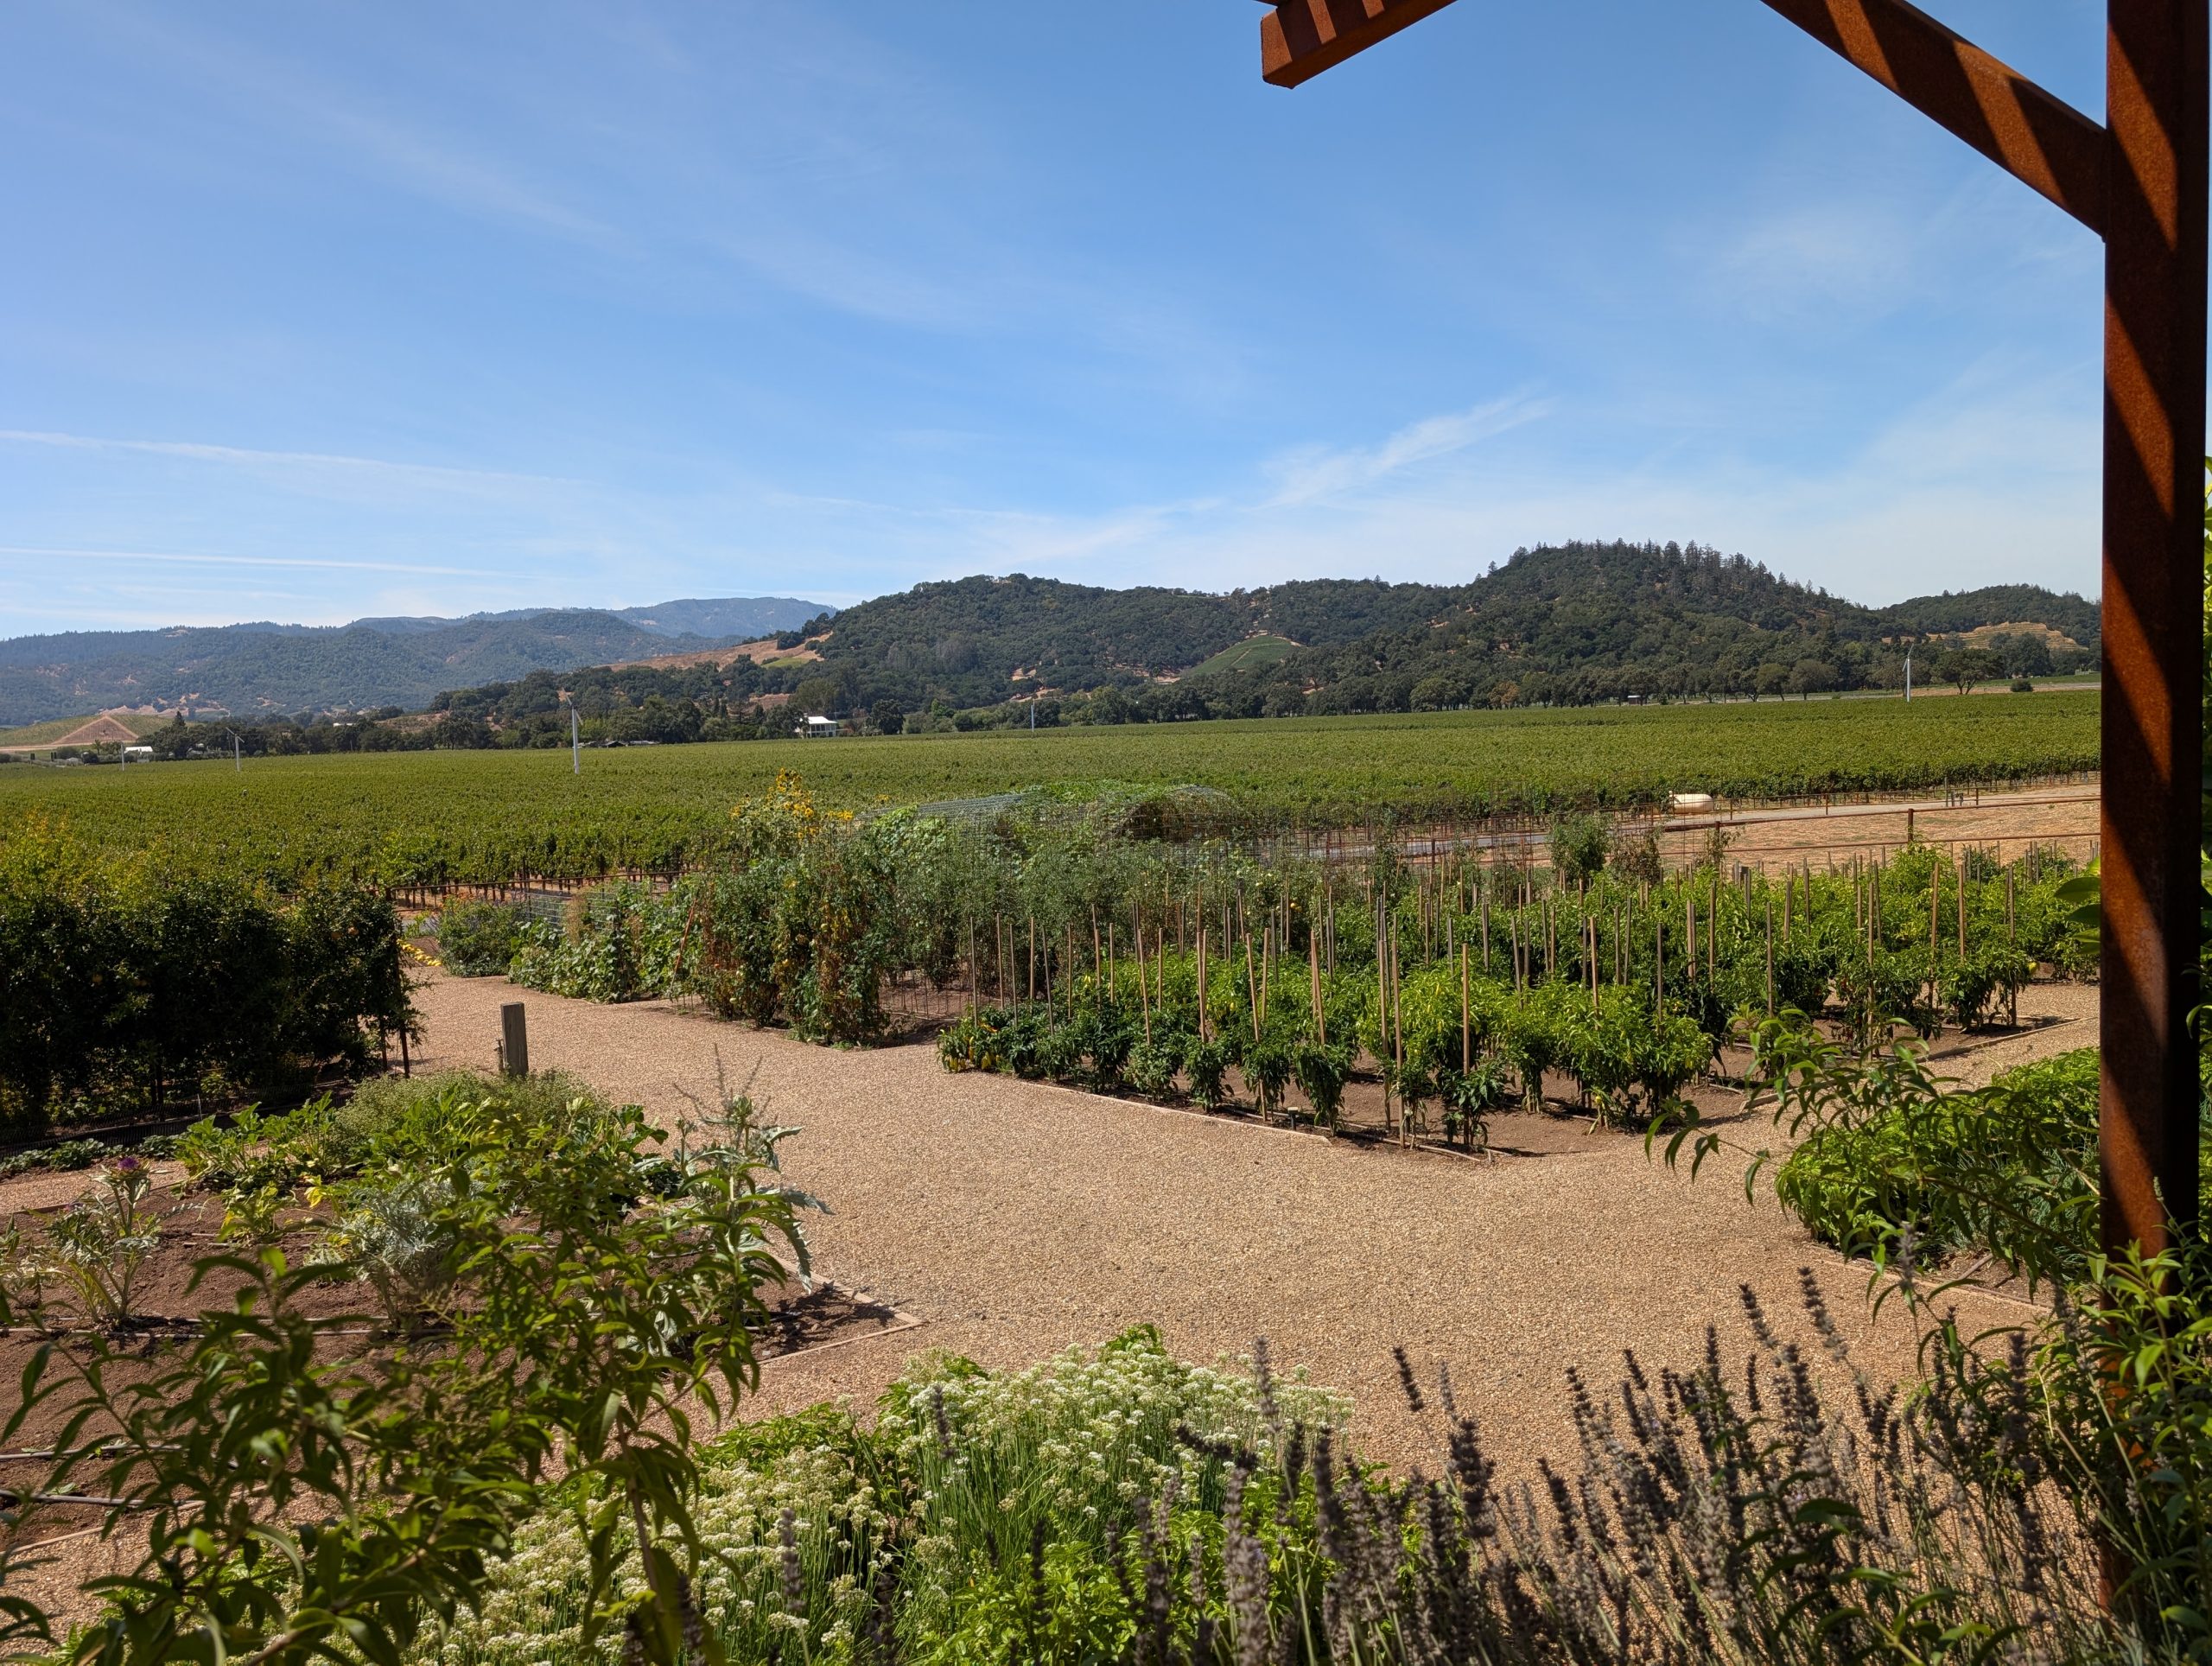
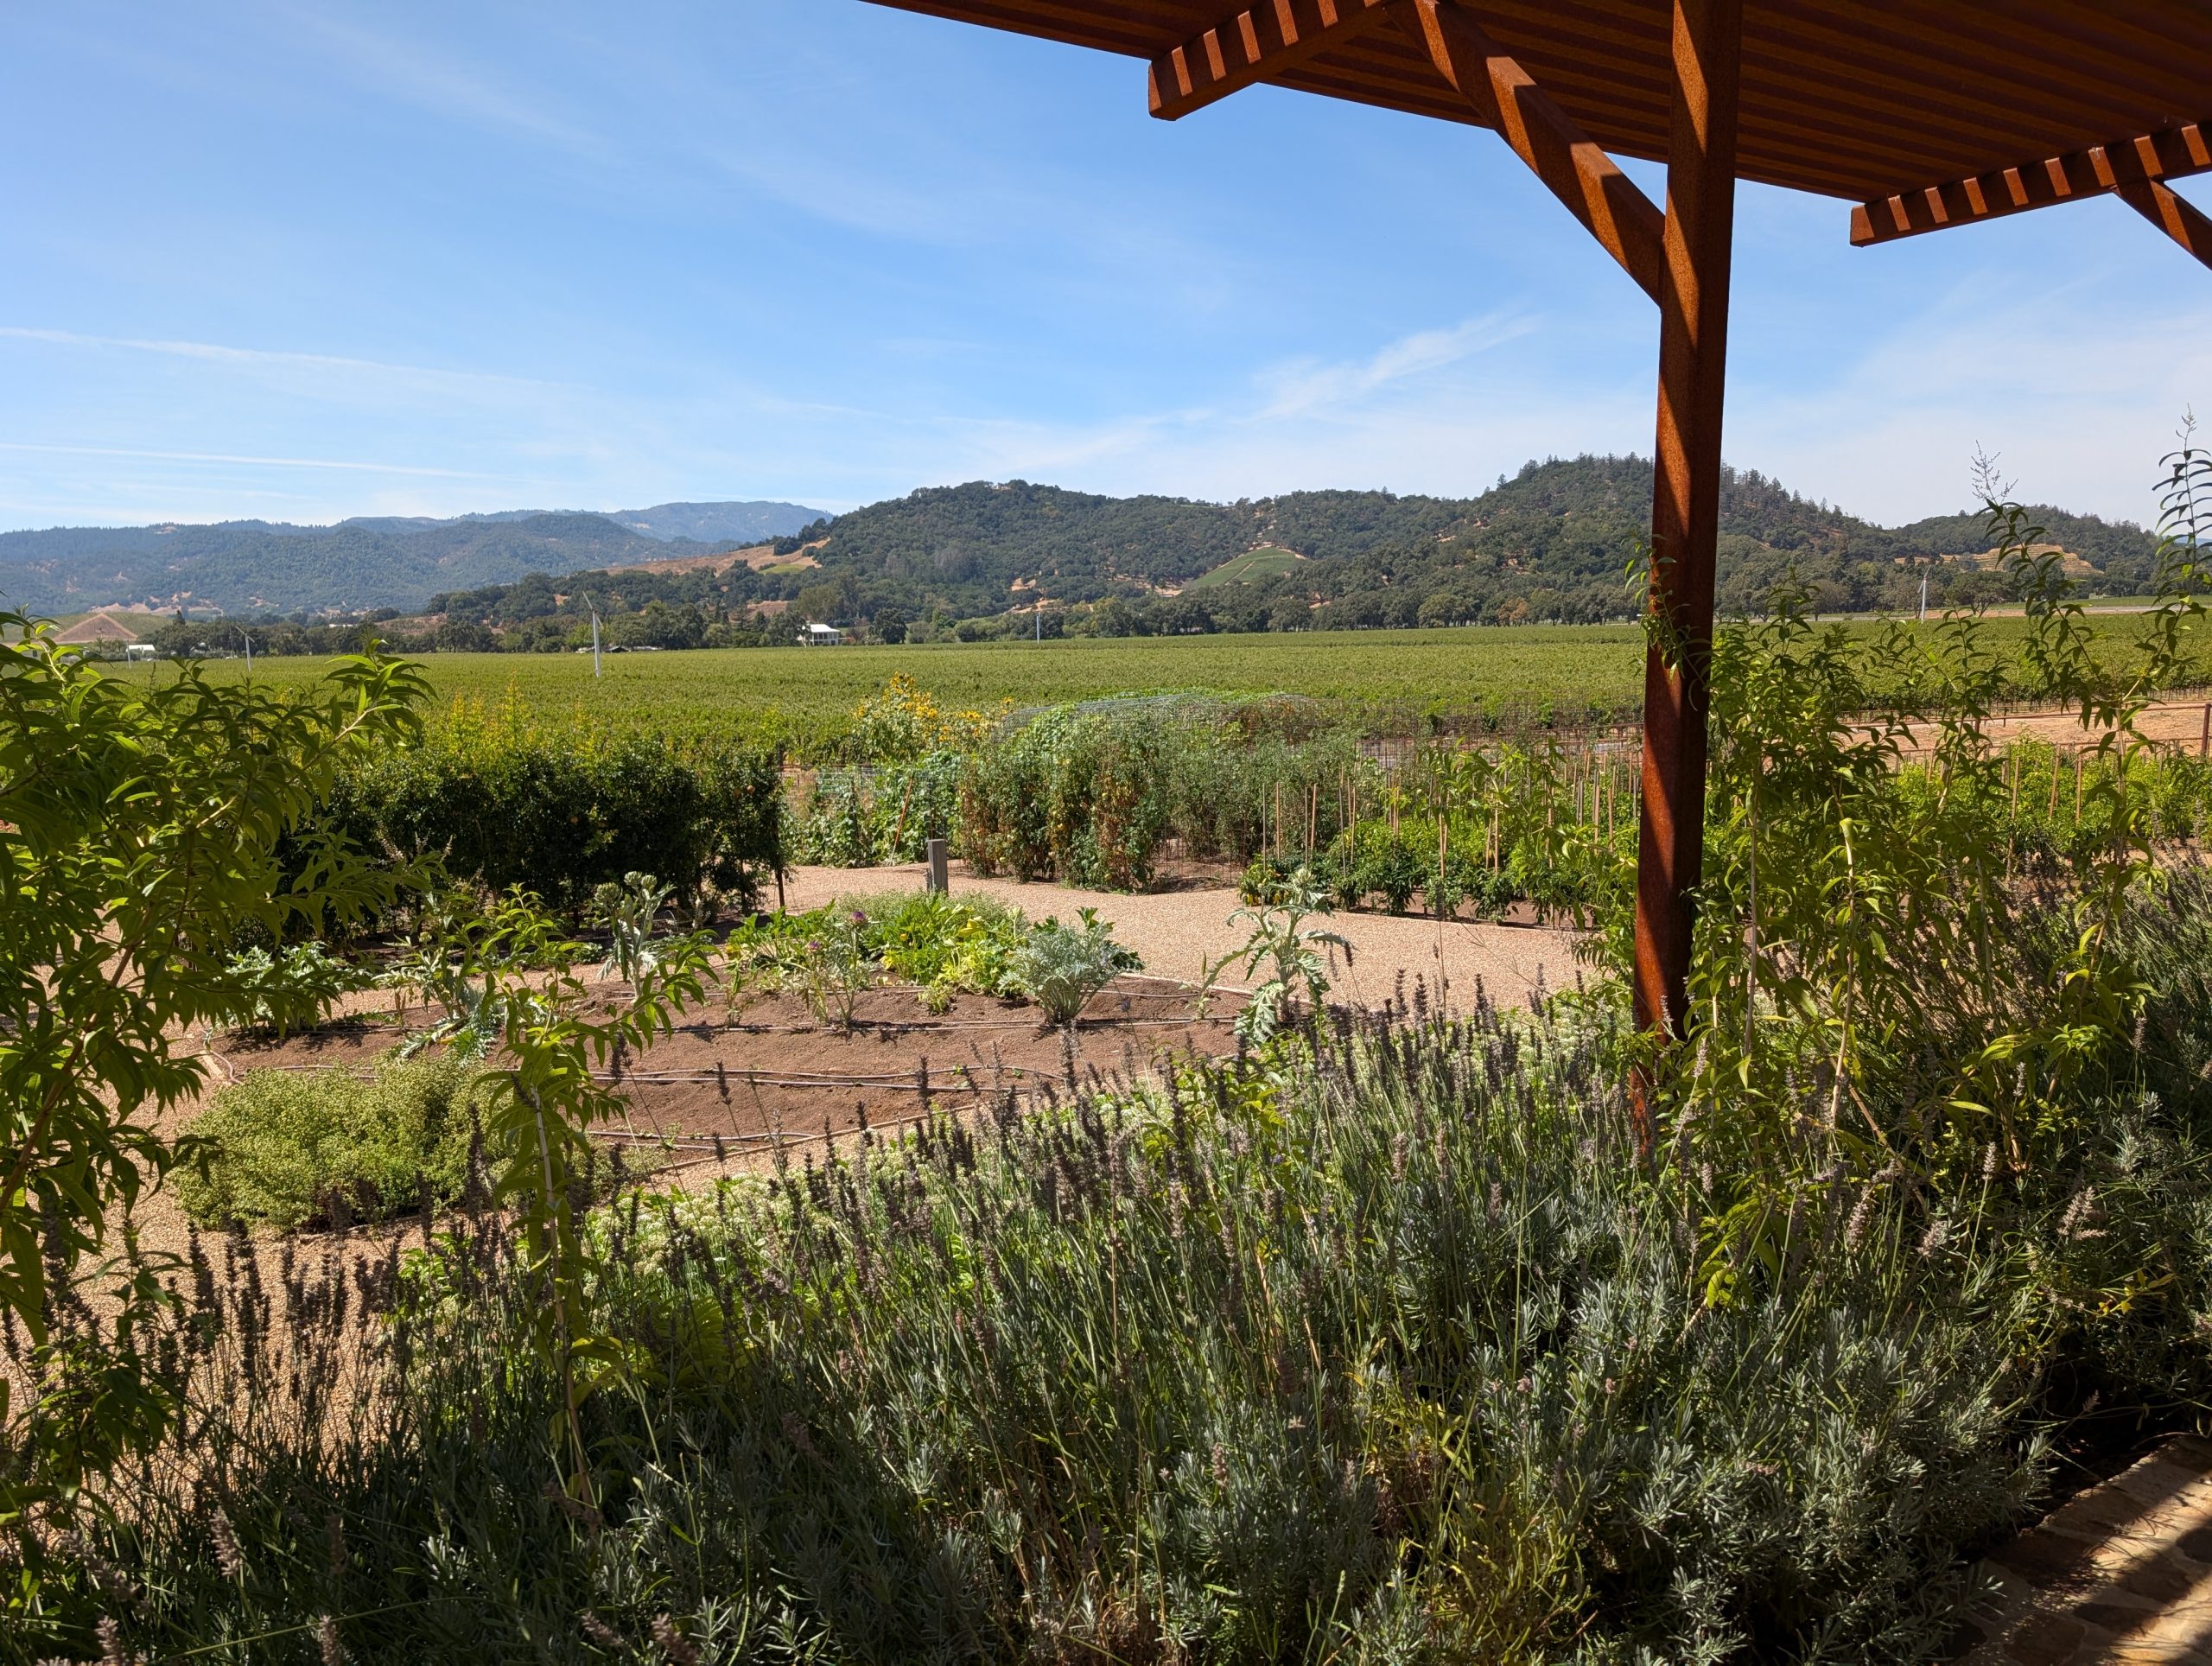
A glimpse at the wineries garden.
From another angle.
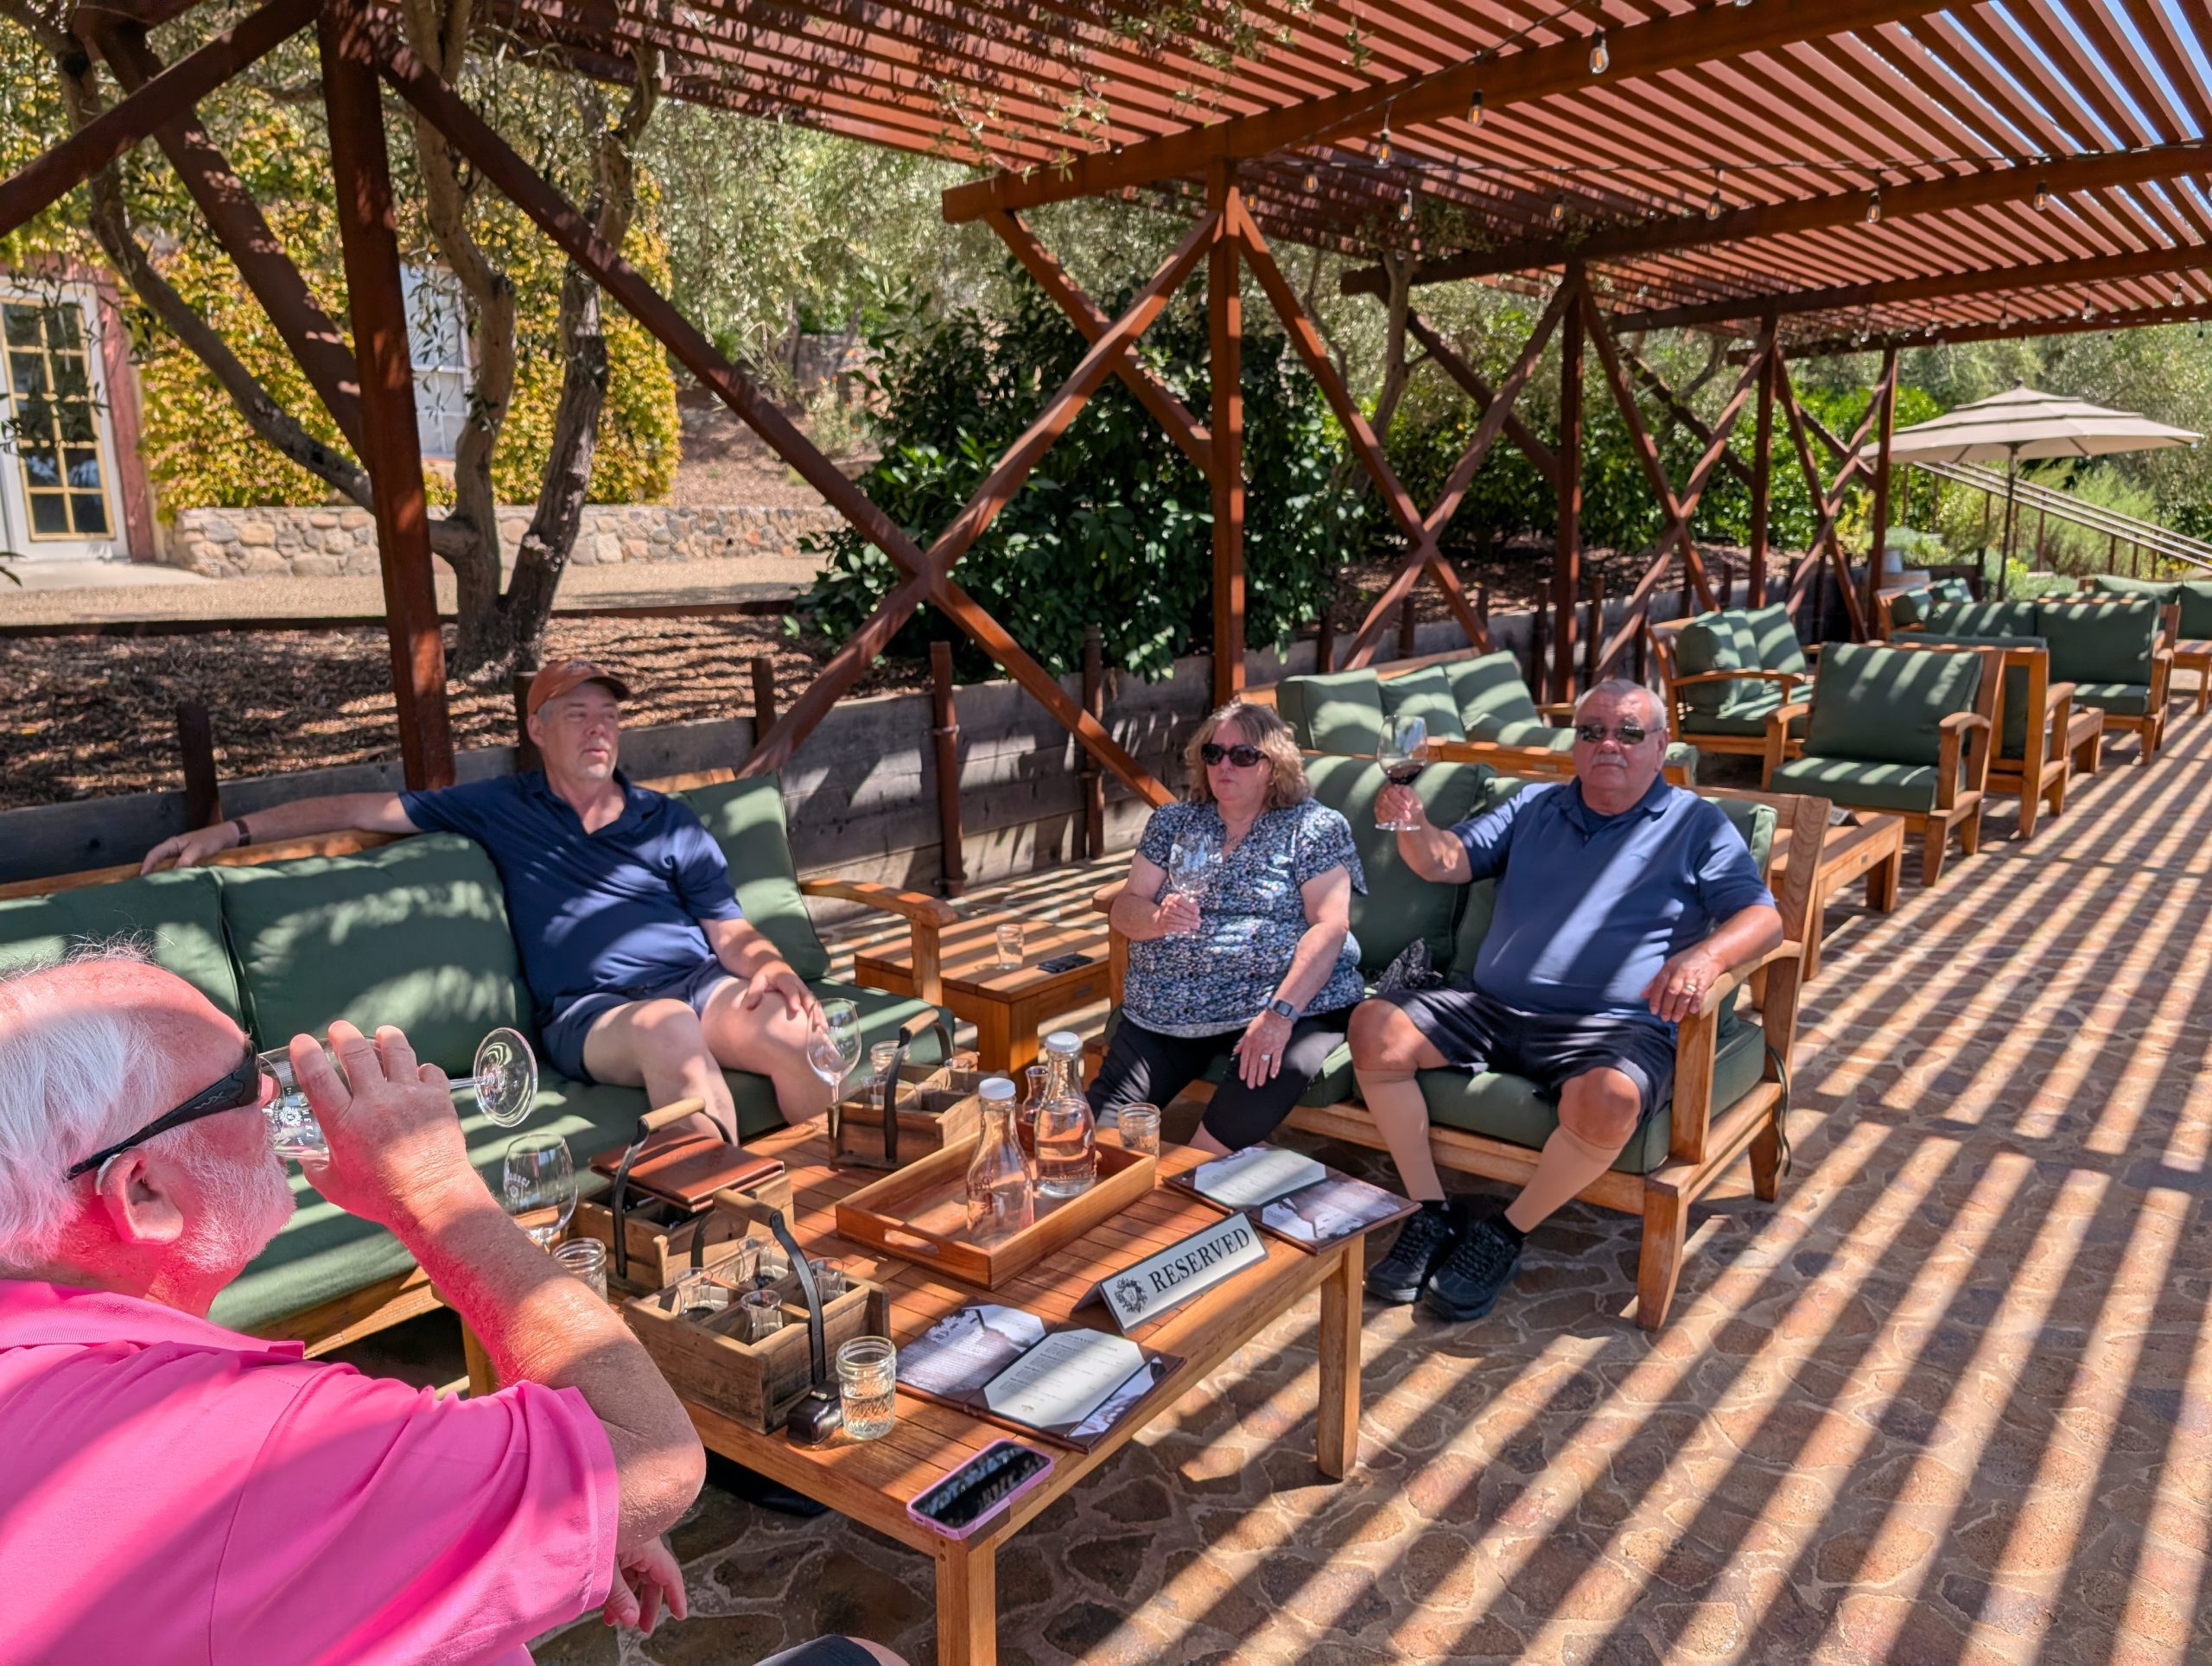
Tasting wine on our semi-shaded patio.
Still tasting wine. (Tim and Phyllis at the far bench.)
Emigrating to California from Italy more than a hundred years ago, Gaetano Regusci chose Stags Leap to put down roots for his family. Today, the fifth generation is being introduced to the ranch he acquired in the 1930s.
The grounds are spectacular with a thriving vegetable garden. The wines are excellent. The tasting experience was perfect with just enough conversation and attentiveness from our hostess Desirey.
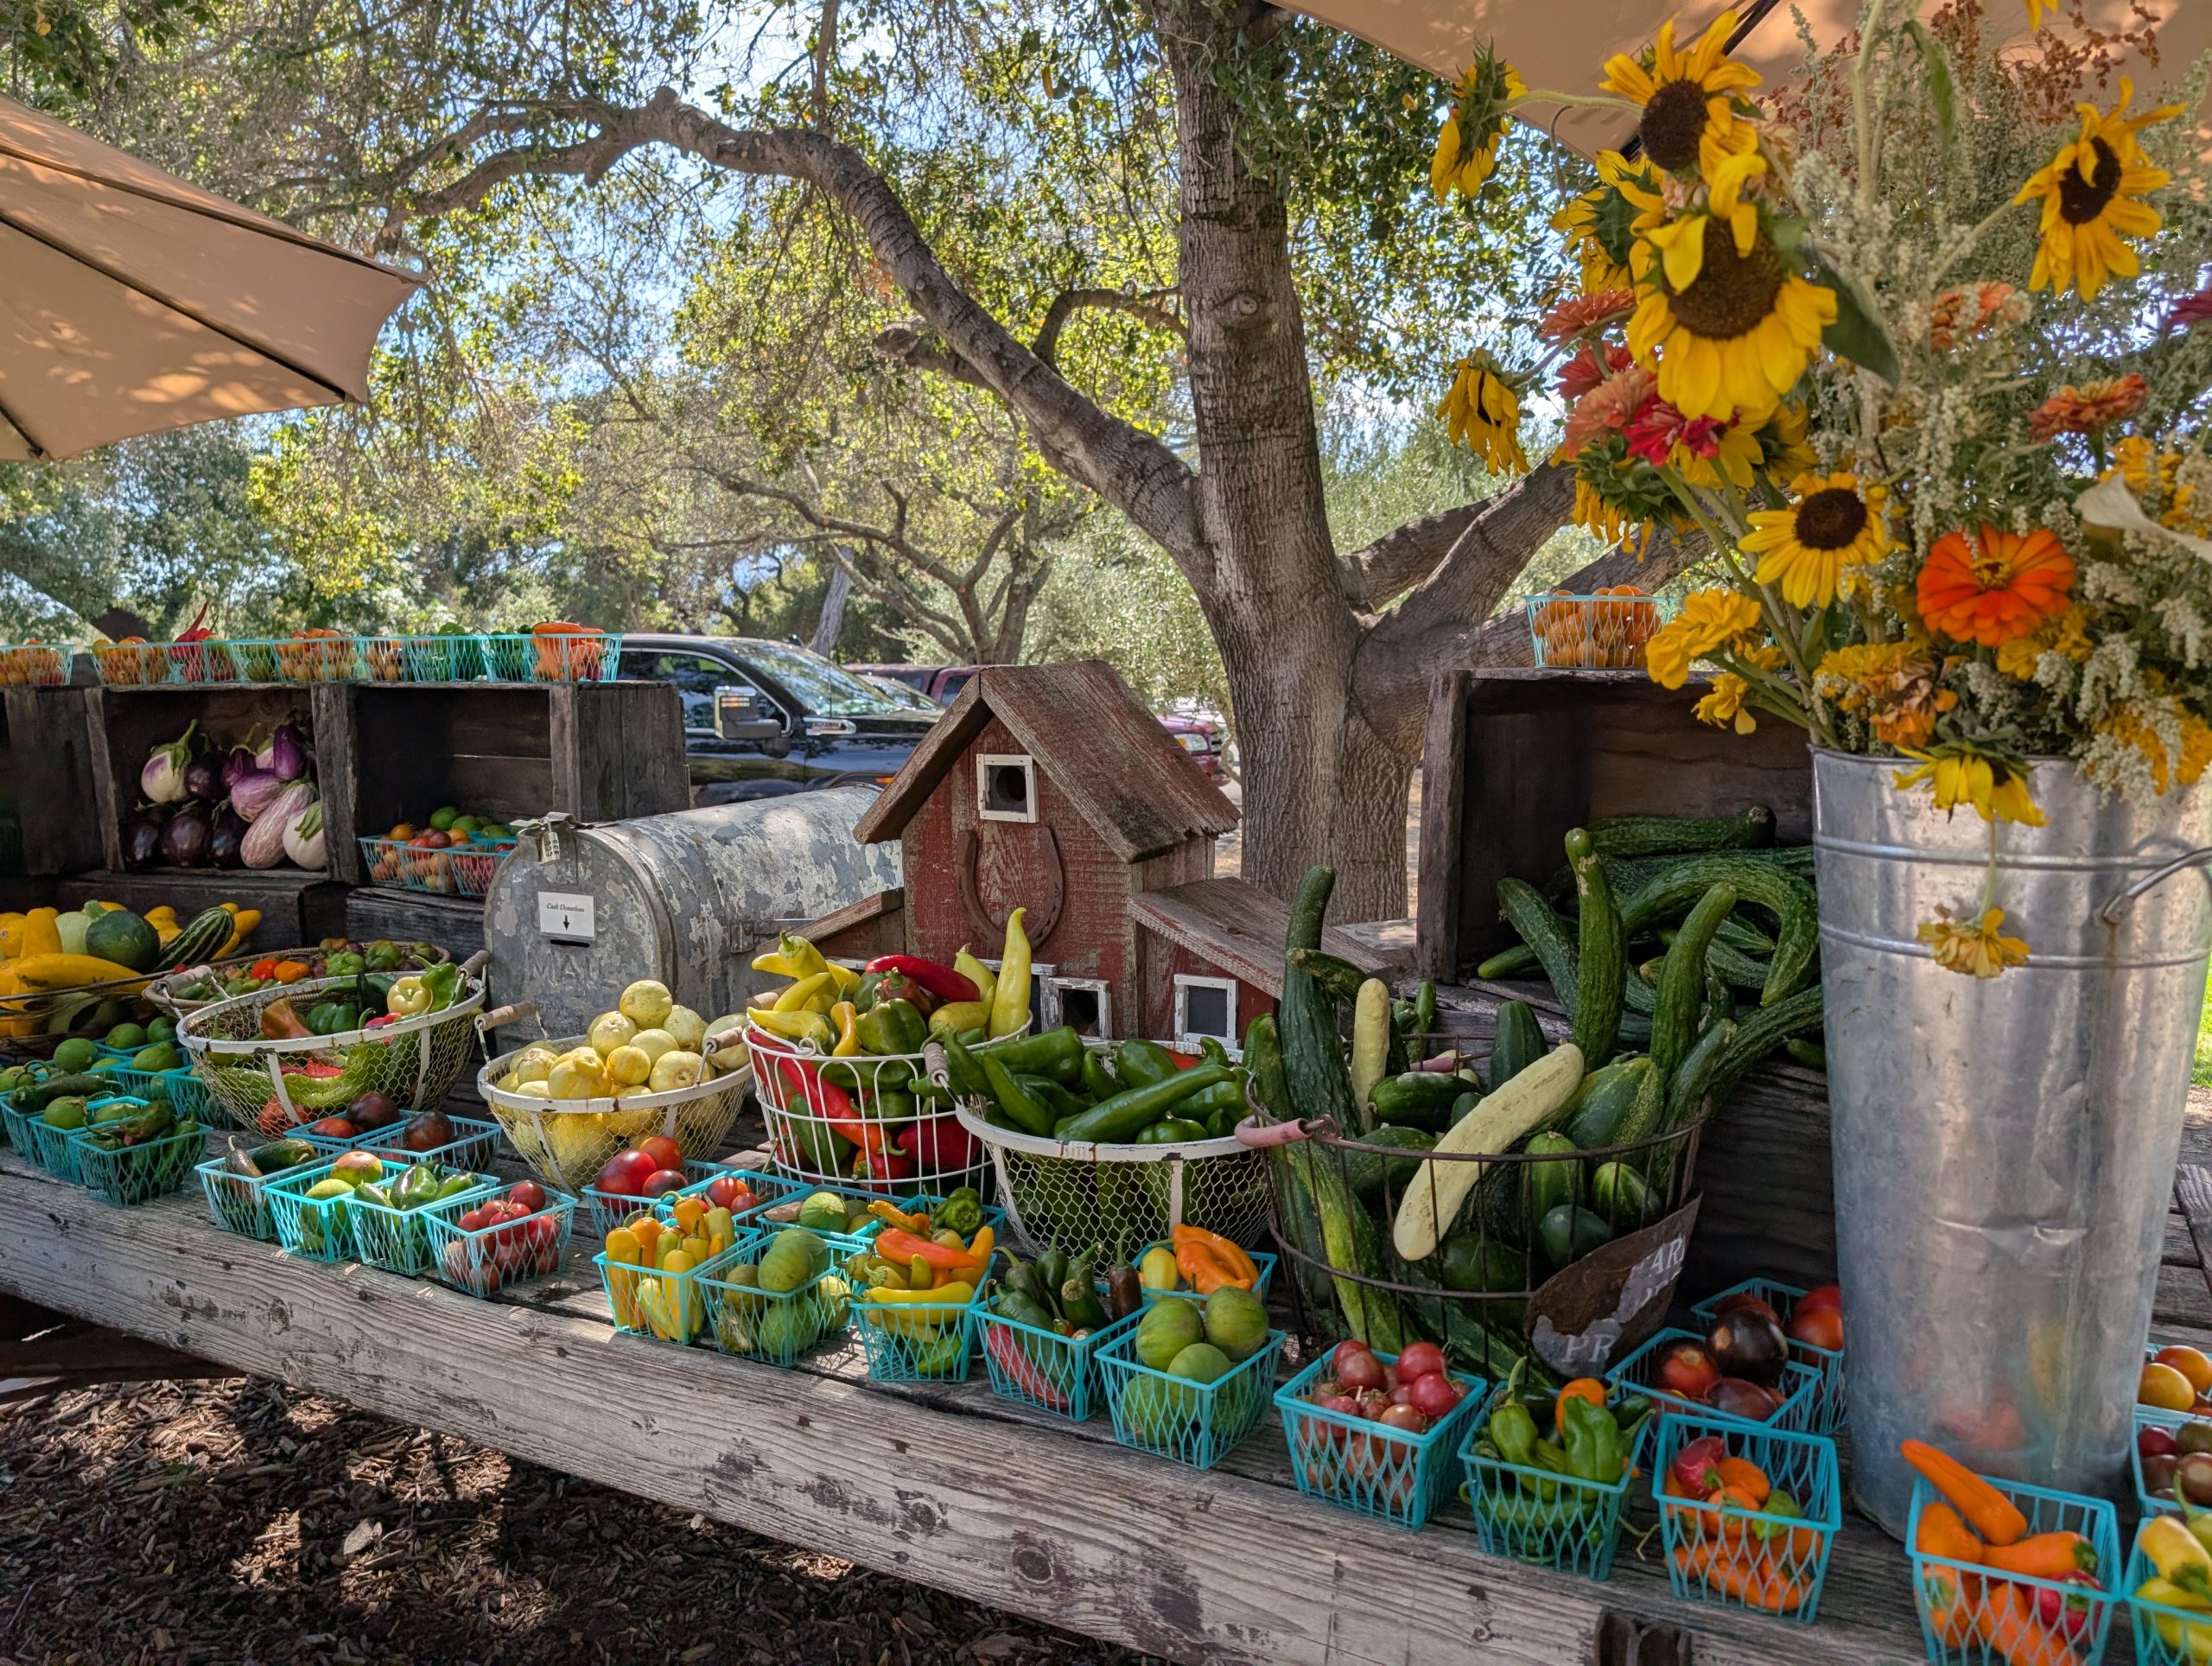
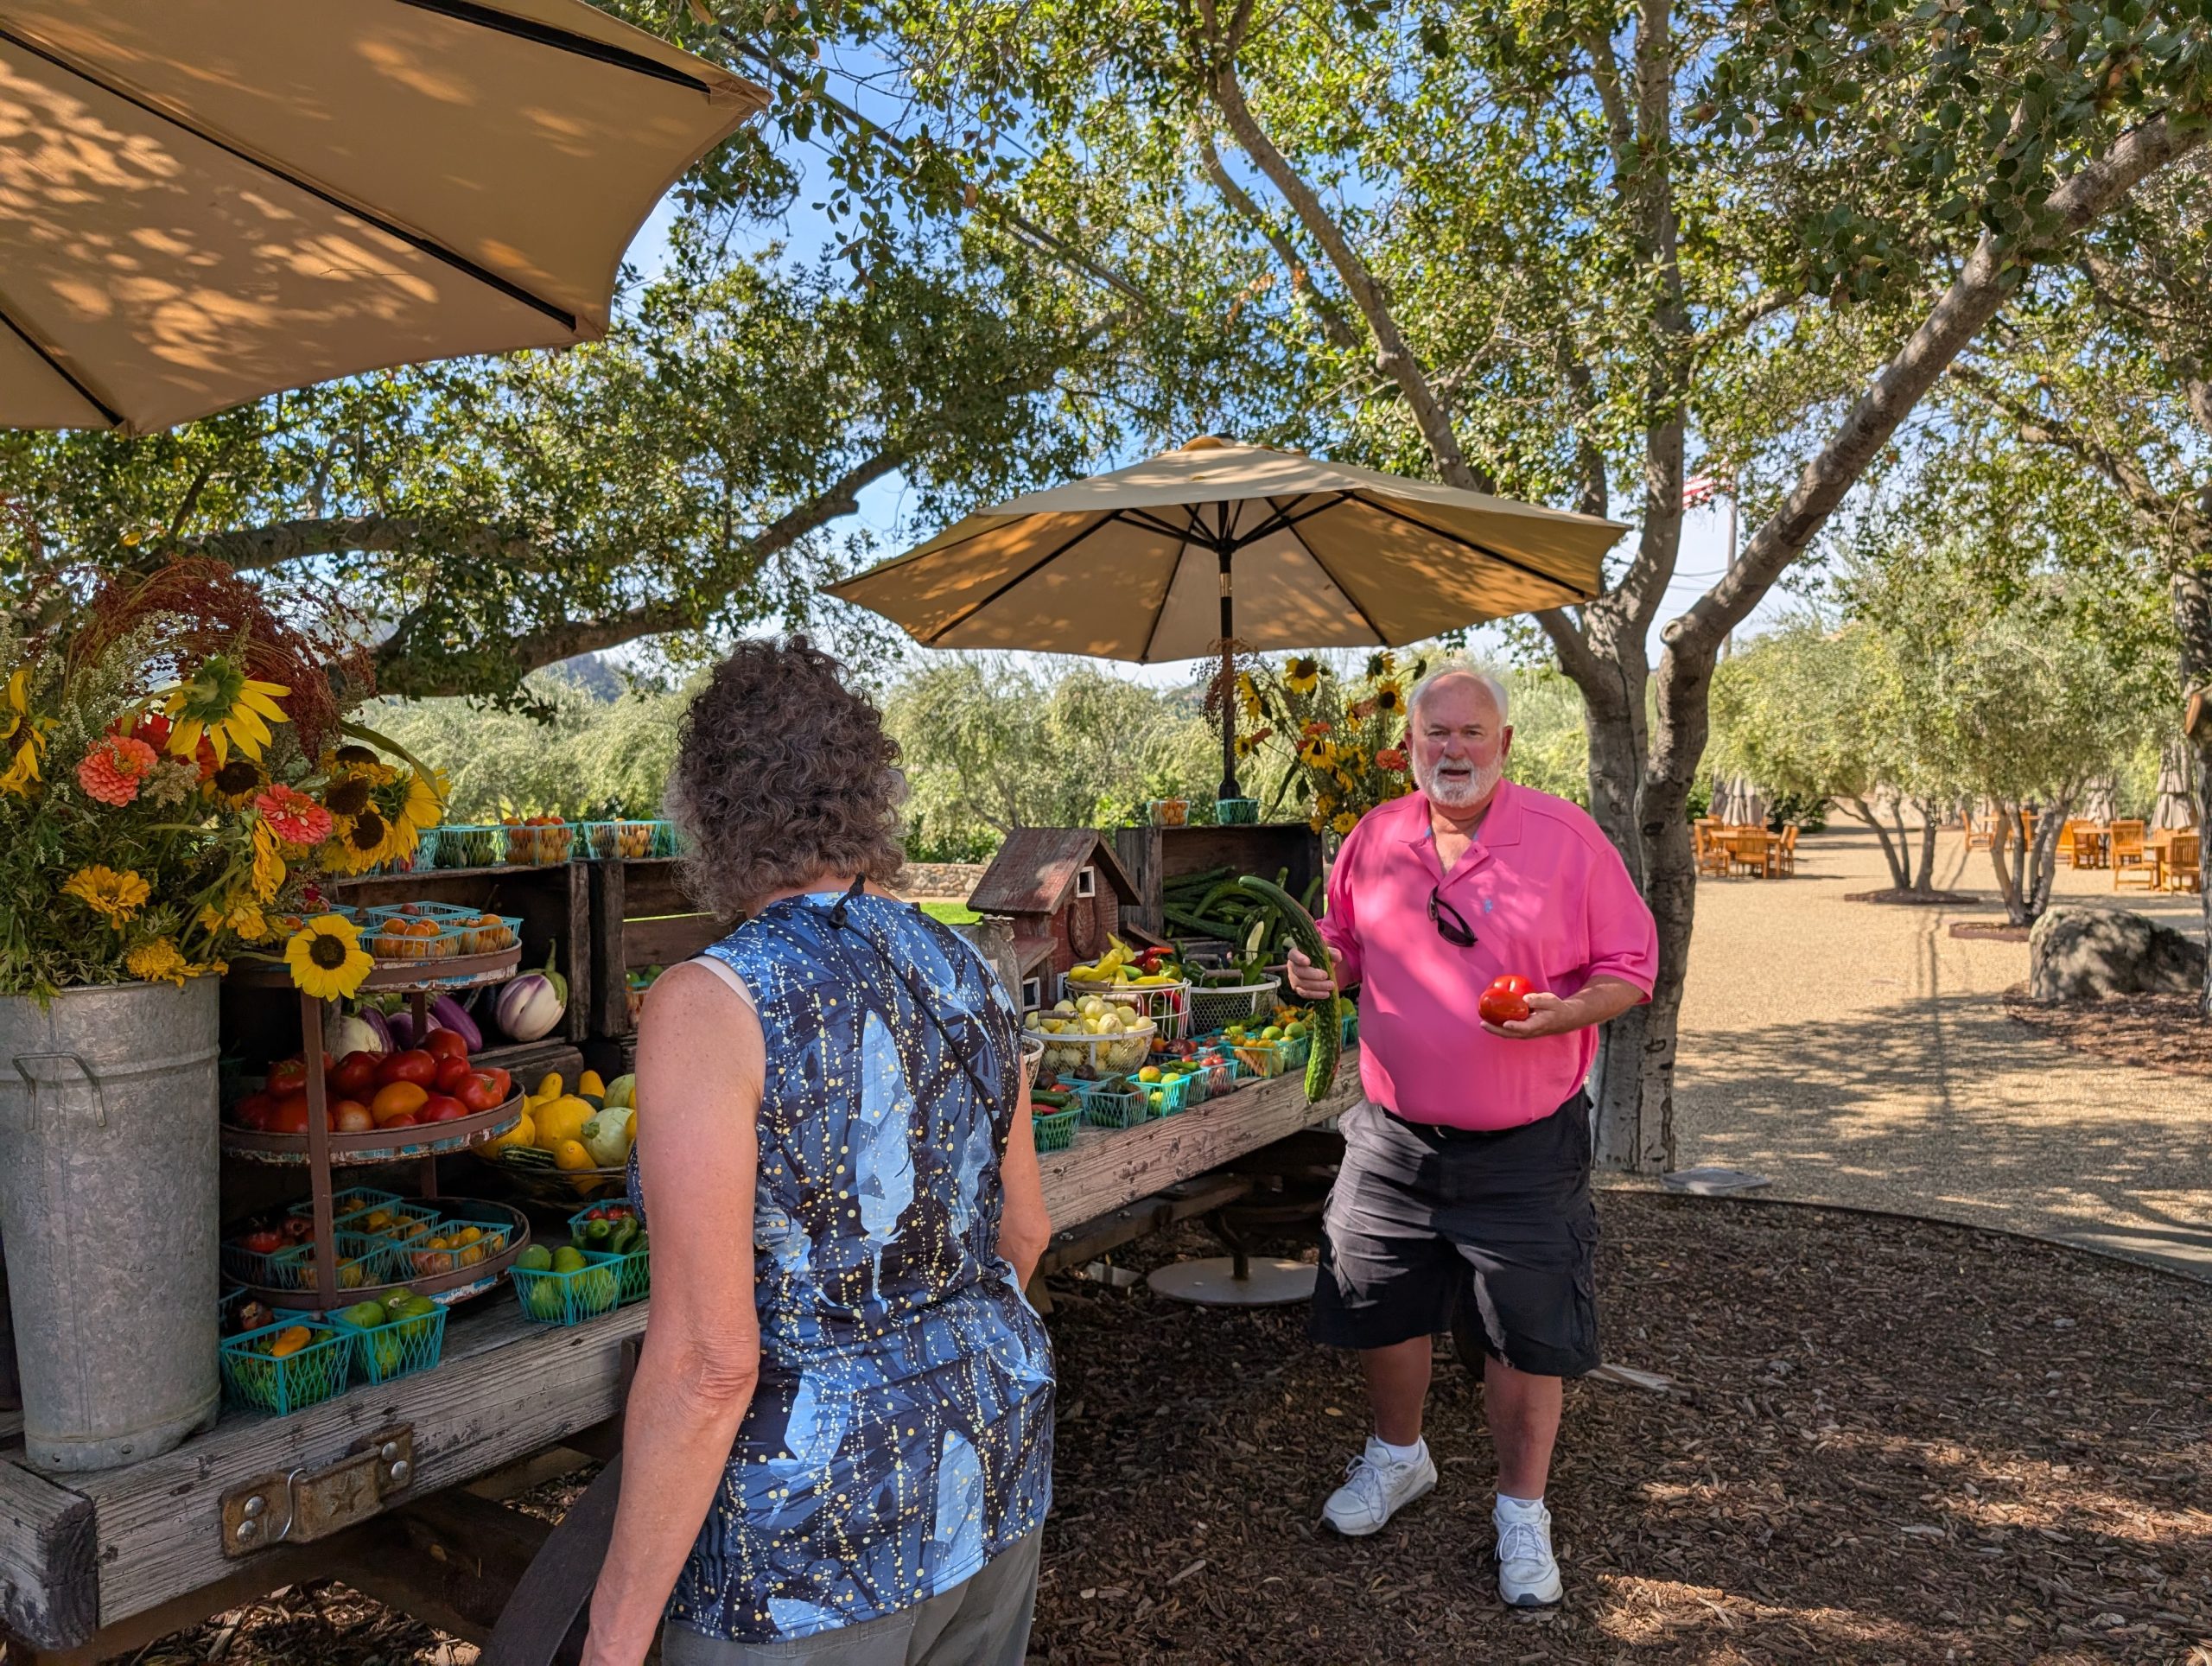
We absolutely loved our experience at Regusci. There was no rush, and we were welcome to stay as long as we wanted. And as we were leaving we were encouraged to take, free of charge, fresh veggies from their gardens that were beautifully presented at their veggie stand.
After finishing at Regusci, we headed to dinner at Scala in nearby Napa. Wonderful meal. Then back to camp to sit outside and just mellow after a wonderful day in California wine country. Tomorrow – San Francisco – HERE WE COME.
Monday, September 8, 2025 – Petaluma RV Resort, Petaluma, California
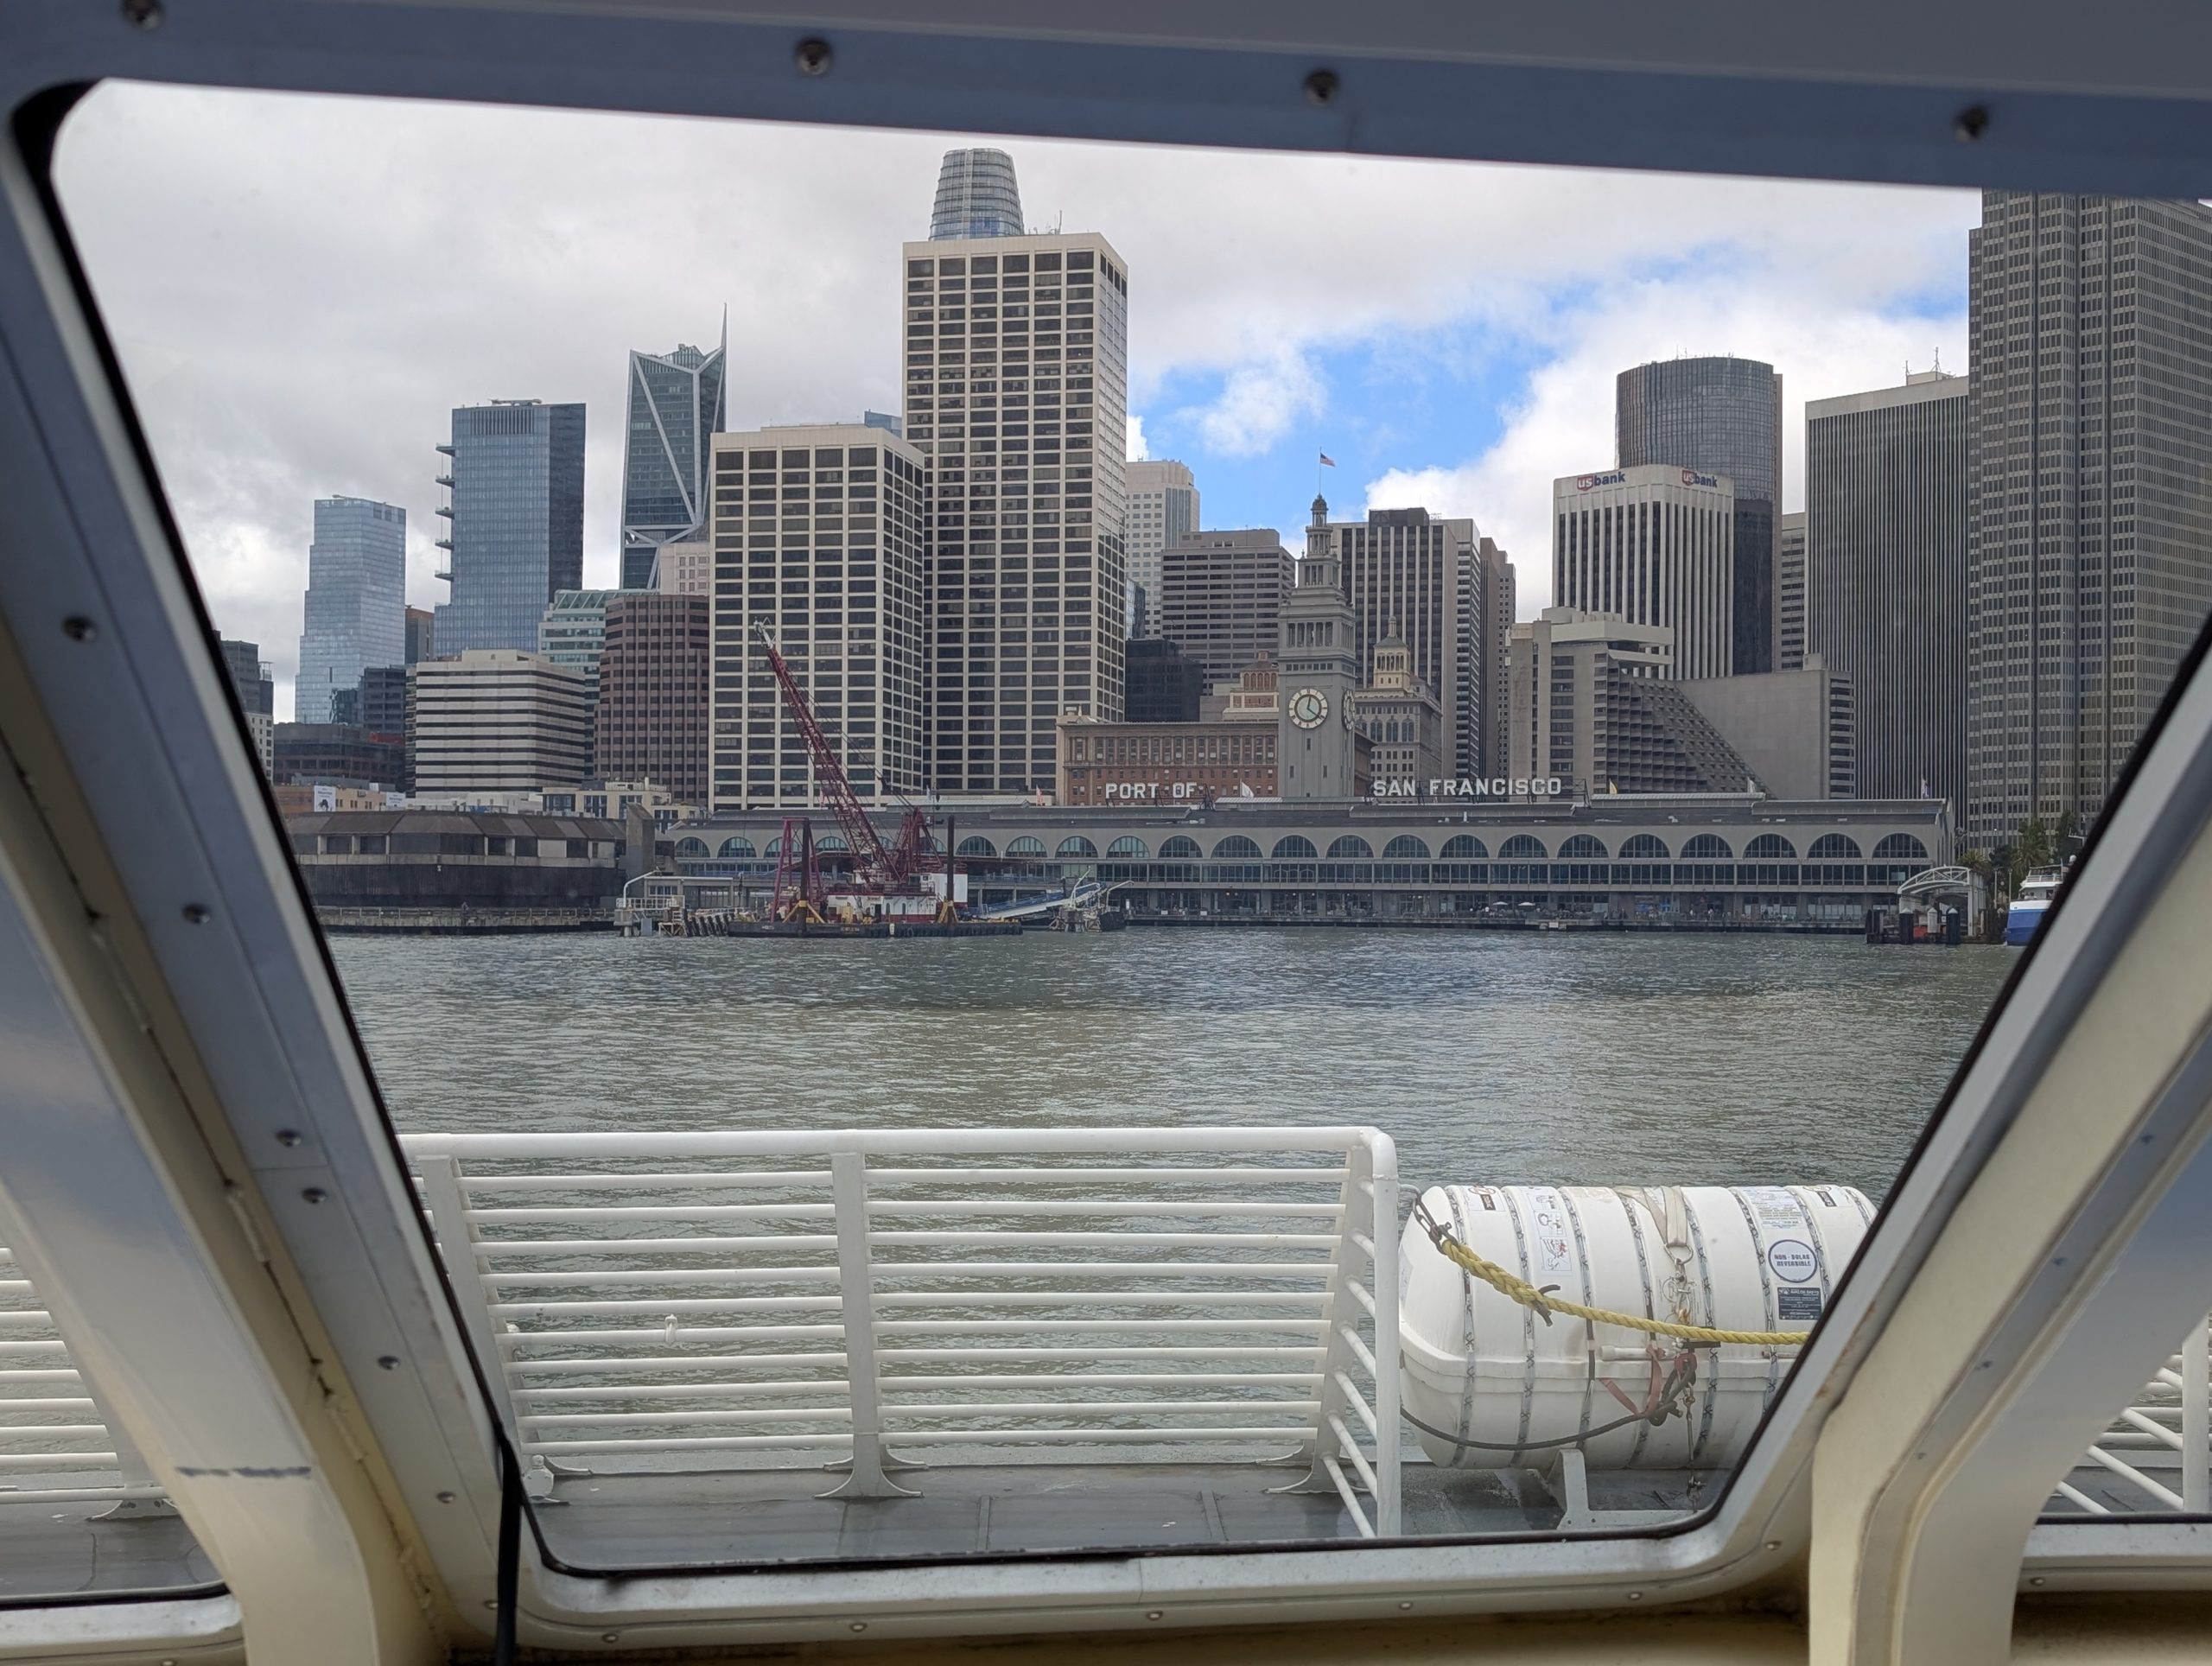
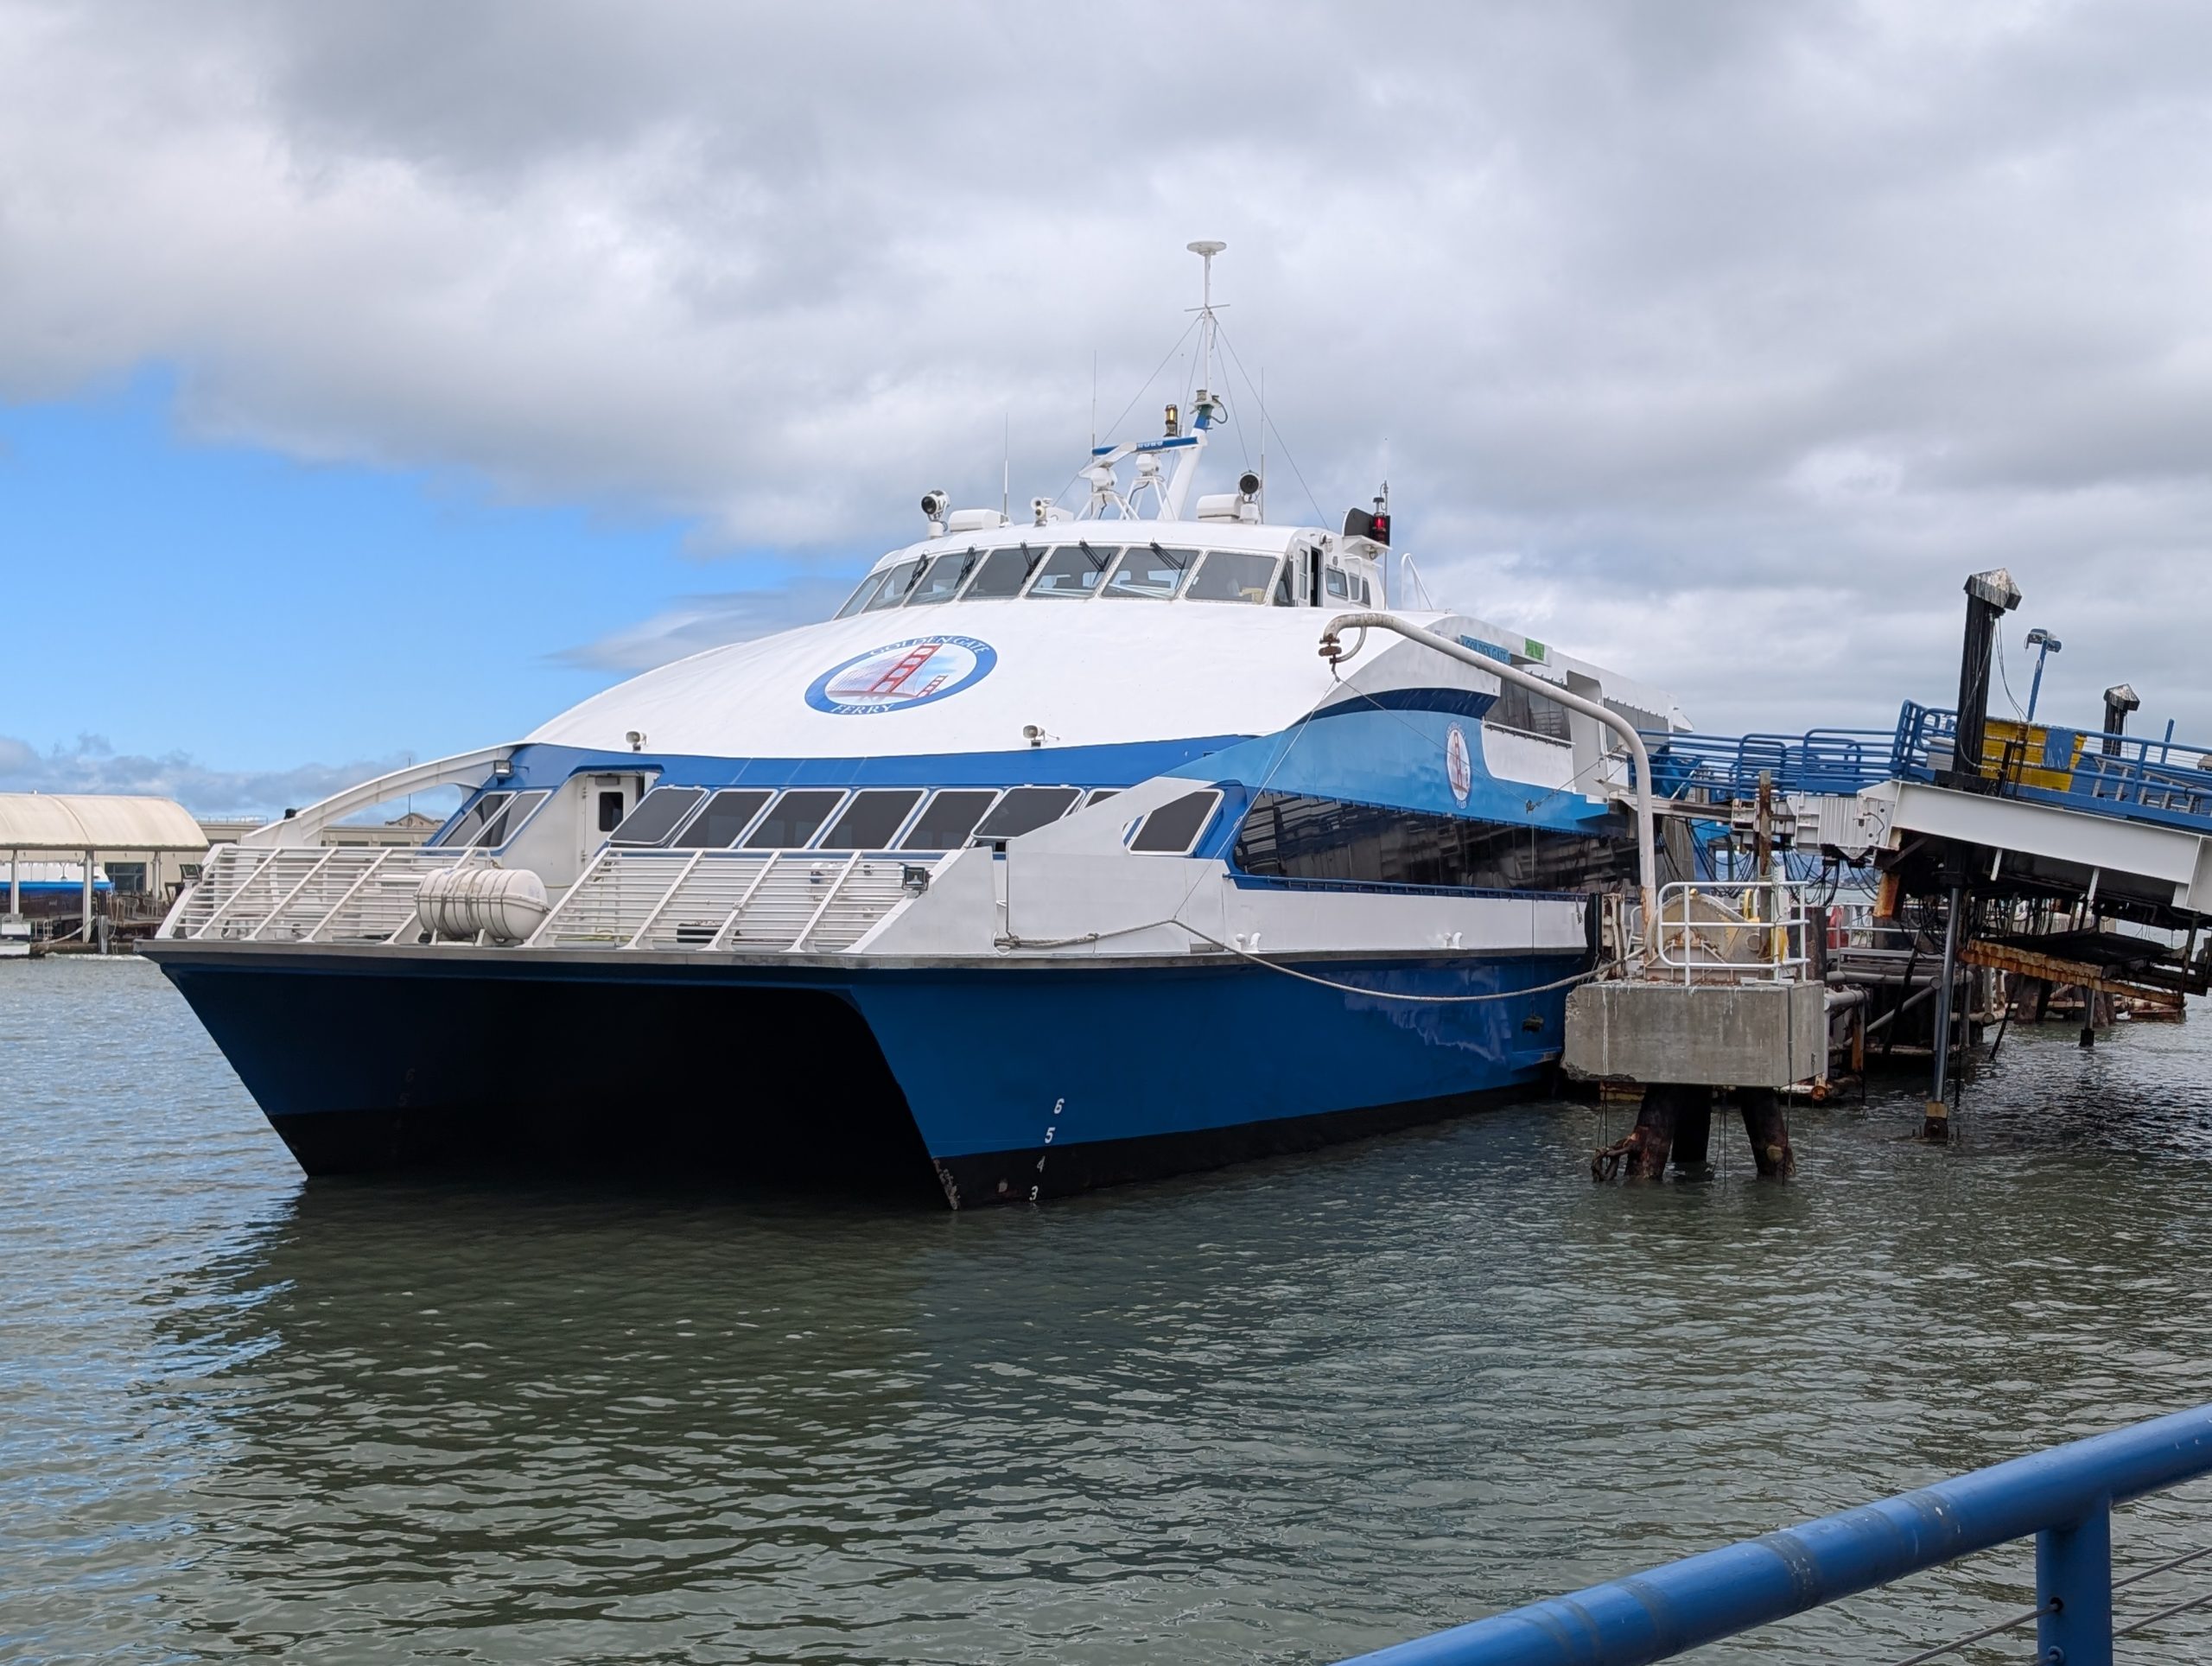
The plan was to leave camp at 10:30 am to catch the 11:50 am ferry in Larkspur to carry us across the San Francisco Bay to the ferry terminal Embarcadero.
View of SF as we approach “the city by the bay”.
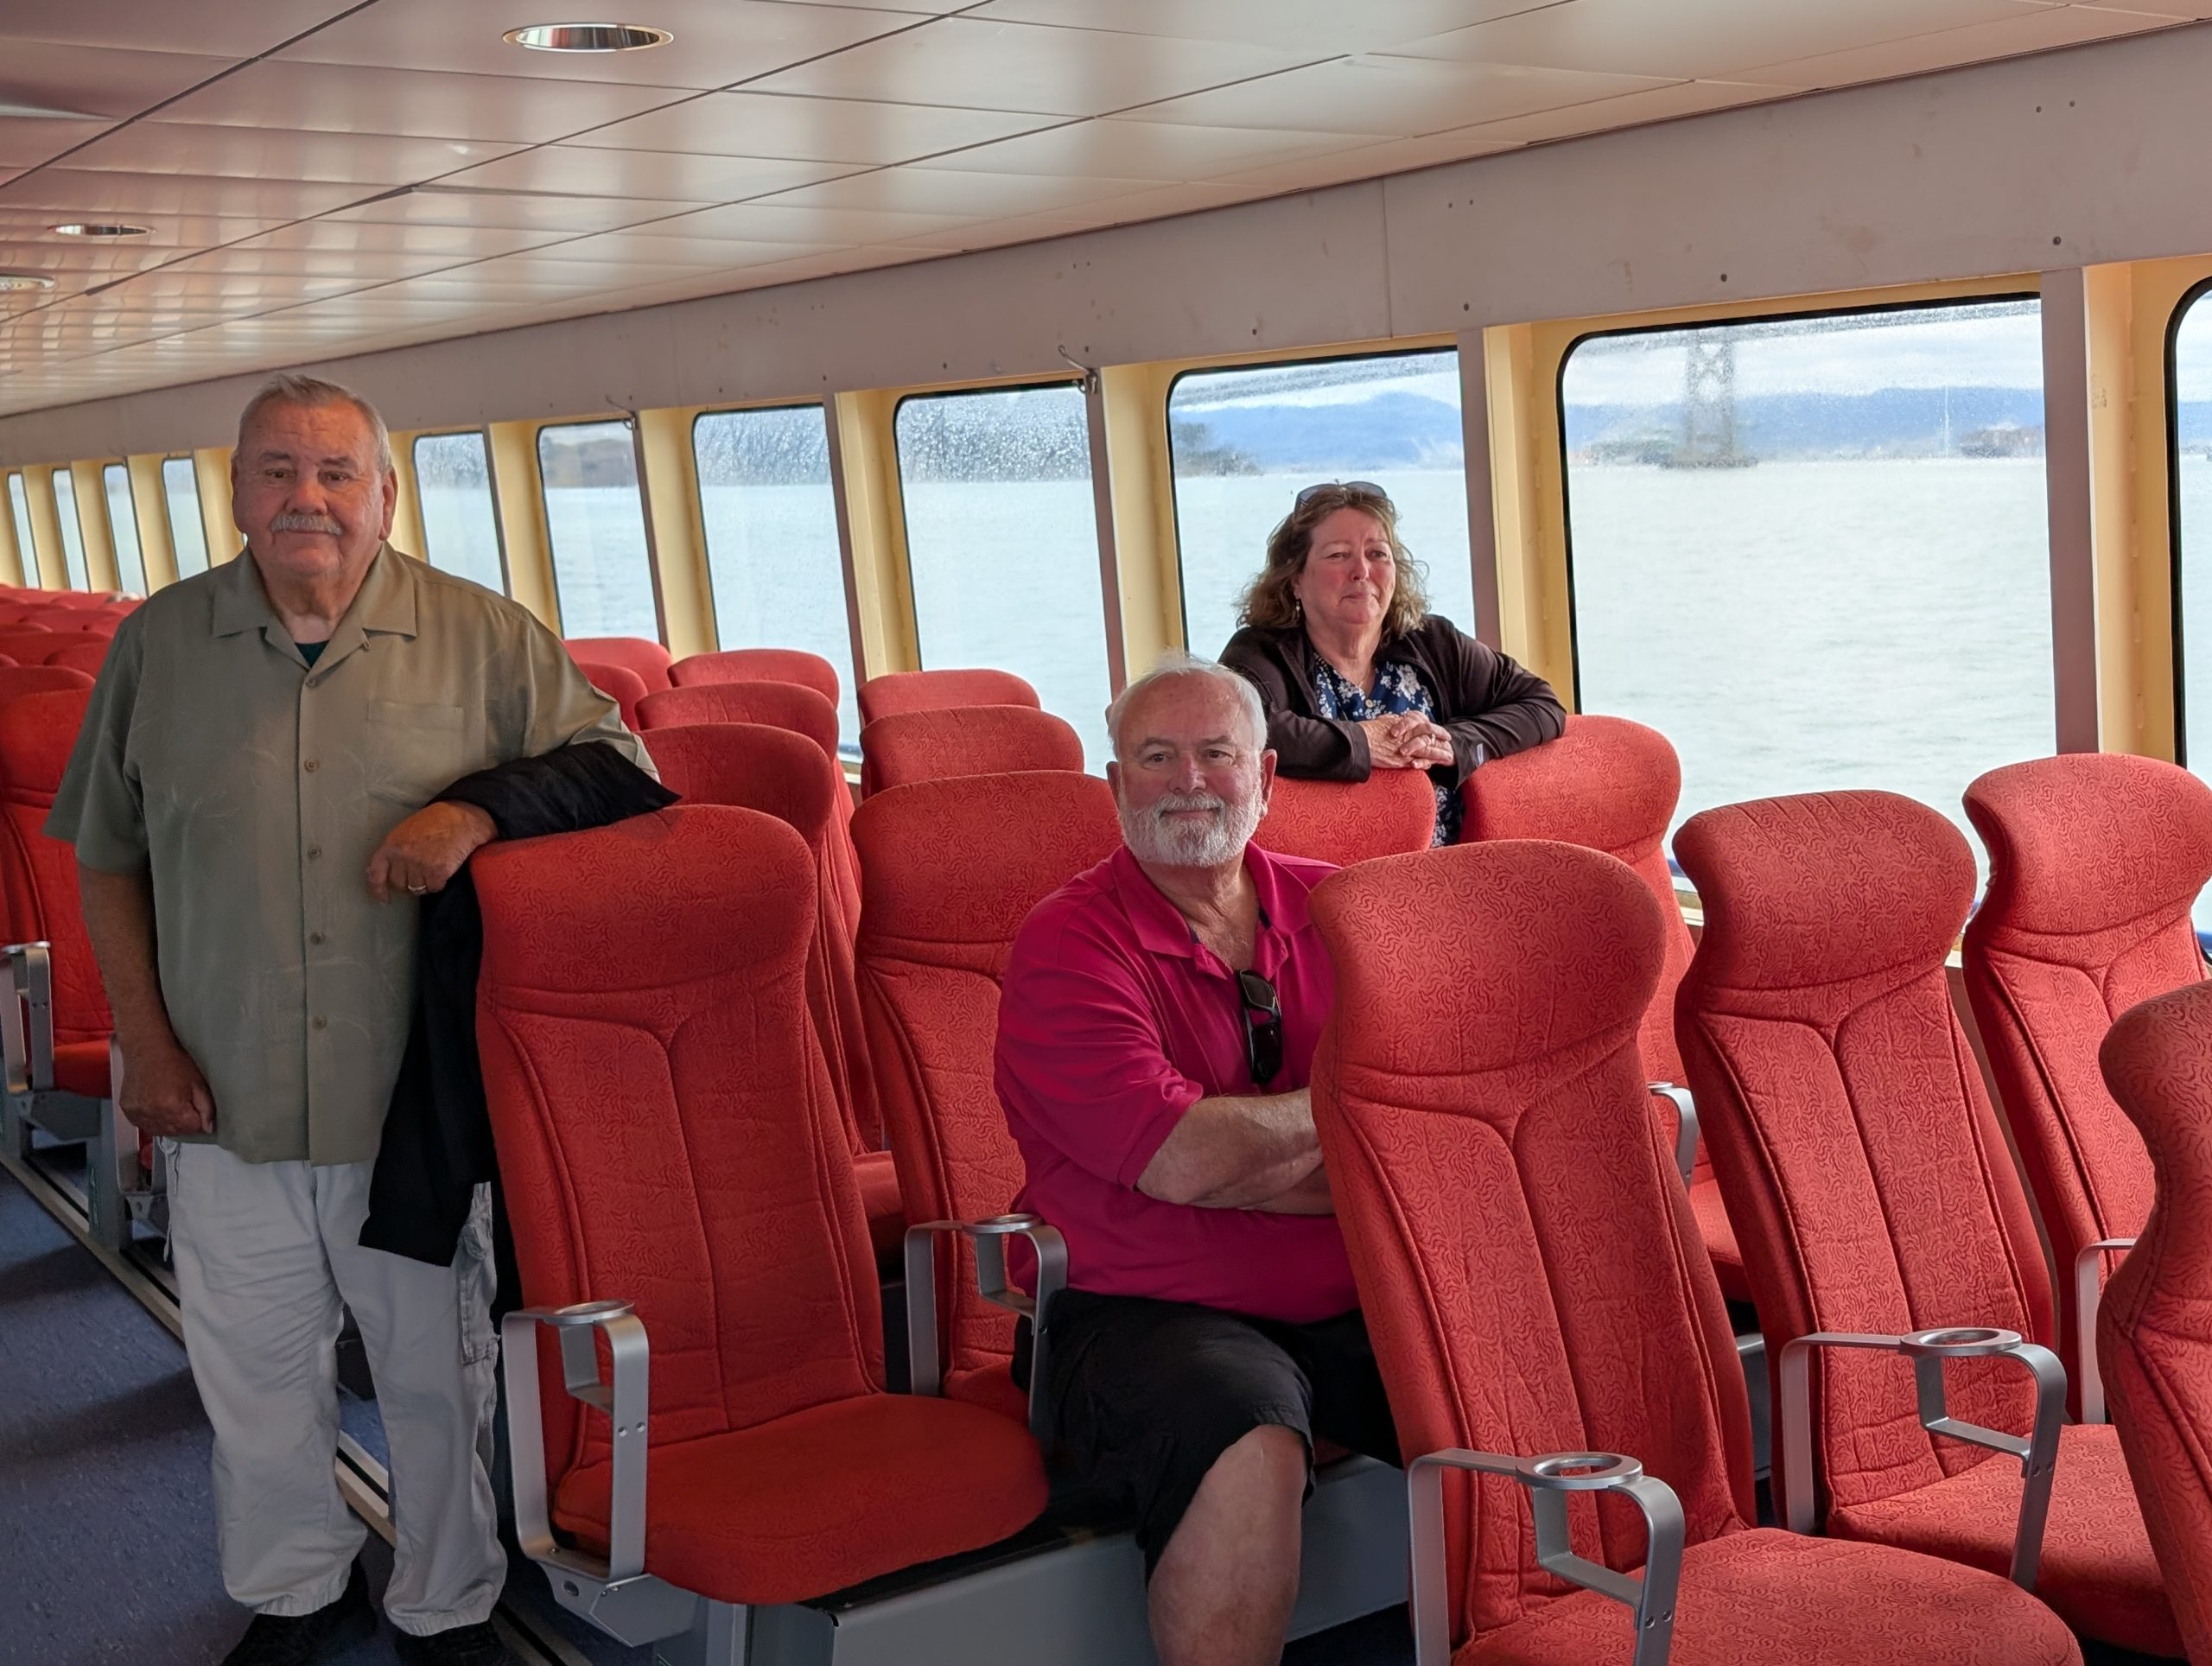
Tim on the left, Jim, and the birthday girl Phyllis back right in the ferry on our way to SF.
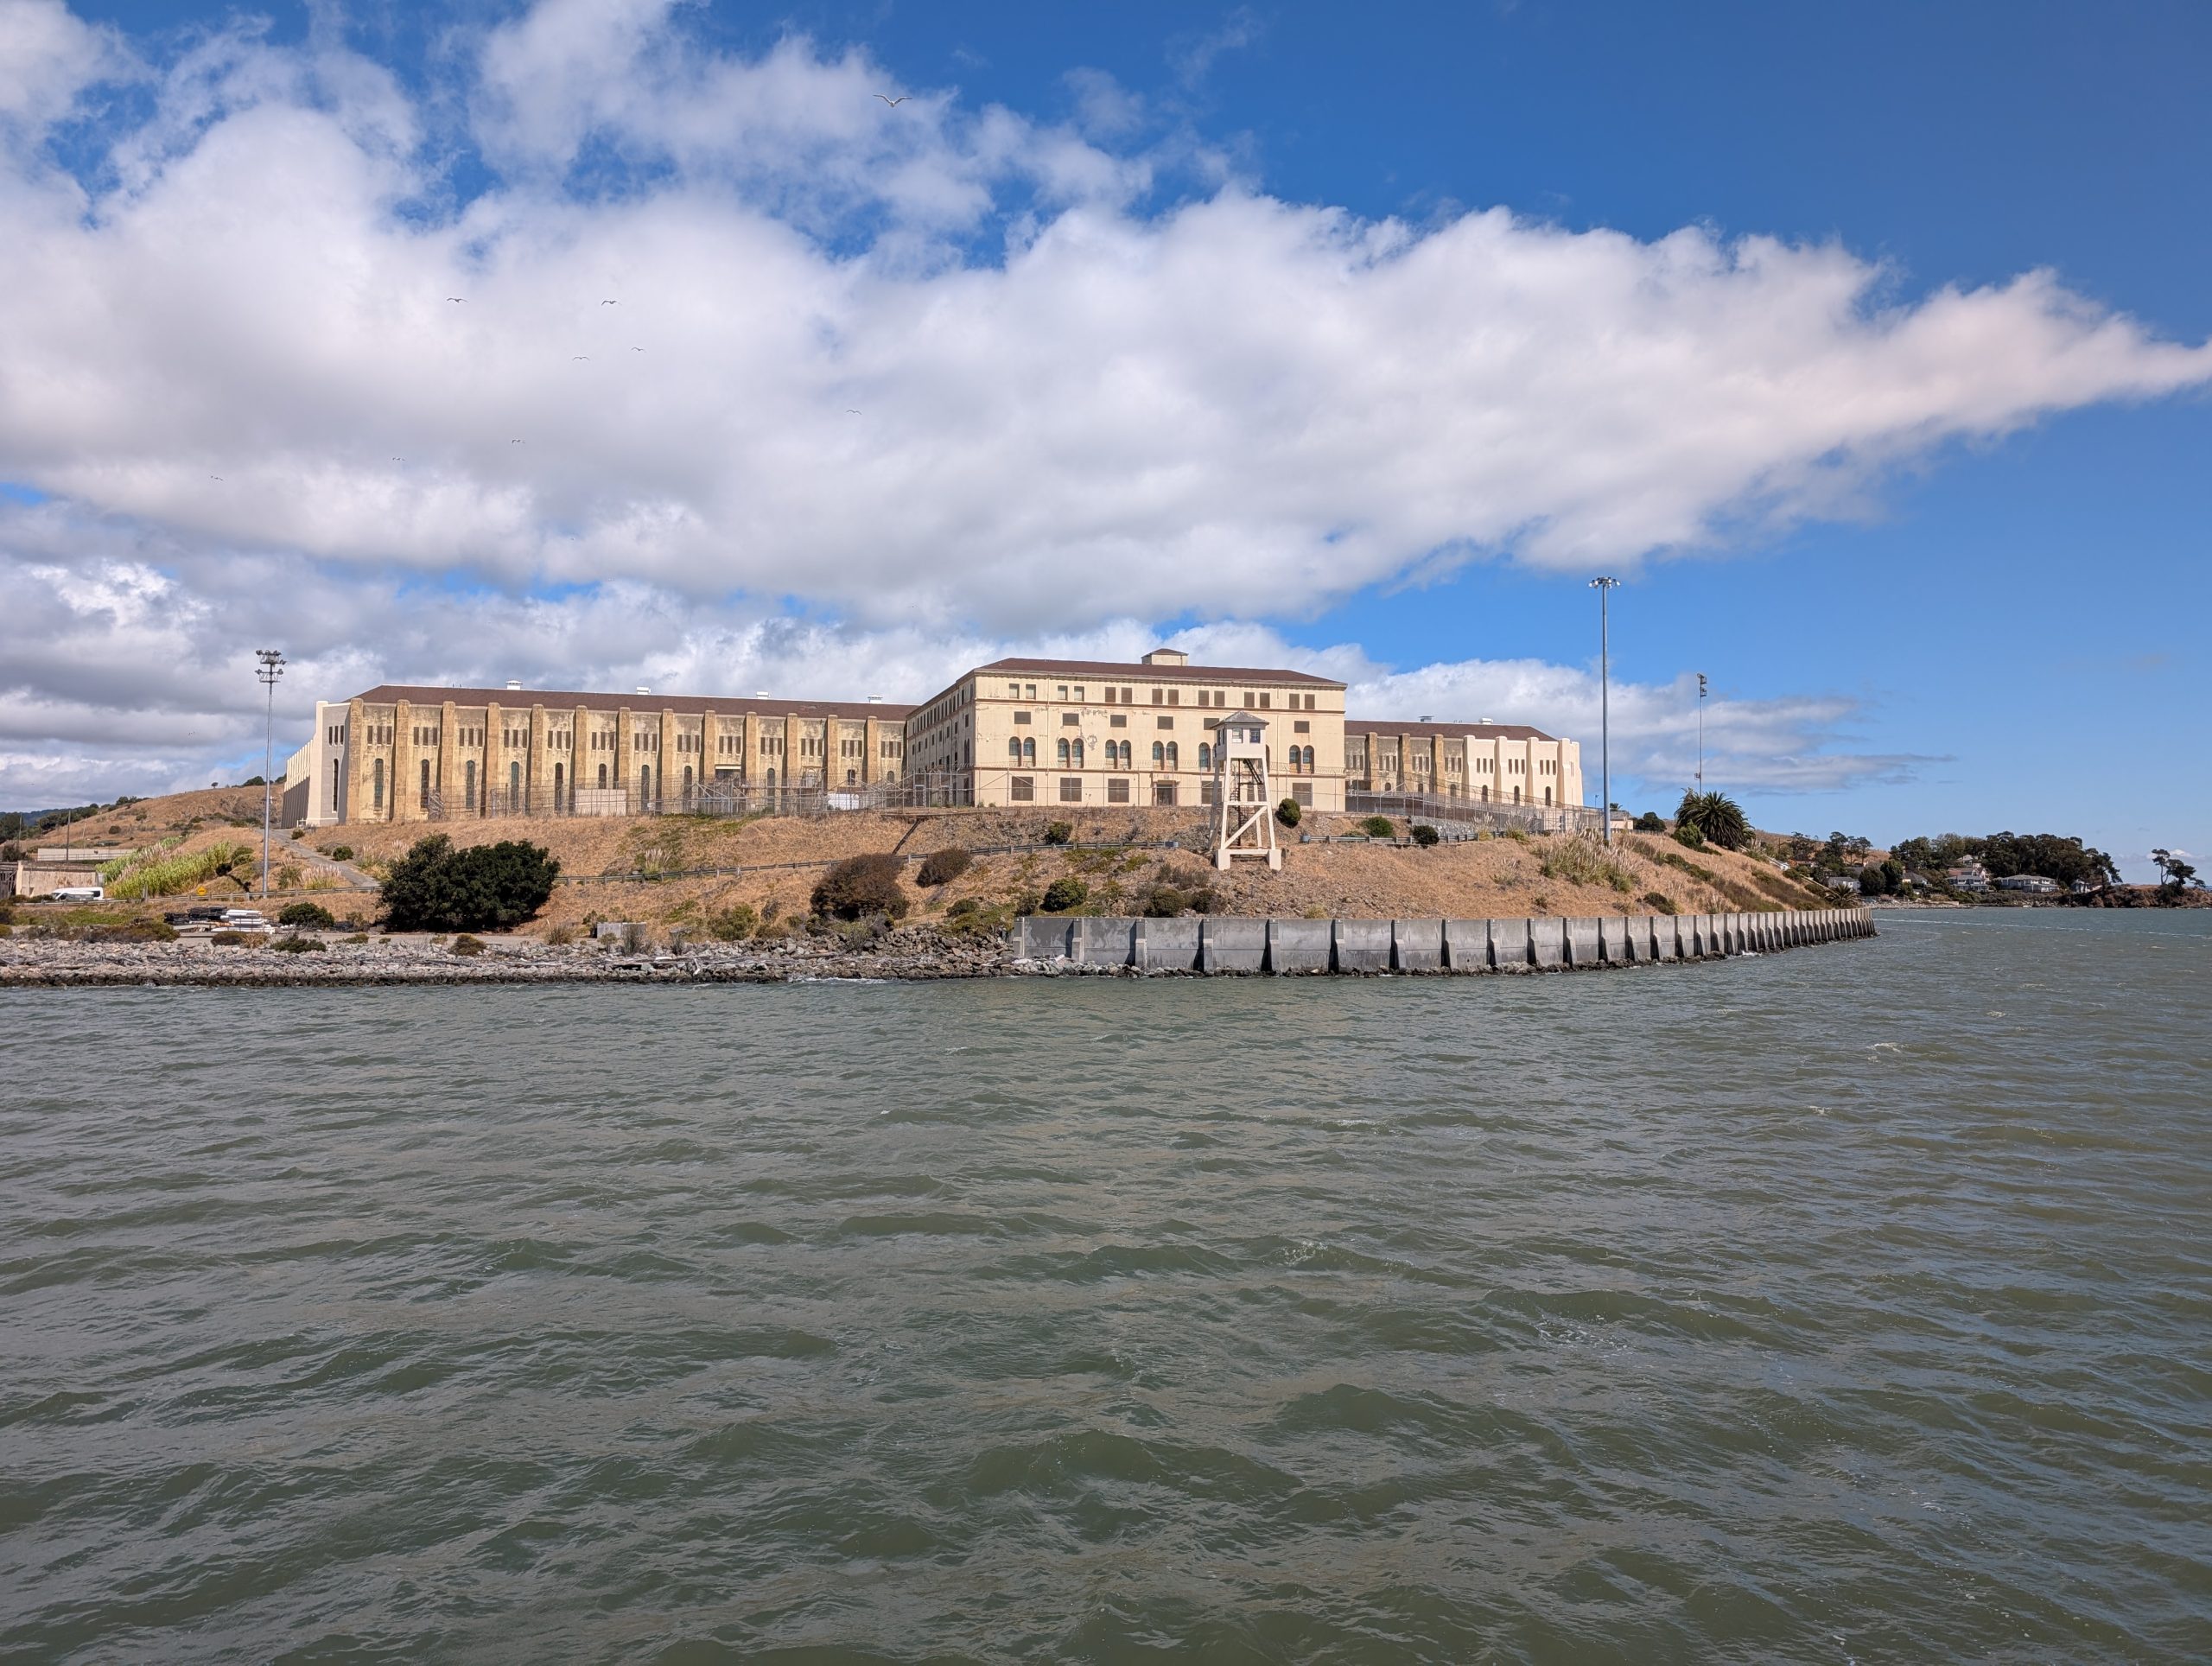
On our left as we were on our way – San Quentin, officially the San Quentin Rehabilitation Center, California’s oldest correctional facility. Established in 1852, located in Marin County. It is currently undergoing a major transformation into a model rehabilitation and re-entry center, aiming to prioritize education, healing, and community reintegration over warehousing. This transformation includes the creation of a new facility for individuals nearing release, inspired by the Norwegian correctional model, with a focus on vocational training, academic programs, and services to reduce recidivism.
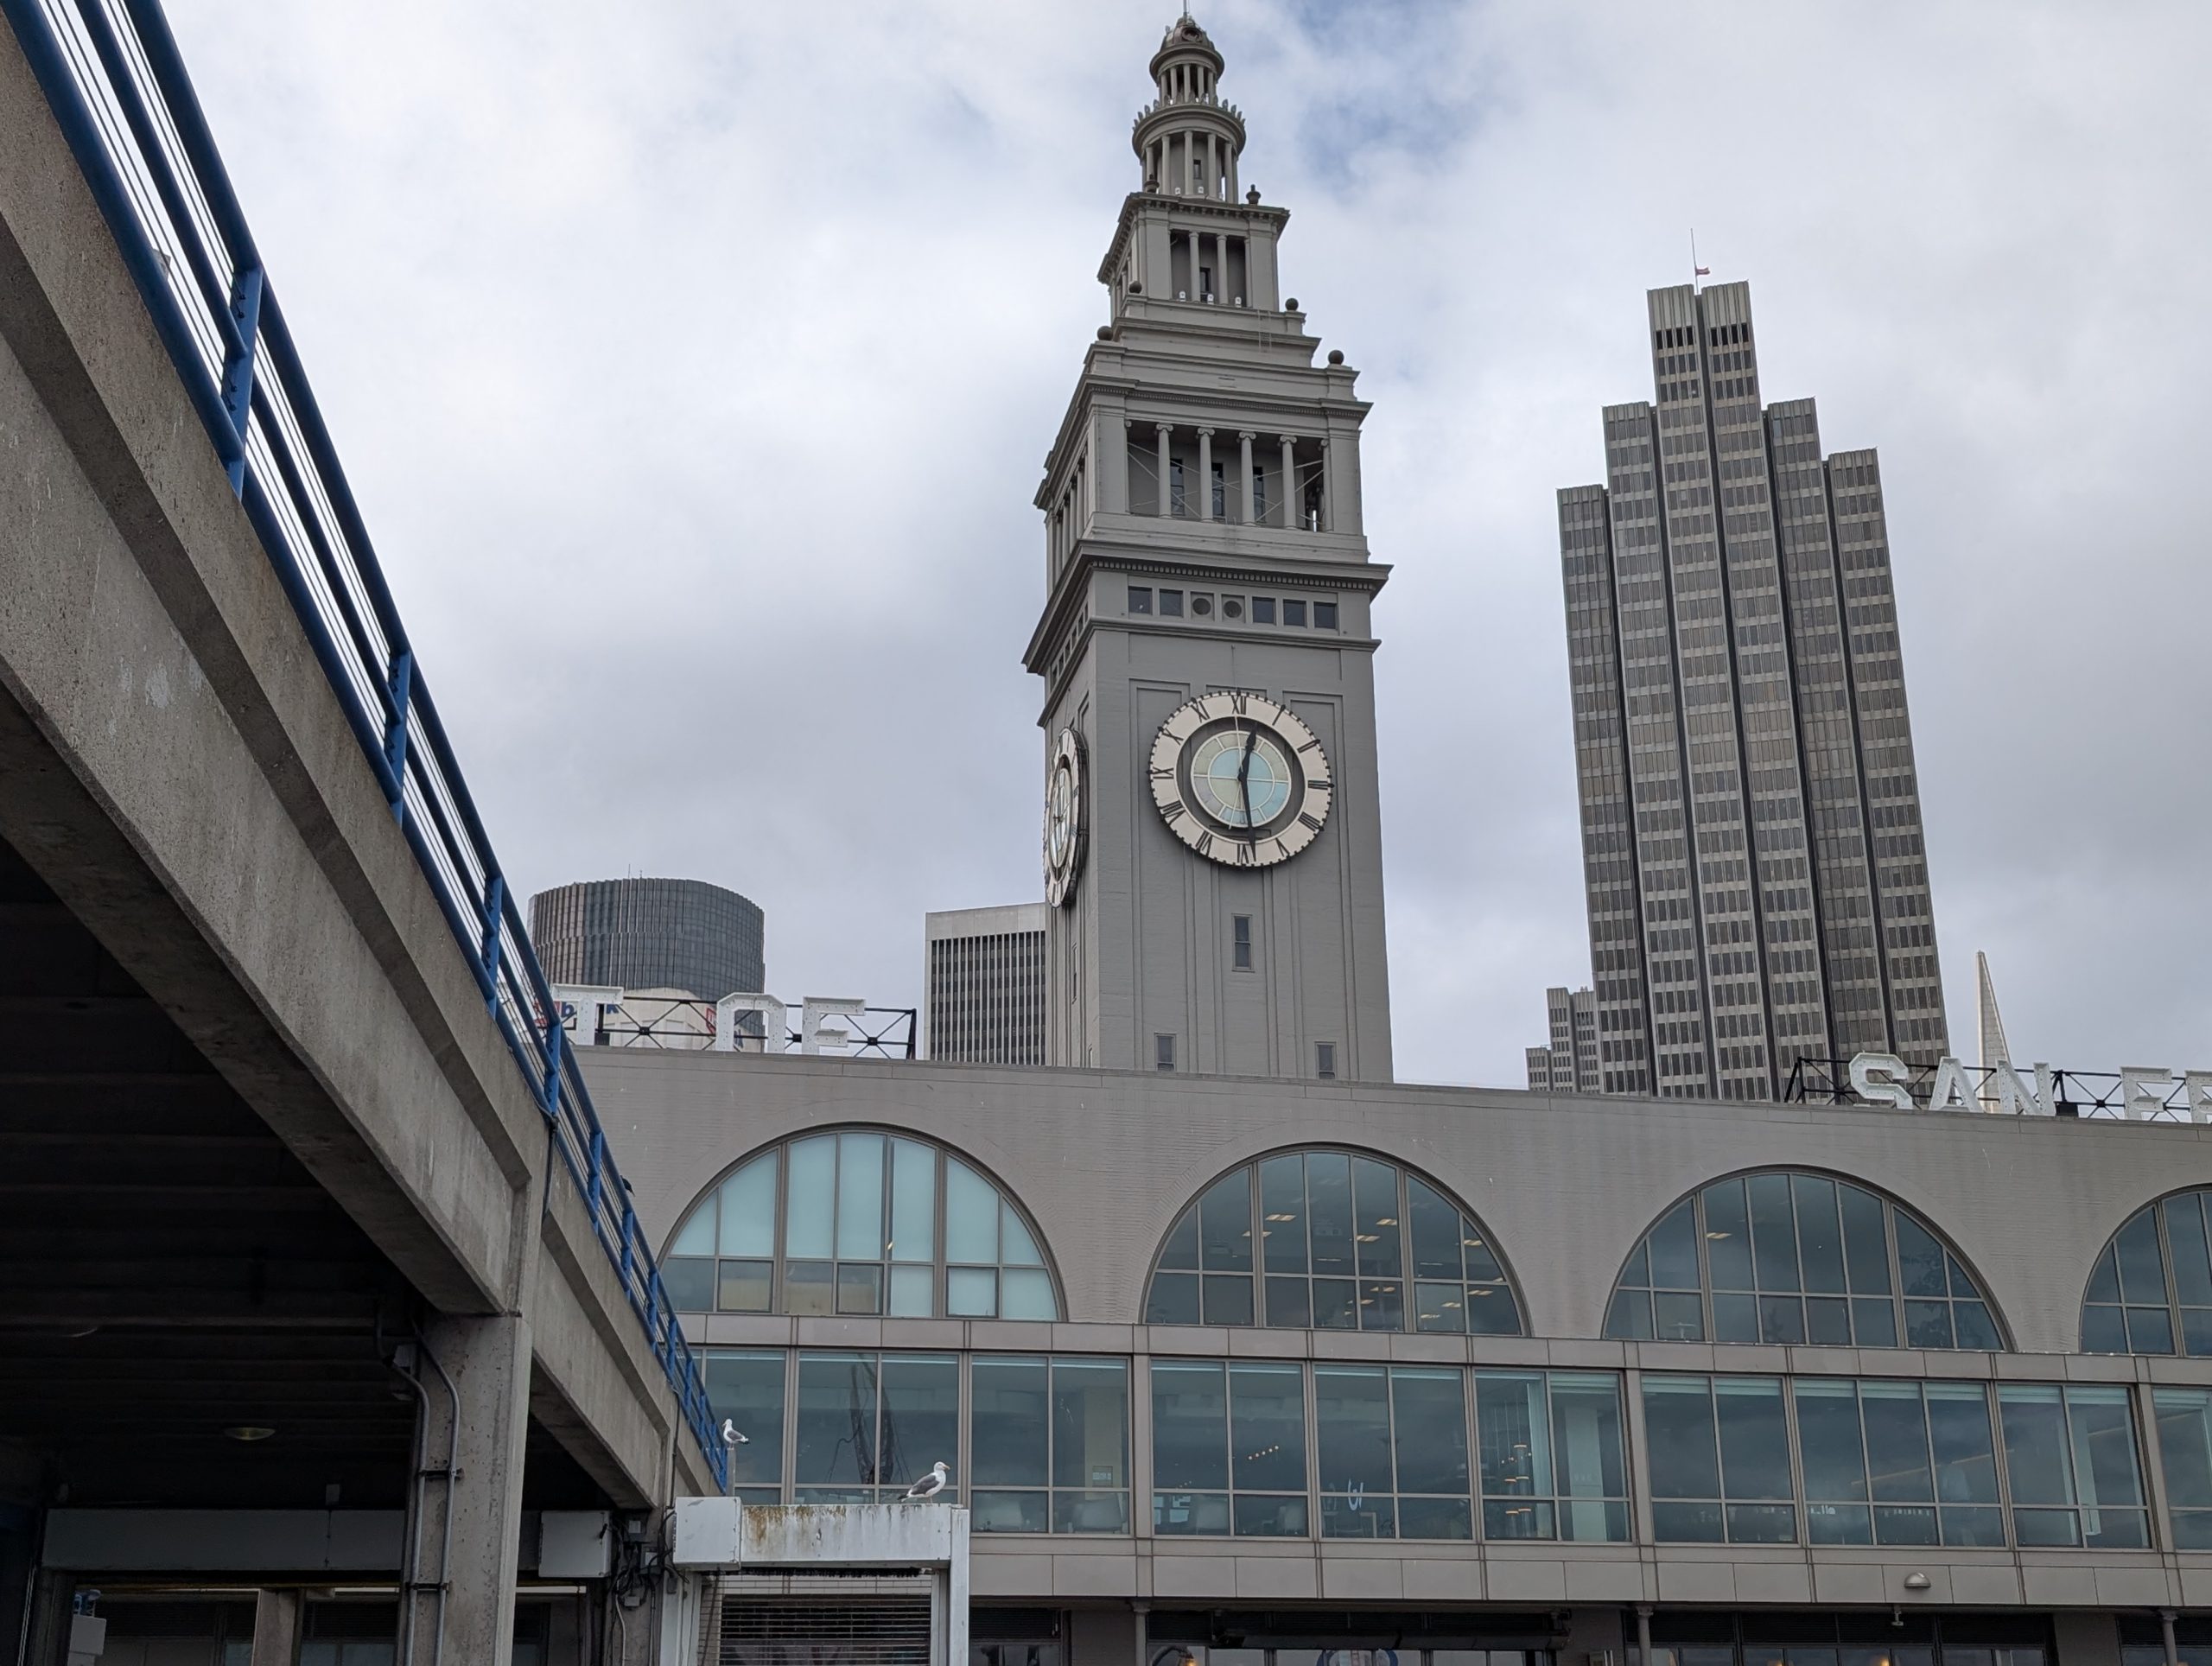
The clock tower. Part of the Ferry Building Marketplace.
Our ferry standing by to take us back to the car park.
The Embarcadero is an amazing stretch along the bay is a boulevard that runs all along the waterfront from the Bay Bridge, past the Ferry Building, and down to Pier 39 and Fisherman’s Wharf.
A number of San Francisco attractions are sprinkled along this street and it’s a popular place for strolling.
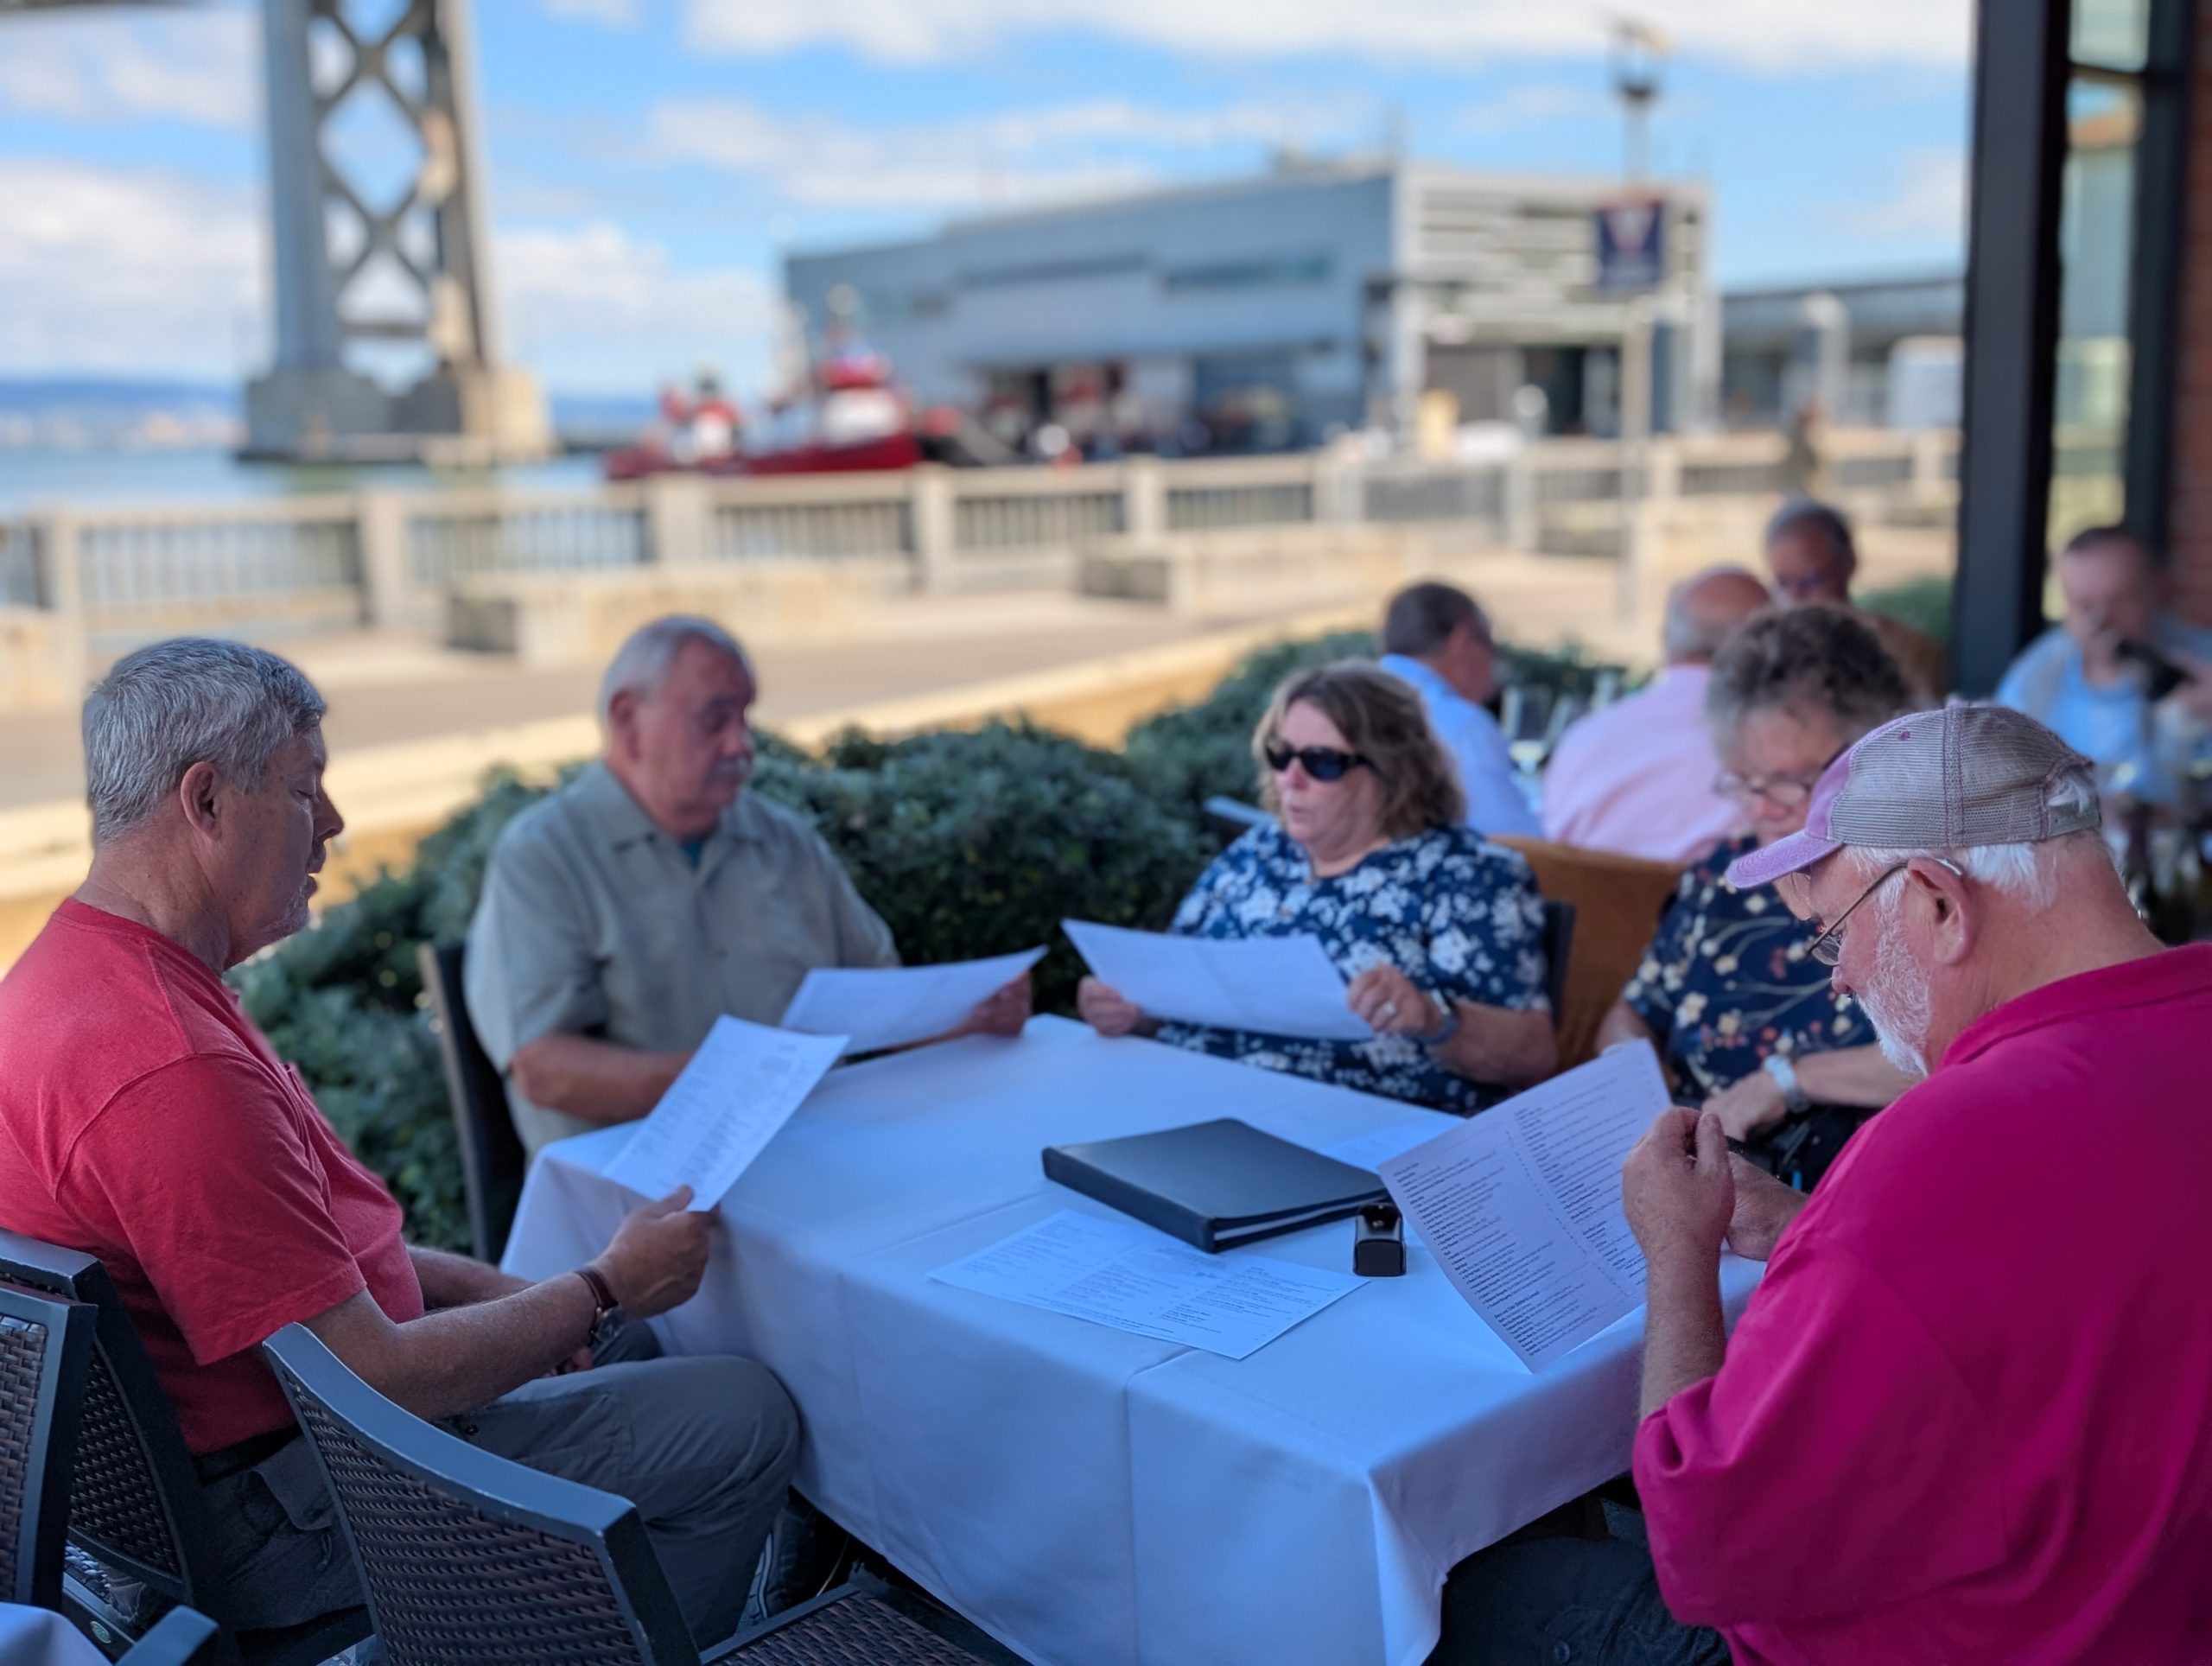
First, we visited the iconic Ferry Building Marketplace. After a brief stop at a wine bar, and purchases that simply had to be made, we headed to the Waterbar Restaurant to celebrate Phyliss’s 73rd birthday. She wanted fresh oysters for her birthday, and that’s exactly what she got! We were lucky enough to score an outside table for six on a covered patio. Beautiful view of the bay and the Bay Bridge which connects San Francisco and Oakland. It could not have been a more pleasant temperature. Perfect for dining in style.
Let’s see, should we order 24 raw oysters, or 48? Oh, what the heck, make it 48!
After our amazing meal, we headed back to the ferry terminal for a couple more purchases and our ferry boat trip back to Larkspur. We sat on the back deck with our jackets on and although we had been warned that there would be some water spray, that just didn’t happen.
After we got off the ferry we headed back to Petaluma and to Safeway for a bit of provisioning. Then back to camp for us to mellow out and catch up on our email, Facebook, my travel log, and each to our own books. It had been a long day, and even after we had planned to get together after a brief pause, all three parties decided simultaneously to remain in our respective rigs for quiet time. There is only so much fun our senior bodies can accommodate in one day. Luckily, we all know when enough is enough!
Tuesday, September 9, 2025 – Mountain Gate RV Park, Redding, California
Woke up to cloudy weather with impending showers likely. And of course, it stayed dry until it was time to hitch up and head out to our next destination. Andy got very wet. But by the time I had secured the inside of the trailer and was needed for the hitching part of the process, I didn’t even need a jacket.
But now we were on our way to Redding. And what a pleasurable ride we had today.
Lots of new (or possibly completely forgotten) countryside.
First, we headed south on 101, then east on highway 116, then south on Lakeville Road (along the Petaluma marsh), left and east on Highway 37, which crossed another marsh (the Nape-Sonoma marches), to Vallejo and I-80, which is the main road from San Francisco to Sacramento. In Vacaville we went north on I-505 which took us into the Sacramento River Valley where we merged onto I-5. At this point we were seeing a lot of agriculture. Amond tree groves, pistachio nut trees, rice fields, etc.
Our only stops along the way were for lunch at a rest stop, and another rest stop to change drivers, and our final stop for gas.
When we arrived at camp, we decided unhitching would work fine on our site. And since this was only a one-night stop and we didn’t need the truck for any provisioning or sightseeing, if it was once again raining the next morning, Andy’s life would be a whole lot easier.
Then a lovely chili dinner was provided by J&M. Then for me, another early to bed.
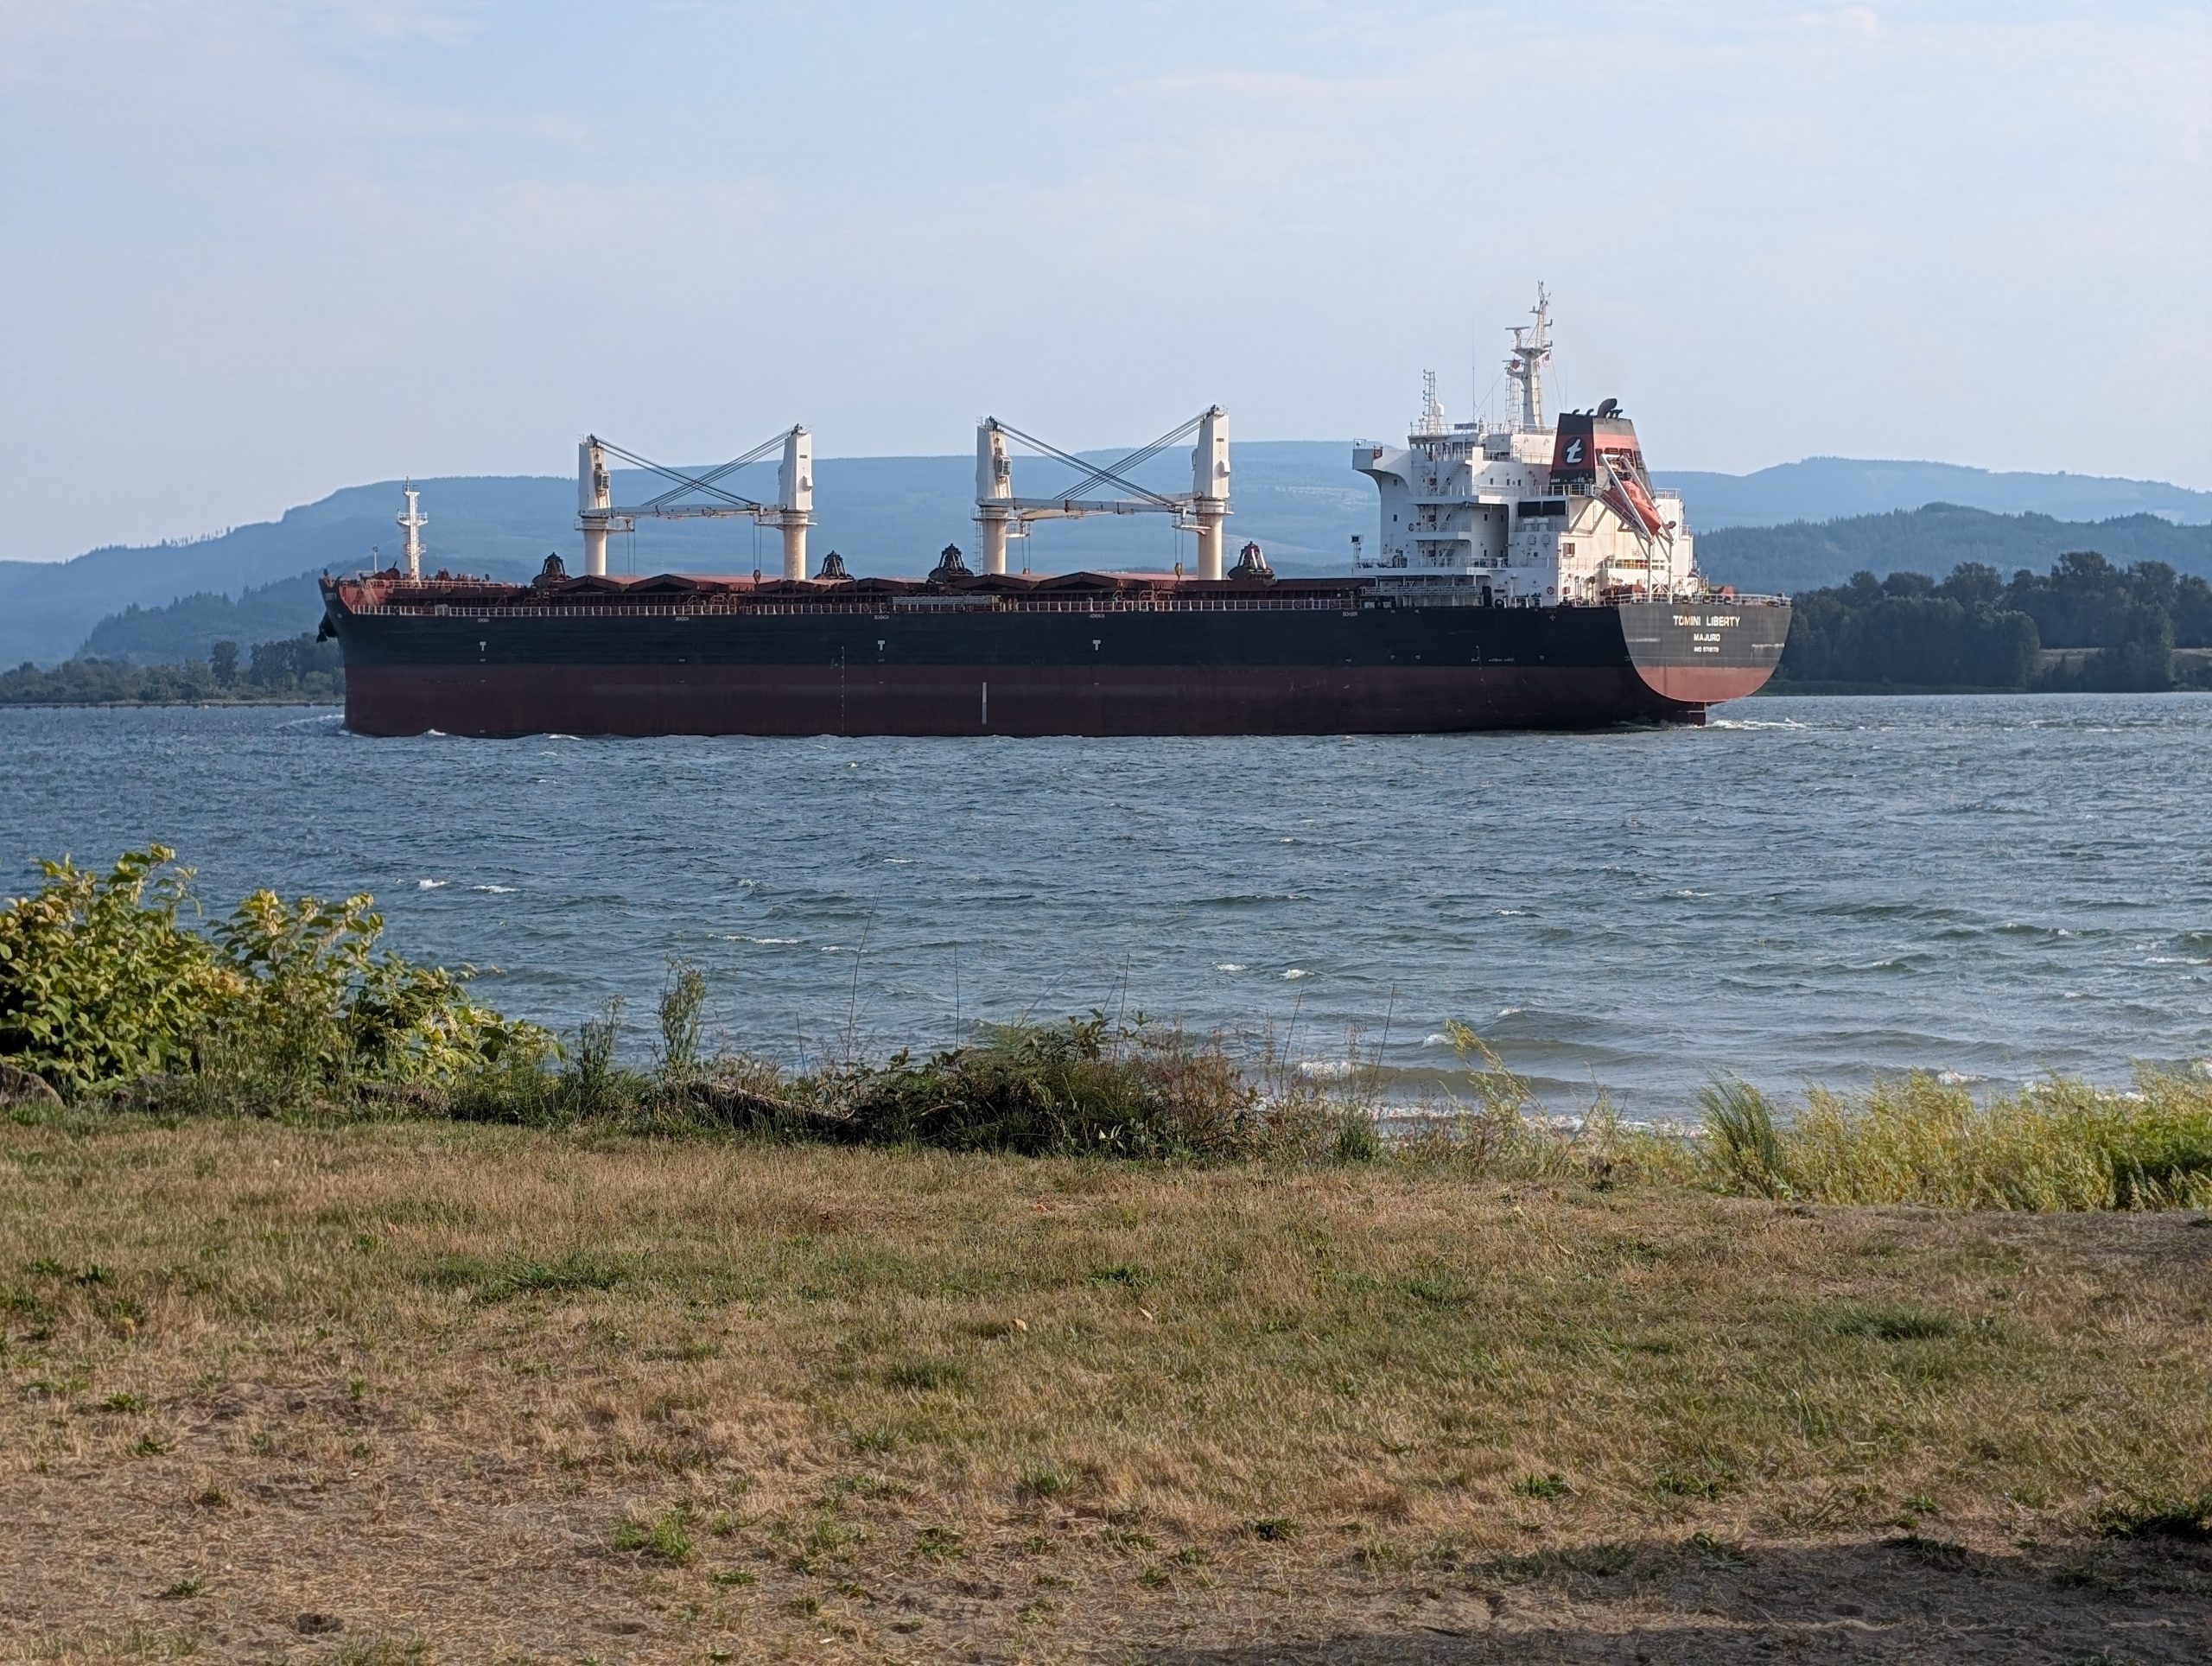
Monday, August 25, 2025 – Home to Skamokawa Vista Park
Left home to hook up the trailer at 10:30 am. All was fine until we had to wait to turn into the trailer storage area because of road work on East Camano Drive. And then after we hooked up the trailer, we once again had to wait for stopped cars to proceed forward before we could get back on the road.
So, after waiting, what seemed like hours but was just minutes, we were finally free to be on our way. I need to mention here that I truly hate road construction. But I am savvy enough to realize that potholes, road widenings, etc. do not magically happen by themselves. That road work is a necessary evil. But that realization doesn’t make any inconvenience caused by “road work ahead” any easier to take. But once back on track, everything went smoothly (relatively speaking) until we crept through the huge road construction around Jblm. (Joint Based Lewis and McCord.)
Then of course, we had to stop for lunch at Red Robin outside Olympia. Decision time. Do we continue west to Montesano and then south taking the scenic route to camp. Or do we go back on to I-5 where a sign had warned of road work for the next 11 miles (you know how I feel about road work). So, of course, I wanted to take our beloved route to Longbeach. We wouldn’t actually be going to Longbeach, but turning left on highway 4, and east to Skamokawa.
So, we didn’t arrive until about 5:30 to hook up with Jim and Margo and Tim and Phyllis, our travel partners, for this entire adventure. Jim immediately made me a martini and Andy a Manhattan. (And just so you wondered, M&M’s really do smooth out the road.)
Then Phyllis fed us wonderful enchiladas and salad, while I provided queso dip and tortilla chips. And for dessert peanut butter cookies and oatmeal raisin cookies. Then it was early to bed for us.
Tuesday, August 26, 2025 – Skamokawa Vista Park
Both of us slept very well and long. We were both pretty fatigued from gigs (Andy) and trip preparation (both of us). But what we woke up to this morning was amazing.
And frankly, words simply do not do justice to this setting. We are backed up to the Columbia River and being entertained by ocean going ships cruising up and down river after going to or leaving various ports along the way to Portland. And fortunately, because of the various depths (from constant dredging) of the river, ships float by the Washington shore very close to this county park.
Magnificent! And this morning, there was a barge that landed just downstream from us that appeared to be picking up full garbage containers and huge empty water containers and taking them away. Fascinating to watch.
And then of course there are the smaller crafts that come and go just for our pleasure. We definitely want to come here again. But suffice it to say, if you only appreciate big towns, museums, fancy restaurants, movie theaters, and luxury accommodations, etc. etc., you will find this area terribly boring. For us, it’s a marvelous place to watch the world go by.
Andy went on two small walks and a longer walk on a nature path, so he got his exercise for the day. My only physical movement today came from going in and out of the trailer and turning the pages of my book. And no, I feel no guilt in spending my day trying mightily to resemble a sloth!
Wednesday, August 27, 2025 – Harborview RV Park, Garibaldi, Oregon
Well, I would love to report that the sun was shining when we got up around 8:00 am, and that there was no precipitation in sight, but that would be a lie. Granted, we didn’t hook up in a downpour. But there was evidence of either heavy mist or light rain on our trailer sky lights and our picnic table. But being the seasoned trailer hooker uppers that we are, we didn’t even put on raincoats.
Then it was out of camp by 11:00 am and on our way to the Astoria Bridge, into the great state of Oregon, and south on 101 to Garibaldi. It took us about 2½ hours, and all three parties arrived safe and sound.
We had been through Garibaldi numerous times in the past but had never camped in the town. But here we are parked just across the road from the waterfront. And of course, since we are right next to the water, and it’s so cloudy we can sometimes not even see the water, it’s bloody chilly. So, after having a small lunch in our trailer we decided to join the others outside. Of course, I had started the day in short pants and sandals. It is still August after all! But, after about a half hour, I changed into long pants and shoes and socks. And I put the heat on in the trailer.
As I’ve gotten older, I have absolutely no patience with being cold. And even changing to warmer clothes didn’t work. So, I am now writing up this trip report happily getting warm in the trailer as the others sit outside and freeze. But enough about my regret at not remembering to bring my thermal underwear!
Today’s drive was magnificent. If you have never driven along the Washington side of the Columbia River from Longview to Ilwaco, then you need to do so before too much time passes. It’s a lovely ride. And then when you cross over the river and into Astoria and head south following 101 along the Oregon coast, you soon find yourself leaving all cares behind you and just concentrating on all the beauty this part of the world has to offer. I truly find the west coast of Oregon one of the most beautiful places on earth.
After setting up camp, and a light lunch, we took our camp chairs over to join the others for an afternoon of adding more clothes layer by layer. It wasn’t raining but marine onshore clouds made it very chilly. Finally, I had gotten to the point of either going in the trailer and turning on the heat or suffering the chances of frostbite. OK, it wasn’t that bad, but darn, it’s still August, and we have the God given right to expect to be able to sit outside this time of year.
When it was time for dinner, we all assembled in J & M’s bus and were served a wonderful taco dinner.
Then back to our trailer for a short read and an early to bed for me.
Thursday, August 28, 2025 – Harborview RV Park, Garibaldi, Oregon
We woke up to foggy weather but no rain. After showering and breakfast, I decided to read the paper (Seattle Times) online. Why do I bother? I am so tired of reading about more gun deaths, bombings in Gaza, what fresh hell Trump has thought up for America, etc. etc., that I’m going to give reading the paper a pass for a few days.
After breakfast, we decided to do a bit of provisioning. So, first gas, then groceries at Fred Meyer, and an obligatory visit to Blue Herron for some really not necessary, but who can refuse, cheese purchases. And a hot dog from their food truck.
Then back to camp to be terribly lazy all afternoon. I even managed to take a lovely 1-hour nap. Then outside in my comfy camp chair to read and converse with our buddies while Andy took a walk at Bar View Jetty County Park.
Tonight, Jim made paella in honor of Tim and Phyllis’s 21st wedding anniversary. What a great way to celebrate. And of course, the paella was fantastic.
Then off to bed at a decent hour because tomorrow we move on to Coos Bay.
Friday, August 29, 2025 – Bay Point Landing, Coos Bay, Oregon
Luckily, we woke up at a decent hour and were just about to leave when Phyllis let us know they would not be heading out for a while. On the way to camp over sometimes very bumpy road, a spring for one of the trailer wheels had severed. Luckily for Tim, he not only had a spare part but Jim to help him install the new spring. But at this point Andy and I couldn’t do a damn thing to help. So, we decided to go ahead and if they couldn’t get into camp until late, we would have dinner ready for them whenever they arrived.
Now I must mention how much we love the Oregon coast. Even though we were on the road for over 4 hours, which BTW is a long time when towing a trailer, the drive could not have been more scenic. And even though we have traveled this same route many times, it never gets old. But back to dinner plans.
Jim had previously made a 6:00 pm dinner reservation for the 6 of us at the Blue Herron in Coos Bay. But if they couldn’t be in camp and set up by then, we would cancel our reservation, and it would be spaghetti and salad at Chez Carr. (The mobile Chez Carr that is.)
But at 4:45 pm they pulled into camp. So, at 5:35 pm, we set out for dinner in town.
And what a fine meal we had. The Blue Herron serves German specialties and a fine selection of seafood entrees.
Then back to camp to sit in our camp chairs and watch the sun set over North Spit. An absolutely lovely way to end the day.
Saturday, August 30, 2025 – Bay Point Landing, Coos Bay, Oregon
We woke to onshore flow, but it soon burned off. Even though our site doesn’t back right up to Coos Bay, we can see it very well from our back window.
After breakfast we decided to go into town for gas and a few grocery items, and then a ride out onto North Spit.
The North Spit of Coos Bay is a strip of land between the Pacific Ocean and the waters of Coos Bay. You can only access the spit by car or truck along a man-made causeway, by boat, or train. (The non-passenger train is used by the huge lumber mills to move lumber.)
In essence, the spit is basically an industrialized, semi-wild peninsula, and a huge protected, endangered species habitat. Made up of open sand dunes, forested islands, and wetlands, the North Spit of Coos Bay is at the southernmost end of a series of sand dunes extending along the Oregon coastline from Florence to Coos Bay. There are 10 miles of hiking/horse trails, sand-driving roads, an undeveloped staging area and miles of beach waiting for exploration. The North Spit boat launch offers a full-size boat ramp, ample trailer parking, restrooms, and running water.
After returning to camp, we read for a while and visited with our friends until it was time for me to pull dinner together. First appetizers, then grilled marinated flank steak, mac and cheese, and salad provided by Tim and Phyllis.
After cleaning up after dinner, it was back to Tim and Phyllis’s to sit outside, enjoy their propane firepit, and watch another beautiful sunset while eating freshly baked snickerdoodles. Life simply does not get better than this!
Sunday, August 31, 2025 – Bay Point Landing, Coos Bay, Oregon
This morning, we had breakfast (blueberry pancakes and bacon) provided by Tim and Phyllis. Wow – what a treat to have someone else fix breakfast.
After breakfast we decided to go exploring. So, with our trusty Oregon Atlas in hand, off we went in search of Cape Arago. Which we found. But then, where next? How about taking Seven Devils Road, cutting over to Beaver Road, and right onto Whiskey Run Road to check out Seven Devils State Rec. Site, then Whiskey Run Beach. After that we went further south to check out Randolf and the Bandon Dunes Golf Resort.
Along the way we met some new friends with four legs. Now, I have met interesting critters on hikes and walks along various types of waterways. Horses, dogs, cats on leashes, crabs out for a stroll, shore birds of various persuasions, etc. etc. But until today, I had never met adolescent goats off, and then on leashes returning to a parking lot after having been for a nice walk on an ocean beach. I just had to have a picture and find out from the goat’s owners, why they were taking their young goats for a walk. Didn’t they have anything better to do with their time? Well, I was soon to learn that these darling critters were being groomed to be pack goats. Yet another thing I had never witnessed before. I’ve witnessed pack horses, donkeys, mules, etc. But pack goats? Proves you are never too old to learn something new. But boy oh boy were these goats cute. I could have gladly taken one home with me.
At this point we decided it was time to head north again, so where our road intersected with 101, we turned north and proceeded along this glorious highway until we hit Beaver Hill Road and followed it until it dead-ended at Seven Devils Road.
At this point we had come full circle.
Then after turning right, we found ourselves, in just a few miles, going through Charleston where we stopped for fish and chips at the Monkey Business Restaurant Express. (Great fish and chips BTW. And the coleslaw was delicious.)
Then back to camp for me to write up today’s trip report and Andy to sit outside and read.
After I finished writing, we joined the others basking in the sun and moving our chairs to avoid too much wind, until it was time to leave for dinner.
Dinner this evening was at the Seven Devils Brewery and Public House in Coos Bay. Food comments ranged from very good, to “shouldn’t there be clams in clam chowder”? But the beer was darned good.
Then on the way home we gassed up and back in camp it was over to T. & P’s site to sit around their propane fire pit until we all decided to call it a day. And for me, I would call it a really nice day. Enough time spent exploring, socializing, writing, and reading. My definition of heaven.
Monday, September 1, (Labor Day) 2025 – Harris Beach State Park, Brookings, Oregon
This was an easy morning. We had such a short run to Brookings, that we piddled around until 11:00 am, by which time we needed to have vacated our site. The RV people even sent us a “reminder” that the checkout time was not just a recommendation. (They didn’t state it that way. But the inference was there.) Never mind that we were already on the road. So, obviously, we were not singled out. We were just one of the many rigs that were slated to be once again either going up or driving down 101.
Once on the road, we were again reminded of why we absolutely love the Oregon coast. And this stretch of the route between Coos Bay and Brookings is probably our favorite. It is simply beautiful everywhere you look. Lots of places to pull over and just enjoy the many haystacks and sea stacks that line the coast. And along with all the sandy beaches and the winding roads that take us through lovely, forested areas inland from the many headlands and capes, there is always something incredibly beautiful to capture our attention.
For a break, all three parties pulled into the same area for lunch. Then out came the chairs and little tables. Sandwiches, chips, pepperoni sticks, beef jerky, hummus and peapods, and cookies were shared around. And all the sunshine we could have asked for. Not to mention the sound of the ocean waves gently braking on the beach. Perfection.
Then back on the road headed for our next destination.
We were a little concerned that the others would not love Harris Beach as much as we do. But our sites, although a bit tight for our traveling companions, are beautiful. And far enough away from 101 so that there is no road noise at all.
Road noise is always a consideration when traveling in the summer months. In the winter, it is no problem because our closed windows usually hide any noise made by motorcycles or trucks and trailers employing air brakes.
But in the summer, when we tend to have multiple windows open, road noise can be very distressing.
But now we are in camp. And sitting outside for a before dinner libation. And for dinner, pulled pork in a flour tortilla (burritos), corn and black bean salad, and guacamole and tortilla chips provided by Tim and Phyllis. Yum, yum, YUM!
After dinner the guys sat outside, and we ladies went into T & P’s trailers to do the dishes, chat, and get warm in front of their propane fireplace.
All together a lovely day in the great state of Oregon.
Tuesday, September 2, 2025 – Harris Beach State Park, Brookings, Oregon
Since Jim was providing breakfast, we doodled around in our trailer until 10:00 am when it was time to head off to J & M’s trailer for homemade hash and toasted English muffins. Fabulous way to start the day.
Then back to the trailer for me to write and Andy to read. Next plan for the day. The guys – drive just over the California border to buy booze. (Booze is much cheaper in California than either Oregon or Washington. So, when we travel to California, we take full advantage of the lower prices.) While the “Booze Brothers” were doing their thing, we ladies hopped into Margo’s Ford Explorer for a grand visit to the teaming metropolis of Brookings to pay Fred Meyer a visit. And perhaps make short stops at other establishments that take our fancy.
When we got back to camp, I read until it was time to get-together for “over the yardarm” libations.
Then a fine spaghetti dinner at the Hobbs. And for me an early to bed. Tomorrow, the Redwoods. Yeah!